Security Settings
Security settings allow the administrator to configure security-related options without looking for support technicians to help solve security breaches. Using security settings, the administrator can configure safeguards for the application from potential vulnerabilities and security breaches.
You can configure security settings by navigating to Admin >> General >> Security Settings.
Role Required: SDAdmin
General Settings:
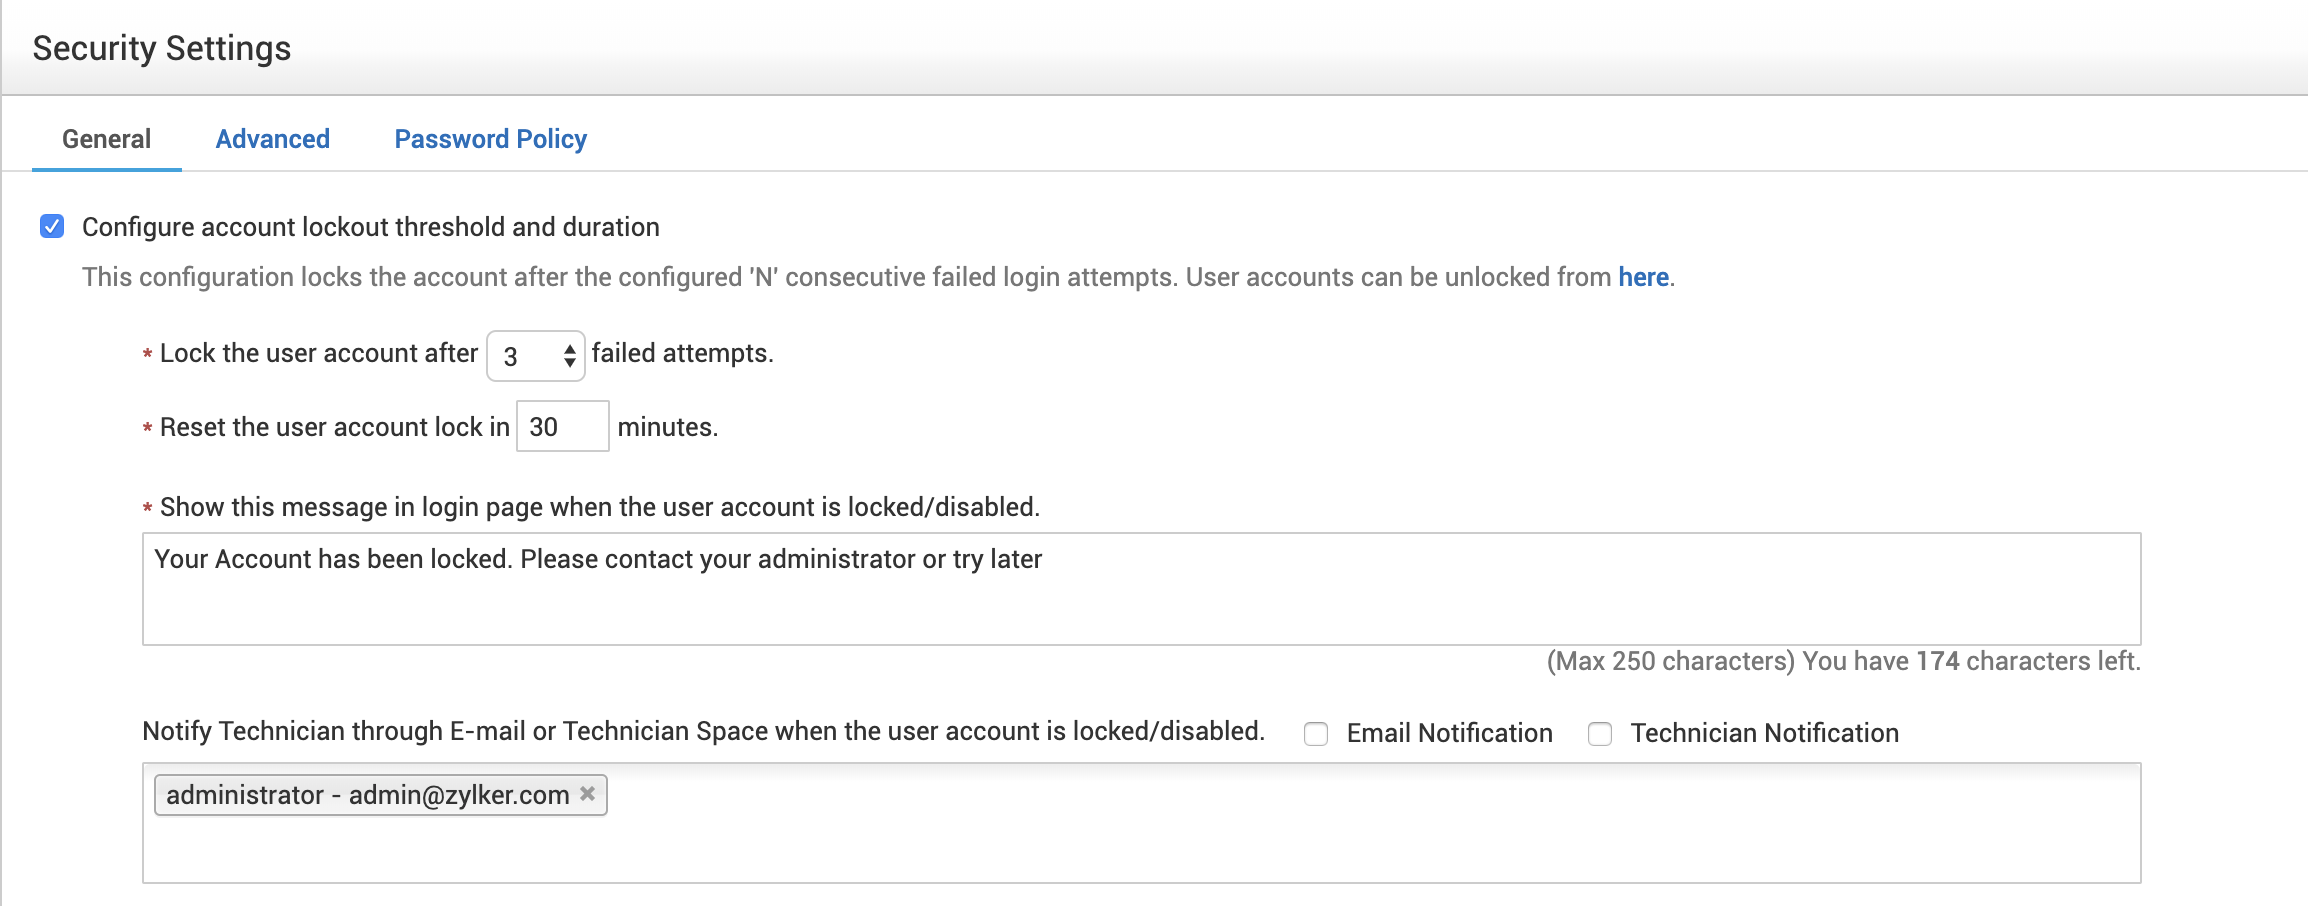
Configure account lockout threshold and duration: Using this option, you can ensure a user account is locked after a pre-specified number of failed login attempts. You can customize the message to be displayed if the user is locked out due to too many login attempts. This configuration applies to all types of authentication.
To configure account lockout threshold and duration,
- Enable Configure account lockout threshold and duration.
- Specify the account lockout threshold.
- Specify the number of login attempts (N) allowed and the duration to reset a locked user account.
- Choose whether to lock the user account only on the computer where the login was attempted or any computer.
- Customize the message to be displayed when the user account is locked.
- Choose to notify technicians either by email or as a technician space notification in the header.
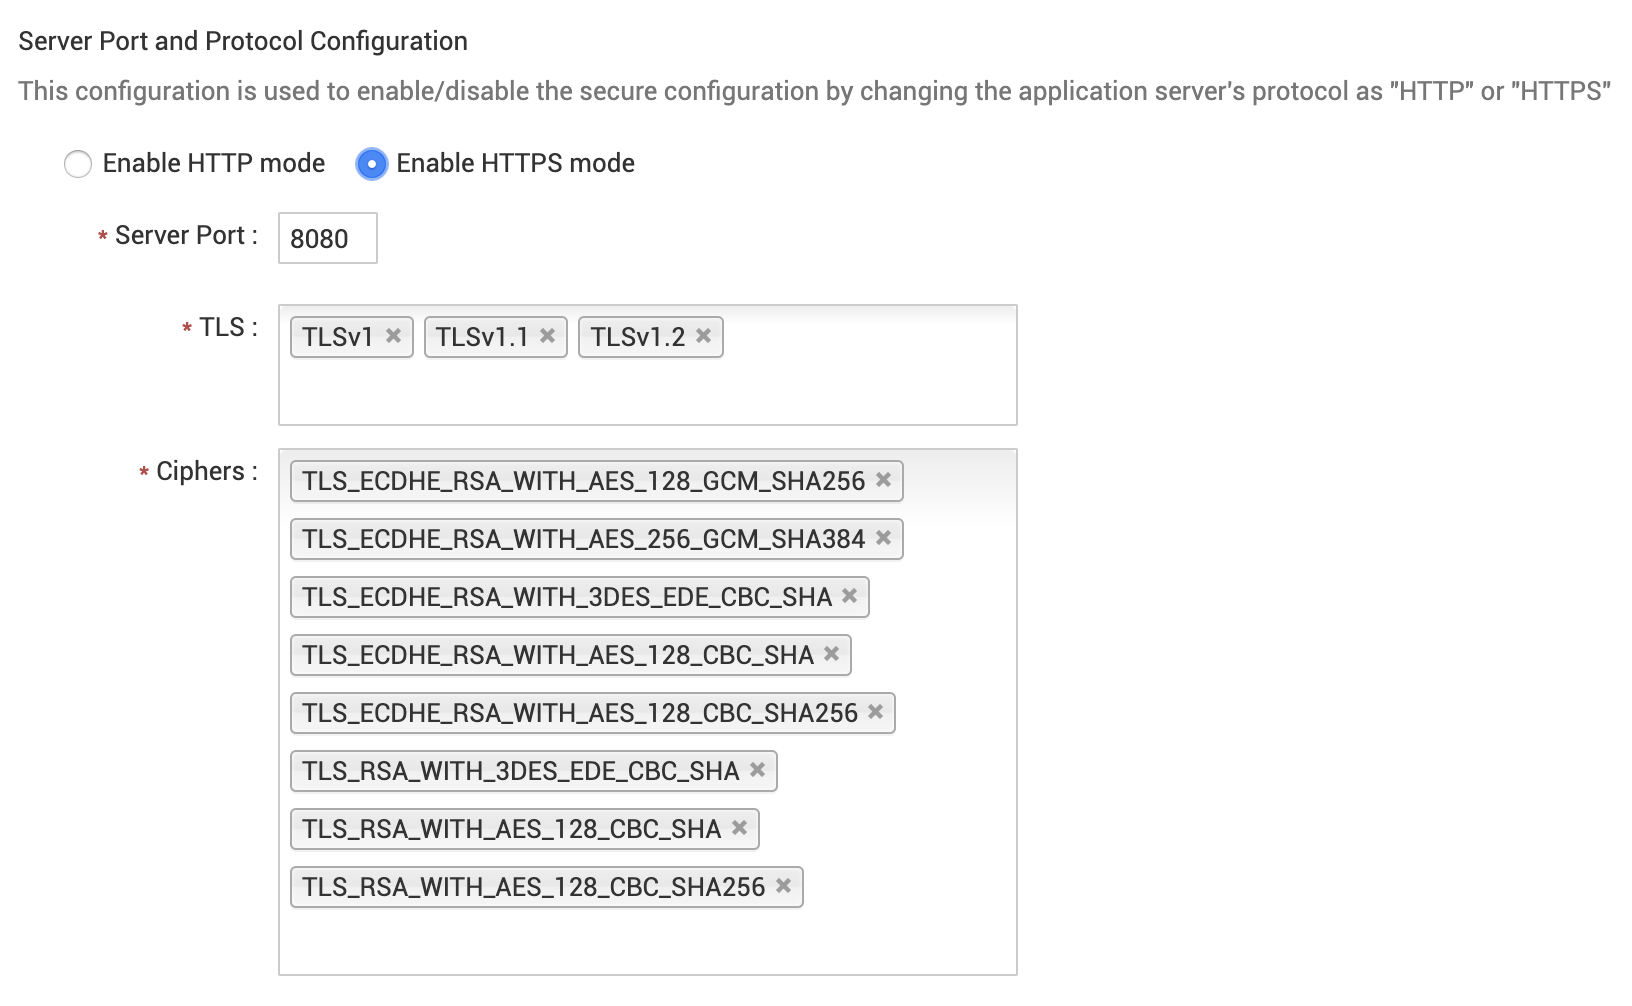
Server Port and Protocol Configuration: You can choose whether to run the application in HTTP or HTTPS mode.
- For HTTP: Specify the default Server port where the application has to run.

- For HTTPS: After specifying the server port and NIO port, the Administrator can choose from the listed TLS versions and Ciphers that help in proper encryption of data, thus preventing hackers from stealing it.
Configure expiry date for "Keep me signed-in" feature: You can set the duration the user can be kept signed into the application. On the expiry date, the user has to re-authenticate by entering the login information again. By default, the user has to re-authenticate every 45 days.

Enable Forgot Password: Under Admin > Security Settings > General, configure the Forgot Password option to be displayed on the login page for users who log in via local authentication. Once enabled, the user can use this option to receive a password reset link in their primary email address. The reset link will be sent only if they provide the user name and the domain name. The password reset link email will not be sent if the email is not configured or associated with multiple profiles. In such cases, the admin will need to manually reset the password.

Customize the password reset notification email under Notification Rules > Send Self-service login details > Customize Template. Use $ to insert variables such as First Name, Product Name, etc. Click Save. To alter the password reset link's validity, contact support at <support@servicedeskplusmsp.com>
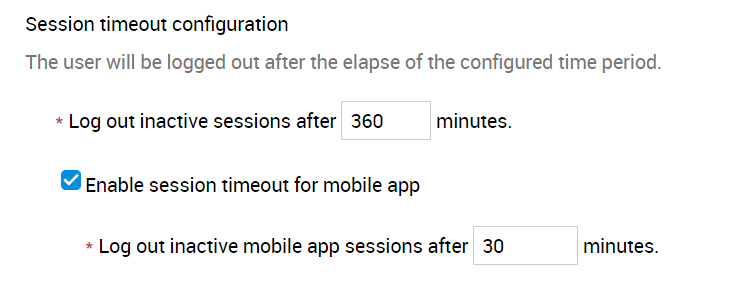
Inactive session timeout configuration: Set the duration in minutes after which the user will be logged out of an inactive session from the web and mobile app. You can set the limit between 1 and 1440 minutes.
Enable password protection for all file attachments: You can protect the file attachments stored in your application from unauthorized access by encrypting them at the server level. This will prevent security breaches over the server data. The password is available only to the SDAdmin and can also be used in case of encryption failure.

Advanced Settings:
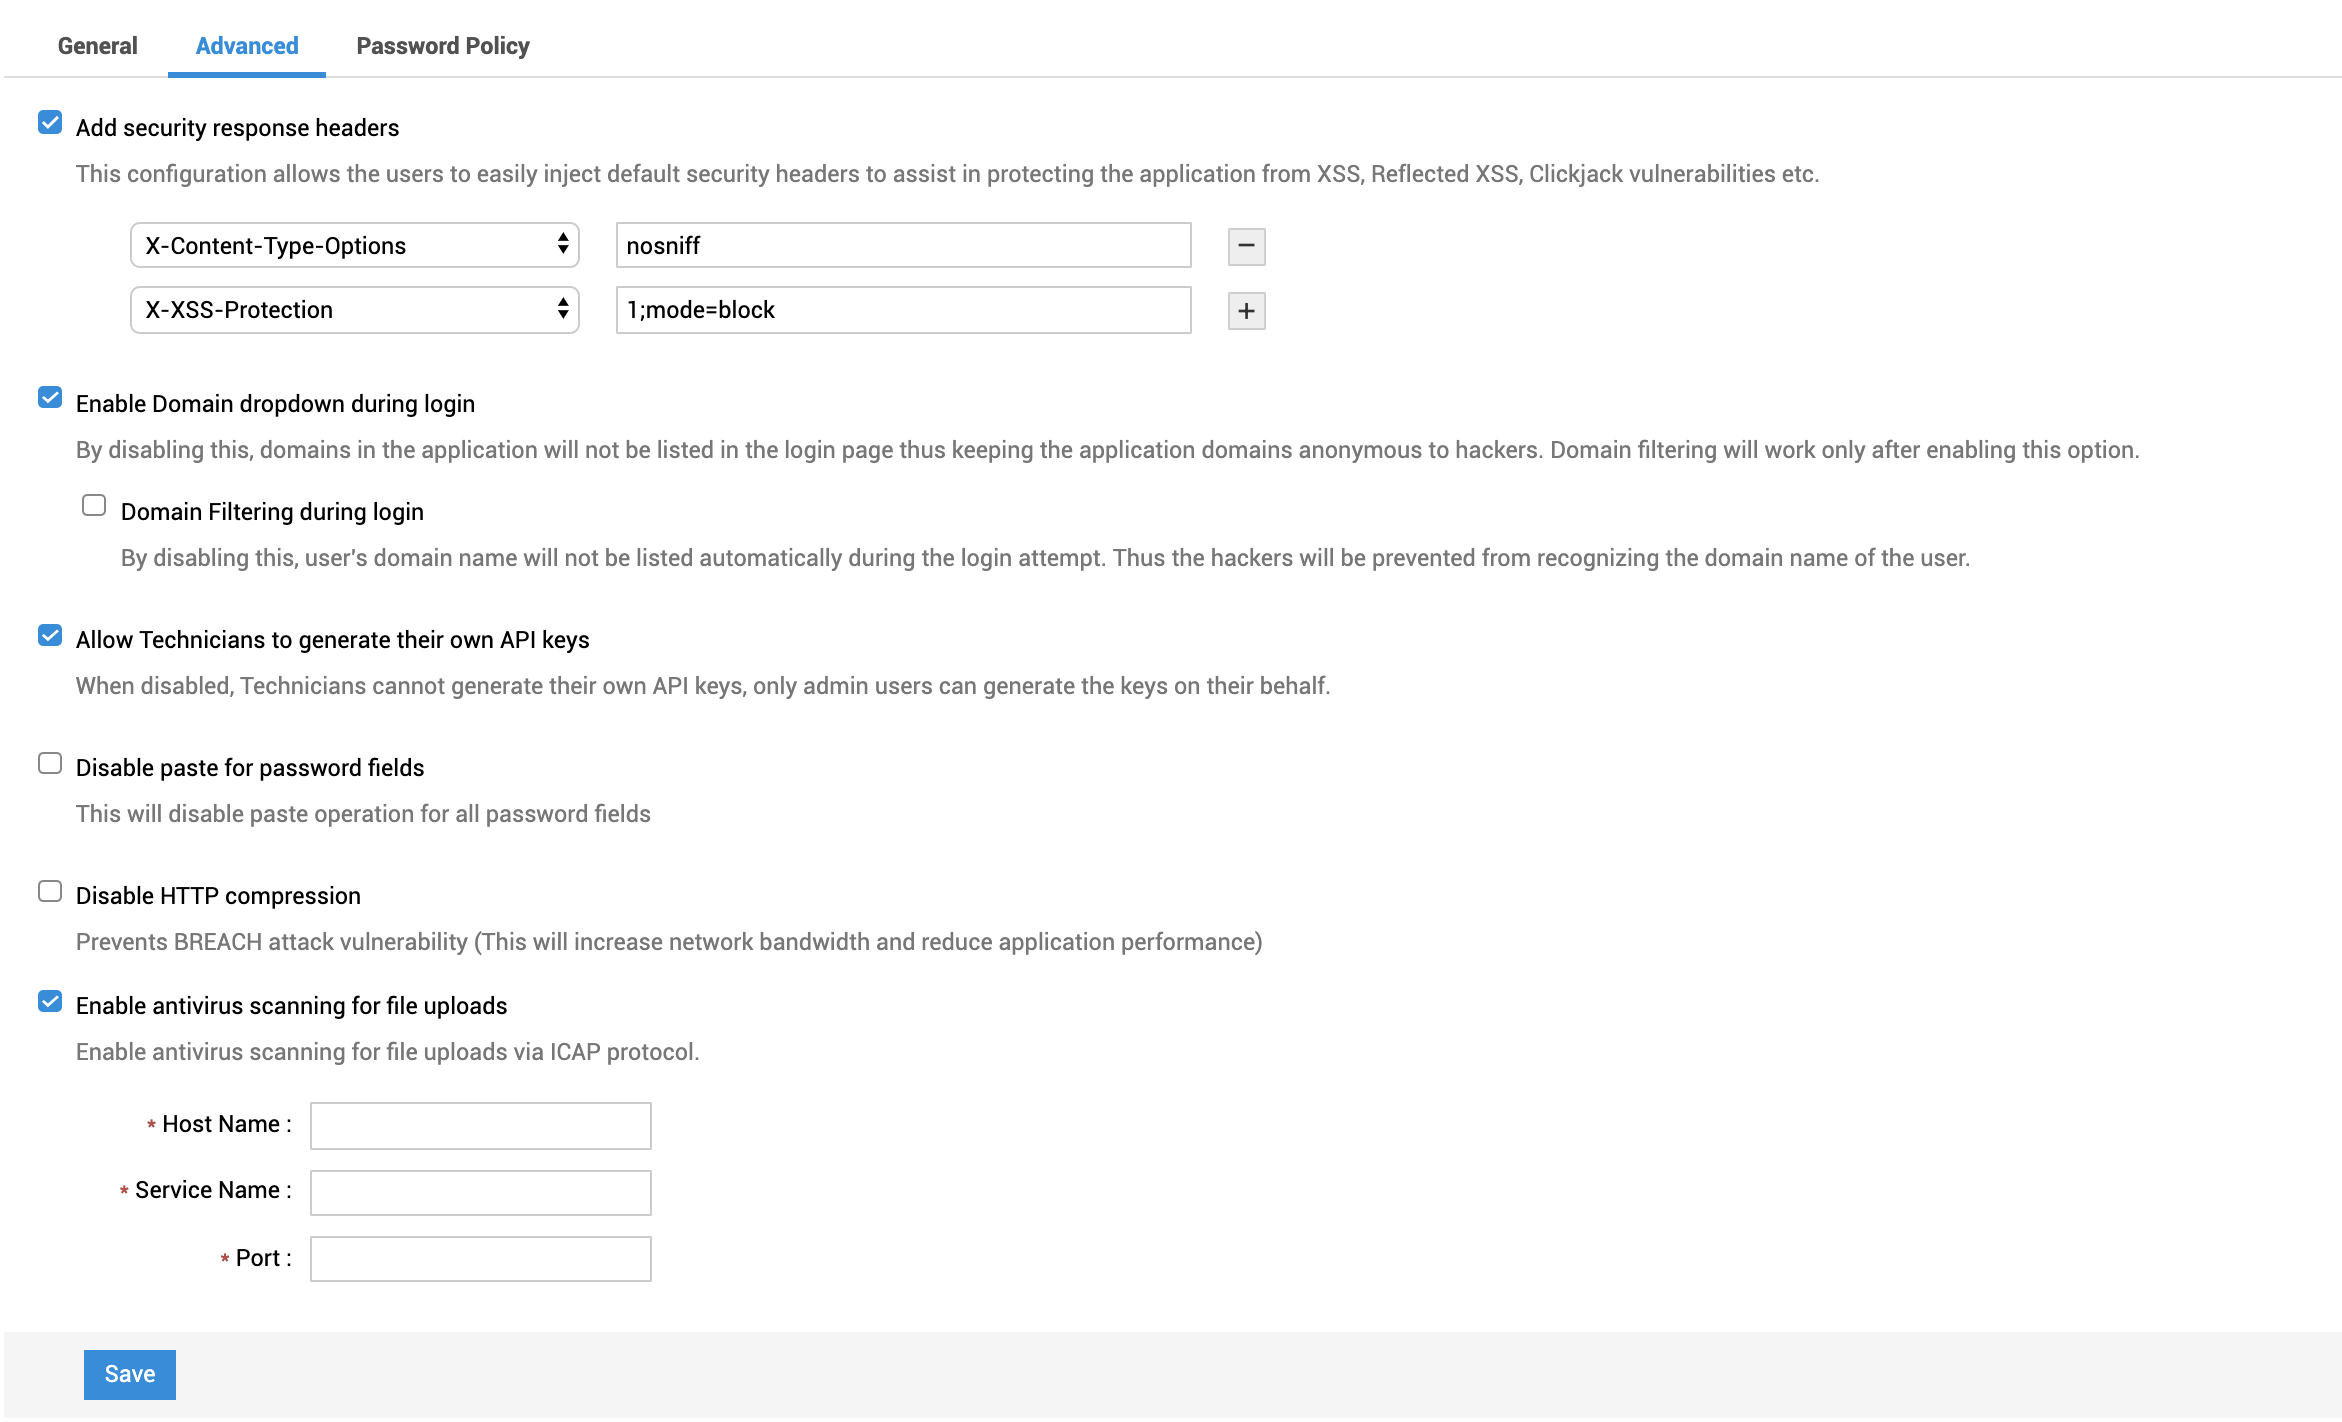
Add security response headers:
Configure security headers to safeguard the application from XSS attacks and other vulnerability attacks.
- Choose the required security response header from the list.
- Enter the response header value.
You can also include or exclude one or more response headers.
Domain Filtering during Login : This option will filter the domains listed during login based on the username entered. If disabled, the entire domain list will be displayed, reducing the probability of hackers knowing the domains where a particular user is present. Note that you can enable domain filtering only if domain drop-down in enabled.
Stop uploading scanned XMLs via non-login URL: Agent sends scanned XML to the application and through a non-login URL, there is a chance that any other scanned XML data can be uploaded into the application. By enabling this option, the application will not respond to the unwanted upload process in between as proper authentication is necessary.
Allow Technicians to generate their own API keys: This option enables technicians to generate their API keys for connecting ServiceDesk Plus with third-party applications. If disabled, only the administrator can generate API keys for the technicians.
Enable antivirus scanning for file uploads:
You can configure your existing antivirus software in ServiceDesk Plus to detect any vulnerable files during file uploads and email attachment receipts. Antivirus software that uses ICAP protocol can only be configured.
To configure an antivirus scan in the application,
- Go to Admin > Security Settings > Advanced.
- Click on the checkbox beside Enable Antivirus scanning for file uploads.
- Enter the Host Name where the antivirus is installed.
- Enter the Service Name and the Port of the antivirus tool. This can be found in your Antivirus tool's Settings page.
- Click Save.
- Once configured, the file uploads and attachment receipts will be scanned for vulnerable files.
Monitor Suspicious Activities
To safeguard the application from URL attacks, ServiceDesk Plus MSP provides an option to notify Org Admins whenever the number of attempts to access a URL exceeds the rate limit. The notification also includes a link to activity details such as the URL address, user details used to invoke the URL, description, date/time, and IP address of the corresponding machine.
To enable the notification,
- Go to Admin > General Settings > Security Settings.
- Under the AdvancedSettings tab, select the Enable push notification for org admins when client request rate limit is reached check box.
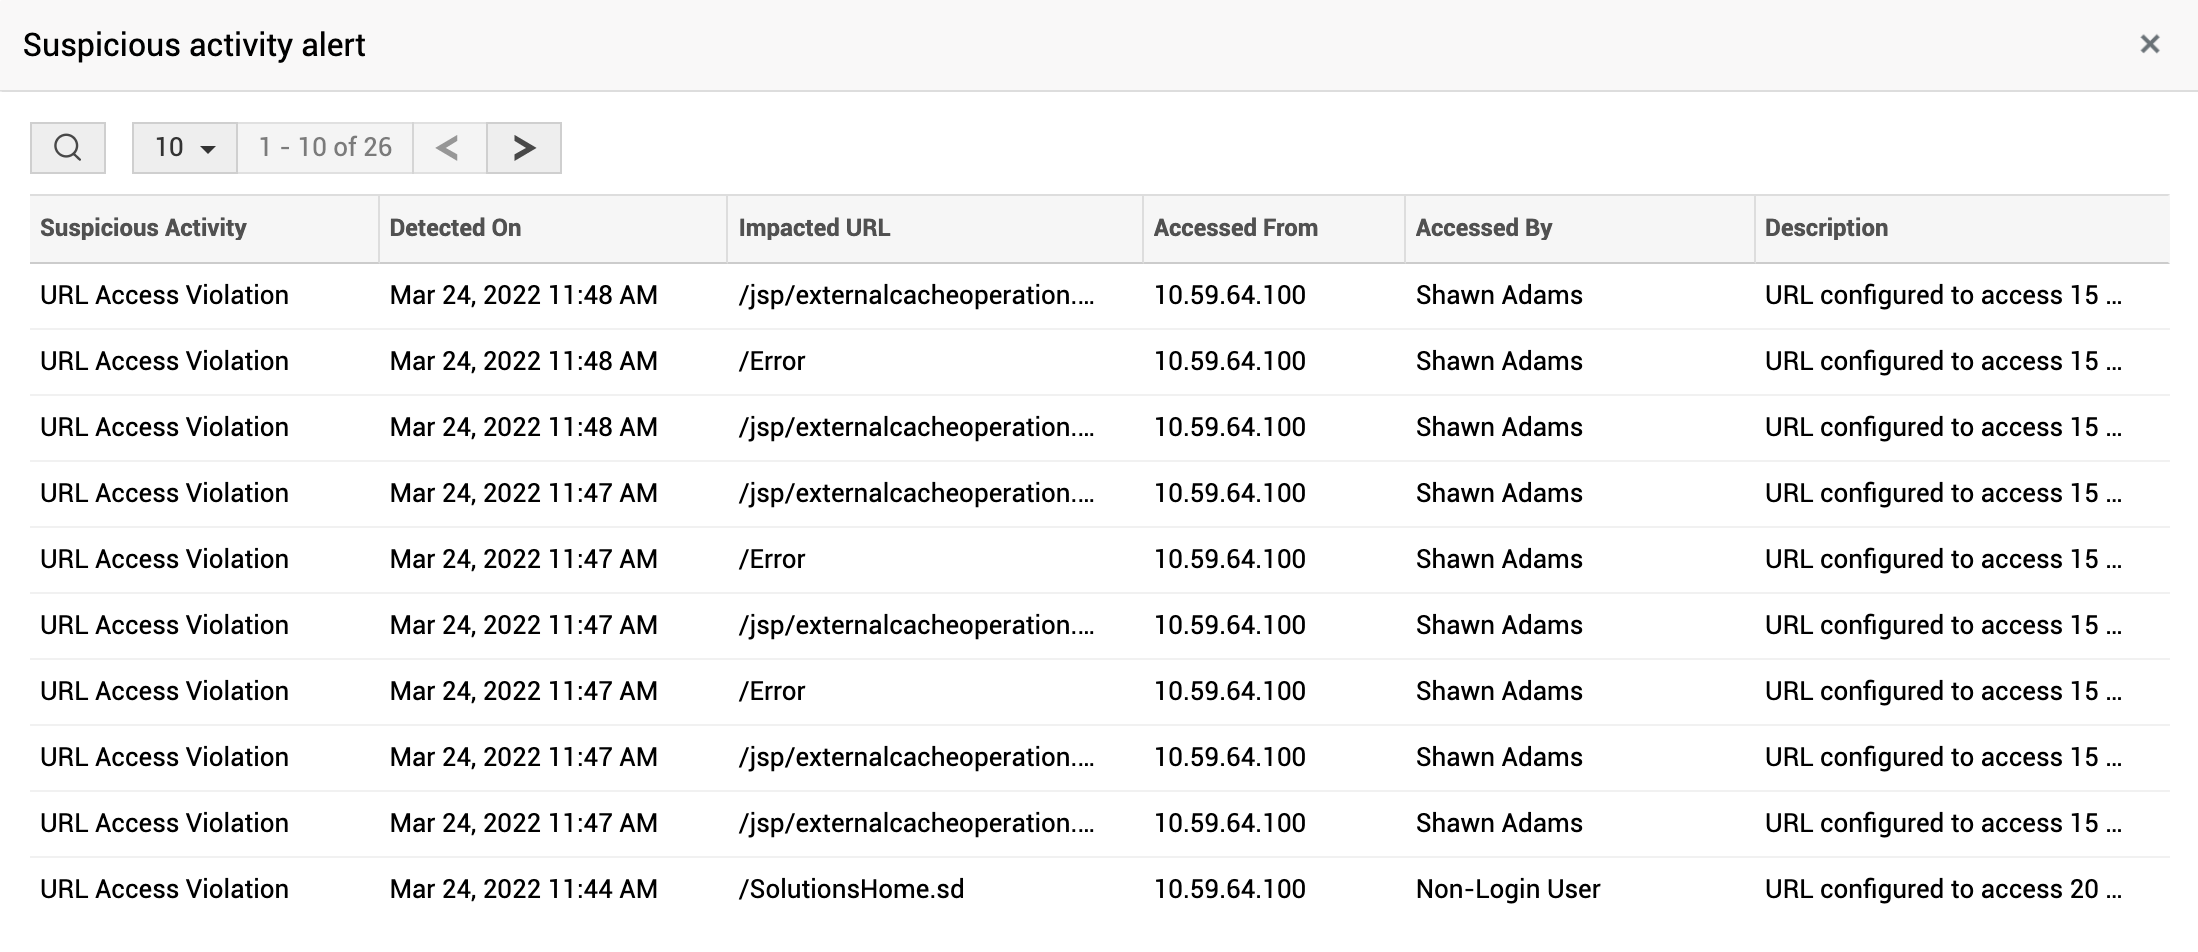
On reaching the rate limit, the connection to the requested URL will be blocked and a notification will be triggered to all users associated with OrgAdmin role. The notification displays the details of the specific activity as shown in the following screenshot:
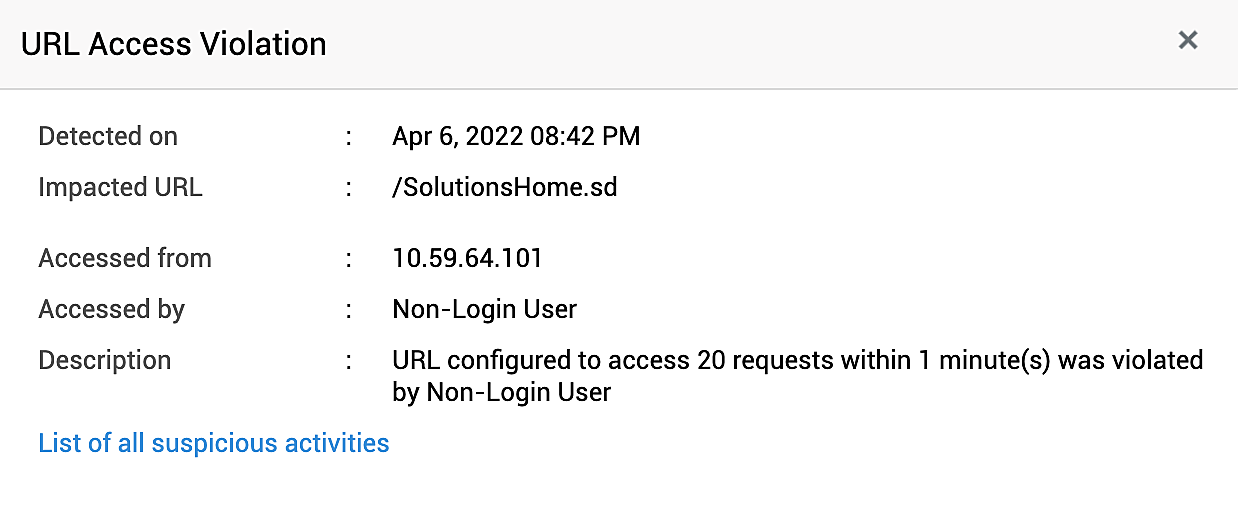
Click List of all Suspicious Activities to view the complete list of suspicious activities.

Password Policy:
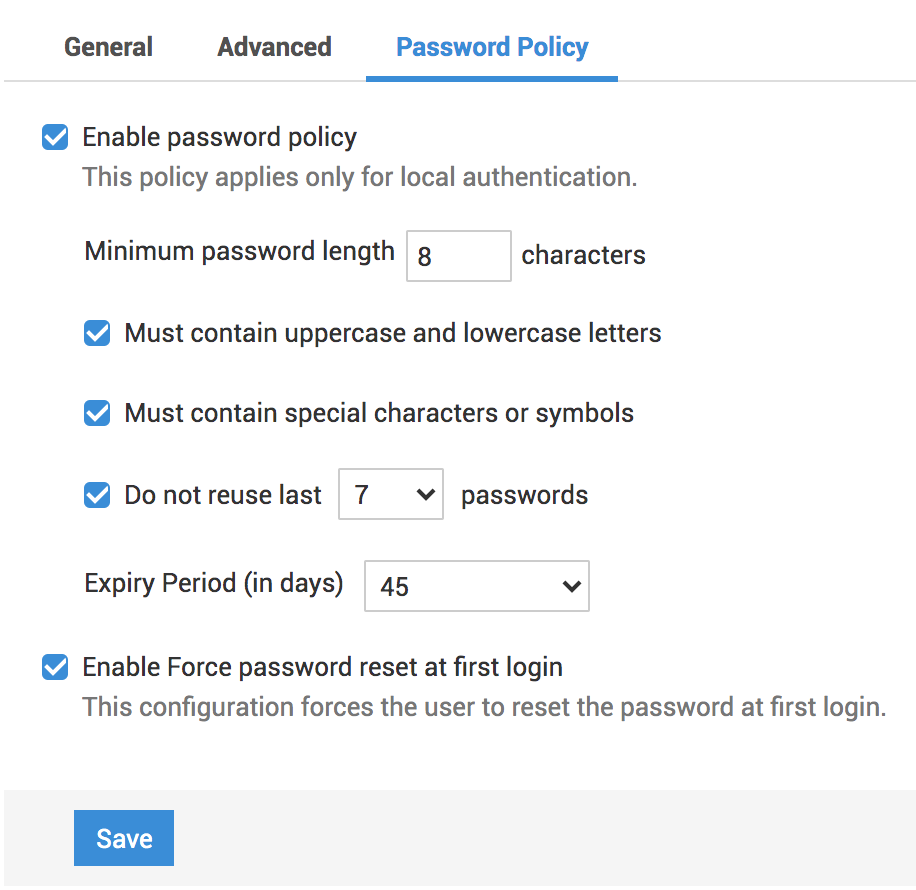
Enable password policy: Password Policy allows the administrator to configure and enforce the criteria for creating passwords. This ensures the better security of user passwords. Password policy is enabled by default.
The configured password policy will be applied when:
-
Users change/reset their account passwords.
-
SDAdmin changes user passwords.
-
New users are added via Web form, CSV import, Active Directory import, or LDAP import.
-
Dynamic users are added.
-
Local authentication password is set - both auto-generated and predefined passwords.
To configure the password policy,
-
Select Enable password policy checkbox.
-
Select the minimum password length between 8 and 99. The default value is 8.
-
Select if the password must include:
-
Both uppercase and lower case letters
-
Special characters/symbols
-
-
Choose the number of previous passwords to remember and prevent reuse. The application can remember up to 8 passwords.
-
Select the expiry period for the password.
Enable Force password reset at first login: Enable this option to force users to change their password during the first login after a preset password was issued.
Security Meter allows you to monitor and gauge how effectively you have configured various built-in application security features. The Security Meter displays a security score in percentage based on the number of security configurations that have been enabled against the total number of available security configurations. Based on the score, your application security is categorized into one of the following four security levels:
-
Unsecured: This level is displayed when the score is less than 50%. This means you have configured less than 50% of the available built-in security settings.
-
Weak Security: This level is displayed when the security score is between 50 and 70%. This means you have configured between 50 to 70% of the available built-in security settings.
-
Moderate Security: This level is displayed when the security score is between 70 and 90%. This means you have configured between 70 to 90% of the available built-in security settings.
-
Highly Secure: This level is displayed when the security score is over 90%. This means you have configured more than 90% of the available built-in security settings.
The security meter can be accessed by SDAdmins or SDOrgAdmins from Admin > General Settings > Security Settings
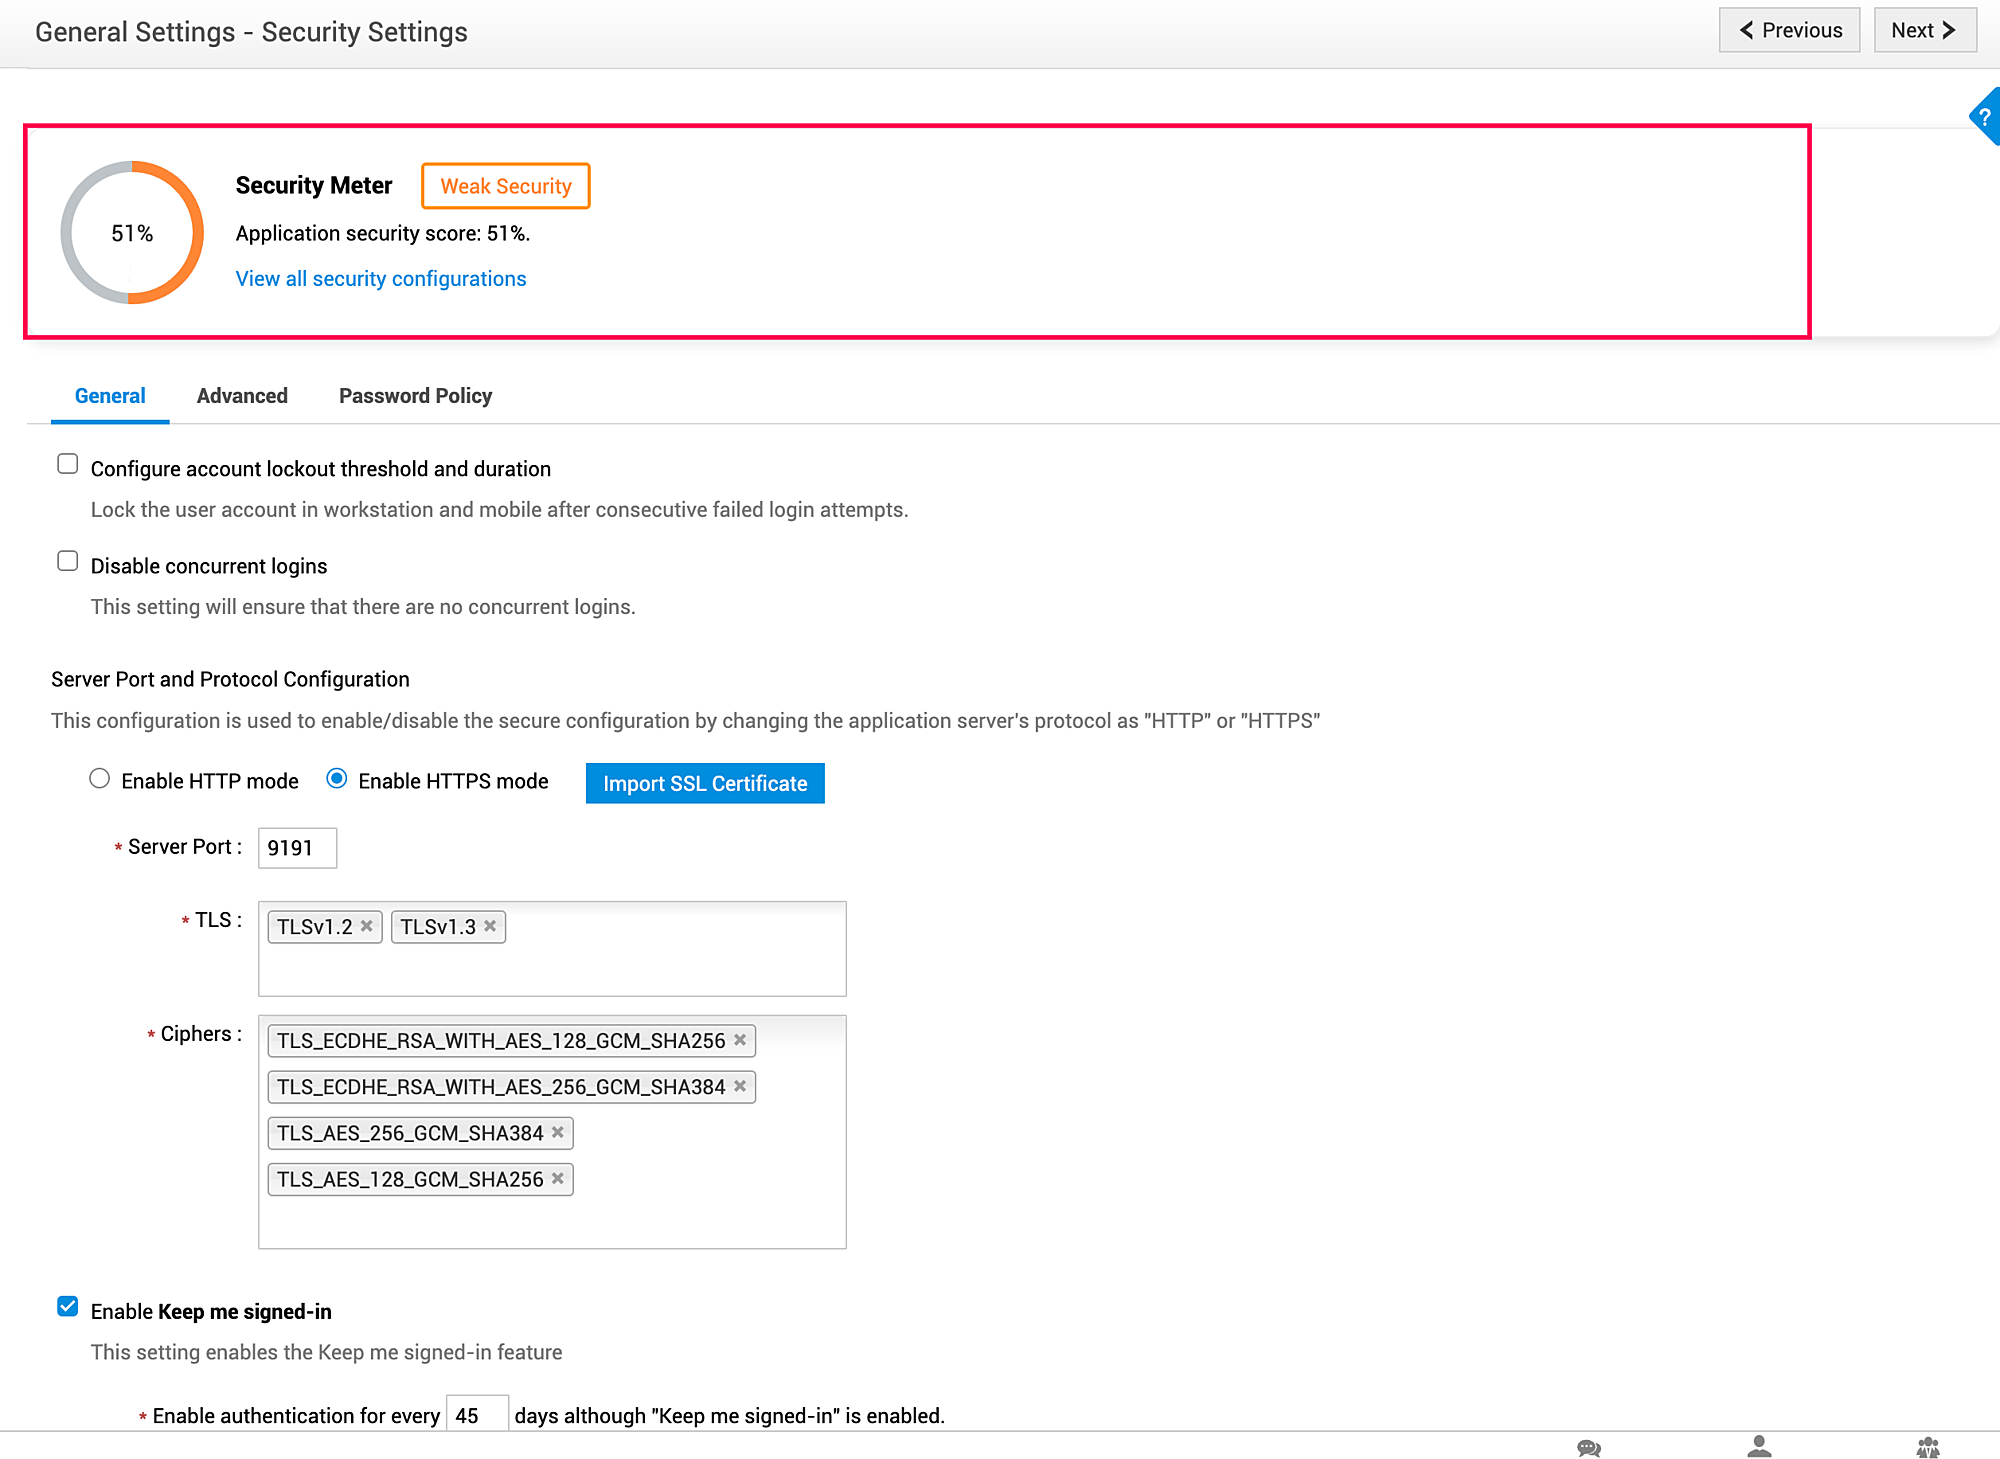
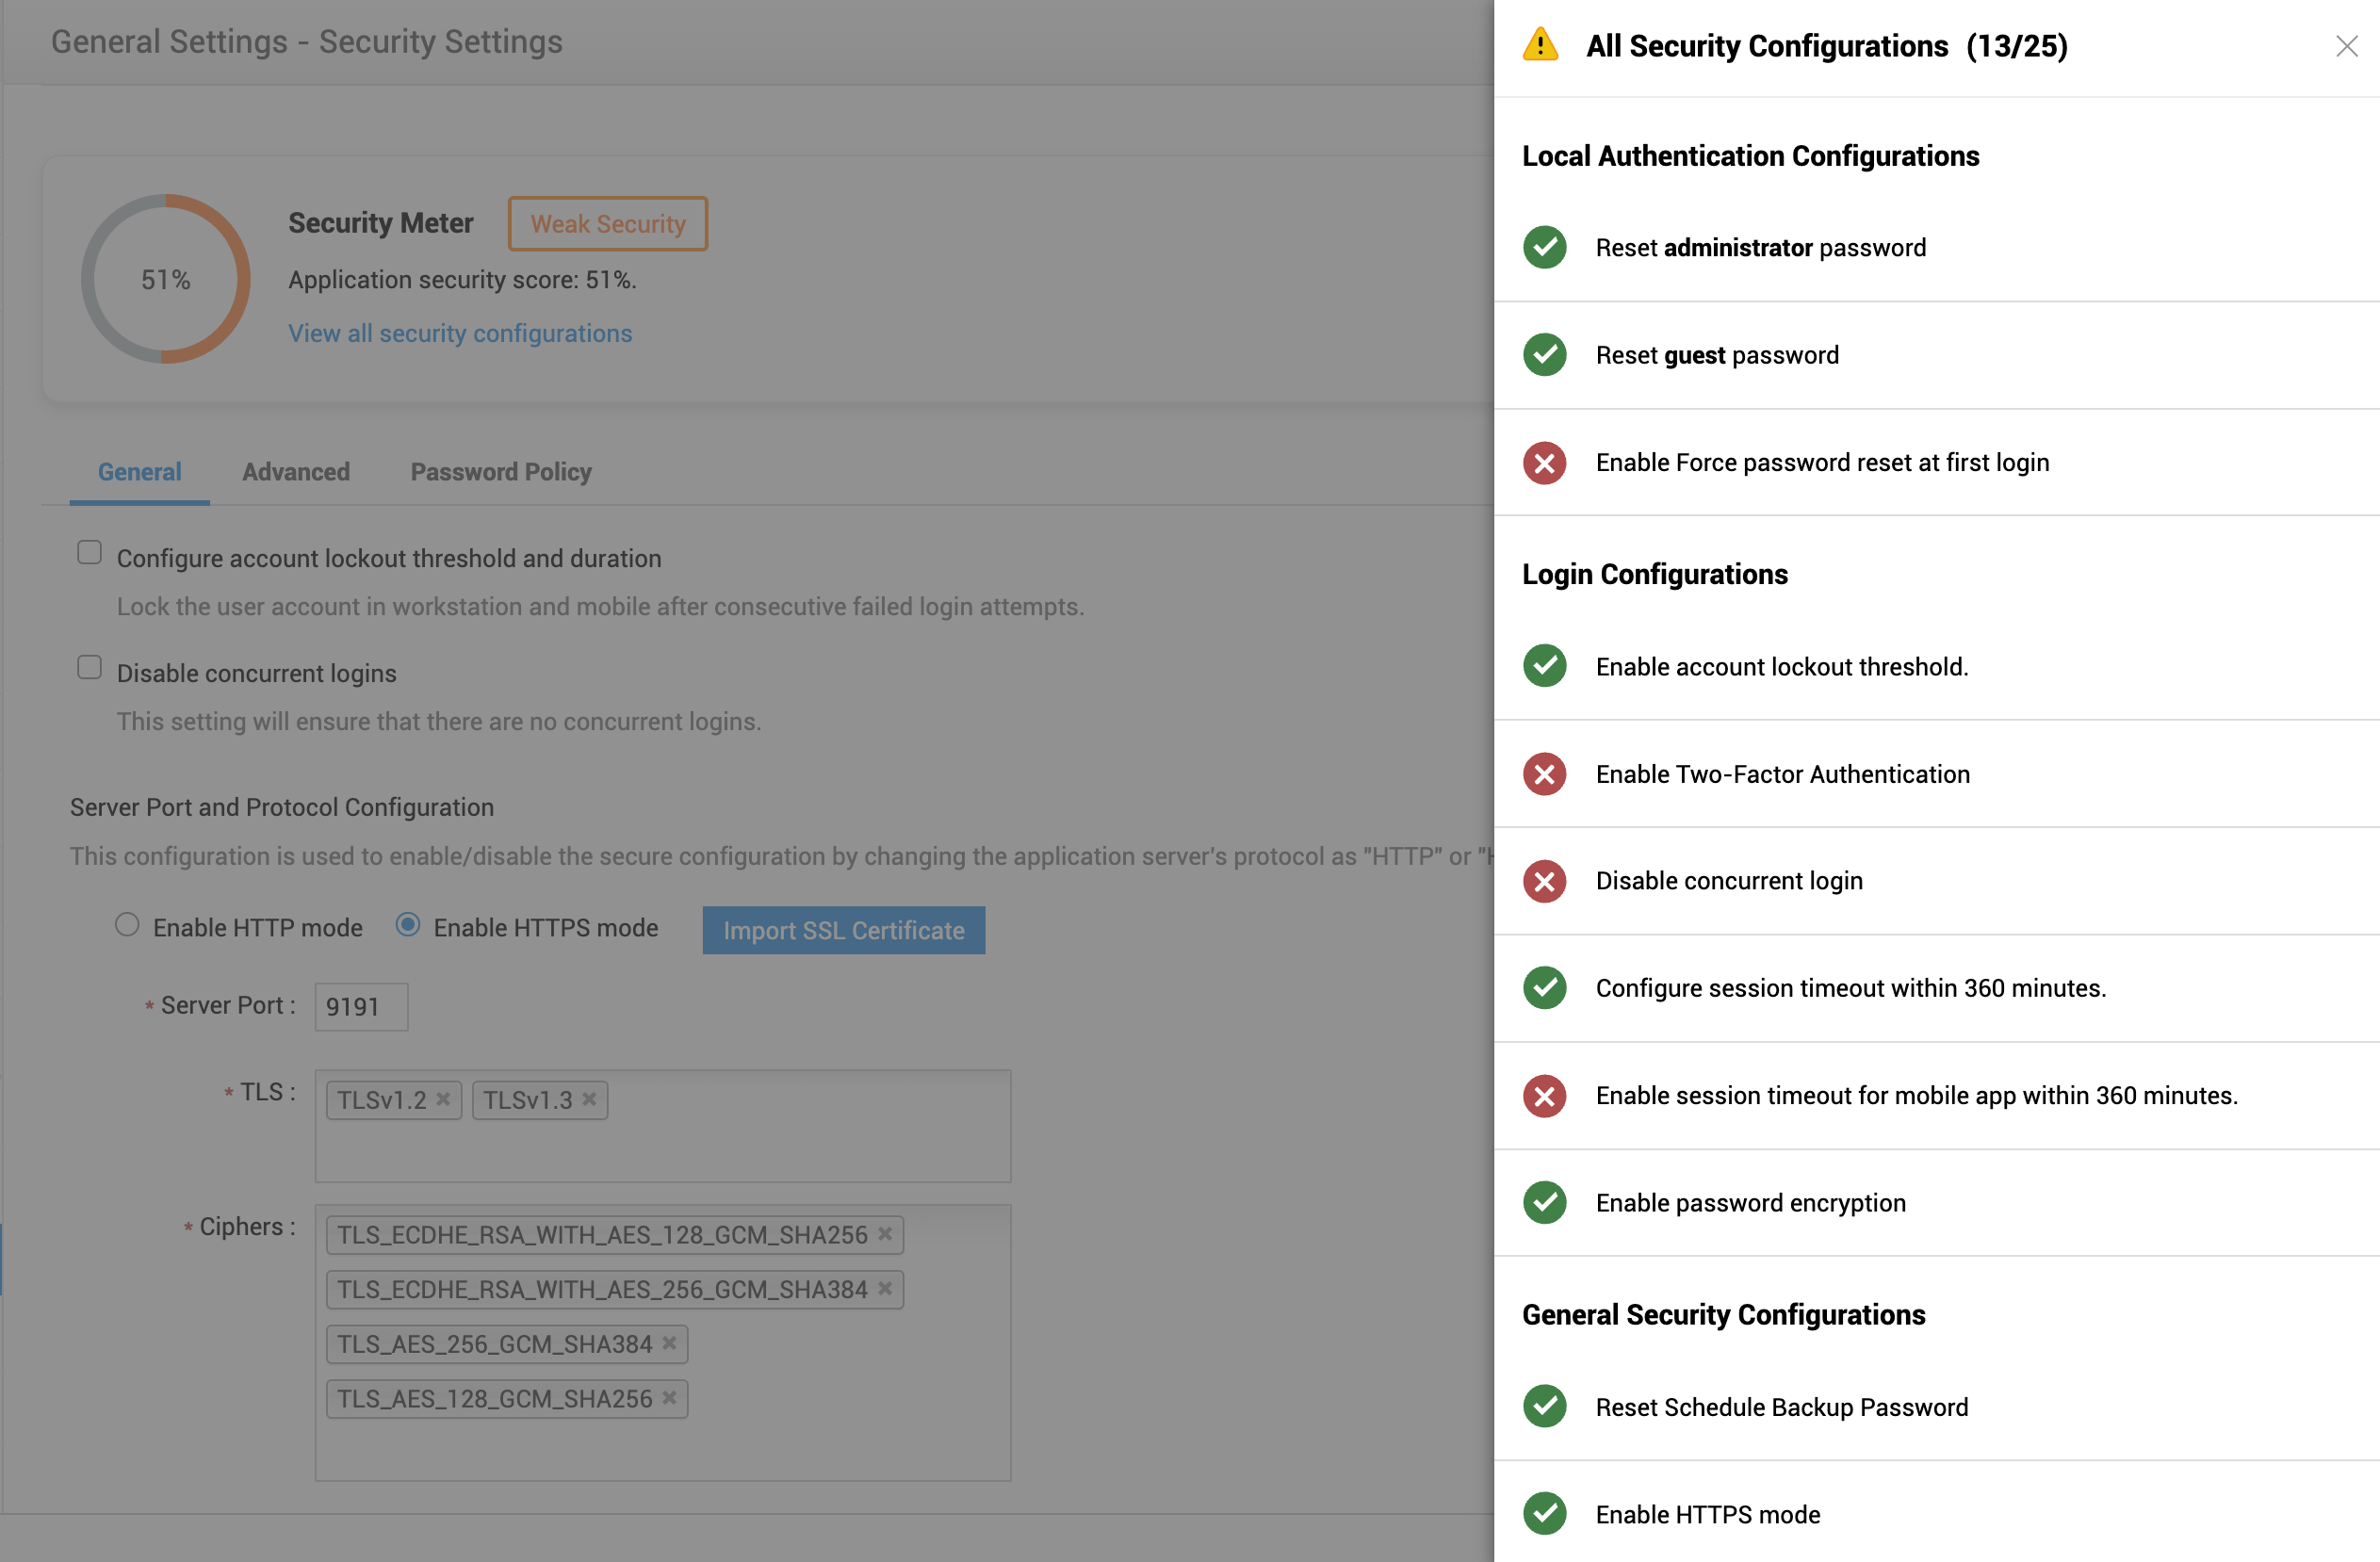
The list of available security settings can also be accessed directly from the security meter by clicking View all security configurations.
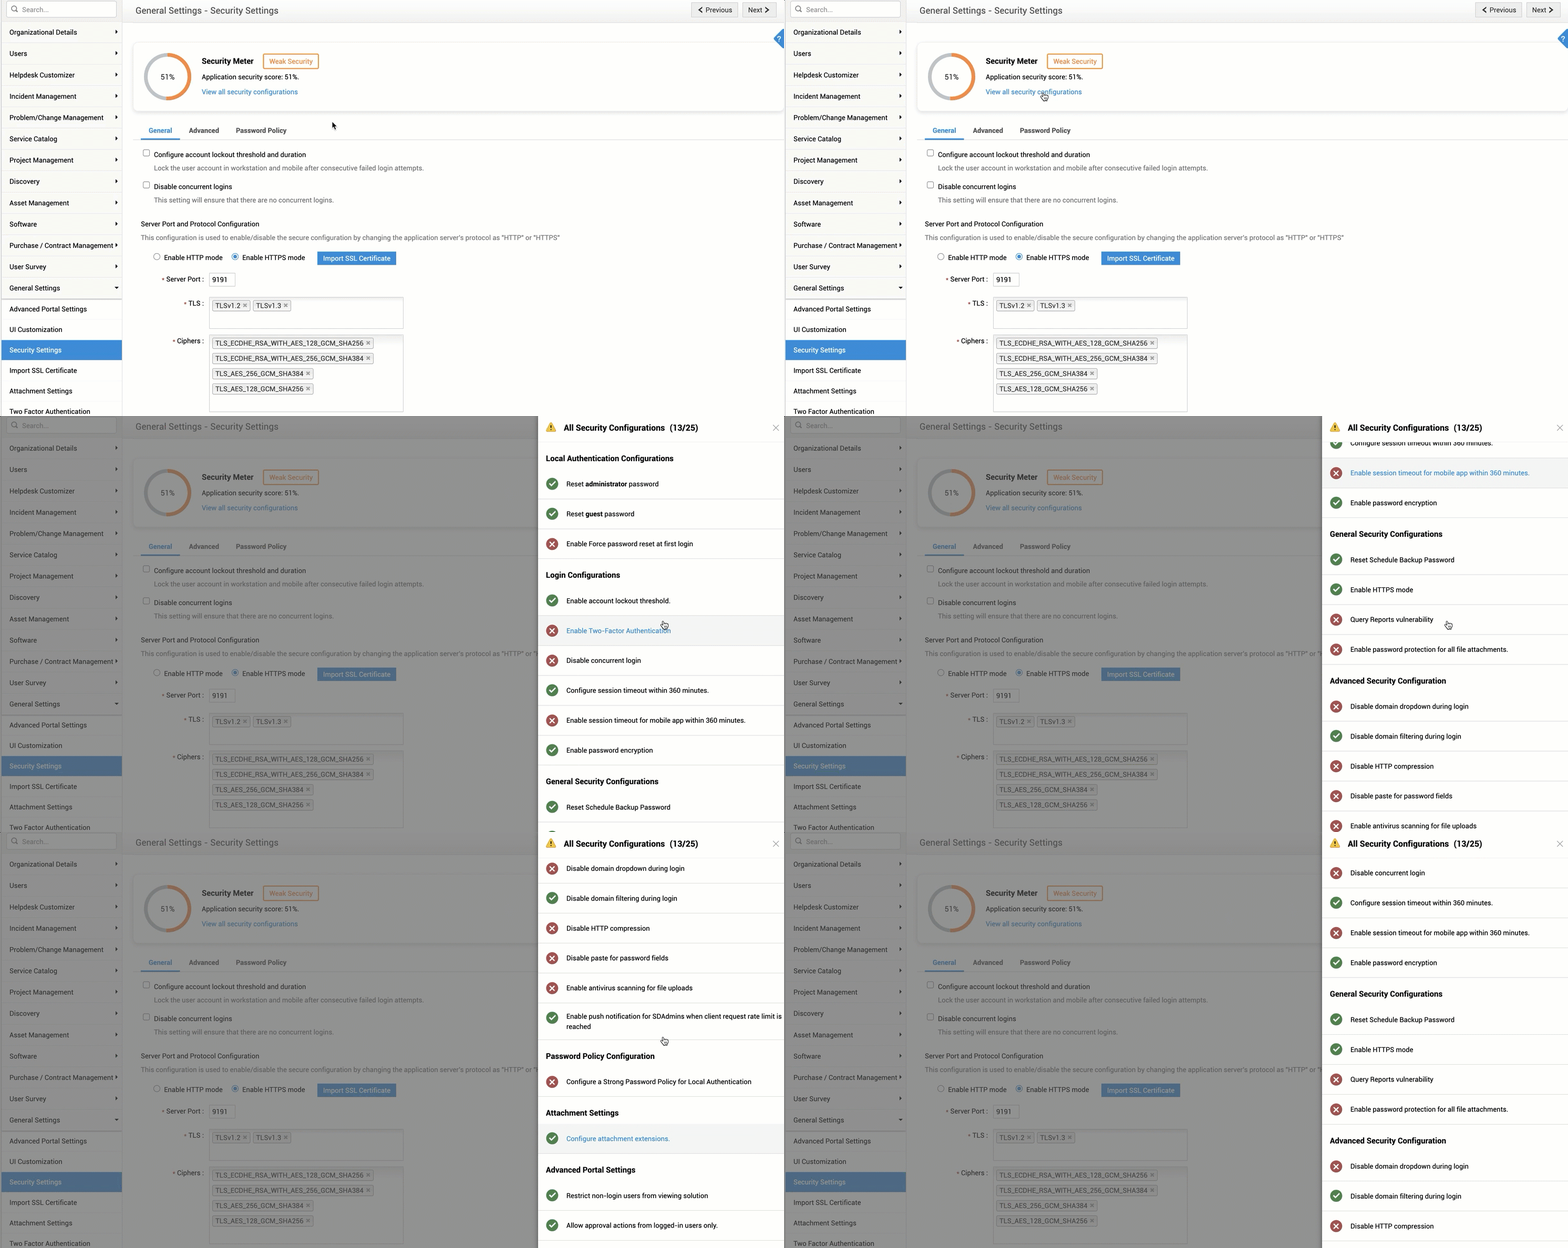
The list shows the security items in multiple categories along with a status icon that indicates whether the settings are enabled/disabled.
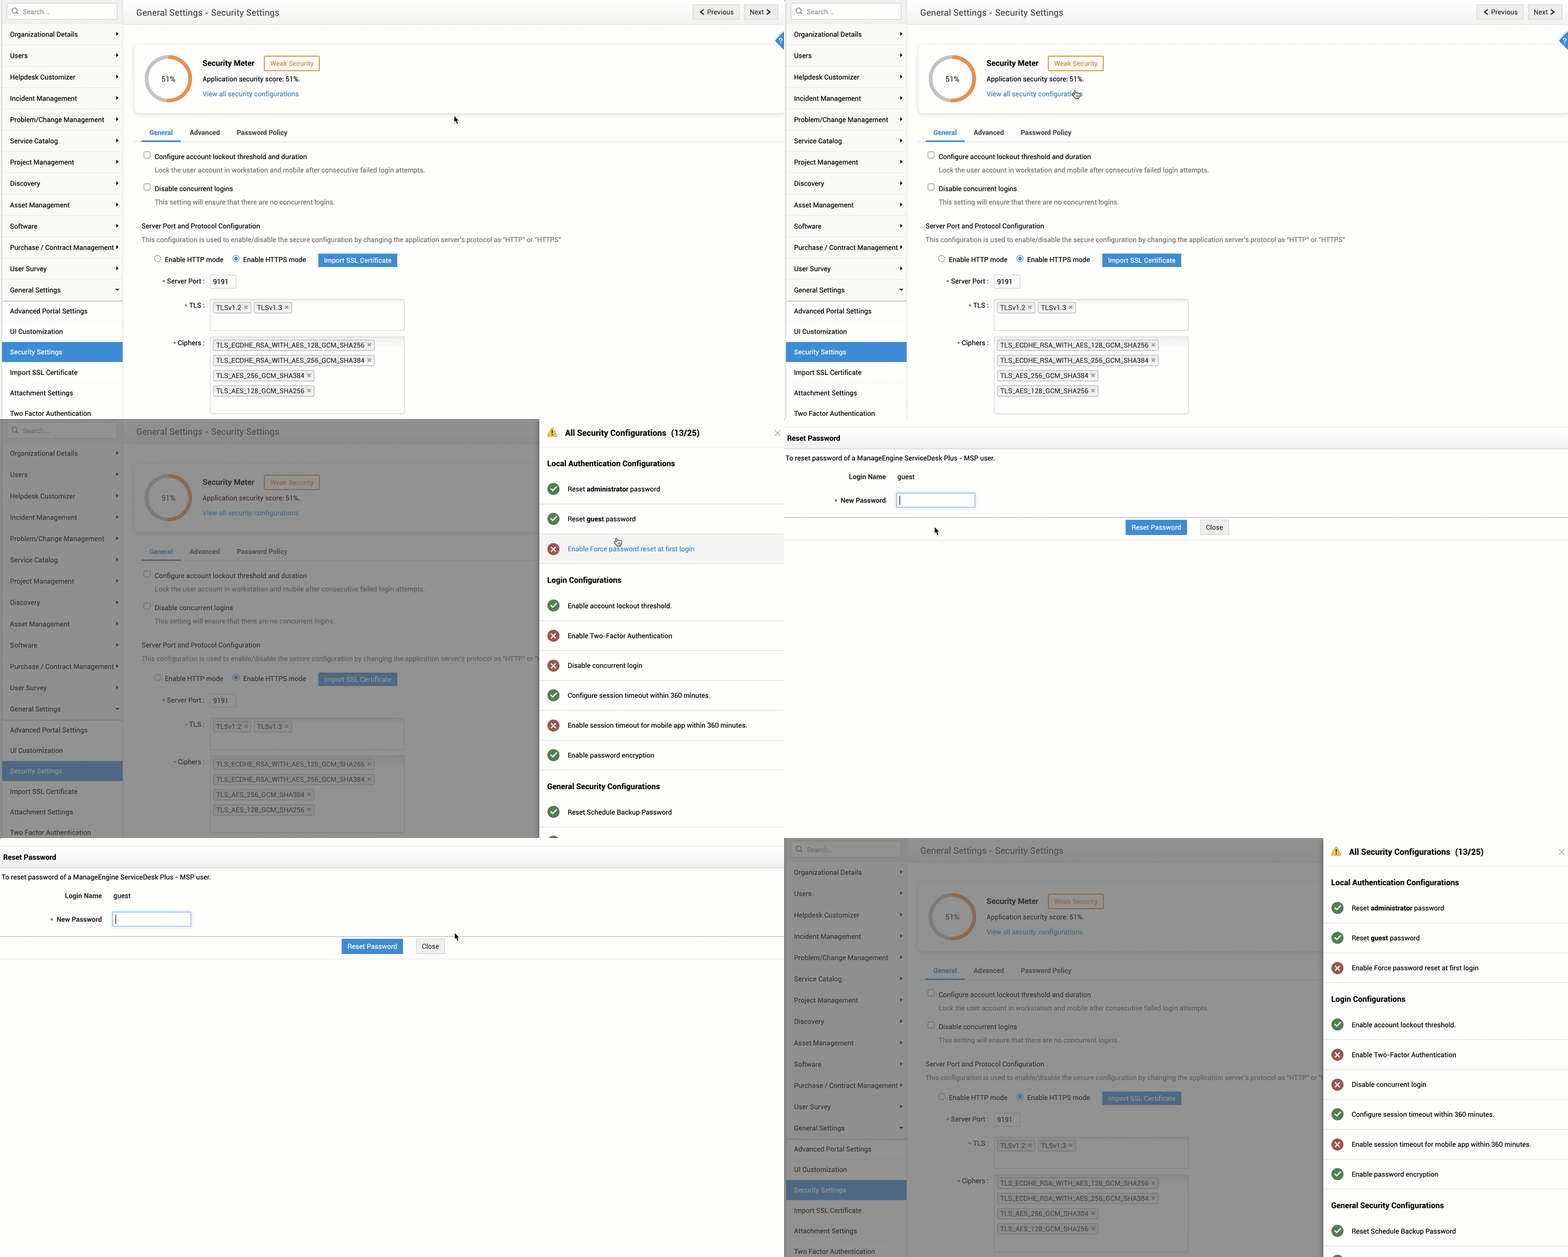
Based on the setting, when you click an item on the list, you will either be taken to the corresponding configuration page or be shown an appropriate configuration popup. You can make the necessary changes there and save it.
Security Alerts
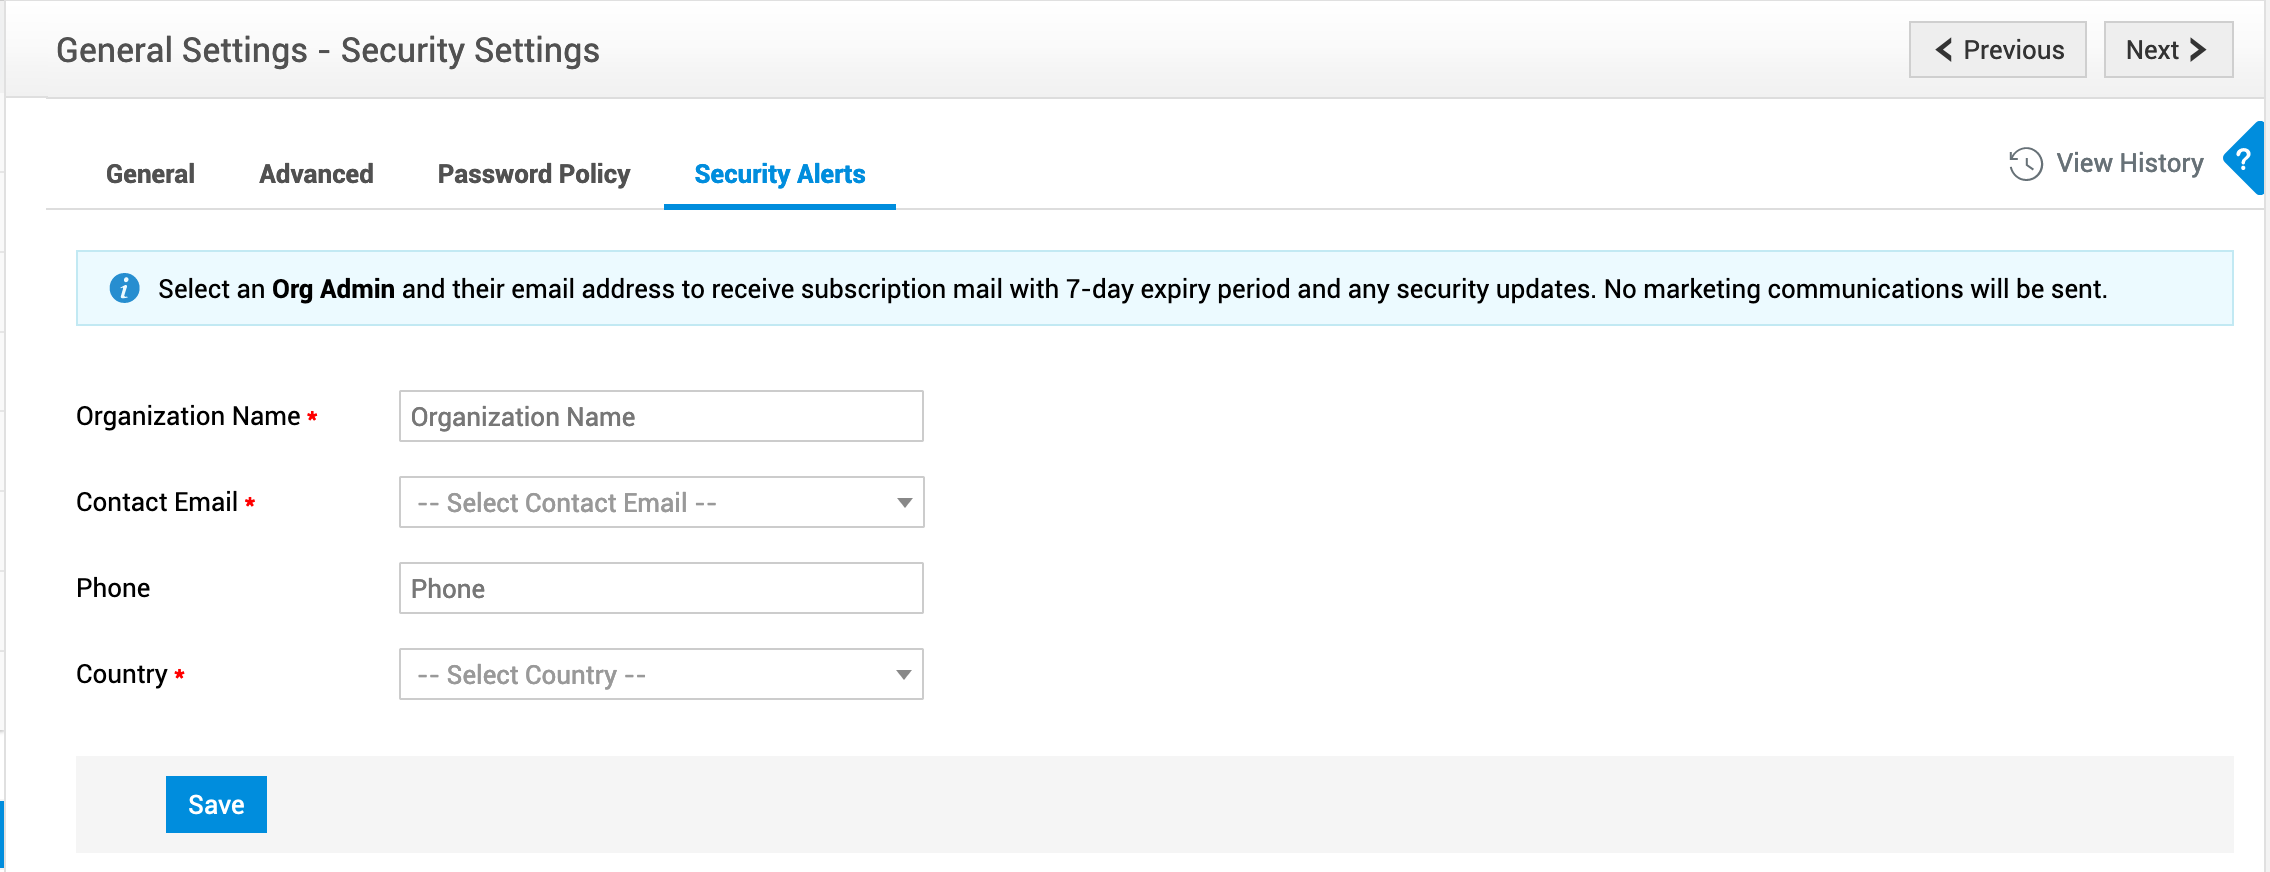
Admins can store their official contact details to get instant notifications on any security update or release. There will not be any marketing communication sent to the stored address.
To get the security alerts,
Org Admins can store their official contact details under Admin > General Settings > Security Settings > Security Alerts.
