Integration Key
ServiceDesk Plus MSP enables administrators configure multiple API keys to allow delegated access for different integration requirements. Apart from creating and managing integration keys, administrators can also reassign them to different technicians as and when they are required.
Add a new key
To add a new integration key,
-
Go to Admin > Developer Space (Apps & Add-ons in the old UI) > Integration Key.
-
Click New.
-
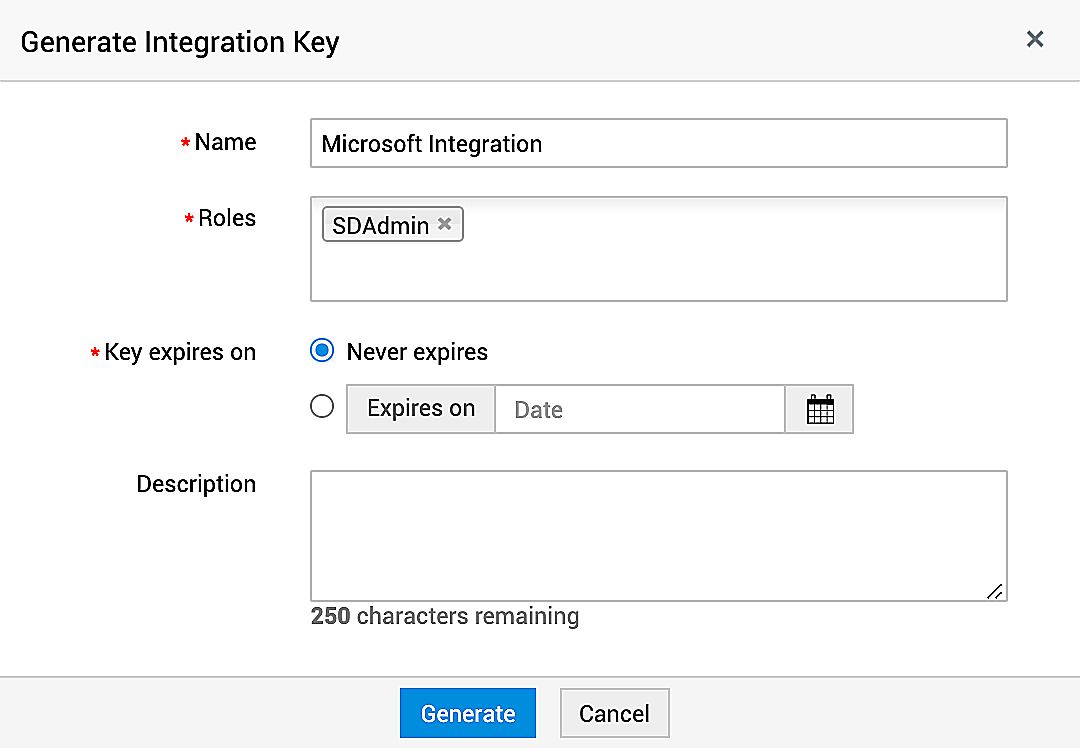
Fill out the displayed form using the pointers given below:
-
Name: Provide a unique name for the integration key.
-
Roles: Select the roles to associate with the key.
-
Key expires on: Choose whether the key has a validity period. Configure the expiry date if you choose the Expires on option.
-
Description: Provide a short description or add notes on the integration key.

-
Click Generate. The key will be created.
View key
All generated keys will be encrypted on the list view page. To view a specific key,
-
Click the key name.
-
In the displayed pop-up, enter your application login password.

-
Click View to display the integration key. You can copy the key to use it in performing REST API calls.

Edit key
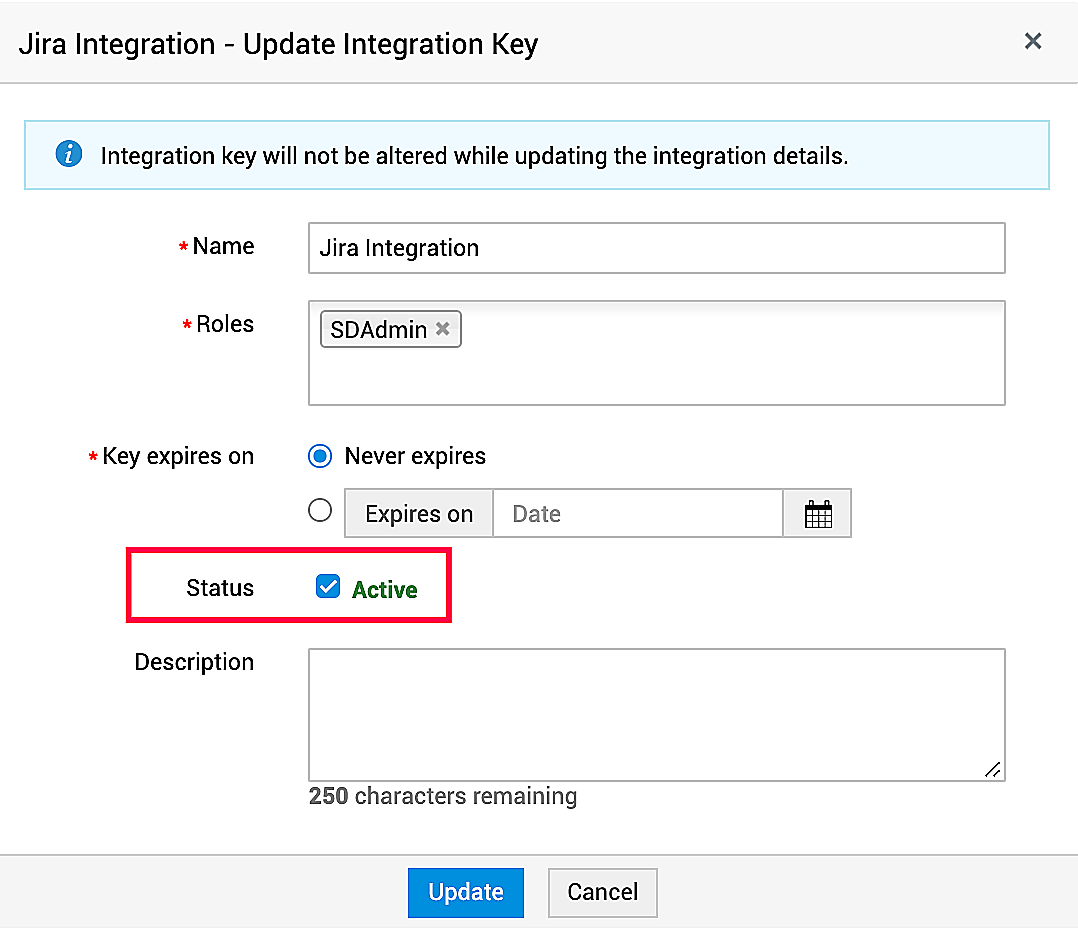
You can edit the keys you own to modify the associated roles, change status, or extend the validity period. However, the edit action will update the modified details without altering the actual key generated.
To edit a key,
-
Click
 > Edit beside the required key in the list view page.
 -
In the displayed window, modify the required details.
-
Click Update to complete the action.
Assign key
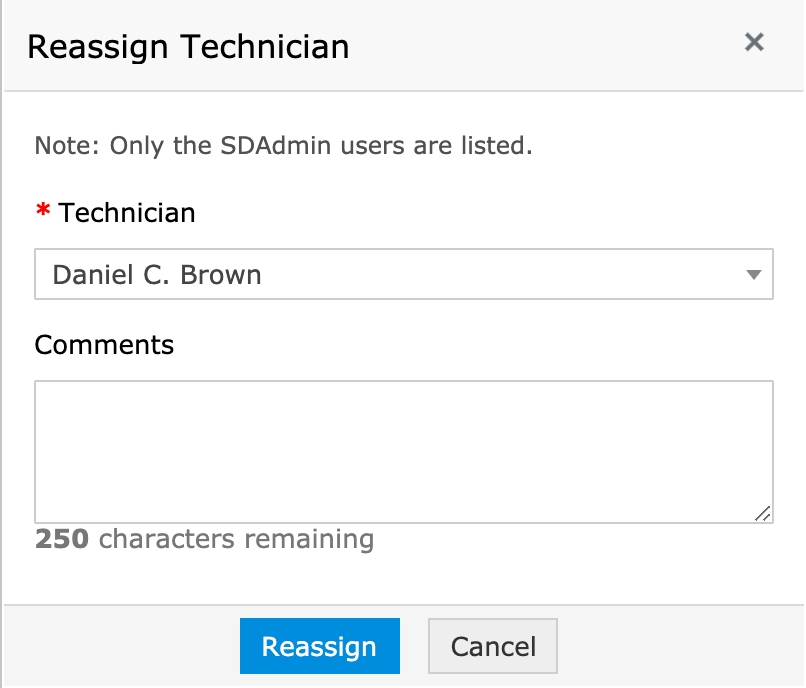
You can assign an integration key to other SDAdmins users. To reassign a key,
-
Click
 > Reassign beside the required key in the list view page.
 -
In the displayed window, select the technician and add relevant comments.
-
Click Reassign. A confirmation message pops up.
-
Click Yes to proceed. The key will be assigned to the selected technician.

To reassign keys in bulk,
-
Select the required keys by enabling the checkboxes beside them.
-
Click Reassign in the list view page.

-
In the displayed window, select the technician and add relevant comments.
-
Click Reassign. A confirmation message pops up.
-
Click Yes to proceed.
Configure key status
All integration keys will be active by default. To mark an integration key as inactive,
-
Click
 > Edit beside the required key in the list view page.
 -
In the displayed window, uncheck the Status option.
-
Click Update. The key will become inactive.

To activate a key, click  > Edit and enable the checkbox beside Status. Click Update to complete the action.
Apply filters
In the list view page, you can use filters to view the keys based on their status such as All, Active, Inactive, and Expired.

Delete key
To delete an integration key,
-
Click
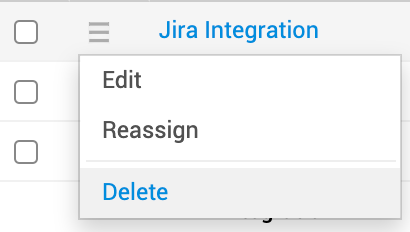
 > Delete beside the key to delete. A confirmation message pops up.
 -
Click OK to proceed. The key will be deleted from the application.

To delete keys in bulk,
- Select the required keys by enabling the checkboxes beside them.
- Click the delete icon
 in the list view page.
 - A confirmation message pops up. Click Yes to proceed.
- The selected keys will be deleted from the list view page.

Notifications
This section lists the notifications triggered upon various activities performed in an integration key. You can view the notifications by clicking the bell icon ![]() on the header panel.
on the header panel.
-
When an admin user reassigns a key to you, you will receive a push notification on the event.
-
When the keys of a deleted user are auto-assigned to you, you will receive a push notification.
-
The keys of a deleted user will be auto-assigned to you, if you have removed the user.
If the user you deleted has keys configured in instances where you do not have access, the keys will be associated to a random user with admin privileges in that instance. -
If a key is about to expire in three days, the key owner will receive a push notification to take necessary action.
-
To configure the day to send the reminder notification, contact support at servicedeskplusmsp-support@manageengine.com.
-
When a key has expired, the key owner will receive a push notification.
-
When a custom role associated with a key is deleted from the application, the key owner will receive a push notification.

