Request List view
Technicians can now opt to view requests in List View, Classic View, or Combined View.
Role Required: Technician
Each view presents the request and task information in different ways.
Request List View
Request list view displays requests in a compact and tabular view.
You can perform the following operations from the list view:
-
View service and incident requests by using the default filters.
-
Create custom filters for requests.
-
View archived requests.
-
Add or remove request field columns from the list view by using Column Chooser.
-
Sort requests by clicking on the column name.
-
Edit, delete, assign, and merge requests.
-
Spot edit Category, Subcategory, Item, and Priority.
-
Perform advance search by using Advanced Filter.
-
Assign/Unassign technicians for requests by using the assign drop-down.
-
Bulk associate a contract for requests. Select multiple requests and click Associate Contract. Select the required contract from the drop-down and click Associate Contract.
List Settings
You can customize the list view by configuring Records per page, Refresh Frequency, Display density, Column resizing, and Personalization under List Settings.

-
Filter drop-down menu: The request list view contains several filters. You can view archived and trashed requests using their respective filters. You can also:
-
Manage existing filters by using
 icon.
icon. -
Favorite filters you use frequently by using
 icon.
icon. -
Sort the filters by using
 icon.
icon.
-

-
Refresh frequency: Set a frequency to auto refresh the request list view from every 3 minutes to 30 minutes.
-
New Incident: Create new incident requests instantly using the New Incident button.
-
Actions drop-down menu: Perform operations to bulk Edit Requests, Delete Requests, Pick up Requests, Close Requests, Merge Requests and Link Requests.
-
Column-wise Search: Perform column-wise search for specific Groups, Requesters, Departments, Sites and so on.
- Resize Columns: Drag the columns tab corners to expand or shrink the column size.
- Add/Remove columns: Click on the columns icon
 at the top header to add or remove columns from the list view.
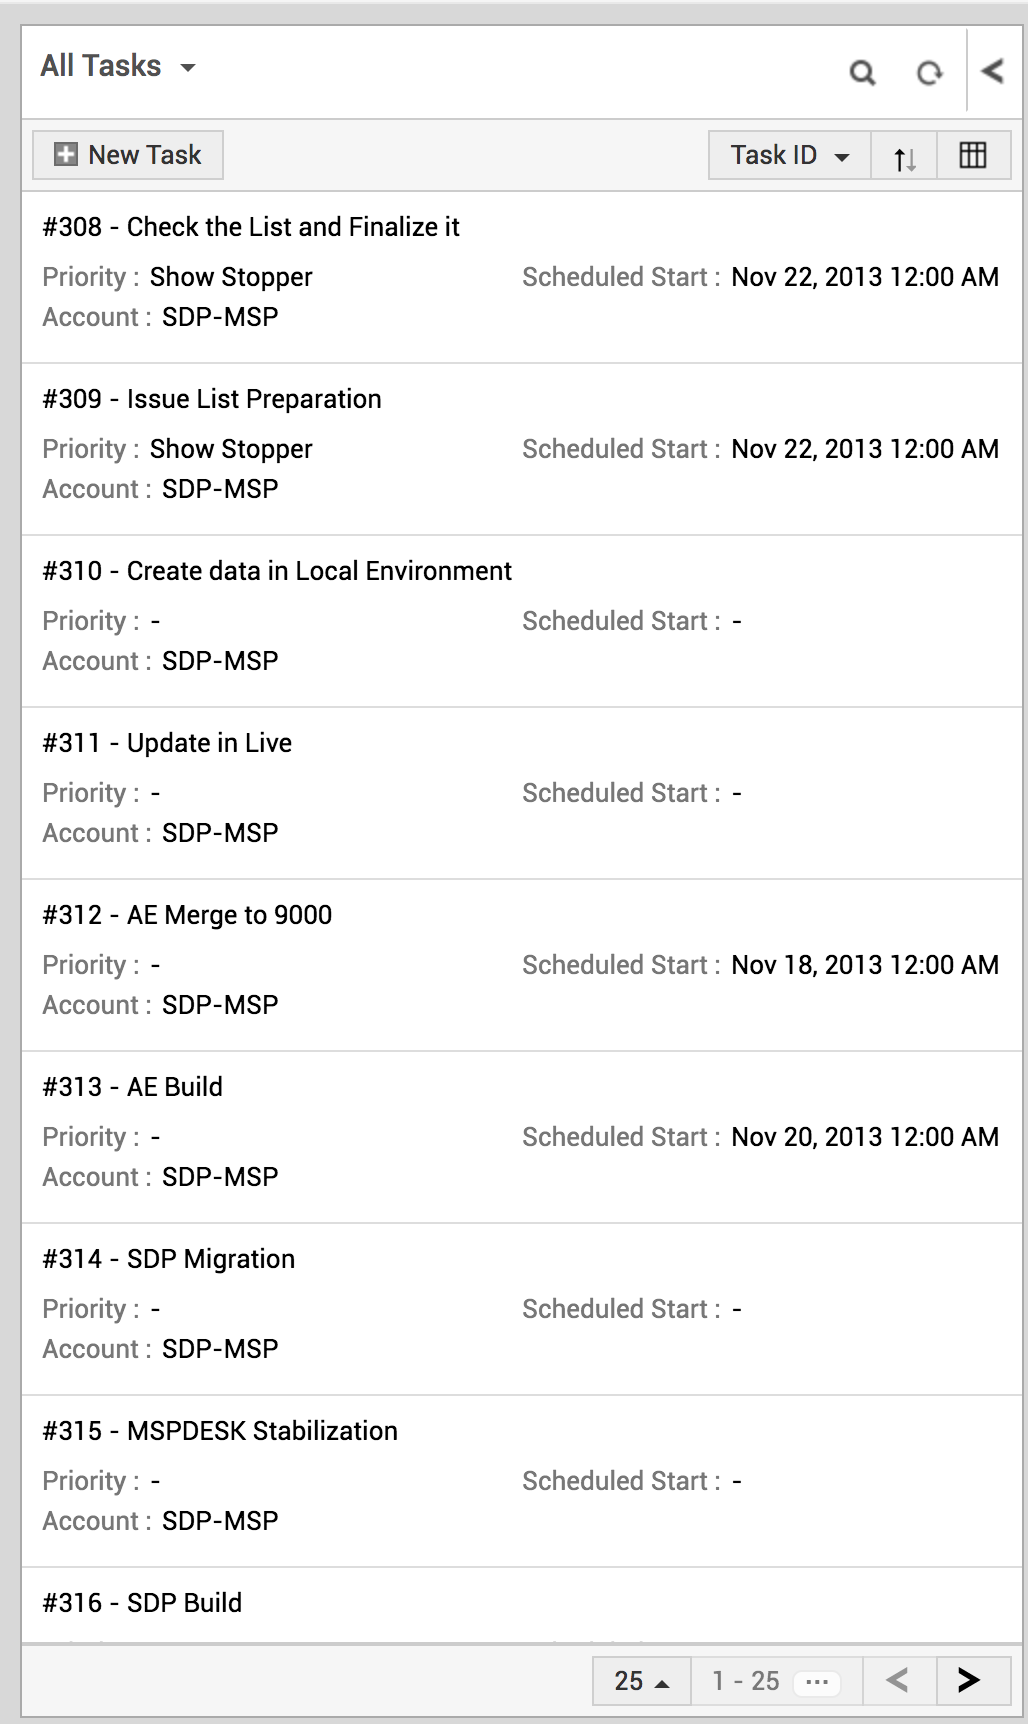
Task list view displays the tasks for the technician. Tasks can be created, edited or deleted from this page itself.
You can also customize how the list view appears by using the following options.
- Use this icon
 to add new fields in the task view snippet.
 - Drag and drop the fields to sort how they appear on the task snippet.
- Sort tasks by using the sort option present at the top.
Request Classic View
Classic View presents the request data in a linear manner. To display requests in classic view, click the on the view header.

You can sort requests by different fields such as subject, technician, and more by using the Sort By button in the header.
The Filter menu and Task List View sidebar in Classic View are similar to List view. For more details, head here.
Combined View
Combined View enables you to track requests and tasks on the same page. It appears similar to the classic view but with limited filters and sorting options.
To switch the request list to the Combined View, click Combined View in the requests page header.

In the Combined View, you can sort requests by:
-
Created date
-
Due by date
-
Scheduled start
-
Scheduled end
Click Request Default View to exit the Combined View.
Filter Drop-Down Menu
The filters available in the Combined View category are:
-
My Pending Activities - Lists the requests and tasks assigned to the current technician.
-
My Group Pending Activities - Lists the requests and tasks assigned to the current technician group.
-
My Pending and Group Unassigned - Lists the requests and tasks of the current technician and current technician group's unassigned tickets.
Assigning Requests from the list view:
Now you can assign requests to a technician or a group from the request list view page itself.
To assign requests to technician/group,
- Hover the cursor over the "unassigned" in the 'Assigned to' column.

- Click on the drop-down to select the technician/group. Please note if you select a group, technicians related to that group alone will be listed.
- Click Assign.
- You can also alternativley assign technicians to requests by selecting requests and clicking the Assign option at the top header.
Viewing Requests from Unknown Requesters
You can view requests raised by unknown requesters from List View.
- Go to the Request List view page.
- Apply Unknown Requests filter.

You can also approve/reject unknown requesters from Request List View. To learn more, click here.
Request Icon Indications:
-
 : After a request has been created by the requester, if the mail icon turns green,it indicates that the reply has been sent by the technician.
 -
 : If the mail icon turns red, it indicates that the requester has replied, but the request is yet to be responded by the technician.
 -
 : The red mail icon with a number count, indicates the number of responses made by the requester with respect to the last response made by the technician. After the technician replies to the request, the mail icon turns green.
![]()
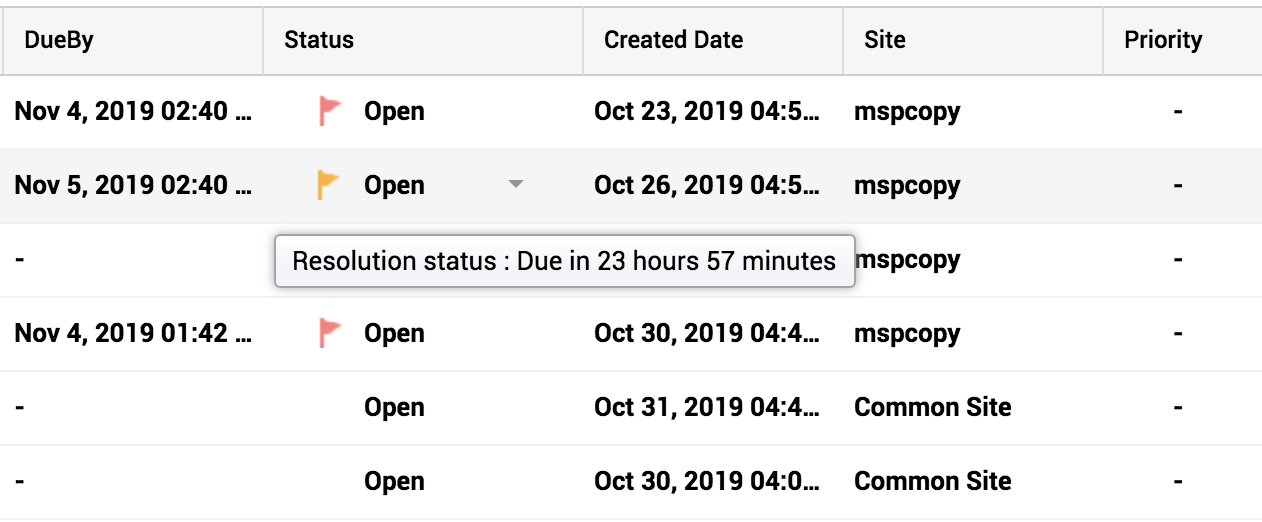
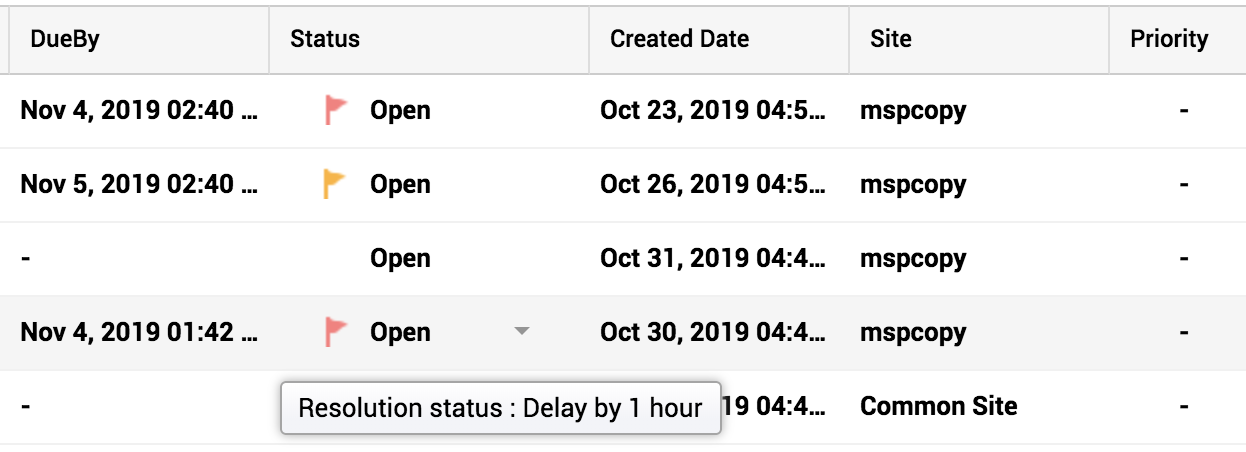
Flags denoting 'Delay by' time and 'Due in' time.
 : Yellow flag pops up, when the request SLA is 70% complete, indicating the "Duein" time without considering the non-business hours.
 : Red flag pops up, when the request SLA is breached, indicating the "Delay by" time.
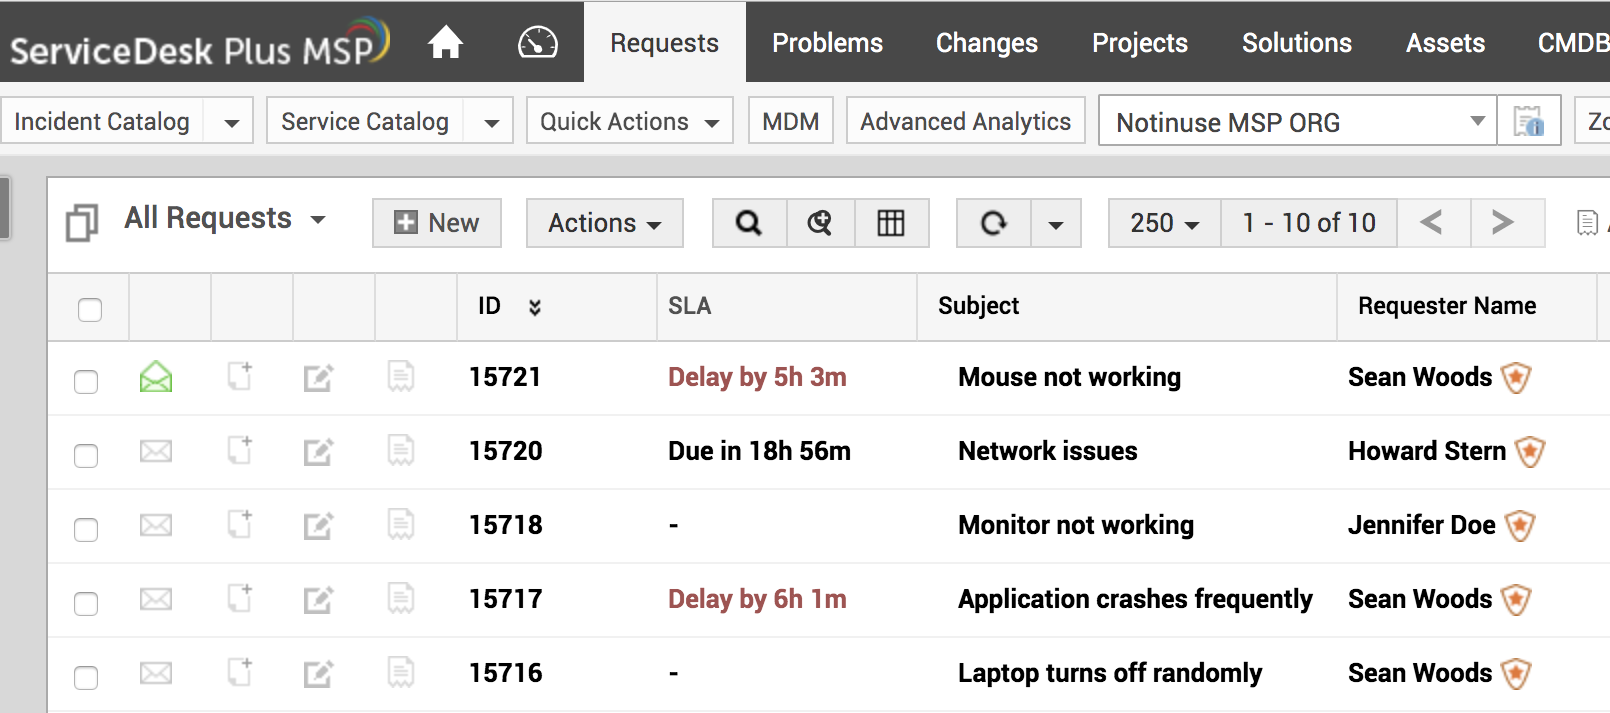
SLA Column:
Enabling the SLA column will display the request "Due in" time as well the request "Delay by" time without considering the non-business hours.
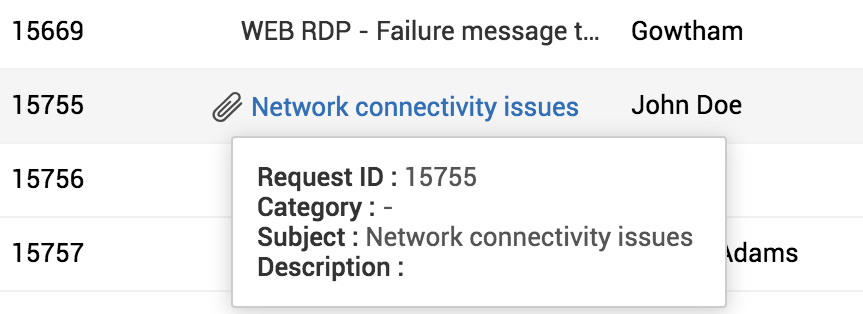
Preview Files
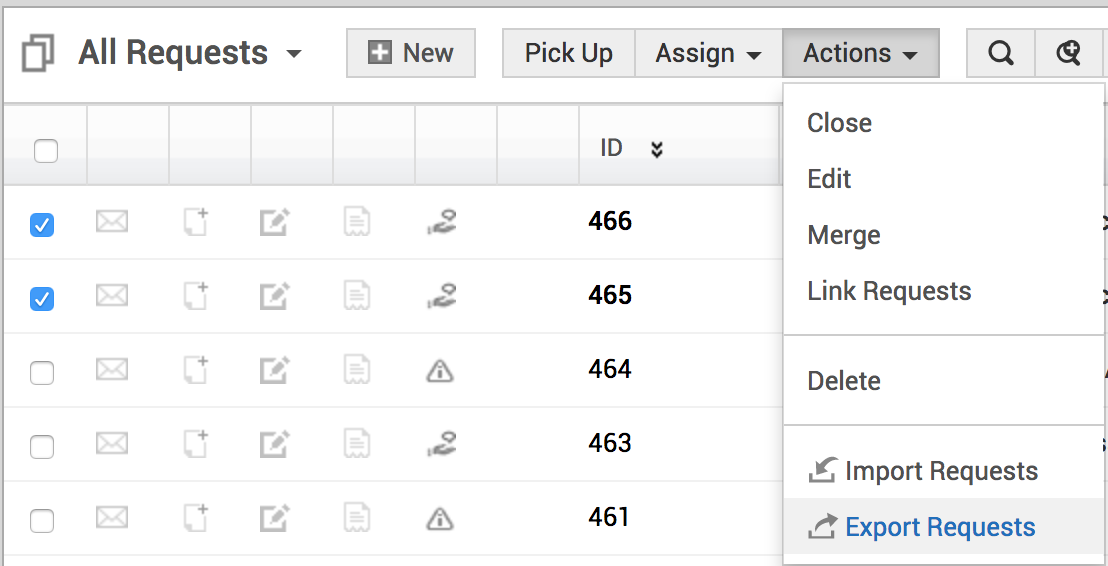
Export from the request list view
Select the requests from the list, click the Actions drop-down, click Export Requests.
Then, select the format in the dialog box that appears, as shown below:
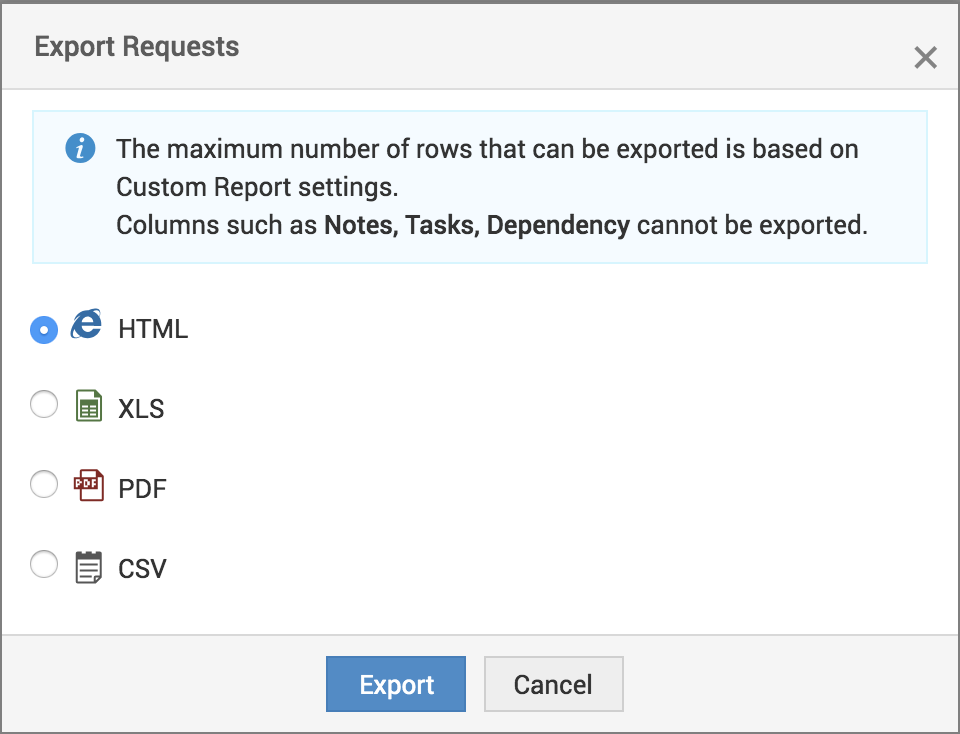
All the requests will be exported in the format you chose.


