The primary goal of any service desk is to restore normal business operations at the earliest possible, and with a minimum business impact. Consequently, managing the incoming tickets is fundamental to implementing an efficient incident management process in your organization.
A typical incident resolution process follows these steps:

However, this doesn't always work this way. There are multiple hurdles at every step.
In the next few topics, we will look at all possible hurdles that you could face while managing a service desk and how you can use ServiceDesk Plus to overcome them.
Prolonged Resolution Time

One of the most common issues that plague any service desk in an organization is long resolution times, which directly leads to increased support costs, decrease in employee productivity, and other business losses. Consequently, it reflects badly on the service desk.
Often, the lack of a structured ticket logging or tracking process or tools can lead to prolonged resolution times.
To resolve a ticket quickly, the technician requires all the necessary ticket information. However, this may not be the case if the ticket form is not detailed enough and does not collect the required information from the customer. Moreover, when the resolution process is not well-defined, it can lead to incorrect or lack of customer communication about the ticket status.
Often, the technician may not know how to proceed with the ticket. In some cases, the technician may have to collaborate with other technicians to resolve the ticket, but the tool may not allow such collaborations.
With ServiceDesk Plus, all these issues can be easily tackled and you can ensure quicker ticket resolution.
ServiceDesk Plus enables you to define a water-tight ticket resolution process that factors in just-in-time help for technicians, automates notifications by role, status, and provides templates that you can use across the process.
In addition, technicians can easily merge or link similar tickets and collaborate with other technicians in the service desk.
The following features in ServiceDesk Plus can address all these challenges easily:
- Request Life Cycle
- Request Templates
- Request Collaboration
- Knowledge Base
Configure Request Life Cycles
The Request Life Cycle enables the service desk to define a tightly structured ticket resolution process; define the direction flow, minimizing any scope for human errors.
Using a simple visual builder and a simpler drag-and-drop process, you can define every ticket status across the life cycle, associate roles for each status, provide contextual help for the technician, mandate and validate information, and automate various actions, including status-wise notifications to various stakeholders.
Let us now configure a life cycle for new asset requests, so that they can be closed with no loss of any resolution time.
The request life cycle consists of statuses and transitions.
Status is the stage of the ticket and transition is the link between statuses and defines the conditions required for the ticket to move from one status into the other.
Using transitions, you can define the conditions for the ticket to move into a status. You can define:
- Scope of Access
- Mandate Field Information
- Trigger Notifications
- Execute Scripts
A new asset request typically goes through the following life cycle:
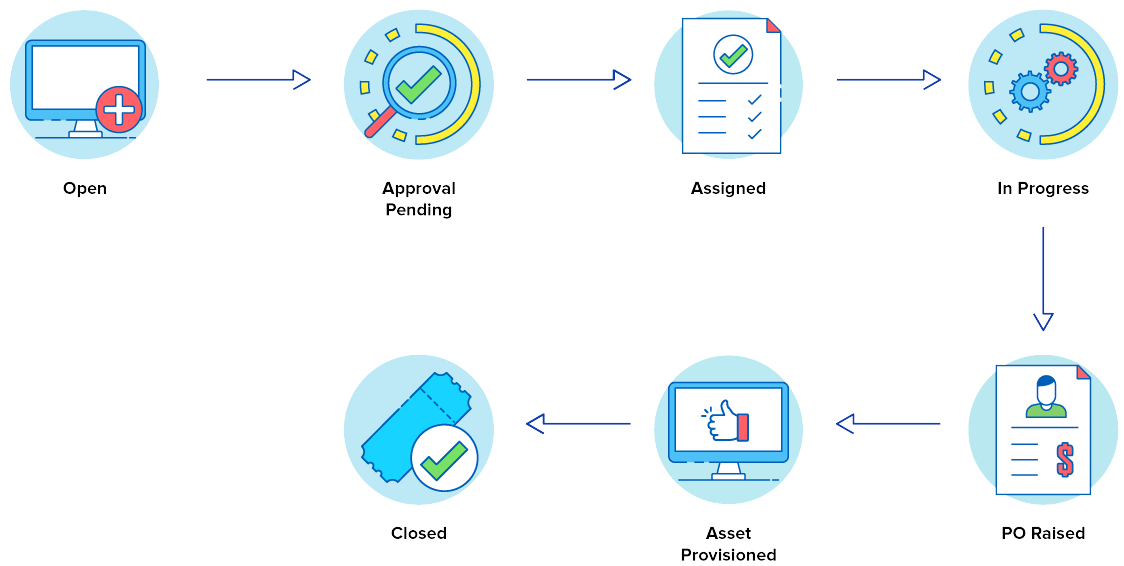
Go to Admin > Helpdesk Customizer > Request Life Cycle
Click New, provide a name and description for the life cycle, associate the Asset Requisition templates, and Save.
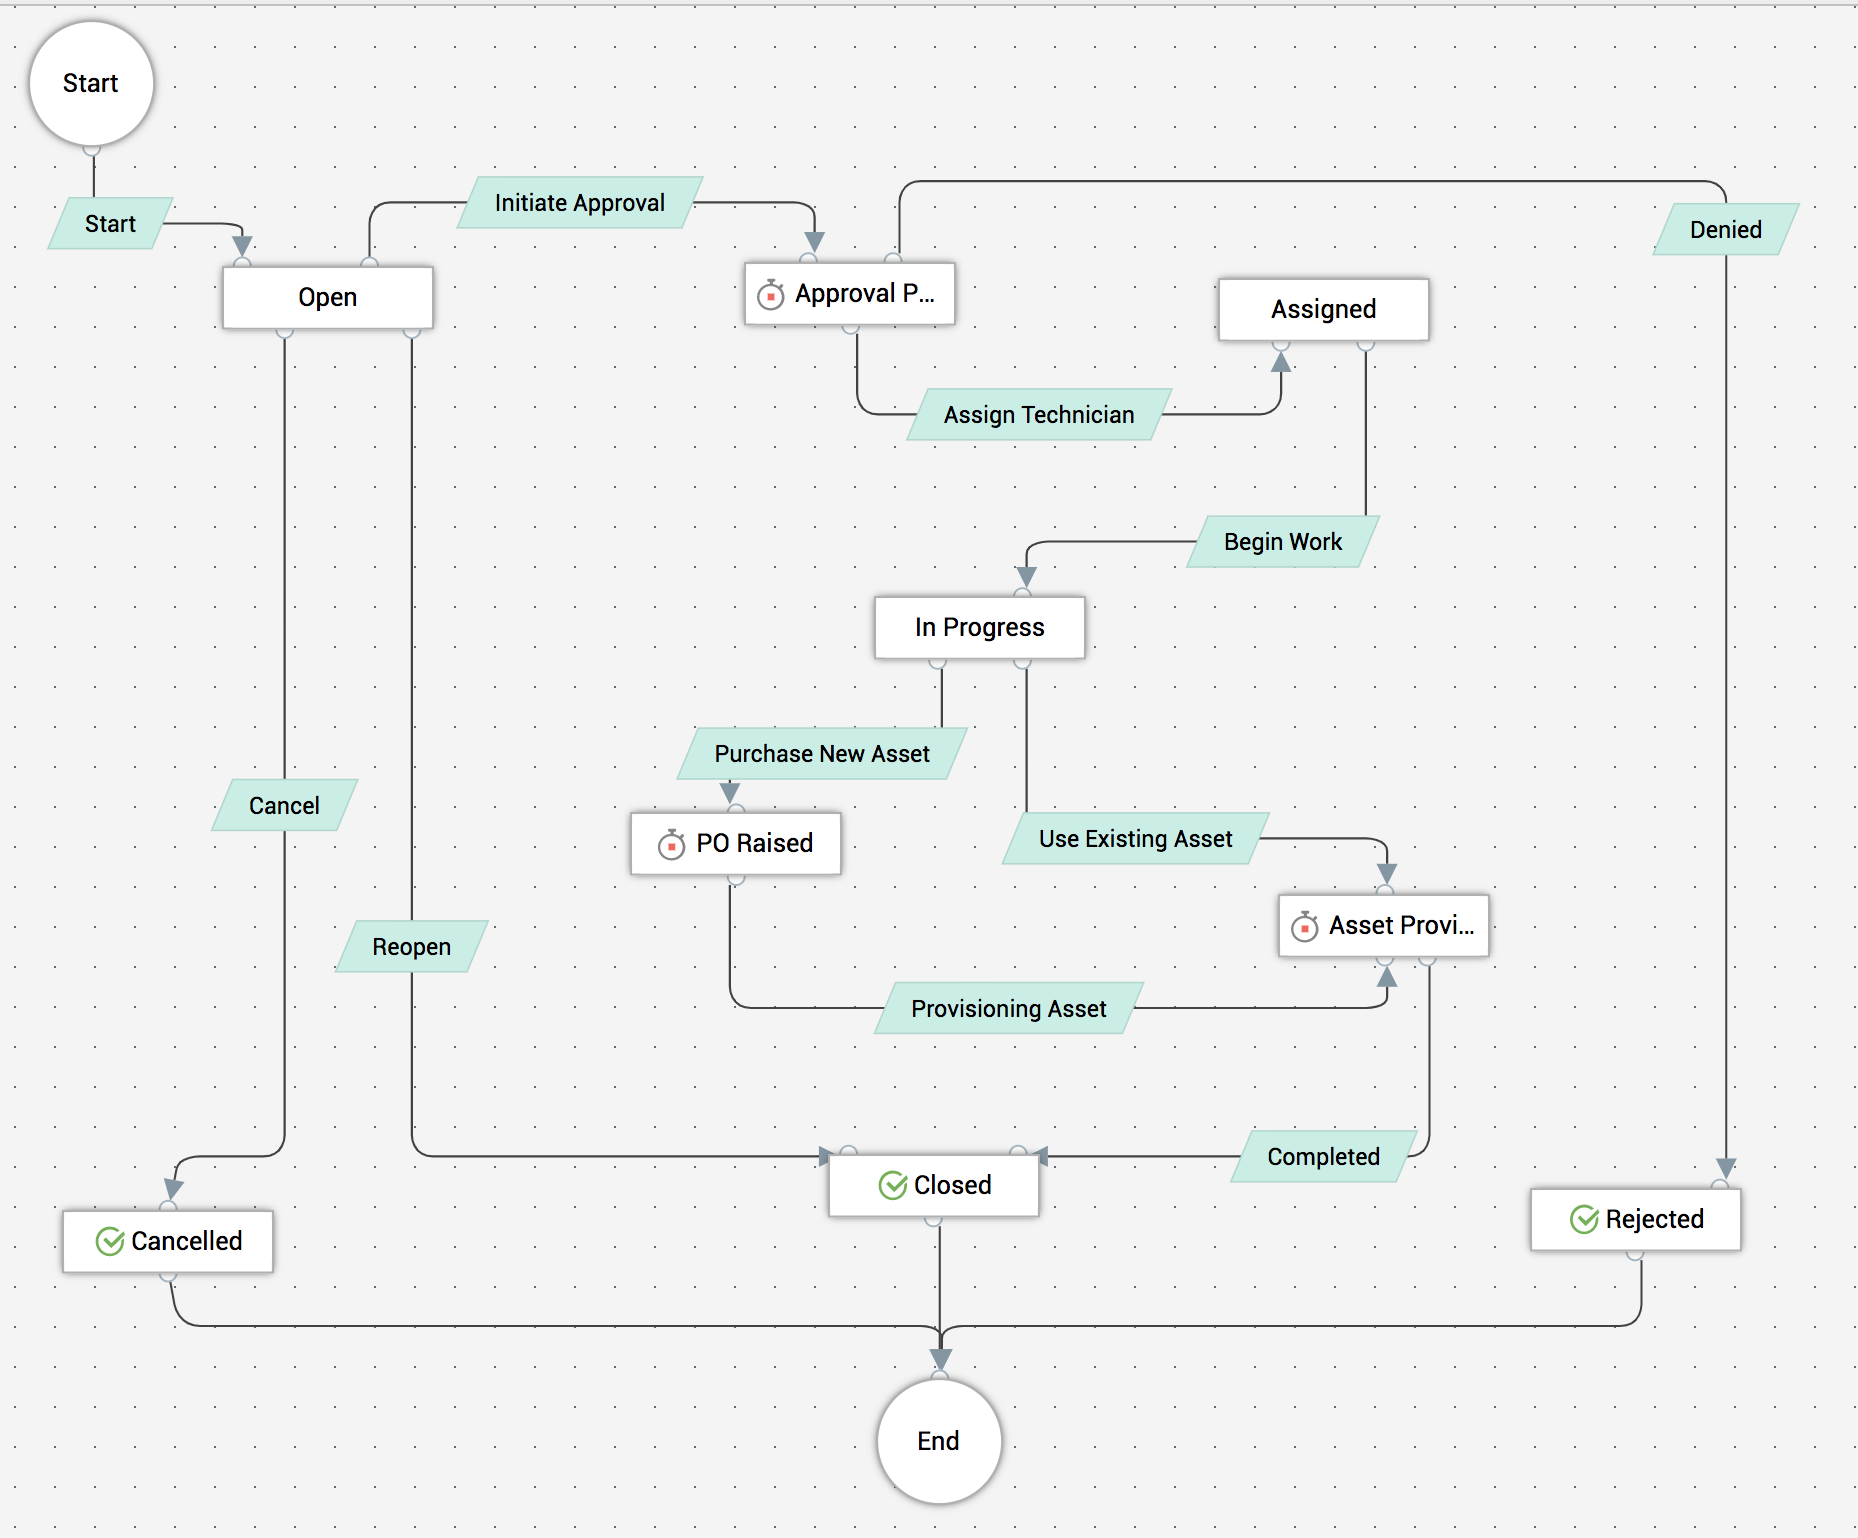
The visual builder that opens will contain some prepopulated statuses and transitions. You can either rename the statuses as per your requirement or create new statuses and transitions through a simple drag and drop process.
In the Asset Provisioning process, a technician picks up a ticket and sends it for approval. On approval, it is mandatory to assign a technician, which automatically triggers a notification to the requester. This is followed by asset purchase, asset provisioning, and ticket closure.
Using the transitions between the statuses, you can easily define this process, providing adequate help for your technicians, automate notifications, and run scripts to perform specific actions.
Use the Before transition to restrict access. With the During transition, request for essential information, abort process, or run custom scripts. And, use the After transition to send custom notifications or scripts.
Finally, publish the Request Life Cycle. Then, all tickets logged using the templates associated with this life cycle will follow the defined process, with no scope for errors or discrepancies that can lead to prolonged resolution times.
To know more, head here.
Configure Templates
Templates are forms that are already filled with some or all the necessary information, saving time and effort the user spends in creating the forms from scratch.
Service desks use multiple forms in everyday tasks. Request templates are used for collecting the required information from the user about the ticket so that time is not lost in the back and forth communication for more information.
Reply templates are used by technicians to communicate repetitive information to multiple users. Similarly, resolution templates help technicians quickly add their resolution to the tickets they have resolved.
Let us now see how easy it is to configure a Service template for a frequently requested service such as a Laptop.
Most often, request for Mobile phones must go through an approval process. In addition, the user may have specific preferences for the type of mobile phone they require. And, depending on the type of mobile they choose, only certain accessories may be available for the chosen phone. All these may lead to unnecessary back and forth communication between the technician and the user, costing the service desk precious time.
ServiceDesk Plus can easily encapsulate all these requirements in one single form and bring down the resolution time massively.
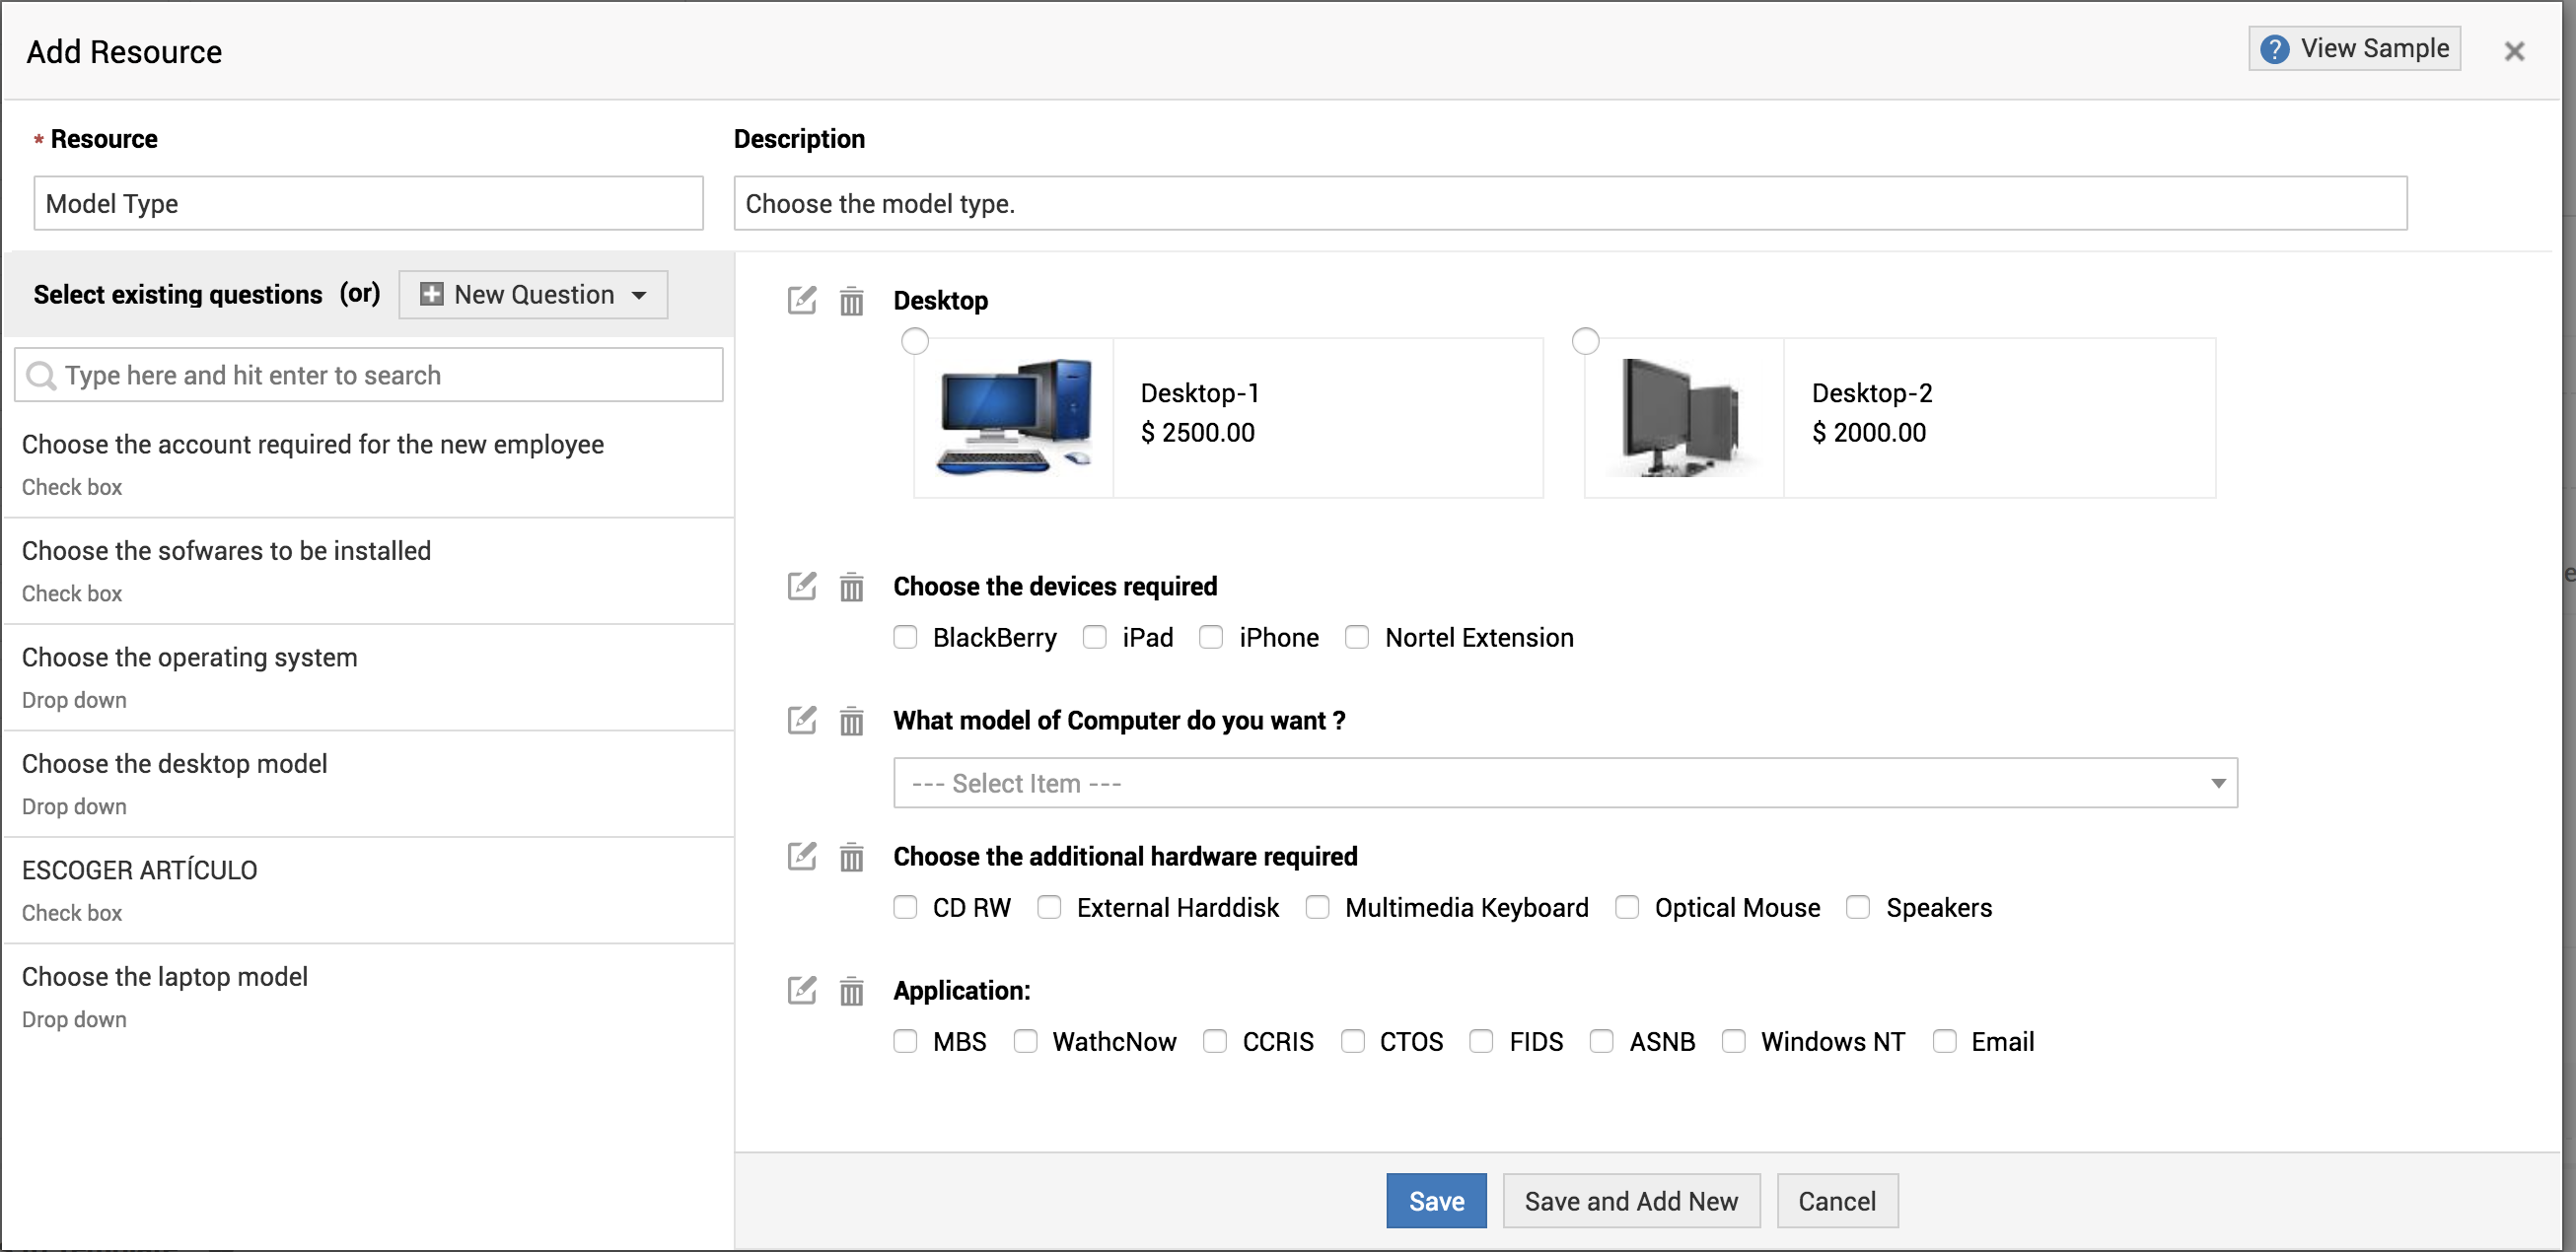
Go to Service Catalog>>Service Categories>>Communication
Click Add Service.
Fill out the displayed form.
Under Resource Questions, you can add the specific information about the laptop such as its type, color, or any additional hardware available, along with their cost and an actual image of the mobile phone.
You can also configure and associate rules for the template such that different fields are made available or hidden depending on user input or selection. That is, you can dynamically modify the display of fields based on user action. For example, if the user selects a Mac laptop, accessories for Windows can be hidden and only Mac accessories be made visible.
Similarly, you can configure incident templates, reply and resolution templates and reduce any scope for loss of resolution time.
To know more, head here.
Enable Request Collaboration
Sometimes, request resolution can be delayed inordinately due to multiple requests being logged for the same incident by the same requester, but on multiple channels. At other times, one incident can be assigned to more than one technician. And in some cases, the assigned technician may lack the know-how to resolve the request. All these together can lead to impossibly long resolution times.
ServiceDesk Plus provides you a way to solve all these issues and reduce any scope for prolonged resolution time.
Merge Requests
When a requester logs the same request by email, by template, and by phone, there's a fair chance that each request is processed separately and different resolutions are provided by different technicians, which can invariably lead to loss of time, effort, and resources.
With ServiceDesk Plus, you can simply merge all these requests.
Under Requests, select all the requests from the user, click Actions, and select Merge.
To know more, head here.

Link Requests
Often, several requesters submit tickets for the same issue. So, addressing each ticket individually by different technicians will lead to unnecessary waste of time and resources. This is because all of the tickets can have only one resolution. Therefore, if all the tickets can be linked, only one technician can work on them and the resolution can be shared with all the users.
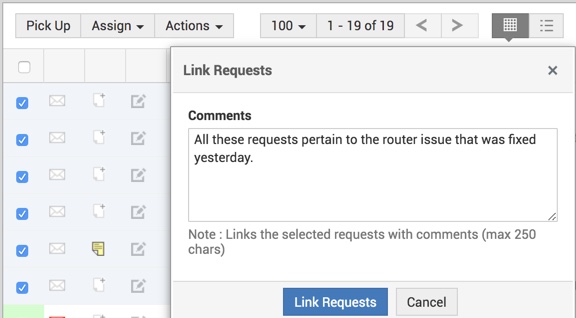
To link tickets, go to the Requests List View, select all the required tickets, click Actions and select Link Requests.
On the displayed pop-up, add any comments and click Link Requests.
Requests Collaboration
Sometimes, multiple technicians may begin working on the same request. At such times, the collaboration feature in ServiceDesk Plus throws an alert. This can also help reduce any unnecessary time spent in resolving requests.
To know more, head here.
Request Sharing
In cases when the technician assigned needs the assistance of another technician, or the requester, ServiceDesk Plus allows you to share the request with specific users.
To know more, head here.


