The primary goal of any service desk is to restore normal business operations at the earliest possible, and with a minimum business impact. Consequently, managing the incoming tickets is fundamental to implementing an efficient incident management process in your organization.
A typical incident resolution process follows these steps:

However, this doesn't always work this way. There are multiple hurdles at every step.
In the next few topics, we will look at all possible hurdles that you could face while managing a service desk and how you can use ServiceDesk Plus to overcome them.
Incorrect Ticket Assignment

Often, incoming tickets are assigned to the wrong technicians. Either the technician lacks the expertise to solve the issue or the technician is just a beginner, who has been assigned a Level 4 ticket.
Besides the loss of precious resolution time, this can lead to your customer getting frustrated due to multiple, incorrect notifications, communication about this mix up, or multiple reassignments. This could also lead to SLA-violations. We will discuss SLA and OLA violations, notifications, and communication later. In this topic, we will exclusively discuss the incorrect ticket assignment and how you can avoid it completely.
With ServiceDesk Plus, you can easily and accurately assign tickets to your technicians. In addition, you can automate the entire process, saving time and minimizing the possibility of manual errors.
All incoming tickets can be categorized, prioritized, and assigned in no time.
Let's see how simple and easy this is when you are using ServiceDesk Plus:
Associate Technicians with Template
One of the ways to ensure the right technician is assigned to the incoming ticket is to associate the request templates with Support Groups.
So, what are support groups?
Support groups are technicians, grouped by their level of expertise, knowledge area, years of experience, and the like. They can be grouped as Hardware, Printer Problems, Asset Provisioning, and so on, depending on the specific requirements of your organization.
How to configure support groups.
The ESM directory must be first configured with the necessary instances and users.
Then, under any instance, go to Admin>>Users>>Support Groups
On the displayed page, select the site from the drop-down and click Add New Group.
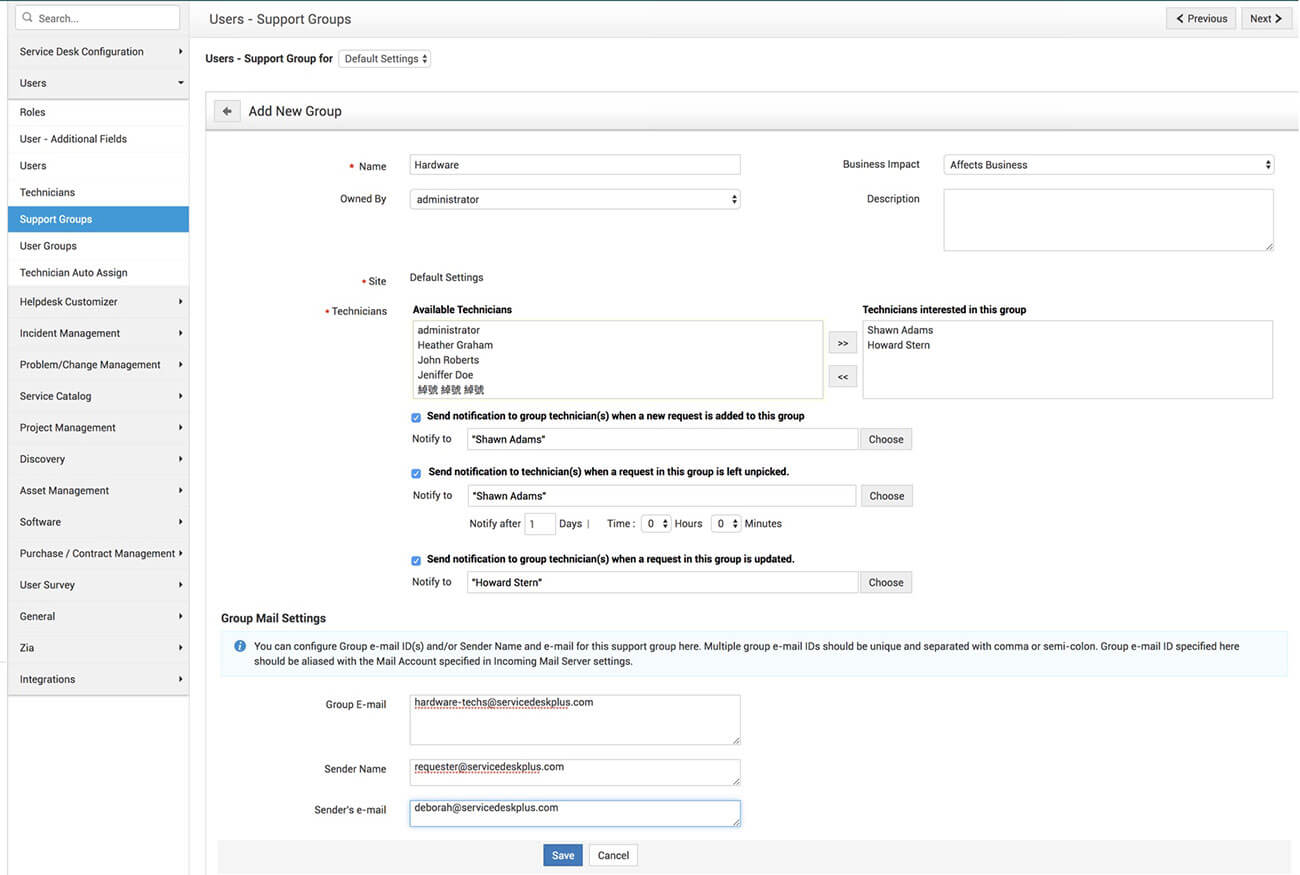
The displayed page is quite intuitive; you will need to fill out the required details, as follows:
Choose an owner for the group, select the business impact, add technicians to the group, select technicians to be notified when a ticket arrives, is not picked for a certain period of time, or when it is updated.
Finally configure the group emailing, complete with the group email ID, sender's email, and name. Make sure these group email IDs are aliased with the mail account configured in the Mail Server settings for incoming emails.
Then, configure a template for user onboarding, and associate the Human Resources support group with the template.
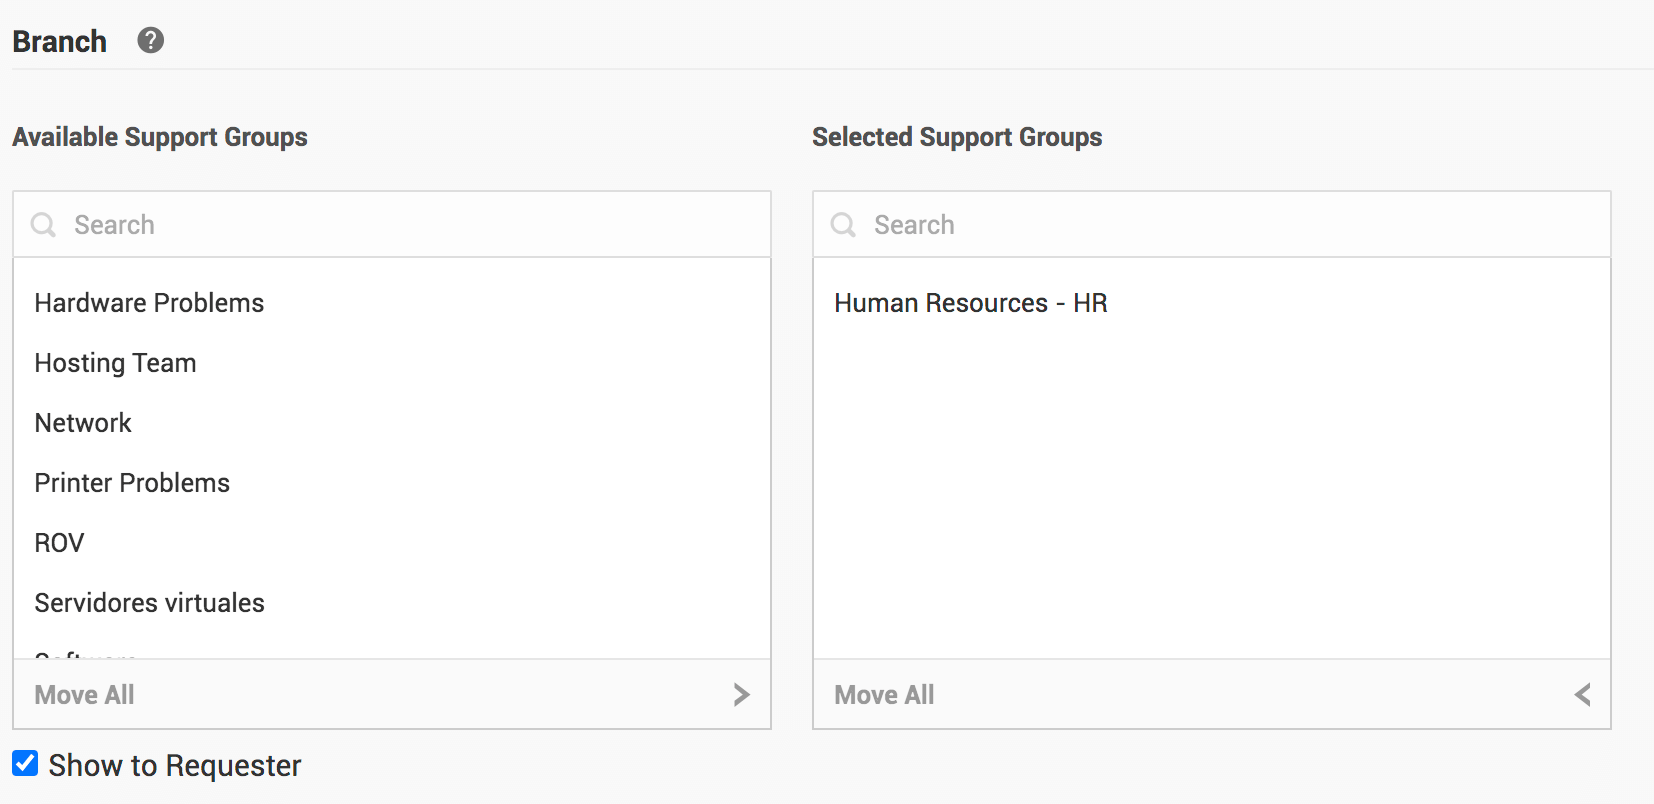
Now any ticket logged for user on-boarding through the user management template will be immediately associated with the Human Resources support group, which will also be adequately notified about the ticket status. This will fully reduce incorrect ticket assignment in your organization.
To know more about templates, support groups, and technician association to templates, head here.
Add Categories and Associate Technicians
Configuring clear categories, sub-categories, and items while designing the default template of the request form is one way to ensure that the right technician is assigned to the right job.
Let's say Teresa, the SQL admin of the IT department is the sole in charge of all database-related questions at Zylker. In her absence, all database-related tickets will be routed to Peter, another SQL admin in the team.
Now, let us see how to configure Teresa and Peter as the Assigned Technician and Backup Technician, respectively.
Go to Admin>>Helpdesk Customizer>>Category>>New Category
On this page, provide the category name as Database and select Teresa from the technician list. This will ensure that all database-related tickets will be assigned to Teresa.

Now, every time a ticket is logged under this category, it will be automatically assigned to Teresa.
Now let's configure Peter as the backup technician for the days Teresa is not available.
Go to the Scheduler on the Home page. Under the Technician drop-down, select Teresa Wood.
The Scheduler will display the days on which Teresa is unavailable. Click the days on which you want to configure a backup technician.
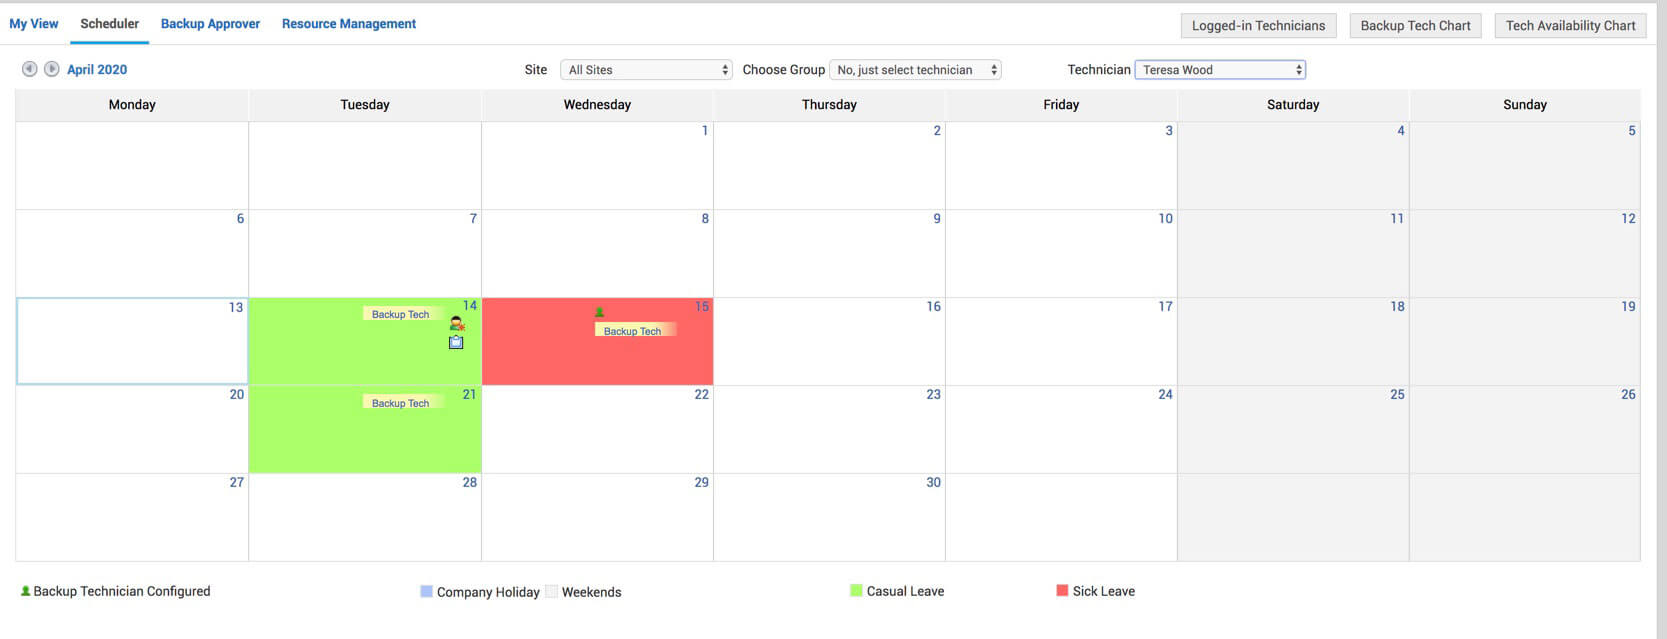
On the displayed page, select Assign to following technician option, and select the technician from the adjacent drop-down.

Now all tickets that are raised under the Database category will be assigned to Teresa automatically, and on days she is unavailable, the tickets will be routed to Peter.
To know more about configuring categories, head here.
Configure Business Rules and Associate Technicians
Business Rules also help in assigning the right technician because you can configure a rule such that the field values in the request form are automatically changed when a given set of conditions is met.
Besides changing field values, business rules can be configured to send out notifications and execute script actions as well.
Business Rules is a powerful way to assign technicians, place the ticket in the right support group, assign a ticket type, update its priority, and a lot more.
Now, let us see how to configure a business rule so that all outage notifications from monitoring tools, which are processed as tickets in ServiceDesk Plus, are specified a certain priority, assigned to a certain support group and level, and email and SMS notifications are sent out to the major incident management team.
Go to Admin>>Incident Management>>Business Rules>>New Business Rule
Provide the basic details of the rule and select when the rule must be executed; while the form is created, edited, or submitted.
Select cascade on, if you want all the configured business rules to run one after the other, in the given sequence; you have the option to organize the sequence of these rules also.
Select Criteria>>Department is, followed by Conditions>>contains, then click Choose, and then select IT Services.
To add more criteria, you select Subject from the list and add the condition as Outage Notifications.
Under Perform these actions, select the actions and their corresponding options.
Finally, under Notifications, choose the technicians (administrator in this case) to be notified and click Save.
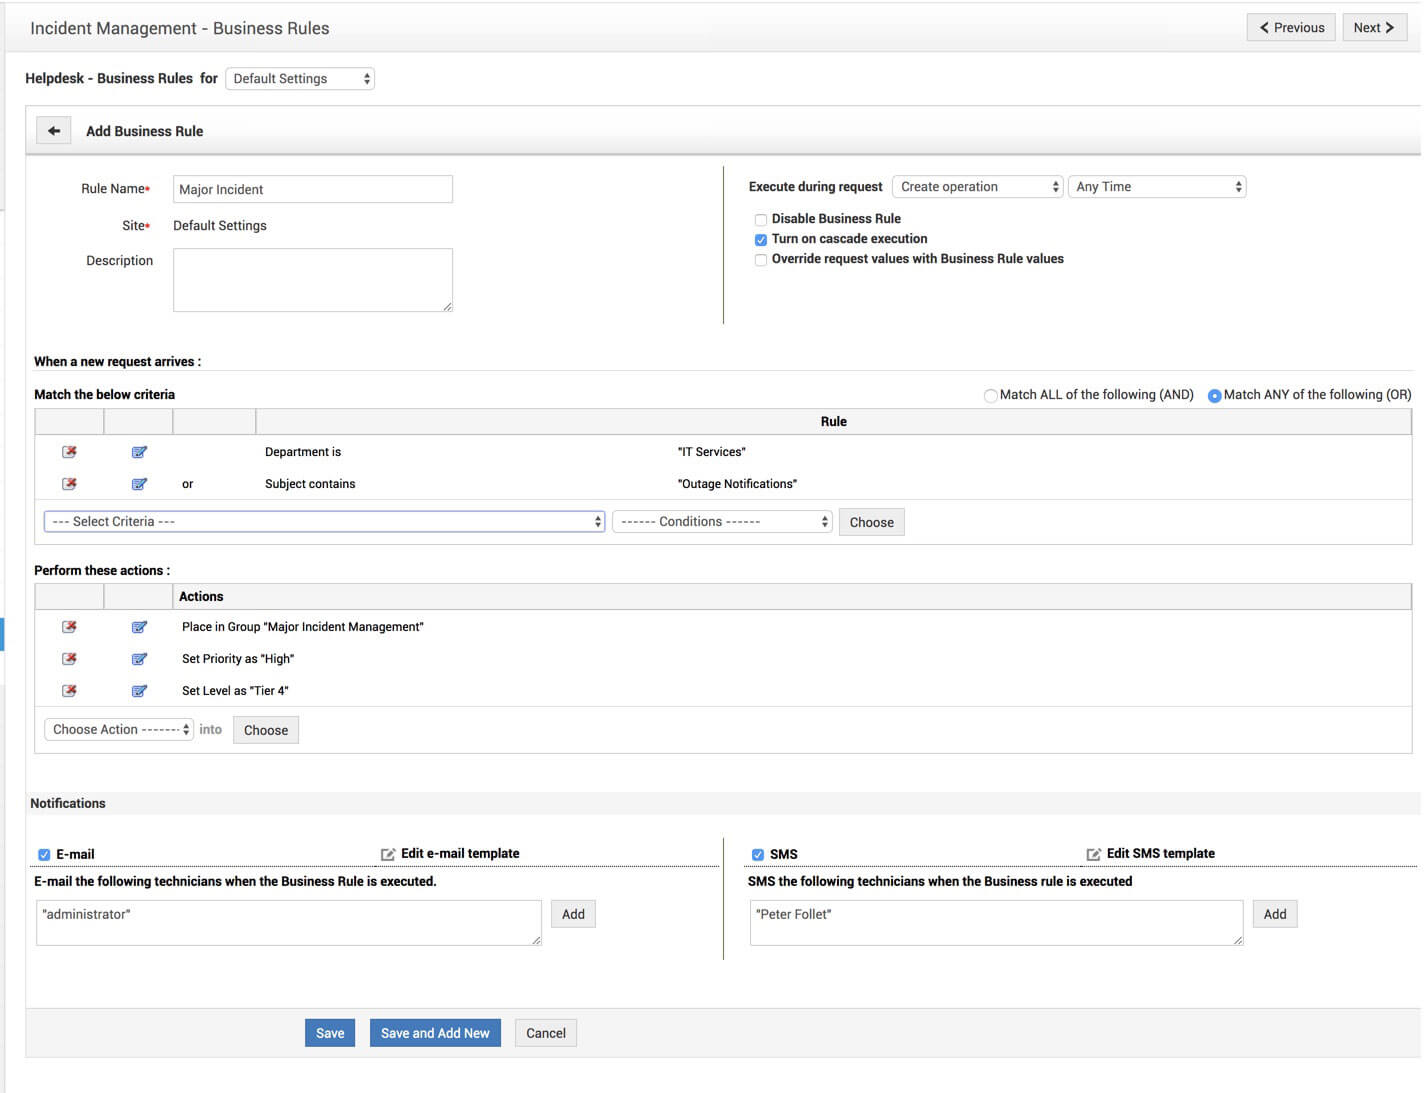
Now, any ticket from the IT Services department or any outage notifications from the monitoring tools will be automatically placed in the Major Incident Management support group and assigned high priority and Tier 4 level. In addition, automated email and SMS notifications will be sent to all stakeholders.
To know more about Business Rules, head here.
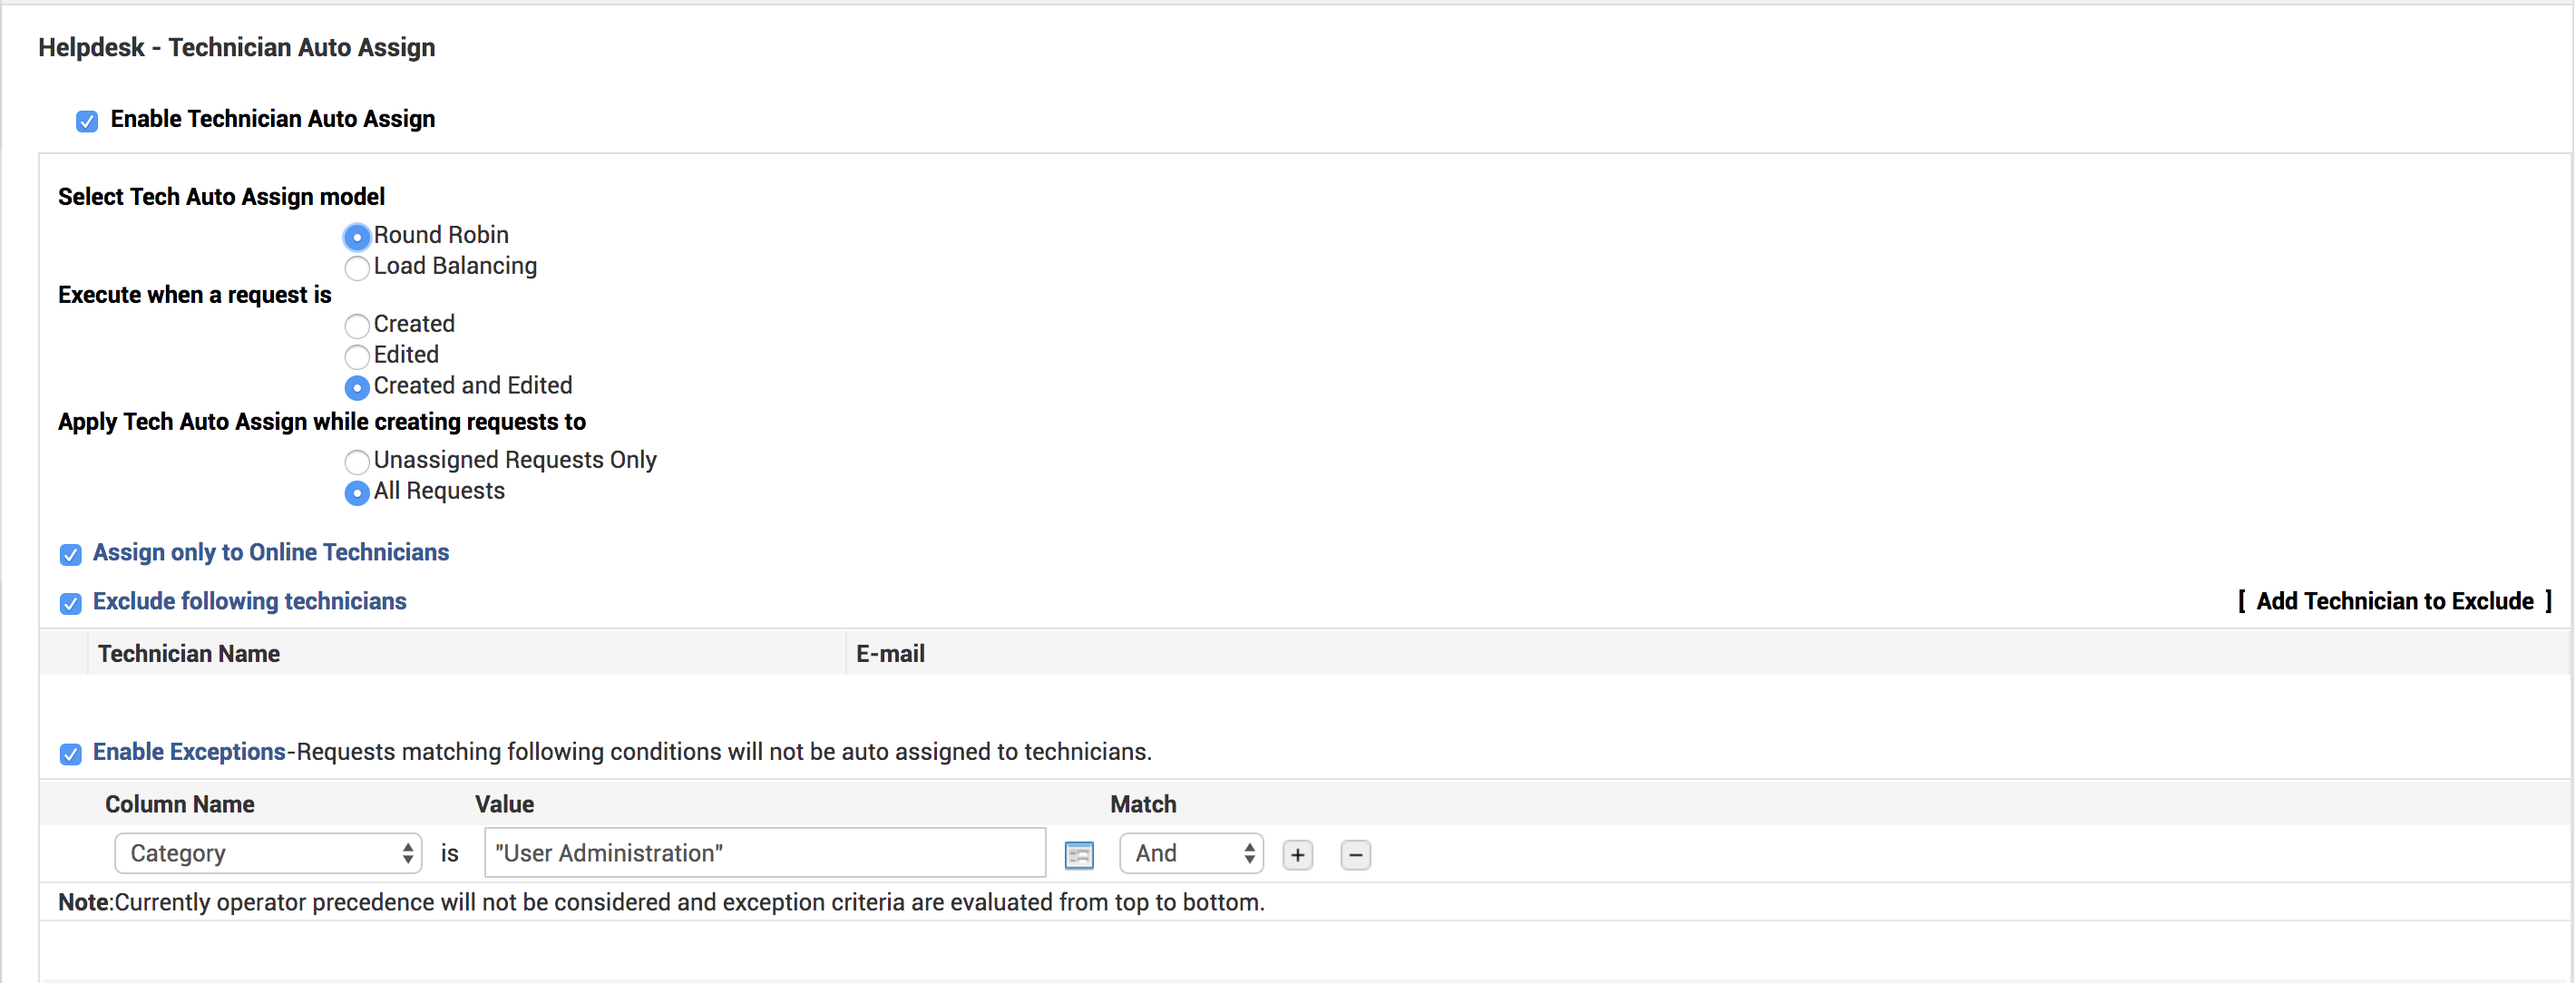
Enable Technician Auto Assign
As the name indicates, the application is configured to assign technicians to the incoming tickets automatically.
With technician auto-assign, you can use either the Round Robin method or the Load Balancing method to assign tickets.
There are multiple options to improve this process; you can use this model either on all tickets or on only the unassigned ones, and when they are created, edited, or created and edited.
You can also choose to include only the online technicians and exclude specific technicians based on criteria that you can choose.
You can also use the Backup Technician feature here to ensure correct ticket assignment. When a technician is on leave or unavailable to work on tickets, you can configure a backup technician so that the ticket life cycle is not interrupted.
To configure a backup technician, follow the steps explained here.
To know more about Technician Auto Assign, head here.


