Business Views:
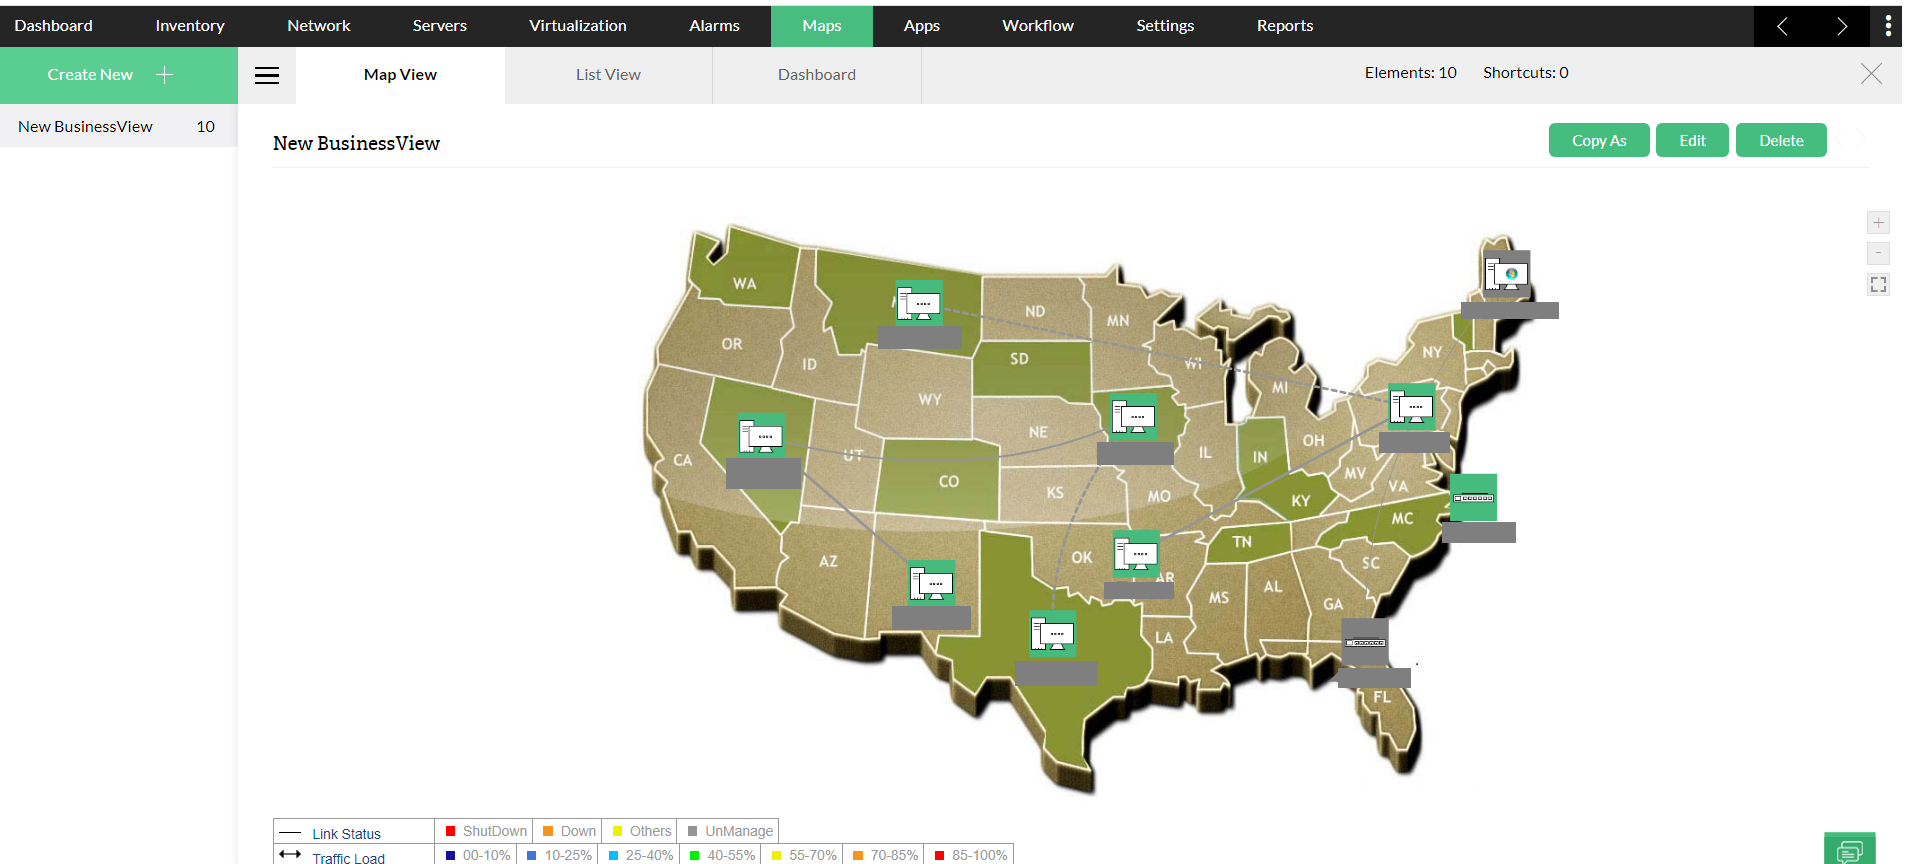
Business views in OpManager Plus provide a graphical representation of devices according to the business service they cater to. This ensures the availability of business critical applications at all times and helps in quicker troubleshooting.
The Business View Tab can be accessed from the Maps section of OpManager Plus.
Adding a Business View:
- Go to Maps -> Business Views -> Create New
- Rename the Business view from 'Untitled' on the upper left corner to the desired one.
- From the available list of devices, drag and drop the devices that has to be grouped, onto the white board.
- You can customize the view by changing font type, size and color.
- Choose the required Background(Map) from the preloaded images or upload a new background image and select Apply.
- Drag and drop devices on the Map based on your requirement.
- Save the created view.
- Select Exit to close the view. The created view would be displayed under the Business Views Tab.

Creating Links between devices:
Adding links between devices in business views, helps to represent network diagram on the map. These links can be configured based on user requirements.
To add a link between two devices in a business view,
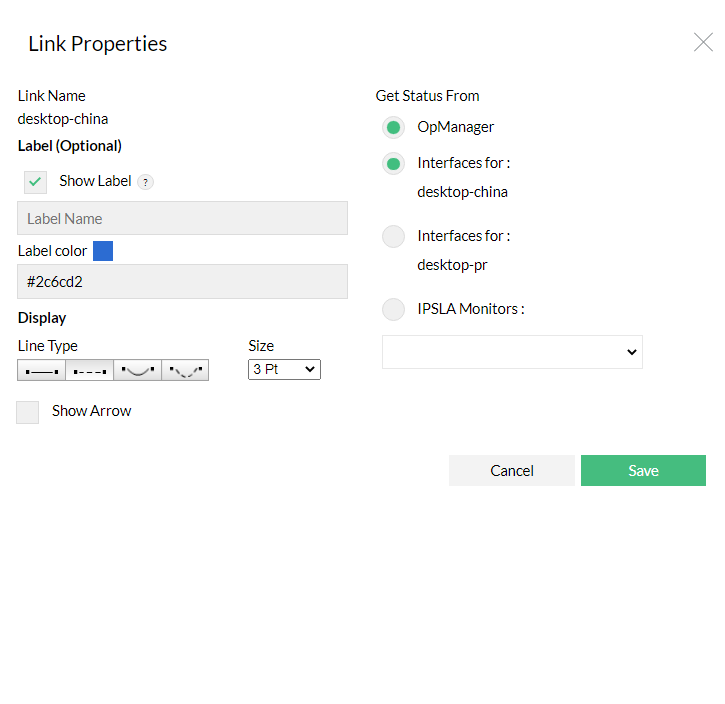
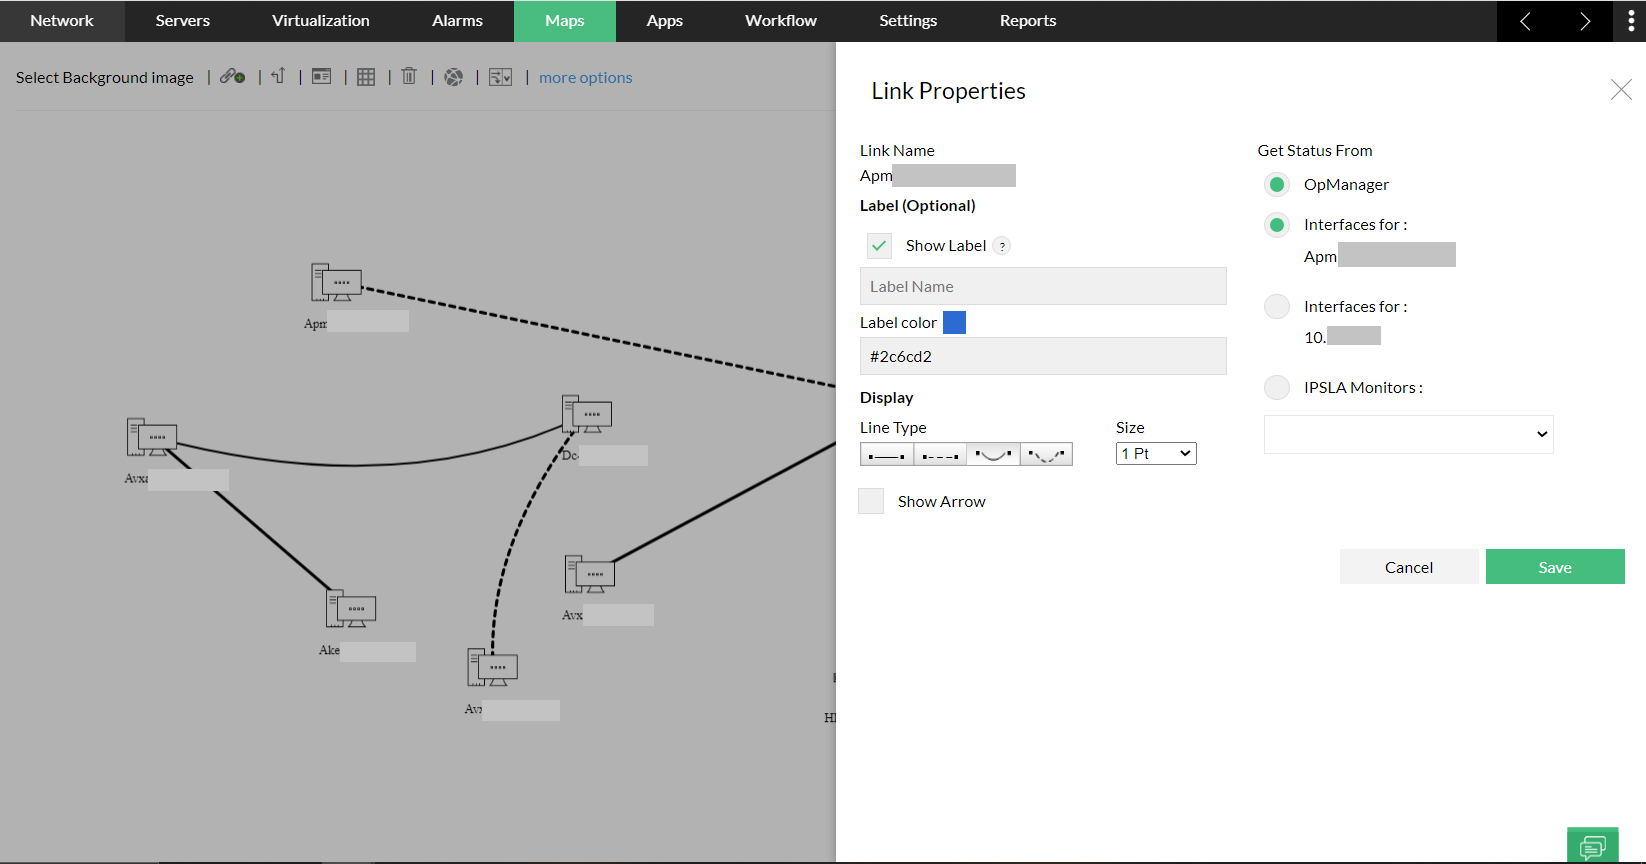
- Select the Add link button next to the Background tab. Drag a link from the source to the destination device and click that device. A link properties dialog pops up.
- Alternatively you can also drag the link button at the top right corner of the source device icon to create a link to the destination device.
- Configure a display name for the link.
- In the Get Status from field, select any interface from either the source device or the destination device. The link will inherit the status of the interface that you choose here. For instance, if the source device goes down, and if you have selected an interface from that device, the link also inherits the status of that device. Note: You can also select to Get Status from either OpManager Plus or NetFlow. If OpManager Plus is selected, status is got through SNMP. If NetFlow is selected, detailed data like Top Source, Destination, QoS etc., can be obtained
- Select the line type and size.
- Deselect the Show Arrow check box if you don't want to show the traffic arrows.
- Click Apply.
- Click Save on the left to save the changes.

Modifying Business Views:
- To make changes to the existing business views, Access the business view from the Maps tab.
- Click the Edit icon to modify the view properties.
- After modifying the properties like adding/removing links, adding more devices to the view, adding shortcuts on the view, changing background etc, click the Save button on the left to save the changes.
Adding Shortcuts:
You can add shortcut icons to business views that helps to easily navigate to a view from another view when objects are grouped based on their geographical location.
- Go to the business view and click the Edit option on right-top corner of the view.
- Click the Add Shortcut button on the left. A shortcut properties dialog pops up.
- Configure a name for the shortcut in the Shortcut Name field.
- From the Open Submap list-box, select the map which should be opened when you click the shortcut.
- Select the icon to be used for the shortcut from the Default Icons or select from the Custom Icon combo-box.
- Click Apply for the shortcut to be added.
Note: You must have created at least two business views to be able to add a shortcut from one view to another.

