Microsoft 365 Automation
M365 Manager Plus automation module helps to automate all the Microsoft 365 management tasks. It lets you create automation, and automation policies.
- Automation: Schedule management tasks and automation policies to be run at specified intervals.
- Automation policy: An automation policy is a chain of tasks which when triggered carries out all the tasks without human intervention.
Steps to Create New Automation
- Navigate to the Automation tab.
- Select the Automation option in the left pane.
- Click Create New Automation.
- Select your Microsoft 365 Tenant, and the Task or Policy to be automated.
- Provide the required inputs in the Task Input section.
- Select the source of data for the task/policy to be automated.
- If it is a report, use the + option to select the appropriate report.
- If it is a CSV File, provide the Location of CSV in the format, \\server_name\share_name\folder.
Note: Select the Select only the appended objects from the file, to ignore the old values in the CSV file since the last time the task was run.
- Select the Frequency at which the task/policy must be run.
- Click Save to run the task at the specified intervals.
Steps to Edit Automation
- Navigate to the Automation tab.
- Select Automation option in the left pane.
- You will now see the list of automation policies you have ever created.
- Click the
 icon found under the Actions column corresponding to the automation you want to edit.
- Perform the changes, and click Update.
Steps to Create New Automation Policy
- Navigate to the Automation tab.
- Select Automation Policy option in the left pane.
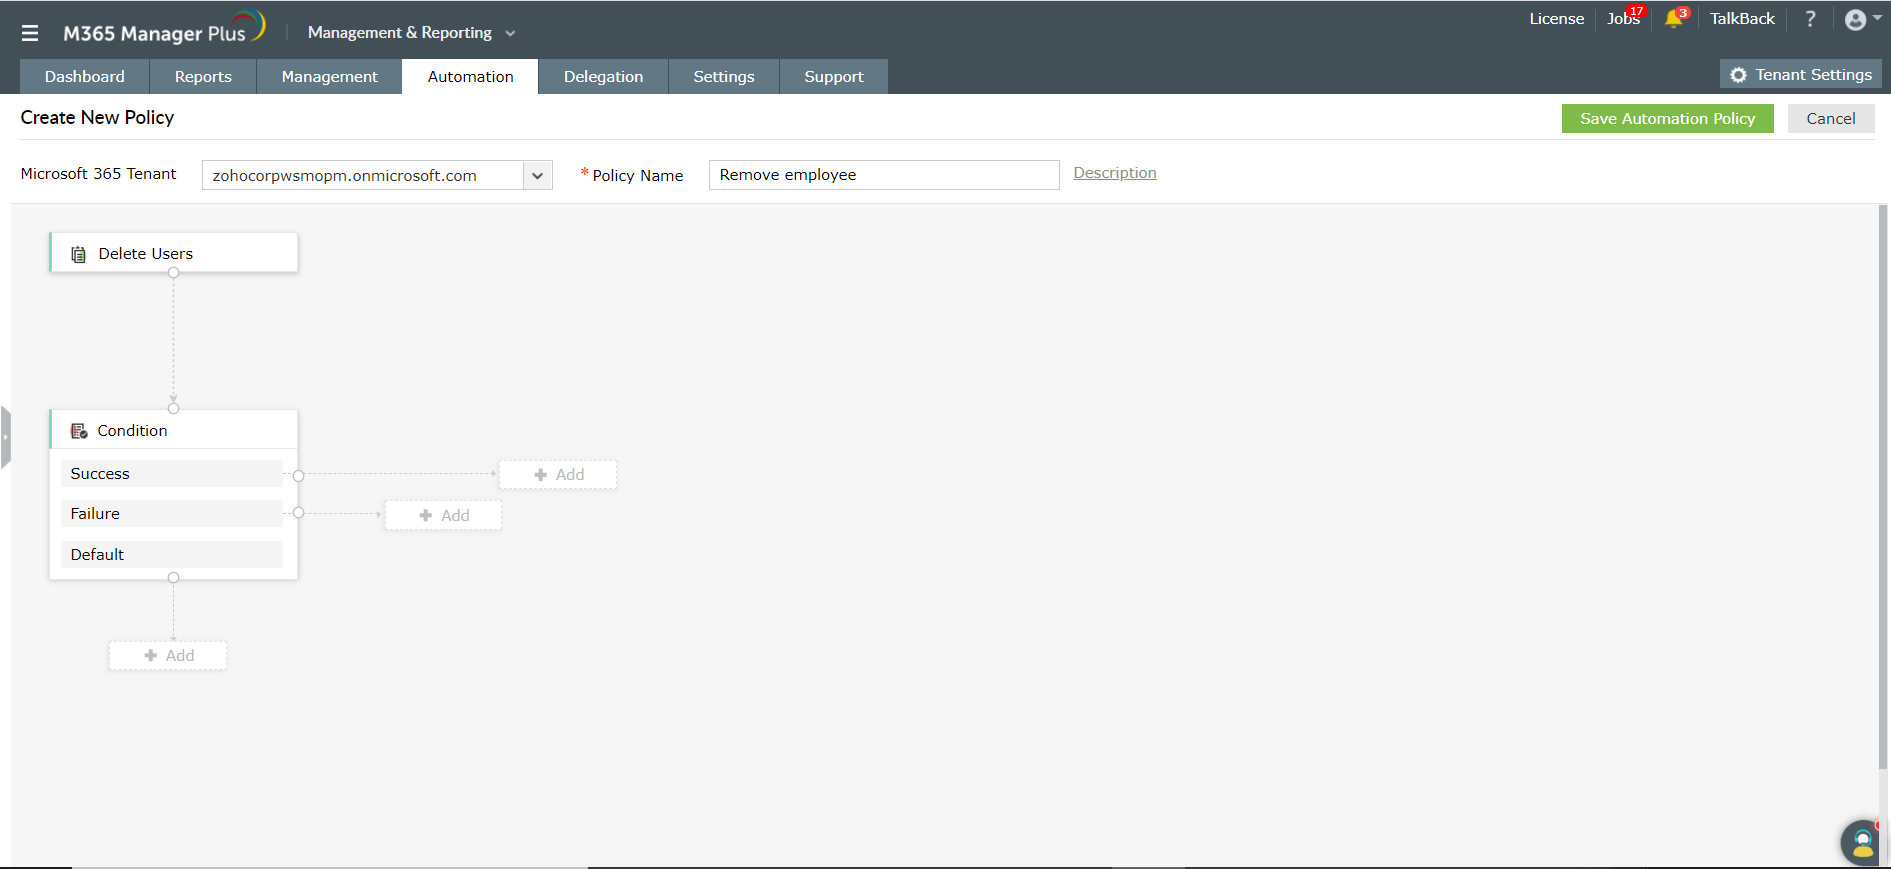
- Click Create New Automation Policy.
- Select the Microsoft 365 Tenant, and provide a name and optional description for the policy to be created. Eg: User account provisioning - This policy creates new user accounts, and licenses to them.
- Click on the Click here to add task option found on the screen to add your first task.
- Adding a task will be similar to creating an automation. Once done click Save.
- You can now see the task you created added to the screen with the Add option in the form of a flowchart.
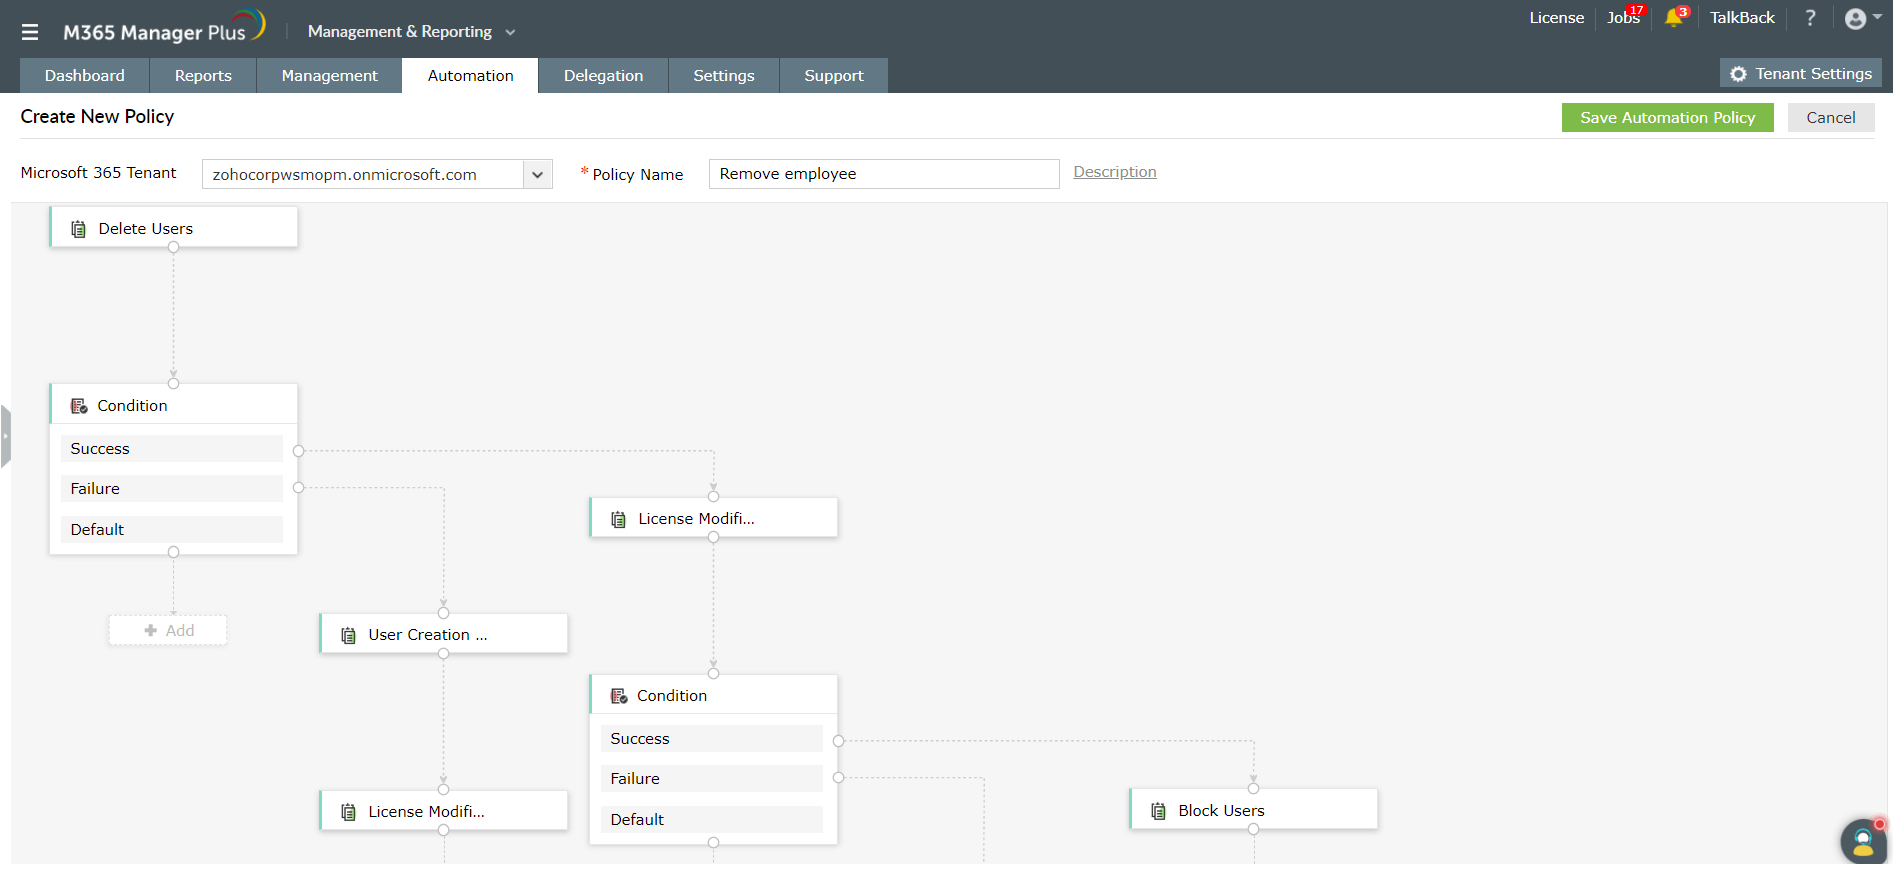
- Using the Add option you can add,
- Task - Use this option helps to add a new management task.
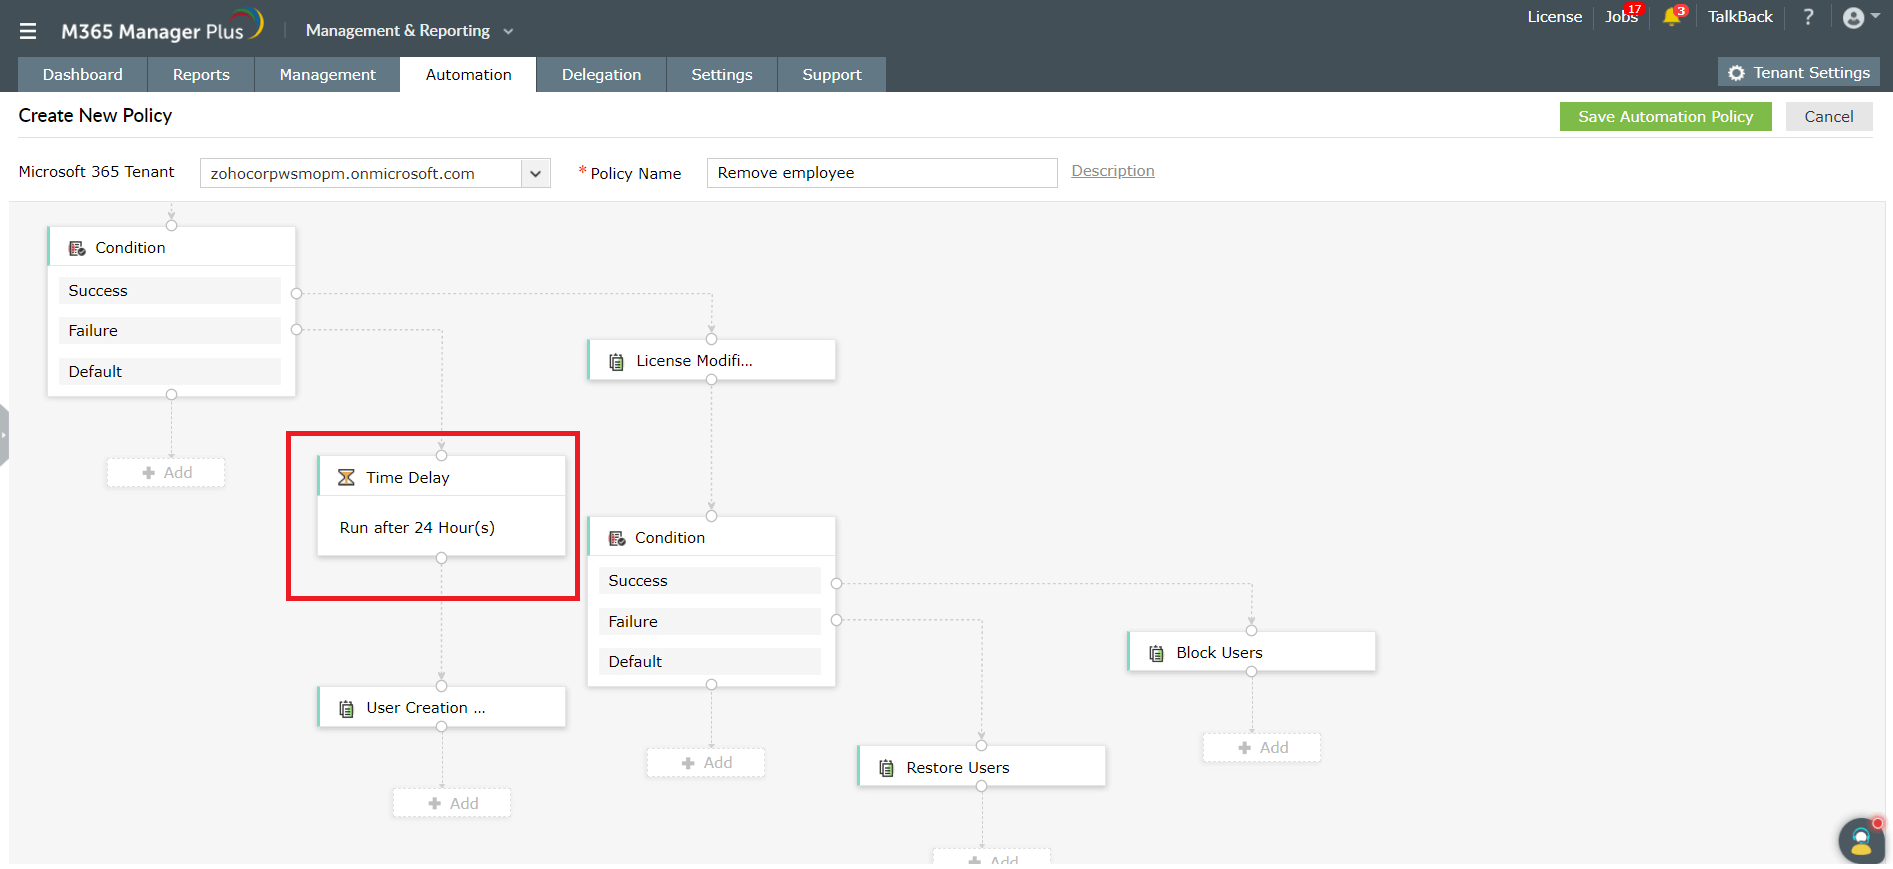
- Time Delay - If you don't want the next task to be carried out immediately, use this options to configure a time delay for carrying out the next task.
- Condition - If you want to carry out different course of action based on the status of a task, use this option to insert conditions (Success, failure, or Default).
- Refer the image above. Using the Add option that extends to each condition, you can keep on adding tasks based on your requirements.
- Once you have added all the tasks, click Create New Automation Policy option found at the top right corner to save.
Steps to Edit Automation Policy
- Navigate to the Automation tab.
- Select the Automation Policy option in the left pane.
- You will now see the list of automation policies you have ever created.
- Click the icon found under the Actions column corresponding to the policy you want to edit.
- In the flow chart that appears, hover on the segment (task, condition, or time delay) to be modified.
- You will see the
 and icons.
- Click to remove the segment, of the icon to modify the segment.
- Once all the changes are made, click on Modify.
Steps to Delete Automation Policy
- Navigate to the Automation tab.
- Select the Automation Policy option in the left pane.
- You will now see the list of automation policies you have ever created.
- Click the icon found under the Actions column corresponding to the policy you want to delete.
- Select Yes in the pop-up that appears.
 ADManager Plus
 ADAudit Plus
 ADSelfService Plus
 M365 Manager Plus