Direct Inward Dialing: +1 408 916 9892
With AD Audit Plus, you can view all your RADIUS logons from an easy-to-use dashboard.
To view an audit report on RADIUS Logon History:
Click on the 'Reports' Tab and then expand Local Logon Logoff and select RADIUS Logon History.


Select the Domain
Select the Computer. You can use the "Add" button to select computers - "Domain Controllers or "Member Servers" can be selected.
Select the 'Period' for which you want to view the logon history.

Here's how you can view a history of RADIUS logon events in native Active Directory.
Pre-requisite: Before you configure a RADIUS server role, you can start by creating a new group on AD for users (For example a group named- WFH_Users) who can authenticate using the RADIUS protocol.
RADIUS protocol is a part of Network Policy Server Role.

Launch the 'Server Manager' in the Windows Server Instance.
Go to Add Roles and Features. You need to walk through the different stages of installation displayed on the left pane to finish installing.
On the Before you Begin pane,click Next. You'll be moved to the Installation Type pane' where you should select type of installation—Role based or Feature based and click Next.
When you move to the 'Server Selection' pane, you can choose the Windows Server you want to add the role to.

On the 'Server Roles' pane, select the 'Network Policy and Access Services' role from the list of server roles provided. When you move on to the 'Features' pane you can apply the default features already selected.

Go to the drop down menu under 'Tools' and select Network Policy Server.

This opens up the NPS snap-in. Now you can right click the NPS tree (generally displayed as 'NPS local') and select the 'Register server in Active Directory' Option.

Click 'Okay' on the confirmation dialog box that is displayed. This NPS server will now be a included in the default domain groups called "RAS and IAS Servers".

A RADIUS client is a device that forwards logon and authentication requests to your NPS.
In the NPS snap-in, expand the NPS tree to find the 'RADIUS Clients and Servers' folder. Expand this folder to view 'RADIUS Clients' and 'Remote RADIUS Server' elements within it.

Right click the 'RADIUS client' element and select 'New'. This directs you to a 'New RADIUS Client' Window. In the 'Settings' tab select 'Enable this RADIUS Client'.After that you can fill in the fields- "Friendly Name'' (name of the RADIUS client you're assigning) and the 'IP/DNS Address' of the client. Finally you can set up a shared secret key manually.

In the 'Advanced' tab select the 'Vendor name' associated with your RADIUS client.
Setting up an NPS policy allows you to authenticate a distinct group of remote users against your NPS with various levels of access permissions.
Under the NPS (Local) tree expand the 'Policies' tab. Under the 'Policies' tab, right click 'Network Policies' and select 'New'.

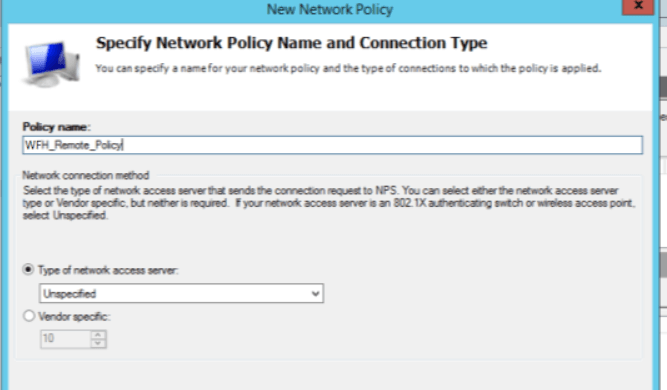
You can name your policy and leave the 'Type of network access server' as unspecified.
You can then specify rules to allow only users within a particular group (for example- WFH_Users) to be allowed to authenticate against NPS by clicking 'Add' against the 'Windows Groups' option.

Against the 'Client Friendly Name' option, 'Add' the client friendly name of the RADIUS client you had specified earlier.
On the 'Next' pane select 'Access Granted'.

Open the NPS snap-in.
In the console tree, click Accounting.
In the details pane, select Configure Accounting.

To view a history of RADIUS logon failures in the Event Viewer, you need to enable auditing for NPS.
In the command prompt, you can enable auditing with the following command
auditpol /set /subcategory:"Network Policy Server" //failure:enable
If both success and failure events are enabled, the output should be:
System audit policy
Category/Subcategory Setting
Logon/Logoff
Network Policy Server Failure
When a user who has been granted remote access, and has been authenticated, the event is recorded in the Event Viewer.
Open 'Event Viewer' and expand 'Security Logs'. Expand the 'Logon/Logoff' tab and after that expand the 'Network Policy Server' tab.
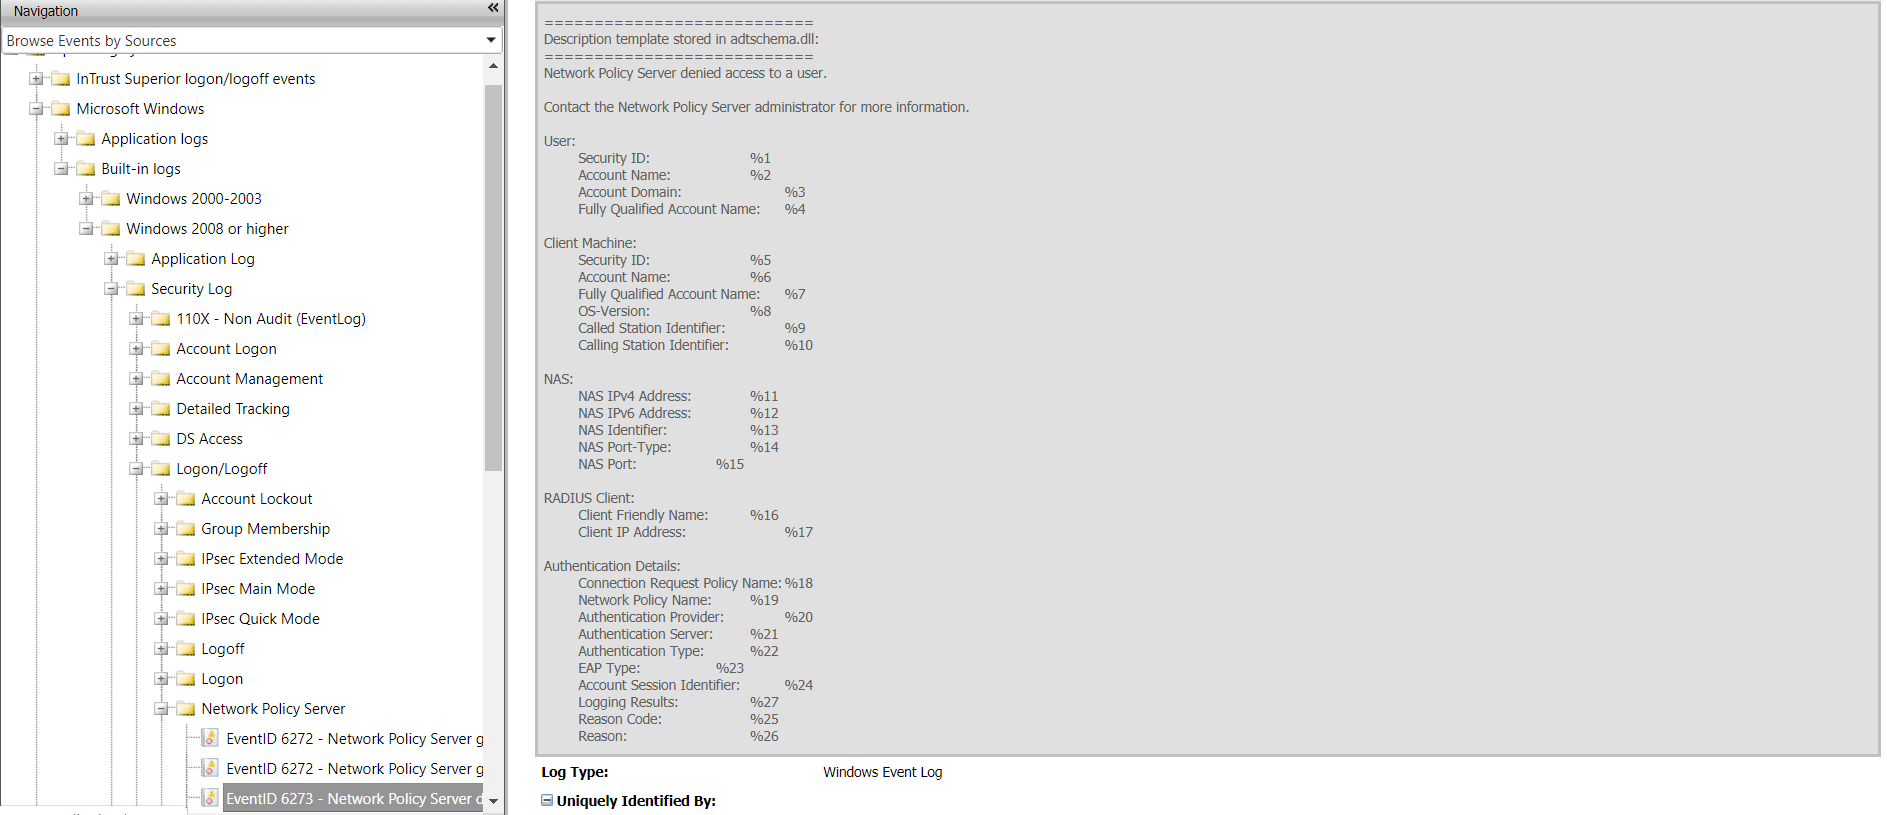
With this information you can view the entire history of RADIUS logons.
Native auditing becoming a little too much?
Simplify RADIUS logon auditing and reporting withADAudit Plus.
Get Your Free Trial Fully functional 30-day trial