Incident workflow management
You can mitigate security incidents in your network before they result in a breach by automating response workflows when alerts are triggered. EventLog Analyzer allows you to create workflows to automatically perform actions such as disabling USB ports, shutting down systems, and changing firewall rules when security incidents are detected.
Steps to create a workflow
- In EventLog Analyzer, click on the Alerts tab.
- Click on the More tools icon present at the top-right corner of the page.
- Click on Workflow to open the Manage Workflow page and click on the +Create Workflow button.
- Enter a name for the workflow in the Workflow Name field.
- Click on the Description link next to the Workflow Name field to enter an appropriate description for the workflow.
- Create a workflow by dragging and dropping the workflow blocks from the left pane into the space provided. Ensure that these blocks are logically arranged to execute an event in your infrastructure.
EventLog Analyzer contains multiple workflow blocks to help you configure workflows to perform the required actions. The logic blocks are categorized under different sections.
The list of workflow blocks and the details to be specified while configuring workflows using them are given below:
| Logic blocks |
Details to be specified |
| Logic actions |
| Decision
Allows you to branch the workflow based on the status of the previous action.
|
|
| Time Delay
Allows you to introduce a time delay in the execution of the workflow.
|
The time delay in minutes. |
| Network actions |
| Ping Device
Allows you to ping a device within your network to check connectivity
|
- The name of the device to be pinged.
- Number of echo request messages to be sent.
- Size of the packet to be sent.
- Timeout for the action.
- Number of action retries within the specified time.
|
| Trace Route
Allows you to run a trace route function to a device in your network to identify the path.
|
- The name of the device you wish to trace the route to.
- The maximum number of hops.
- Timeout for the action.
|
| Process actions |
| Test Process
Allows you to test whether a process is running on a device.
|
- The name of the device on which you want to test the process.
- The process you want to test.
- ExecutablePath and CommandLine to execute the process.
|
| Start Process
Allows you to start a process on a device
|
- The name of the device on which you want to start a process.
- The process working directory.
- The command to start the process.
|
| Stop Process
Allows you to stop a process on a device.
|
- The name of the device on which you want to stop the process.
- The process you want to stop.
- ExecutablePath and CommandLine to execute the process.
|
| Service actions |
| Test Service
Allows you to test whether a service is running on a device.
|
- The name of the device on which you want to test the service.
- The service you want to test
|
| Start Service
Allows you to start a service on a device.
|
- The name of the device on which you wish to start a service.
- The service to be started.
|
| Stop Service
Allows you to stop a service on a device.
|
- The name of the device on which you wish to stop a service.
- The service to be stopped
|
| Windows actions |
| Log Off
Allows you to log off from the currently active session on a device.
|
- The name of the device you want to log off from.
- Select whether you'd like to force this action.
|
| Shut Down System
Allows you to shut down a Windows device.
|
- The name of the device to be shut down.
- Select whether you'd like to force this action.
|
| Restart System
Allows you to restart a Windows device.
|
- The name of the device to be restarted.
- Select whether you'd like to force this action.
|
| Execute Windows Script
Allows you to execute a specified script file on a Windows device.
|
- The name of the device on which you want to execute the script file.
- The type of script file.
- Upload the script file to be executed.
- Arguments to the script, if any. You can separate multiple arguments using commas.
- Timeout for the action.
- The working directory for the script's execution.
|
| Disable USB
Allows you to disable the USB port on a device.
|
- The name of the device on which you want to disable the USB port.
|
| Linux actions |
| Shut Down Linux
Allows you to shut down a Linux device.
|
- The name of the device to be shut down.
- Select whether you'd like to force this action.
|
| Restart Linux
Allows you to restart a Linux device.
|
- The name of the device to be restarted.
- Select whether you'd like to force this action.
|
| Execute Linux Script
Allows you to execute a specified script file on a Linux device.
|
- The name of the device on which you want to execute the script file.
- The type of script file.
- Upload the script file to be executed.
- Arguments to the script, if any. You can separate multiple arguments using commas.
- Timeout for the action.
- The working directory for the script's execution.
|
| Notification actions |
| Send Pop-Up Message
Allows you to display a pop-up message on a device.
|
- The name of the device on which you want to display the message.
- The message to be displayed.
|
| Send Email
Allows you to send an email message.
|
- The recipient's email address.
- The email subject and body.
|
| Send SMS
Allows you to send an SMS message.
|
- The recipient's mobile number.
- The SMS content.
|
| Send SNMP Trap
Allows you to send SNMP traps to the required destination.
|
- Enterprise OID.
- SNMP Manager.
- Message content.
|
| Active Directory actions |
| Disable User
Allows you to disable a user's account.
|
The name of the user account you want to disable. |
| Delete User
Allows you to delete a user account.
|
The name of the user account you want to delete. |
| Disable Computer
Allows you to disable a computer account.
|
The name of the computer account you want to disable |
| Firewall Actions |
| Cisco ASA Deny Inbound Rule
Allows you to add an deny inbound rule.
|
- The name of the firewall device.
- The Interface name.
- Source address.
- Destination address.
|
| Cisco ASA Deny Outbound Rule
Allows you to add an deny outbound rule.
|
- The name of the firewall device.
- The Interface name.
- Source address.
- Destination address.
|
| Fortigate Deny Access Rule
Allows you to add an deny access rule.
|
- Name of the firewall device.
- Source address.
- Destination address.
- Name of the source interface.
- Name of the destination interface.
|
| PaloAlto Deny Access Rule
Allows you to add an deny access rule.
|
- Name of the firewall device.
- Source address.
- Destination address.
- Name of the source zone.
- Name of the destination zone.
- Type of Rule (Universal, Intrazone or Interzone).
|
| SophosXG Deny Access Rule
Allows you to add an deny access rule.
|
- Name of the firewall device.
- Source address.
- Destination address.
|
| SophosXG Update Deny Access Rules
Allows you to update an deny access rule.
|
- The name of the firewall device.
- The rule name.
- Source address.
- Destination address.
|
| Barracuda CloudGen Deny Access Rule
Allows you to add an deny access rule.
|
- Name of the firewall device.
- Source address.
- Destination address.
- Name of the source interface.
- Name of the destination interface.
- Type of Rule (Inbound or Outbound).
|
| Miscellaneous actions |
| Write to File
Allows you to write a message to a file
|
- The name of the device on which the file is located.
- The file name.
- The absolute file path.
- The text to be written to the file.
- Select whether you would like to append to or overwrite a file if it already exists.
|
| CSV Lookup
Allows you to search for values within a CSV file.
|
- Upload the CSV file to perform by clicking on "Browse".
- Specify the header or column number.
- Select the field to be matched.
|
| Forward Logs
Allows you to forward logs to the required destination.
|
- Name of the destination server.
- The protocol to be used.
- Port number and standard.
|
| HTTP Request
Allows you to send an HTTP request to a URL.
|
- The URL to which you want to send an HTTP request to.
- Specify the Method you want to use (Get or Post).
- Add the required headers.
- Add the required parameters.
|
| ADManager Plus actions |
| Workflow Blocks |
Details to be specified |
| Disable User
Allows you to disable a user account
|
- The name of the block.
- The action to be performed (here, Disable User).
- A brief description for this block to record its purpose in the workflow.
- The username of the user account you want to disable.
|
| Delete User
Allows you to delete a user account
|
- The name of the block.
- The action to be performed (here, Delete User).
- A brief description for this block to record its purpose in the workflow.
- The username of the user account you want to delete.
|
| Disable Computer
Allows you to disable a computer account.
|
- The name of the block.
- The action to be performed (here, Disable Computer).
- A brief description for this block to record its purpose in the workflow.
- The device name of the computer account you want to disable.
|
| Reset user password
Allows the user to reset their password
|
- The name of the block.
- The action to be performed (here, Reset user password).
- A brief description for this block to record its purpose in the workflow.
- The username of the user account you want to reset the password.
- The type of password that you want: Random or Custom.
|
| Add user to group
Allows you to add a user to a particular group
|
- The name of the block.
- The action to be performed (here, Add user to group).
- A brief description for this block to record its purpose in the workflow.
- The username of the user account you want to add to the group.
- The name of the group you want to add the user.
|
| Remove user from group
Allows you to remove a user from a particular group
|
- The name of the block.
- The action to be performed(here, Remove user from group).
- A brief description for this block to record its purpose in the workflow.
- The username of the user account you want to remove from the group.
- The name of the group that you want to remove the user from, or remove the user from all the groups that are available.
|
| Enable user
Allows you to enable a disabled user account
|
- The name of the block.
- The action to be performed(here, Enable user).
- A brief description for this block to record its purpose in the workflow
- The username of the user account you want to enable.
|
| Unlock user
Allows you to unlock a locked user account
|
- The name of the block.
- The action to be performed(here, Unlock user).
- A brief description for logic block to record its purpose in the workflow.
- The username of the user account you want to unlock.
|
| Update user
Allows you to update an attribute of a user
|
- The name of the block.
- The action to be performed(here, Update user).
- A brief description for this block to record its purpose in the workflow.
- The username of the user account you want to update.
- The attribute that you want to update in the user account's data.
- The value of the attribute that needs to be updated.
|
| Delete Computer
Allows you to delete a computer account
|
- The name of the block.
- The action to be performed(here, Delete Computer).
- A brief description for this block to record its purpose in the workflow.
- The device name of the computer account you want to delete.
|
| Enable computer
Allows you to enable a disabled computer account
|
- The name of the block.
- The action to be performed(here, Enable Computer).
- A brief description for this block to record its purpose in the workflow.
- The device name of the computer account you want to enable.
|
| Endpoint Central actions |
| Workflow Blocks |
Details to be specified |
| Install Patch
Allows you to install a patch on a specific device for a detected vulnerability.
|
- The name of the block.
- Name/IP of the destination device to install patch
- Name of the deployment configuration
- Description for the deployment configuration
- Vulnerability identifier will be extracted from alert criteria
- Deployment policy to be applied
|
| Approve Patch
Allows you to approve patches for the detected vulnerability.
|
- The name of the block
- Vulnerability identifier will be extracted from alert criteria.
|
Note: To utilize the Endpoint Central actions, please configure data enrichment for ManageEngine Endpoint Central. Click here to know how.
- You can enter a brief description for each logic block to record its purpose in the workflow. This makes it easier for you to understand and edit the workflow later.
- Click on the Save button to create the workflow.

To edit an existing workflow you can click on the edit icon present against the workflow name in the Manage Workflow page.
NOTE:
List of devices supported:
- All types of Windows operating system.
- Linux operating systems :
- Ubuntu
- Debian
- Fedora
- CentOS
- Red Hat Enterprise Linuc (RHEL)
- Arch Linux
- SUSE Linux Enterprise Server (SLES)
- openSUSE
- Gentoo OS
Managing workflows
You can view and edit existing workflows in EventLog Analyzer by navigating to the Alerts tab and clicking on Workflow from the More tools icon. The Manage Workflows page displays the list of workflows, their descriptions, the number of alert profiles associated with each workflow, and their histories. You can enable or disable, delete, edit, and copy the workflows by clicking on the respective icons.

Updating workflow credentials
You can automate workflows on Windows, Linux, and Cisco devices for which you have administrative privileges. You have to update credentials of these devices in EventLog
Analyzer for seamless execution of the workflows.
To automate workflows in Windows devices:
If the Windows devices have already been added to EventLog Analyzer, workflows can be executed by using the devices credentials or the domain credentials of the devices. So, you need not manually update credentials for Windows devices.
To automate workflows in Linux devices
You can configure a set of common credentials for executing workflows in all Linux devices by following the steps given below:
- Click on the Workflow Credentials link present in the Manage Workflow page.
- Select credential type as Linux Devices.
- Enter the username, password, and port number.
- Click on Update to store and use these credentials to execute workflows in all Linux devices.

To automate workflows in Cisco devices
You must configure the REST API agent in the Cisco firewall to execute workflows by following the steps given in this link. (The Cisco REST API supported versions are listed here).
You can configure a set of common credentials for executing workflows in all Cisco devices using EventLog Analyzer by following the steps given below:
- Click on the Workflow Credentials link present in the Manage Workflow page.
- Select credential type as Cisco Devices.
- Enter the username and password.
- Click on Update to store and use these credentials to execute workflows in all Cisco devices.

If the common credentials do not work for certain Cisco Devices, you need to configure the credentials for those devices by following the steps given below:
- Navigate to Settings → Configuration → Manage Devices → Syslog Devices.
- Hover your mouse pointer near the device on which you want to execute workflows and click on the edit icon.
- In the Update Device pop-up menu, click on Advanced.
- Select the Configure REST API Credentials check box.
- Enter a username and password.
- Click on Verify Credential to send a REST API call to the Cisco device to verify if the credentials are valid.
- Click on Update to store and use the specified credentials for executing workflows.

To automate workflows in Fortigate devices
In order to generate an API token to execute workflows in Fortigate devices, you need to create a new REST API Admin using the steps given below:
Step-1: Create Administrator profile
- Navigate to System from the sections listed on the left in the dashboard.
- Click on the Admin Profiles under the System section.
- Click the Create icon to start creating a new admin profile.
- You will see the New Admin Profile window open up.
- Enter an appropriate name for your admin profile.
- Select access control permissions for different functionalities between None, Read, Read/Write or Custom.
- Select Read/Write for both Policy and Address options under Firewall Option.
- Click OK to create your new admin profile
Step-2: Create a REST API Admin and generate an API key
- Navigate to System from the sections listed on the left in the dashboard.
- Select Administrators under System section.
- Click on the Create New icon.
- Select REST API Admin option.
- You will see the New REST API Admin window open up.
- Enter an appropriate username for your REST API admin profile.
- Select your previously created Administrator Profile from the drop down menu.
- Click on OK to confirm your New REST API Admin.
- Once you are done with this process, the system will automatically generate a new API key, which will be displayed only once.
- Copy the generated API key before shutting it down.
Note: In case you lose your newly generated API key, you can go back to the Administrator section and click on the Regenerate icon.
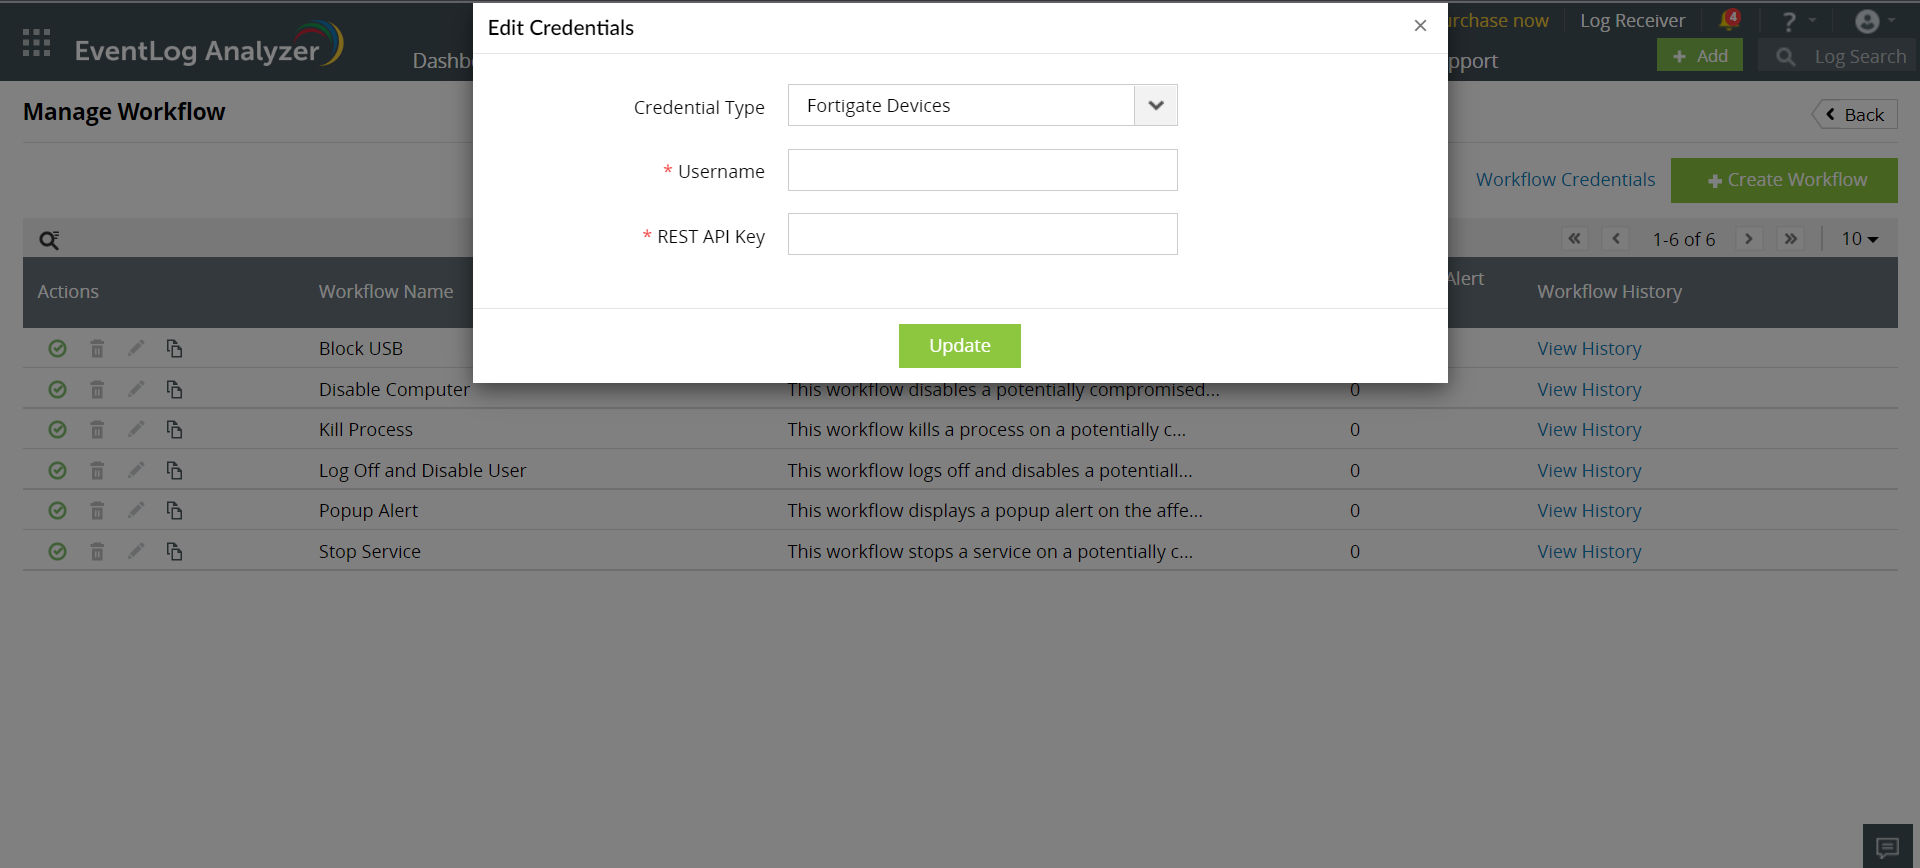
After this process, You can configure a set of common credentials for executing workflows in all Fortigate devices using EventLog Analyzer by following the steps given below:
- Click on the Workflow Credentials present on the top-right corner of the Manage Workflow page.
- Select credential type as Fortigate Devices.
- Enter the generated API key along with the Username in the workflow credentials page.
- Click on Update to store and use these credentials to execute workflows in all Fortigate devices.
To automate workflows in PaloAlto devices
To execute workflows successfully, API access should be enabled by following the steps given here. Please note that the required permissions for the user under XML API are:
- Configuration
- Operational Requests
- Commit
You can configure a set of common credentials for executing workflows in all PaloAlto devices by following the steps given below:
- Click on Workflow Credentials on the top-right corner of the Manage Workflow page.
- Select credential type as PaloAlto Devices.
- Enter the created administrator Username/Password.
- Click on Update to store and use these credentials to execute workflows in all PaloAlto devices.

To automate workflows in SophosXG devices
You must configure the encrypted password to execute workflows on SophosXG devices. You can generate the encrypted password using the steps given below:
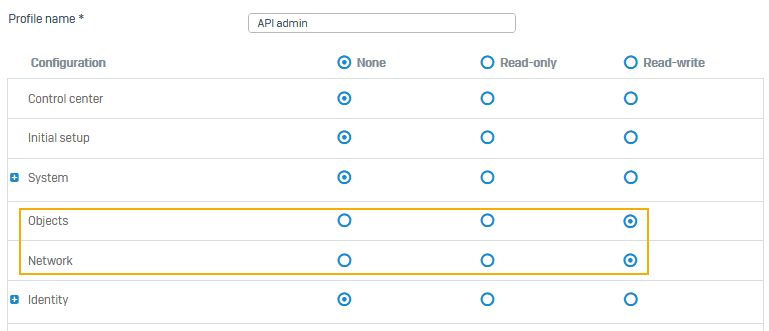
Step 1: Create an administrator profile
Log in to your Sophos application and create an administrator profile with read-write permission for objects and network.
- Go to Profiles > Device access and create an administrator profile with specific rights.
- Click Save.
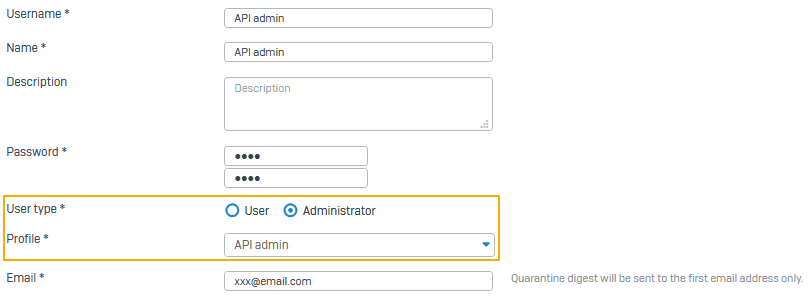
Step 2: Create an administrator
- Create a user and add the administrator profile.
- When you add a user with the API administrator profile, you can limit the administrator's rights based on the profile. Alternatively, you can use an existing administrator account.
- Go to Authentication > Users and click Add.
- Set User type to Administrator.
- Select the API administrator profile created in step 1.
- To allow access for a specific time, select the Access time.
- To allow access only from specific IP addresses, select an option for Login restriction for device access.
- Click Save.
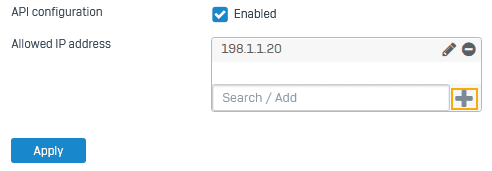
Step 3: Allow API access
Turn on API configuration and allow API access from the administrator's IP address.
- Go to Backup and firmware > API.
- Select API configuration.
- For Allowed IP address, enter the IP address from which you'll make the API request and click the add icon.
- Click Apply.
Step 4: To generate encrypted password
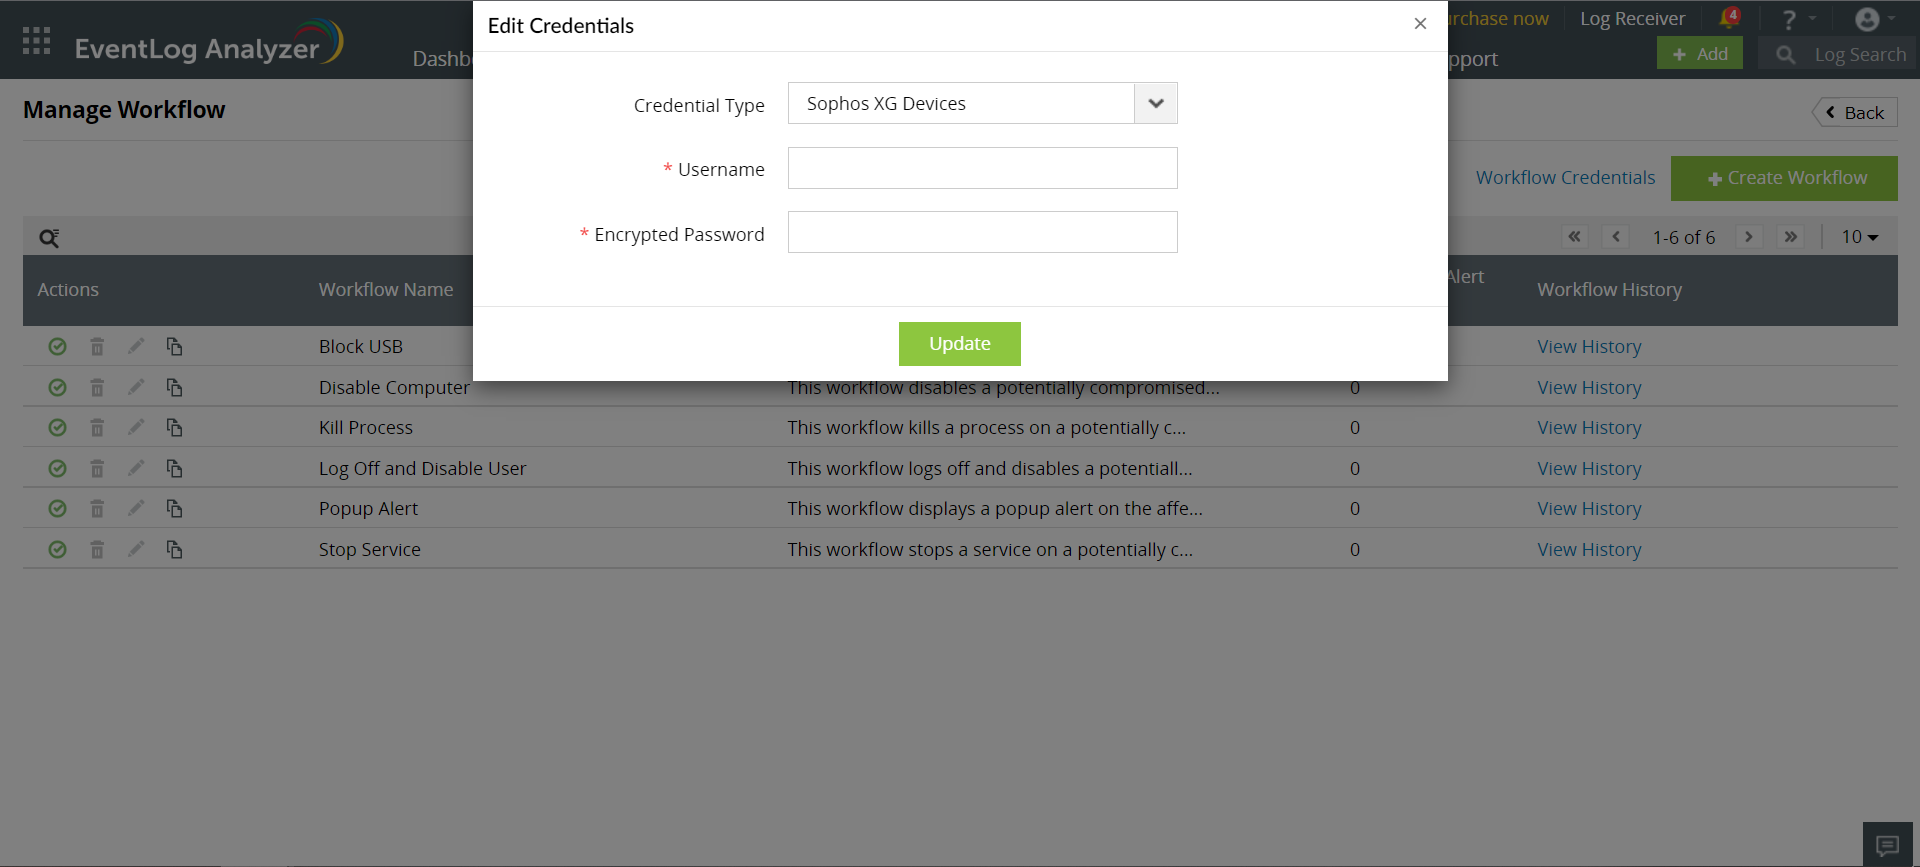
After generating the encrypted password, you can configure a set of common credentials for executing workflows in all SophosXG devices by following the steps given below:
- Click on the Workflow Credentials present on the top-right corner of the Manage Workflow page.
- Select credential type as SophosXG Devices.
- Enter the encrypted password along with the Username in the workflow credentials page.
- Click on Update to store and use these credentials to execute workflows in all SophosXG devices.
To automate workflows in Barracuda CloudGen devices
In order to execute workflows in Barracuda CloudGen devices, you need to create an X-API Token using the steps given below:
Step 1: Enable the REST API for HTTPS.
Step 2: Create an Administrator Profile for REST API authentication.
Step 3: Create an X-API Token for authentication.
After finishing the process, you can configure a set of common credentials for executing workflows in all Barracuda CloudGen devices by following the steps given below:
- Click on the Workflow Credentials present on the top-right corner of the Manage Workflow page.
- Select credential type as Barracuda CloudGen Devices
- Enter the generated Access Token along with the Username in the workflow credentials page.
- Click on Update to store and use these credentials to execute workflows in all Barracuda CloudGen devices.

Automating workflows in ADManager Plus
ADManager Plus , an IGA solution with hybrid AD management, reporting, and automation capabilities, must be integrated with EventLog Analyzer for the successful execution of response workflows. The list of actions that can be added to the workflow are called workflow blocks. These actions include:
- Enabling, disabling, updating and deleting a user
- Enabling, disabling and deleting a computer
- Resetting a user's password
- Adding to, and removing users from a group
Only after the integration is complete, can any of these actions be carried out.
You can set up an integration in EventLog Analyzer to execute actions via ADManager Plus. Here are the steps:
- Click on Workflow Credentials at the top-right corner of the Manage Workflow page.
- Select credential type as ADManager Plus
- Fill in the required details about the Host, Protocol, Port and Auth Token.
- Click on Update, to integrate ADManager Plus with EventLog Analyzer.

- If the SOAR Workflow in ADManager Plus is not enabled, integration failure will occur.

- After a successful integration, the user can begin constructing the workflow.

Additionally, the user will not be able to construct workflows following an unsuccessful integration.

Note:
- Event Log Analyzer version above 12430 and ADManager Plus version above 7224 are required for this integration.
- Integration must also be enabled for EventLog Analyzer in the ADManager Plus integration configuration page.
- One help desk technician (HDT) license can only be used to perform a maximum of 50 actions per day. To perform more actions, ensure you have additional HDT licenses purchased in ADManager Plus.
- The default admin account will not be considered as a HDT account.
Enabling tight integration for EventLog Analyzer in ADManager Plus
To perform Workflow actions from Eventlog Analyzer, tight integration must be enabled from within ADManager Plus. Here are the steps to do this:
- In ADManager Plus, click on the Admin tab.
- Click on Integrations under System Settings.
- Select EventLog Analyzer under Log Forwarding.

- Enable SOAR workflow by checking the Allow LOG360 SIEM to execute AD Management actions box.
- Click the Test Connection and Save button.
- This will enable SOAR workflow in ADManager Plus to execute workflow actions from EventLog Analyzer.

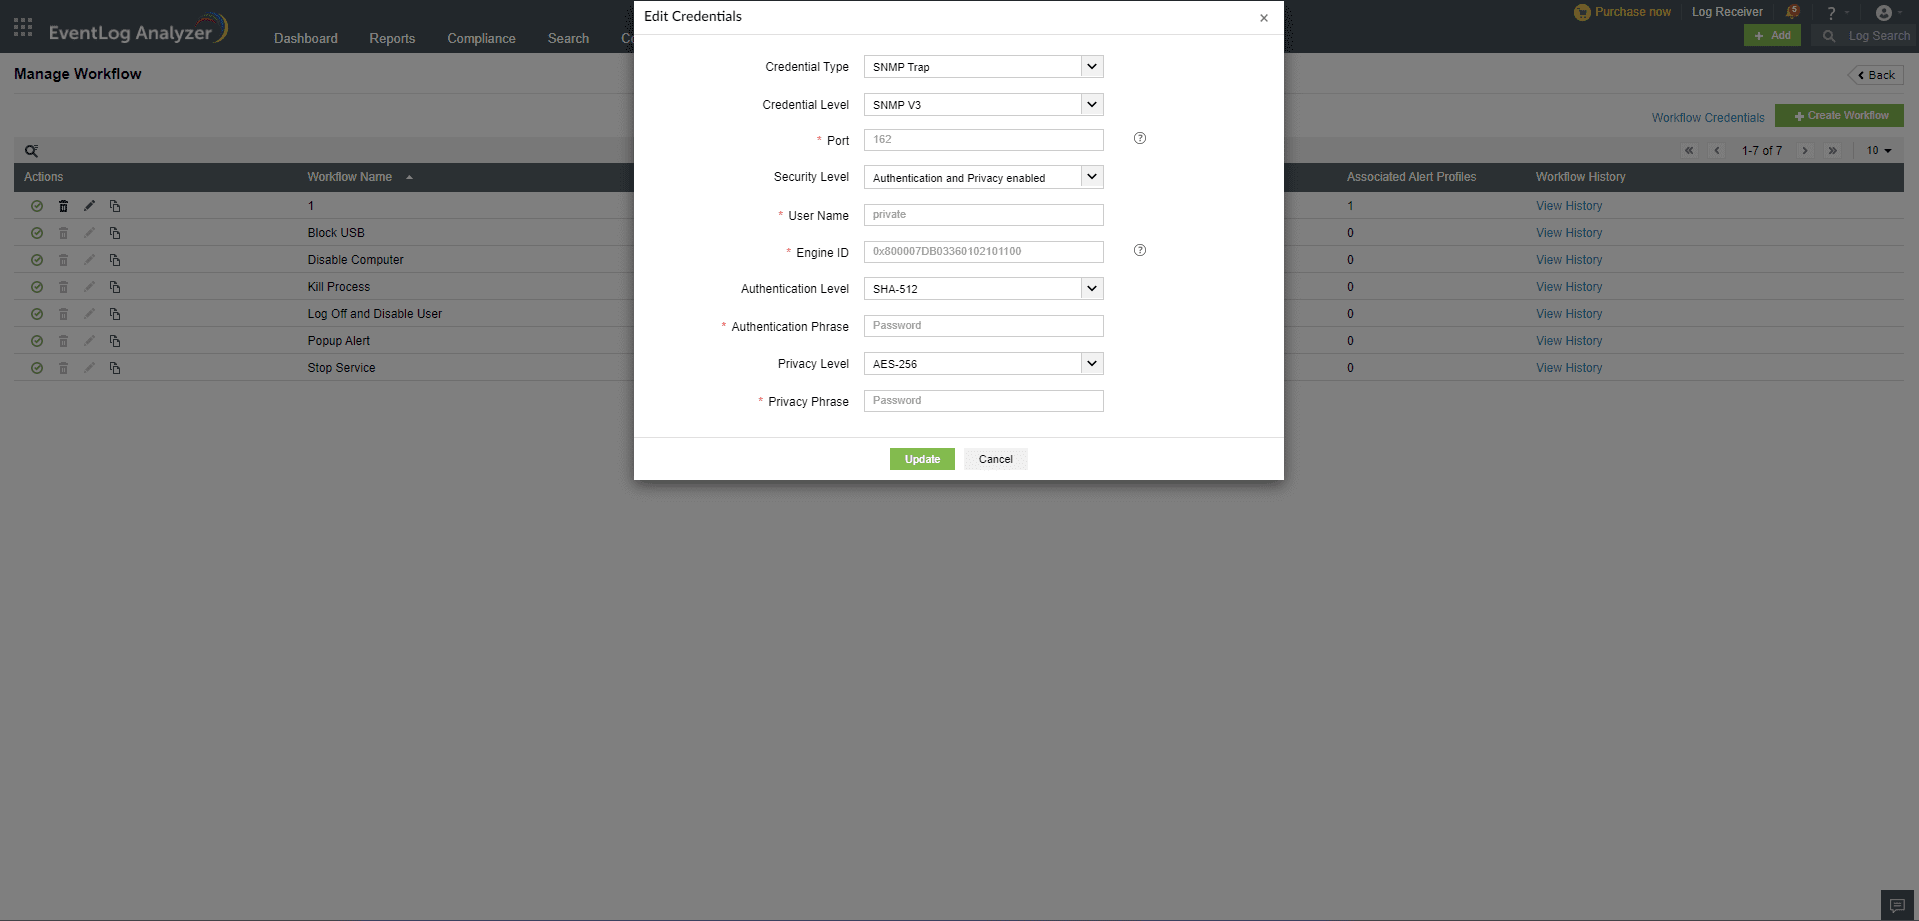
Automating workflows in SNMP TRAP
To automate all SNMP Trap workflows using EventLog Analyzer, you can configure a common credential by following these steps:
- Navigate to the Manage Workflow page and click on the Workflow Credentials link.
- Choose SNMP Trap as the credential type.
- Enter the SNMP credential.
- Click Add/Update to save. This credential will now be used to execute all SNMP Trap workflows.
Note: Refer to the port management page for details on how to update credentials.
 Click here to expand