ManageEngine’s release management framework
Release policy and methodology
Per IT Process Maps, a release policy is defined as “a set of rules for deploying releases into the live operational environment, defining different approaches for releases depending on their urgency and impact.”
What a release policy includes:
1. Release level and identification
Release levels are categorized as major, minor, or emergency based on the objective and urgency of the release. Release identification refers to the number and naming conventions. For example, major releases may be numbered in increments of one (V1.0, V2.0, etc.) and minor releases may be numbered in increments of 0.1 (V1.1, V1.2, etc.). This varies based on the product team or organization.
Level |
Definition |
Identification example |
|
Major |
A release to introduce a new functionality. It can also be an accumulation of previous minor releases. |
Launching a new product E.g., Product V1 |
|
Minor |
A release to makes changes to existing functionalities. |
Adding a new feature E.g., Product V1.1 |
|
Emergency |
A temporary release required to quickly resolve an issue. It’s usually followed by a major or minor update. |
Bug fixes E.g., Product V1.1.1 |
2. Expected frequency of releases
3. Roles and responsibilities (which we’ll talk about in detail later)
4. Documentation requirements
Stages of the release management life cycle
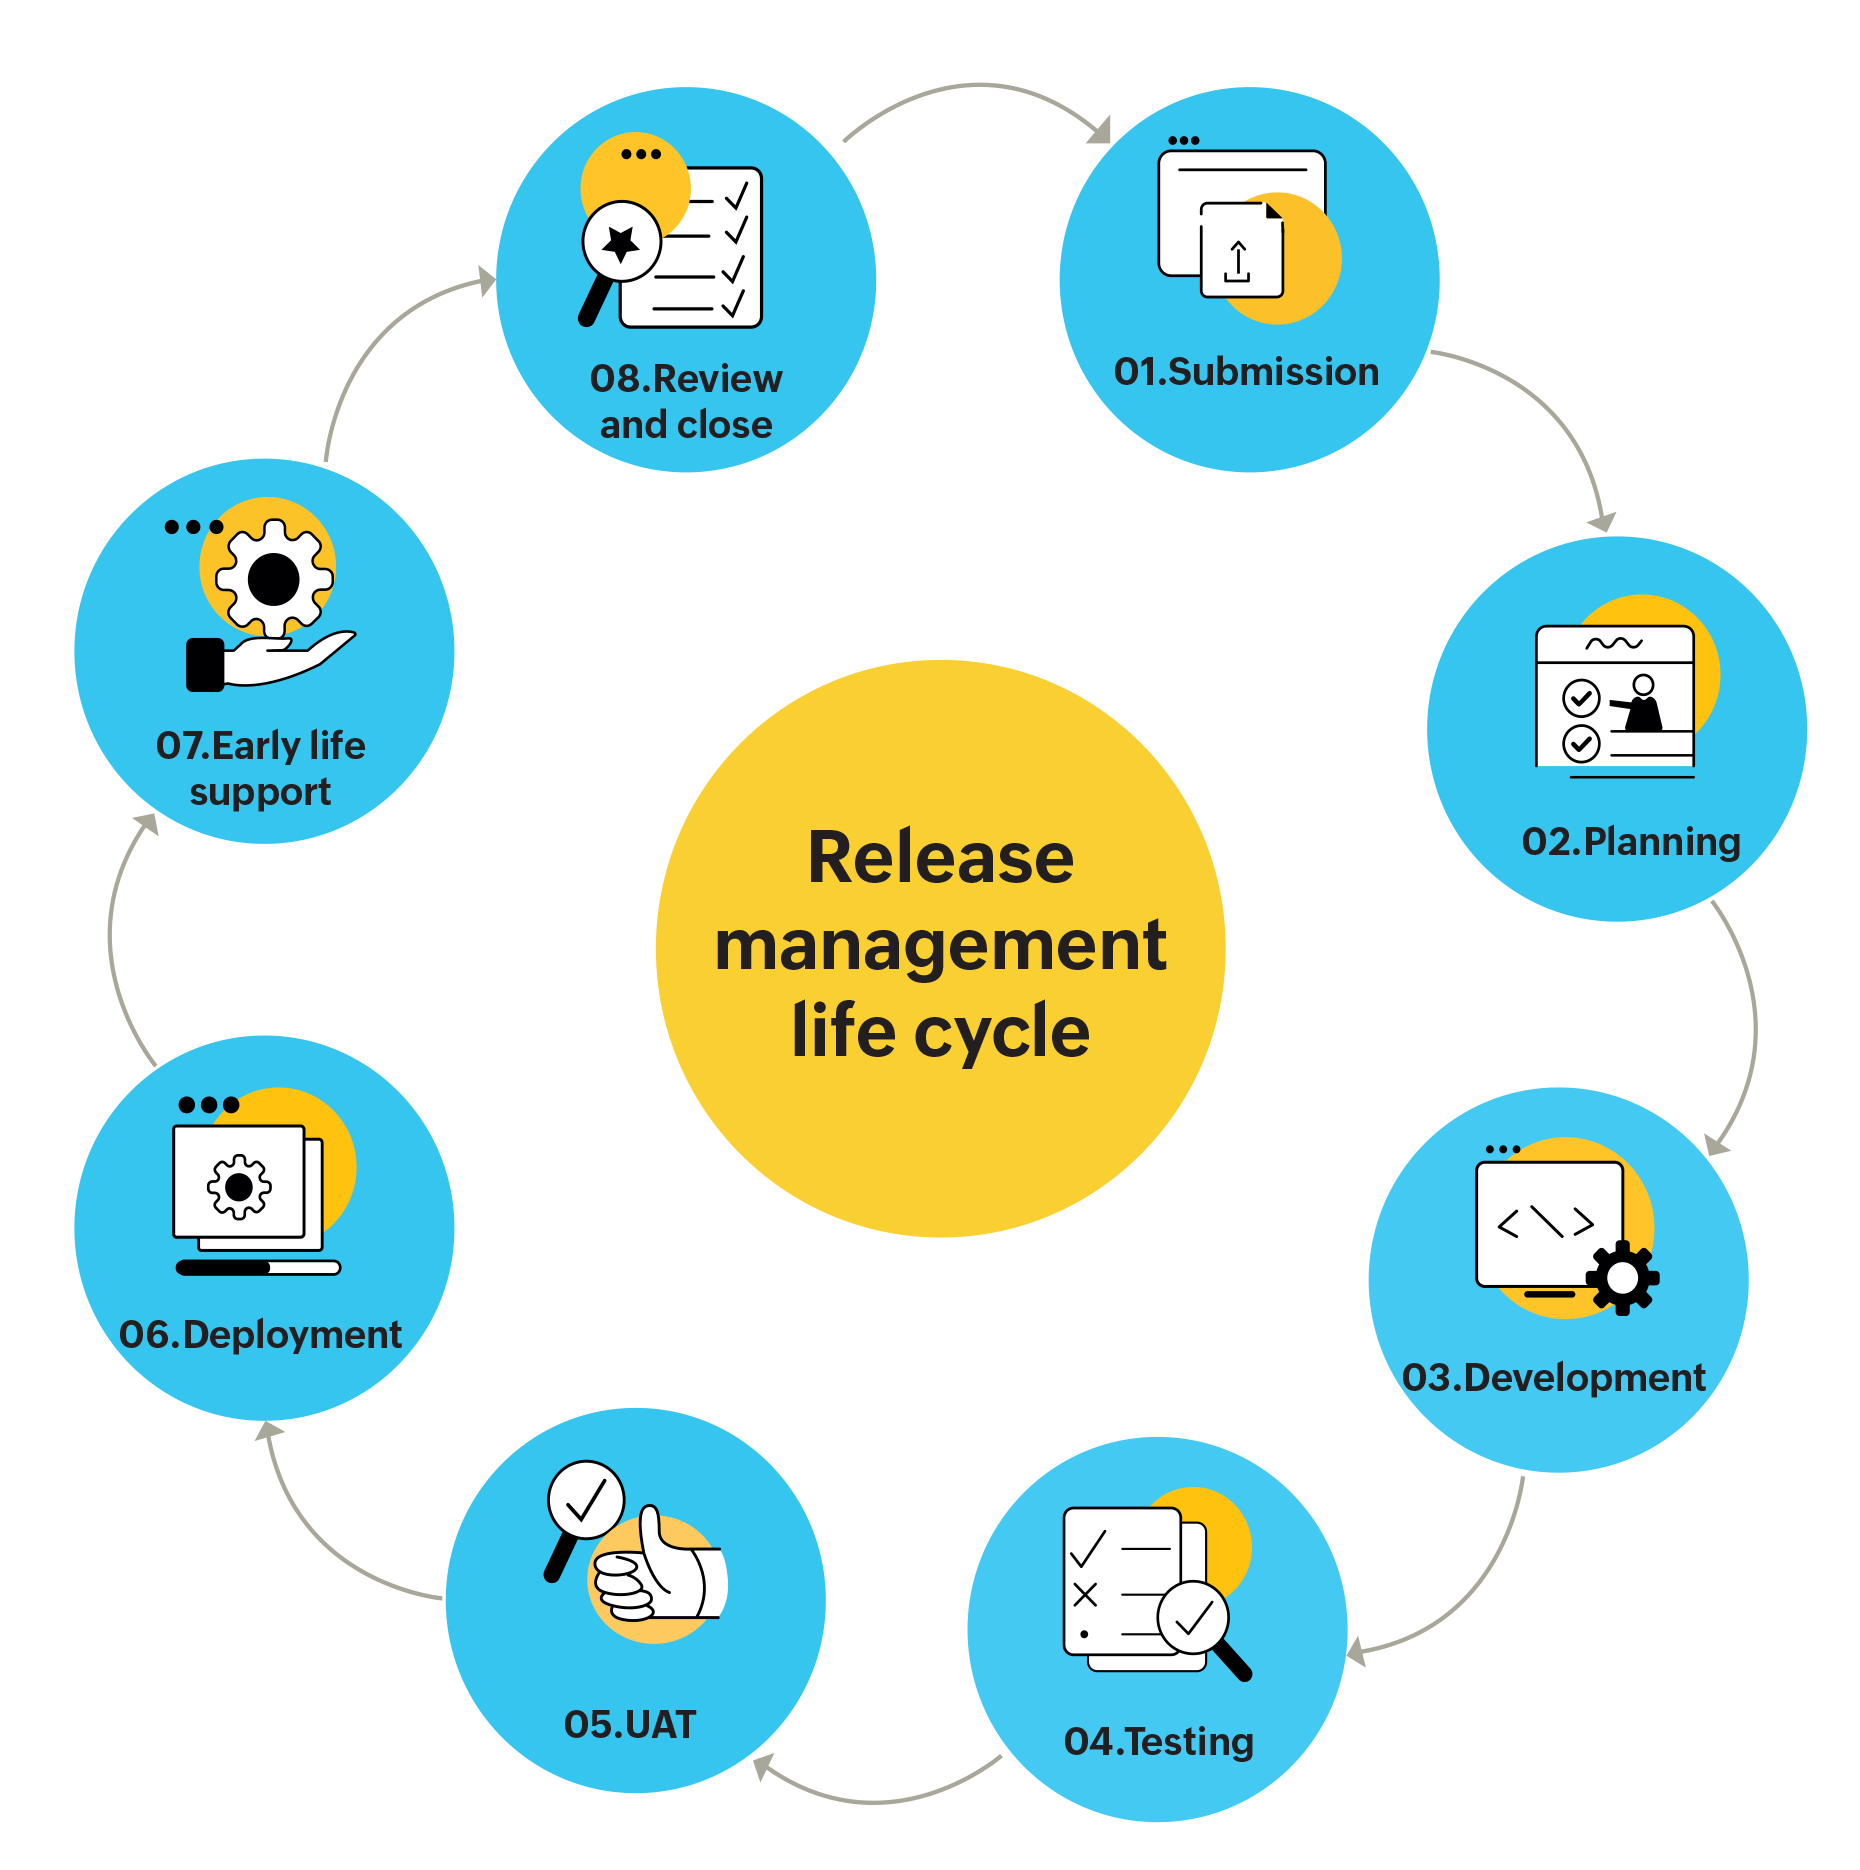
The release management cycle at ManageEngine.
Stage 1: Submission
The first step of the cycle is to identify a required functionality. Customer-facing teams like pre-sales, support, and product management work together to provide the development team with their input in the form of expected user interfaces and use cases. The submission stage is the primer that allows us to set the expectations for the entire cycle. What are our customers looking for? How will this product or feature enhance the user experience? Once we determine these, we move forward to stating the objectives of the release, including:
- Business requirements.
- Priority.
- Risks and timeline constraints.*
- Release type, methodology, and policy.
- Scope of release.
- Cost (if any).
- Supporting documents for release requirements.
*Constraints for release deployment: Releases are dependent on multiple factors such as:
- Service-level agreements (SLAs) or operational-level agreements (OLAs).
- Resource availability.
- Budget.
- Security issues.
- Corporate policies.
Listing our dependencies allows us to identify maintenance windows, during which releases can be deployed and users can be informed about services that may not be available. This doesn’t apply to emergency releases, which can be released at any time.
After the release requester submits the required details, a release coordinator verifies the information provided and assigns a release engineer. The release engineer is now the owner of the release and they’ll be in charge of the next stage. The owner provides an outline of the release implementation by:
- Communicating with teams for the release plan.
- Identifying the development team and the quality assurance (QA) team.
- Identifying other users for various roles in the release, if any.
- Assigning due dates for the standardized release process

Role |
Responsibilities |
|
Release requester |
|
|
Release engineer |
|
|
Release manager |
|
|
Development head |
|
|
Testing or QA head |
|
|
UAT owner |
|
RACI matrix:
A responsibility assignment matrix can also be used to map out each member’s task in the entire release management process.
R – Responsible, A – Accountable, C – Consulted, I – Informed
|
|
Engineer |
Manager |
Coordinator |
Development head |
Reviewer |
Testing team |
| Submission | R | AR | I | |||
| Planning | R | AR | AR | |||
| Development | I | I | C | |||
| Testing | I | I | C | R | ||
| Deployment | R | A | C | C | ||
| Training/ support | AR | |||||
| Reviewer | AR | |||||
| Close | AR | I |
Stage 2: Planning
The planning stage is handled by the release engineer. Tasks are distributed for different participants of the release. For example, the QA team members are mapped to the release to test out each build. If you have tasks that often repeat, add them as templates under each stage so you can choose them quickly instead of entering the same details each time.
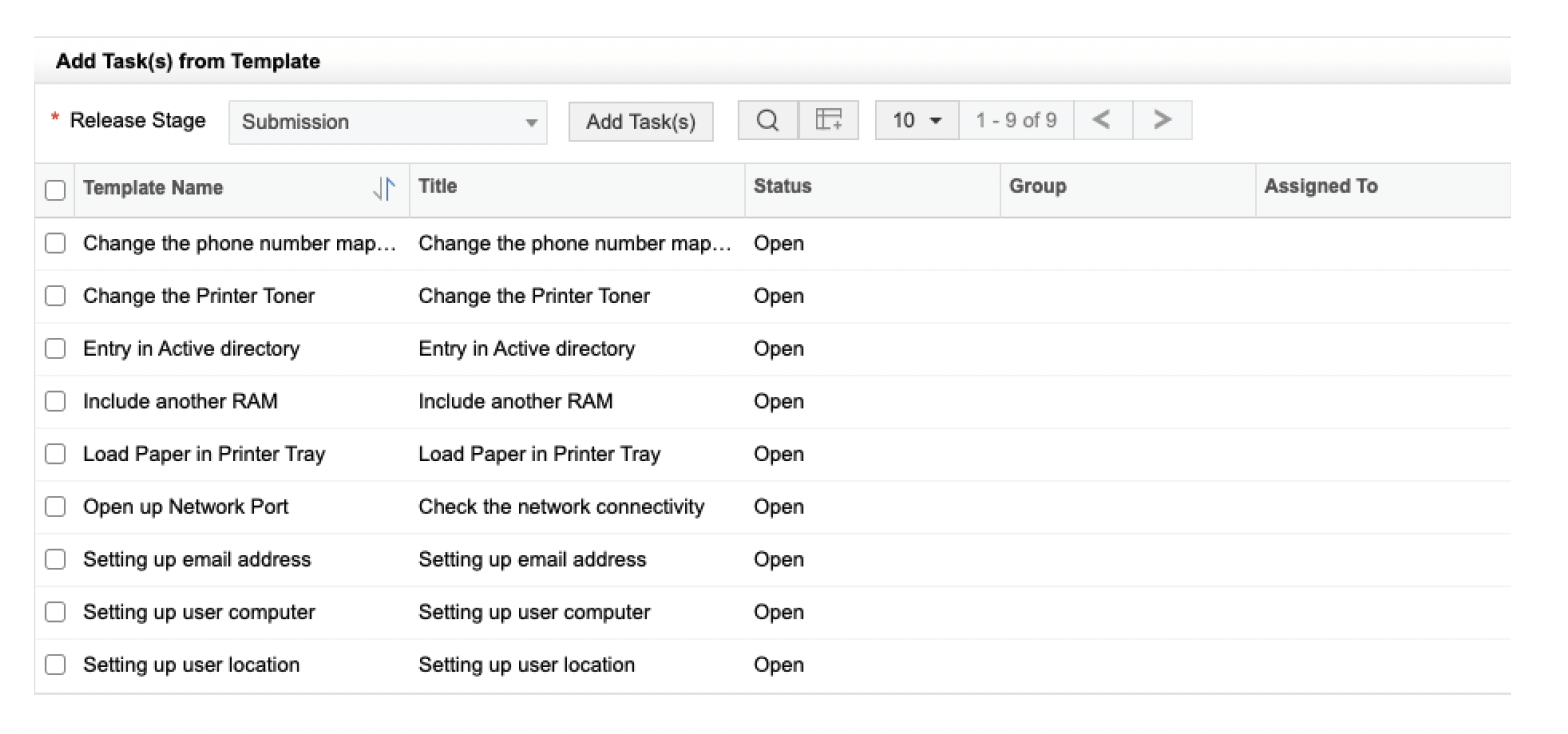
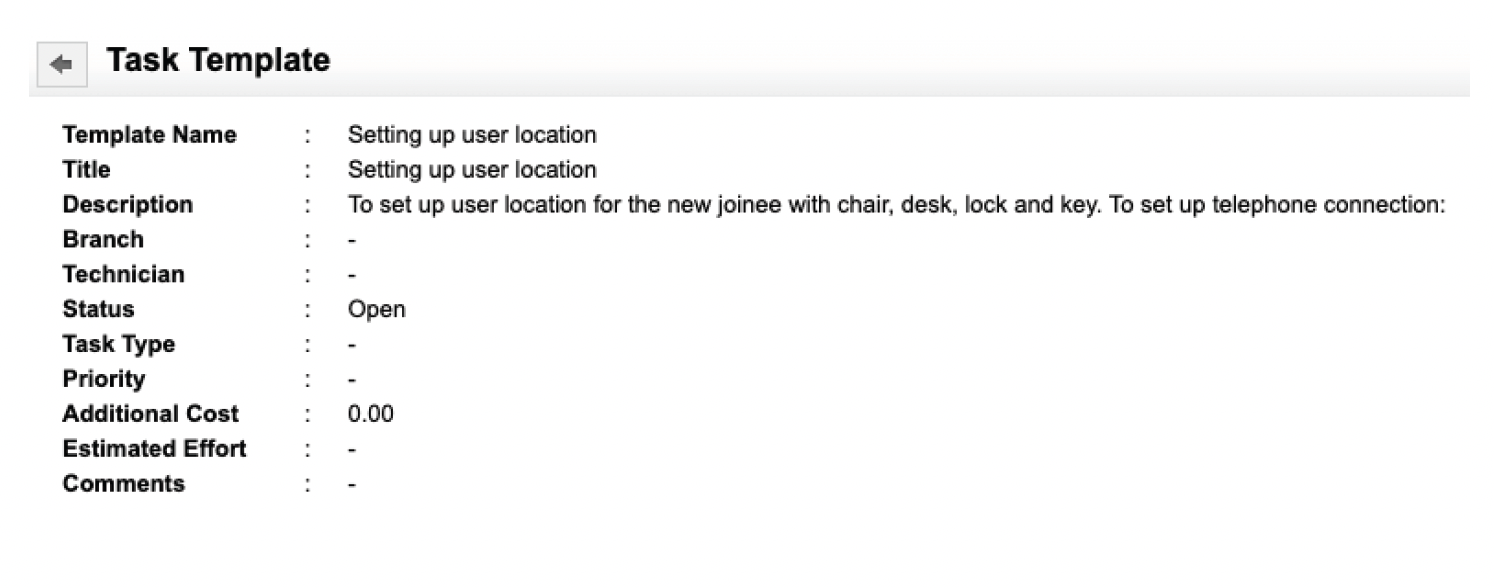
The planning stage requires:
1. Scope: Effects upon:
- Client-side business areas.
- IT services.
- IT infrastructure components.
2. A planned implementation date and time period, itemized according to:
- Development phase.
- Test phase.
- Rollout.
- Where necessary, reference to more detailed implementation plans.
3. Downtime details:
These consist of different downtime or maintenance windows required for completing the release activity. The downtime is configured here and reviewed later in the review stage.
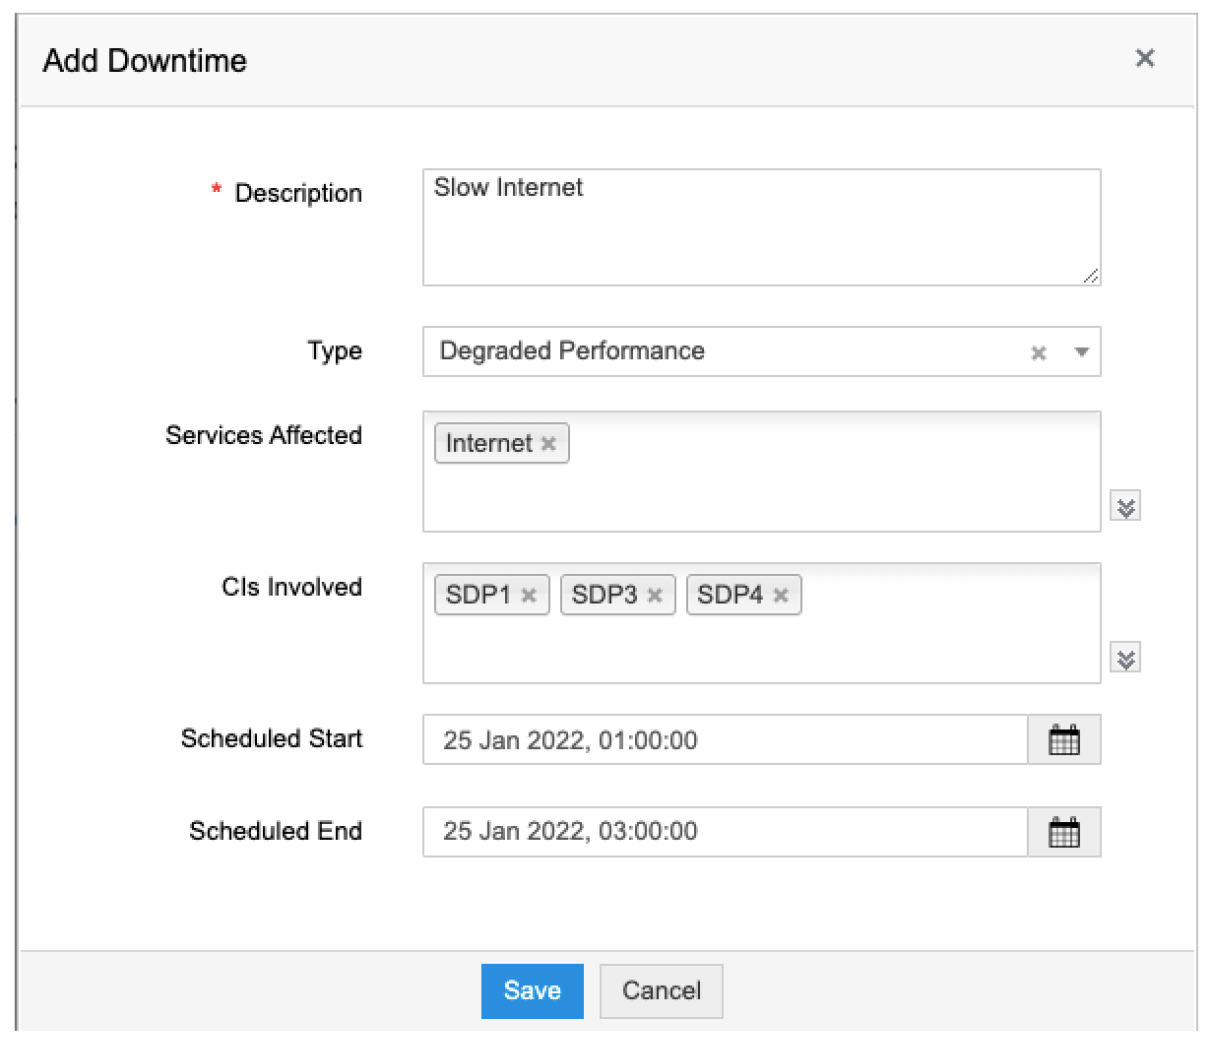
4. Back-out plan:
What happens if the release backfires? We need a plan B that tells us how to undo the release or how the effects can be mitigated. A configuration baseline is a record of the last working state of the service. If the release fails, we can go back to that checkpoint to ensure it doesn’t impact users negatively. The configuration baseline can be defined in the release policy.
The release manager verifies the planning, validates the back-out plan, and approves moving on to the next stage: development.
Stage 3: Development
The development stage is handled by the development team lead. ManageEngine follows a software development life cycle process, which dictates how software is designed, developed, tested, and implemented to satisfy the needs of end users.
A standard template for development consists of sections like:
1. Details:
- Schedule period (start and end times)
- Actual time taken (start and end times)
- Description
- Attachments
2. Tools used.
3. Tasks:
Work is usually distributed across teams or team members, which are listed here.
4. Approvals:
Any approvals configured for this stage in the workflow are displayed here.
5. Status comments:
You might be wondering why release management has scheduled start and end dates and actual start end dates. A release, or any project for that matter, relies on many variables or has risks that may not always work out the way you’d expect. You might face delays in procuring hardware, or the finance team could delay approval. In such cases, scheduled or baseline dates and actual dates help your team understand if you’re ahead, on time, or behind schedule.

*Tools
There are hundreds of tools available for software development. Here, we’ll list some of the tools preferred by our developers and what they’re used for.
Tool |
Purpose |
|
Ansible |
IT automation |
|
Ant |
Build tool |
|
Zoho Cliq |
Communication and collaboration |
|
Docker |
Container management |
|
GitHub |
Distributed version control management |
|
Jenkins |
Open-source platform for CI |
|
Mercurial |
Distributed source control management |
|
Selenium |
Test automation |
|
ServiceDesk Plus |
Help desk and release management |
Once the build is completed, the developers will provide the release notes and build URL.
Stage 4: Testing
Once the development team lead confirms the development stage is complete, the QA team starts working on testing the release package based on the tasks assigned to them. This stage is overseen by the QA team lead or testing lead. As the name suggests, the QA team handles planning, validates all testing-related tasks, and maintains standards.
There are three major types of tests:
(a) Functional testing:
This determines whether the code satisfies the desired functional requirements. Regression testing is also a form of functional testing. It verifies that the code doesn’t unsettle existing functionalities.
(b) Integration testing:
This tests if the code works well with integrations.
(c) Performance testing:
This monitors performance indicators. Load testing is a form of performance testing. We add load to the system and look for errors or breaks.
After these checks are performed, the team may perform product-specific checks or secondary tests to ensure satisfaction of business requirements and suitability for deployment.
For this stage, we require the following:
1. A test plan:
This demonstrates how the testing has to be carried out.
2. Testing tasks:
Using tasks, the testing lead distributes work across their team.
3. An issue tracker:
A document with issues recorded by the testing crew.
4. QA stage schedule start and end times:
These can be used by the testing lead to schedule tasks properly.
5. QA stage actual start and end times:
These can be used by the testing lead to record the actual time taken to complete the testing stage.
6. Approvals:
Before allocating the work, the testing lead needs to confirm that the proper build or environment is provided to the team with necessary access and requirements.

Apart from these, we also use features like:
1. Testing stage-specific statuses:
These allow the testing lead to keep track of the status of the work happening.
Default statuses used:
- Pending for acceptance
- Accepted
- In progress
- On hold
- Rejected
2. Status comments:
When the testing lead specifies a status, they can also provide comments mentioning the reason why it’s chosen. This provides clarity and ensures everyone in the team is on the same page.
3. Notes:
On a timely basis, team members can use notes to interact and collaborate.
Stage 5: User acceptance testing (UAT)
In this stage, the end user will be provided with a test environment to validate that the release meets end users’ expectations as per the release plan. The UAT stage is predominantly handled by the UAT owner(s). They’re responsible for planning and validating UAT-related tasks. Ideally, this should be someone with an in-depth understanding of the process or software. They’ll also be provided with the requirement documents accepted by the QA team.
After the development stage, we select members from the QA team to act as the end users and carry out acceptance testing. The team member will raise issues, if any, in a bug tracking product. These need to be fixed by the development team before release. They also need to verify compliance parameters, which are part of the development cycle. This stage usually takes a couple of weeks.
For this stage, we require:
1. A UAT plan:
This demonstrates how the testing has to be carried out.
2. UAT tasks:
Using tasks, the UAT owner distributes work across the team.
3. An issue tracker:
A document containing issues recorded by the UAT crew.
4. UAT stage schedule start and end times:
These can be used by the UAT owner to schedule tasks properly.
5. UAT stage actual start and end times:
These can be used by the UAT owner to record the actual time taken to complete the UAT stage.
6. Approvals:
Before allocating the work, the UAT owner needs to confirm that the proper build environment is provided to the team with the access and requirements mentioned.

Apart from these, we also use:
1. UAT-specific statuses:
These allow the UAT owner to keep track of the current status of the work happening.
Default statuses used:
- Pending for acceptance
- Accepted
- In progress
- On hold
- Rejected
2. Status comments:
When the UAT owner specifies a status, they can also provide comments mentioning the reason why it’s chosen. This provides clarity and ensures everyone in the team is on the same page.
3. Notes:
On a timely basis, team members can use notes to interact and collaborate.
Stage 6: Deployment
Types of deployment
1. Big bang vs. phased deployment
Using a big bang approach simply means updates are released all at once for all end users, whereas phased deployment involves a release of updates in parts or for different user groups.
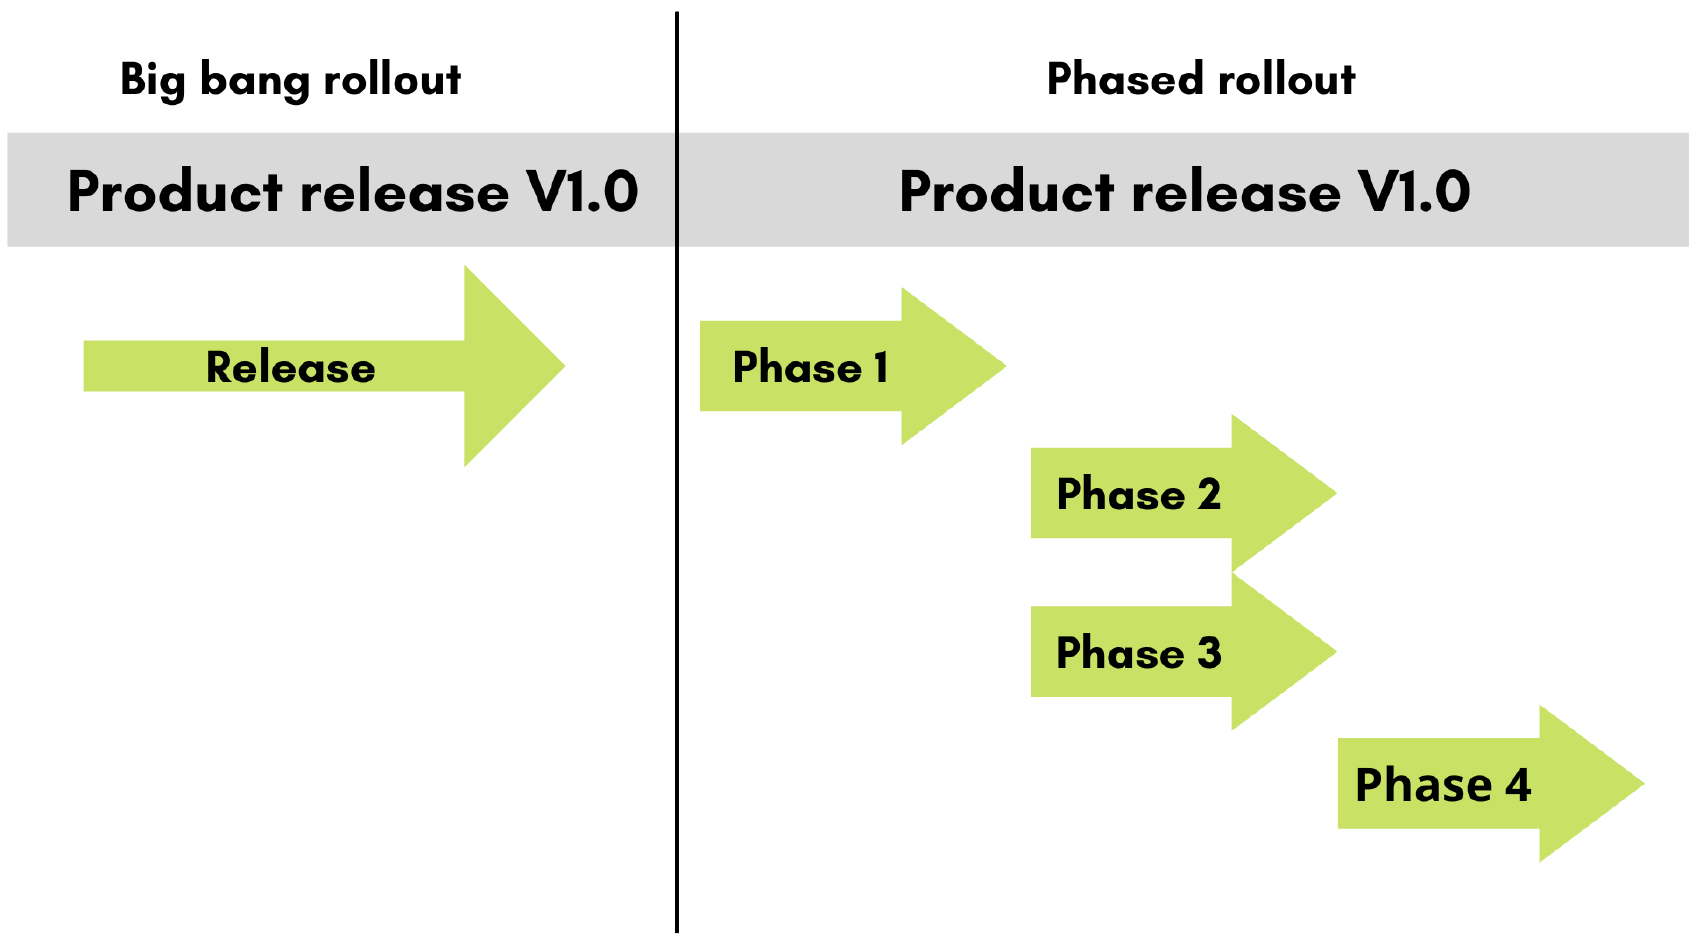
There are pros and cons for both methods.
|
Factor |
Big bang deployment |
Phased deployment |
|
Implementation cost |
Low |
High |
|
Risk |
High |
Low |
|
Implementation time |
Short |
Long |
|
Productivity |
Low (at first) |
High |
|
ROI realization |
Fast |
Delayed |
There’s no definitive answer on which deployment method works better. You should evaluate them based on specific conditions such as budget, productivity, risks, and timeline.
2. Push vs. pull deployment
Push deployment:
An update is pushed from a central location to users simultaneously.
Pull deployment:
Updates are made available for users to download at their convenience or when a user workstation restarts, e.g., mobile app updates.
|
Push |
Pull |
|
Enforces uniformity |
Lacks uniformity |
|
Requires accurate configuration data |
Doesn’t rely on accurate configuration data |
|
Harder to scale up |
Not complex to scale up |
3. Automated vs. manual deployment
If your organization has fast release cycles, automated deployment is a far better choice than manual deployment.
Benefits of automated deployment:
- Ensures repeatability and consistency
- Less prone to errors
- Takes significantly less time
- Supports larger target environments
- Increases productivity and efficiency
Manual deployment is preferred only in certain cases, like rare releases and releases with limited cycles.
Now, let’s talk about the deployment process. It’s time to take our build from the test environment to the live environment. The deployment stage is handled by the release engineer and overseen by the release manager.
The release owner must document:
- Downtime for configuration items involved.
- Schedule start and end times.
- Actual start and end times.
- Tasks.
After deployment, the release engineer confirms completion of the stage.

Stage 7: Training or early life support (ELS)
ITIL® defines ELS as “a stage in the service life cycle that occurs at the end of deployment and before the service is fully accepted into operation. During early life support, the service provider reviews key performance indicators, service levels, and monitoring thresholds and may implement improvements to ensure that service targets can be met. The service provider may also provide additional resources for incident and problem management during this time.”
Customer satisfaction is key, right? The objective of this stage is to keep all customer-facing teams updated on new functionalities, assess overall performance, and quickly resolve any operational issues that pop up during the initial phase after deployment. ELS promotes increased user satisfaction and a reduction in number of reported incidents.
Requirements that must be documented in advance include:
- Resources allocated.
- Time period.
- SLAs and OLAs.
- KPIs.
- Exit criteria.
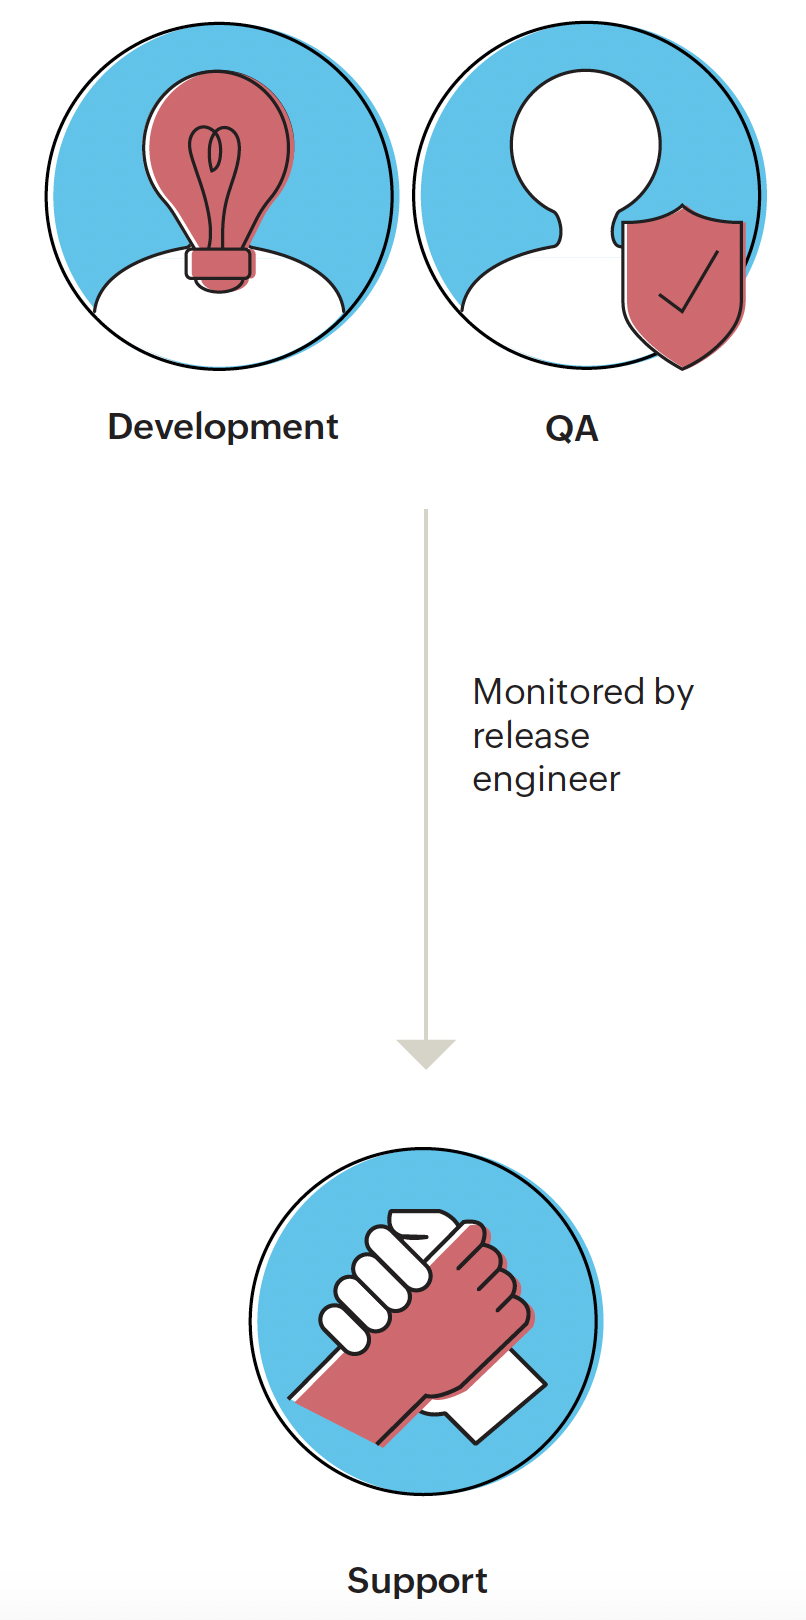
The development and QA teams are responsible for training support staff who in turn assist end users. The release engineer ensures training and ELS are provided to affected users relating to the release for the time period as per the SLA.
Stage 8: Review and close
Review
The review stage helps determine whether the release was successful or not. At this point, we should be able to answer the following questions:
- Does the release carry out its required function?
- Are all the relevant teams aware of these changes?
- Can this build template be replicated easily?
- Can it be rolled back?
- Is more training required for users?
- Is it user-friendly?
- Have all configuration items and processes been updated in the CMDB?
- Have all the post-launch issues been resolved?
- Is the documentation process complete?
The review stage is owned by the reviewer, who is usually a member of the development or QA team and who may not have been involved in the build process. The release reviewer and a team assess The release reviewer and a team assess the release, including the entire release process’ efficiency, cost, and time effectiveness, impact, intended and incidental outcomes, and more. The processes involved in each stage of the release will be thoroughly inspected. The review team also determines whether the release met the specified business requirements while causing little or no disruption to the production environment. If it meets the business requirements, SLA targets, and end users have stopped reporting incidents, they can verify the deployment and provide review comments.

Next review schedule:
If the reviewer wants to re-verify the deployment due to changes that may have occurred, they can choose another date for it. In that case, the review stage will be moved back to “In progress.” If there are any other minor issues that don’t pose a threat or affect users, these must be documented and addressed in the next release.
Close
The life cycle of any release, be it completed or canceled, ends with the closure stage. In this stage, the release manager associates a closure code for the release and provides their comments, if any. The closure code provides details on whether the release is closed due to cancellation, rejection, completion, or other reasons, which makes it easier for stakeholders to understand too. Based on the comments, the release engineer can finally close the release. Resources taken up by this release can now be allocated to other tasks, i.e, your next release!
Metrics that matter
KPIs put a quantitative value on how effective your release management process is and identify areas of improvement. These metrics usually cover every stage and are best understood when visualized graphically. We add release metrics to our advanced analytics tool to keep track of our progress.
Examples of KPIs for individual releases:
- Estimated release downtime in minutes or hours
- Total release downtime in minutes or hours
- Deployment duration
- Number of incidents
- Mean time to repair
- Difference in estimated and actual delivery date
- Number of defects
Examples of KPIs for the overall release management process:
- Number of releases
- Release duration in days
- Number of release back-outs
- Number of releases by priority
- Number of releases by risk
- Average cost per release
- Average release cycle time