
- Overview
- Configuration
Jira
Integrate Jira with ADManager Plus for streamlined user lifecycle management
Jira is a prominent SaaS platform known for its cloud-based project management and issue tracking software. Integrating Jira with ManageEngine ADManager Plus provides organizations an efficient and streamlined solution for user lifecycle management. By leveraging Jira's features and ADManager Plus' automation capabilities, organizations enhance productivity, foster collaboration, and ensure accurate employee data management across their IT infrastructure.
Automated user provisioning
Ensure consistent and up-to-date user information across platforms, eliminating the need for manual data management and reducing the risk of errors in user account management.
Advanced reports
Comprehensive reporting and auditing capabilities, enabling IT administrators to track user activities, monitor changes, and generate compliance reports.
How to integrate ADManager Plus and Jira
- In ADManager Plus, navigate to the Automation tab and click HCM Integrations.
- Under HCM applications, click on the Custom HCM tile to integrate a new custom HCM solution.
- In the Custom HCM Integration window that displays, enter a suitable Name, Description and upload a logo of Jira and click Save.
- Click on the Jira tile added in the previous step to configure the API authorization methods, endpoints and LDAP data mapping.
- In the Authorization section, select OAuth 2.0 as the Authorization Type.
- Header Prefix: Specify a prefix value for your authorization header.
- OAuth 2.0 Grant Type: The Authorization code is the default grant type. Note: The client's credentials grantType is also supported.
- Callback URL: You will be redirected to the Callback URL after authentication. This should be registered with the API provider.
- Auth URL: Specify the Authorization Endpoint URL.
- Access Token URL: Enter the OAuth server URL where the application can exchange the Authorization code for an Access Token.
- Client ID and Client Secret: Enter a valid ID and its secret key.
- Scope: Specify the data you would like to access.
- Click Advanced Options and choose the headers and query parameters from the Add To drop-down menu.
- In the API Endpoint Configuration section, add the following:
- Endpoint URL: https://api.atlassian.com/ex/jira/{cloudid}/{api} Note: Click here to view Jiras' API references.
- Click Advanced Options to add headers and parameters.
- Method: Choose Get.
- Headers: Click and configure the respective HTTP headers as configured in the endpoint.
- Parameters: Cick and configure the query parameters as configured in the endpoint.
- Message type: Select None.
- Check the Repeat calling this Endpoint box to continually call the API until you get the required response. From the drop-down menu, select the parameter and specify the increment value. You can also set a condition which, when satisfied, calls the endpoint repeatedly.
- Once finished, click Test & Save. A response window will display the requested elements.
- Click Data Source - LDAP Attribute Mapping to match endpoints and to map AD LDAP attributes with the respective attributes in the HCM solution.
- Enter the Configuration Name and Description, and select the Automation Category from the drop-down menu.
- In the Select Endpoint field, choose those columns that are unique to users (employeeIdenifier, username, etc.). The values in these columns should be consistent across all the endpoints.
- In the Attribute Mapping field, select the attribute from the LDAP Attribute Name drop-down menu and map it with the respective column in the HCM solution.
- Click Save.
While configuring an automation in ADManager Plus, select Jira as the Data Source and automate user management. Click here to learn more about automation configuration.
Steps to configure new app integration in Jira
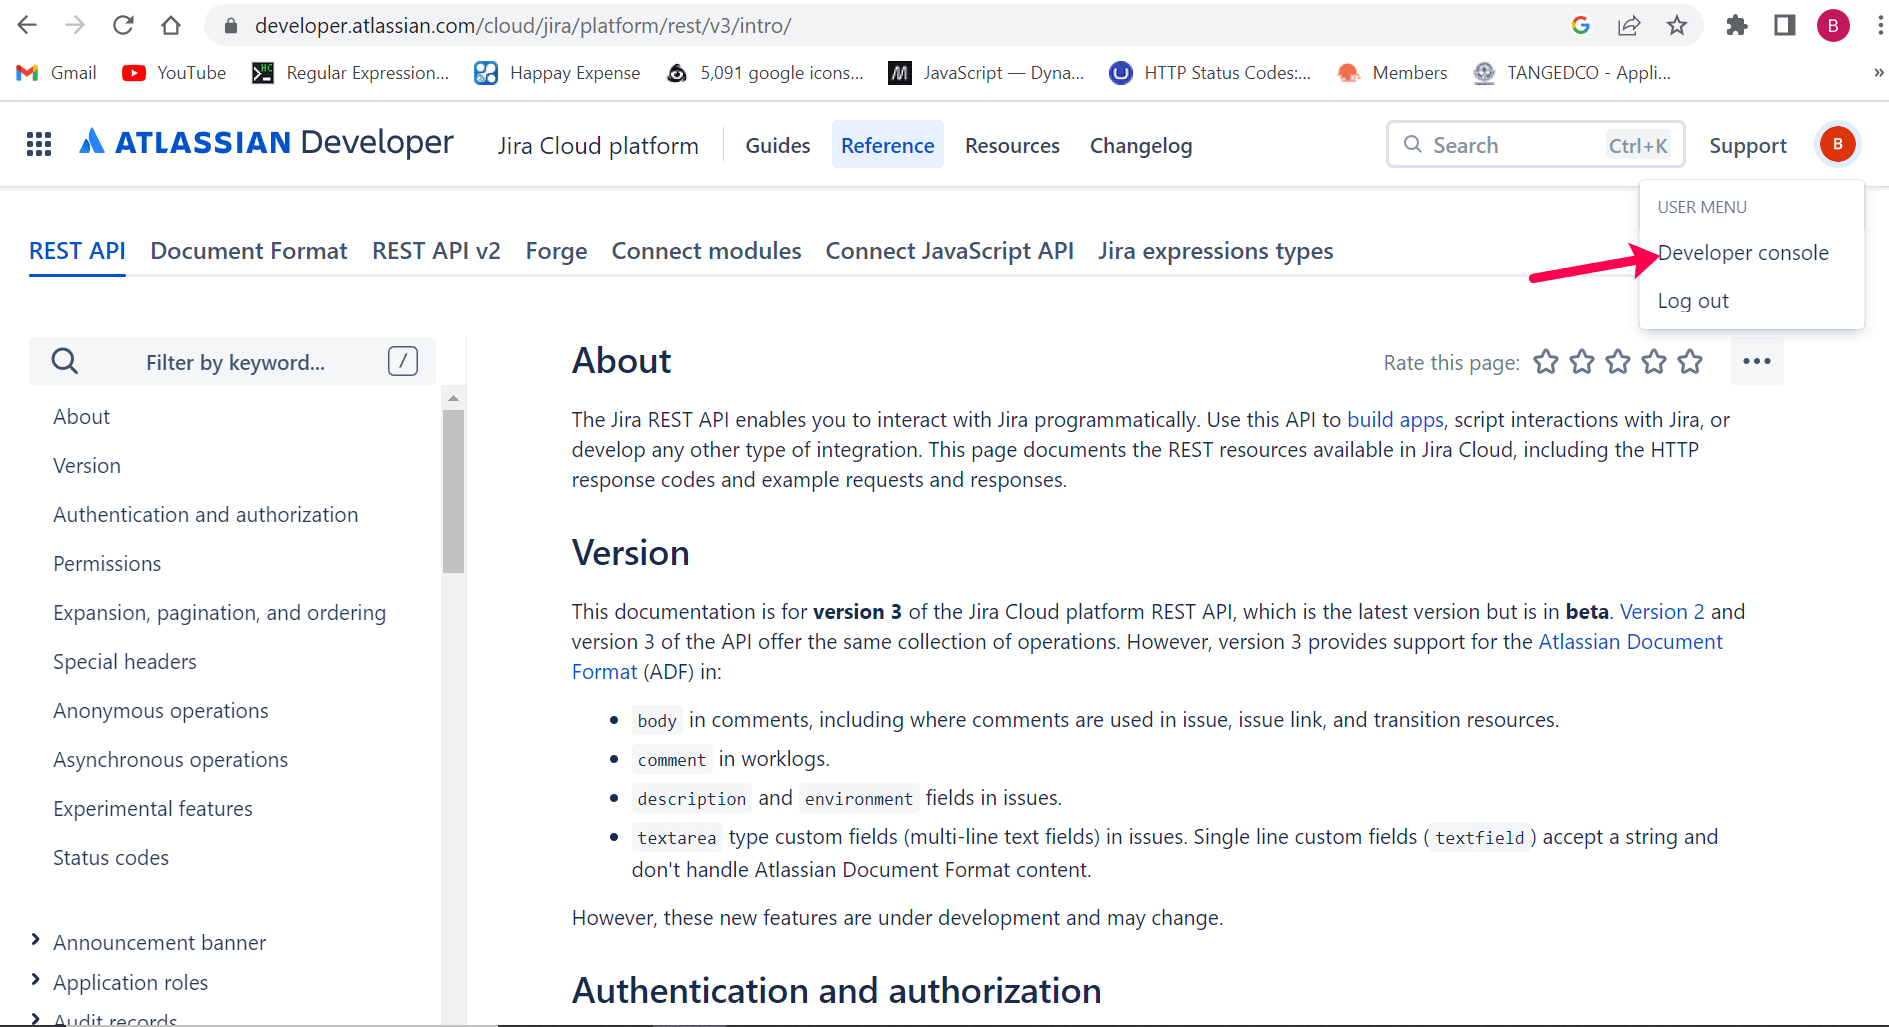
- Navigate to Jira api documentation (developer.atlassian.com) > Profile > Developer console.
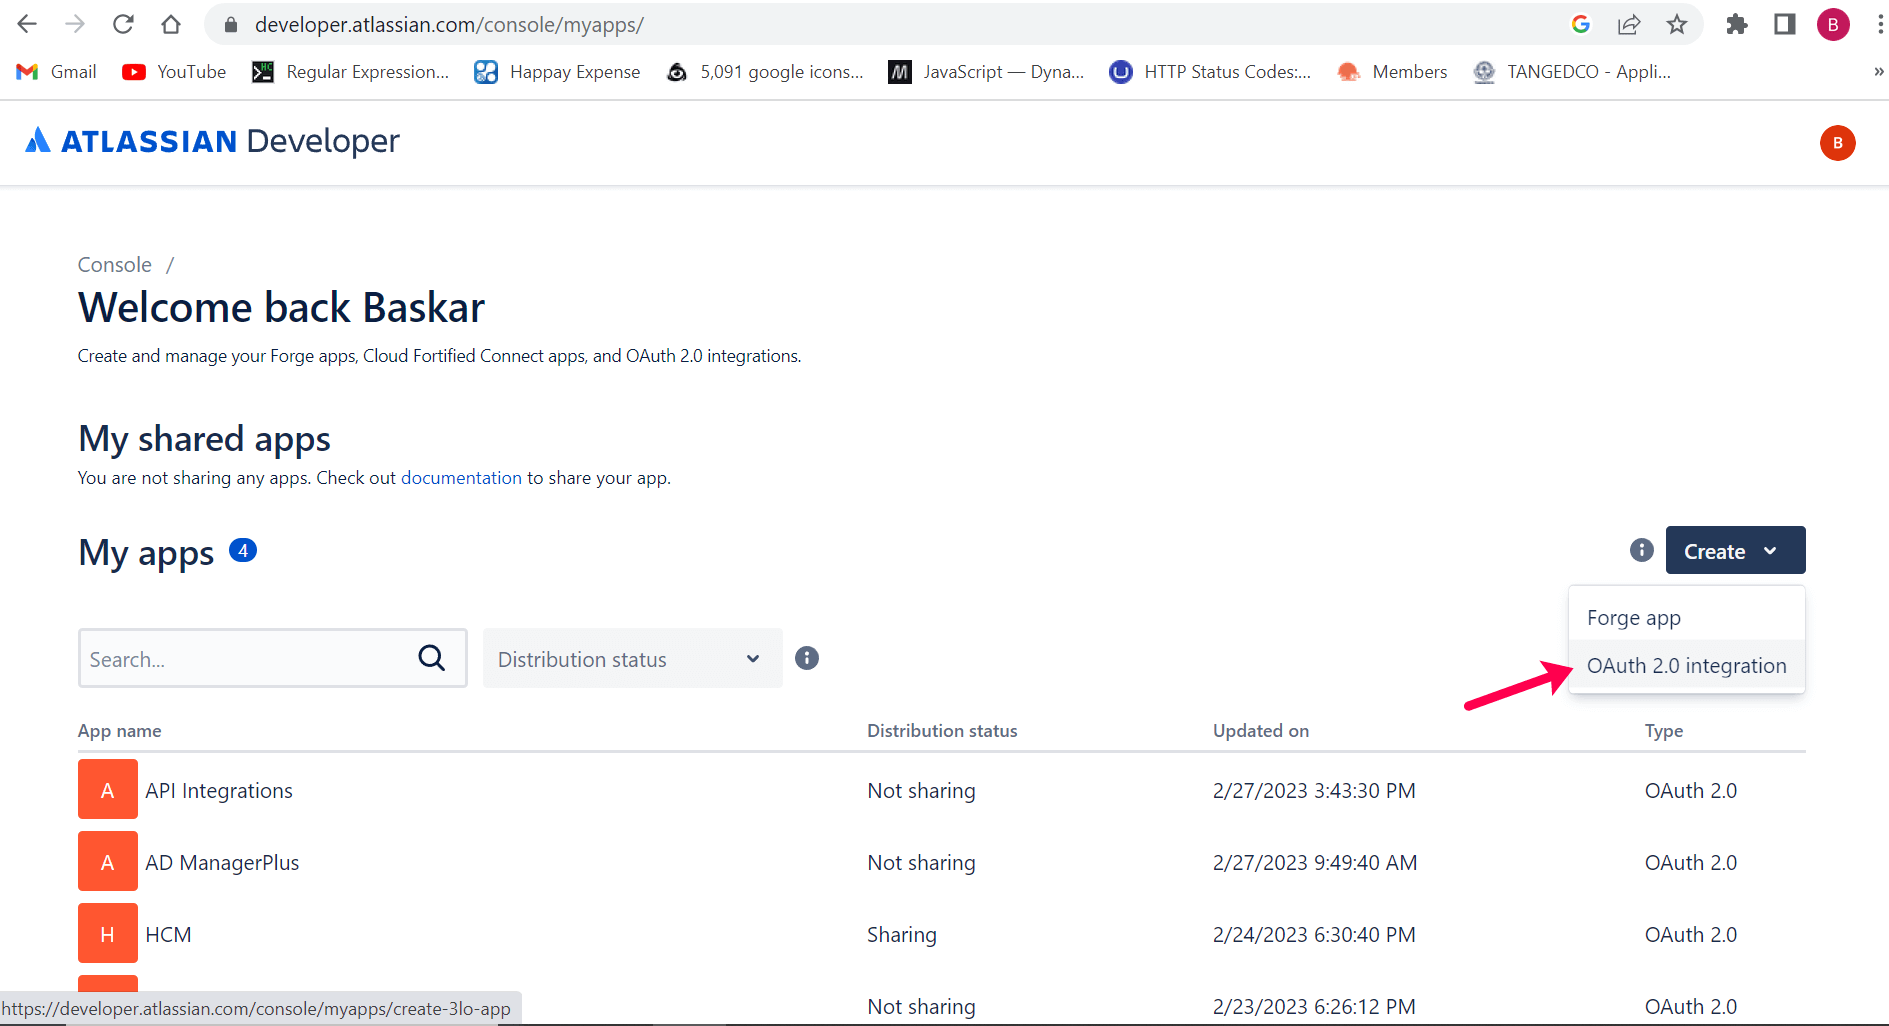
- Select Create and choose OAuth 2.0 integration.
- Enter an application name and check the terms and conditions box.
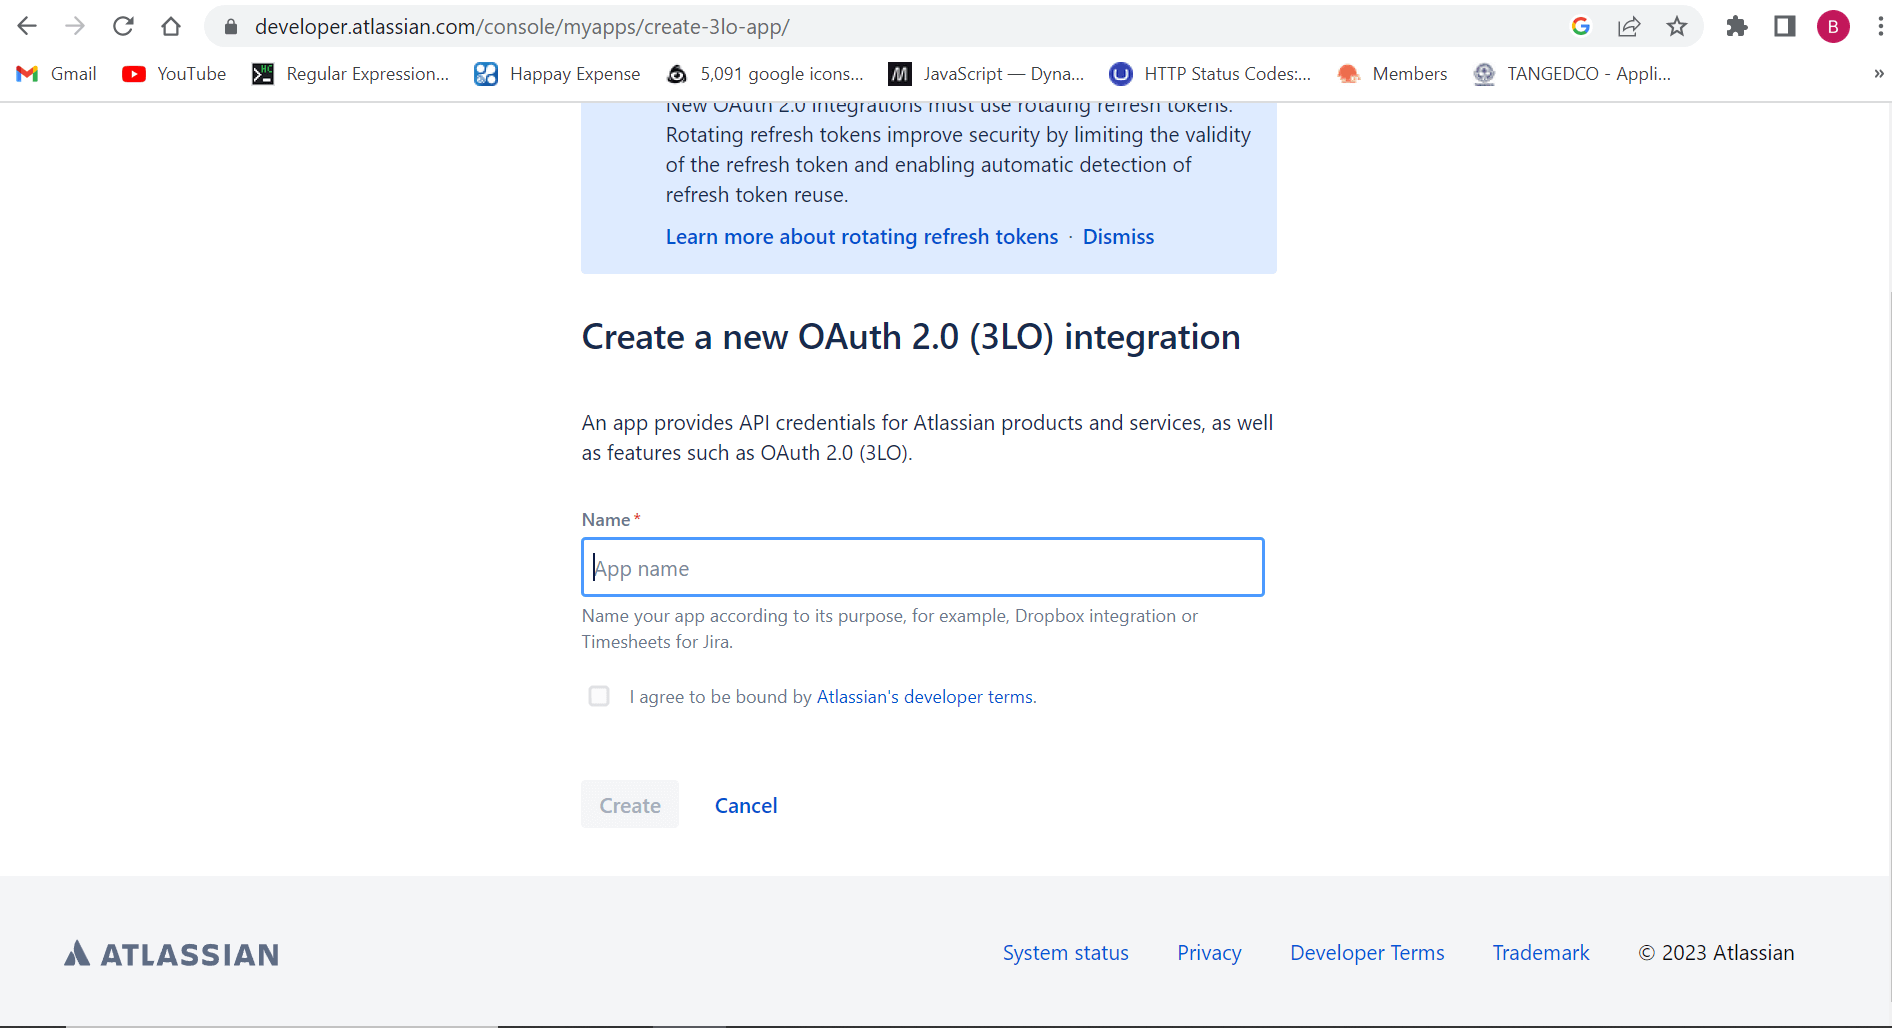
- Click Create.
Steps to set permissions in Jira
- Navigate to Jira api documentation (developer.atlassian.com) > Profile > Developer console.
- Select My apps and choose the application you have integrated.
- From the left pane choose Permissions.
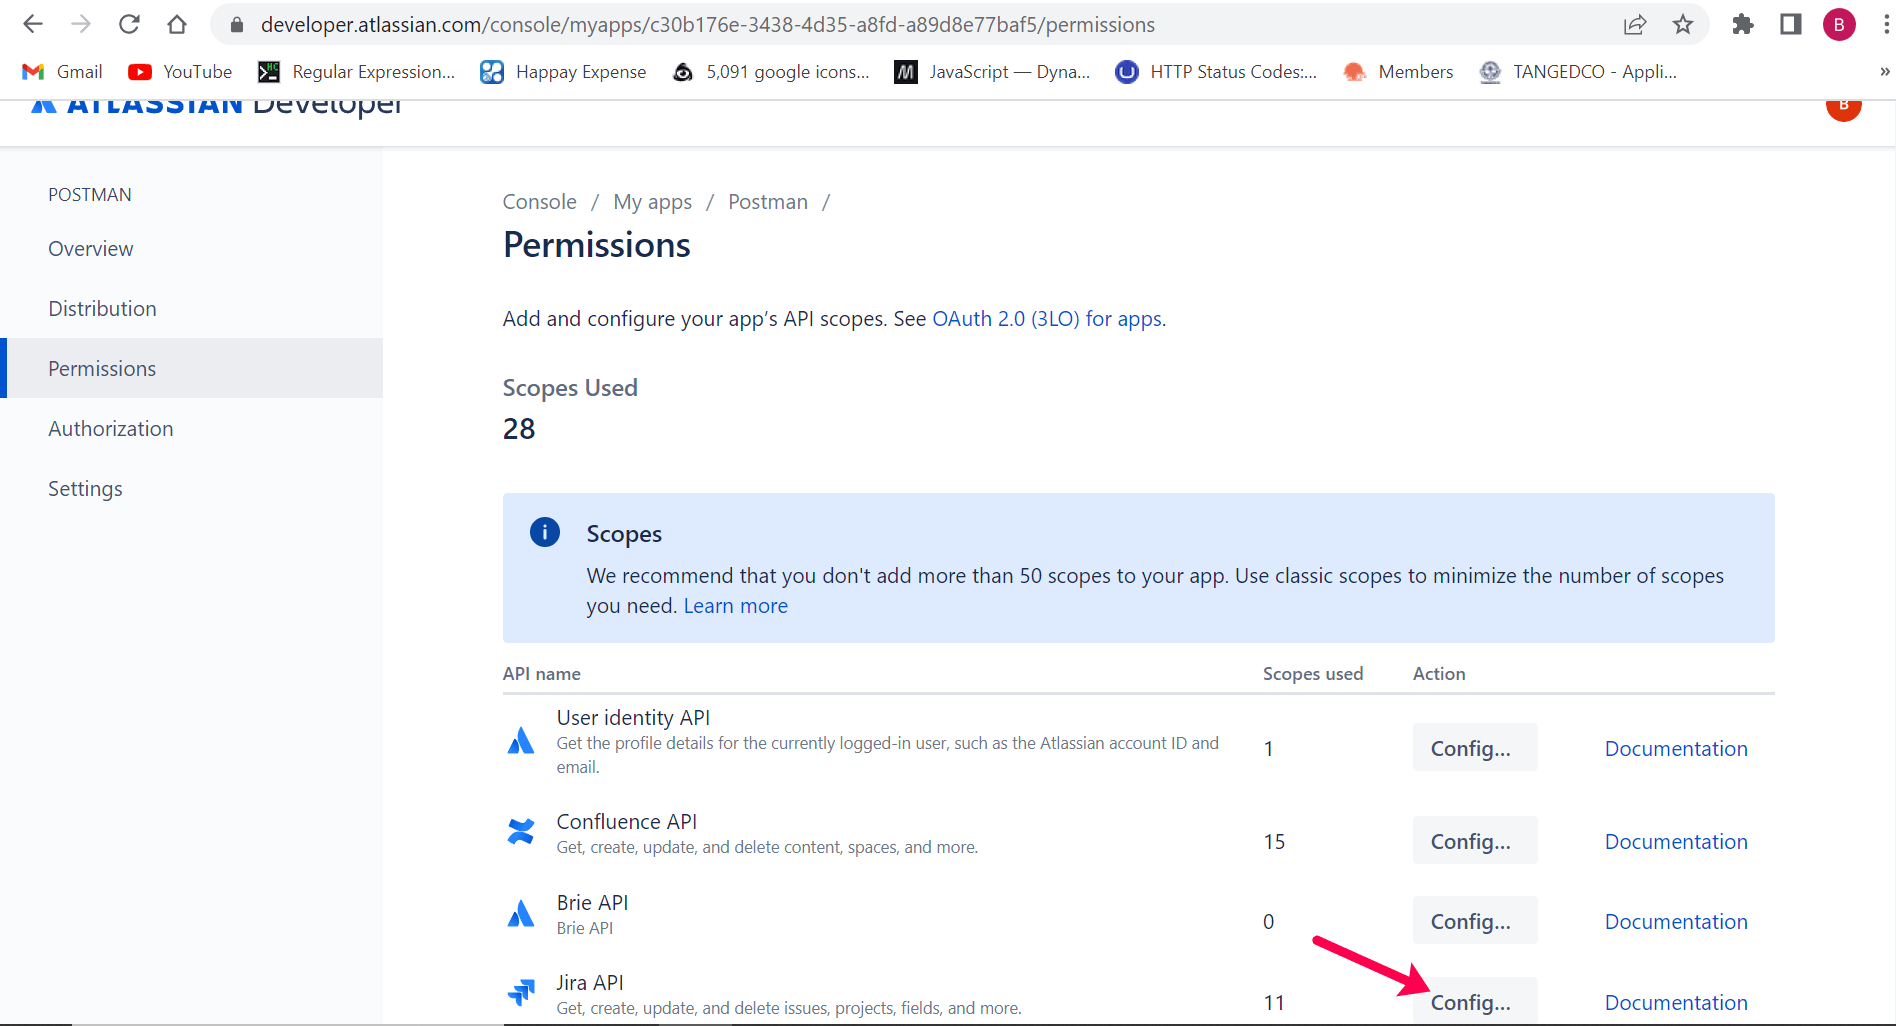
- Click Configure next to Jira API and set the required permissions.
Steps to generate the client ID and the secret in Jira
- Navigate to Jira api documentation (developer.atlassian.com) > Profile > Developer console.
- Select My apps and choose the application you have integrated.
- From the left pane choose Settings.
- Copy the Client ID and Secret values and paste the generated values in the required field.
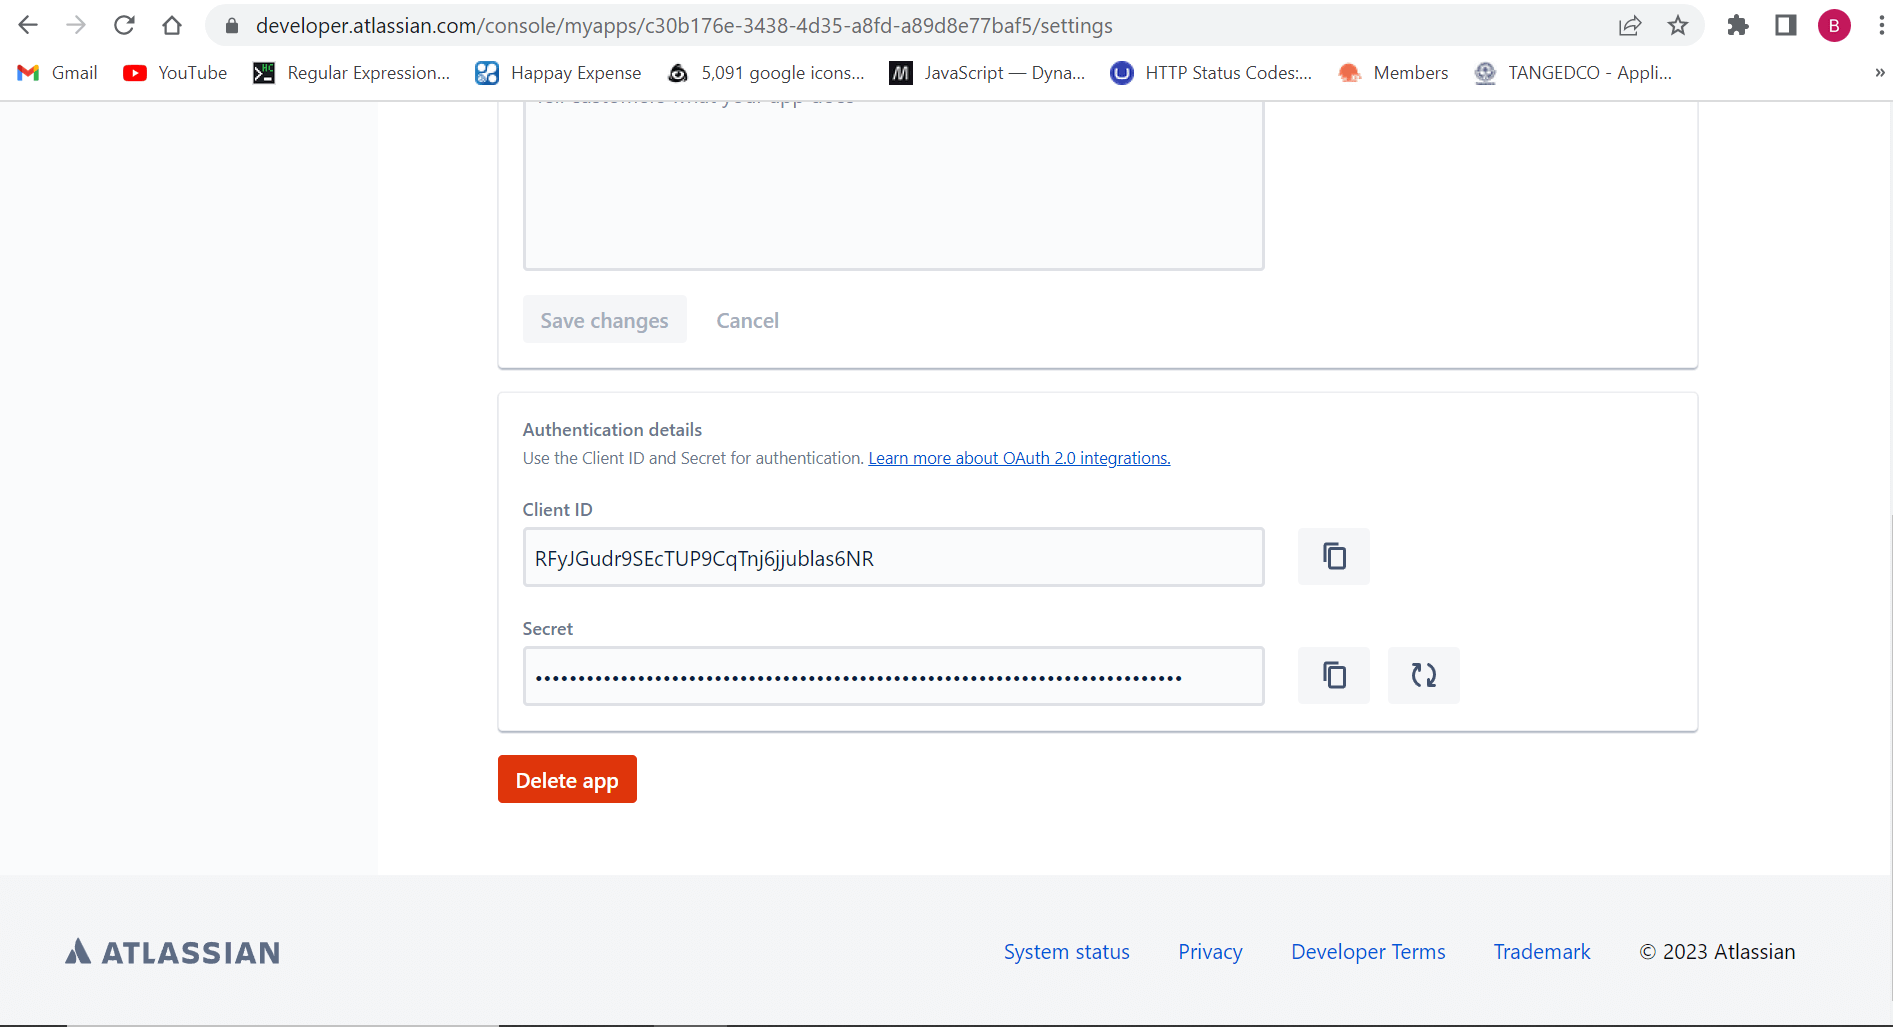
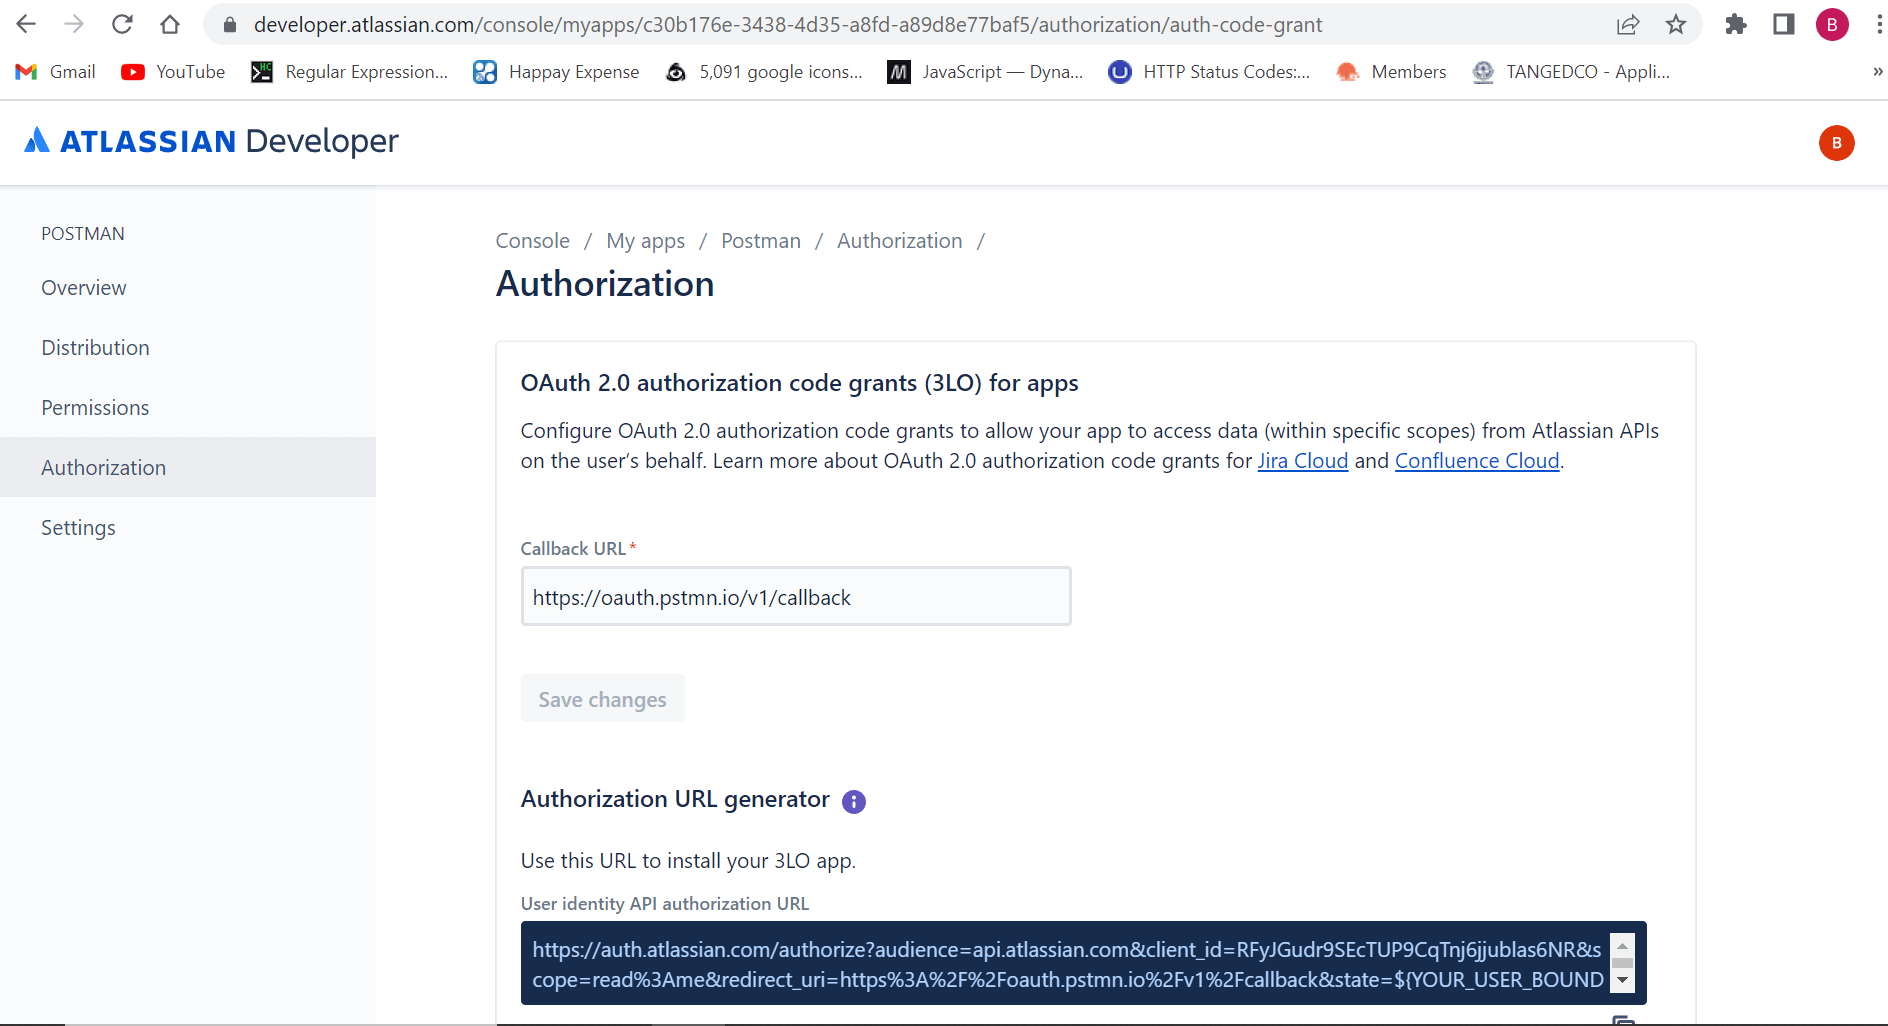
Steps to set the Redirect URI in Jira
- Navigate to Jira api documentation (developer.atlassian.com) > Profile > Developer console.
- Select My apps and choose the application you have integrated.
- From the left pane choose Authorization.
- Paste the Callback URL from ADManager Plus in the Callback URL field.
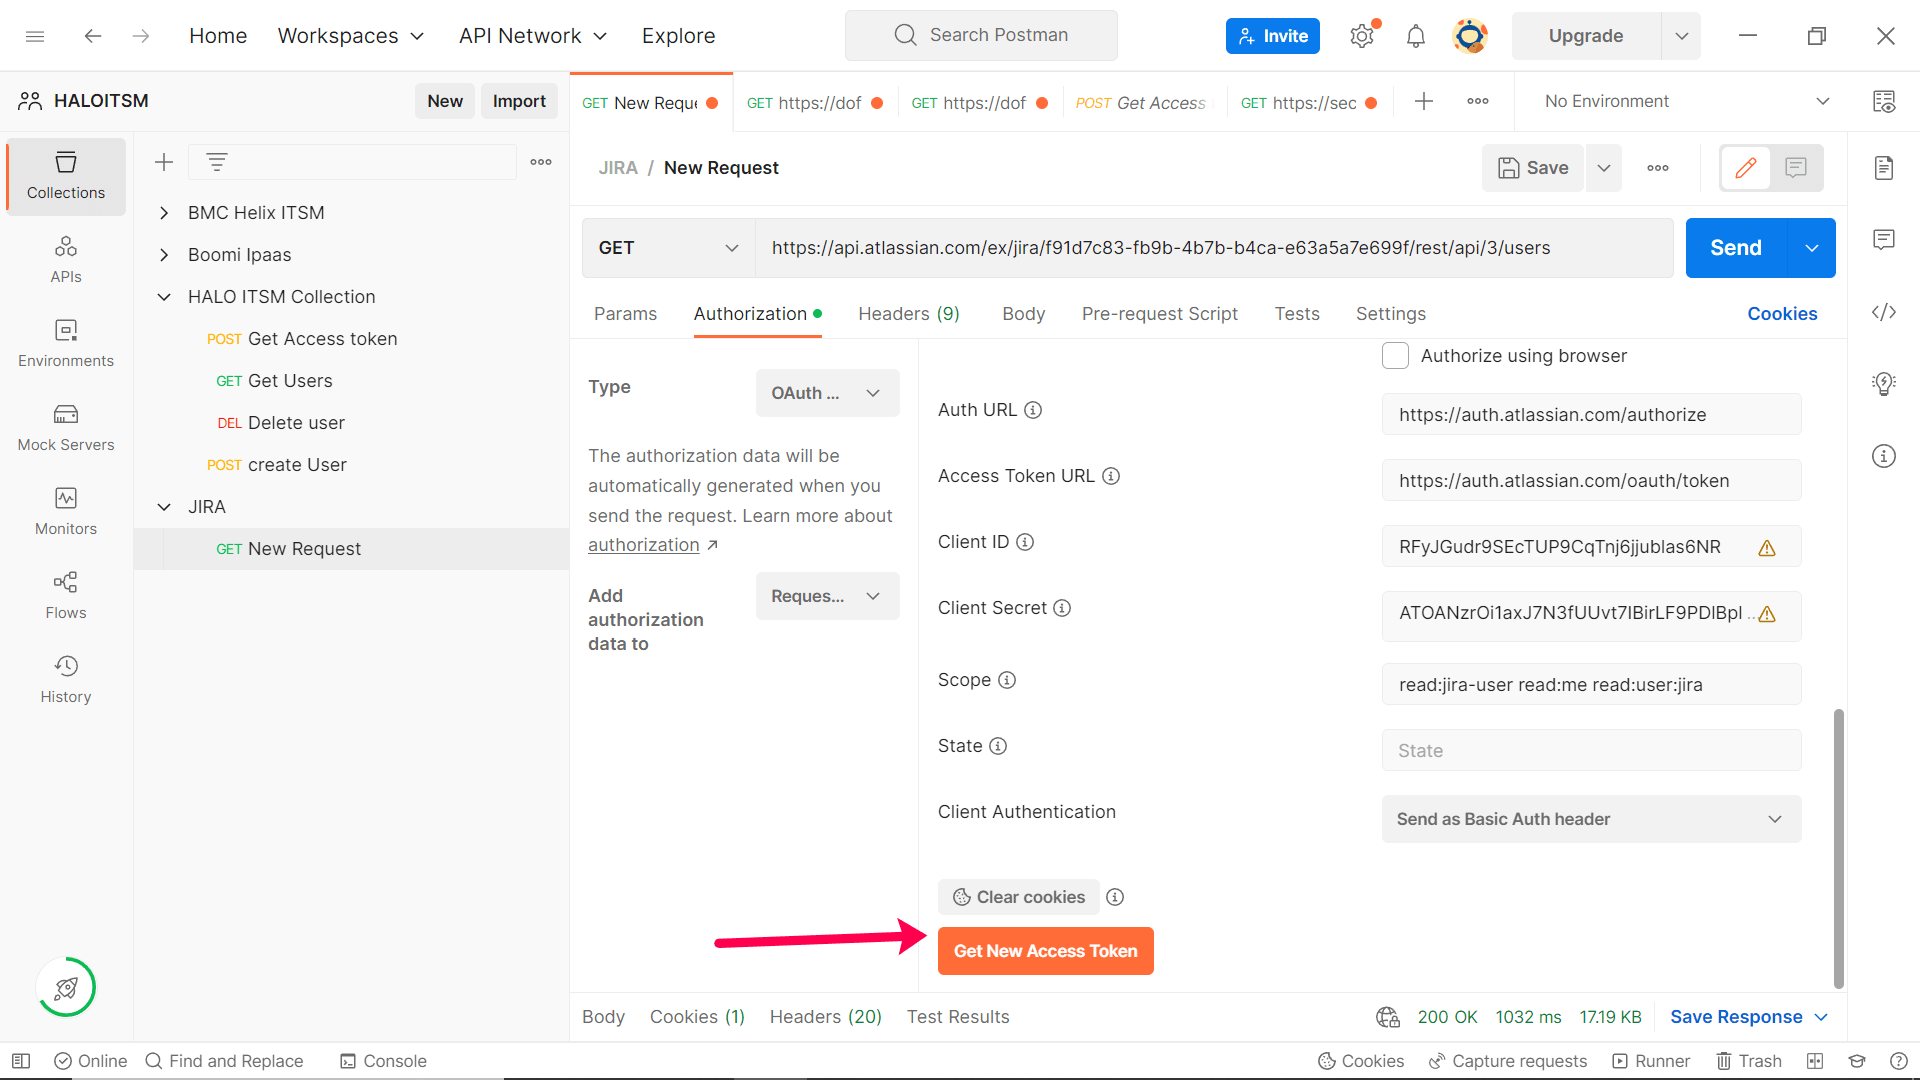
Sample Postman configuration to get access token
- Navigate to Postman (https://www.postman.com).
- Fill in all the required parameters and click Get New Access Token.
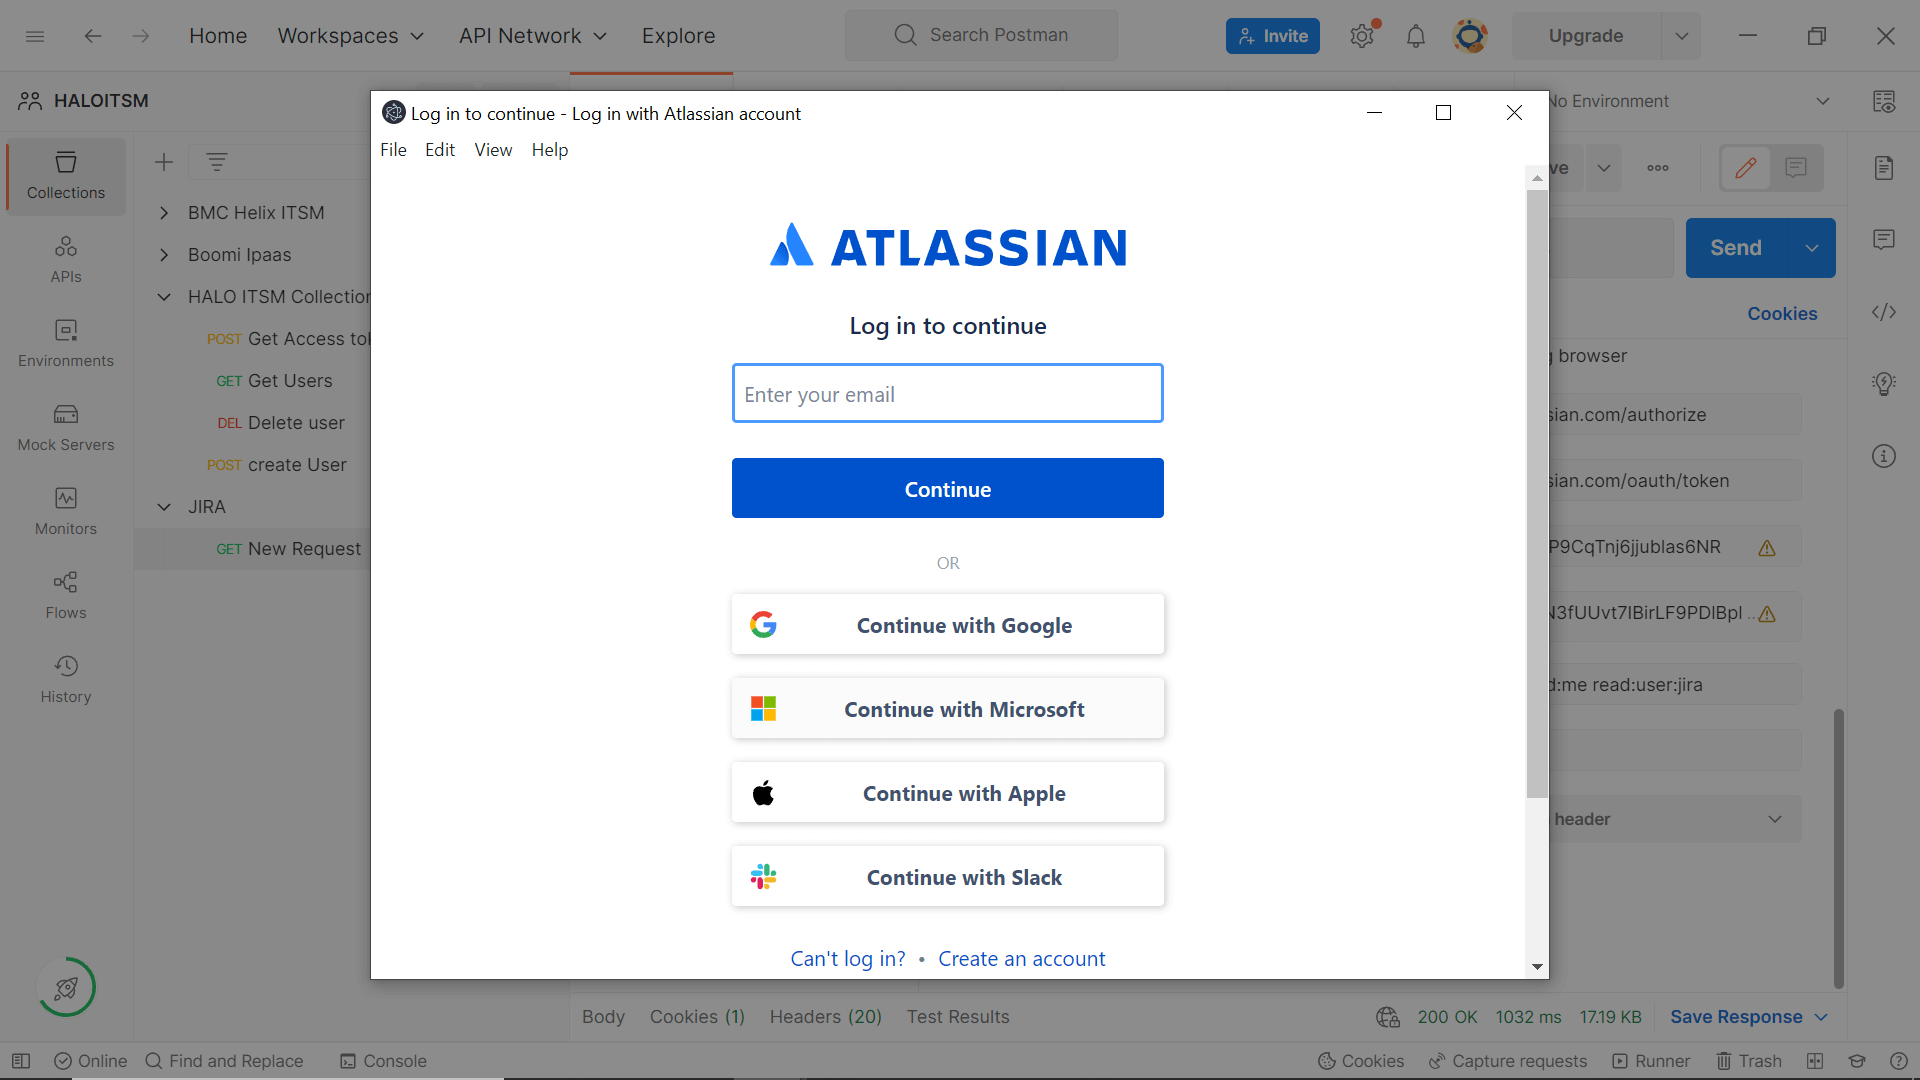
- Once you click Get New Access Token, you will be redirected to the JIRA login page.
- Log in with your Jira credentials and complete the authentication process.
- After successful authentication, the server will respond with Status code 200 if the credentials are valid. The response will include the access token and its expiry time, along with a refresh token if offline_access is specified.
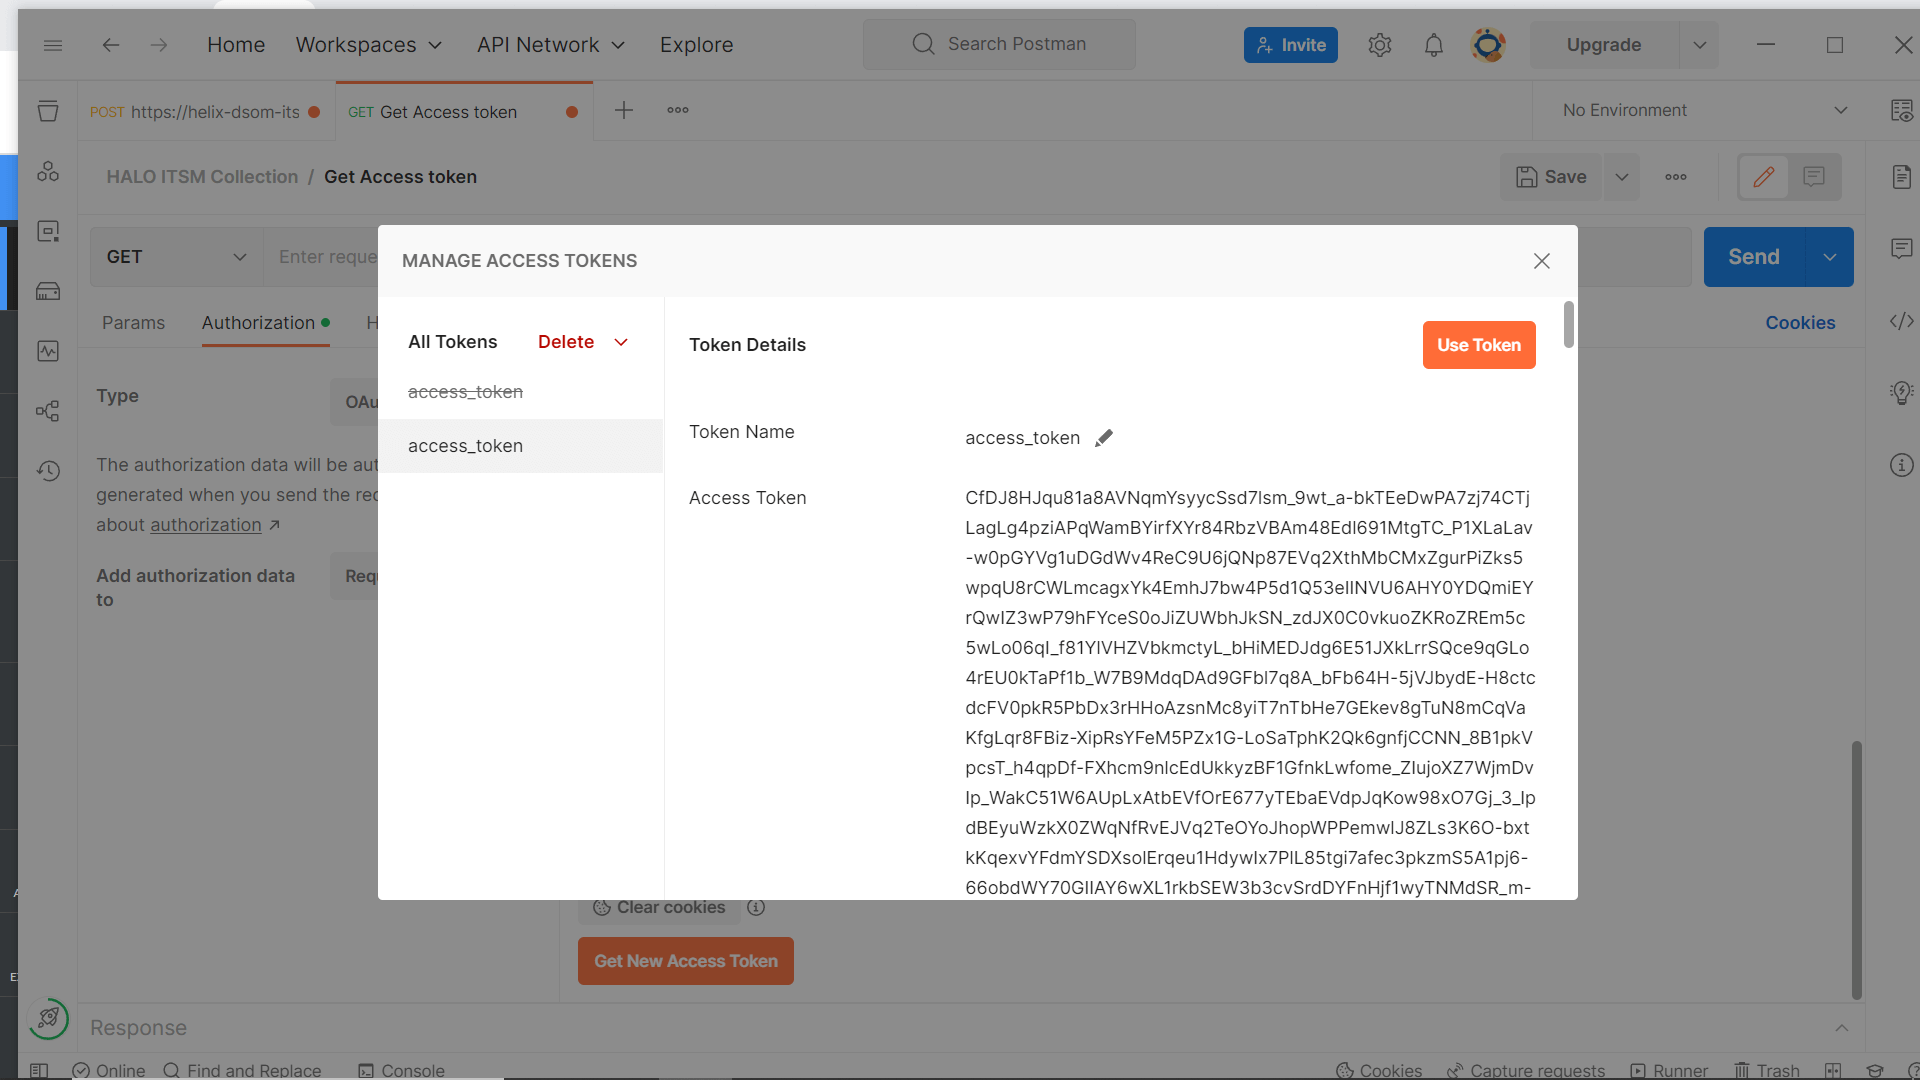
- Once you obtain the access token, utilize it in API requests.
Here's an example of API integration to retrieve all users.
- Method: GET
- API: https://api.atlassian.com/ex/jira/{cloudid}/rest/api/3/users
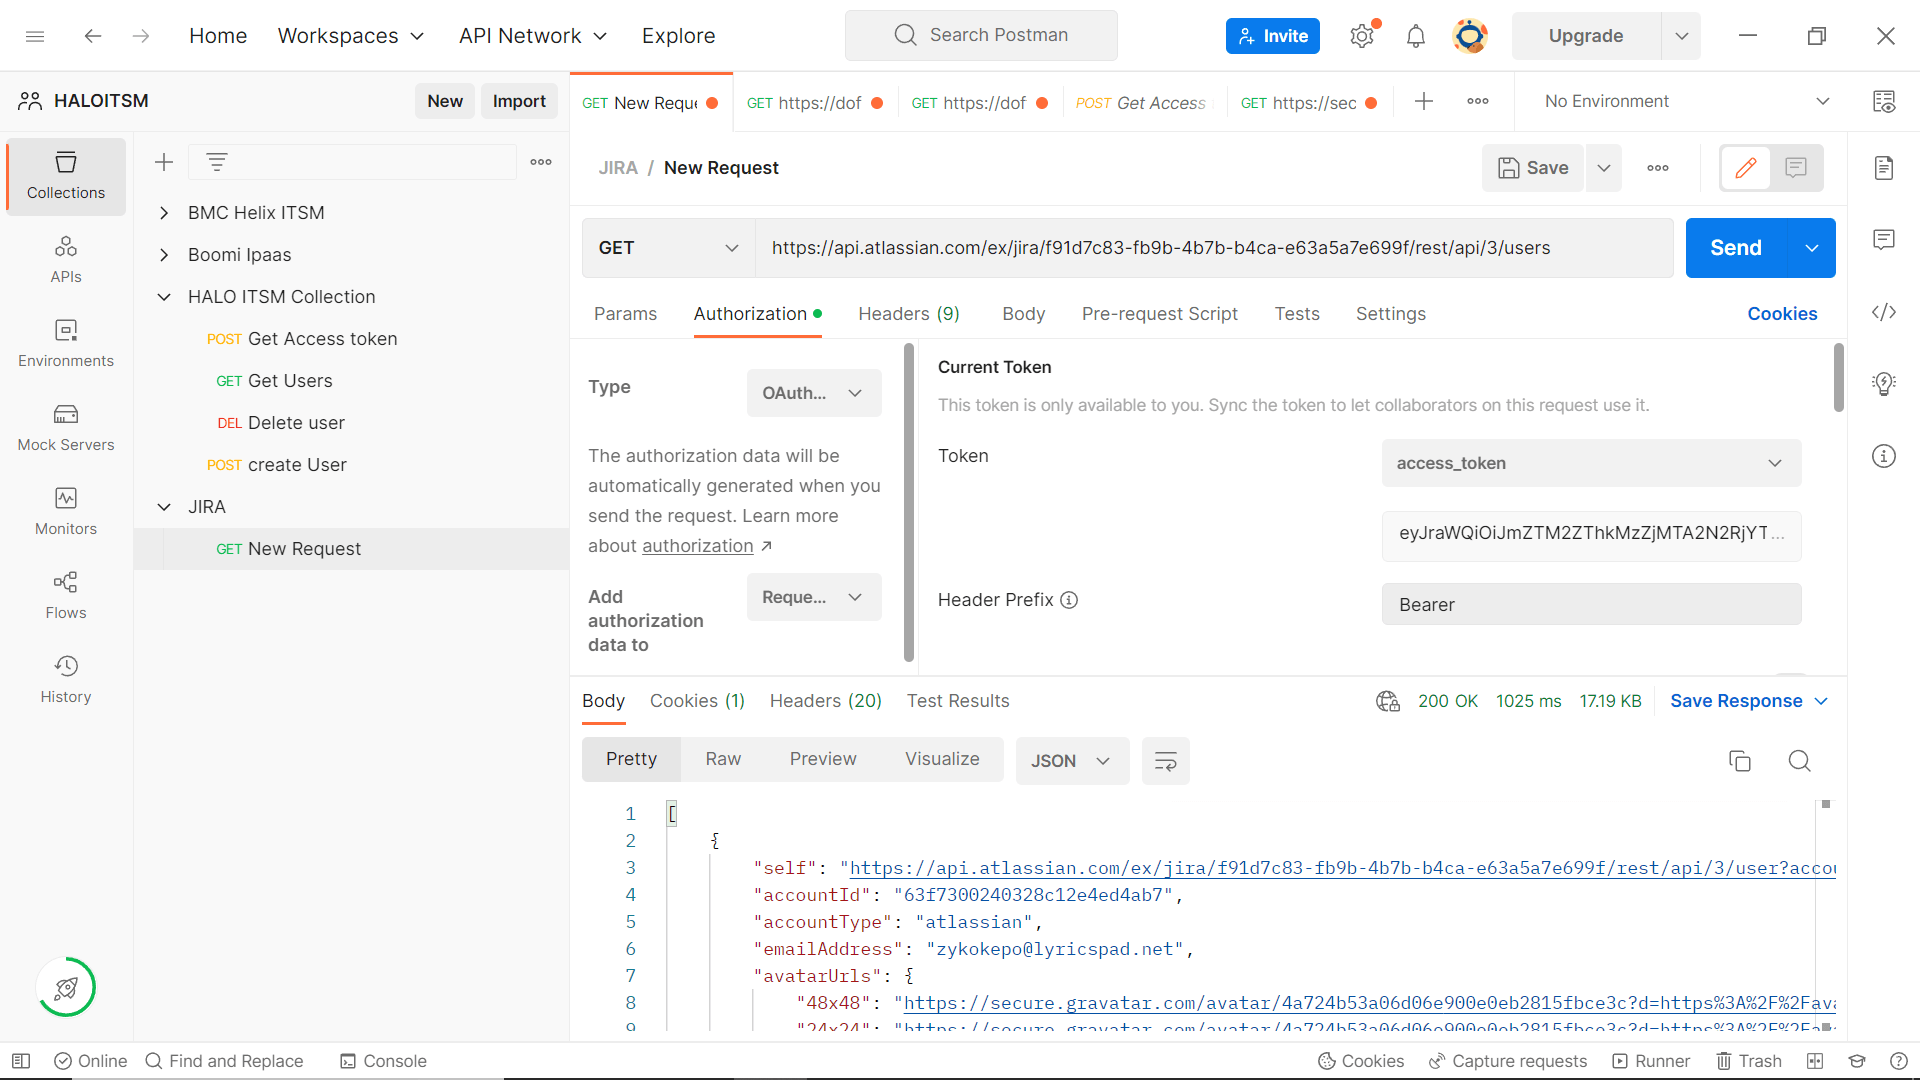
Sample Response:
                             [                                                         {

"self": "https://api.atlassian.com/ex/jira/f91d7c83-fb9b-4b7b-b4ca-e63a5a7e699f/rest/api/3/user?accountId=63f7300240328c12e4ed4ab7",

"accountId": "63f7300240328c12e4ed4ab7",

"accountType": "atlassian",

"emailAddress": "zykokepo@lyricspad.net",

"avatarUrls": {

"48x48":

"https://secure.gravatar.com/avatar/4a724b53a06d06e900e0eb2815fbce3c?d=https%3A%2F%2Favatar-management--avatars.us-west-2.prod.public.atl-paas.net%2Finitials%2FB-1.png",                                     "24x24":

"https://secure.gravatar.com/avatar/4a724b53a06d06e900e0eb2815fbce3c?d=https%3A%2F%2Favatar-management--avatars.us-west-2.prod.public.atl-paas.net%2Finitials%2FB-1.png",                                     "16x16":

"https://secure.gravatar.com/avatar/4a724b53a06d06e900e0eb2815fbce3c?d=https%3A%2F%2Favatar-management--avatars.us-west-2.prod.public.atl-paas.net%2Finitials%2FB-1.png",                                     "32x32":

"https://secure.gravatar.com/avatar/4a724b53a06d06e900e0eb2815fbce3c?d=https%3A%2F%2Favatar-management--avatars.us-west-2.prod.public.atl-paas.net%2Finitials%2FB-1.png"

},

"displayName": "Baskar",

"active": true,

"locale": "en_US"

},

{

"self": "https://api.atlassian.com/ex/jira/f91d7c83-fb9b-4b7b-b4ca-e63a5a7e699f/rest/api/3/user?accountId=63f74dca40328c12e4ed55d7",

"accountId": "63f74dca40328c12e4ed55d7",

"accountType": "atlassian",

"avatarUrls": {

"48x48":

"https://secure.gravatar.com/avatar/3b73abcf46e1e004566cc3a18515c163?d=https%3A%2F%2Favatar-management--avatars.us-west-2.prod.public.atl-paas.net%2Finitials%2FJ-0.png",                                     "24x24":

"https://secure.gravatar.com/avatar/3b73abcf46e1e004566cc3a18515c163?d=https%3A%2F%2Favatar-management--avatars.us-west-2.prod.public.atl-paas.net%2Finitials%2FJ-0.png",                                     "16x16":

"https://secure.gravatar.com/avatar/3b73abcf46e1e004566cc3a18515c163?d=https%3A%2F%2Favatar-management--avatars.us-west-2.prod.public.atl-paas.net%2Finitials%2FJ-0.png",                                     "32x32":

"https://secure.gravatar.com/avatar/3b73abcf46e1e004566cc3a18515c163?d=https%3A%2F%2Favatar-management--avatars.us-west-2.prod.public.atl-paas.net%2Finitials%2FJ-0.png"                                 },

"displayName": "jenish",

"active": true,

"locale": "en_US"

},                                                      ]
Actions supported:
- Create user accounts
- Add users to groups
- Modify user attributes
- Remove users from groups
- Modify user accounts with Template options
- Create mailbox
- Reset passwords
- Disable or delete mailbox
- Unlock user accounts
- Move the Home folder
- Enable user accounts
- Delete the Home folder
- Disable user accounts
- Revoke Microsoft 365 licenses
- Delete user accounts
- Manage users' photos
- Run custom scripts
- Disable Lync accounts
- Move users across groups
- Configure auto-reply settings