
- Overview
- Configuration
Slack
Streamline user access management with Slack - ADManager Plus integration
Slack is a comprehensive cloud productivity platform used by many businesses for communication and collaboration. By integrating Slack to ADManager Plus, IT teams can schedule and automate tasks within the Slack workspace, including provisioning and deprovisioning accounts, managing access, and ensuring enterprise security. Additionally, the integration allows for the monitoring and regulation of critical tasks, such as revoking licenses and deleting user accounts, by implementing multi-level business workflows. This ensures that organizations central control over user identities, permissions, and tasks while improving overall operational efficiency and security across both platforms.
Automate Workflows
Streamline IT workflows, enhances security, and saves valuable time by efficiently managing user access rights and reducing manual administrative tasks.
Accelerate business productivity
Securely assign permissions and access to resources as and when employees are provisioned to improve productivity.
Steps to integrate ADManager Plus with Slack:
- Log in to ADManager Plus.
- Navigate to the Automation tab and click Application Integrations.
- Under HCM applications, click the Slack tile.
- Click Enable the Slack Configuration.
- Basic details under the Slack Endpoint configuration tab and Authorization tab are pre-filled.
- Under the Authorization tab, complete the fields for Client ID and Client Secret after the OAuth app is configured in your Slack workspace.
- Copy and save the Callback URL, as you will need it while configuring the OAuth app in Slack. The steps to configure the OAuth app in Slack can be found here.
- The pre-populated Slack Endpoint configuration retrieves all user information using the Repeat calling this endpoint option, where a maximum of 100 users per API call are fetched until there are no users in the endpoint. For more details, you can refer to this API documentation. To proceed, click Test & Save.
- On successful configuration, the structure of the response data will be displayed. Now, click Proceed.
- Finally, map the LDAP attributes with the appropriate Slack fields.
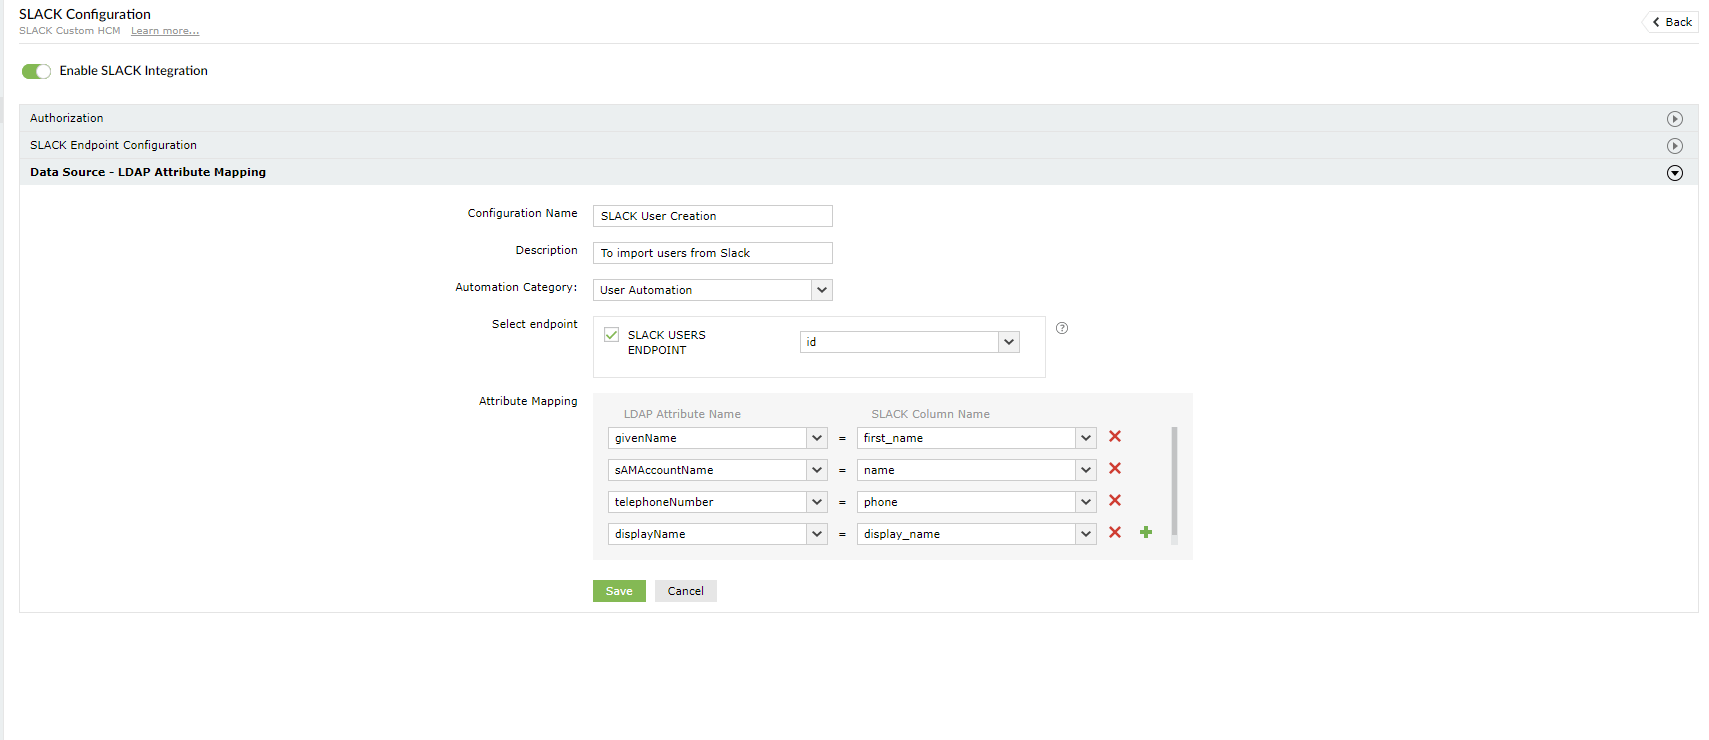
Steps to integrate ADManager Plus with Slack:
To create an OAuth App and get the Client ID, Redirect URl, and Client Secret, follow the steps below:
- Log in to your Slack Workspace
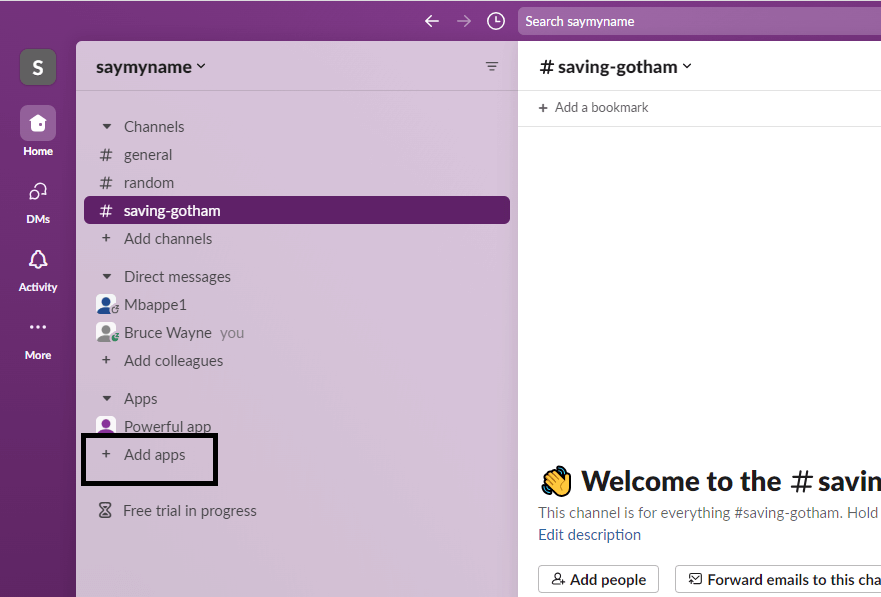
- Click Add apps in the left navigation panel.
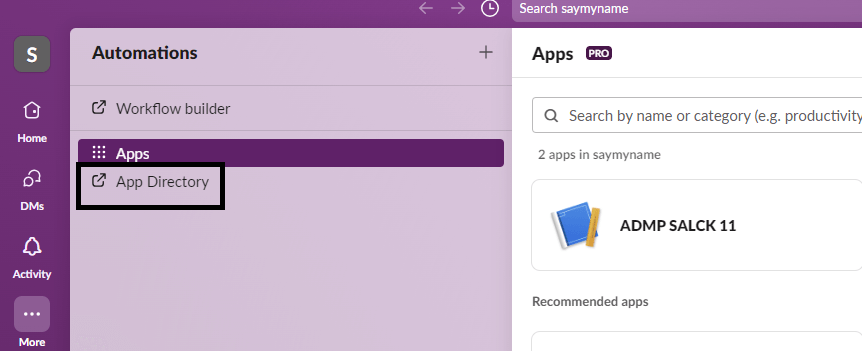
- Now, click the App Directory, which will direct you to the App Directory page.
- In the App Directory page, click the Build button in the top-right corner.

- You will be redirected to the Slack API page. From there, locate and click Your Apps in the top-right corner.

- Click the Create New App button.
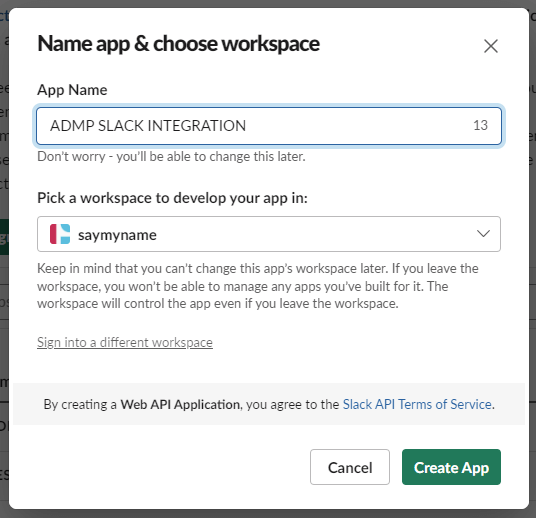
- Provide a suitable app name and choose the workspace in which you want to build the app.
- When you click Create App, credentials, such as a Client ID, Client Secret, and Verification Token, will be generated. These details have to be used in ADManager Plus while configuring the Authorization.
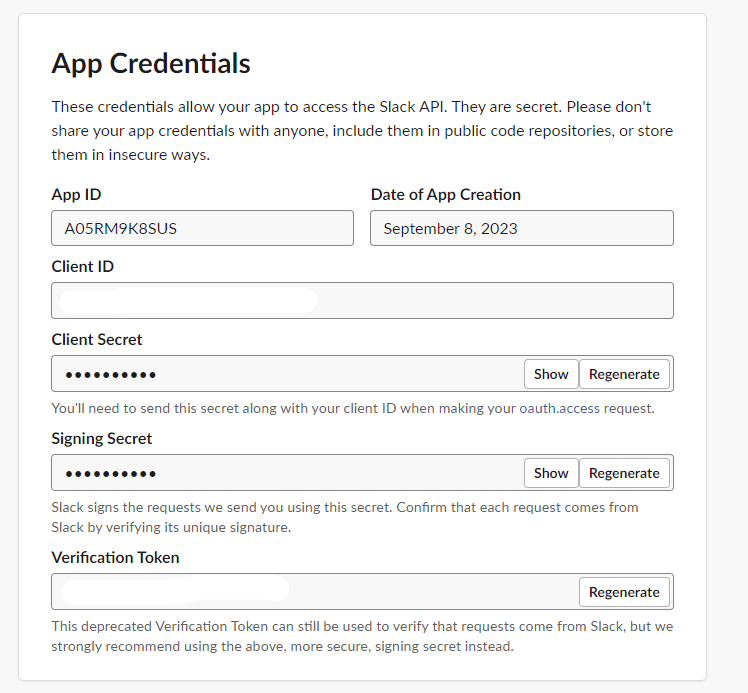
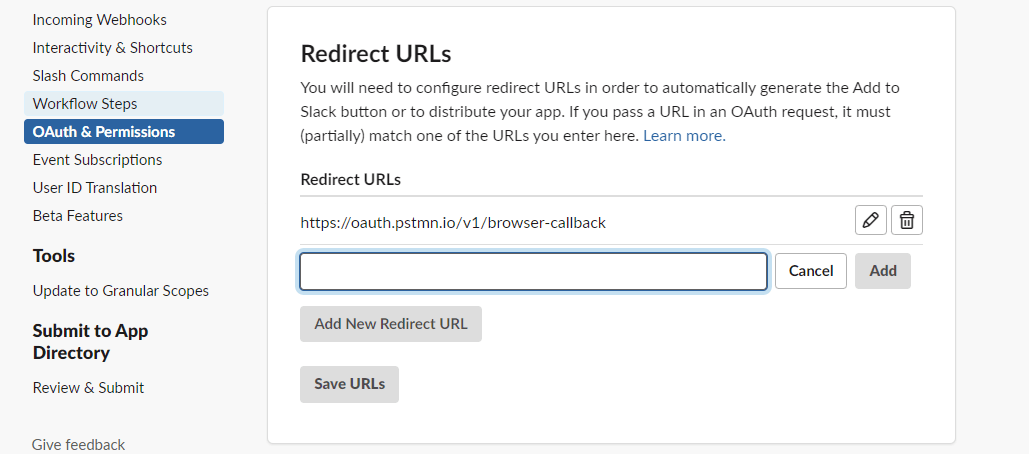
- Now, add the callback URL that you copied from ADManager Plus in the Redirect URL field and click Save URLs.
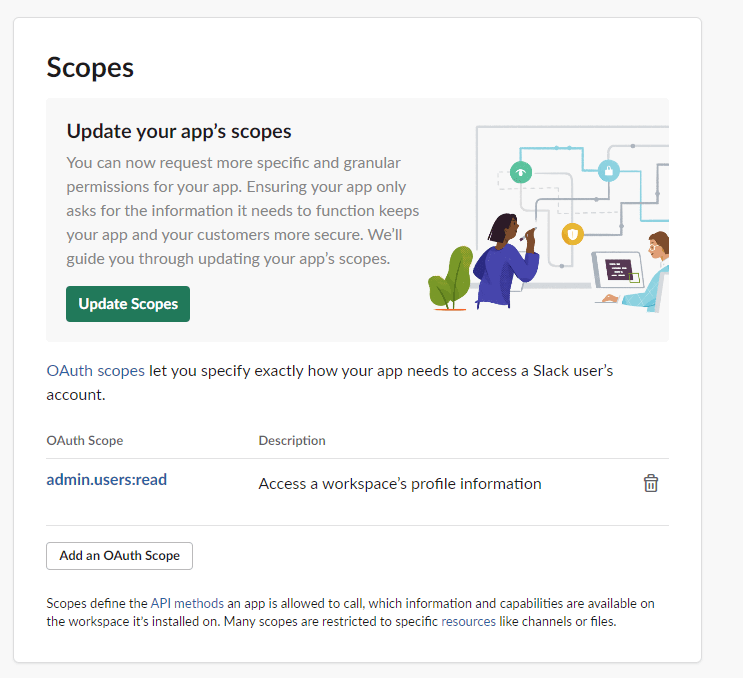
- Next, scroll down to Scope and click Add an OAuth Scope and add admin.user:read to give ADManager Plus access to read the user data.
While configuring an automation in ADManager Plus, select Slack as the Data Source to automate user management