Integration with GoDaddy SSL
Key Manager Plus facilitates integration with GoDaddy SSL certificate authority (CA) and helps you achieve an end-to-end life cycle management of GoDaddy certificates installed on your domains from a single interface. This document discusses the steps you should follow to establish connection with your GoDaddy account, acquire, deploy, renew and perform all certificate management related operations from Key Manager Plus.
Before you proceed with the integration, complete the following step as a prerequisite:
Prerequisite
Add the following base URL and port as an exception in your firewall or proxy to ensure Key Manager Plus is able to connect to GoDaddy's CA Services.
URL: https://api.godaddy.com/
Port: 443
Follow the step-by-step procedure below to integrate GoDaddy with Key Manager Plus:
1. Configure GoDaddy API Credentials in Key Manager Plus
To begin managing lifecycles of certificates issued by GoDaddy CA from Key Manager Plus, you have to initially set up connection with your GoDaddy account by providing your API key details generated from the website. To generate your API key,
- Go to the GoDaddy developer portal and switch to the API keys tab.
- Log in to your GoDaddy account if you aren't logged in already.
- Once you log in, you'll be redirected to the API keys page where you can create and manage API keys. Click Create New API key.
- Provide your application name, choose the environment type as Production and click Next.
- The API key and its secret is generated. Copy and save the secret in a secure location, for it will not be displayed again.
- Now, go to Key Manager Plus and navigate to Integrations >> Public CA Integrations >> GoDaddy.
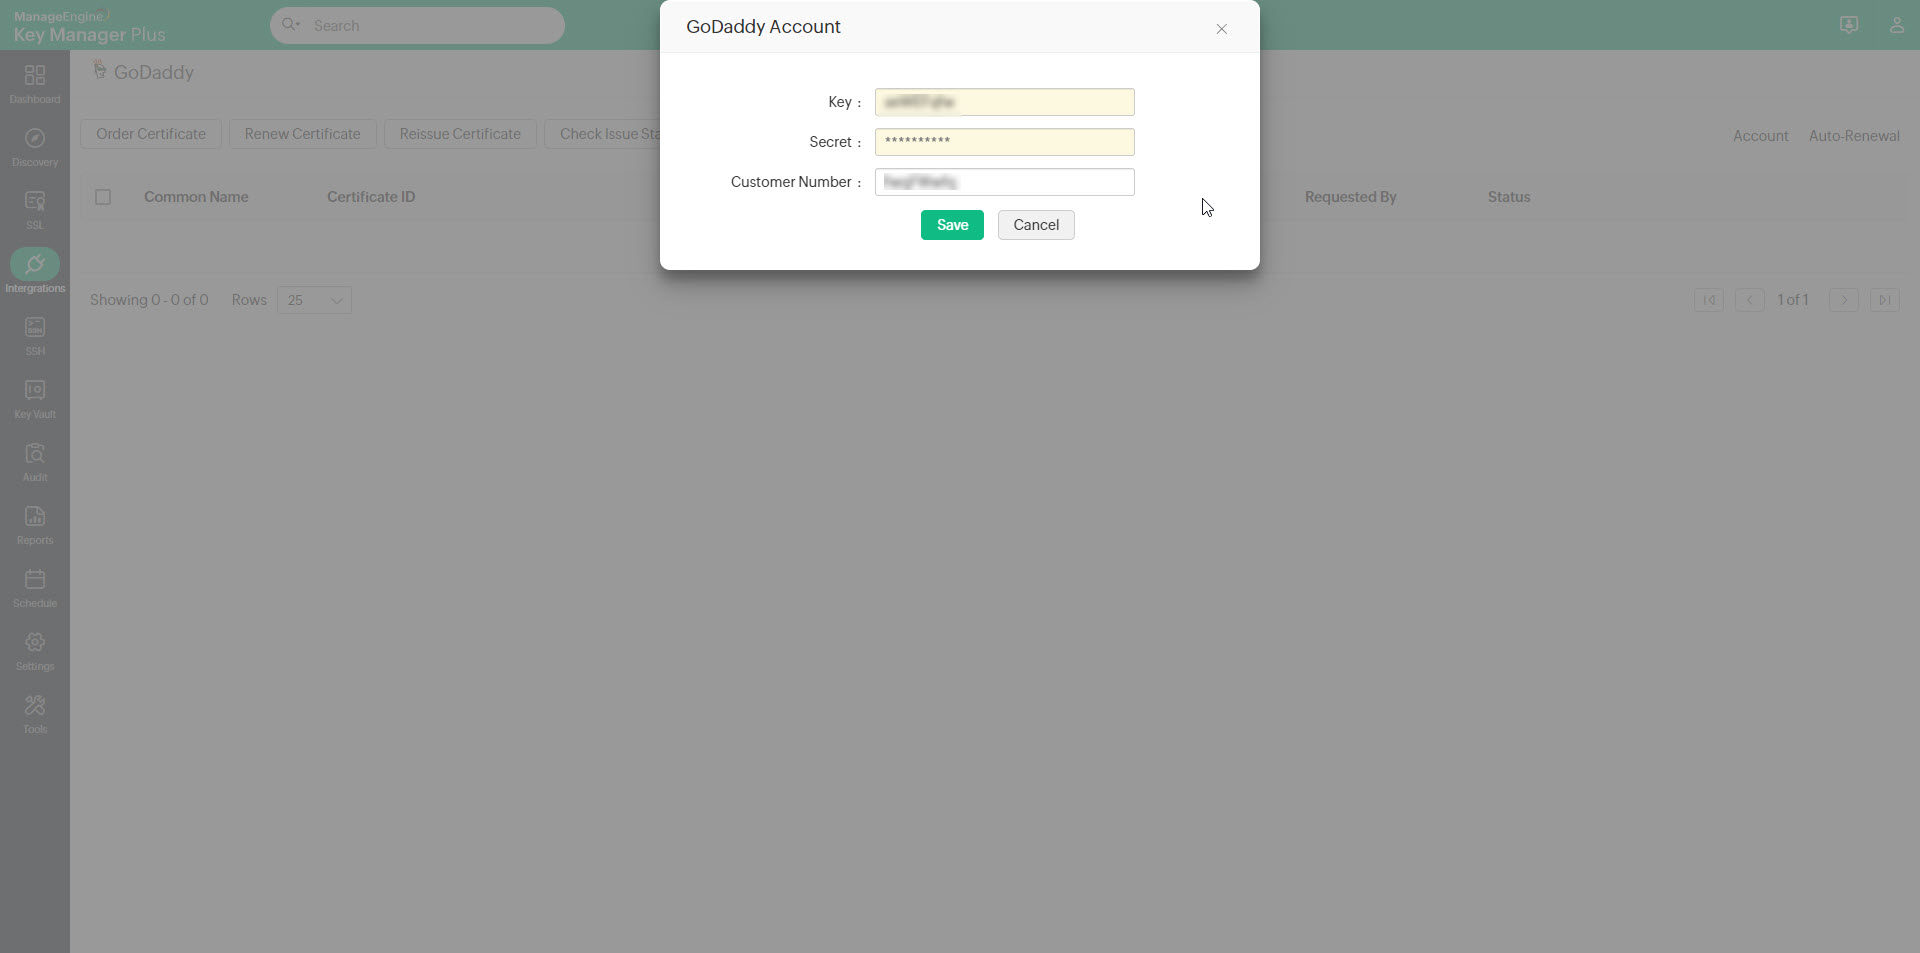
- You'll be prompted to provide your API key details. Provide the API key and secret in the pop up that appears and click Save.
- The key details are stored in Key Manager Plus. The account configuration is a one-time process so you needn't provide your API details every time you place a certificate order.
2. Place a Certificate Order
After setting up the account, you need to acquire SSL certificates from GoDaddy before placing a certificate order from Key Manager Plus.
- To buy SSL from GoDaddy, go to the GoDaddy web security portal and buy the certificates of your choice from SSL Certificates. This will just add the desired SSL product to your GoDaddy account as a credit; the SSL certificates won't be available for use.
- After purchasing the SSL certificates, you can set up the certificates in Key Manager Plus by creating a certificate request, and importing the certificates into Key Manager Plus.
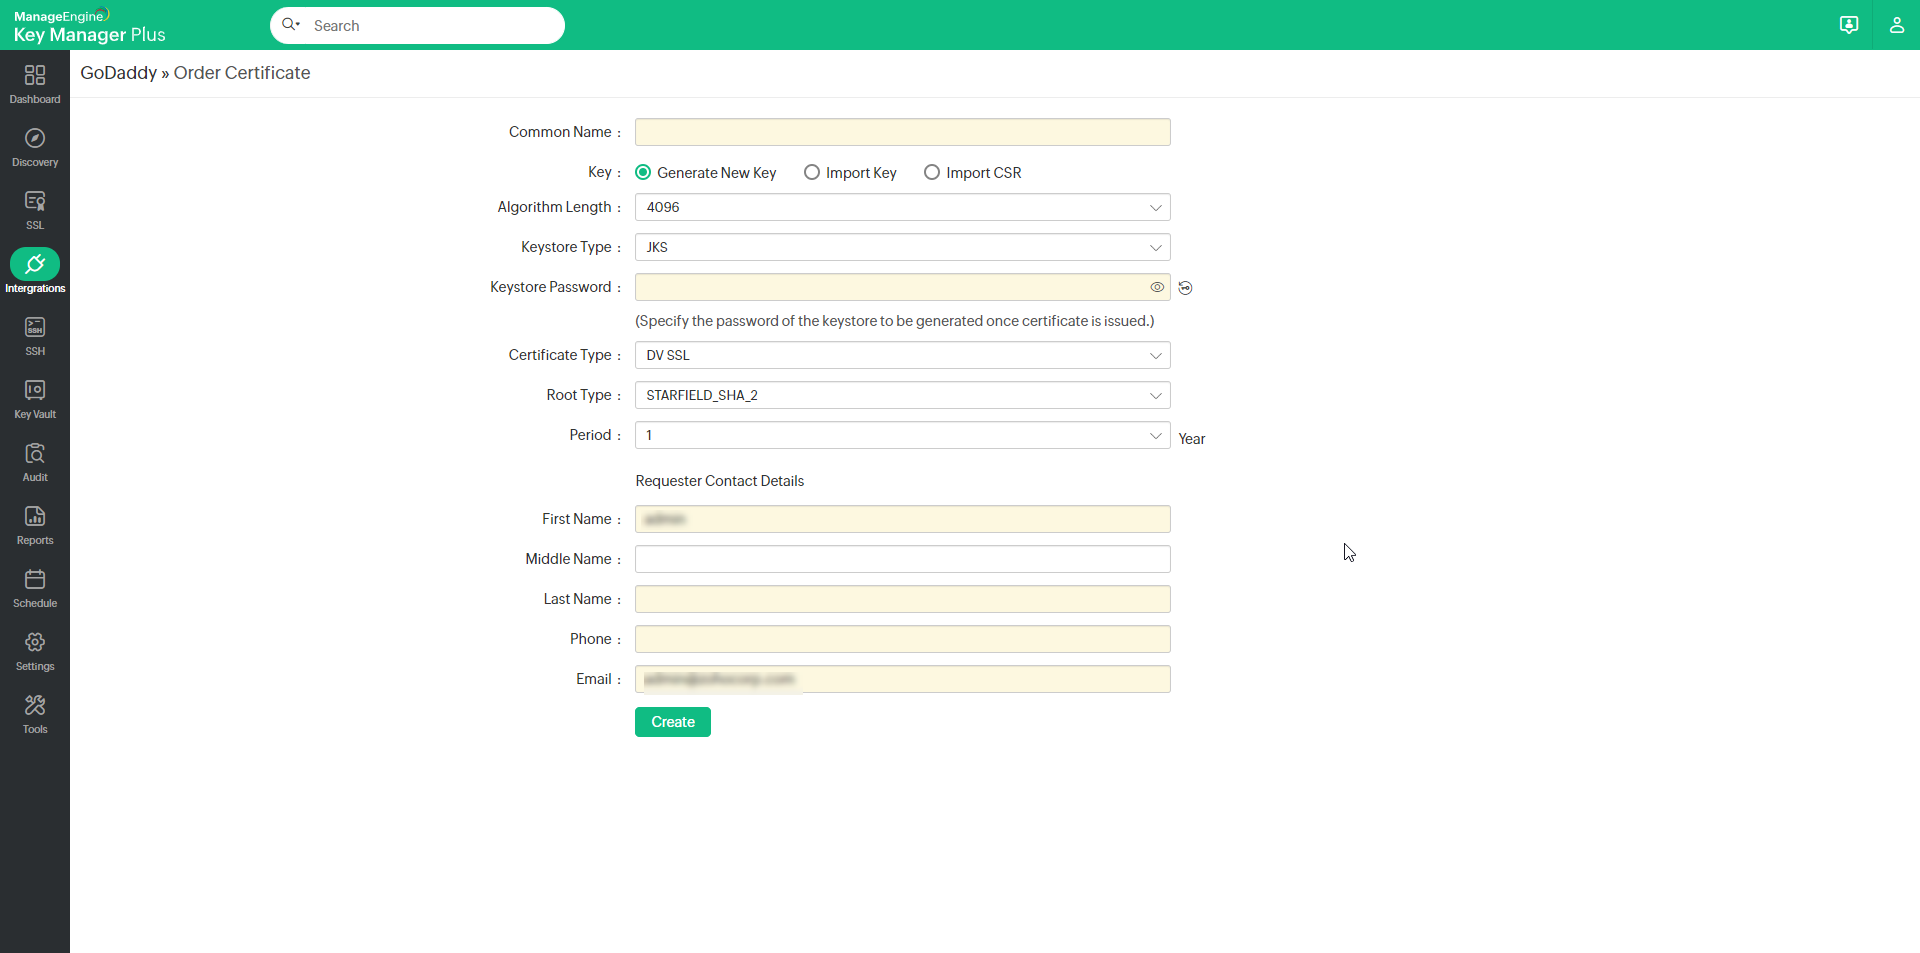
- To do so, navigate to Integrations >> Public CA Integrations >> GoDaddy, and click on Certificate Order.
- Fill in the required details and click Create.
- Key Manager Plus also provides options to import an already existing private key / CSR file when placing certificate orders.
Note: When raising certificate requests from Key Manager Plus, you can only raise as many requests as the number of set-up certificates purchased from GoDaddy.
3. Domain Validation through Challenge Verification
Once you have placed the certificate order, you need to validate your ownership of the domain by fulfilling certain challenges put forth by GoDaddy CA. The challenge IDs are mailed to requester's as well as the domain administrator's email ids. To prove your ownership of the domain and acquire the SSL certificate,
- Open the email from GoDaddy consisting of domain verification challenge details.
- GoDaddy offers two methods to prove your domain ownership, out of which you've to choose one based on the type of your certificate request and your environment.
HTML page- Upload an HTML page with the challenge ID provided in your domain server, to a distinct directory of the website for the common name in your request.
( Note: This validation method is not available for Wildcard SSL certificate requests. )
- DNS record - Create a TXT record with the challenge ID in your domain name's zone (DNS) file.
- After making the above updates, click on the verification link sent to your email ids. Your domain is validated and on successful validation, GoDaddy certificate authority issues the certificate.
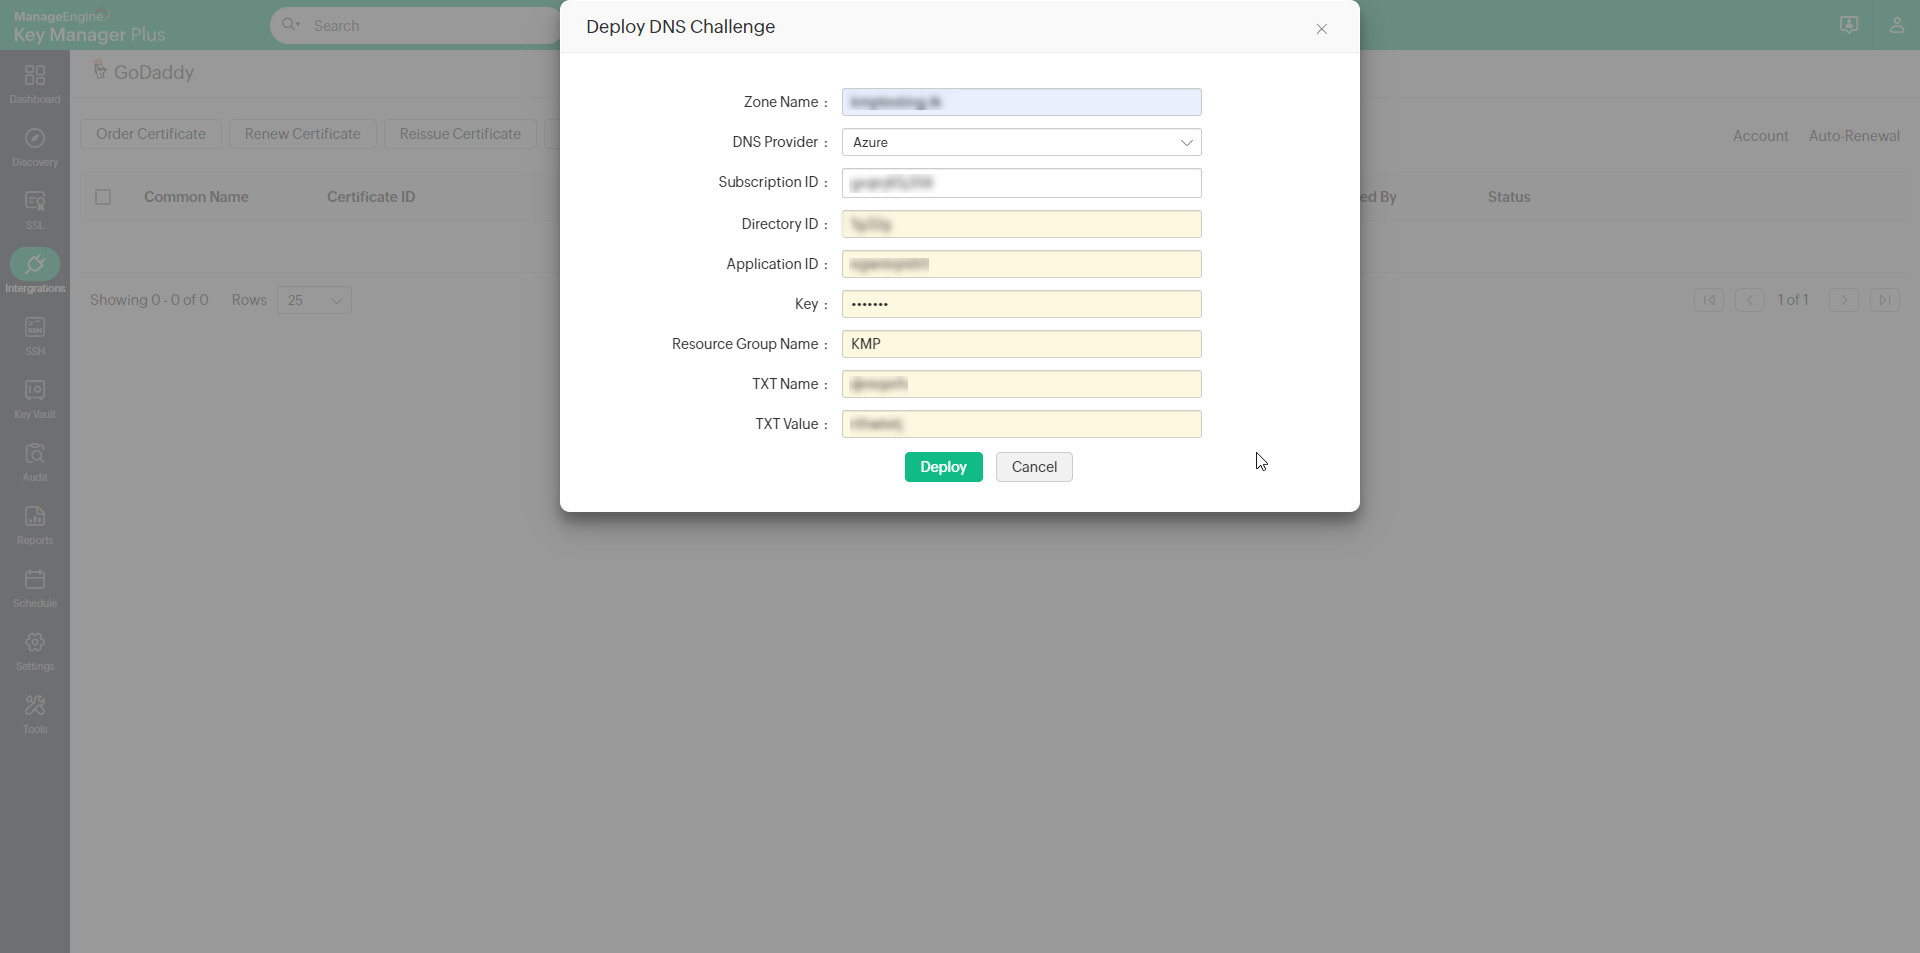
- For domain validation through DNS based challenge verification, you can configure your DNS details (supported for Azure DNS, Cloudflare DNS, Amazon Route 53, RFC2136 Update, GoDaddy DNS, ClouDNS, and DNS Made Easy) and deploy the challenge ID directly from Key Manager Plus using the Deploy DNS Challenge option.
Click here for a more detailed explanation of the instructions for domain control challenge verification.
4. Certificate Issue
After performing the operations on your domain server and submitting for domain validation, navigate to Key Manager Plus server and click Check certificate availability icon beside the corresponding certificate request. If your domain verification is successful, GoDaddy issues the certificate which is fetched by Key Manager Plus and is added to the centralized certificate repository.
Note: The certificate is automatically added to Key Manager Plus repository, only if you have the required license count. If not, renew your Key Manager Plus license and then attempt to add the issued certificate to the repository.
5. Renew, Reissue, Revoke, Delete and Cancel Certificate Orders
You can renew, reissue, revoke, delete or cancel certificate orders from Key Manager Plus.
5.1 Manual Certificate Renewal
To renew the desired certificates manually, perform the steps that follow:
- Navigate to Integrations >> Public CA Integrations >> GoDaddy.
- Select the required certificate and click Renew Certificate from the top menu.
- You have to prove your ownership of the domain before every renewal by fulfilling the challenges put forth by GoDaddy CA. The challenges are mailed to the requester's and domain administrator's email IDs.
- On successful validation, certificate is issued and is automatically added to Key Manager Plus certificate repository.
5.2 Automated Certificate Renewal
To configure the auto-renewal process for the desired certificates, perform the steps that follow:
- Navigate to Integrations >> Public CA Integrations >> GoDaddy and click Auto-Renewal from the top pane.
- From the page that appears, enable the auto-renewal process.
- Enter the number of days before expiry in which the auto-renewal process is to be carried out.
- Select the desired certificates that are to be auto-renewed.
- Select the Algorithm Length, KeyStore Type, Root Type, and Period for the newly renewed certificate and click Save.
Based on the configured details, the auto-renewal process will be carried out. Click the Auto-Renewal Audit to get insights about the certificates renewed through the auto-renewal process.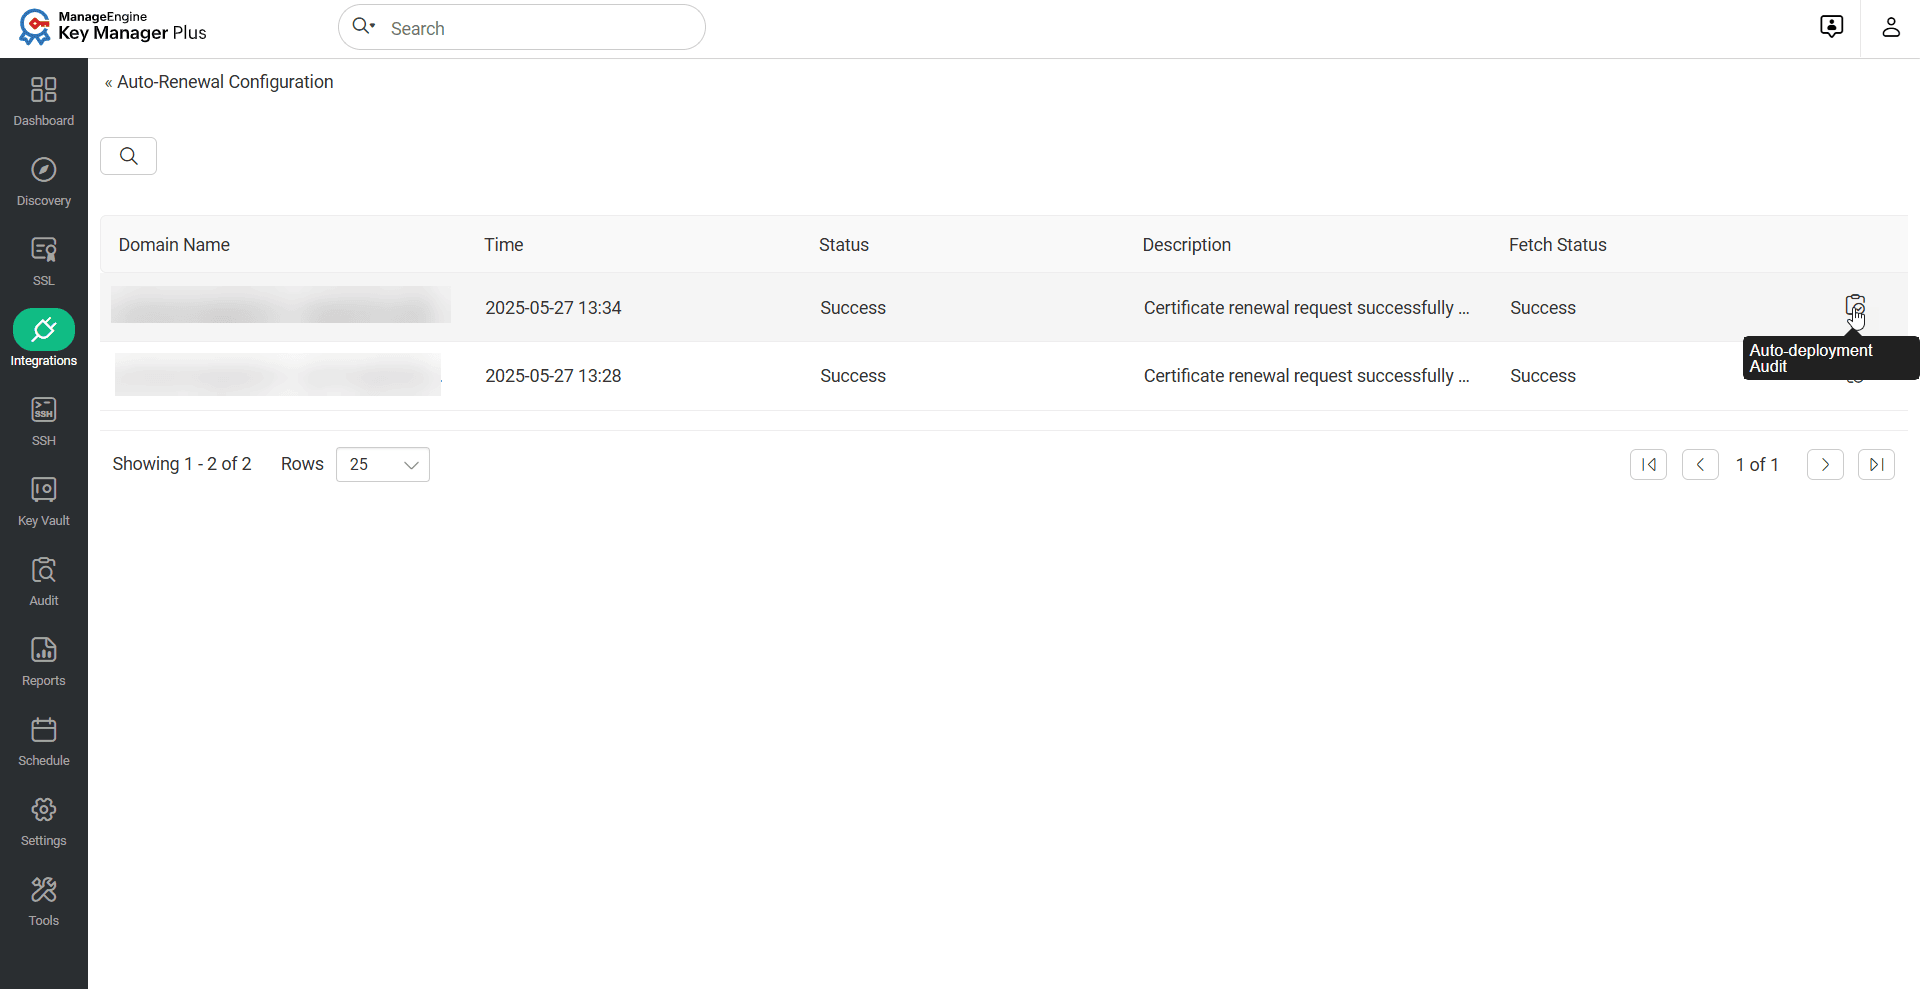
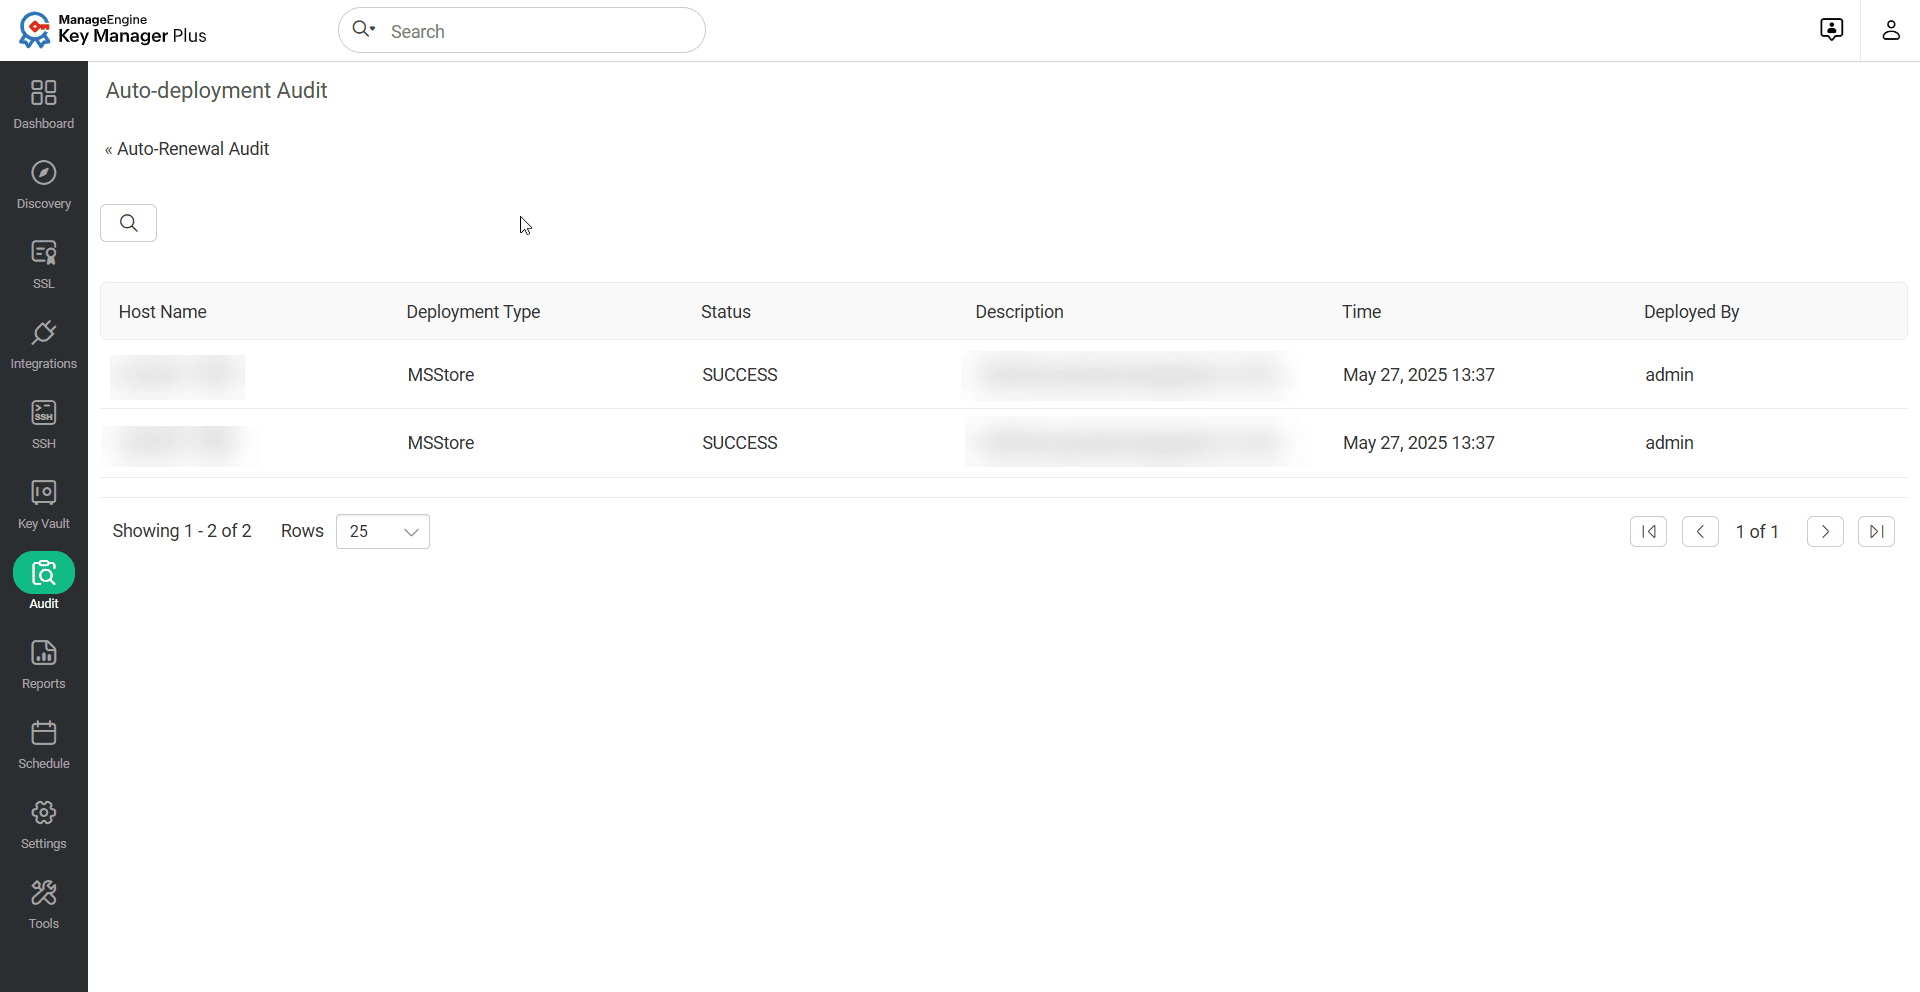
If a certificate has already been deployed to an endpoint or if the deployment has been preconfigured using any of the supported deployment methods, and the Deploy Certificate on Auto-Renewal option is enabled under the Edit Certificate window, Key Manager Plus will automatically deploy the renewed certificate to the respective endpoint upon successful auto-renewal. This auto-deployment follows the system-defined schedule interval, and you can monitor the deployment status for each server in the Auto-Deployment Audit section.
5.3 Reissue Certificate
To reissue the required certificates, do the steps that follow:
- Navigate to Integrations >> Public CA Integrations >> GoDaddy.
- Select the required certificate and click Reissue Certificate from the top menu.
- Here again, you have to prove your ownership of the domain before every fulfilling the challenges put forth by GoDaddy CA. The challenges are mailed to the requester's and domain administrator's email IDs.
- On successful validation, the certificate is reissued and is automatically added to Key Manager Plus certificate repository.
5.4 Revoke Certificate
To revoke the certificates, do the steps that follow:
- Navigate to Integrations >> Public CA Integrations >> GoDaddy.
- Select the required certificate and click Revoke Certificate from the More top menu.
- The certificate is revoked. Switch to SSL >> Certificates tab and delete the certificate to remove it from Key Manager Plus' repository.
Note: Revoking a certificate will remove the certificate as well as the corresponding SSL bought from GoDaddy website, and you won't be able to request another certificate for the same SSL. So, it is advised to use 'Reissue' instead of 'Revoke'.
5.5 Delete Certificates
To delete the certificates, do the steps that follow:
- Navigate to Integrations >> Public CA Integrations >> GoDaddy tab.
- Select the required certificate and click Delete from the More top menu.
- The certificate request is deleted from Key Manager Plus.
5.6 Cancel Certificate Order
To cancel the certificate order, do the steps that follow:
- Navigate to Integrations >> Public CA Integrations >> GoDaddy tab.
- Select the required certificate and click Cancel Order from the More top menu.
- The certificate order is cancelled.
6. Import Existing Certificates
Key Manager Plus allows you to import existing certificates from GoDaddy which you may have ordered before integrating with Key Manager Plus. Using this option, you can import previous GoDaddy certificates into the SSL >> Certificates tab and manage them from Key Manager Plus.
- Navigate to Integrations >> Public CA Integrations >> GoDaddy tab.
- Click More >> Import Existing Certificates. In the pop up, you can choose to exclude the expired and revoked certificates.
- Click Import.
The imported certificates will be added to the SSL >> Certificates tab. Please note that the these certificates will not be present under the GoDaddy certificates tab.
7. Export Certificates
Key Manager Plus allows you to export existing certificates issued by GoDaddy, as well as export the private keys associated with GoDaddy certificate orders created within Key Manager Plus. Follow these steps to export certificates and private keys:
- Navigate to Integrations >> Public CA Integrations >> GoDaddy.
- To export a certificate, click the Export Certificate button beside the desired certificate. The certificate will be downloaded to your machine in .cer format.
- To export the private key associated with a certificate, click the Export Private Key button beside the desired certificate whose private key you wish to export. The private key will be downloaded to your machine in .key format.