Enrollment
Once you've signed up for Identity360 and log in for the first time, you have to enroll for the MFA methods configured by your administrator. Identity360 offers the following MFA methods:
By default, you are automatically enrolled to receive email verification codes using your primary email address. Depending on the administrator policy, you can enroll in other MFA methods as well.
Enrollment process
Enrollment can work in two ways:
- Optional enrollment: Your admin can configure MFA methods and lets you choose to enroll in them or not.
- Enforced enrollment: You are mandated to enroll in specific MFA methods after completing authentication.
Optional enrollment
Here are the optional enrollment steps for each MFA method supported by Identity360:
Email Verification
In addition to your primary email address, you may have the option to enroll a secondary email address to receive email verification code. To do so:
- Log in to Identity360. Go to the MFA Enrollment tab.
- Under Enrolled MFA Methods > Email Verification > select + Add Email Address.
- In the Add Secondary Email Address pop-up that appears, enter the secondary email address you wish to use for MFA in the Enter email address field and click Send Code.
- Enter the verification code sent to your secondary email in the Enter Code field and click Verify Code.
- If successful, your secondary email address will be added under the Email Verification section.
Google Authenticator
Here's how to enroll for Google Authenticator
- Open Identity360 and go to the MFA Enrollment tab.
- Navigate to Set up Optional MFA Methods > Google Authenticator.
- Click Setup to open the Google Authenticator pop-up.
- Install the Google Authenticator app on your mobile device.
- Open the app, and click Add a code or + to add your account. Select Scan a QR code.
- Using the app, scan the QR code displayed on the enrollment page.
Note: If you're unable to scan the code, click Unable to scan the QR code? and follow this process.
- A TOTP will be generated in the app. Enter this in the field provided in the pop-up and click Verify Code.
- You are now successfully enrolled in Google Authenticator.
Microsoft Authenticator
Here's how to enroll for Microsoft Authenticator
- Open Identity360 and go to the MFA Enrollment tab.
- Navigate to Set up Optional MFA Methods > Microsoft Authenticator..
- Click Setup to open the Microsoft Authenticator pop-up.
- Install the Microsoft Authenticator app on your mobile device.
- Open the app, and go to Add Account > Other account (Google, Facebook, etc,).
- Using the app, scan the QR code displayed on the enrollment page.
Note: If you're unable to scan the code, click Unable to scan the QR code? and follow this process.
- A TOTP will be generated in the app. Enter this in the field provided in the pop-up and click Verify Code.
- You are now successfully enrolled in Microsoft Authenticator.
Zoho OneAuth's time-based one time (TOTP) passcode
Identity360 supports Zoho OneAuth app's TOTP authentication method. Here's how to enroll for it:
- Open Identity360 and go to the MFA Enrollment tab.
- Navigate to Set up Optional MFA Methods > Zoho OneAuth TOTP.
- Click Setup to open the Zoho OneAuth TOTP pop-up.
- Install the Zoho OneAuth app.
- Open the app. Go to Authenticator > OTP Authenticator.
- Click the + and select Scan the QR secret.
- Using the app, scan the QR code displayed on the enrollment page.
Note: If you're unable to scan the code, click Unable to scan the QR code? and follow this process.
- A TOTP will be generated in the app. Enter this in the field provided in the pop-up and click Verify Code.
- You are now successfully enrolled in Zoho OneAuth TOTPs.
Custom TOTP authenticator
You administrator can also choose to configure a custom TOTP authenticator for MFA. Here's how to enroll in this method:
- Open Identity360 and go to the MFA Enrollment tab.
- Go to Set up Optional MFA Methods and find your custom TOTP provider.
- Click Setup to open the custom TOTP authenticator's pop-up.
- Install and open the custom TOTP provider's app on your mobile device.
- Navigate to the section where you can add your account.
- Using the app, scan the QR code displayed on the enrollment page.
Note: If you're unable to scan the code, click Unable to scan the QR code? and follow this process.
- A TOTP will be generated in the app. Enter this in the field provided in the pop-up and click Verify Code.
- You are now successfully enrolled in your custom TOTP authenticator.
SMS Verification
If your admin added you to Identity360 with a pre-registered mobile number, it will be set as your primary mobile number, and you will be considered as enrolled for SMS verification. However, you can still enroll with a secondary mobile number based on your organization's policies to verify your identity in case you lose access to the primary mobile number.
If your admin added you to Identity360 without a pre-registered mobile number, you will need to enroll your mobile number based on your organization's policies.
Here's how to enroll for SMS Verification:
- Log in to Identity360. Go to the MFA Enrollment tab.
- Navigate to Set up Optional MFA Methods > SMS Verification.
- Click Set up to open the SMS Verification pop-up.
- Enter the mobile number where you wish to receive the verification code and click Send Code.
- Enter the verification code sent to your mobile number in the Enter Code field and click Verify Code.
- If successful, your mobile number will be added under the SMS Verification section.
- To add a secondary mobile number, navigate to Enrolled MFA Methods > SMS Verification > select + Add Mobile Number.
- In the Add Secondary Mobile Number pop-up that appears, enter the secondary mobile number you wish to use for MFA in the Enter Mobile Number field and click Send Code.
- Enter the verification code sent to your secondary mobile number in the Enter Code field and click Verify Code.
- If successful, your secondary mobile number will be added under the SMS Verification section.
Passkeys
Passkeys are a form of authentication that can be used to replace passwords. You can use in-built authenticators such as Windows Hello and Apple Touch or FaceID on your devices, or hardware security keys provided by your organization to securely authenticate your identity.
Prerequisites
- Passkey support requires compatible devices, OS, and browser versions. The latest devices and b rowsers support it. Check the list of supported devices here. If you are still facing any compatibility issues, please contact your administrator.
Here's how to enroll for passkeys:
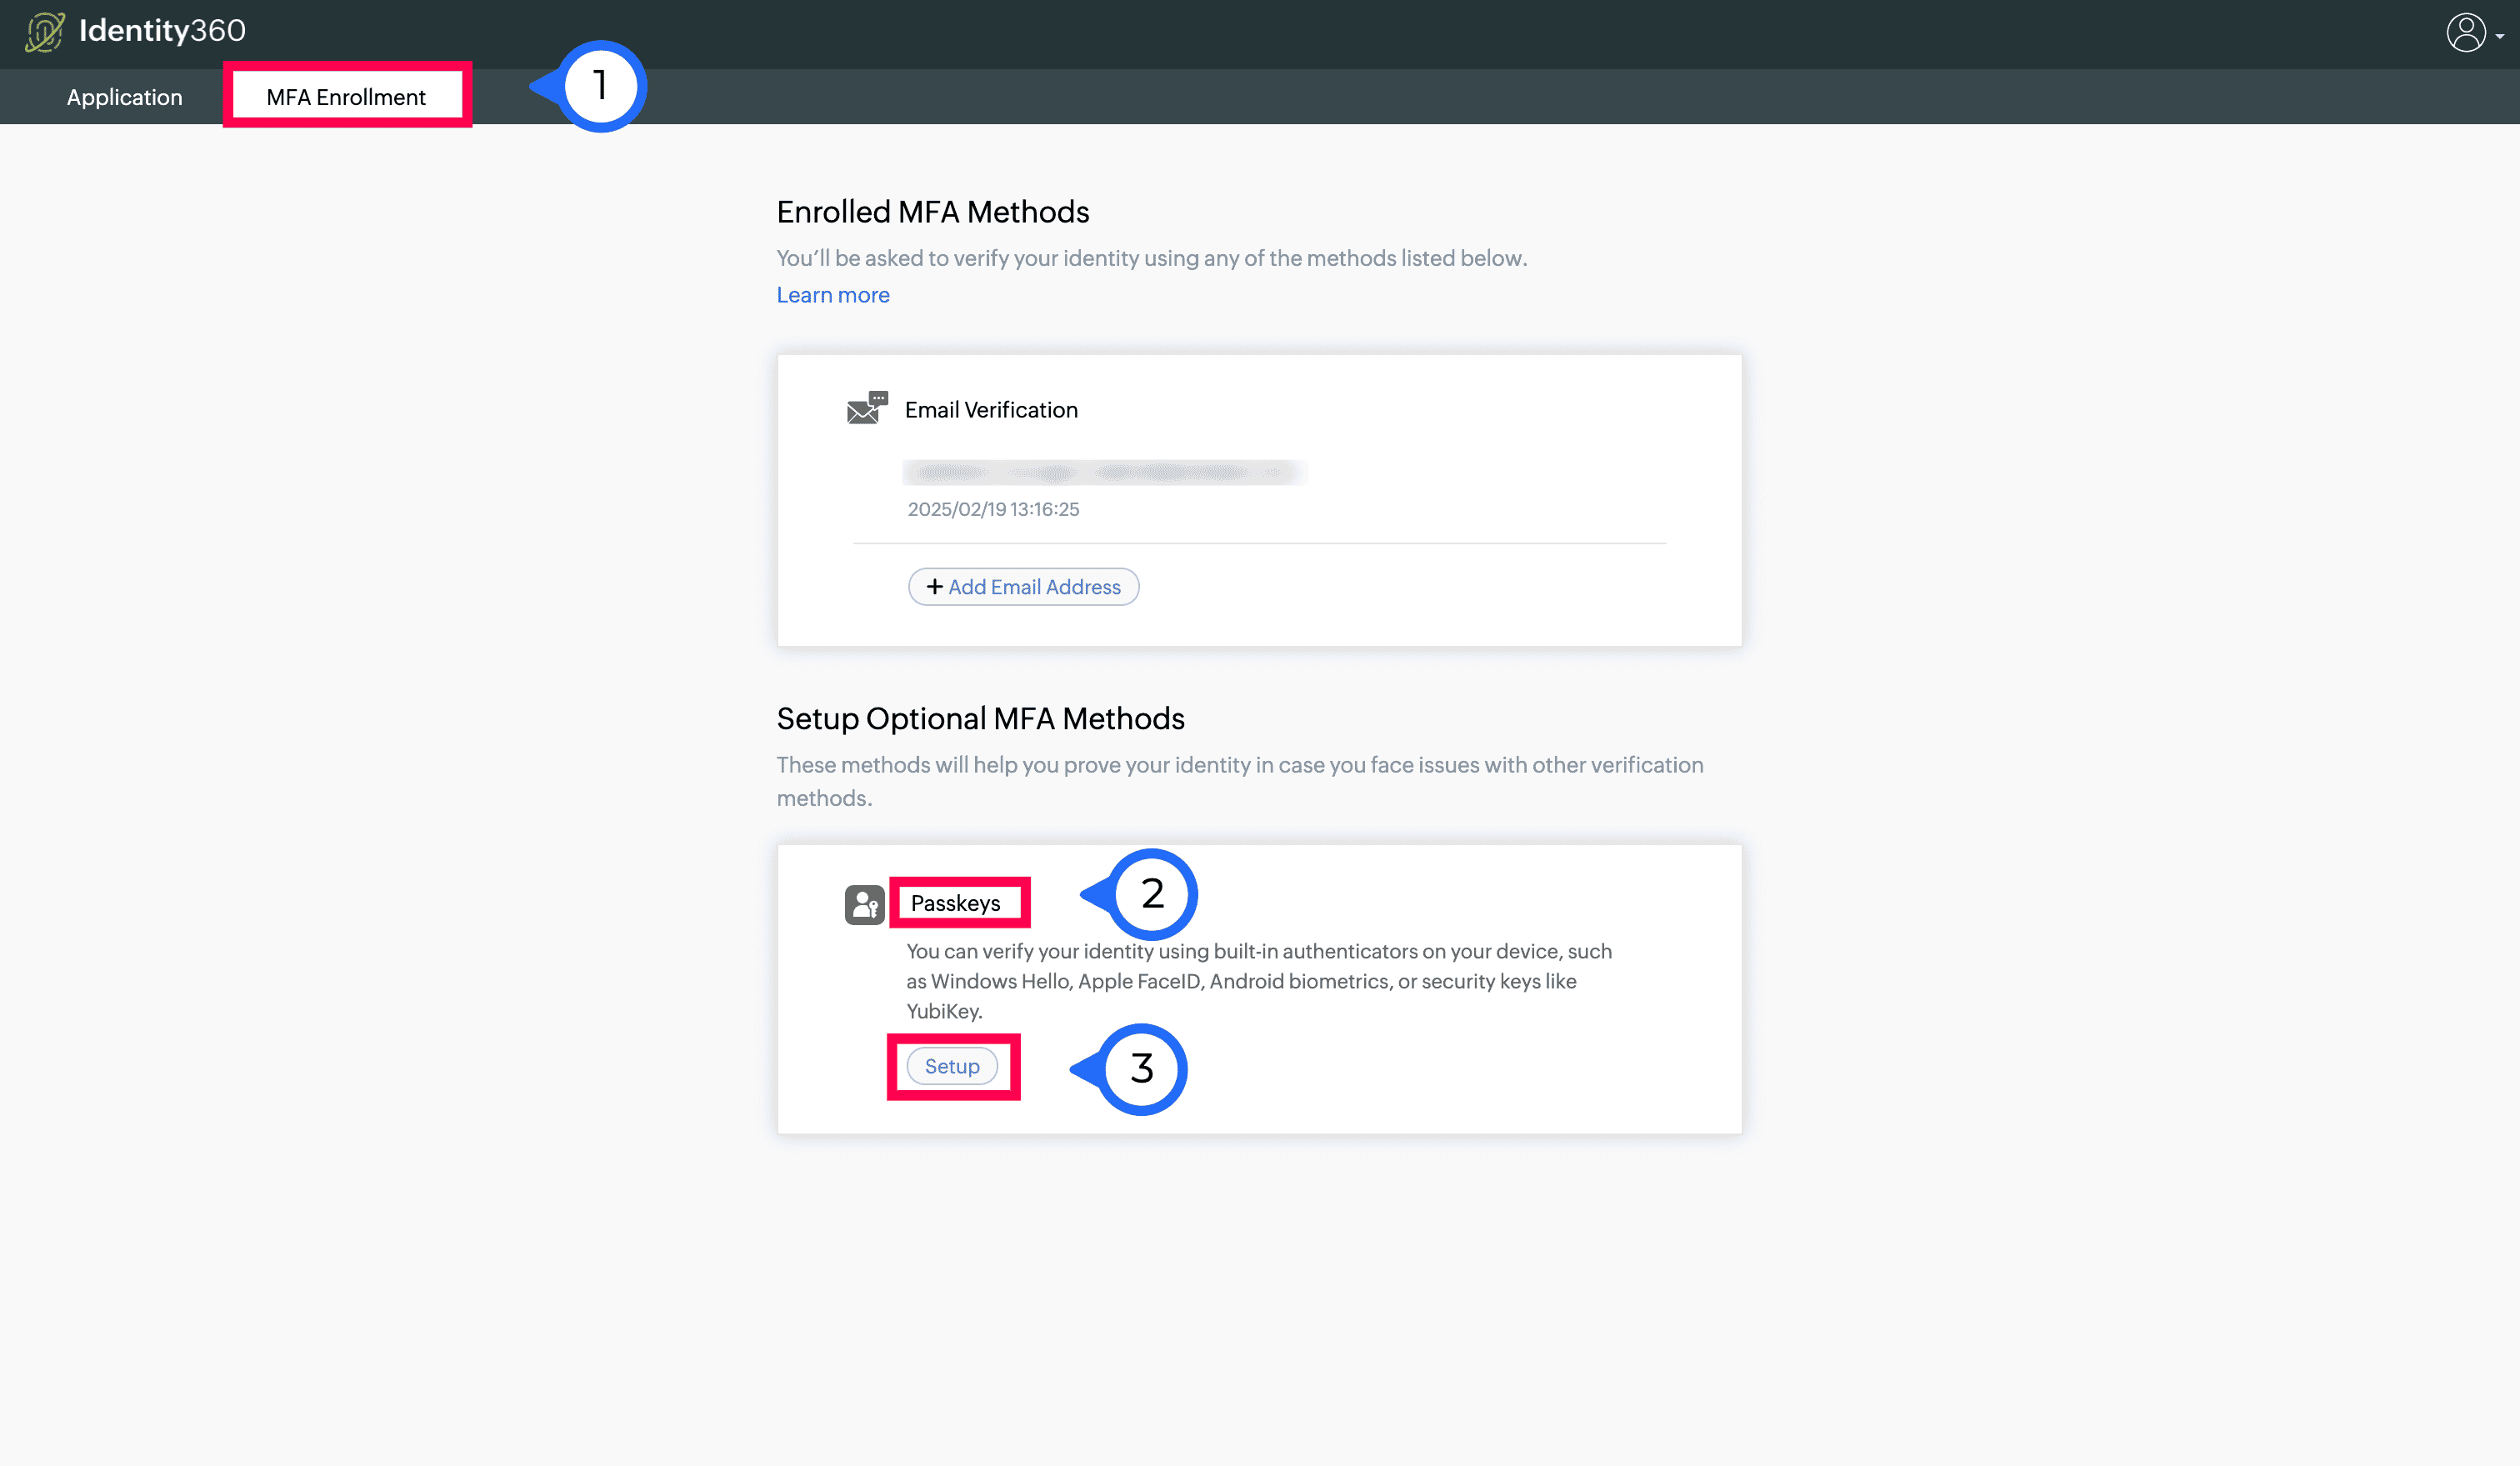
- Log in to Identity360. Go to the MFA Enrollment tab.
- Navigate to Set up Optional MFA Methods > Passkeys.
- Click Set up to open the Passkeys pop-up.
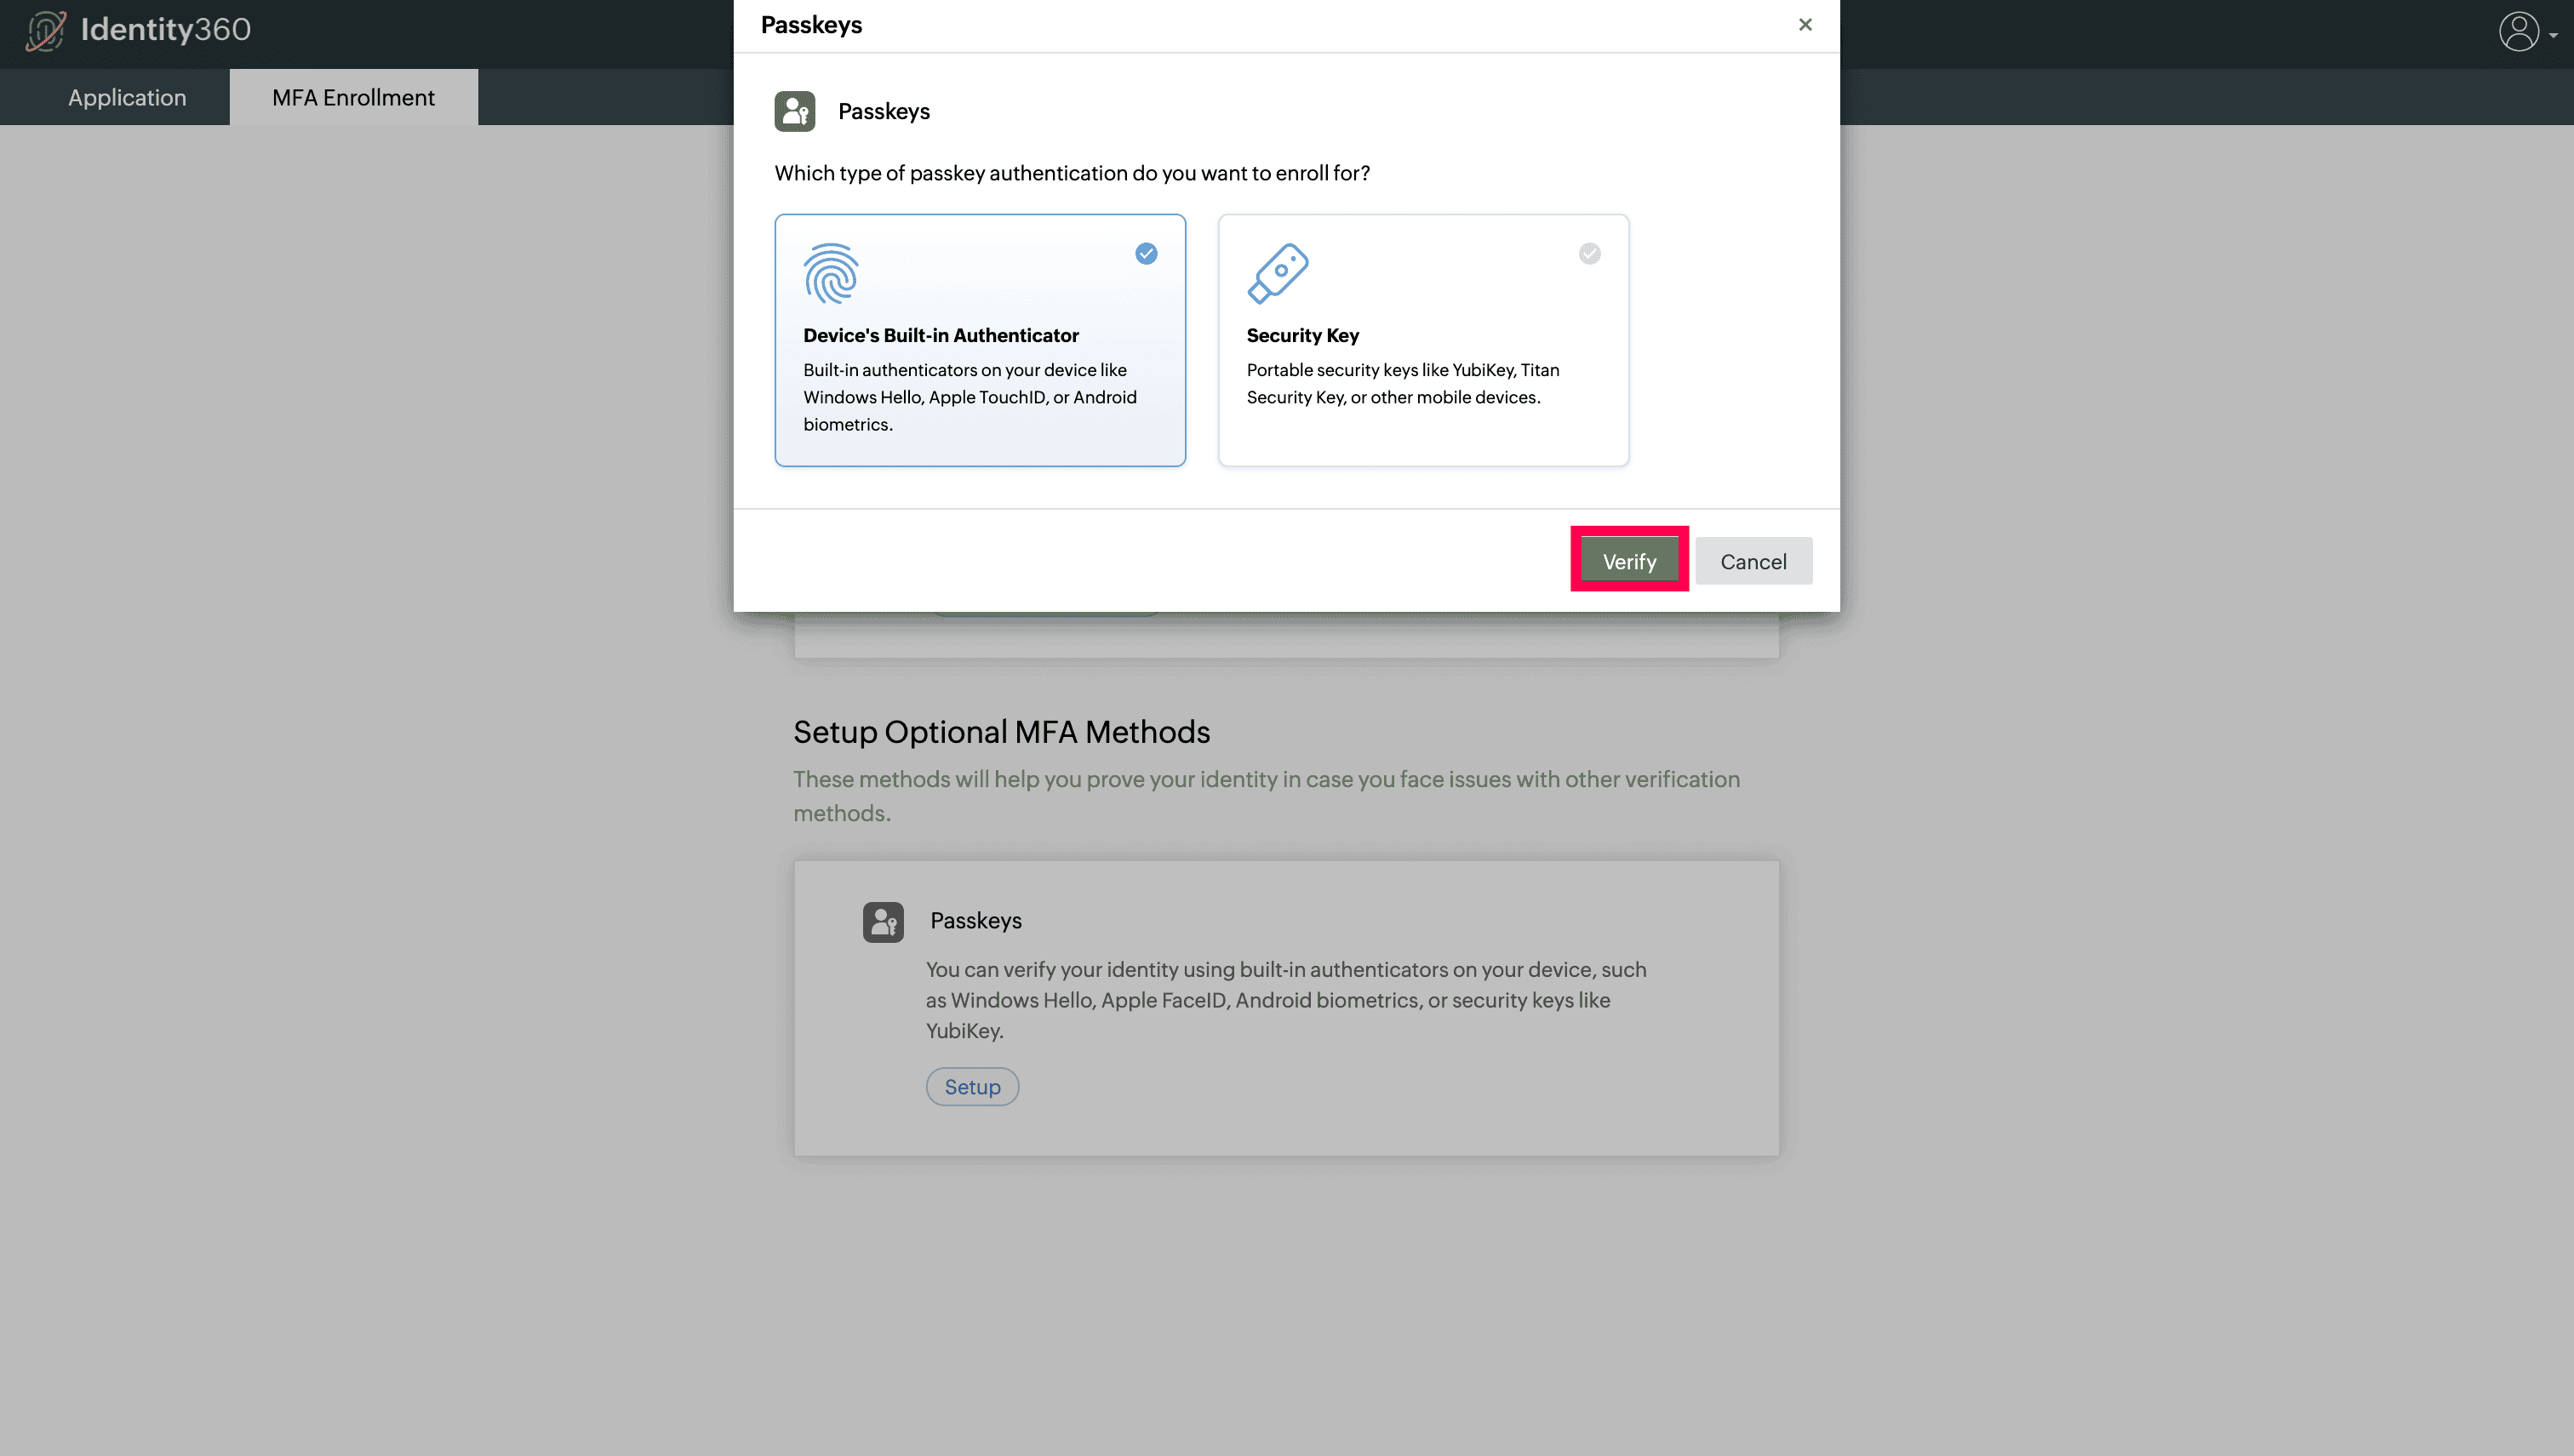
- Identity360 provides two types of passkeys:
- Device’s Built-in Authenticator (Platform Authenticator): Your device will prompt you to verify your identity using its built-in authentication method, such as Face ID, Touch ID, or PIN.
- Security Key (Roaming Authenticator): Your security key will prompt you to verify your identity by entering a PIN or scanning your fingerprint using the sensor. If you want to enroll a smartphone or tablet, scan the QR code displayed on the screen using your device to establish a secure connection via Bluetooth.
- Your available passkey options will depend on the authentication settings configured by your admin.
- Choose a passkey you wish to authenticate with.
- Click Verify to proceed.
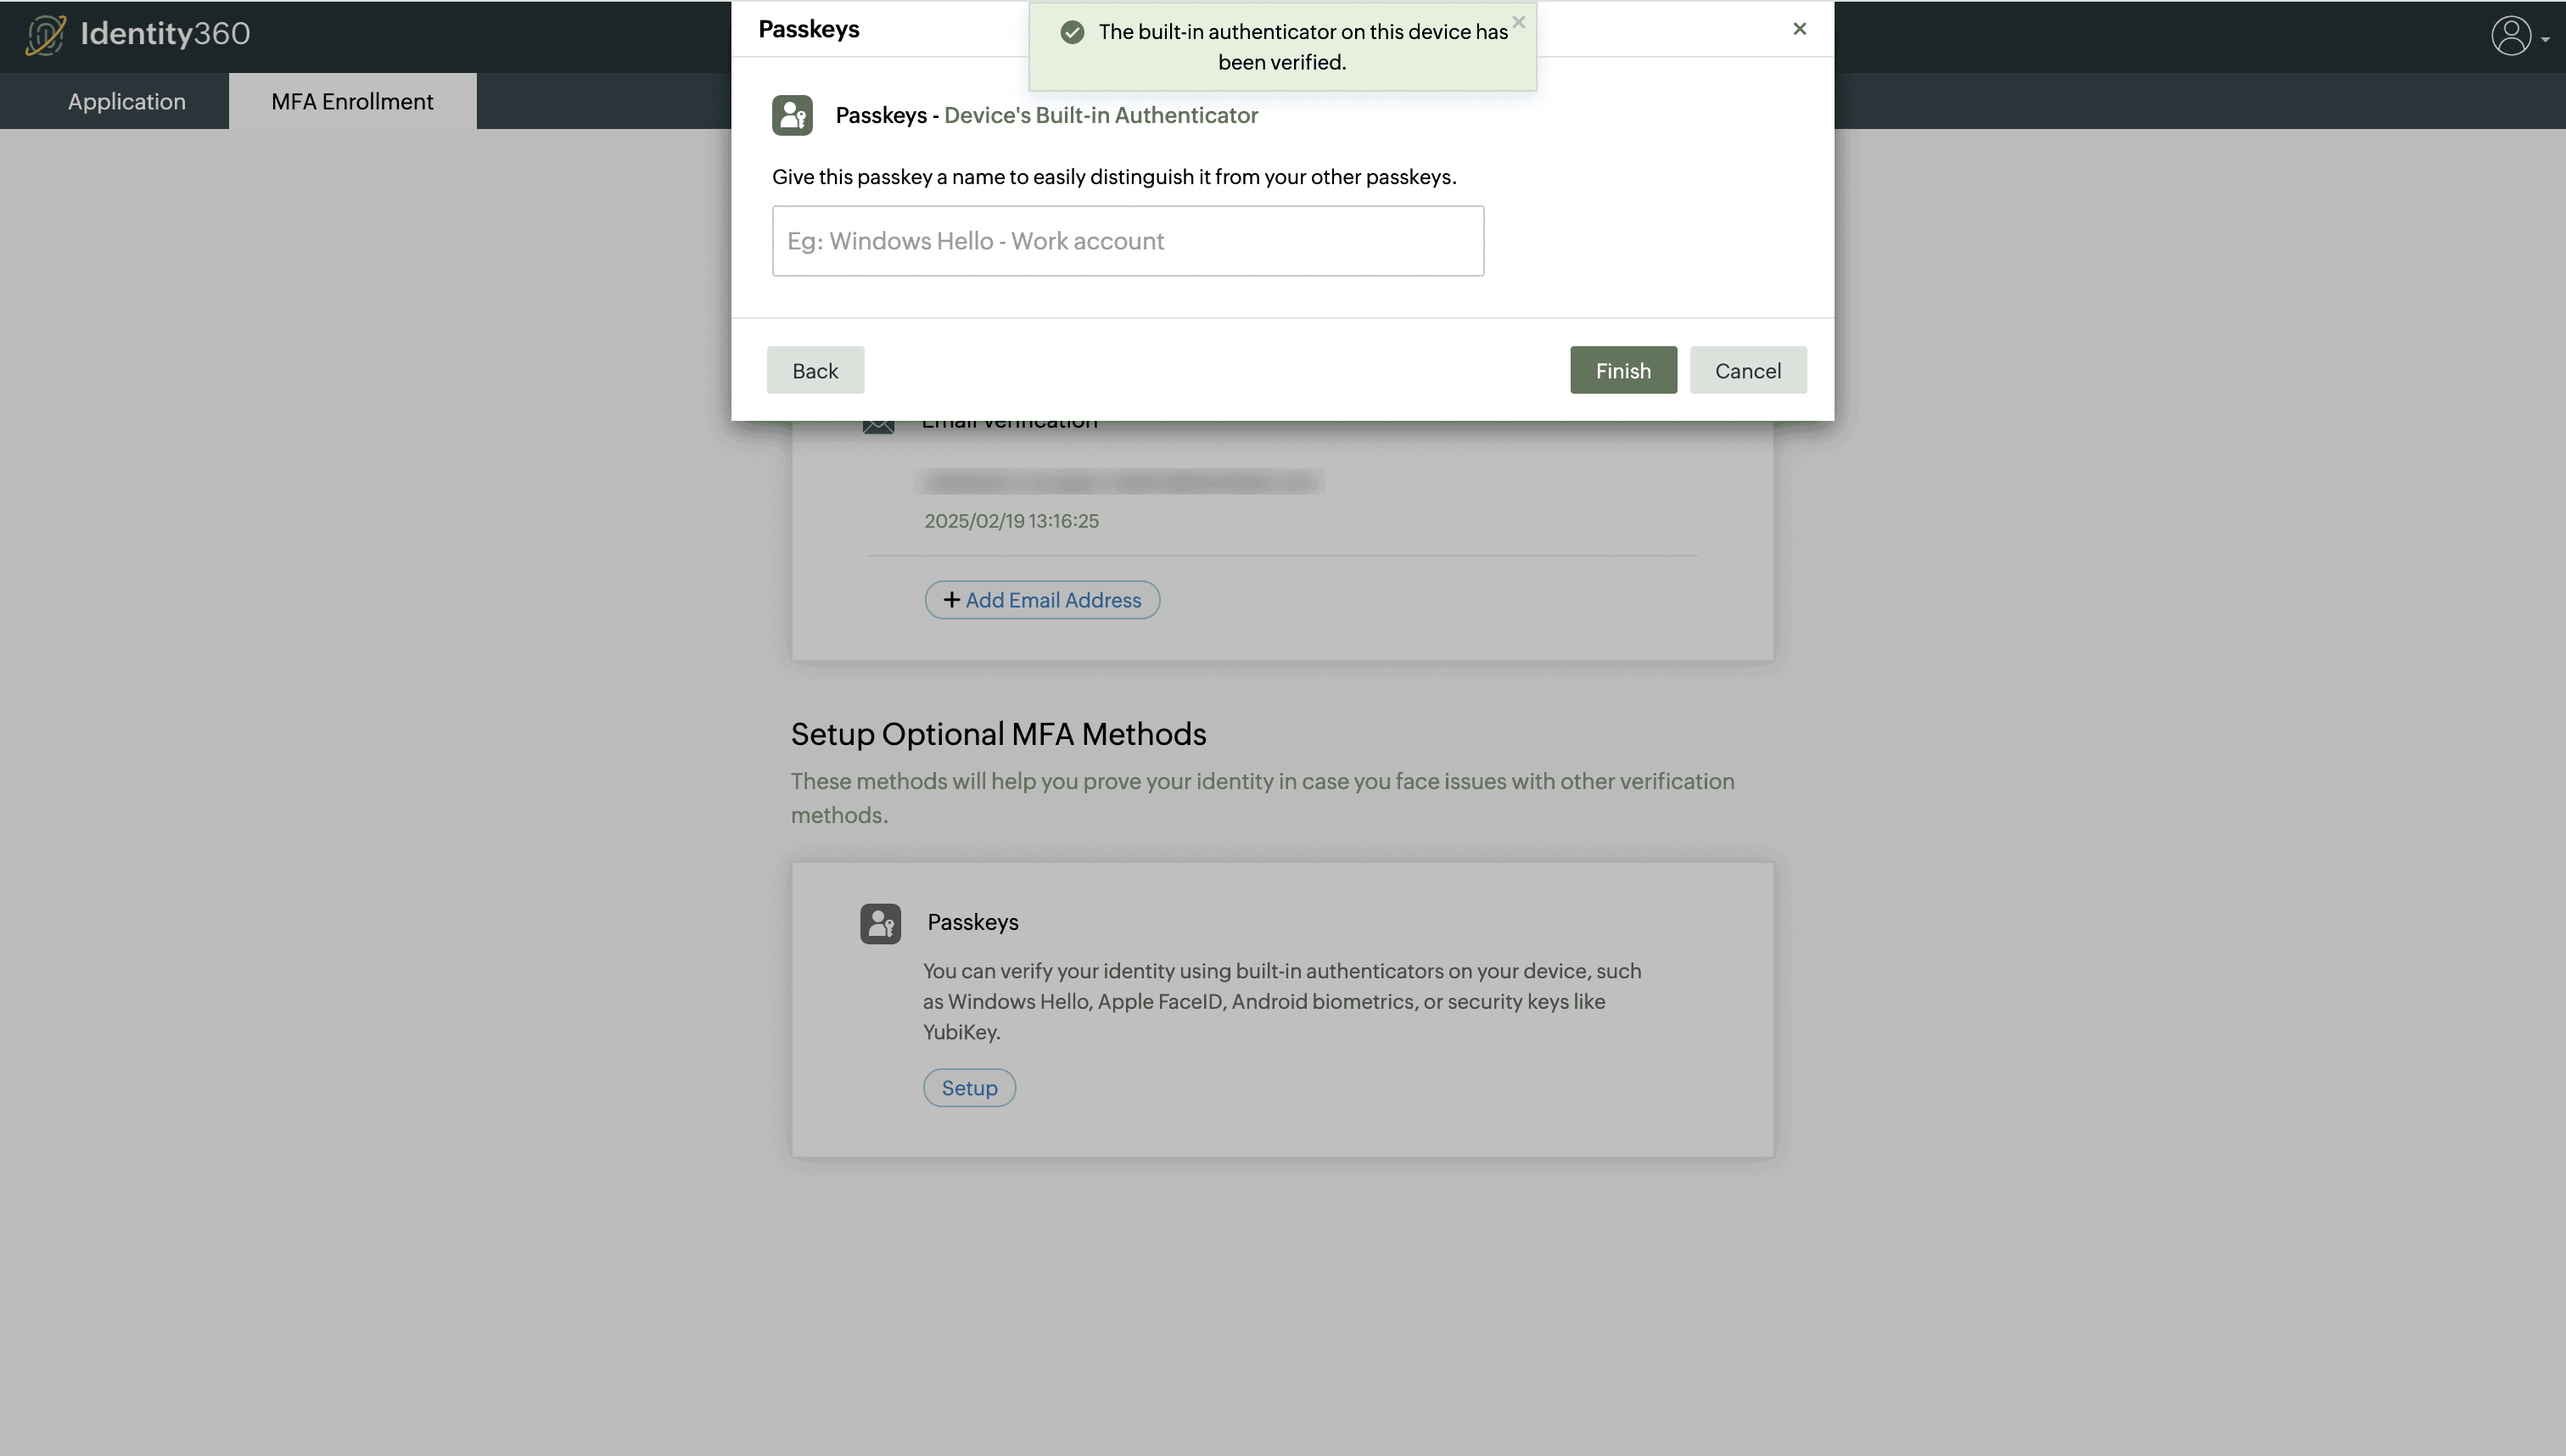
- Once your identity is verified, you can name your passkey and complete your MFA enrollment.
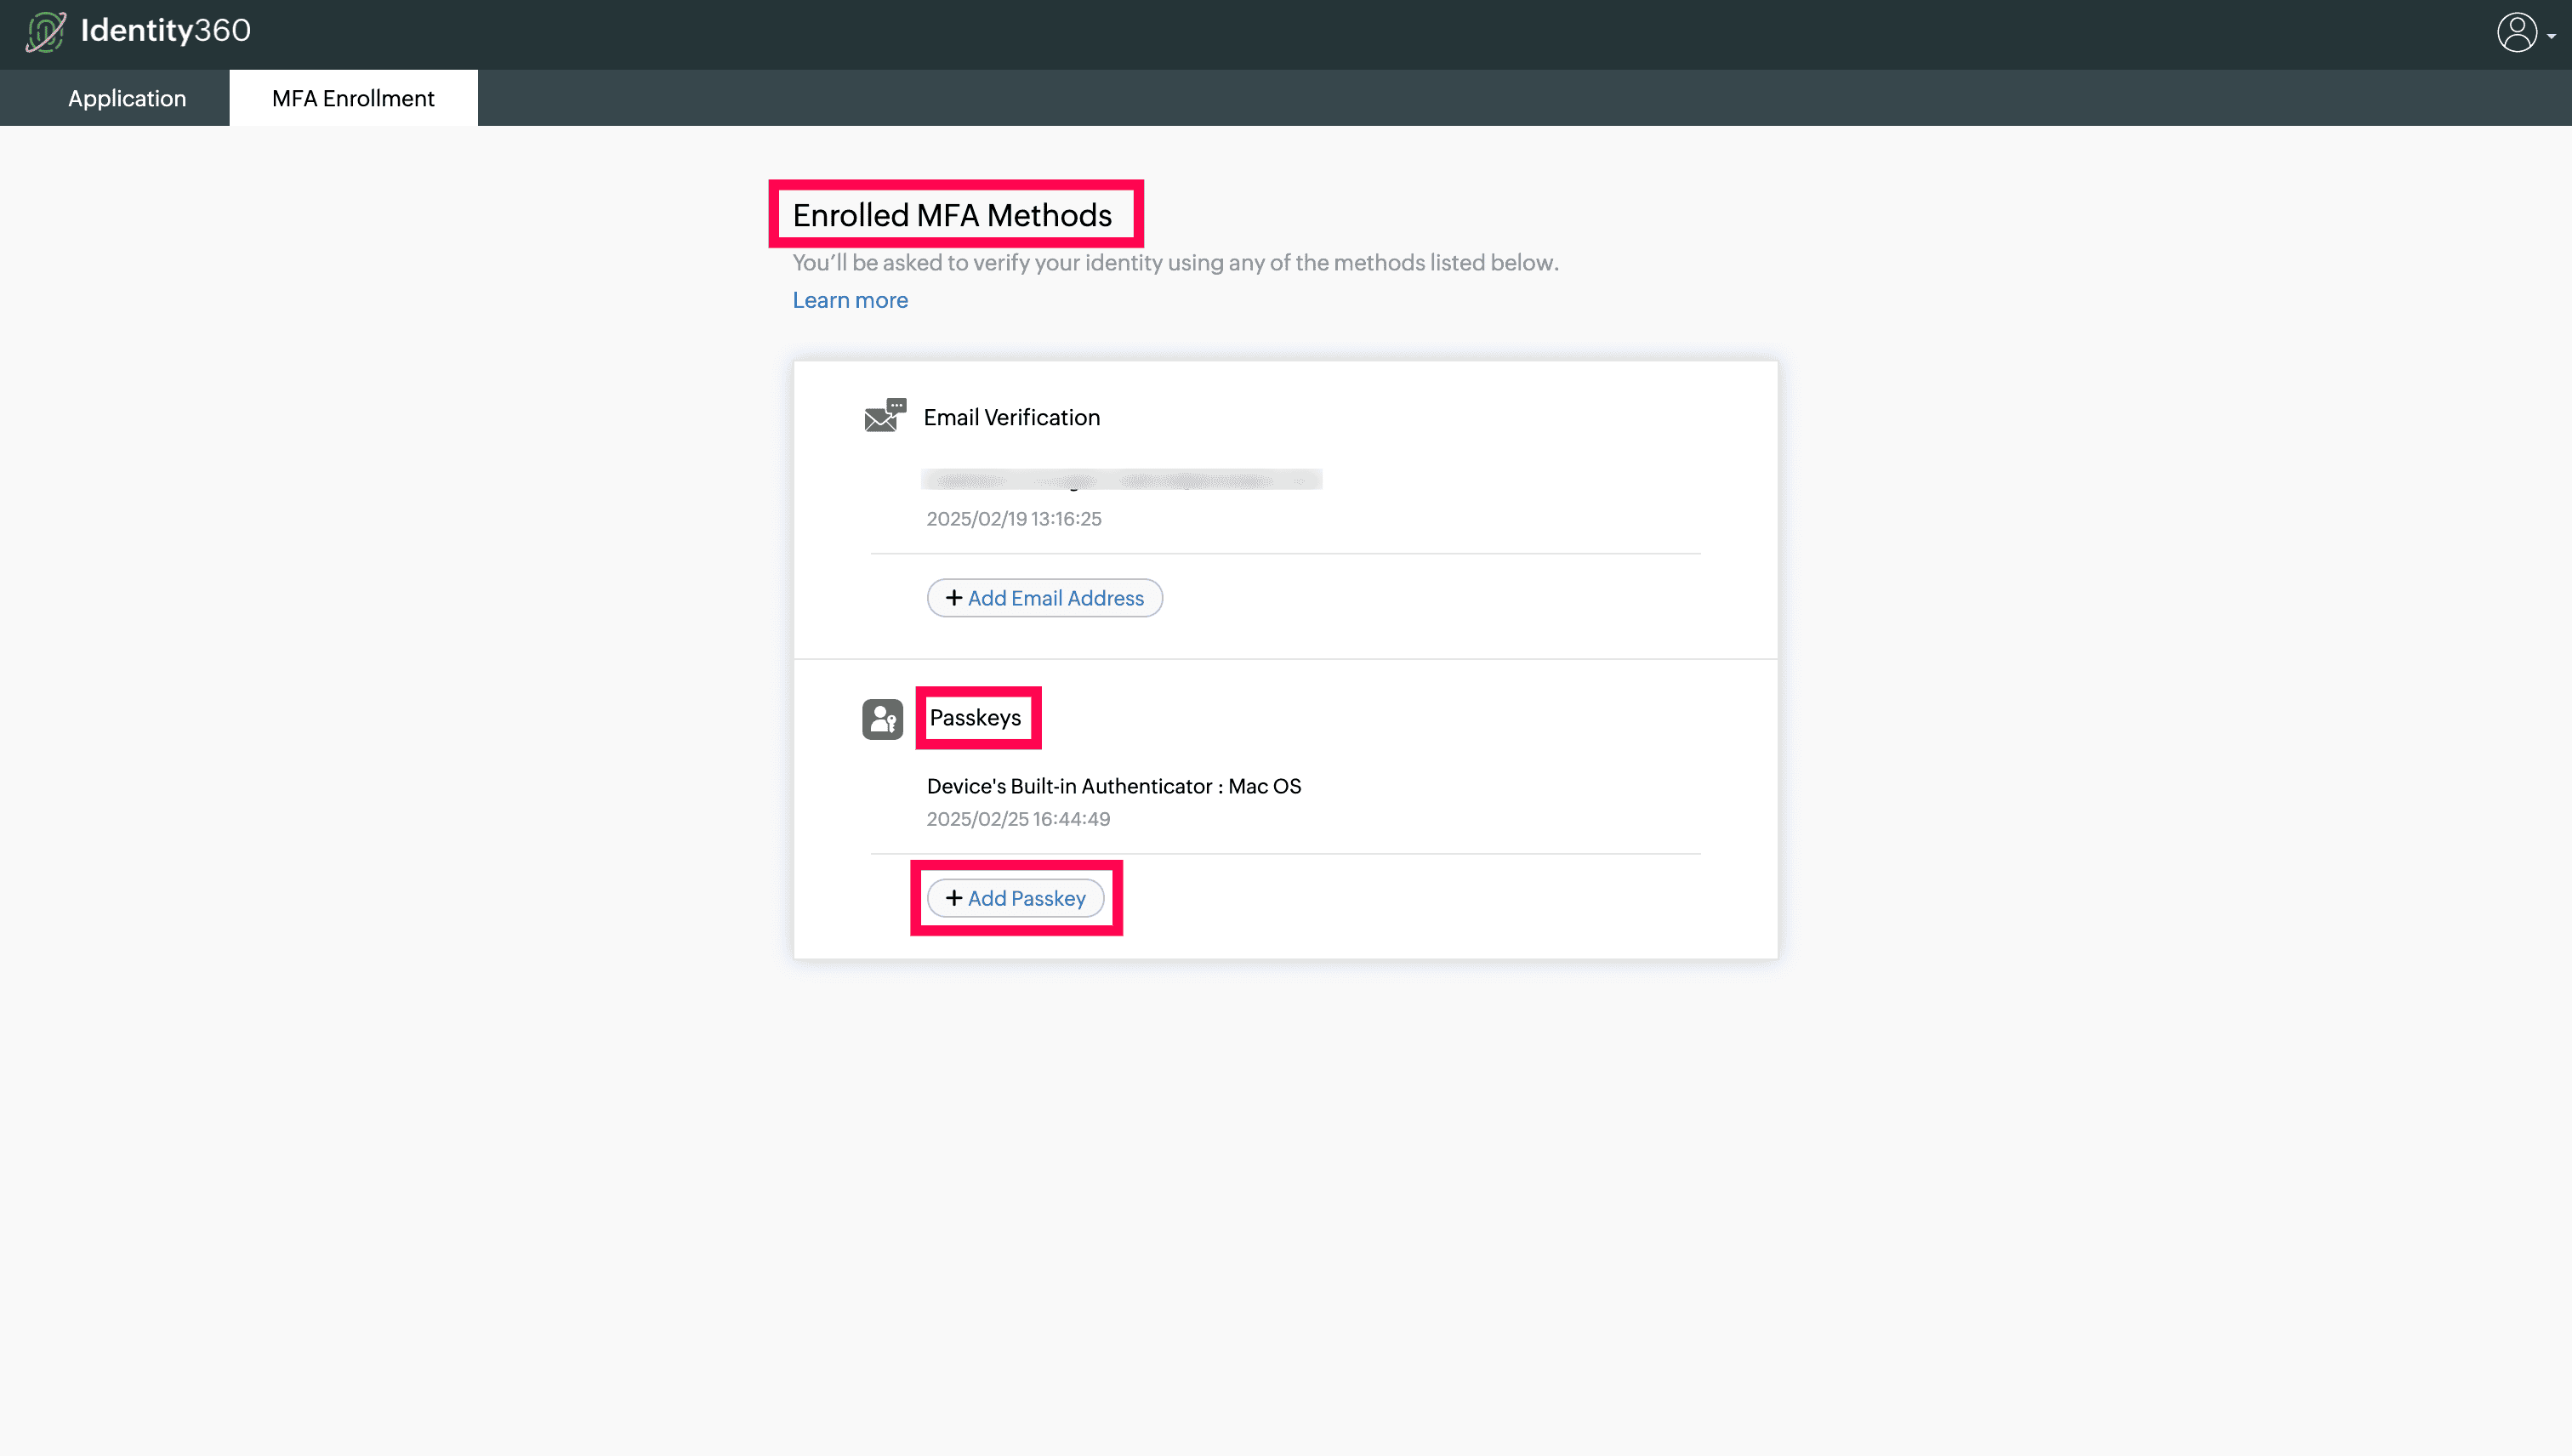
- To add a secondary passkey, navigate to Enrolled MFA Methods > Passkeys, and then click on + Add Passkey.
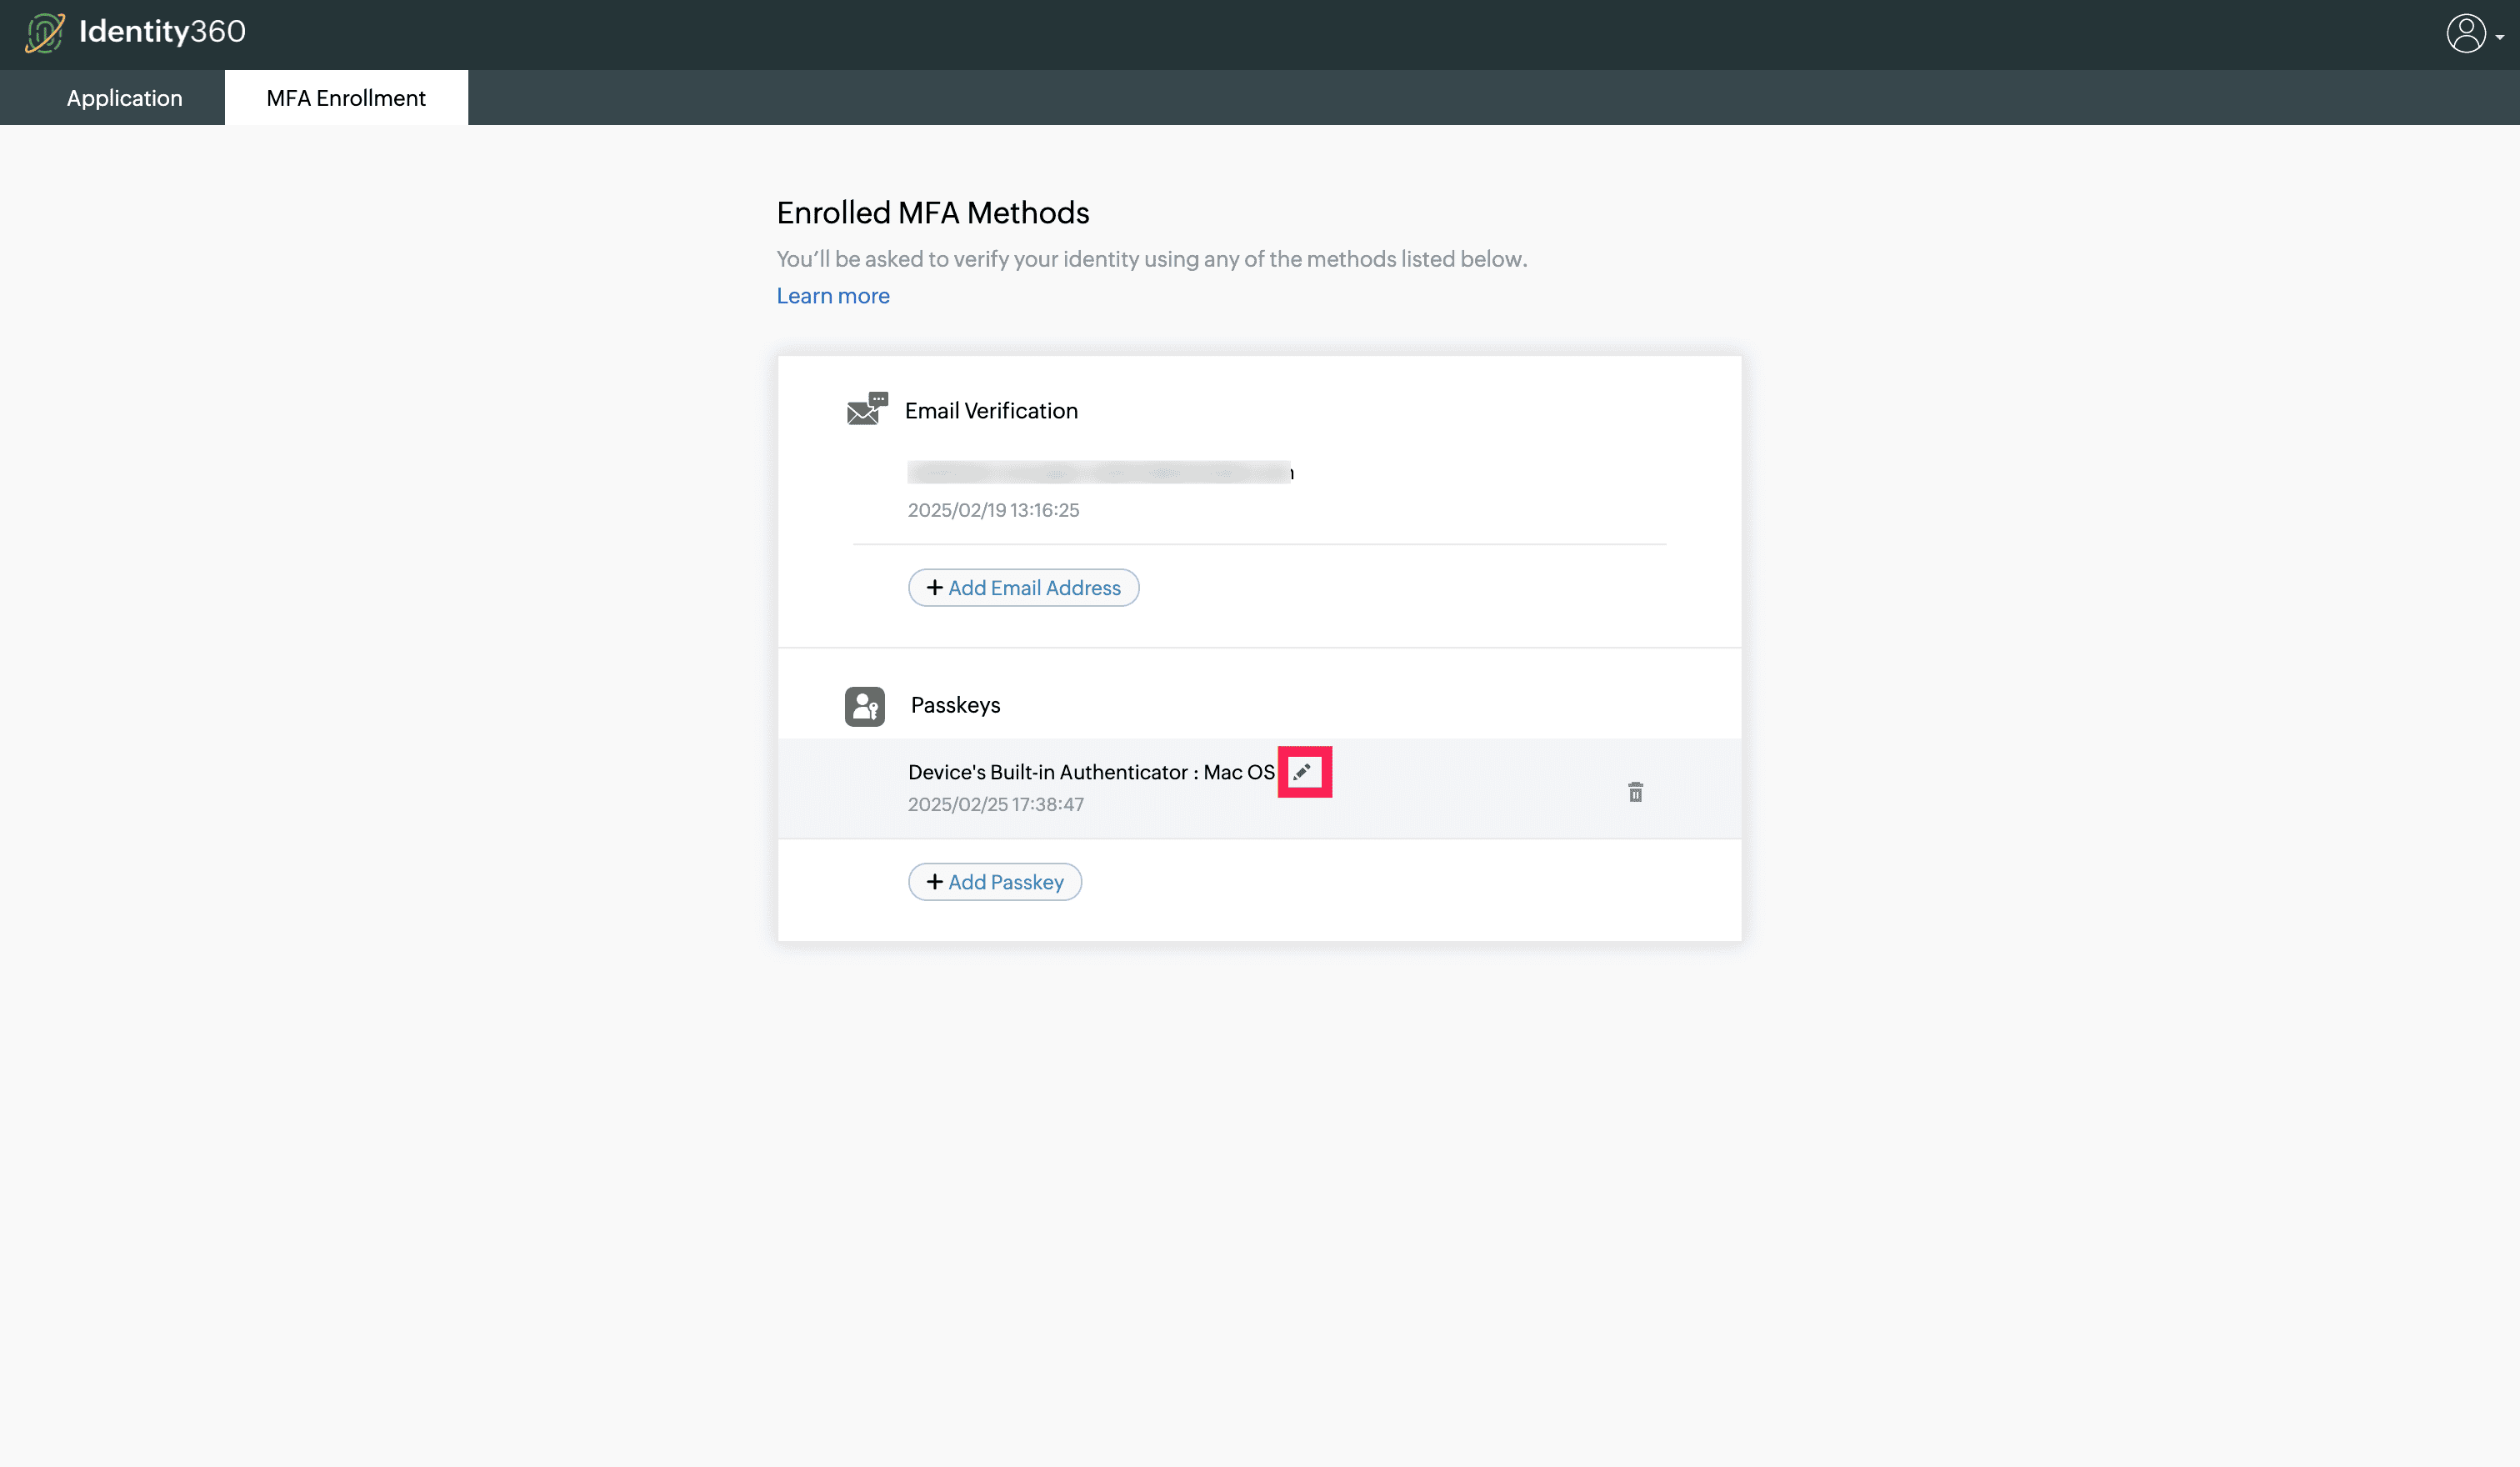
To modify a passkey name:
Click the  icon next to the passkey name you wish to modify under Enrolled MFA Methods.
To disenroll a passkey:
Click the  icon next to the passkey you wish to remove under Enrolled MFA Methods. The steps to remove a passkey from your device may vary depending on your platform.
- For Windows, passkeys can be removed under Passkey settings.
- For Mac, passkeys can be removed in the Passwords app.
For more detailed instructions, please refer to the official documentation for your specific device and operating system.
Duo
Here's how to enroll for Duo:
- Open Identity360 and go to the MFA Enrollment tab.
- Navigate to Set up Optional MFA Methods > Duo.
- Click Set up to open the Duo pop-up.
- In the Confirm Action pop-up, click Yes to be redirected to the Duo enrollment page.
- Carry out the Duo enrollment process, which may differ depending on the authenticators configured in Duo.
- You are now successfully enrolled in Duo.
Unable to scan the QR code?
If your mobile device's camera isn't functional and the QR code cannot be scanned:
- Click Unable to scan the QR code?
- A secret key will now be displayed. Copy this.
- Open the authenticator app and paste the copied secret key. Depending on the app, the field to paste the secret key can be found under:
- Google Authenticator: Click Add a code > Enter a setup key.
- Microsoft Authenticator: Click + > Scan a QR code > Or Enter Code Manually.
- Zoho OneAuth: Click Authenticator > OTP Authenticator > + > Scan QR code > Enter code manually.
- Custom TOTP authenticator: Contact your administrator for assistance.
- Once the secret key is pasted, a code will be generated in the authenticator app. Copy it and paste it in the Enter Verification Code field provided in the Identity360 portal.
Enforced enrollment
When you log in to Identity360 or your Windows machine, you will be forced to enroll if MFA is enabled based on your organization's policies.
Click Setup Now to proceed with the enrollment process. The enforced method(s) will appear.
The enrollment steps for each method are the same for optional enrollment and enforced enrollment.
Managing enrollment information
You can also modify or delete your enrollment information in the MFA Enrollment tab.
How to modify enrollment information:
For email verification
Based on the admin configuration, if you have multiple email addresses enrolled, you can choose which email address will receive OTPs. For this:
- Click the MFA Enrollment tab. Go to Enrolled MFA Methods
- Under Email Verification, click the Set as default email icon (
 ) to designate an email address as the default one for receiving OTPs for MFA.
For SMS Verification
Based on admin configuration, if you have multiple mobile numbers enrolled, you can choose which mobile number should receive the verification code. For this:
- Click the MFA Enrollment tab. Go to Enrolled MFA Methods.
- Under SMS Verification, click the Set as default number icon () to designate a mobile number as the default one for receiving OTPs for MFA.
For other MFA methods:
- Open the MFA Enrollment tab. Under Enrolled MFA Methods, navigate to the MFA method you want to enroll in and click the edit icon (
 ).
).
- In the pop-up that opens, select Change device.
- Re-enroll in the MFA method using your preferred device.
For Duo
- Open the MFA Enrollment tab in Identity360. Under Enrolled MFA Methods, navigate to the Duo section and click the edit icon.
- In the pop-up that opens, select Modify.
Note: You will be allowed to modify your Duo enrollment only if the Device Management Portal settings are configured in your organization's policy.
- You will be redirected to the Duo Device Management Portal, where you can reconfigure your preferred device settings.
How to delete enrollment information
While you cannot delete your primary email address and mobile number, you can delete the secondary email address and mobile number.
For email verification:
- Open the MFA Enrollment tab and go to Enrolled MFA Methods.
- Under Email Verification, click the delete icon (
 ) available next to the secondary email address.
For SMS verification
- Open the MFA Enrollment tab and go to Enrolled MFA Methods.
- Under Email Verification, click the delete icon () available next to the secondary email address.
For other MFA methods:
- Open the MFA Enrollment tab. Under Enrolled MFA Methods, navigate to the MFA method you want to enroll in and click the edit icon ().
- In the pop-up that opens, select Remove.
- In the confirmation pop-up that appears, click Yes.
How to delete enrollment information
For email verification:
While you cannot delete your primary email address, you can delete the secondary email address. To do this:
- Open the MFA Enrollment tab. Go to Enrolled MFA Methods.
- Under Email Verification, click the delete icon () available next to the secondary email address.
For other MFA methods:
- Open the MFA Enrollment tab. Under Enrolled MFA Methods, navigate to the MFA method you want to enroll in and click the edit icon ().
- In the pop-up that opens, select Remove.
- In the confirmation pop-up that appears, click Yes.
Don't see what you're looking for?
-
Visit our community
Post your questions in the forum.
-
Request additional resources
Send us your requirements.
-
Need implementation assistance?
Try onboarding
 ADManager Plus
 ADAudit Plus
 ADSelfService Plus
 AD360
AD360