Settings
- Overview of Settings
- Org Settings
- Mail Settings
- Scheduler Settings
- Helpdesk Settings
- Audit Logs
- Report Settings
- Roles
- SingleSign-ON(SAML)
Overview of Settings
The Settings section provides configuration options for various aspects of the tool, including org settings, mail settings, scheduler settings, audit logs, report settings, user roles, and single sign-on. These settings allow you to customize and control the tool's functionality, synchronization, notifications, and access levels according to your specific requirements.
Org Settings
The Org Settings section provides details of Super Admin, and Currency chosen by you. It allows you to provide your Org Name and specify your preferred Time Zone.

Mail Settings
The Mail Settings section allows you to configure the integration with your preferred mail app and fetch invoices from the designated mailbox.
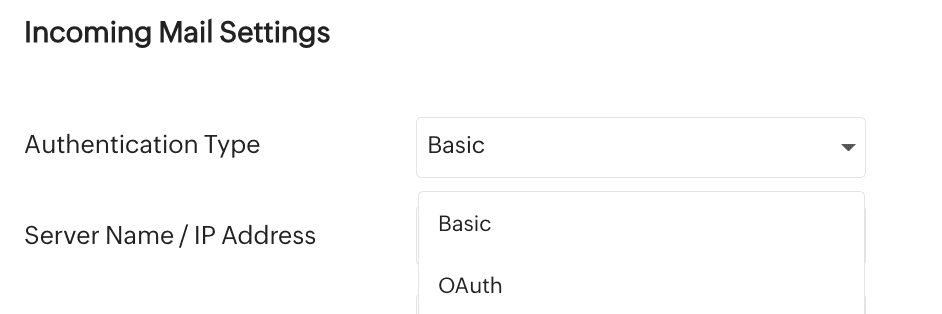
There are two ways to configure your mail server.
- Basic
- OAuth
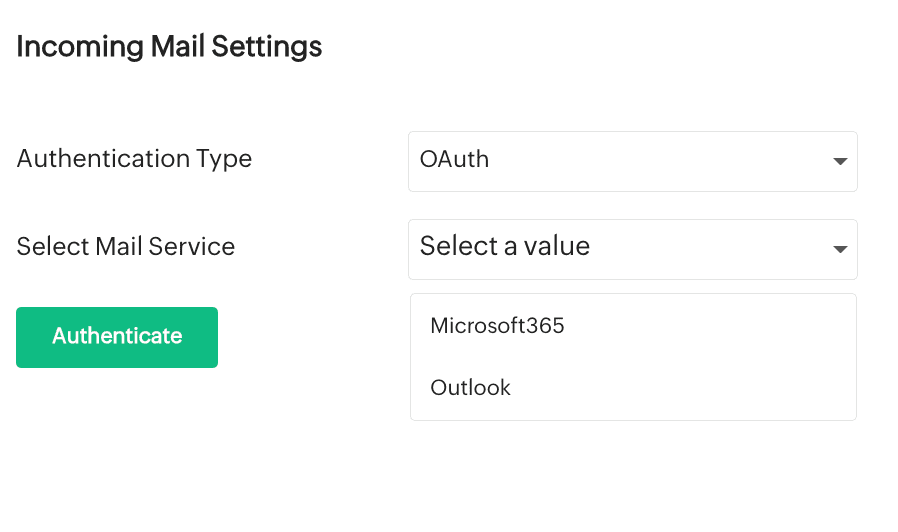
Configuring mail server using OAuth
- Choose OAuth from the drop-down box.
- Select your preferred mail service from the Select Mail Servic drop-down list.
- Click Authenticate to configure the selected mail service.
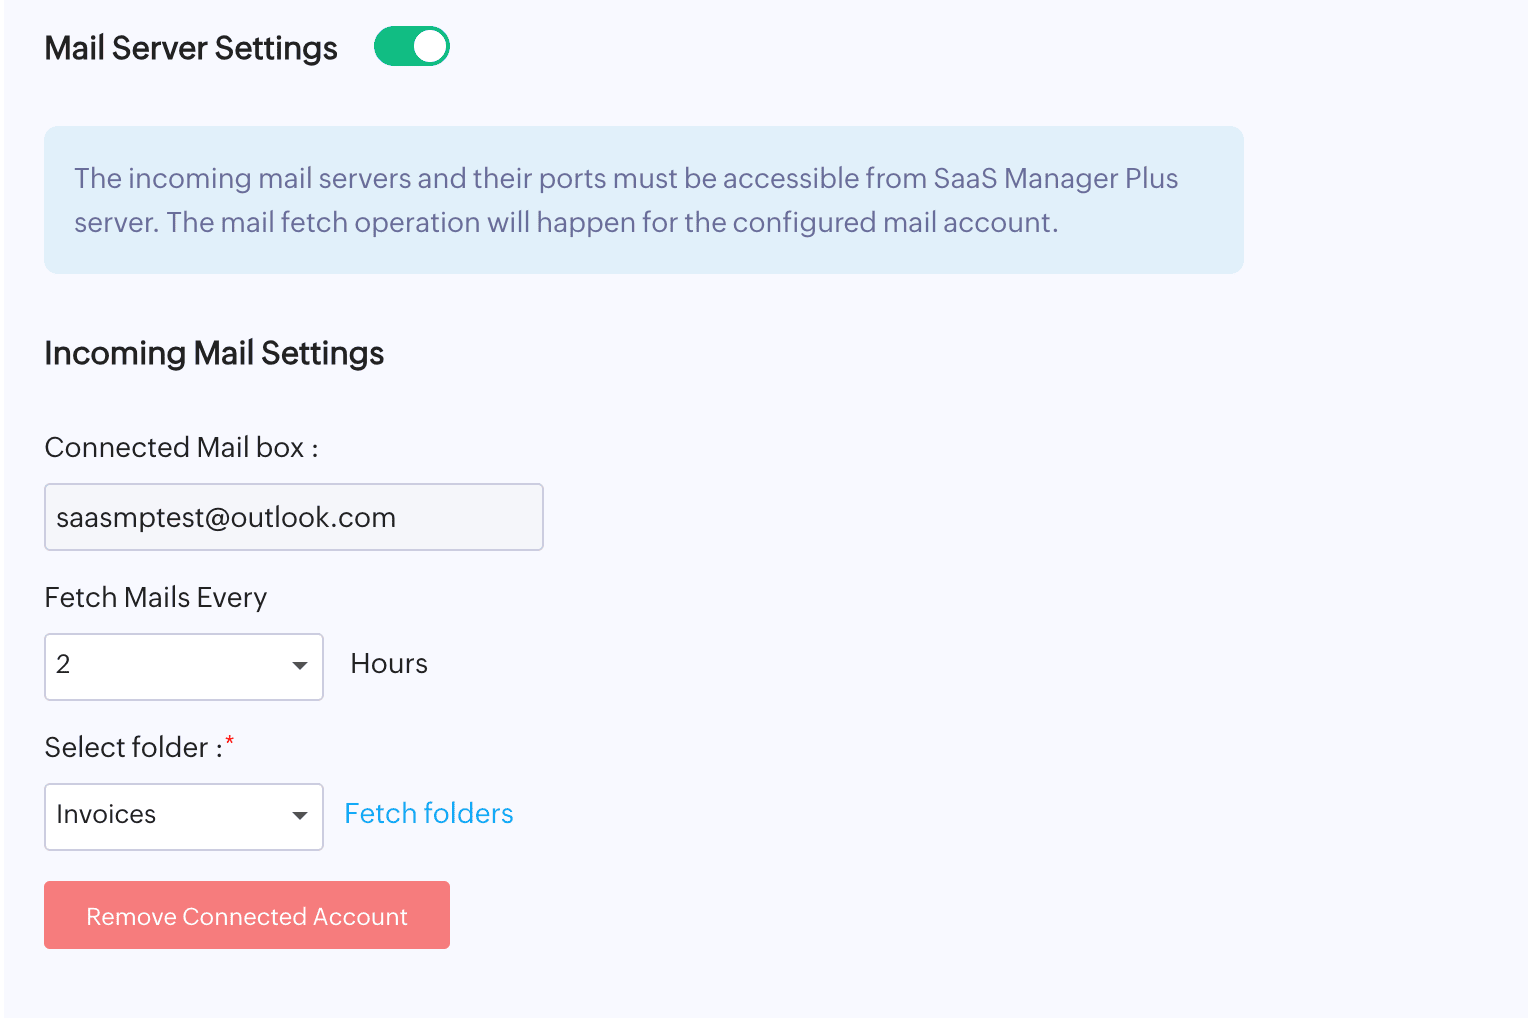
- You will be redirected to the login page of the selected mail service. Provide the necessary credentials and click Accept.
- Connected Mail Box will be added to your account, and you can choose the preferred time limit and folder to fetch mail from the configured mail server.
NOTE: Click Fetch folders to fetch all the available folders from the connected mail box.
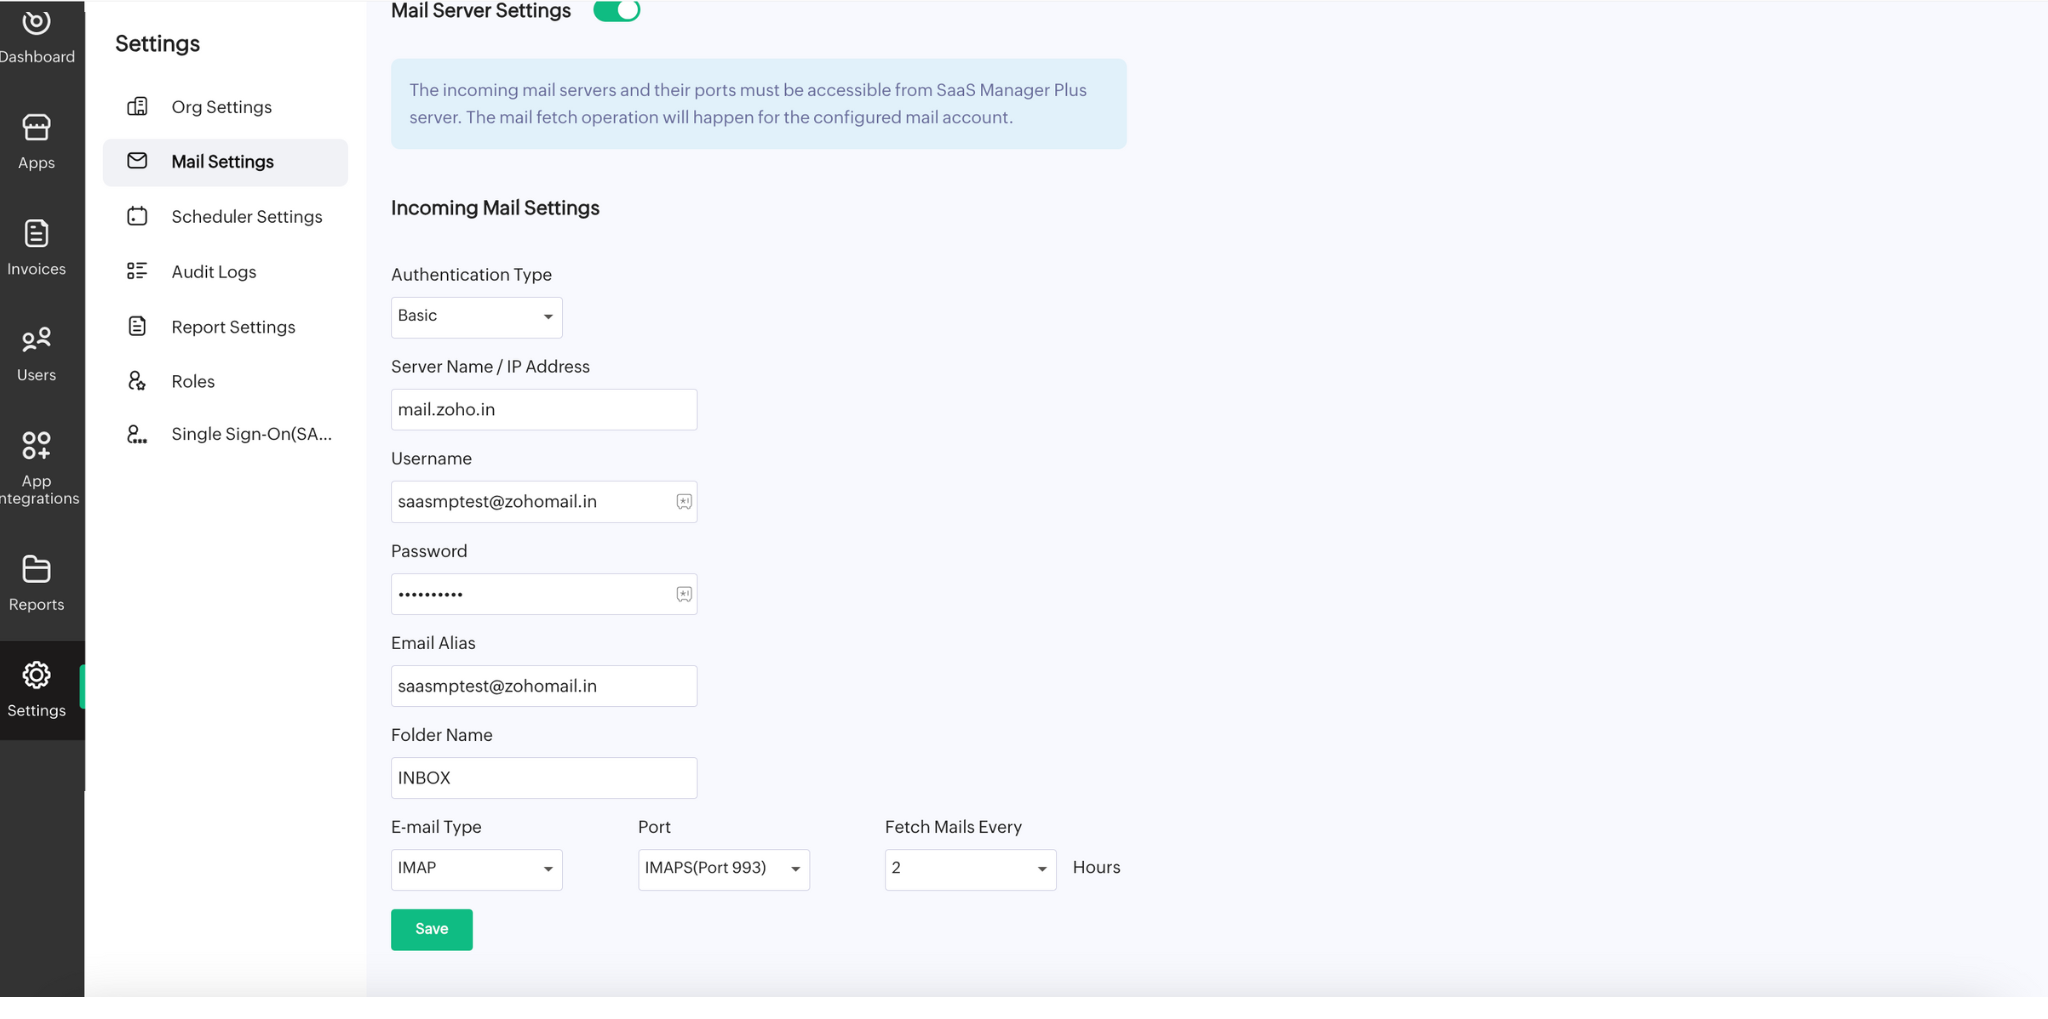
Configuring mail server using Basic
To ensure proper connectivity, you can set up the following fields after choosing Basic from the drop-down box:
- Server Name/IP address: Enter your mail server's name or IP address.
- Username: Provide the username associated with your mail account.
- Password: Enter the password for your mail account.
- Email Alias: Specify the email alias, if applicable.
- Folder Name: Enter the folder name where invoices are stored.
- Email Type: Choose between POP and IMAP from the drop-down box.
- Port: Select the appropriate port type from the drop-down list (POP: Port 110, POPS: Port 995, IMAP: Port 143, IMAPS: Port 993).
- Fetch Mails Every: Specify the time interval for fetching mails from the mailbox (options include two hours, six hours, and 12 hours).
- Click Save to confirm the configuration.
Note: You can enable or disable the mail fetch operation using the slider button in the top-left corner of Mail Server Settings.
Scheduler Settings
The Scheduler Settings section allows you to configure various scheduling options for app data sync, notifications, and reports. It comprises five tabs:
a) App Data Sync
Under App Data Sync, you'll find two sections:
- Note: App Data Sync will be enabled by default when a user integrates the first app via OAuth.
- Settings: The integrated applications will be synchronized periodically based on the configured frequency.
To set up app data synchronization
- Choose the desired Frequency for app data synchronization using the drop-down box.
- Specify the Start Date and Time for the synchronization process.
- Update the settings by clicking the Update button.
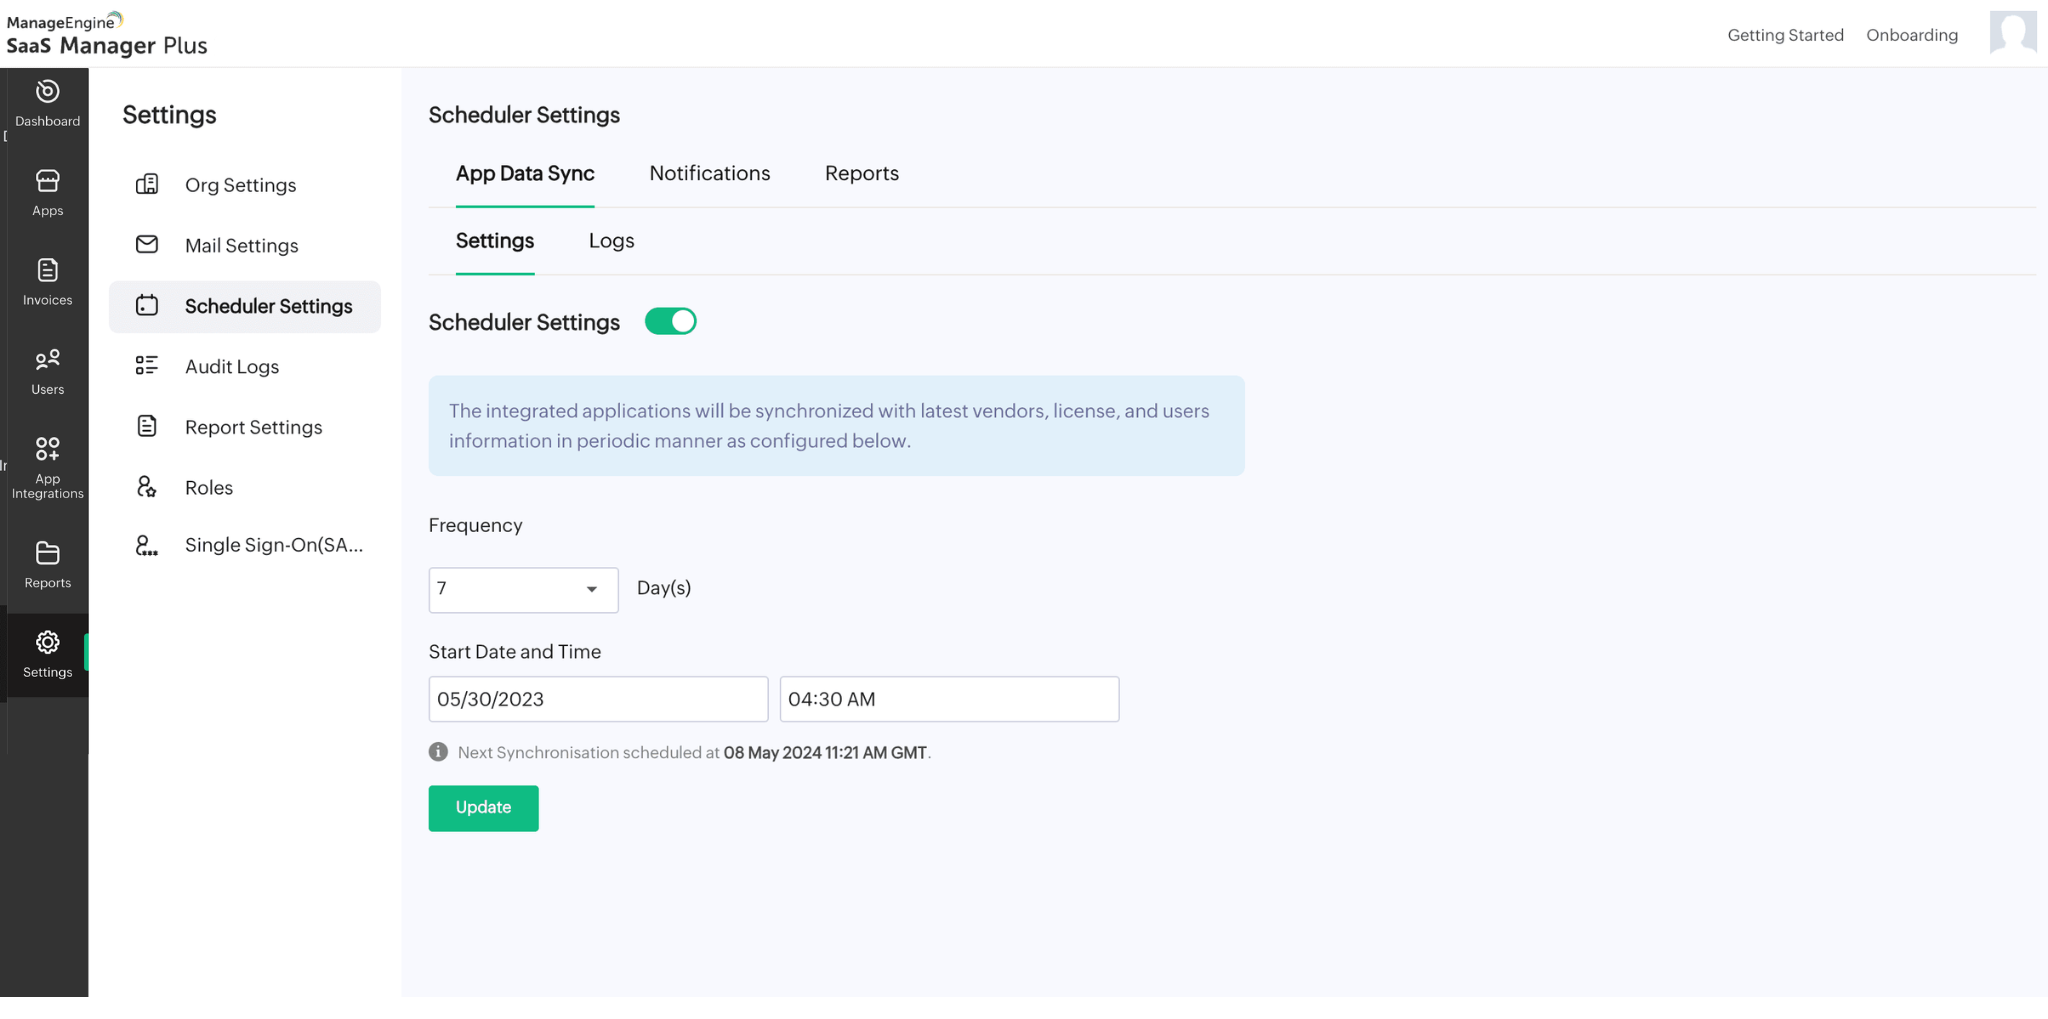
Note: You can enable or disable the app data synchronization using the slider button in the top-right corner of Scheduler Settings.
IDPs will not be synced automatically when the scheduler is enabled.
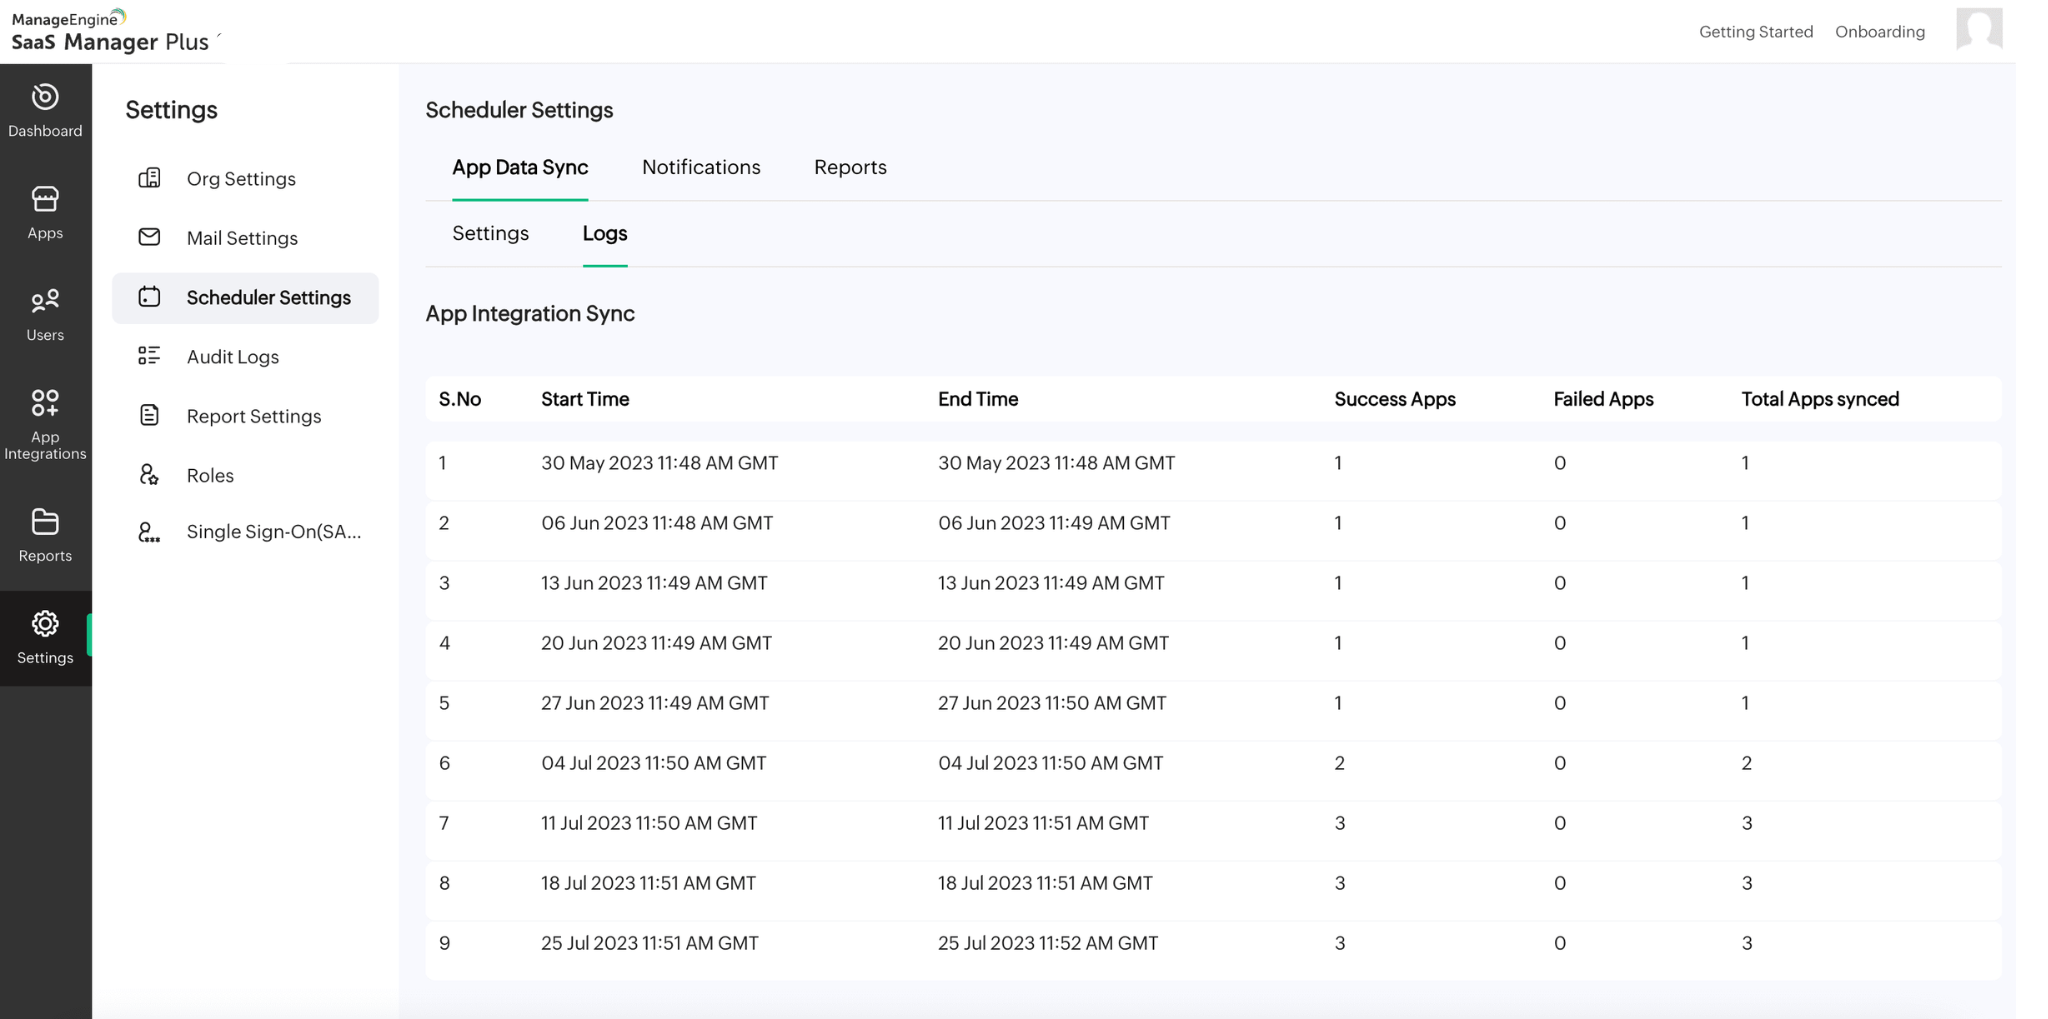
Logs: Provides a history of successful and failed synchronization processes, including Start Time, End Time, Success Apps, Failed Apps, and Total Apps Synced.
b) Notifications
Under Notifications, you'll find two sections:
- Settings: Set up notifications for license expiry based on your preferences.
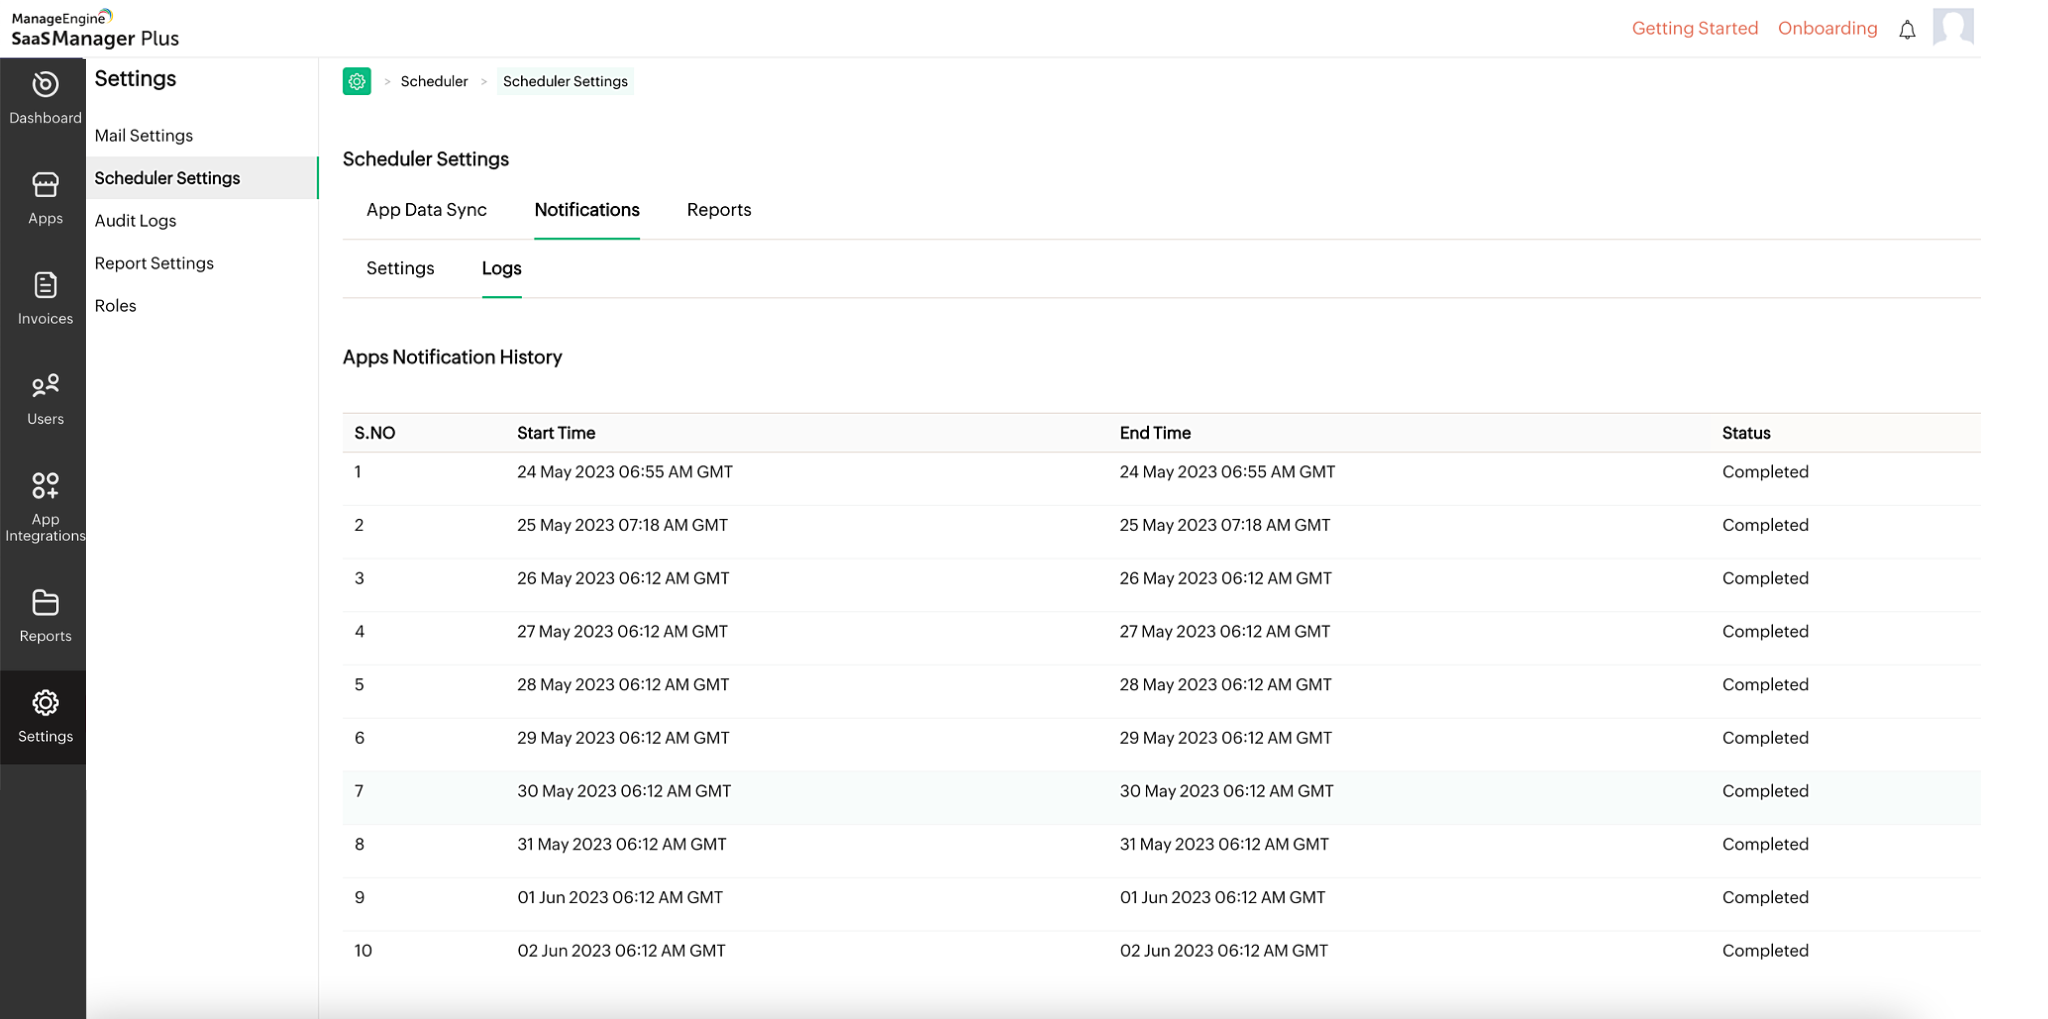
- Logs: Displays the history of app notification activities, including Start Time, End Time, and Status.
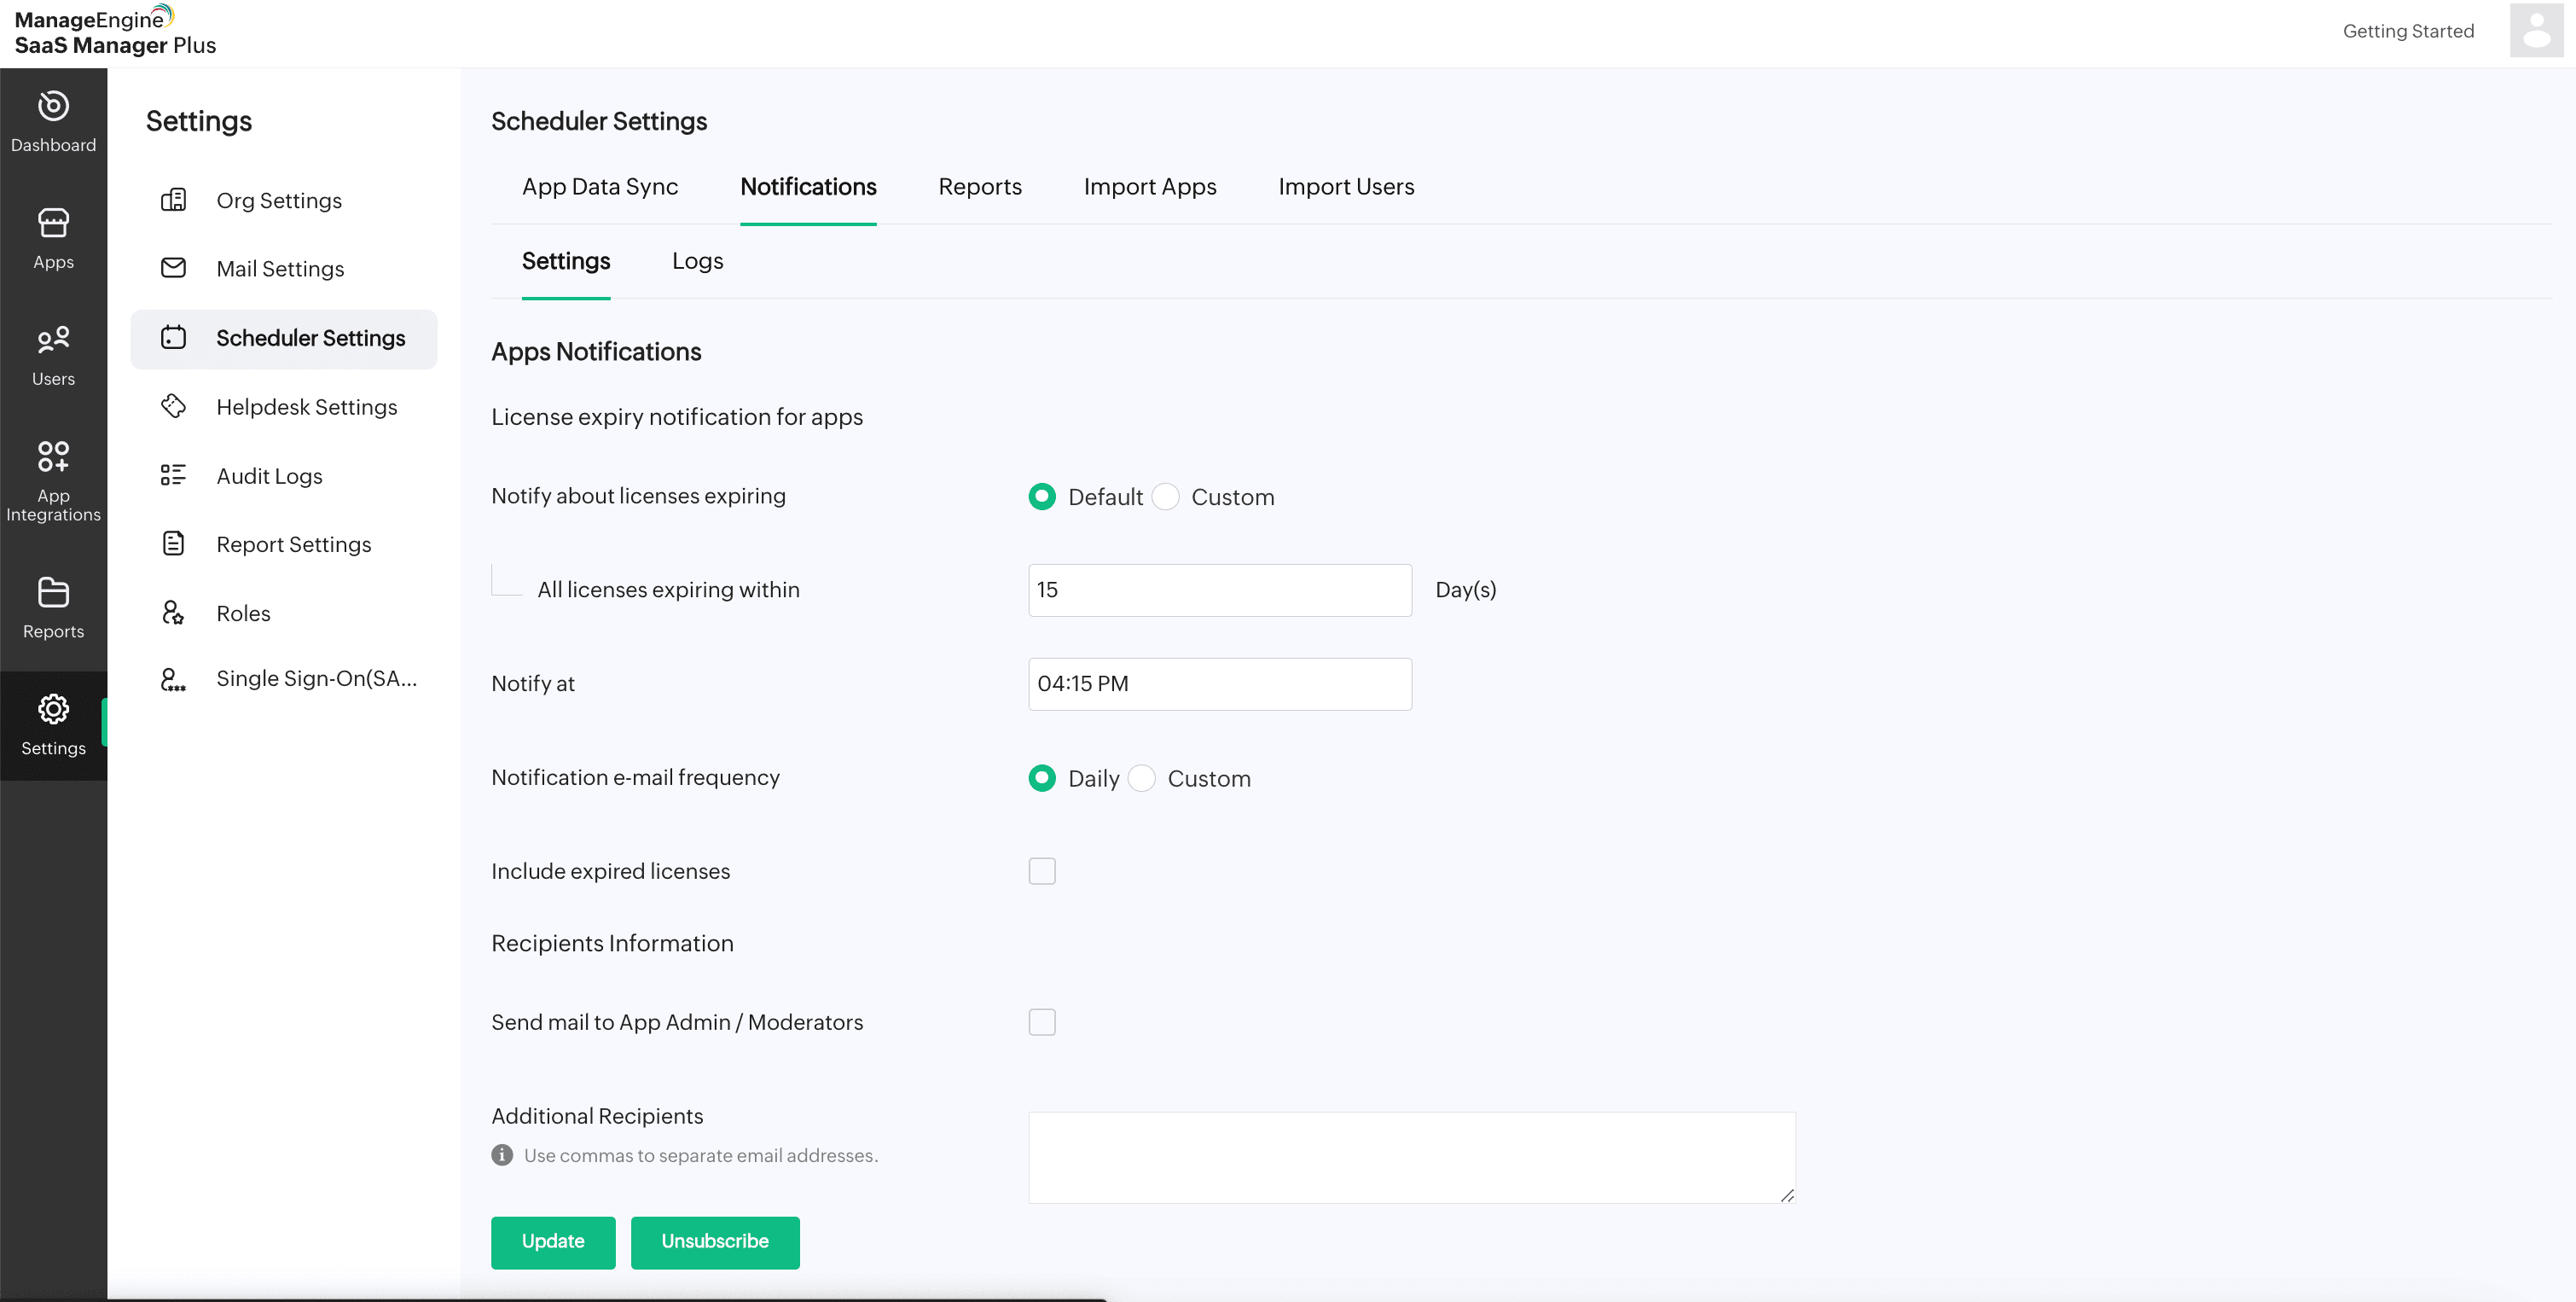
To set up app notifications
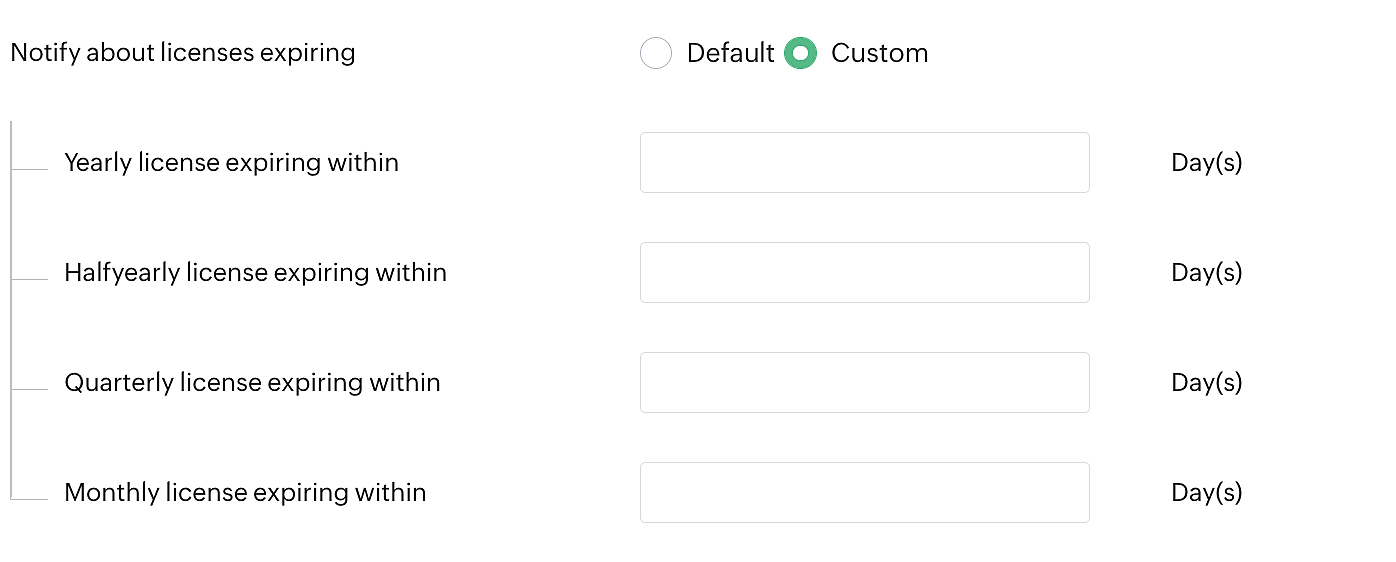
- Configure license expiry notifications by selecting either the Default or Custom button.
- If the Default option is chosen, notifications for all licenses expiring within the specified number of days will be sent.
- If the Custom option is chosen, specify the number of days for yearly, half-yearly, quarterly, and monthly license expirations.
- Set the time for sending the notifications using the Notify at field.
- Choose the frequency of notification emails: Daily or Custom.
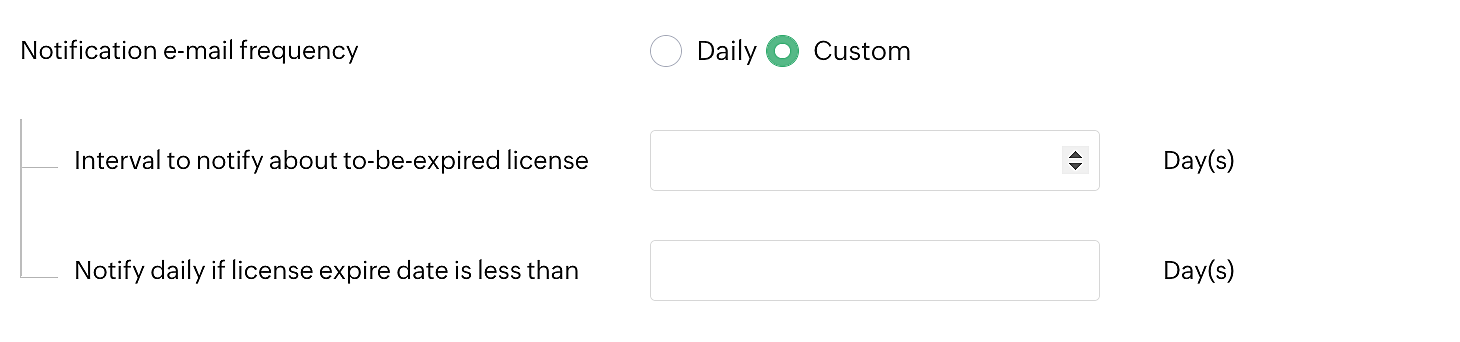
- If the Daily option is chosen, email notifications will be sent every day.
- If the Custom option is chosen, you can specify the interval for receiving notifications about expiring licenses. Additionally, you can set the condition to notify daily if the license expiration date is less than the specified interval.
- Once you define the desired number of days, the system will automatically send notification emails based on the specified intervals.
- Select the Include expired licenses check box to send notifications for expired licenses.
- Select the Send Mail to App Admin/Moderators check box to notify app admins or moderators, if required.
- You can add additional recipients in the Additional Recipients text box by separating email addresses with commas.
- Click Update to confirm the settings.
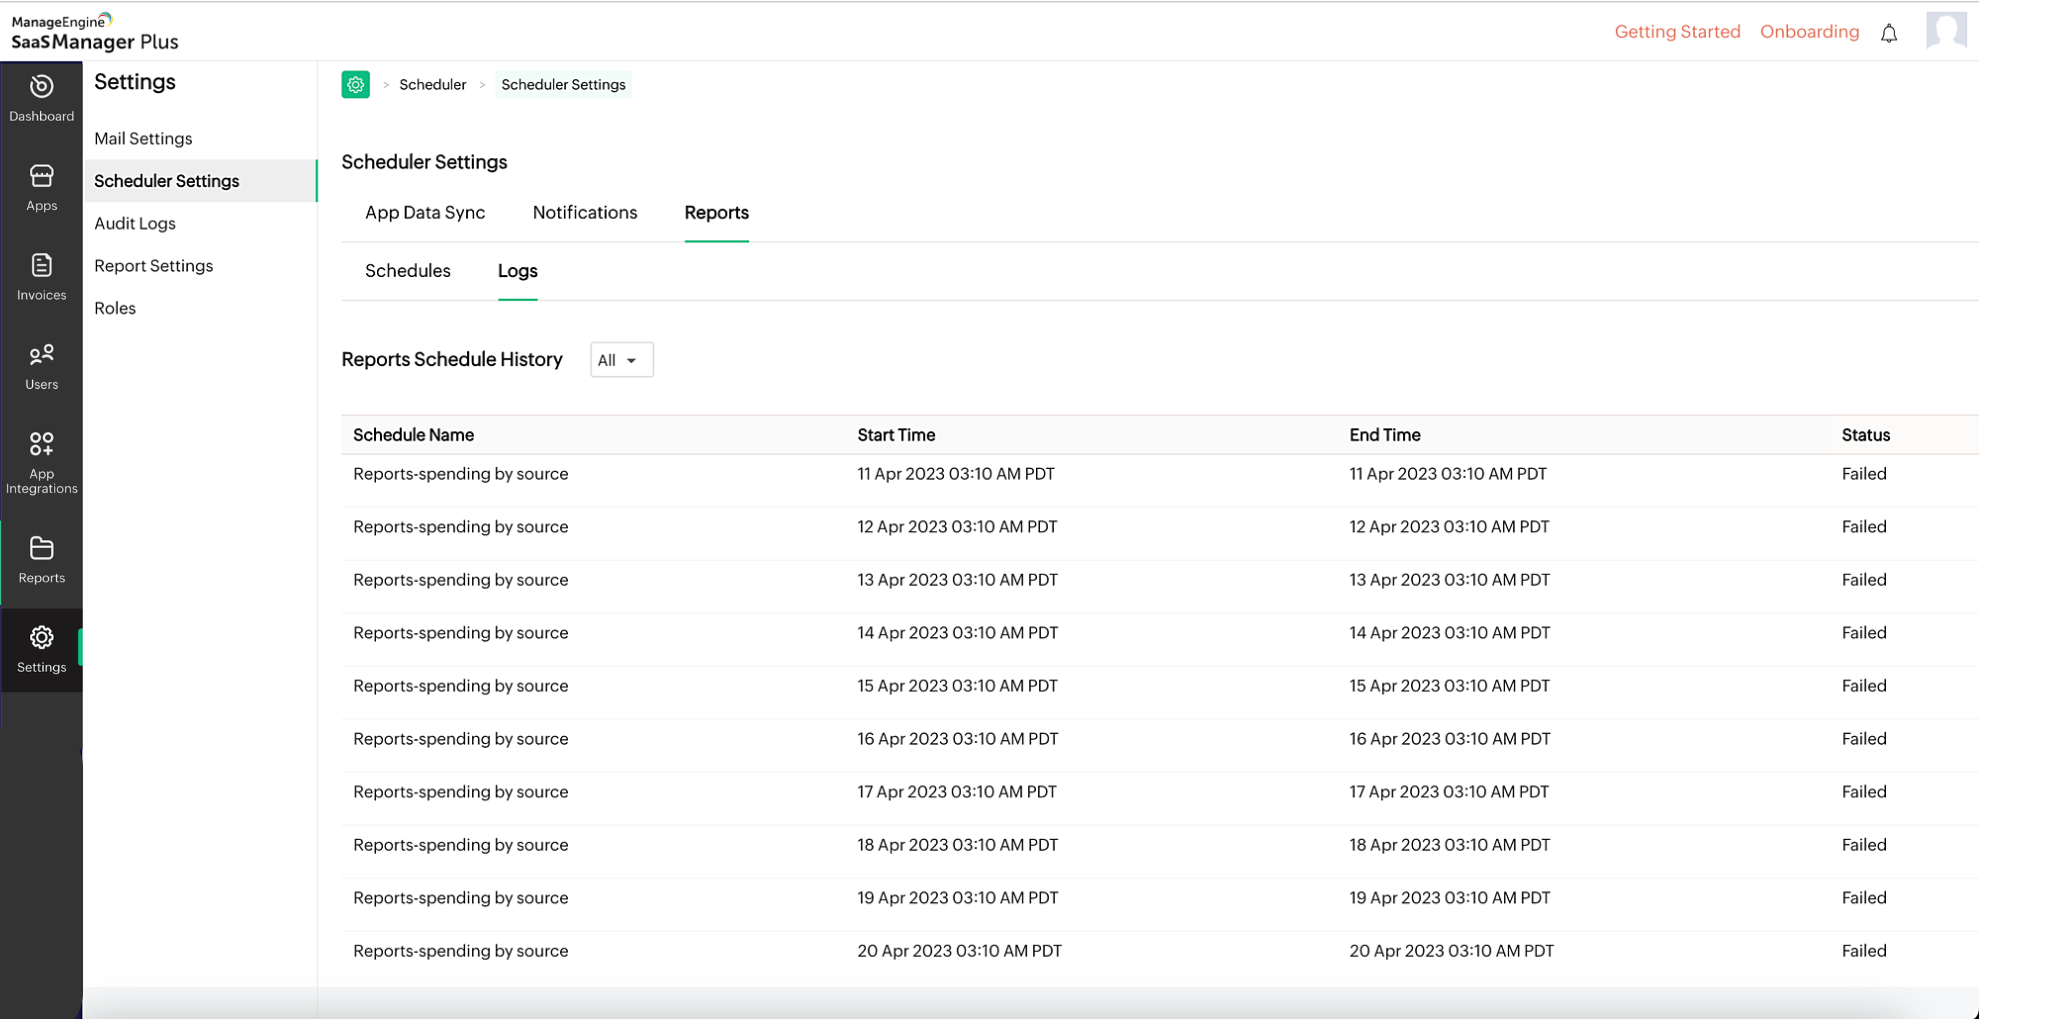
c) Reports
The Reports allows you to generate and send reports periodically via email.
To add a new schedule report
- Under the Schedules section, click the Add Schedule Report button to create a new scheduled report.
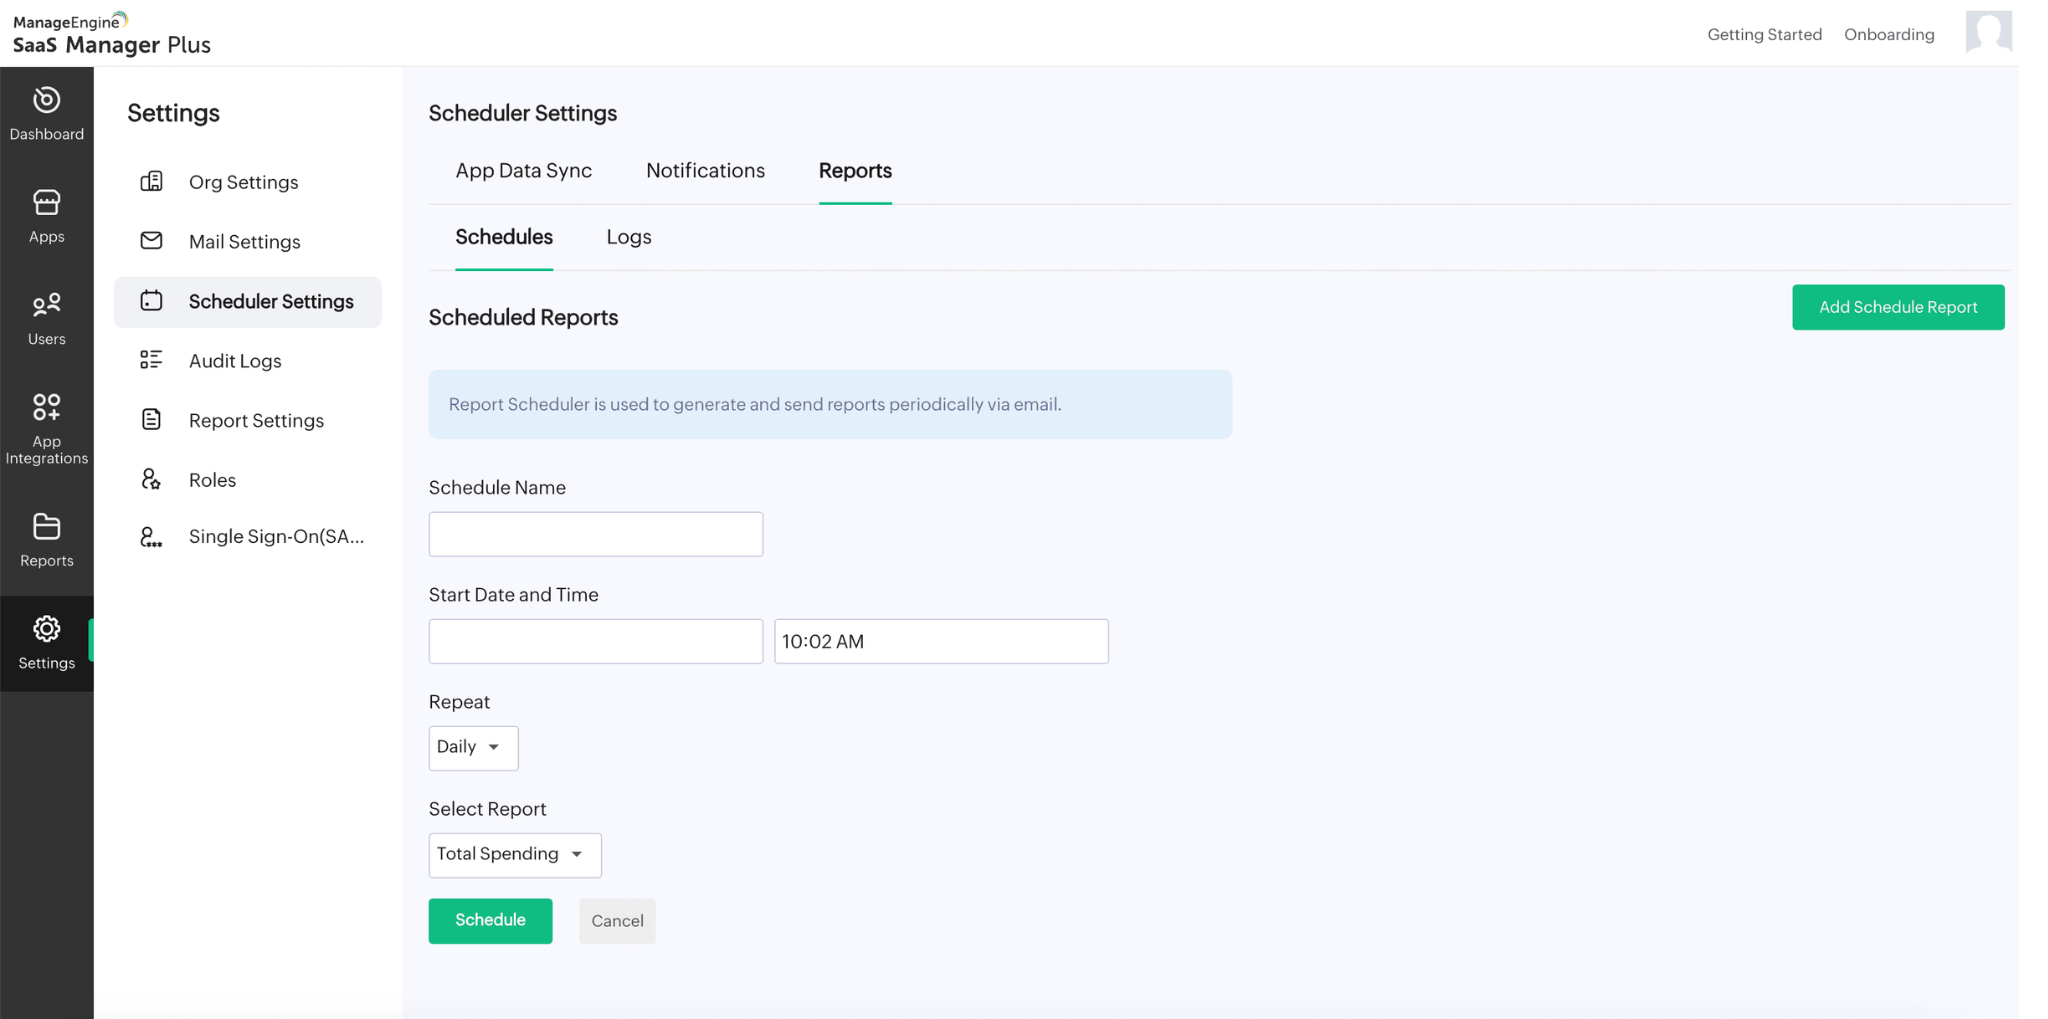
- Specify the Schedule Name and Start Date and Time, and choose the frequency for the report mail to be sent under Repeat (daily, weekly, monthly, or yearly).
- Select the desired report from the Select Report drop-down box.
- Click the Schedule button to confirm the settings and schedule the report.
- The scheduled reports will display details such as the Schedule Name, Report Name, Last Run, Next Run, Frequency, and Status.
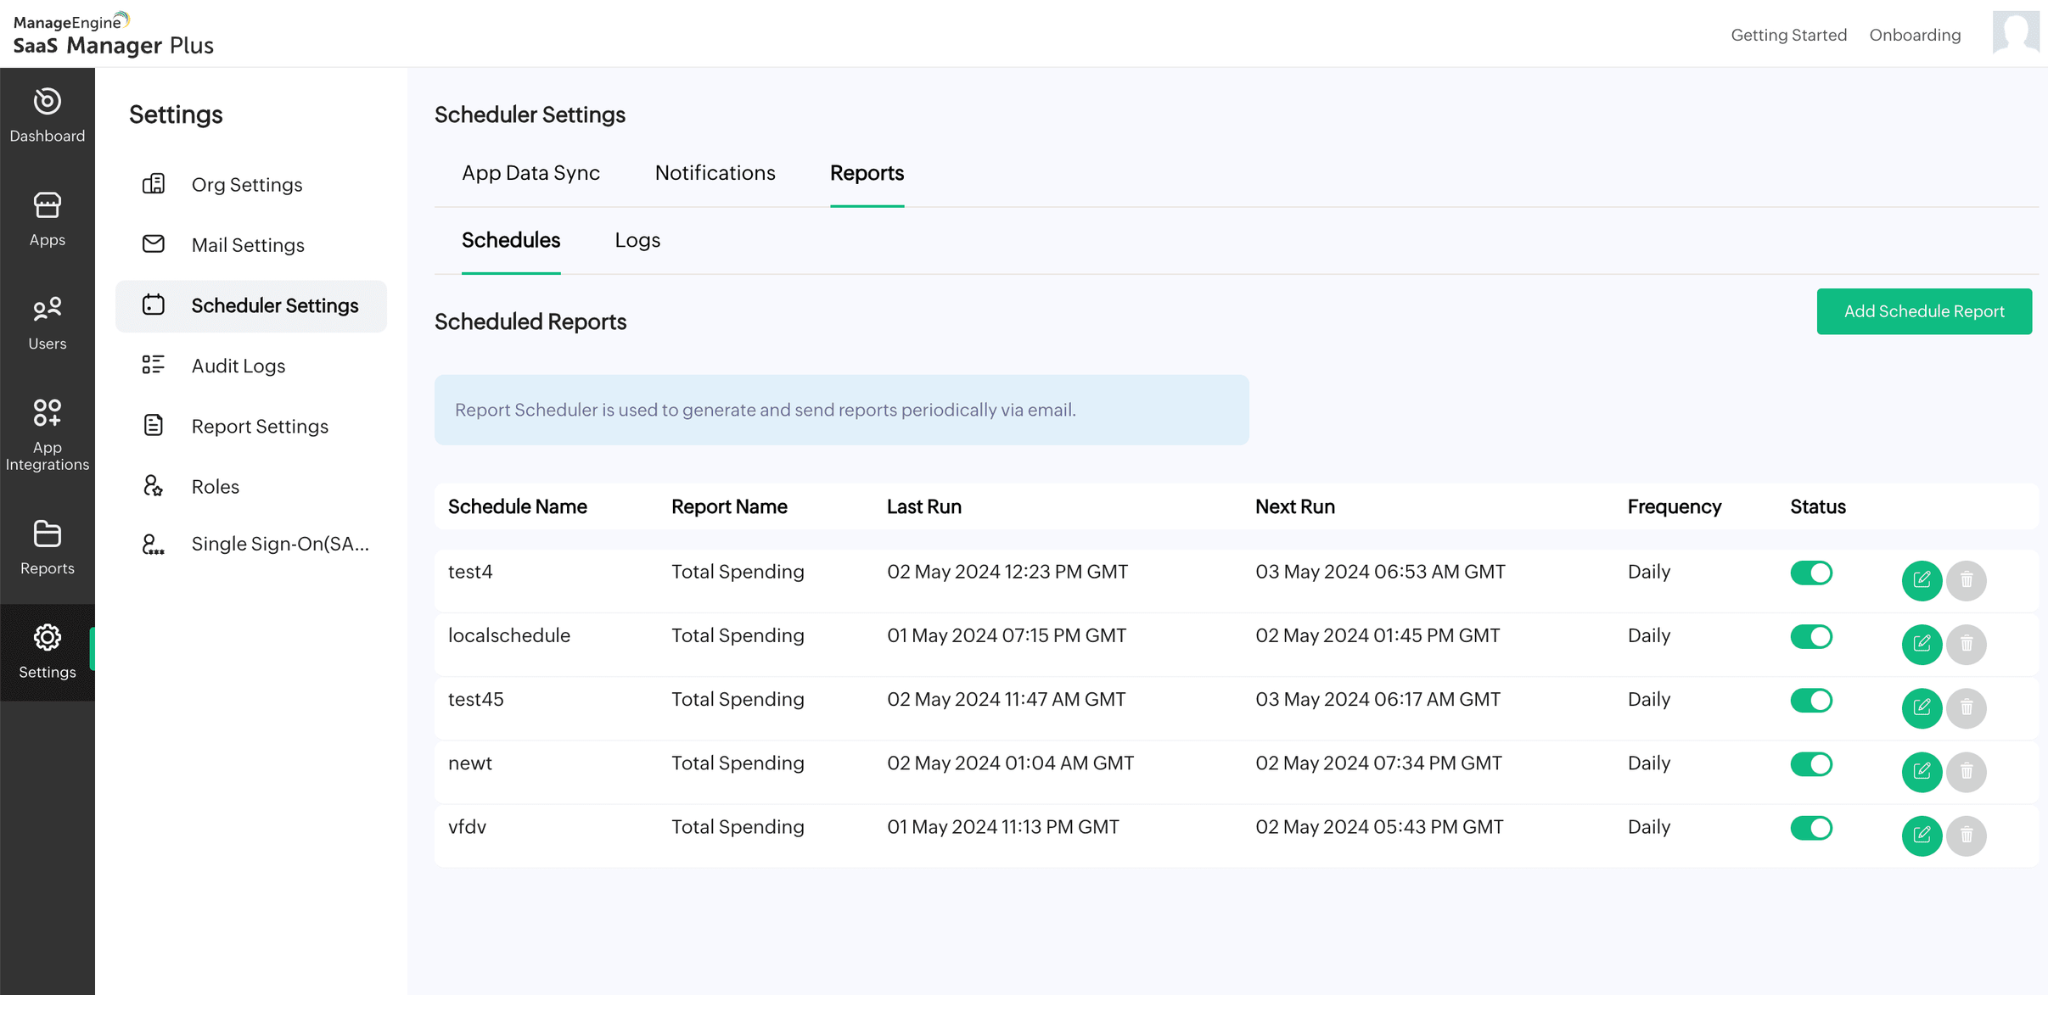
- The Logs section shows the history of scheduled reports, including the Schedule Name, Start Time, End Time, and Status.
d) Import Apps
Import Apps displays the status of the scheduler for imported CSV files, along with File Name, Start Time, End Time, Imported Apps Count, and Failed Apps Count.

e) Import Users
Import Apps displays the status of the scheduler for imported CSV files, along with File Name, Start Time, End Time, Imported Users Count, and Failed Users Count.

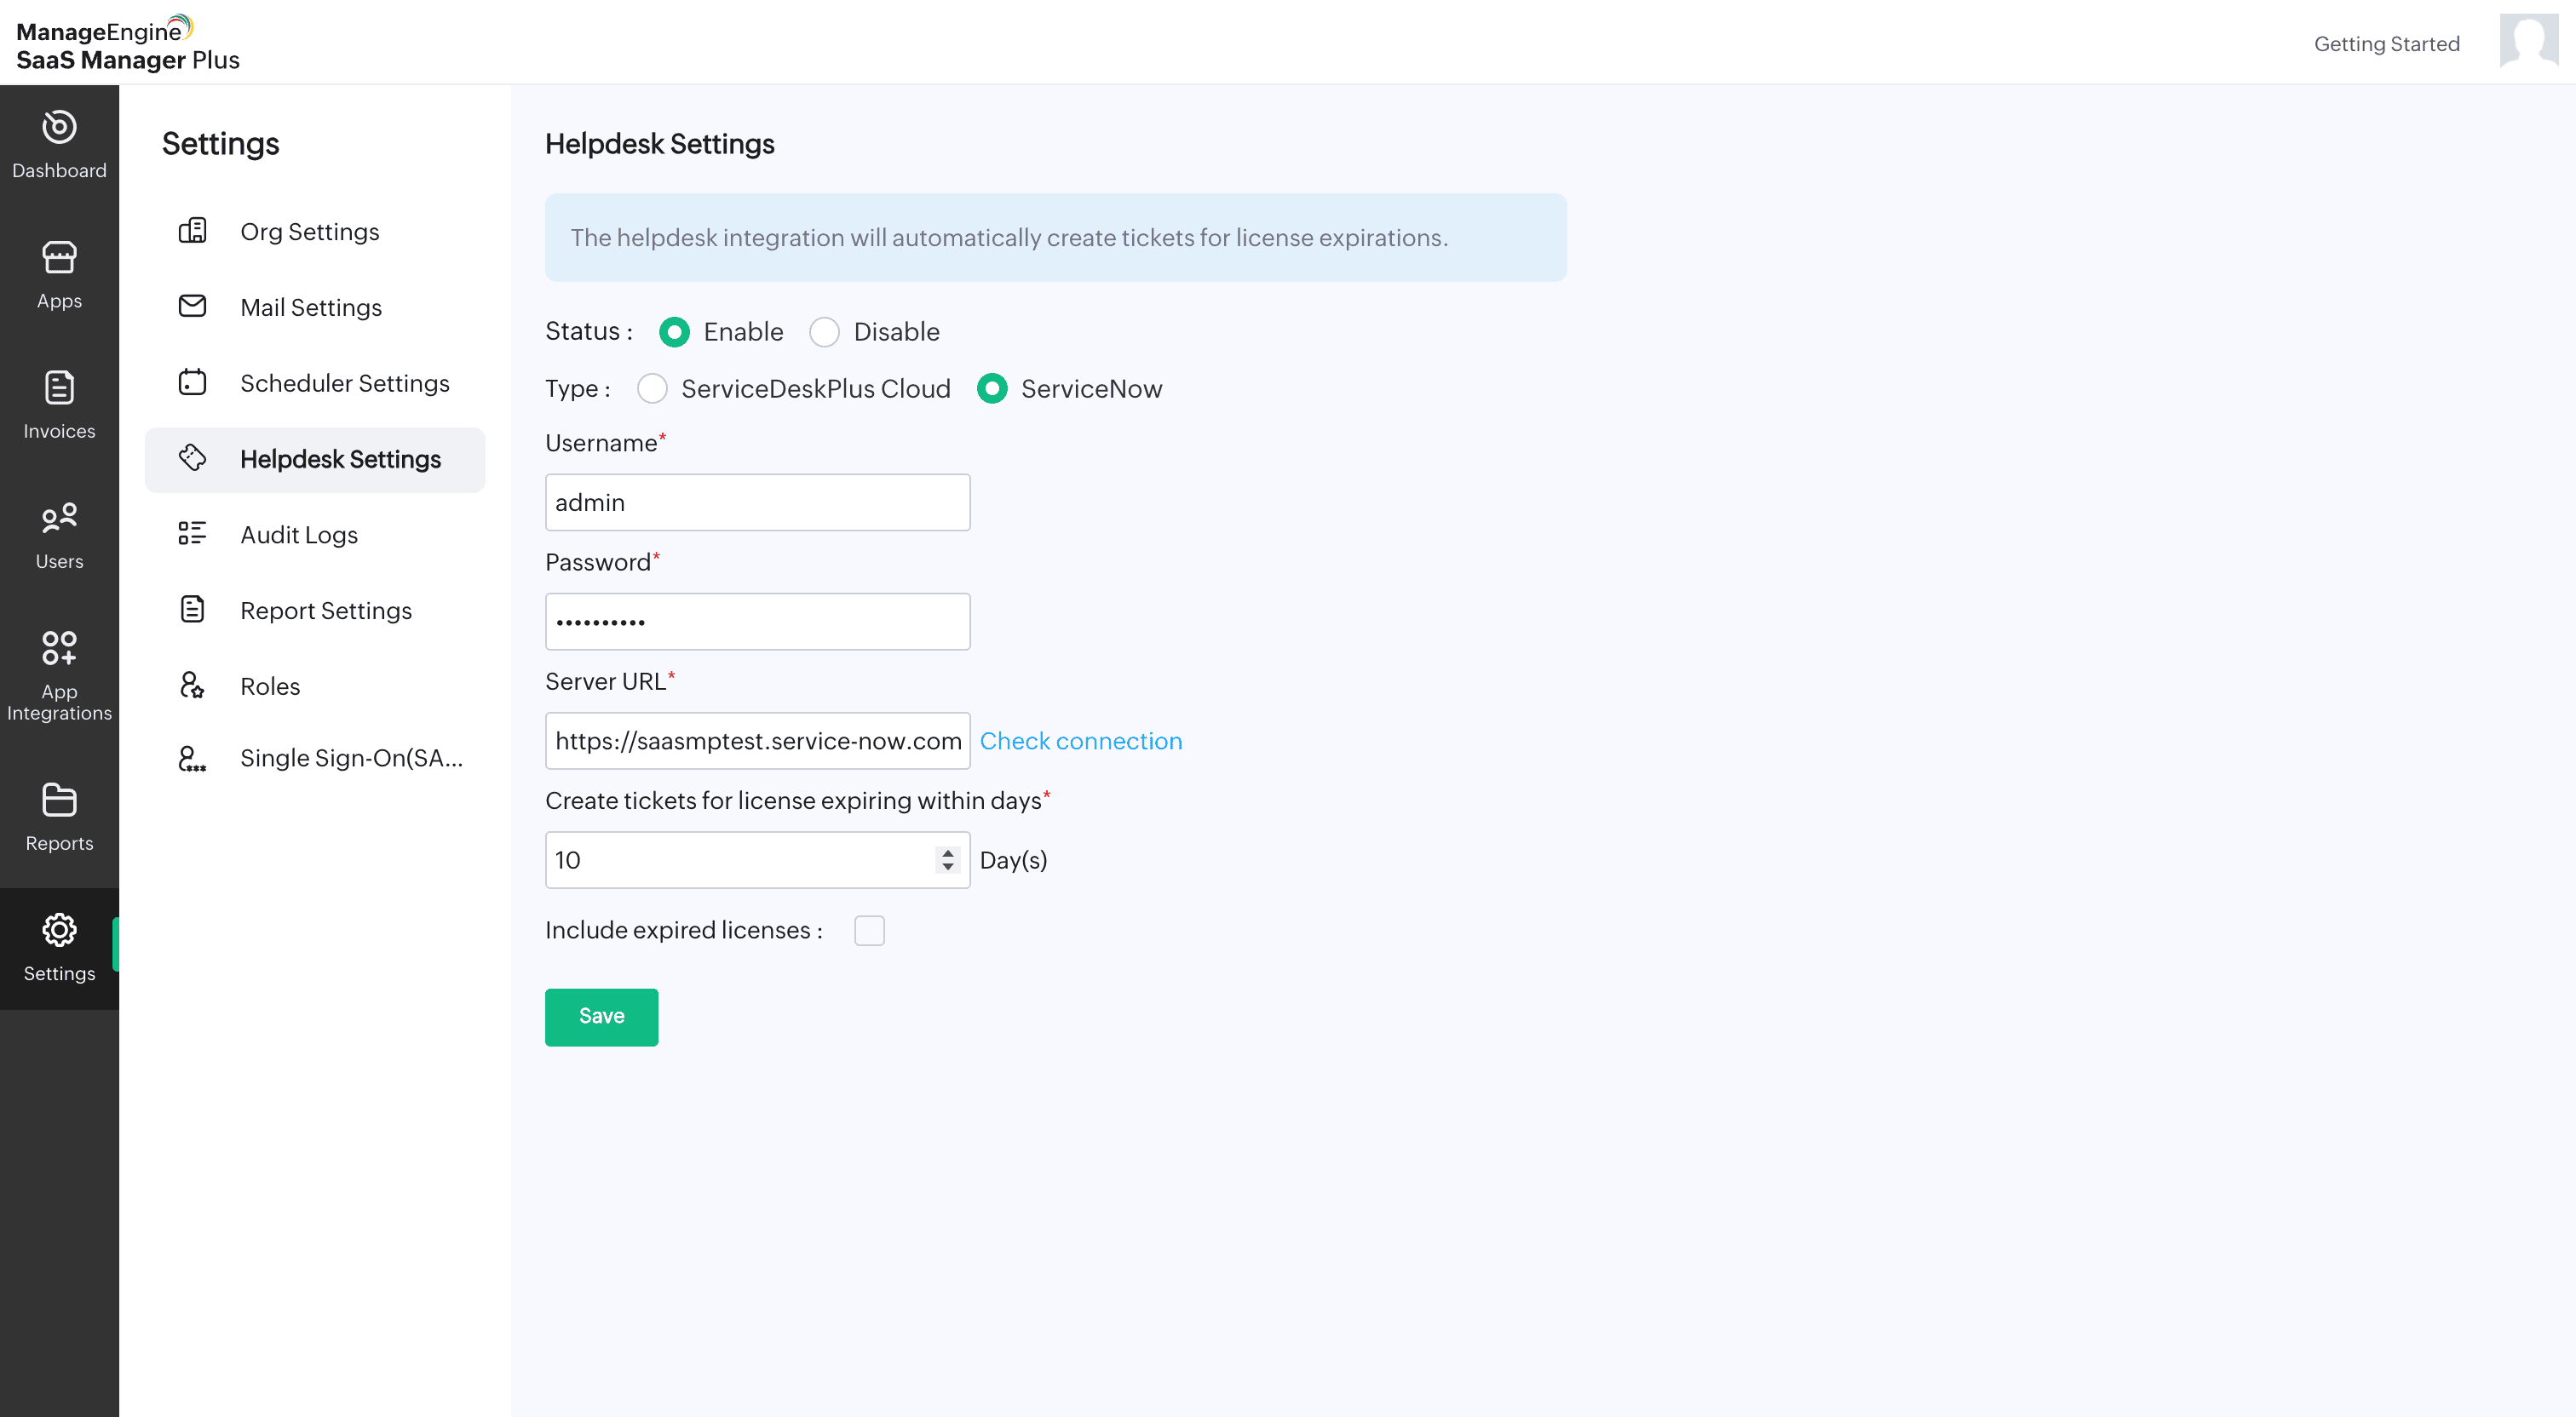
Helpdesk Settings
Helpdesk integration enables you to automatically create tickets for expiring or expired licenses based on your choice of service provider.
To enable Helpdesk integration
- Set the Status to Enable
- Select your preferred type of service provider For ServiceNow,
- Enter your Username and Password
- Enter the Server URL of your ServiceNow instance
- Enter the number of days to create tickets for all the licenses that will expire within that specified timeframe.
- Click Save
NOTE: To generate tickets for expired licenses, select the Include expired licenses checkbox.
For ServiceDeskPlus Cloud,
- For first-time setup, click Authenticate to integrate with ServiceDesk Plus Cloud
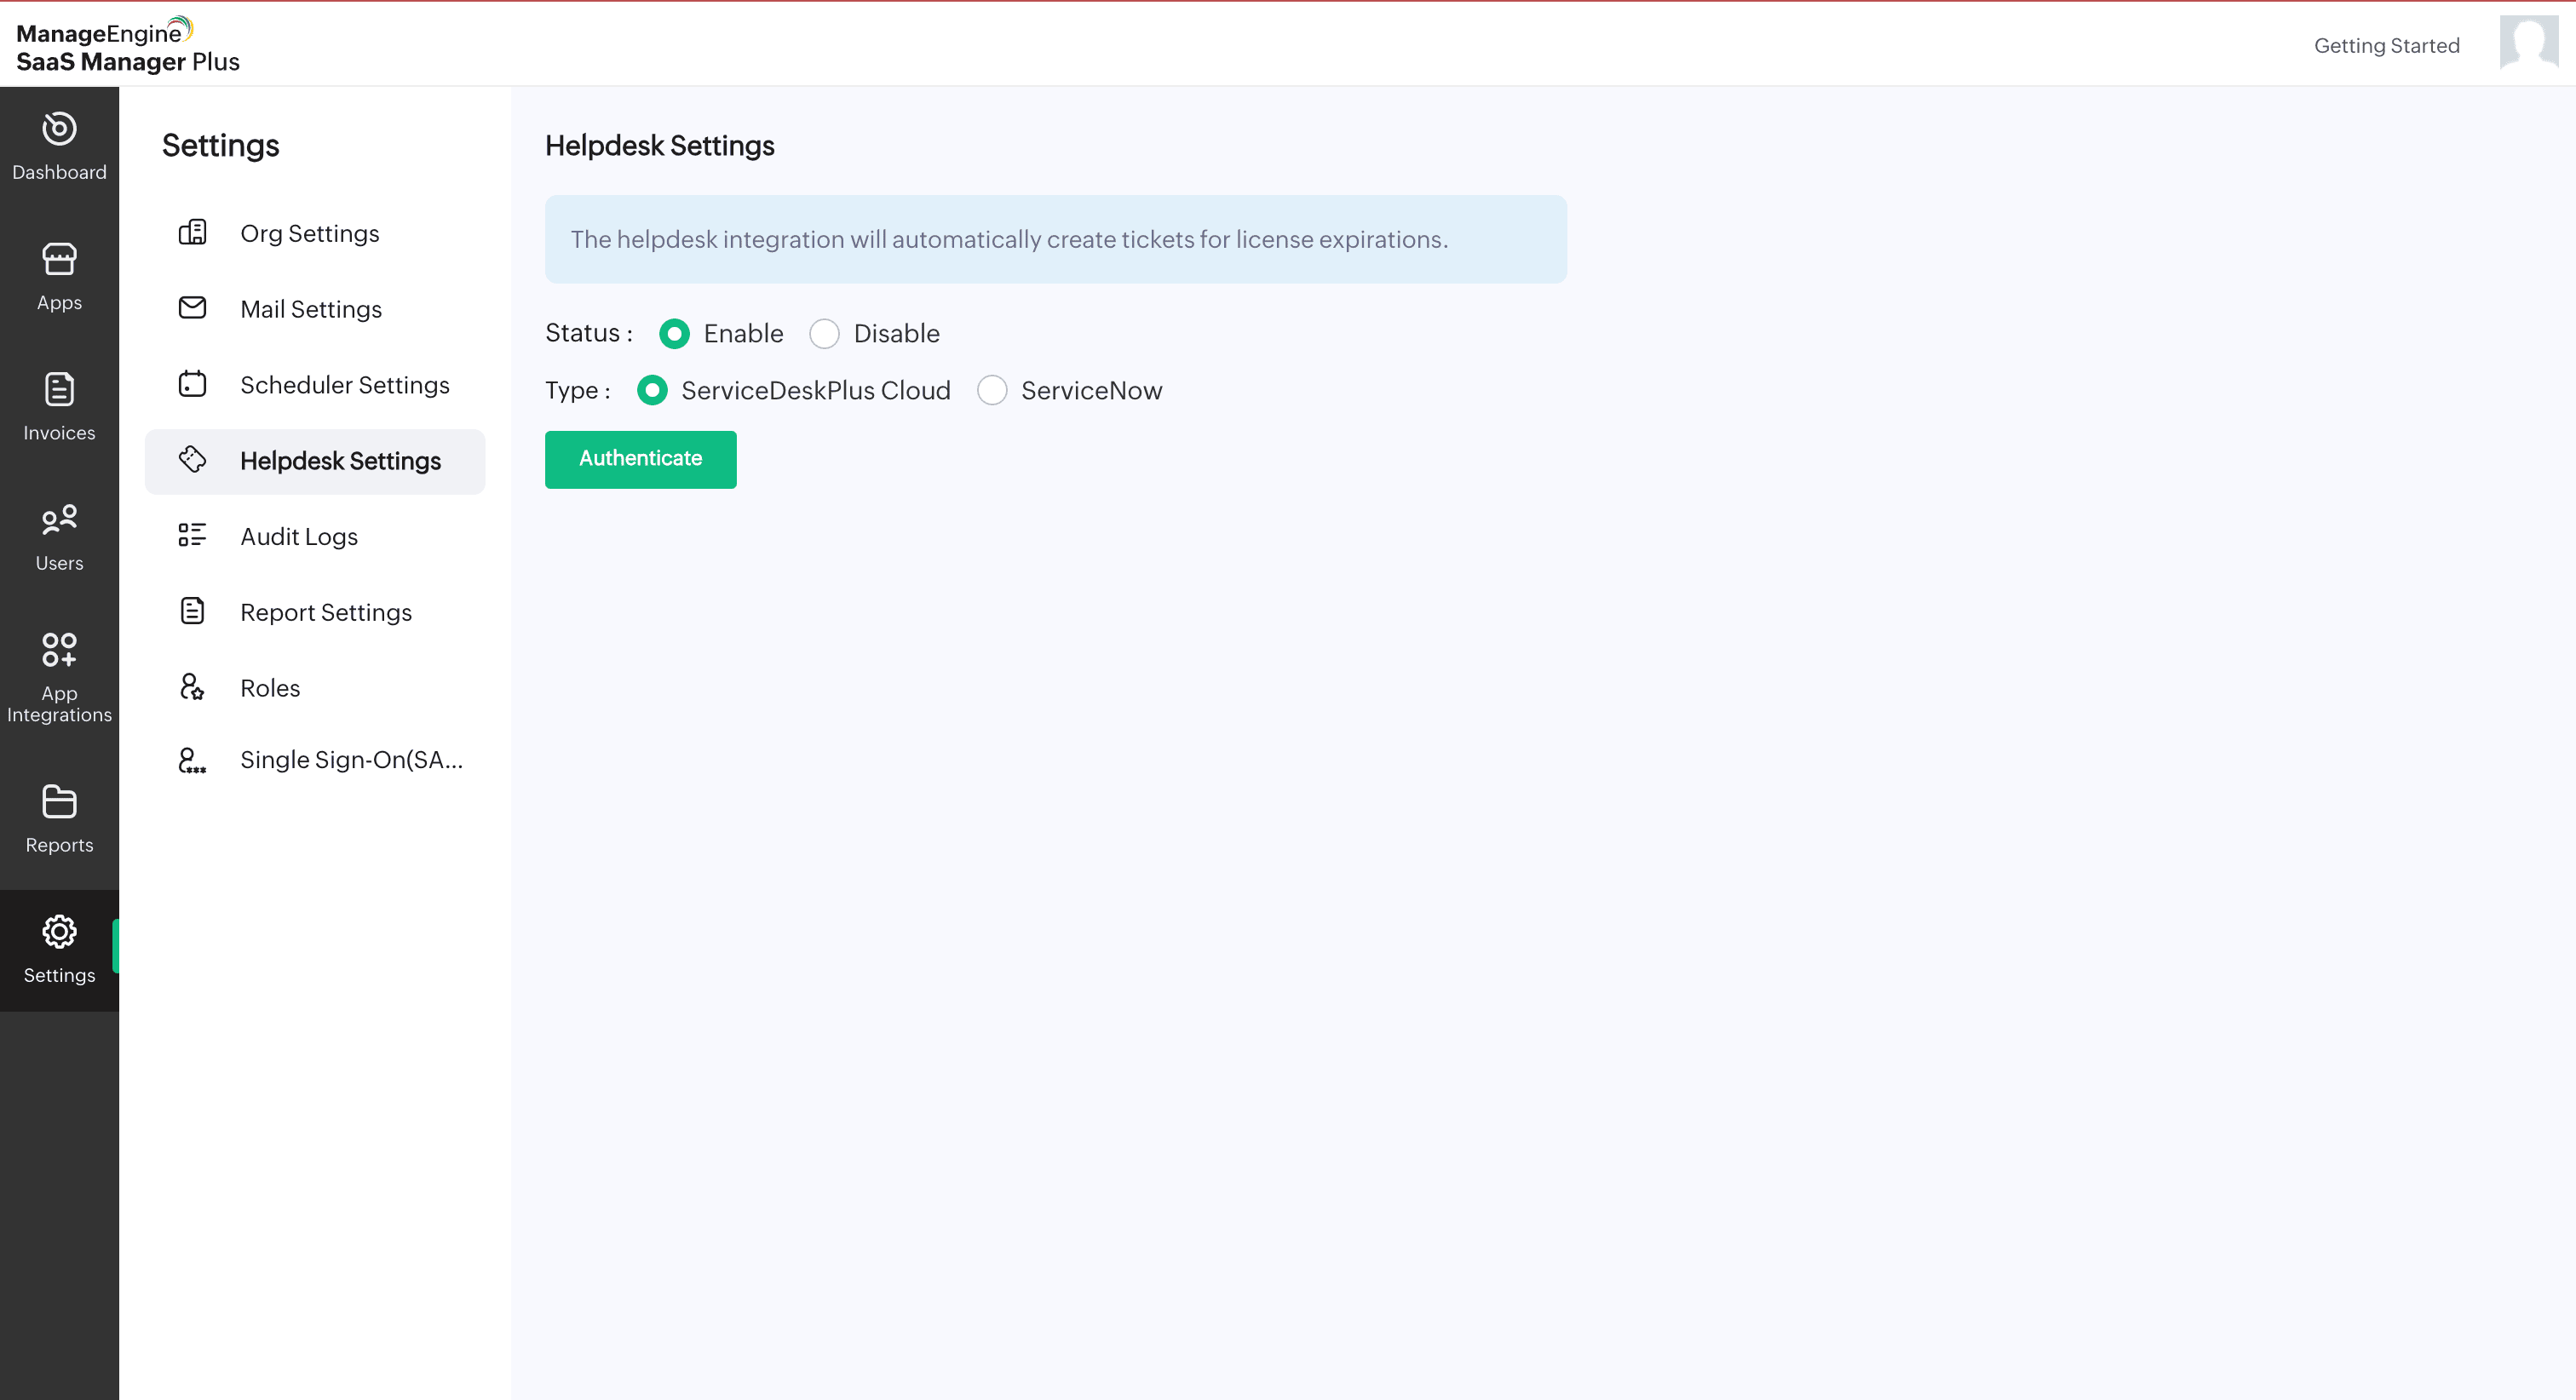
- Once authentication is successful, select the required portal
- Click Fetch Portals to retrieve the list of available portals, then choose the one you need
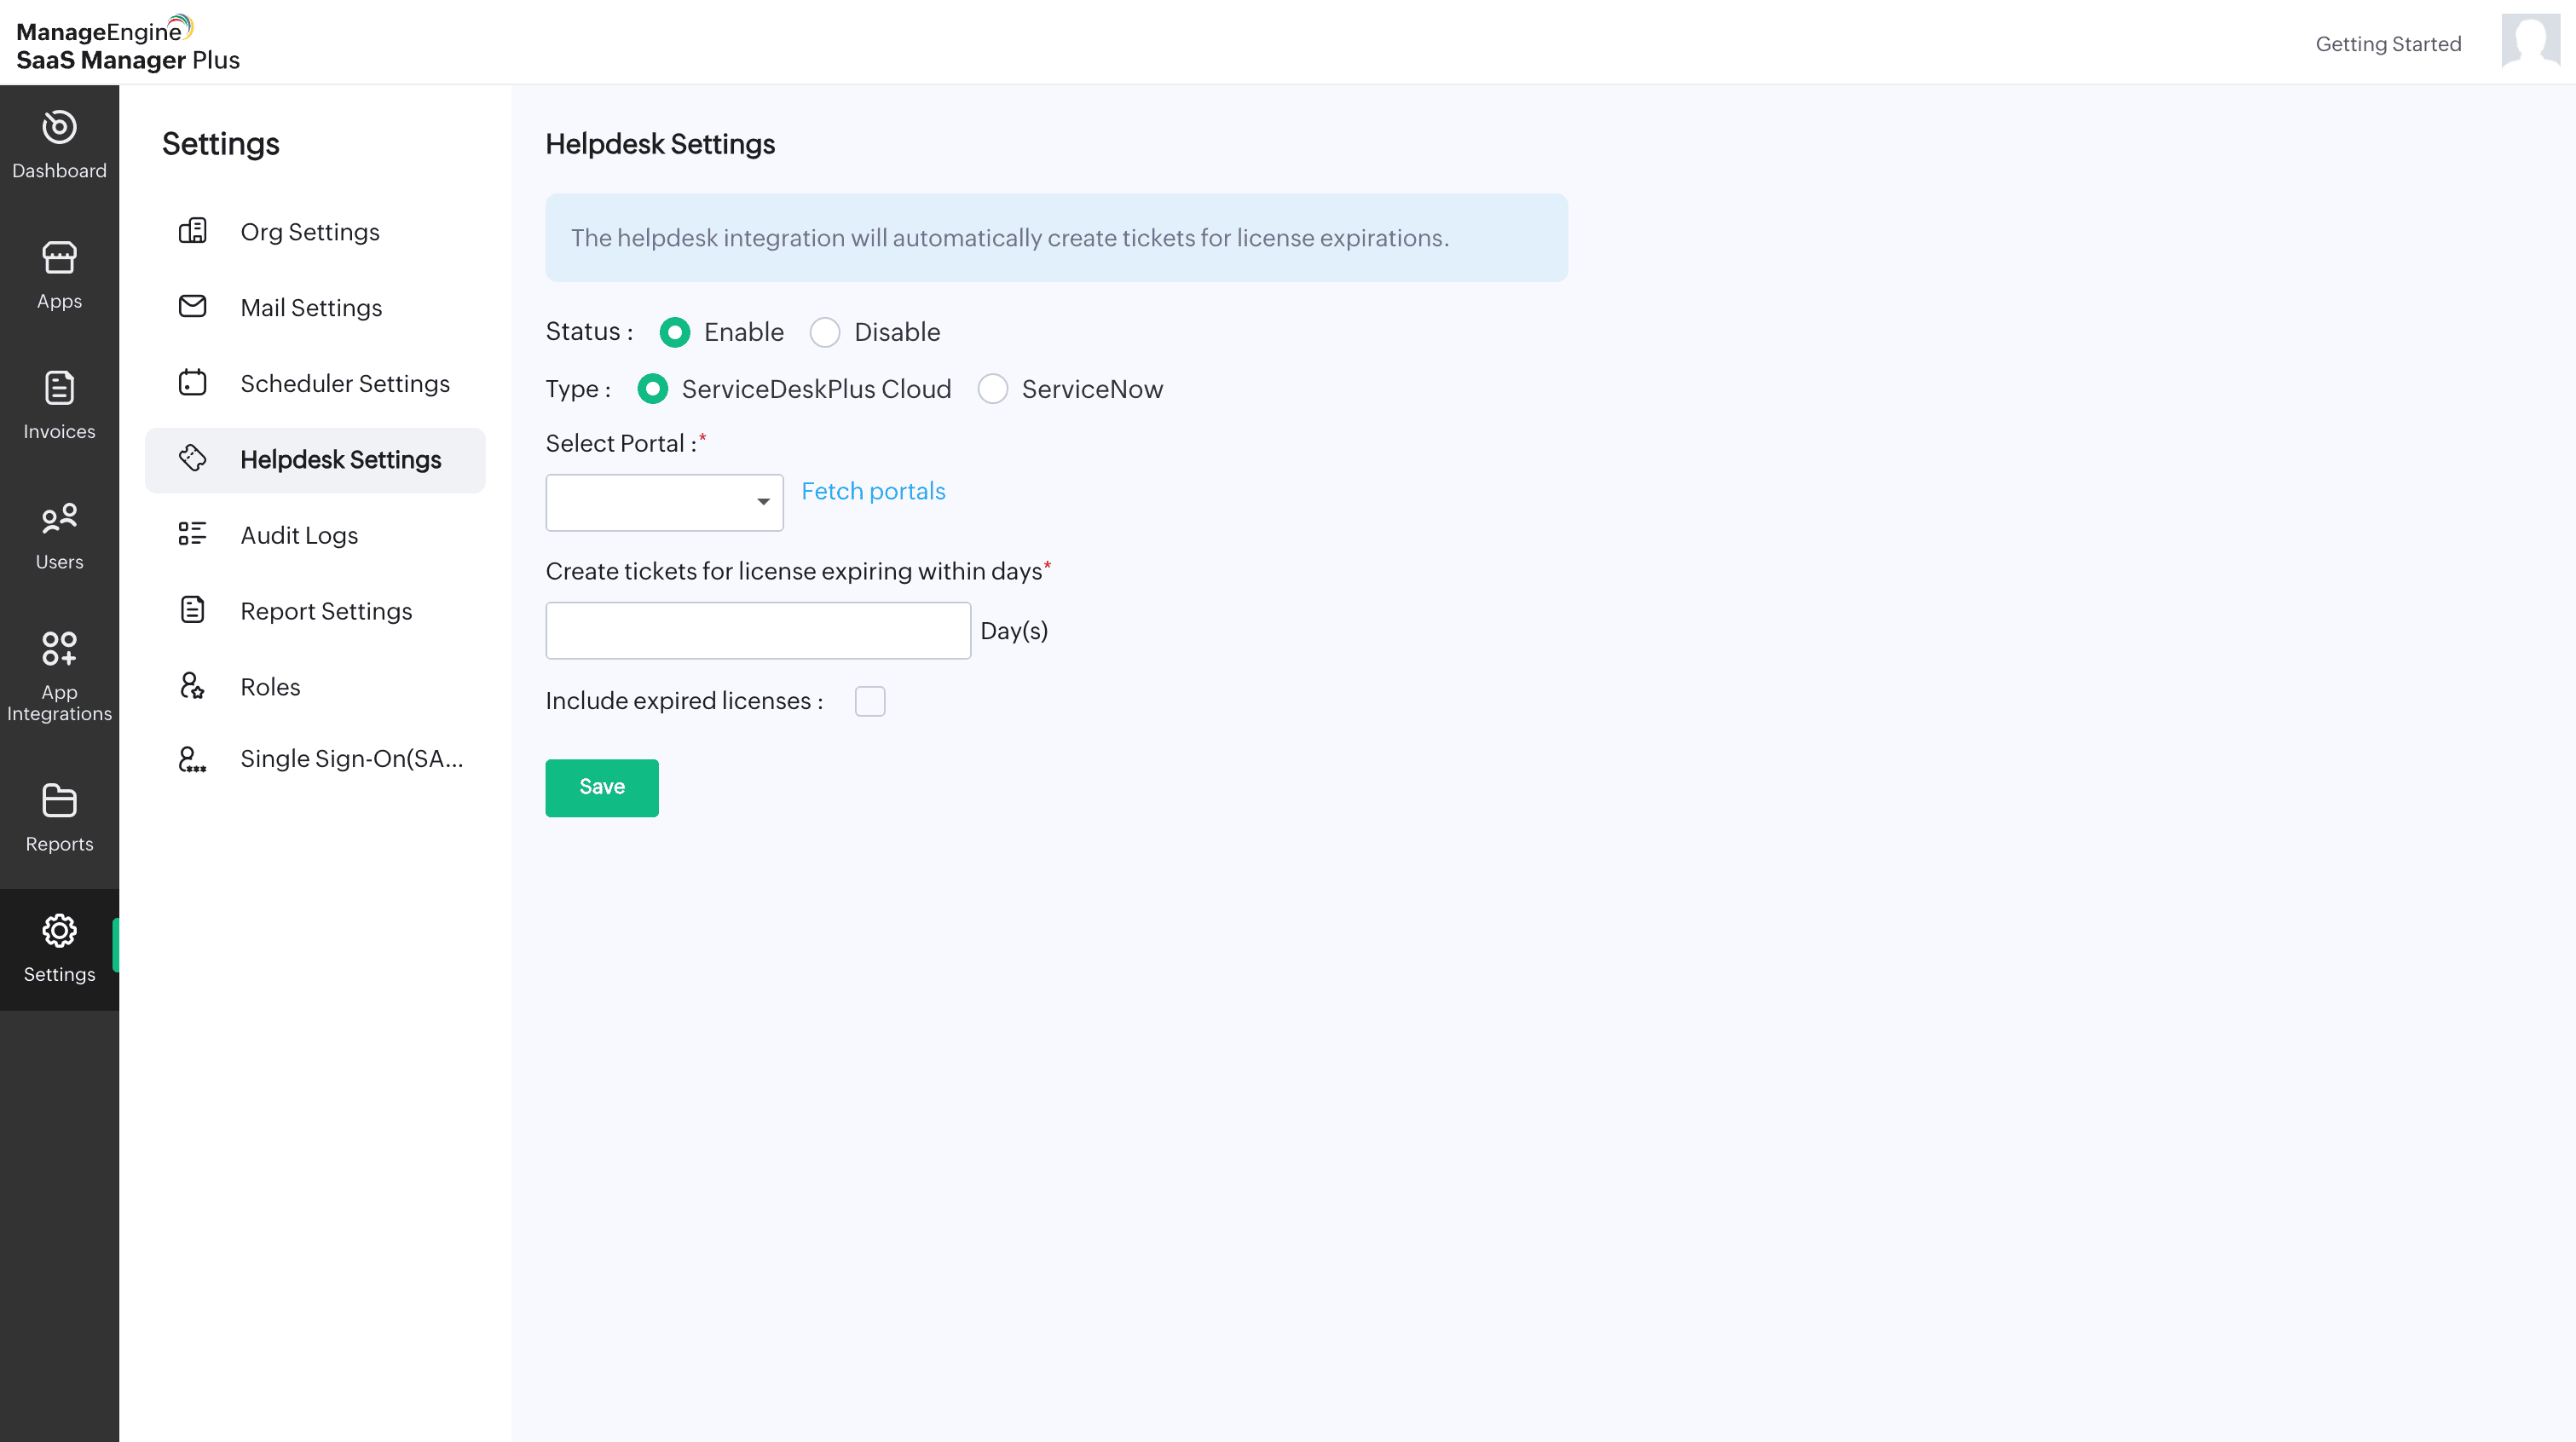
- Specify the number of days to create tickets for all licenses expiring within that time
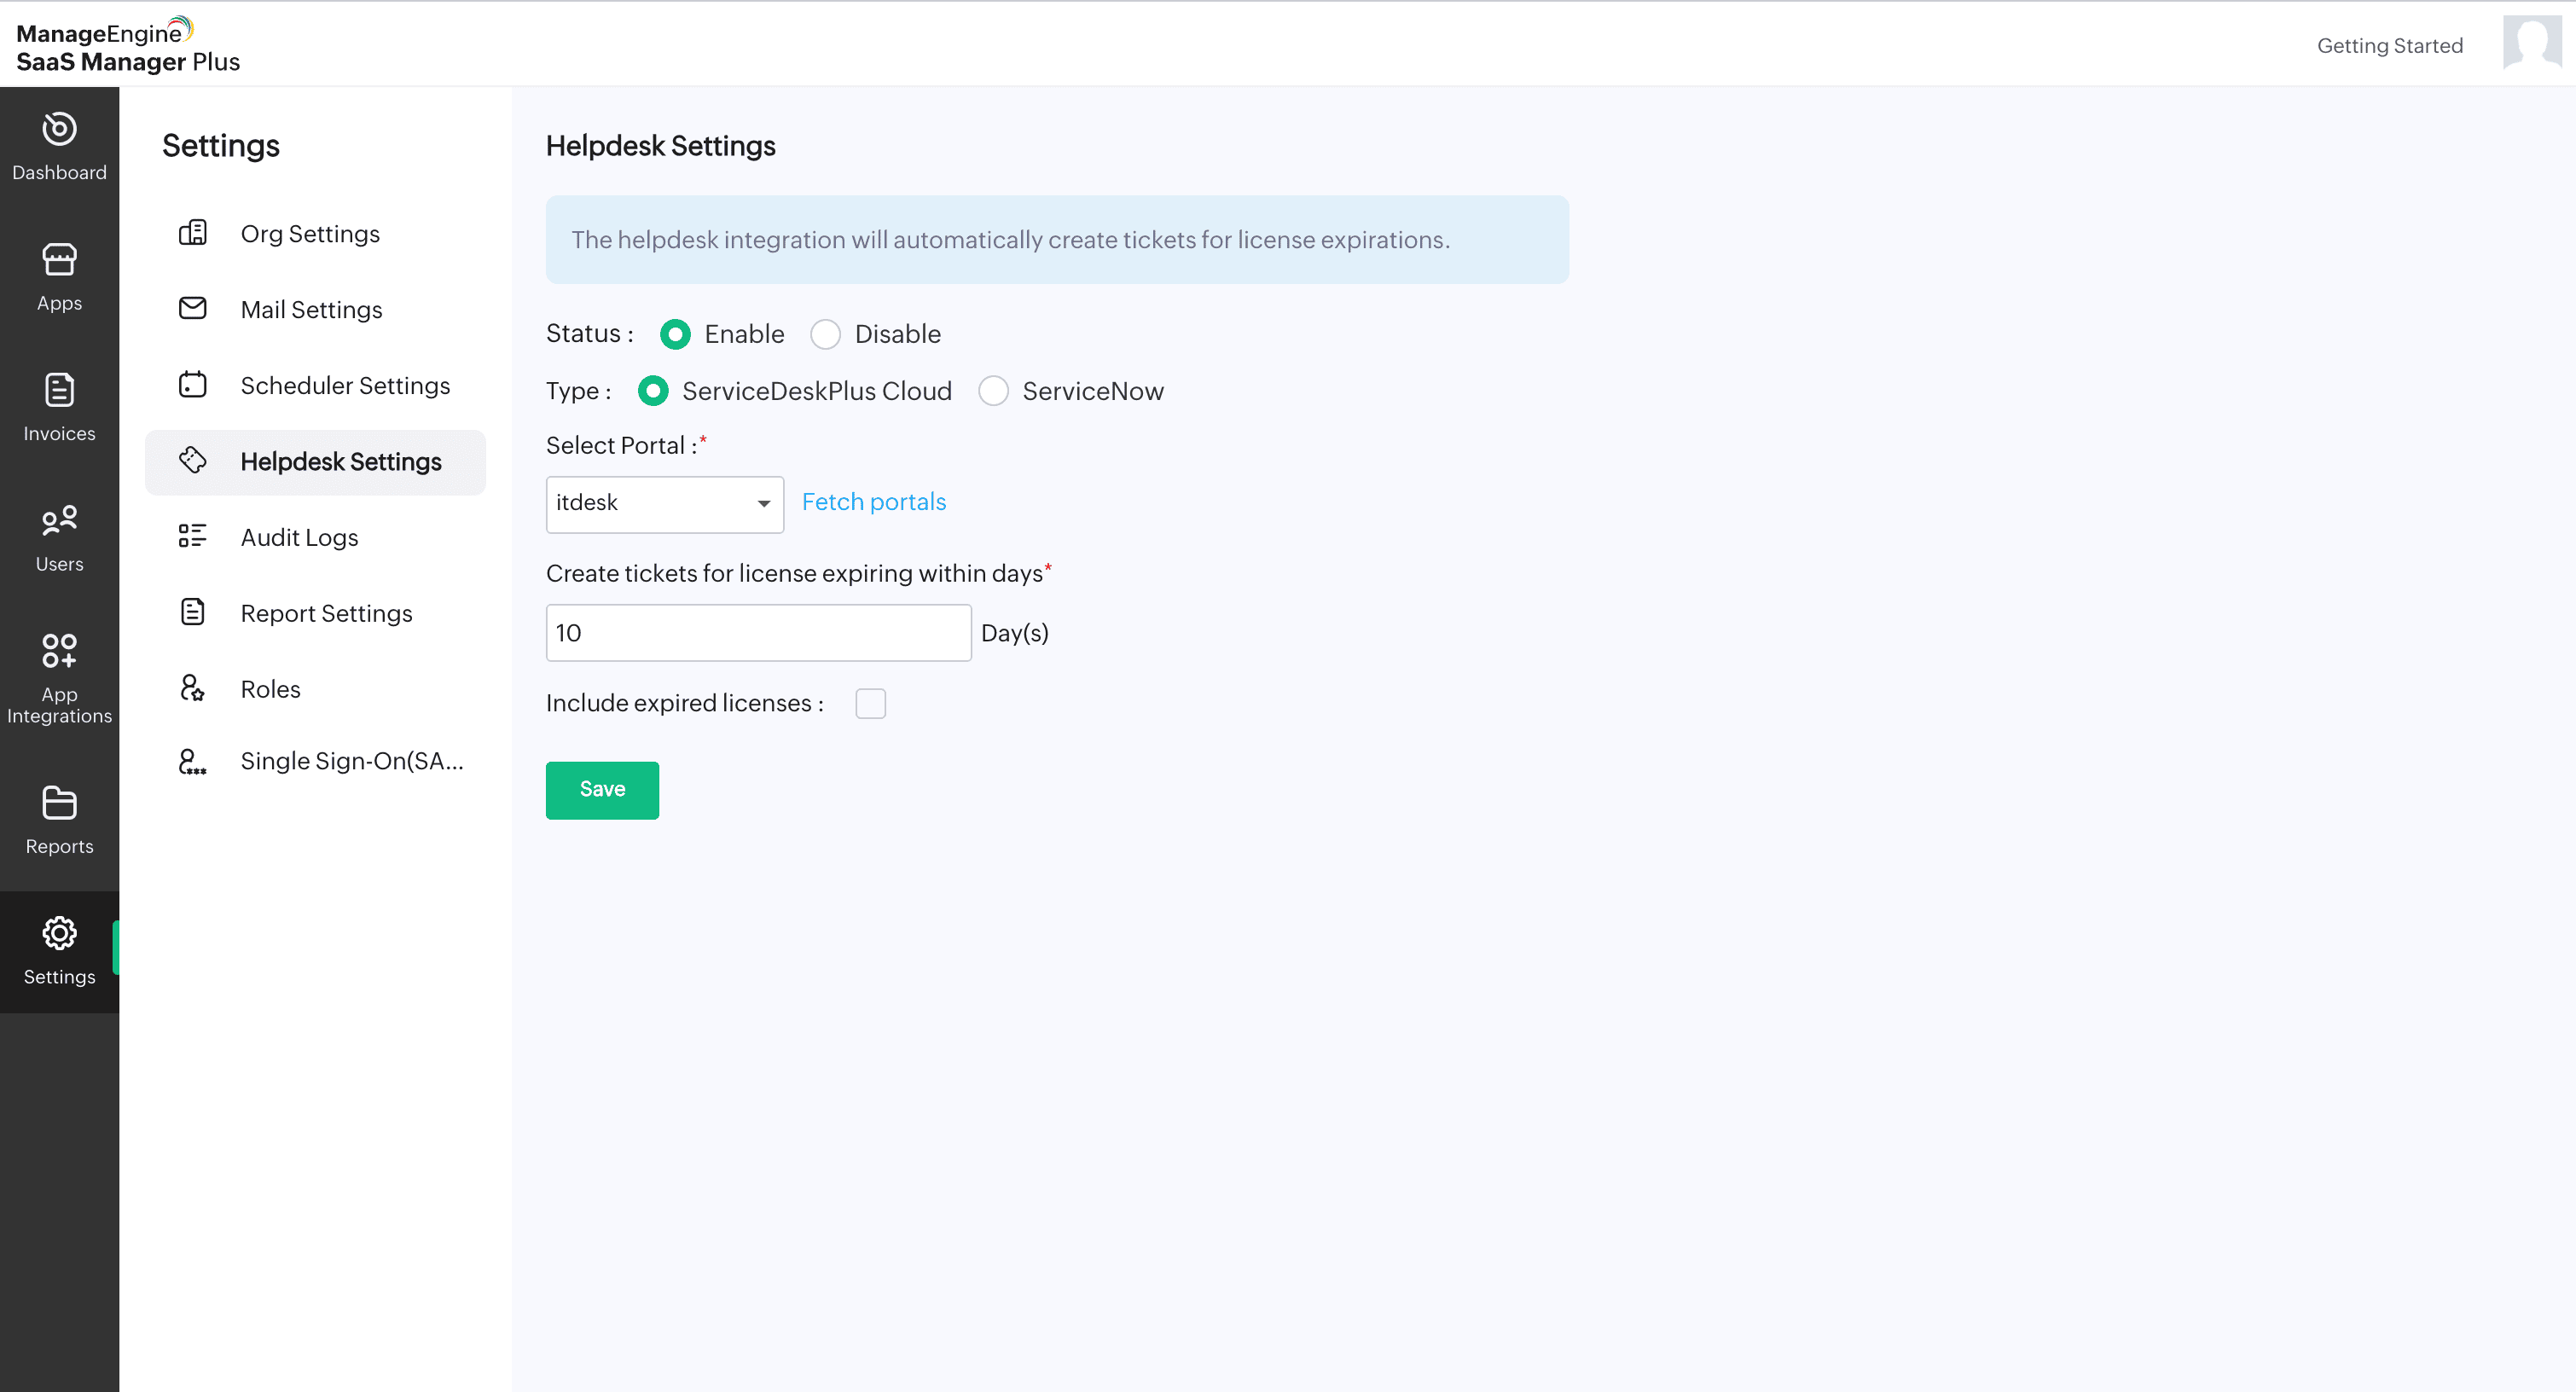
- Click Save
NOTE: To generate tickets for expired licenses, select the Include expired licenses checkbox.
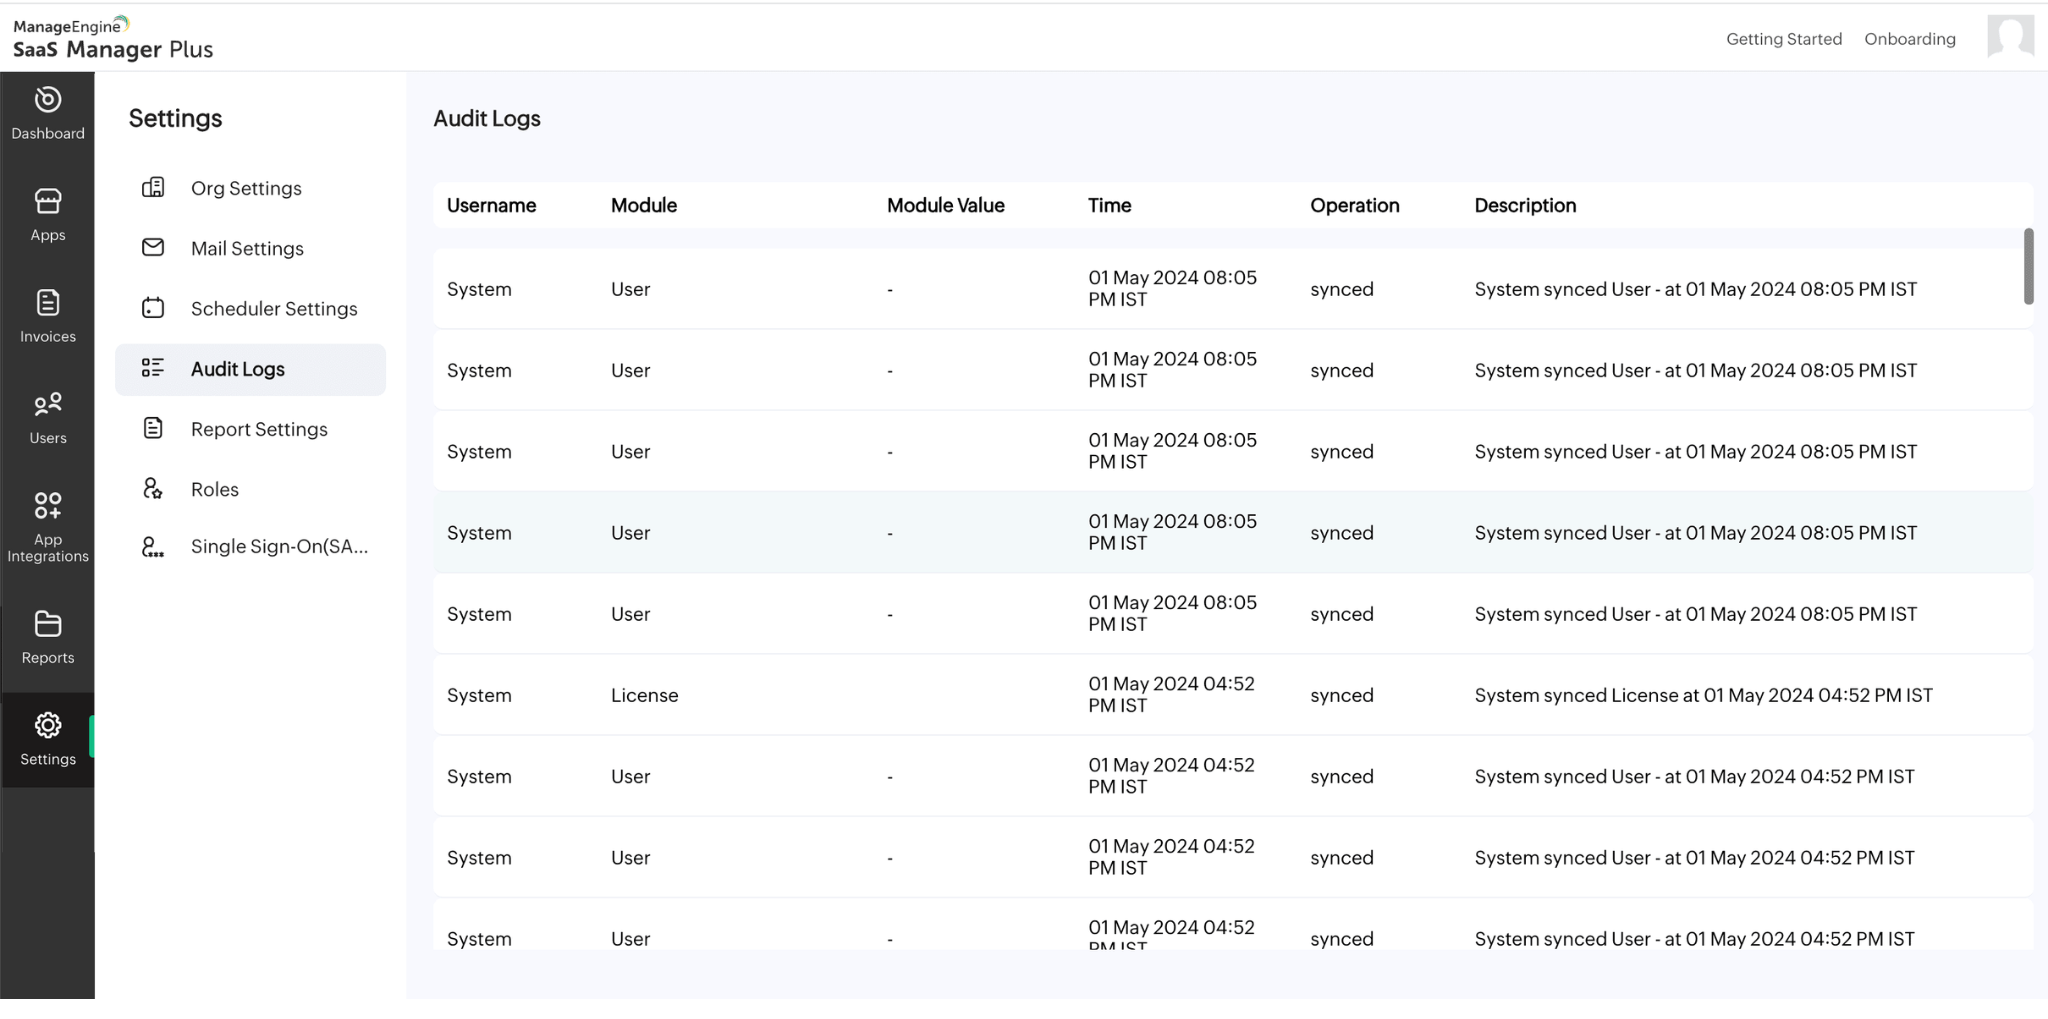
Audit Logs
The Audit Logs section provides a comprehensive record of all activities within the tool. It includes the Username, Module, Module Value, Time, Operation, and Description. These logs allow you to track and review user actions and system events.
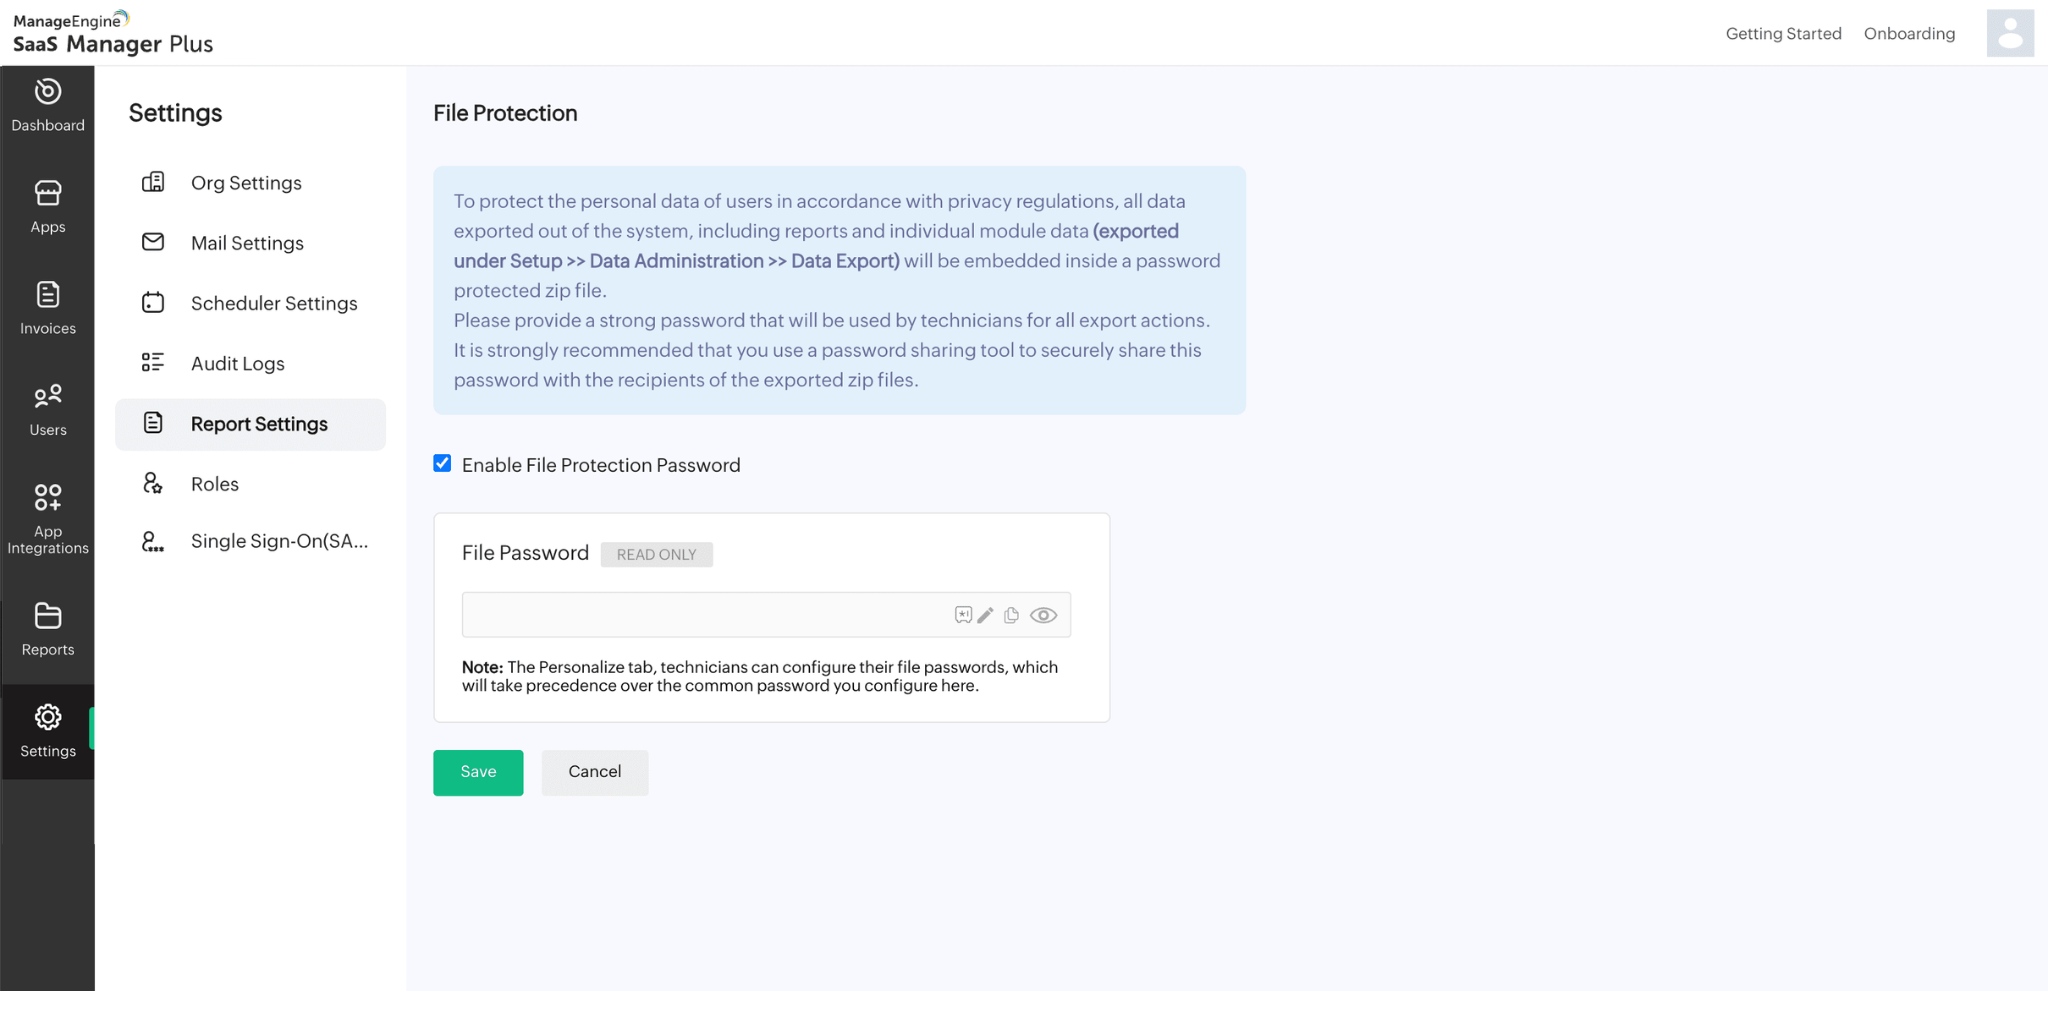
Report Settings
The Report Settings section allows you to customize settings related to report exports and email notifications.
To set a password for exported reports and emails
- Check the Enable File Protection Password check box.
- Specify the desired password in the File Password text box.
- Click Save to confirm the password.
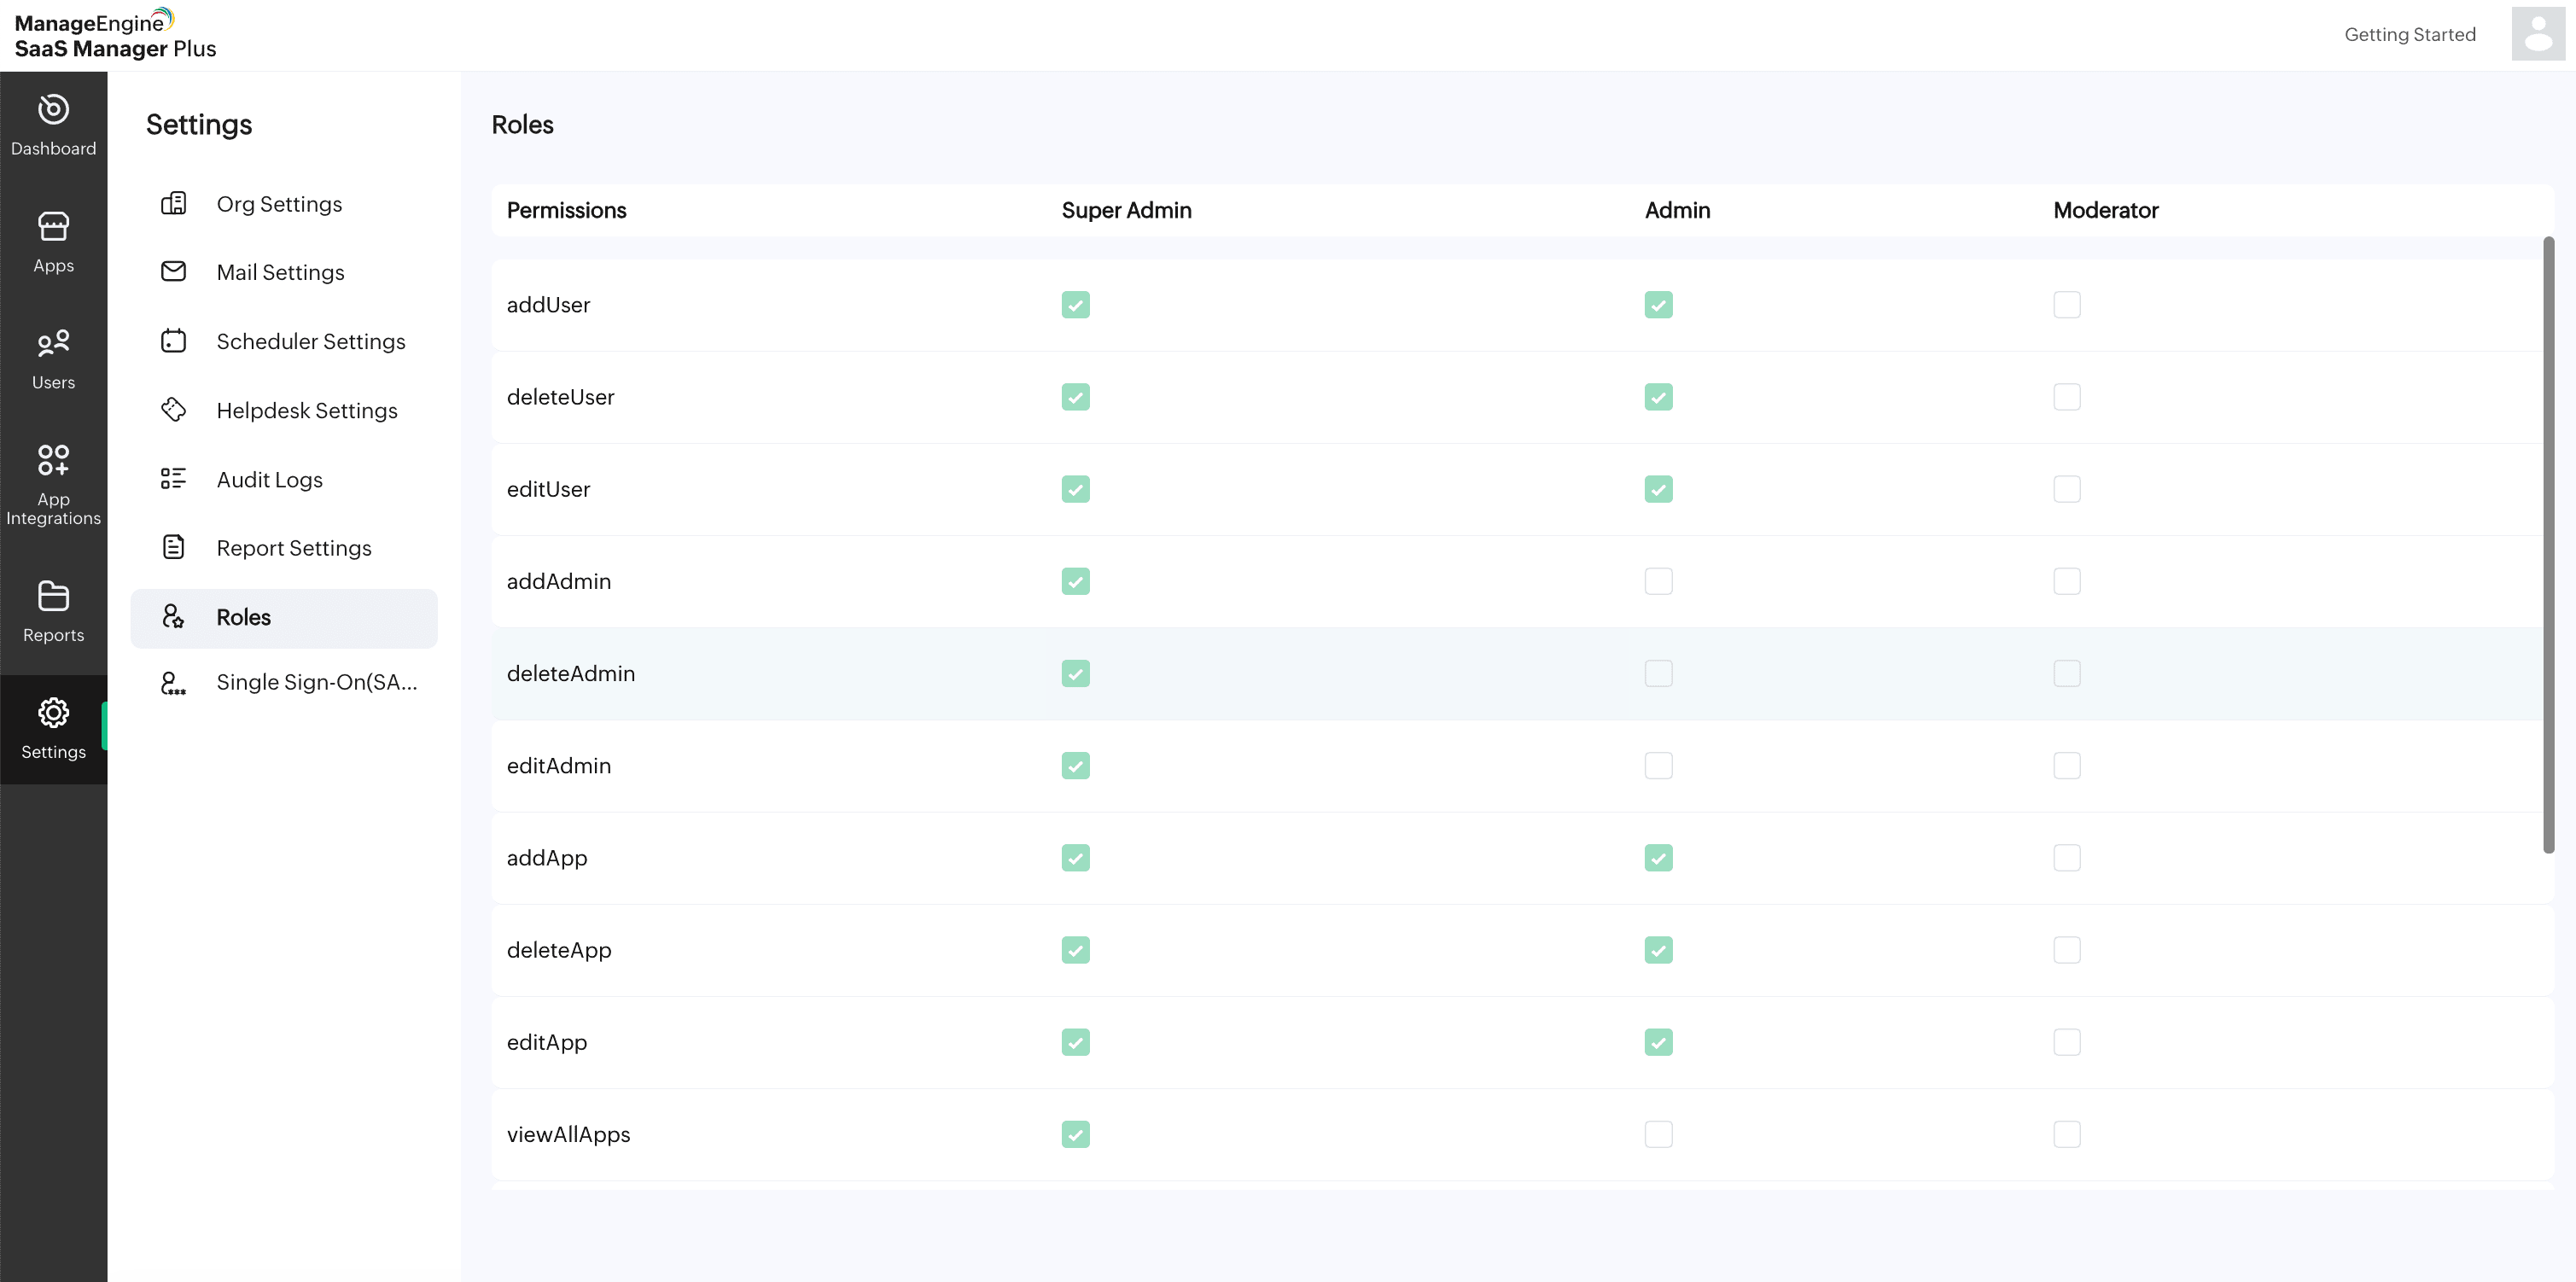
Roles
The Roles section defines the different user roles and their corresponding permissions and access levels within the tool. The roles include Super Admin, Admin, and Moderator, each with specific privileges. These roles help to manage and control user access and responsibilities effectively.
SingleSign-ON(SAML)
To enable Single Sign-On using SAML authentication, click on SingleSign-On(SAML) tab and you will be redirected to Zoho Directory.
Follow the steps provided here for custom authentication with Okta.
NOTE - Only the users who already exist in Zoho Directory can access SaaS Manager Plus