- Log360 Cloud
- Configuration settings
- File Monitoring
- EMC Isilon
EMC Isilon file monitoring
Dell EMC Isilon is a scale-out network-attached storage (NAS) platform designed to manage and store large volumes of unstructured data, providing high performance and scalability for data-intensive workloads. The integration of Isilon with Log360 Cloud enhances security and operational insights.
Supported versions
OneFS OS versions 7.0 and above.
Audited events
Log360 Cloud audits every successful and failed attempt to perform the following file activities:
- Create
- Read
- Rename
- Write
- Delete
- Permission changes
This guide provides the steps on configuring real-time change auditing for your EMC Isilon cluster using Log360 Cloud.
Required privileges
Certain minimum privileges are required to ensure the effective functioning of Log360 Cloud while auditing your EMC Isilon nodes. Create a dedicated Log360 Cloud Isilon user account and provide it with the below privileges.
- Provide these privileges with read-only access
- ID: ISI_PRIV_LOGIN_SSH
- ID: ISI_PRIV_AUTH
- ID: ISI_PRIV_NETWORK
- Provide this privilege with read and write access:
ID: ISI_PRIV_AUDIT
Note: To enable LogForwarding, it is essential to grant ISI_PRIV_AUDIT with both read and write permissions. However, if you choose to use Manual Log Forwarding, you can set the privilege to read-only.
- Verify that the cluster name or cluster DNS name is mapped to the node's IP address.
- The user configured under domain settings for the authentication provider must have read permission to the shares.
Configuring EMC Isilon auditing in Log360Cloud
Follow these steps to configure EMC Isilon auditing in Log360 Cloud:
- Go to Settings > Configuration > File Integrity Monitoring > EMC Isilon cluster.

- If the cluster is configured to a domain, select the EMC Isilon Cluster from the list of discovered devices. If not, you can choose the Configure Manually option and enter the cluster name.

- Provide the correct credentials and SSH port number. Then, choose an appropriate Agent.
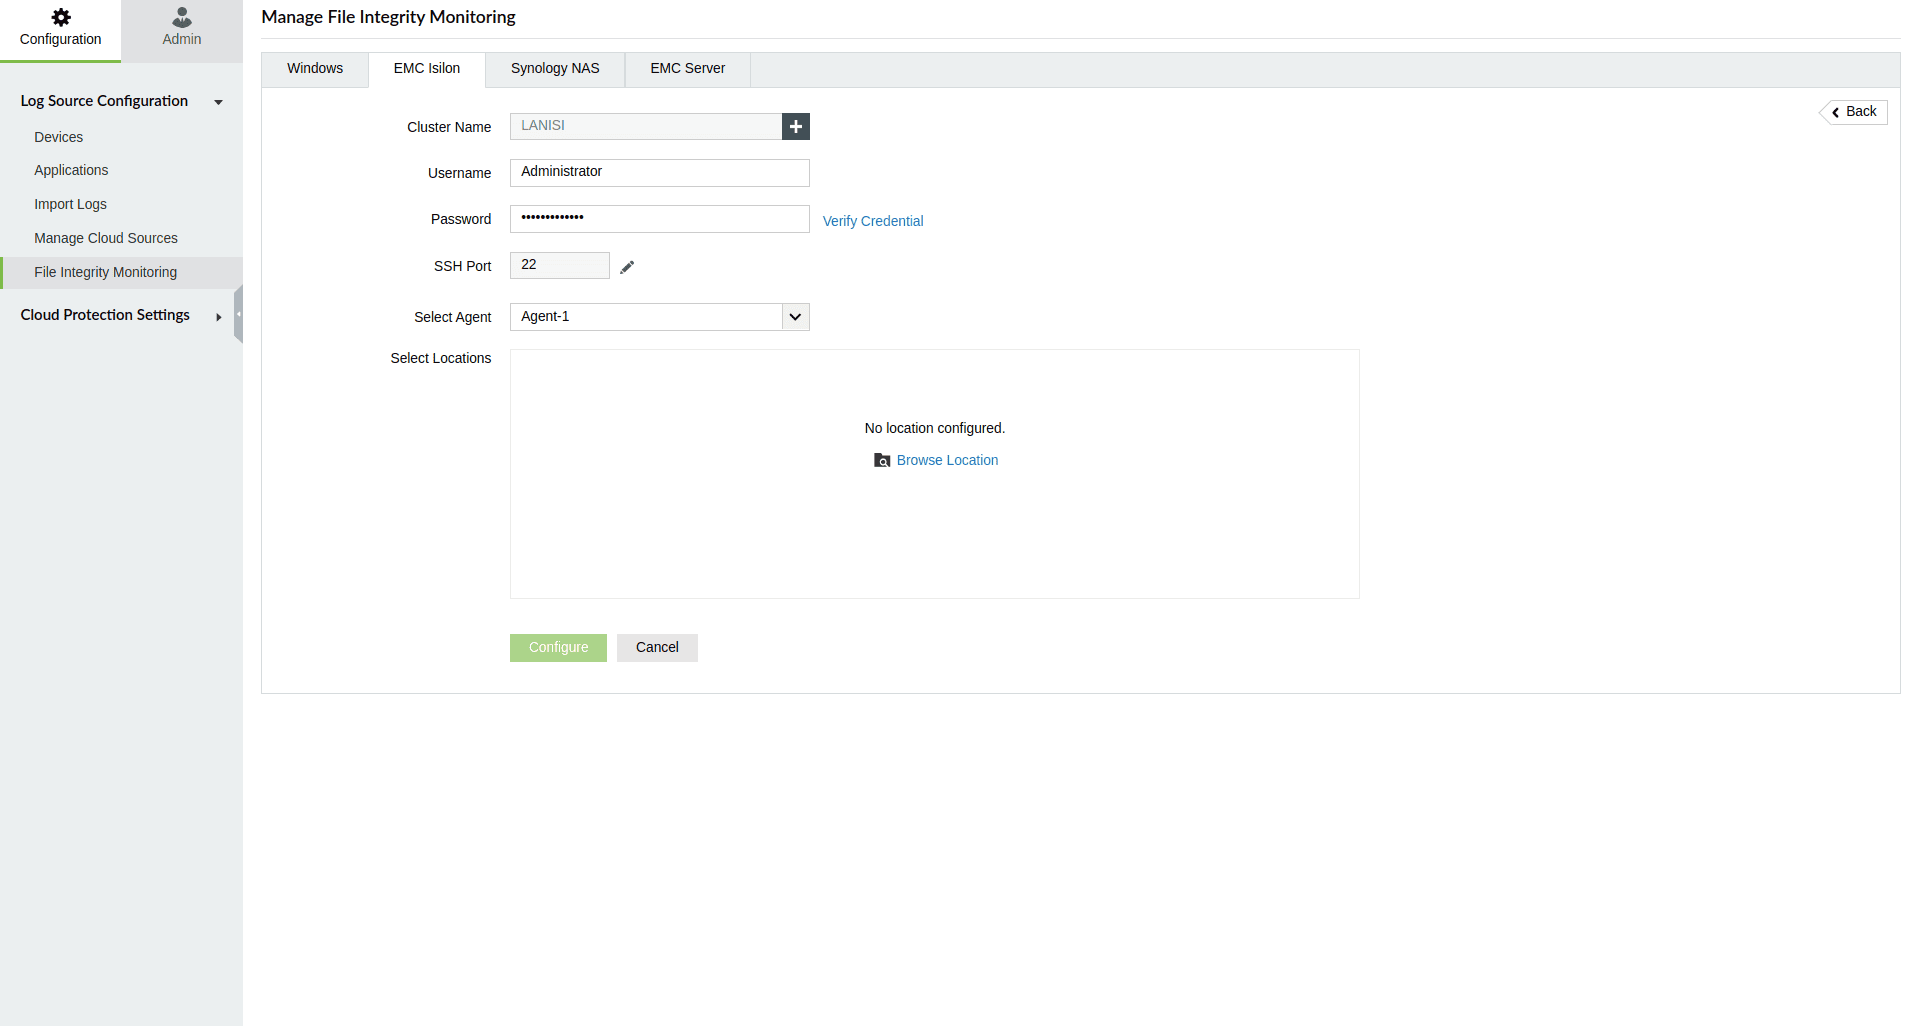
- Verify the provided credentials to enable browsing of locations. Ensure proper credentials validation before browsing Isilon locations for secure connections and accurate file activity monitoring.
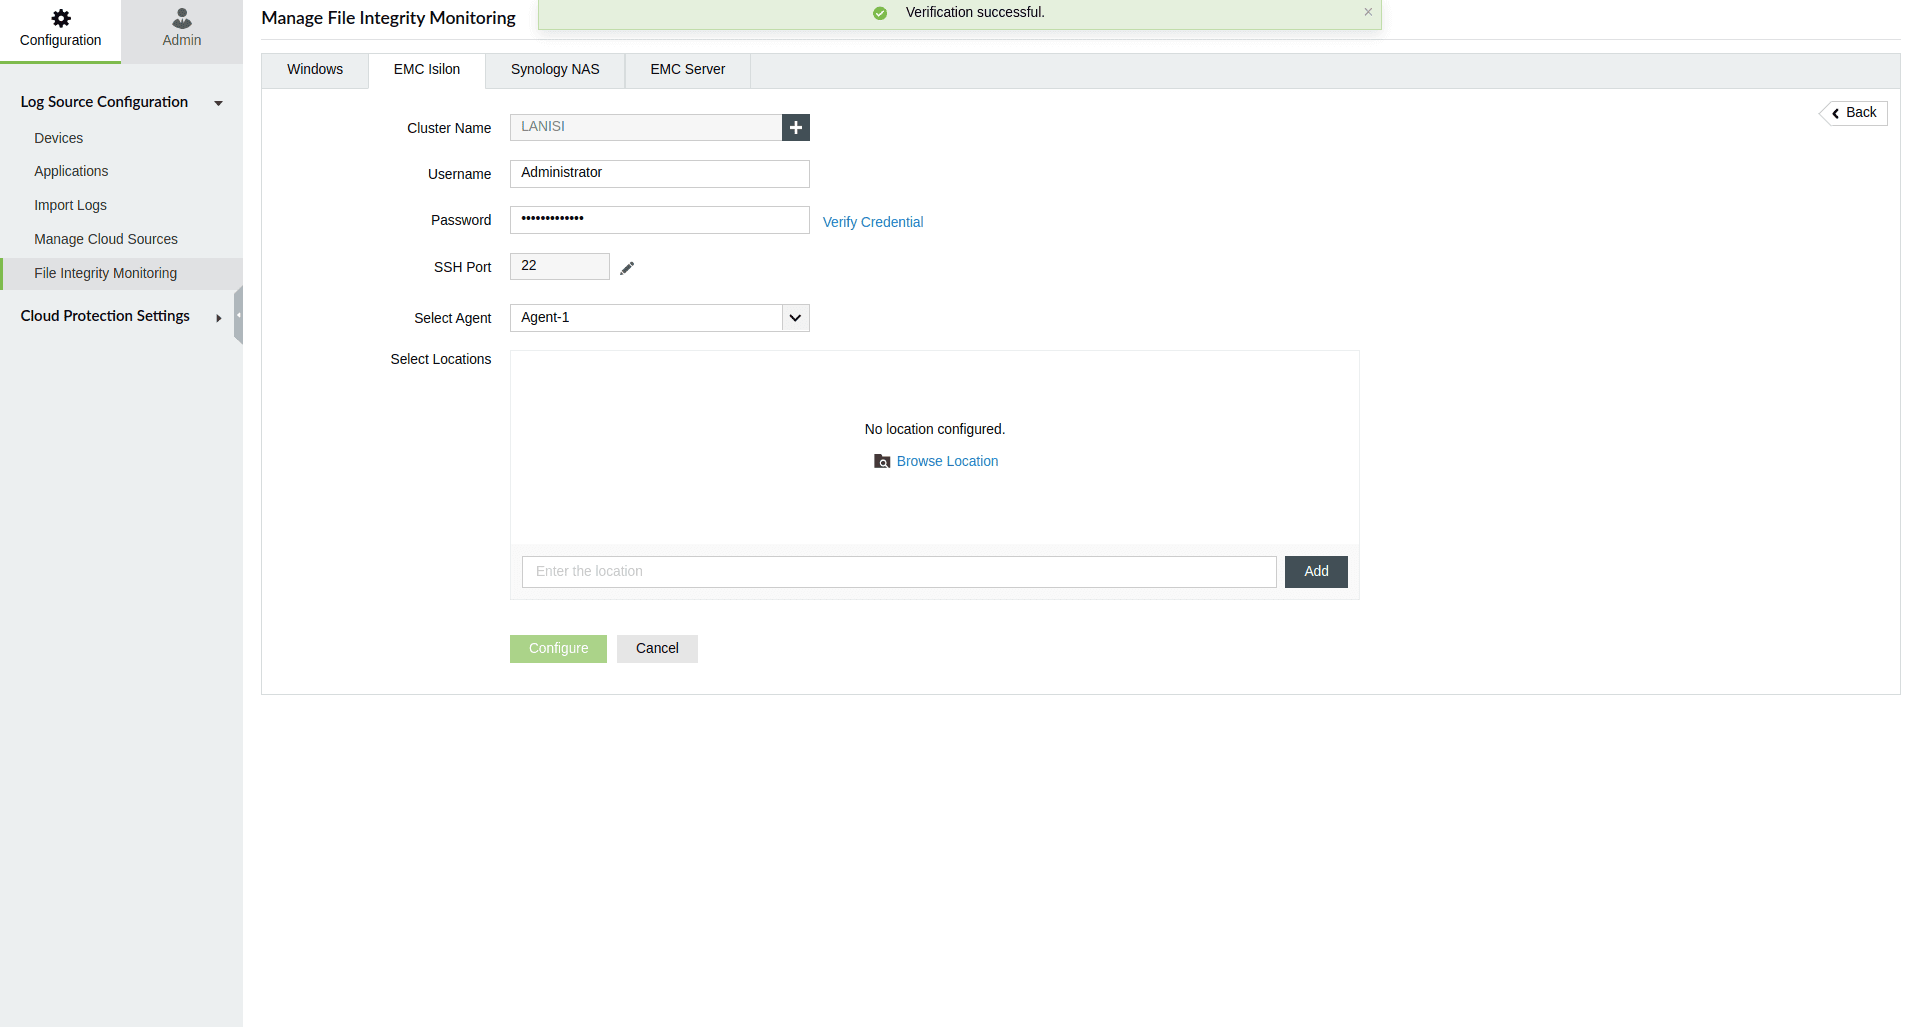
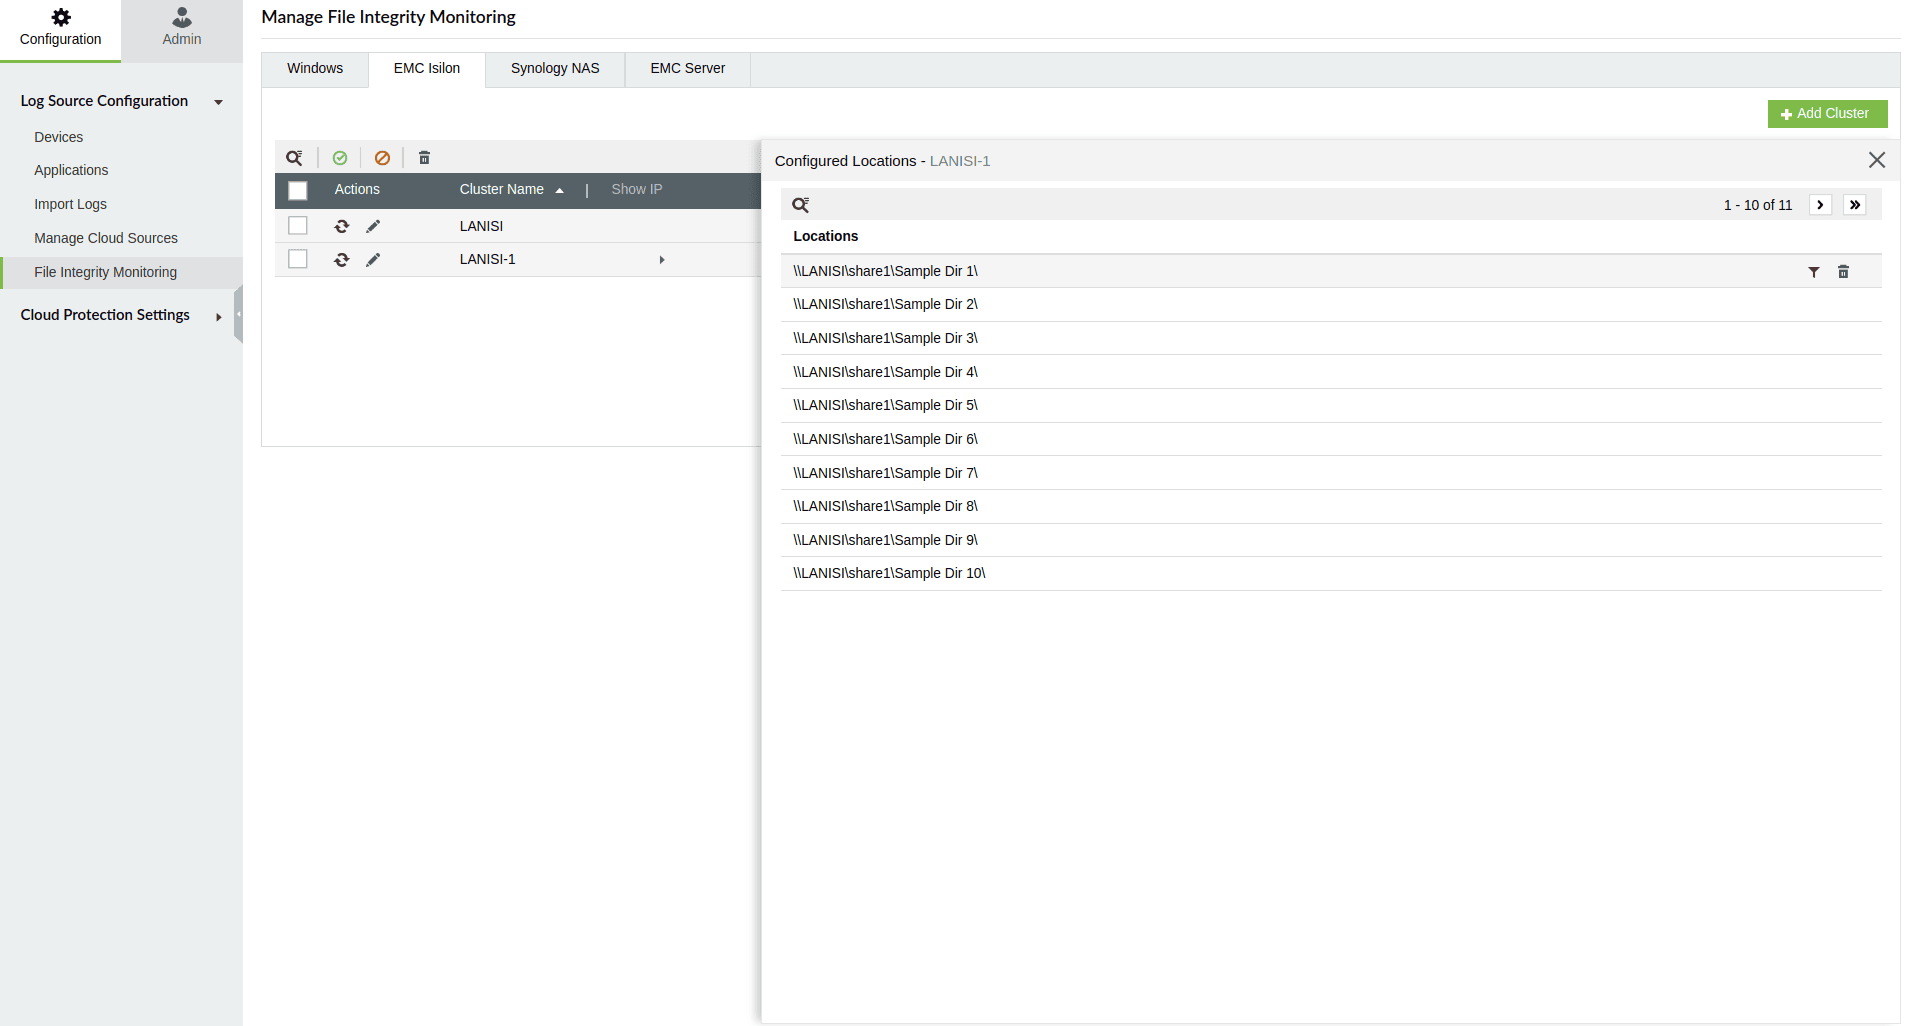
- Browse through the directories and choose the specific files and folders you wish to monitor. Alternatively, you can manually enter the path to the files/folders.

- Utilize the Filter to:
- Include/exclude certain file types.
- Exclude sub-locations within the main directory.
- Exclude all sub-locations within the main directory.

- Click on the Configure button to initiate the configuration process.

Note:
- To update credentials, click on 'Edit' and modify the required credentials. When using domain credentials, confirm that the chosen domain serves as an Authentication Provider for the cluster. Verify the successful addition of the cluster to the specified domain.
- If the specified location is removed or unreachable from the agent, a warning icon will appear next to the location. Users can investigate potential issues with the location or choose to remove it from monitoring if it has been deleted on the cluster.

- When adding local users or sub-nodes to the cluster, remember to refresh the interface before auditing with the new settings.

- You have the option to filter or delete locations from the Two Column layout.
Log Forwarding:
- Supported versions: Auto log forwarding is supported for ONEFS version 8.2 and above.
- Auto log forwarding is enabled by default during device configuration.
- If there is a failure in configuring log forwarding, please check the troubleshooting tips and utilize the 'Configure' button displayed below to set up log forwarding.

- Verify the selected agent and click Configure to enable auto log forwarding. Please note that the Isilon cluster forwards logs only to 514/UDP, and this cannot be changed.

Note:
- If the agent is modified at this point, it will impact the device configuration.
- If you are using a version below 8.2, manual configuration becomes necessary.
Manual configuration steps:
Step 1
- Enable protocol auditing and configure the audit settings.
- Select the specific events that need to be tracked for monitoring.
Step 2
- Activate syslog forwarding in the Isilon environment.
- Add the IP address of the Log360 Cloud Agent to which data should be forwarded for monitoring.
If using OneFS version 7.x,
- To enable protocol auditing and configure audit settings, execute the following commands:
isi audit settings modify -- protocol-auditing-enabled yes -- audited-zones <zone_names>
isi zone zones modify <zone_name> -- audit-success create,delete,read,rename,set_security,write
isi zone zones modify <zone_name> -- audit-failure create,delete,read,rename,set_security,write
- To enable syslog forwarding, use the following command:
isi zone zones modify <zone_name> --syslog-forwarding-enabled=yes
- To configure the IP address:
Connect to any one of your Isilon nodes using an SSH client.
Open the syslog.conf file, which can be found at the /etc/mcp/templates directory.
Locate the !audit_protocol line and add the below entry, providing the correct value in place of hostname or IP address:
Save the syslog.conf file.
If using OneFS versions 8.0 and 8.1,
- To enable protocol auditing and configure audit settings, execute the following commands:
isi audit settings global modify --protocol-auditing-enabled yes --audited-zones <zone_names>
isi audit settings modify --zone <zone_name> --audit-success create,delete,read,rename,set_security,write
isi audit settings modify --zone <zone_name> --audit-failure create,delete,read,rename,set_security,write
isi audit settings modify --zone <zone_name> --syslog-audit-events create,delete,read,rename,set_security,write
- To enable syslog forwarding, use the following command:
isi audit settings modify --syslog-forwarding-enabled=yes --zone=<zone_name>
- To configure IP address:
Connect to any one of your Isilon nodes using an SSH client.
Open the syslog.conf file, which can be found at the /etc/mcp/templates directory.
Locate the !audit_protocol line and add the below entry, providing the correct value in place of hostname or IP address:
Save the syslog.conf file.
If using OneFS versions 8.2 and 9.4,
- To enable protocol auditing, configure audit settings, and set up the IP address:
isi audit settings global modify --protocol-auditing-enabled yes --audited-zones <zone_name> --protocol-syslog-servers <IP_of_ADAuditPlus_server>
isi audit settings modify --zone <zone_name> --audit-success create,delete,read,rename,set_security,write
isi audit settings modify --zone <zone_name> --audit-failure create,delete,read,rename,set_security,write
isi audit settings modify --zone <zone_name> --syslog-audit-events create,delete,read,rename,set_security,write
- To enable syslog forwarding, execute this command:
isi audit settings modify --syslog-forwarding-enabled yes --zone <zone_name>
Note: Enable only essential audit events, such as create, delete, read, rename, set_security, and write, to prevent unnecessary increases in cloud storage usage.
Troubleshooting
Target cluster is not listed during configuration

Cause: The cluster has not been added to the domain.
Solution:
- Ensure that the correct domain is selected.
- Check if the cluster's domain is set as the authentication provider.
- Click the refresh option in the 'Select Cluster' modal to reload computer objects in the domain.
- Verify that the computer object created in Active Directory has the Operating System named OneFS.
Credentials verification
Error message: Connecting to <Cluster Name> failed due to cluster inaccessibility or an incorrect port configuration.
Cause:
- Cluster name is not resolving to the correct IP address.
- Incorrect SSH port configuration.
Solution
- Cluster name resolution:
- Verify that a ping to the Isilon cluster using its cluster name resolves to the correct IP address.
- If not, add a DNS Host Mapping entry for the Isilon cluster name.
- Confirm your internet connection is working.
- SSH port matching:
- Execute the command isi ssh settings view to check if the SSH port used for configuration matches the SSH port enabled on the Isilon cluster.
- If they don't match, update the Secure Shell (SSH) port before adding the cluster using the command: isi ssh settings modify --port <Integer>.
Error message: Verification failed due to insufficient privileges in the provided credentials.
Refer to the relevant section on required privileges for Effective EMC Isilon Auditing.
Browsing location
Error message: Permission denied error.
Cause: Incorrect credentials or insufficient read access to the specified location.
Solution:
- Provide credentials of an account with appropriate privileges for the specified location.
Error message: No SMB shares found.
Cause:
No shares have been created, or the zones where shares are created have not been audited.
Solution:
Verify whether the zones where shares were created are listed in the Audited Zones. To check, use the command isi audit settings global view and ensure that the zones are properly listed in the Audited Zones.
Auto log forwarding configuration failure
Cause: The user may not have ISI_PRIV_AUDIT with read & write permission to edit log forwarding settings in the Isilon cluster.
Solution: Confirm the provision of credentials with the required privileges for log forwarding configuration; refer to the relevant section on credentialing.
Ensure that port 514/UDP is enabled on the selected agent.
For further instructions on log forwarding, refer to the Log Forwarding section.
Unable to check if the locations exist due to Invalid Credentials
Cause:
This error can occur when credentials have been updated or invalid.
Solution:
- Provide credentials for an account with appropriate privileges.
Unable to check if the locations exist due to cluster inaccessibility or an incorrect port configuration
Cause:
This error can occur when the server name does not resolve to the correct IP address.
Solution:
- Ensure proper cluster name resolution by confirming that pinging the Isilon cluster using its cluster name resolves to the correct IP address. If not, add a DNS Host Mapping entry for the Isilon cluster name.
- Additionally, verify that the internet connection is working. Check SSH port matching by executing the command 'isi ssh settings view' to ensure it matches the SSH port enabled on the Isilon cluster. If not, update the SSH port using the command 'isi ssh settings modify --port <Integer>'.
No data received
Cause:
- Syslog configuration issue.
- Syslog data not reaching ManageEngine Log360Cloud Agent.
Solution:
- Check syslog configuration:
- Execute the command isi audit settings global view to check:
- The list of IPs in protocol-syslog-servers
- The zones where shares were created are listed in the Audited Zones.
- If the zone is not listed, add it to the Audited Zones using the command: isi audit settings global modify --audited-zones <zone_name>
- Check forwarded syslog data:
- Install ManageEngine free syslog forwarder.
- Stop the ManageEngine Log360Cloud Agent service.
- In the free syslog forwarder tool, add the Isilon cluster IP to the Receive Syslogs section and click "Start" to receive syslog data.
- If no data is shown, recheck the syslog configuration.
- If the issue persists, contact the support team at support@log360cloud.com.
Replace <zone_name> with the actual name of the zone you want to add.
Accessed by field not indexed / Data not received from a particular node
Cause:
A new user/node may be created.
Solution:
- Use the 'Refresh Interface' button to update Isilon nodes' configuration and local users.
