Backup and Restore
In Windows
In Linux
In Windows
Backup Process in Windows
Follow the steps given below to take a backup of the ManageEngine SupportCenter Plus data,
-
Click Start -> Programs -> ManageEngine SupportCenter Plus -> Backup Data.
[OR]
Alternatively, take backup from <SupportCenter>\bin directory in the command prompt. Execute the backUpData.bat as shown below,
C:\>cd ManageEngine\SupportCenter\bin\backUpData.bat
-
A backup of the data and the file attachments that have been added to the application is created in <SupportCenter>\backup directory.
-
The file name for the back up file is of the pattern BackUp_month_date_year_hr_min.data. An example of the backup file name: backup_supportcenter_7013_fullbackup_12_08_2008_15_22.data
Backup Process in Windows without file attachments
-
From command prompt, go to <SupportCenter Plus>\bin directory and execute backUpData.bat --trimmed command to start the database back up.
C:\ManageEngine\SupportCenter\bin\backUpData.bat --trimmed
-
Once the back up is complete, a backup file with .data extension is placed in the Trimmed Backup folder under SupportCenter Plus Home directory.
-
The backup file contains information such as, the Build number of SupportCenter Plus, and date and time when the back up was performed. Here is the format of the backup file.
backup_ supportcenter_ [build number] _database_month _date _ year _ hour _minutes.
For example, a trimmed backup taken in Version 7.0 of SupportCenter Plus looks like this,backup_supportcenter_7013_database_12_08_2008_15_22.data
Restore Process in Windows
To restore the backup data,
-
Click Start -> Programs -> ManageEngine SupportCenter Plus -> Restore Data.
[OR]
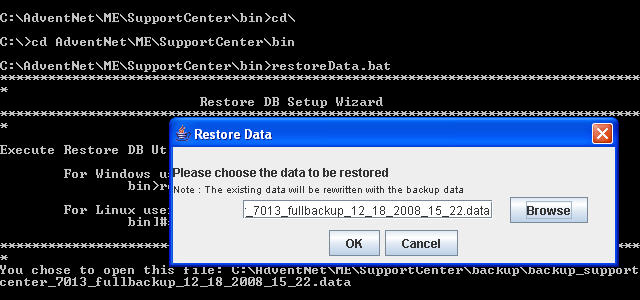
Go to <SupportCenter>\bin directory in the command prompt. Execute the file restoreData.bat as shown below,
C:\>cd ManageEngine\SupportCenter\bin\restoreData.bat
-
The Restore Data pop up window appears. Browse the backed up file and click OK.

-
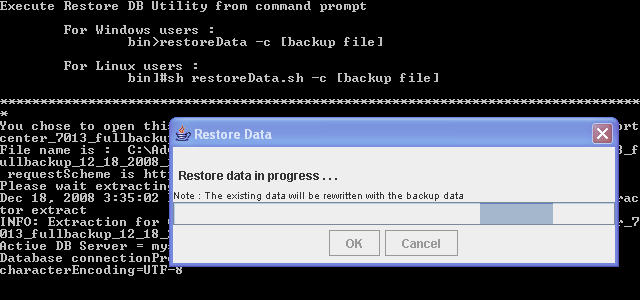
The data begins to restore. While restoring the existing data is rewritten with the backed up file.
 |
Note:
-
The SupportCenter Plus server needs to be shut down before you restore the data.
-
The backup file name has to be a .data file.
-
Click Alt+Tab to view the Restoring Data pop up if its not visible.
|

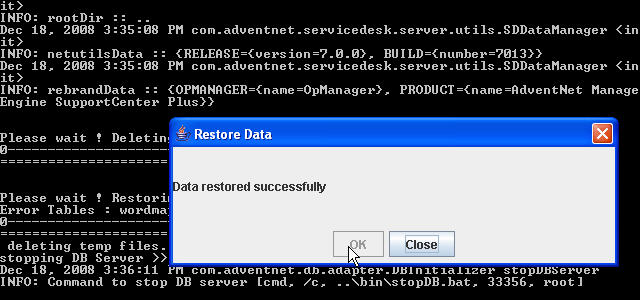
- Close on successful installation.

In Linux
Backup Process in Linux
Follow the steps given below to take a back up of the ManageEngine SupportCenter Plus data,
-
Go to <SupportCenter>/bin directory from the command prompt.
-
Execute the backUpData.sh file as given below,
$ sh backUpData.sh
The back up file is created in the <SupportCenter>/backup directory.
-
The file name for the back up file is of the pattern BackUp_monthdate_year_hr_min.data. An example of the back up file name:
backup_supportcenter_7013_fullbackup_12_08_2008_15_22.data
Backup Process in Linux without file attachments
-
From command prompt, go to <SupportCenter Plus>\bin directory and execute backUpData.sh --trimmed command to start the database back up.
$ sh backUpData.sh --trimmed
-
Once the back up is complete, a backup file with .data extension is placed in the Trimmed Backup folder under SupportCenter Plus Home directory.
-
The backup file contains information such as, the Build number of SupportCenter Plus, and date and time when the back up was performed. Here is the format of the backup file.
backup_ supportcenter_ [build number] _database_month _date _ year _ hour _minutes.
For example, a trimmed backup taken in Version 7.0 of SupportCenter Plus looks like this, backup_supportcenter_7013_database_12_08_2008_15_22.data
Restore Process in Linux
To restore the back up data,
-
Go to <SupportCenter>/bin directory from the command prompt.
-
Execute the file restoreData.sh at command prompt as shown below,
$ sh restoreData.sh <backup file name>
The back up file name has to be the .data file from which you wish to restore the data.
 |
Note: The SupportCenter Plus server needs to be shut down before you restore the data.
|
