Listener ports
The listener ports tab helps you configure and manage the syslog ports through which the agents are listening for logs.
You can navigate to this tab as follows: Settings > Admin > Management > Listener Ports.
The table displayed has four categories: Action, Port, Protocol, Associative Agent
- Action: Displays Enable/ Disable action, Delete action, Set port as default action.
- Port: Displays the port number
- Protocol: Displays the operating protocol.
- Associative Agent: Displays all the agents associated with the port number.

This document elaborates on the following actions:
Add a Syslog Port
- Navigate to Navigate to Settings > Admin > Management > Listener Ports..
- Click on Add Syslog Port.

- In the pop-up that appears, specify the following:

- Port - Specify the port number field
- Protocol - Select protocol from the drop-down.
Important Note: For each protocol, you can add upto 6 ports.
- Add Agent - Select the agent(s) on which this port can be enabled. Click Add.
- If this has to be the default port, you can check the box Make the port as default. Once you make the port default, all agents will listen through this port. Note that any new agents added will automatically start listening through the default port(s).

- Click Add.
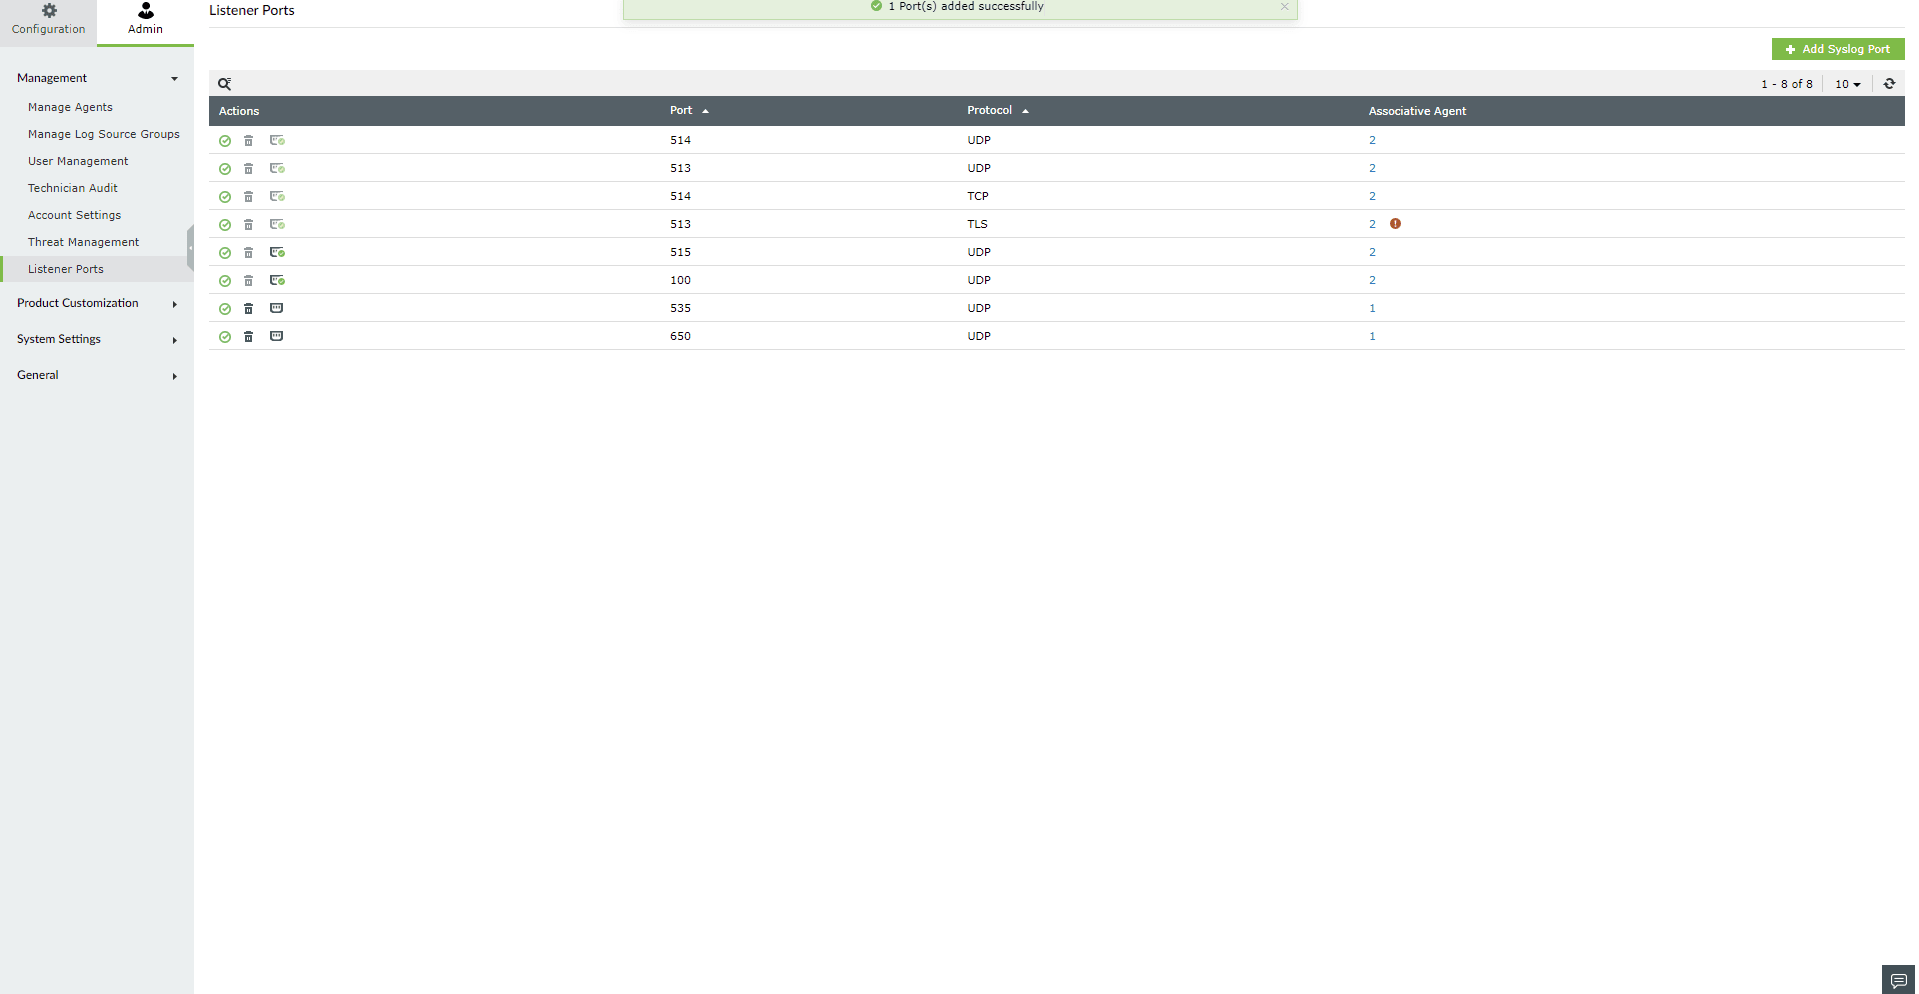
You've successfully added a port.
Delete a listener port
- Go to Settings > Admin > Management > Listener Ports.. The listener ports will be displayed as shown.
- Click on the Delete icon corresponding to the port you want to delete.
- Confirm the action by clicking Yes in the pop-up.

- A message that you've deleted the listener port will be shown as below.

You've successfully deleted a listener port.
Enable/Disable a listener port
- Go to Settings > Admin > Management > Listener Ports.. The listener ports will be displayed as shown.

- All ports are enabled by default. To disable a port, hover over the Enabled icon. Disable Port action will be shown. Click on it.

- Once you click on it, the port will be disabled and the icon changes to red. A message that the port is disabled is displayed as shown.

- To enable a disabled port, hover over the red icon as shown and click.

- The port will be enabled and the icon changes to green . A message that the port is enabled is displayed as shown.

Manage default syslog ports
- Go to Settings > Admin > Management > Listener Ports.. The listener ports are displayed as shown.

- To make a port default, click the
 icon.
icon.
- A message that Syslog port marked as default will be displayed as shown.

- To remove a syslog port from default, click the corresponding icon. A message that Syslog listener port removed from default will be displayed as shown.

Update agents for an existing syslog port
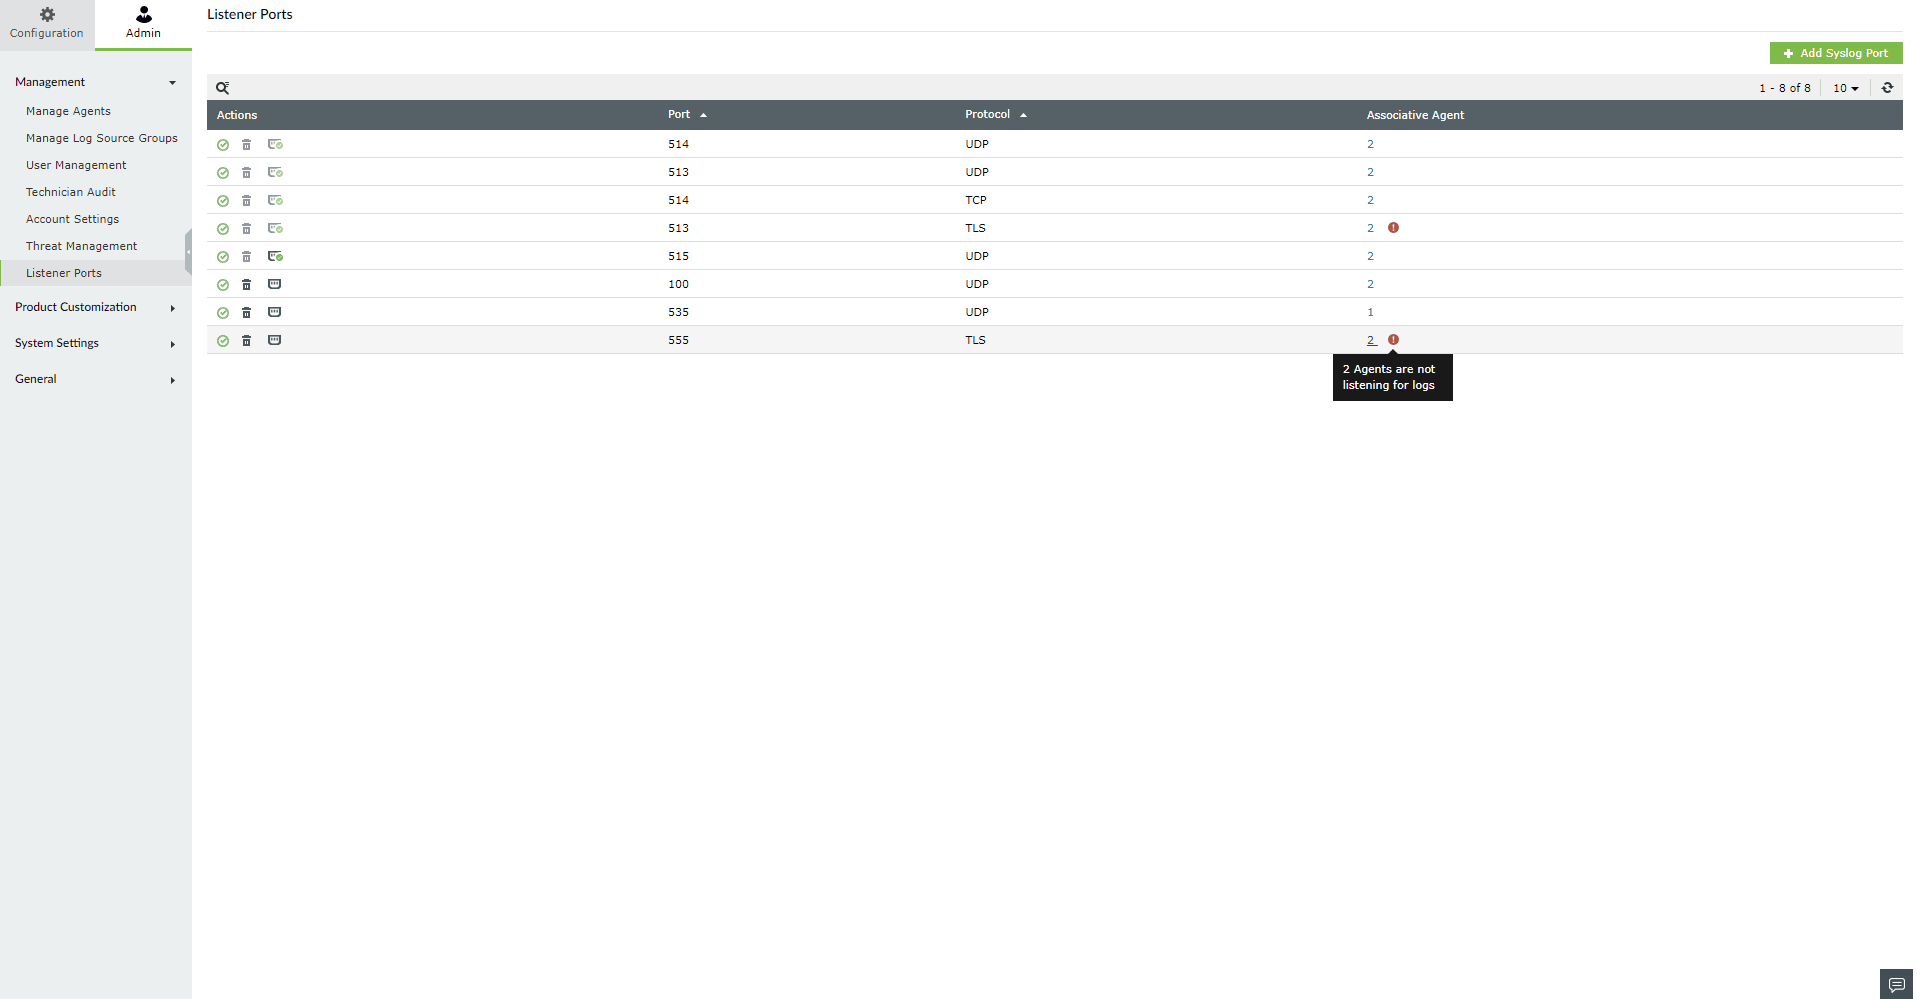
- Go to Settings > Admin > Management > Listener Ports.. The listener ports are displayed as shown.

- The Attention icon in the above screenshot is indicative of agents that are not listening. To check this or update an existing port, click on the corresponding number in the Associative Agents column.
- This will open the list of agents and their status with a troubleshoot link in case of an error. Proceed to select or unselect the required agents by checking the checkboxes.
- You can change views of agents being shown through the Showing drop-down that provides Unassociated Agents, Associated Agents and All options.

- Once you've selected the agents, click Update.
Agent-side TLS certificate installation
- Click Install with your TLS Certificate.

Through the install wizard
- Select Store Location as Local Machine and click Next.

- Verify the file name and click Next.

- Enter the certificate password and click Next.

- In Certificate Store, select Place all certificates in the following store. Click Browse, select the ManageEngineLog360 store, and click OK. Then click Next.


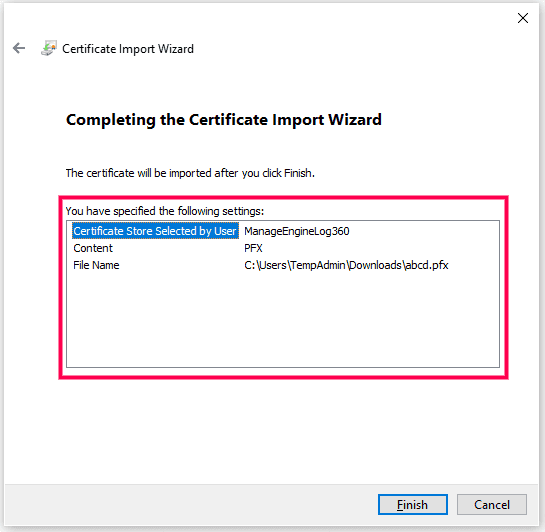
- Finally, verify the store and certificate.

Verify the certificate on the local machine
- Run certlm.msc and navigate to the ManageEngineLog360 store to verify your certificate.

Through command prompt:
- Run the Command Prompt as Administrator.
- Execute the following command:
certutil -f -p "<PASSWORD>" -importpfx "ManageEngineLog360" <PFX CERTIFICATE PATH>

Adding certificates through GPO with script
- Place your certificate on a network share path.
- Create a script file in the Netlogon shared folder on the domain controller to run this command:
certutil -p "<PASSWORD>" -importpfx "ManageEngineLog360" "<PFX_SHARE_CERTFICATE_PATH>"
- Open Group Policy Management Console (GPMC). Right-click the Group Policy Object you want to edit and click Edit.
- Navigate to Scripts (Startup/Shutdown):
Computer Configuration\Policies\Windows Settings\Scripts (Startup/Shutdown)
- Double-click Startup.
- In the Startup Properties dialog box, click Add.
- In the Add a Script dialog box, enter the path to the script or browse to the script file in the Netlogon shared folder on the domain controller.
- After installing the certificate, restart the agent. Refer here to restart the agent.
