Palo Alto DHCP server monitoring
OpUtils' IP address Management enables Palo Alto DHCP server monitoring. You can monitor, and manage the IP ranges, available IP pool, subnets, scope details, and server details. To add DHCP server and monitor server automatically through OpUtils web console, follow the steps below.
Adding Palo Alto DHCP servers
- Click 'Add' under the 'IP Address Manager'.
- Choose the 'Add DHCP Server' option.
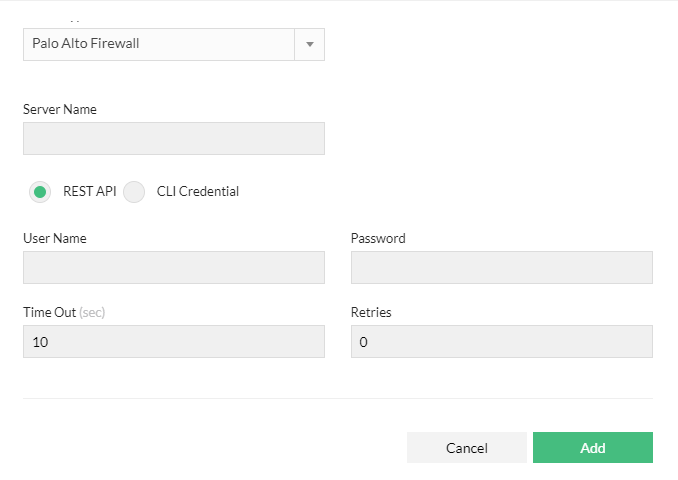
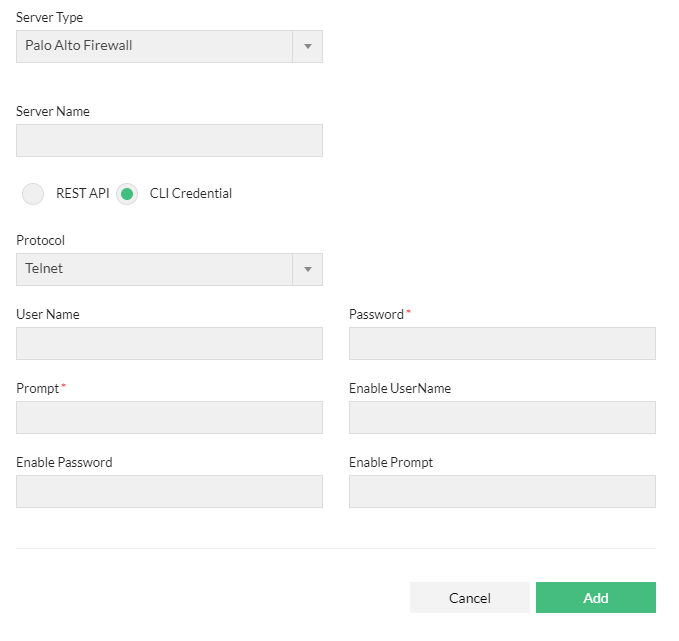
- Under 'Add DHCP Server' select the Palo Alto DHCP server in the 'Server Type' drop down.
- Specify the 'Server Name' of the Palo Alto DHCP server.
- Select how you wish to add the DHCP server.
- You can choose to add the server via REST API option (Follow step 5) or via CLI (Follow step 6)
DHCP monitor settings
Schedule monitoring of Palo Alto DHCP server
- Click the Settings tab to open the settings page.
- Select the Scheduler tab.
- Under 'OpUtils' click on 'DHCP'.
- Under Scheduler, create a new schedule and change the Status to 'Enabled'.
- Specify the interval to perform the scan:
- Daily - to update everyday. You need to specify the starting time.
- Weekly -to update on specific day(s) in a week. You need to specify the starting time and the day(s) on which the update should happen.
- Monthly - to update on a specific day every month(s). You need to specify starting time, select a day and select a month.
- Once Only - to run the tool only once at the scheduled time.
Configuring DHCP utilization alerts
Alerts can be configured to be triggered via email or syslog, when lease utilization of the server or scope is greater than 80%.
- Click the Settings tab to open the settings page.
- Under 'OpUtils' click on 'DHCP'.
- Under 'Configure Alerts' enable the required alerts. You can chose to receive the alerts via syslog, email, or both.
Viewing DHCP summary details
The DHCP Summary view under IP Address Manager offers insights into the DHCP Servers that are being monitored with the following details:
- Server IP: The IP Address of the DHCP Server.
- Total IPs: Total number of IPs in the DHCP IP pool.
- MAC Address: MAC address of the DHCP server.
- Leased IPs: The number of used IP Addresses in that scope.
- DNS Name: Name of the associated DNS server.
- Reserved IPs: Number of IPs reserved for specific use.
- Number of Scopes: Total number of scopes in the DHCP server.
- Available IPs for lease: The number of available IP Addresses in that DHCP server.
- Scan Status: Status of the last DHCP server scan.
To view the details of a specific DHCP Server, select the server from the hierarchical tree. To retrieve the current values, select the DHCP Server and click Refresh. Select All to view / refresh all the DHCP Servers.To delete all the scopes of a DHCP Server, select the server and click Delete. To export the scope details, select the DHCP Server and click Export and choose an appropriate format.
Thank you for your feedback!

