Organize SSH resource, Keys, and Users as Groups for Bulk Management
Key Manager Plus gives the provision to create groups of resources for easy organization and to carry out operations in bulk. You can assign, delete, or modify the group similar to working with a single resource.
The list of items available in a group is enumerated in their respective tabs. You can drill down to the individual items by clicking the name of a group.
At the end of this document, you will have learned the following sections:
1. SSH Resource Group Management
1.1 Create Resource Groups
To create a resource group:
- Click the Resource group icon in the top-right corner of the SSH >> SSH Servers tab
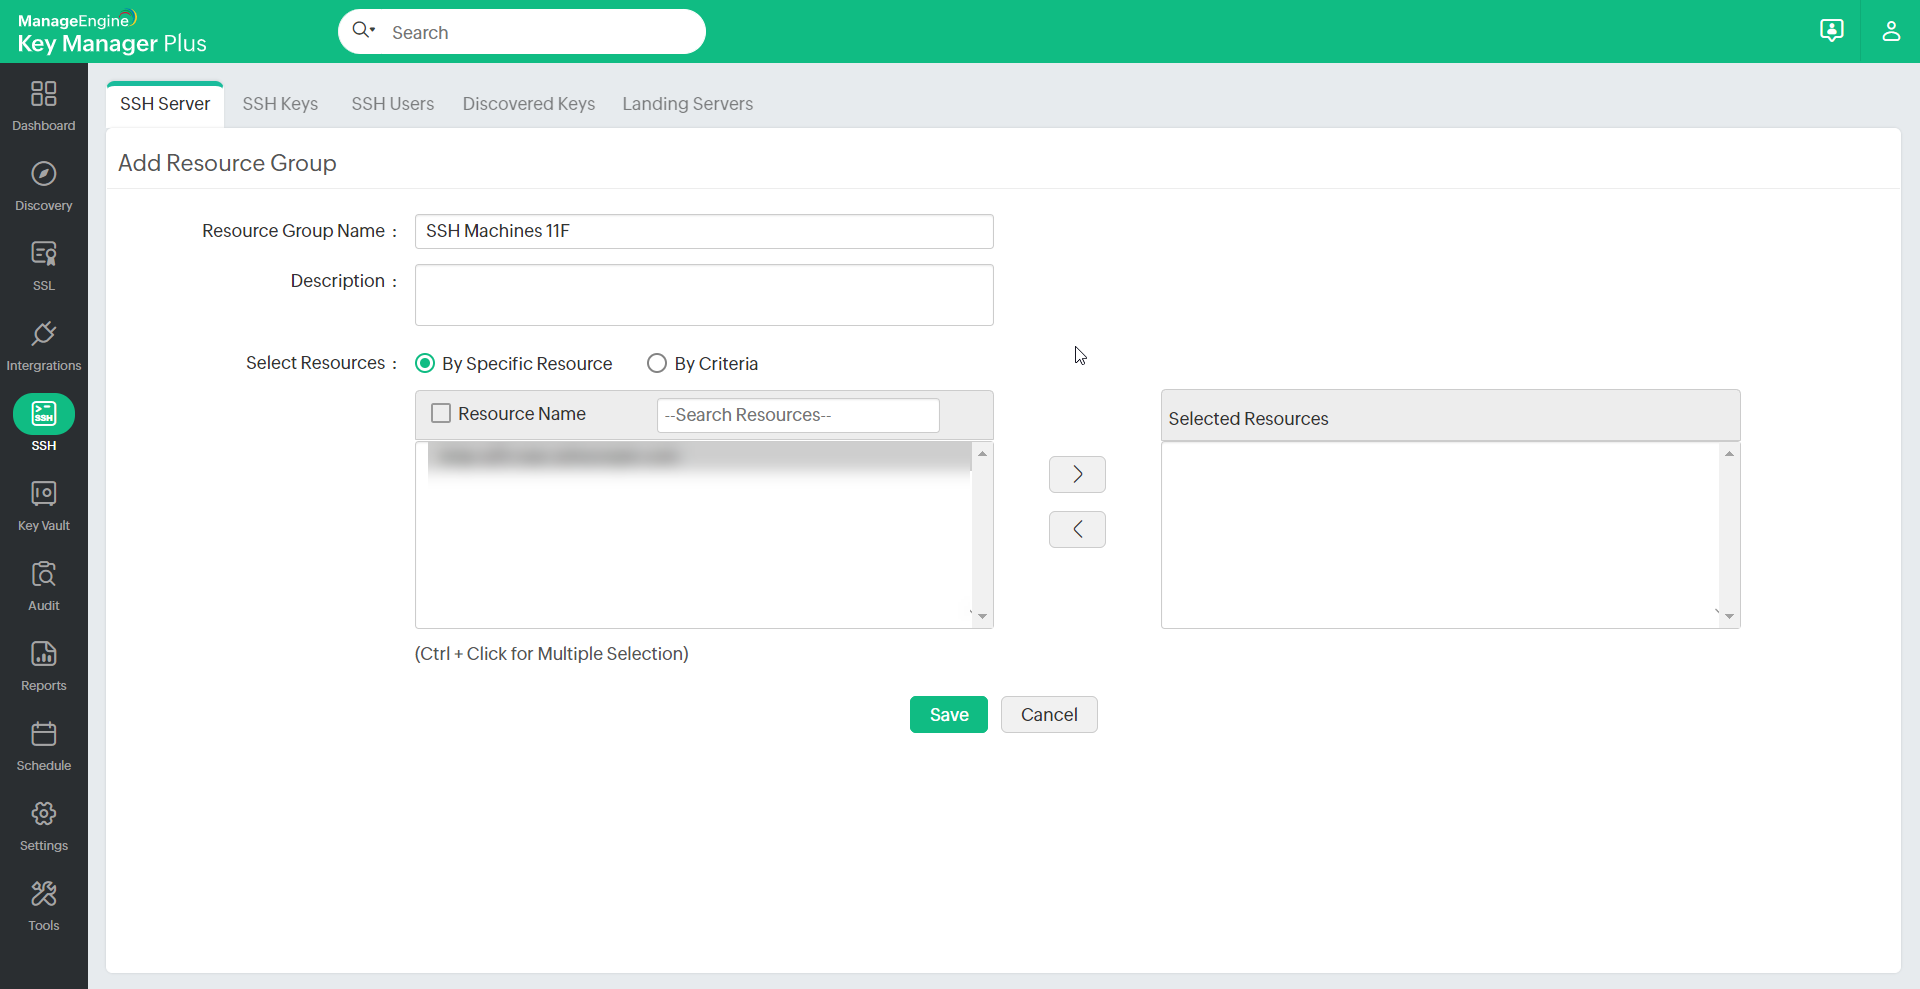
- Click the Add Group button. You will be redirected to the Add Resource Group window.
- Enter Resource Group Name and Description. Take care while choosing the name since it cannot be edited later.
- You can choose the resources to be added in a group in 2 ways:
- By Specific resource— Select the resources to be added to the group, individually.
- By Criteria— This serves as dynamic resource grouping. You will specify the exact criteria based on which you want to create the group. Here, you have many options to choose from - you can search for resources based on host name, ip address etc. and filter the search in fine-grained manner based on the criteria such as "contains", "does not contain", "equals" "not equal", "starts with" and "ends with". Click the Matching Resources button at the bottom-right corner of the window to see the corresponding resources.
Note: If you select the By Criteria option, the conditions specified are applicable to resources to be discovered in future too. If any of the resources match the criteria, they will be automatically included into the new group.
- Click Save.
1.2 Edit Resource Groups
To make changes to an existing resource group:
- Click the Resource Group icon in the top-right corner of the SSH >> SSH Servers tab.
- Click the Edit icon present in the right corner of the table view.
- You can change the resource selection type and edit the resources available in a group or add, modify, or delete, the filters applicable to a group.
Once you make changes to the group and save, a message will be displayed confirming the update of the changes.
Note : The name of the group cannot be modified. However, you can add or modify the description and the list of resources.
1.3 Delete Resource Groups
You can delete the resource groups provided they are not assigned to any user at the time of deletion.
To delete a resource group:
- Click the Resource Group icon in the top-right corner of the SSH >> SSH Servers tab.
- Select the resource groups.
- Click the Delete button.
A pop-up window will appear to make sure that the selected resources are to be deleted. Click Ok to delete the groups.
Note: You will not be able to delete resource groups that are currently assigned to a Key Manager Plus user account.
2. SSH Key Group Management
2.1 Create Key Groups
To create a group of SSH keys:
- Click the Key Group icon in the top-right corner of the SSH >> SSH Keys tab.
- Click the Add Group button. You will be redirected to the Add Key Group window.
- Enter Key Group Name and Description. Take care while choosing the name since it cannot be edited later.
- You can choose the resources to be added in a group in 2 ways:
- By Specific key— Select the keys to be added to the group, individually.
- By Criteria— This serves as dynamic key grouping. You will specify the exact criteria based on which you want to create the group. Here, you have many options to choose from - you can search for specific keys based on its name, type, length, or creator, and filter the search in a fine-grained manner based on the criteria such as "contains", "does not contain", "equals" "not equal", "starts with" and "ends with". Click the Matching Keys button at the bottom-right corner of the window to see the corresponding keys.
Note: If you select the By Criteria option, the conditions specified are applicable to keys that are discovered later too. If any of the those keys match the criteria, they will be automatically included into the new group.
- Click Save.
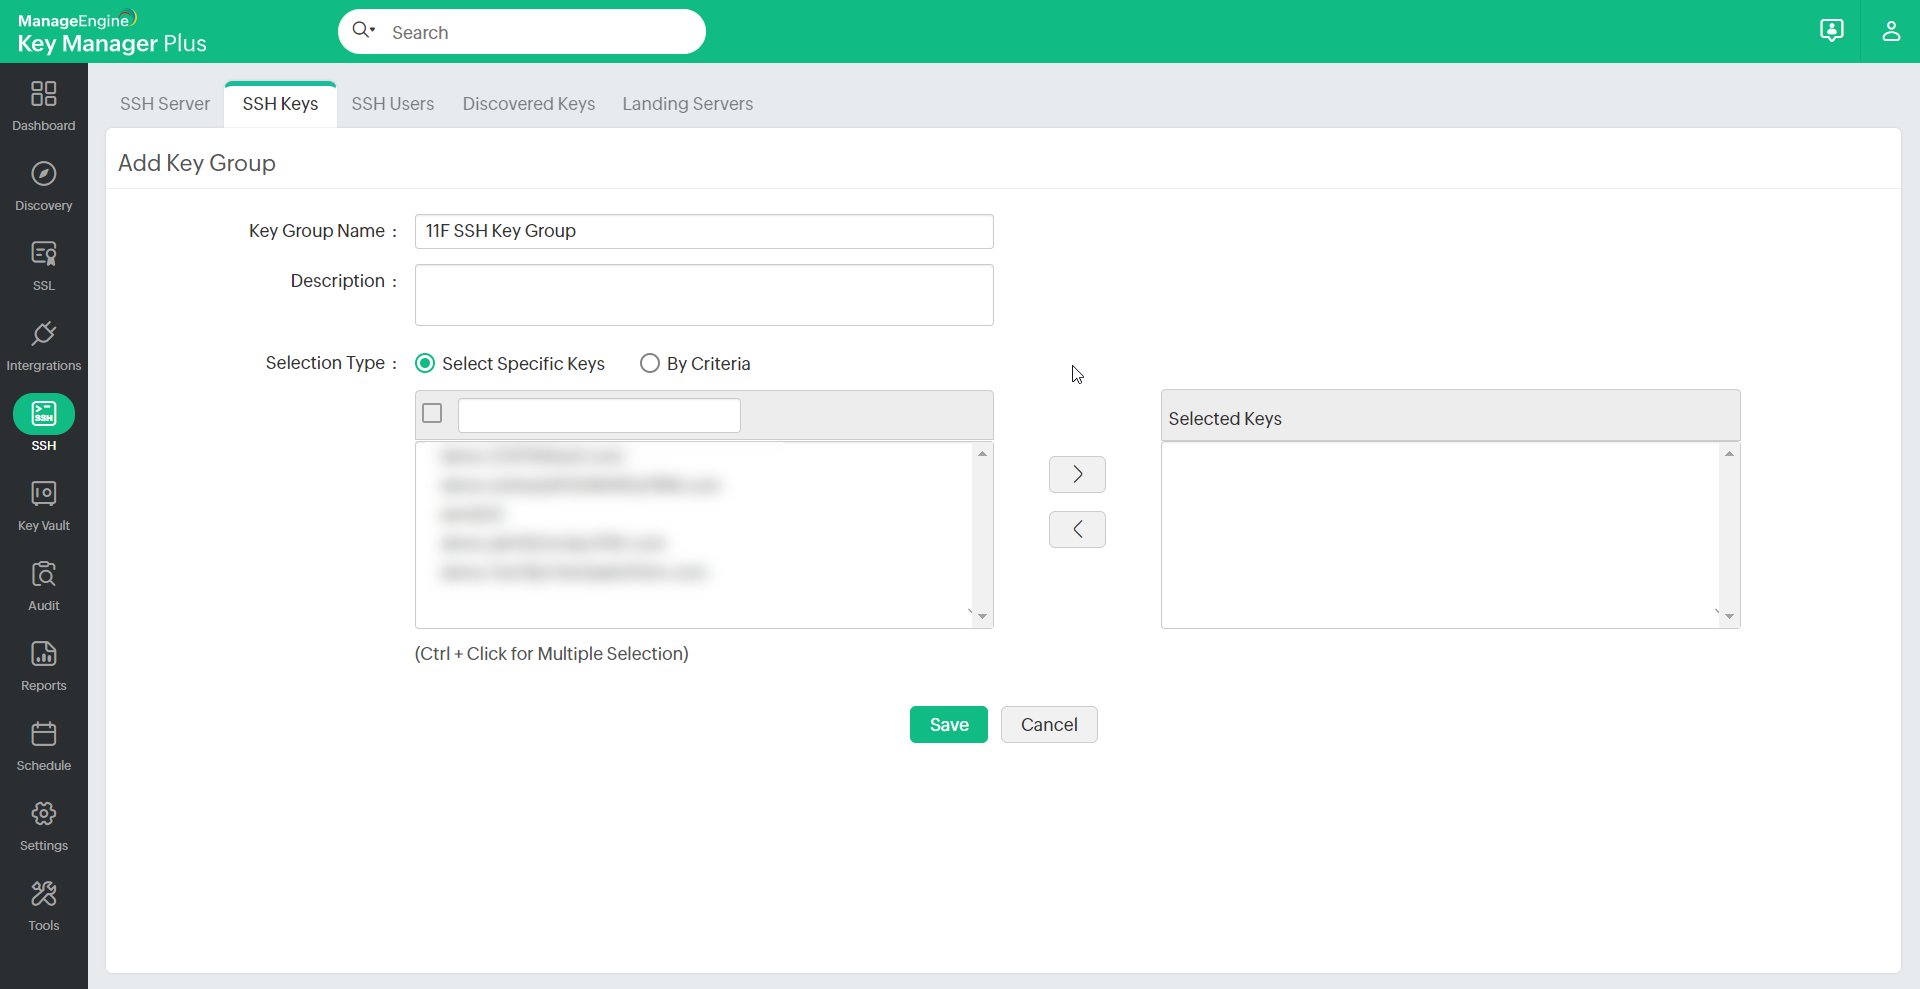
In addition, you can directly select individual keys from the SSH >> SSH Keys tab and click the Create Group button for faster group creation.
2.2 Edit Key Group
To make changes to an existing key group:
- Click the Key group icon in the top-right corner of the SSH >> SSH keys tab.
- Click the Edit icon present in the right corner of the table view.
- You can change the key selection type and edit the keys available in a group or add, modify, or delete the filters applicable to a group.
Once you make changes to the group and save, a message will be displayed confirming the update of the changes.
Note: The name of the group cannot be modified. However, you can add or modify the description and the list of keys available in it.
2.3 Rotate Keys of a Key Group
To rotate all the keys of a key group:
- Navigate to the SSH >> SSH Keys tab.
- Click the Key Group icon in the top-right corner of the screen.
- Select the key groups and click the Rotate button.
You will be redirected to the Key rotation audit window where the status of key rotation is updated.
2.4 Delete Key Groups
To delete a key group:
- Click the Key Group icon in the top-right corner of the SSH >> SSH Keys tab.
- Select the key groups.
- Click the Delete button.
A pop-up window will appear to make sure that the selected groups are to be deleted. Click Ok to delete the groups.
3. SSH User Group Management
3.1 Create SSH User Groups
To create a group of SSH users:
- Click the User Group icon in the top-right corner of the SSH >> SSH Users tab.
- Click the Add Group button. You will be redirected to the Add User Group window.
- Enter User Group Name and Description. Take care while choosing the name since it cannot be edited later.
- You can choose the resources to be added in a group in 2 ways:
- By Specific Users — Select the users to be added to the group, individually.
- By Criteria — This serves as dynamic user grouping. You will specify the exact criteria based on which you want to create the group. Here, you have many options to choose from - you can search for specific users based on its user name, host name or IP address, and filter the search in a fine-grained manner based on the criteria such as "contains", "does not contain", "equals" "not equal", "starts with" and "ends with". Click the Matching Users button at the bottom-right corner of the window to see the corresponding users.
Note: If you select the By Criteria option, the conditions specified are applicable to users that are discovered later too. If any of the those users match the criteria, they will be automatically included into the new group.
- Click Save.
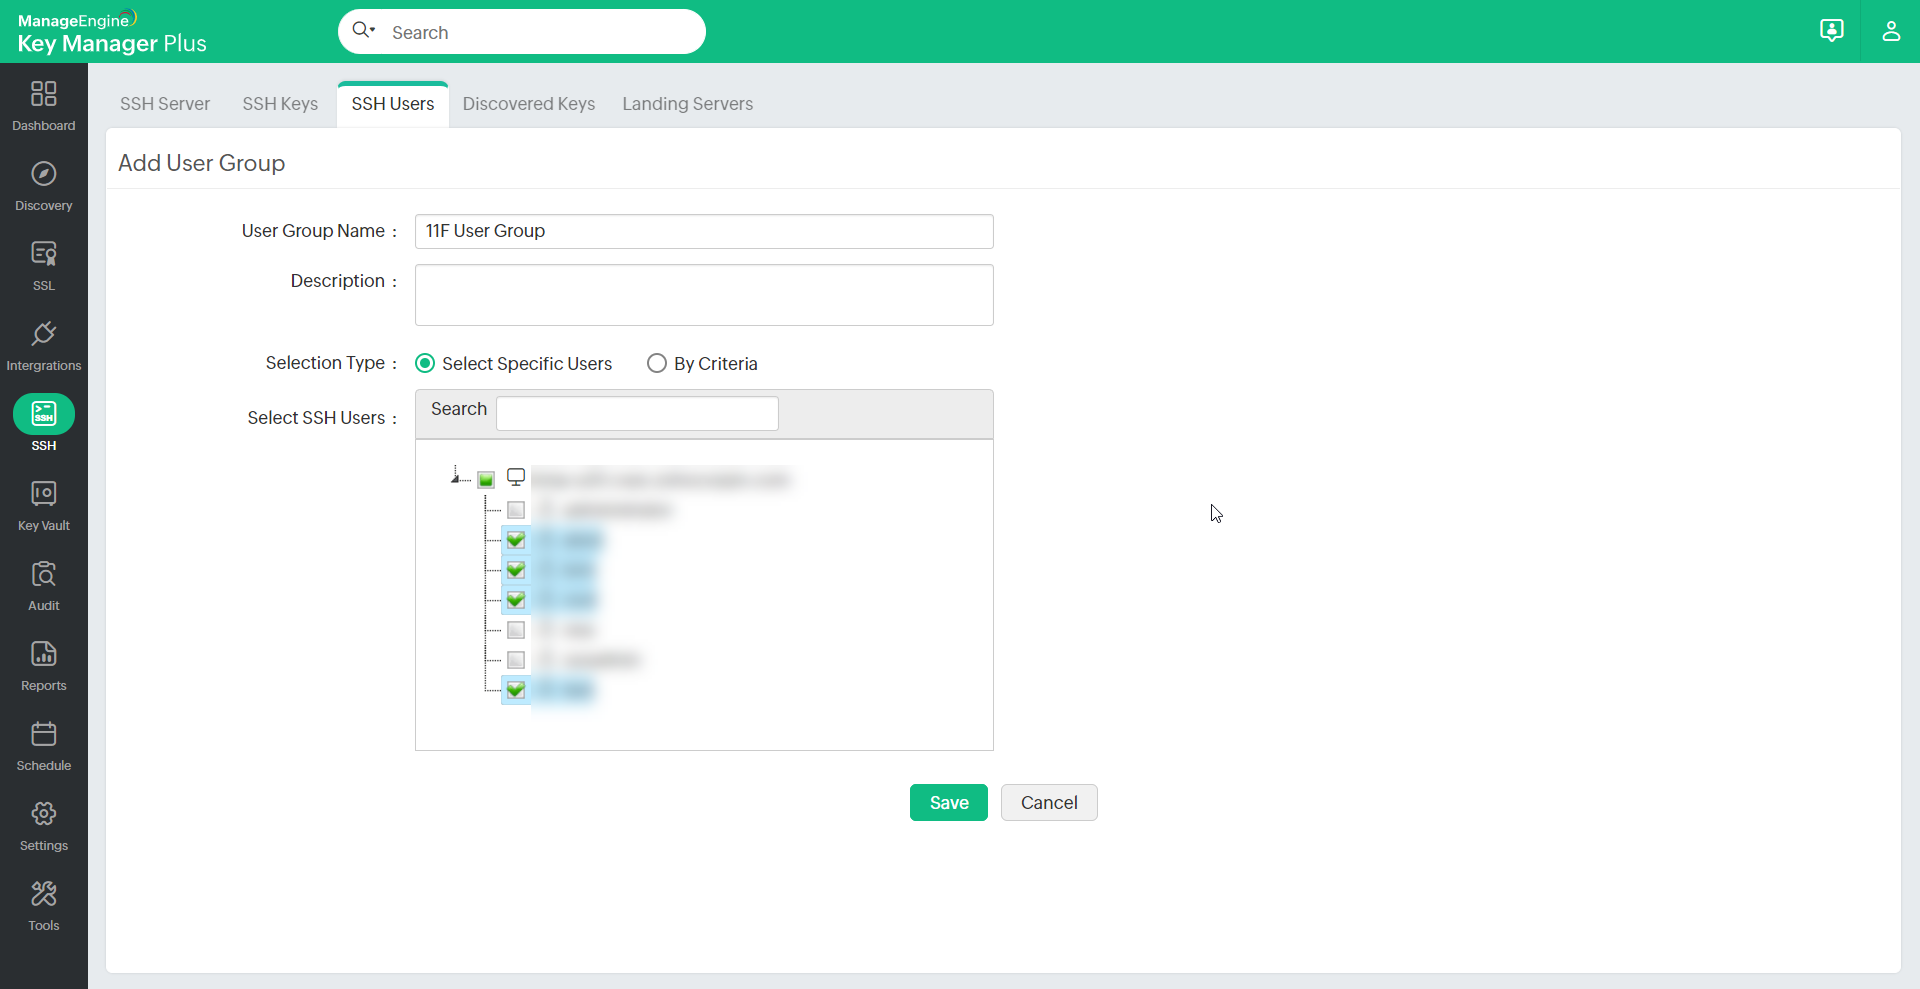
In addition, you can directly select individual users from the SSH >> SSH Users tab and click the Create Group button for faster group creation.
3.2 Edit User Groups
To make changes to an existing user group:
- Click the User Group icon in the top-right corner of the SSH >> SSH users tab.
- Click the Edit icon present in the right corner of the table view.
- You can change the user selection type and edit the users available in a group or add, modify, or delete the filters applicable to a group.
Once you make changes to the group and save, a message will be displayed confirming the update of the changes.
Note : The name of the group cannot be modified. However, you can add or modify the description and the list of users available in it.
3.3 Enter Credentials
To enter the credentials and apply it to all the users of a group:
- Navigate to the SSH >> SSH Users tab.
- Click the User Group icon in the top-right corner of the screen.
- Select the user groups and click the Credential button.
- Enter the Login Password that is applicable to all the users in the selected groups, and click Save.
3.4 Associate Key
To associate single key with all the users of a group:
- Navigate to the SSH >> SSH Users tab.
- Click the User Group icon in the top-right corner of the screen.
- Select the user group and click the Associate button to open Public Key Association window.
- Select the required Key.
- Select the checkbox to Elevate to "root" user.
Note: For security reasons root user login might be disabled for servers/machines. Enabling this option elevates a user login from a non-root user to a root user and allows you to associate keys to all other users in the server. Users have to provide root user and any non-root user credentials to KMP to elevate to a root user.
- Click Associate.
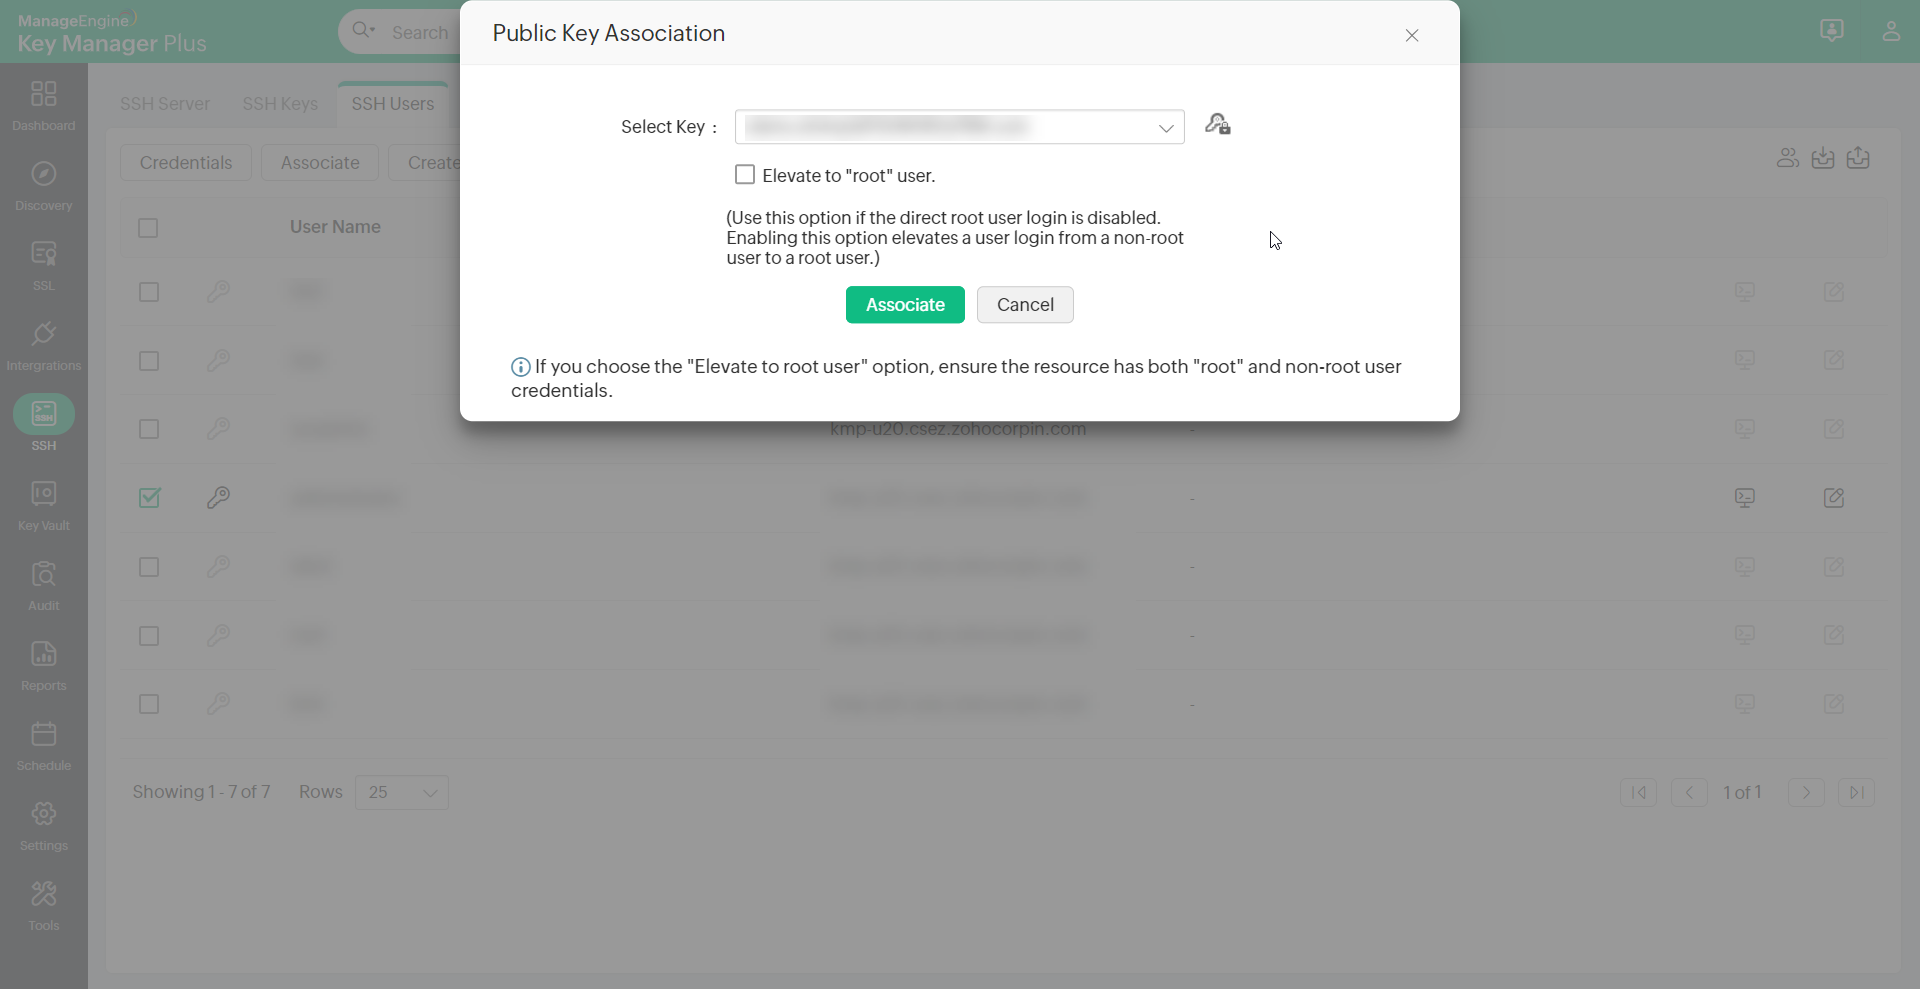
You will be redirected to the SSH key window wherein the status of association is updated.
3.5 Create and Deploy
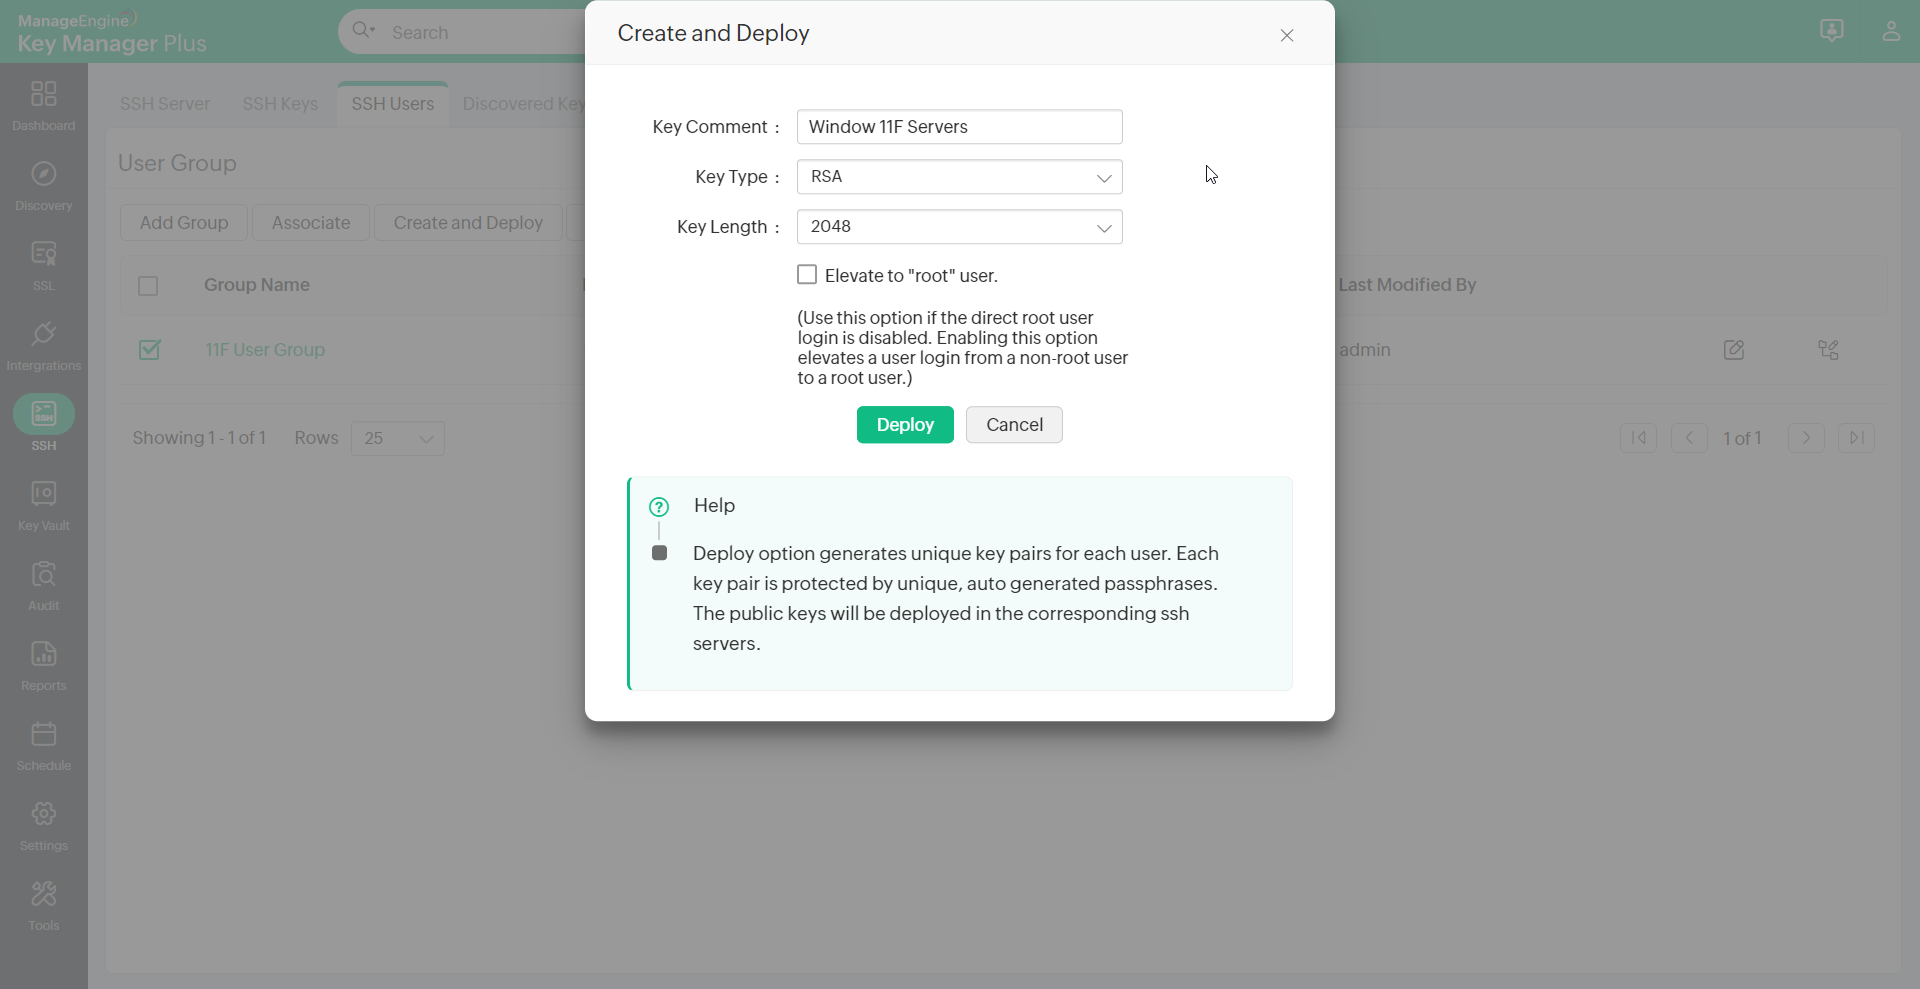
You can use the Create and Deploy feature of Key Manager Plus for one click generation and deployment of keys. Unique key pairs are generated for each user account and the corresponding keys are deployed automatically in user accounts of the target servers.
This feature can be applied to create keys and deploy them across all the user accounts of a user group as well. To create and deploy keys for user groups:
- Navigate to the SSH >> SSH Users tab.
- Click the User Group icon in the top-right corner of the window.
- Select the user groups and click Create and Deploy.
- In the Create and Deploy window, mention Key Comment and select Key Type and Key Length.
- Select the checkbox to Elevate to "root" user.
Note: For security reasons root user login might be disabled for servers/machines. Enabling this option elevates a user login from a non-root user to a root user and allows you to associate keys to all other users in the server. Users have to provide root user and any non-root user credentials to KMP to elevate to a root user.
- Click Deploy.
The status of the key deployment can be viewed from the Audit tab in the GUI.
3.6 Delete User Groups
To delete a group of users:
- Click the User group icon in the top-right corner of the SSH >> SSH users tab.
- Select the user groups.
- Click the Delete button.
A pop-up window will appear to make sure that the selected groups are to be deleted. Click OK to delete the groups.