App Integrations
- Available app integrations
- Connecting with applications
- Connecting with applications manually
- Custom App
- Redirect URL
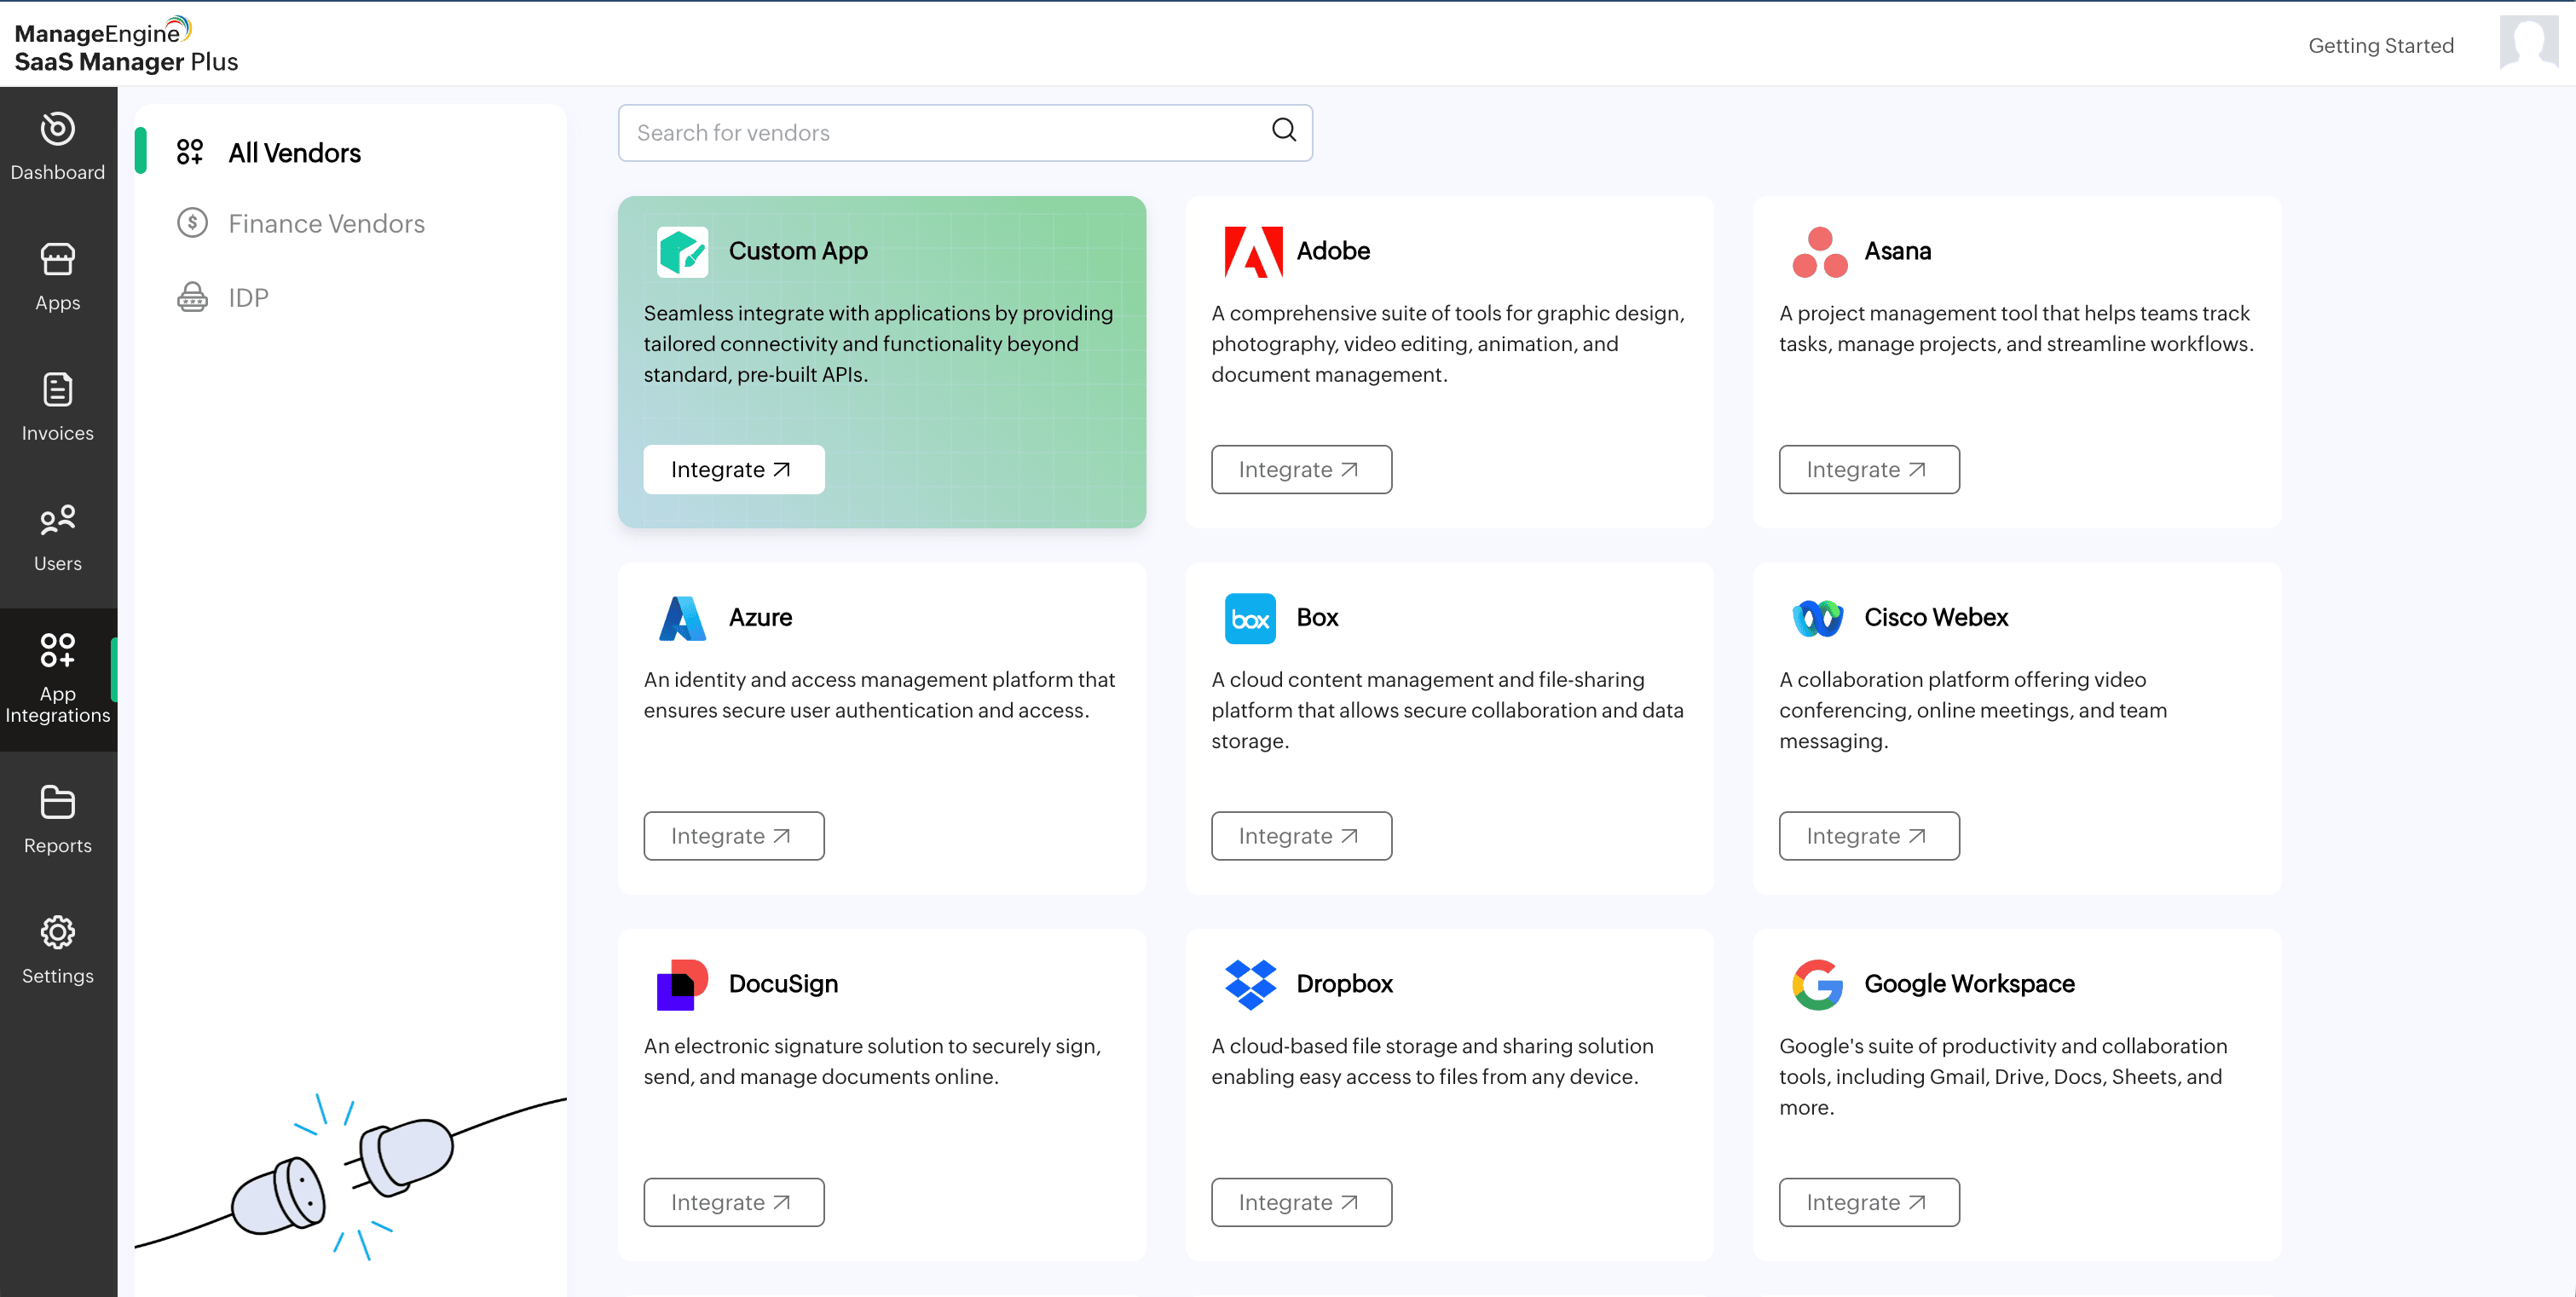
Available app integrations
Currently, there are 28 apps available for integration with SaaS Manager Plus. These apps can enhance your workflow and provide seamless integration within the platform. Also, the subscribed apps are sourced from vendor integrations. You can choose from the apps that are added manually or through invoice upload. The availability of these integrations expands the functionality and versatility of SaaS Manager Plus.

Connecting with applications
To connect with the following applications, follow these steps:
- For Box, Google Workspace, Dropbox, Microsoft365, Asana, Zendesk, Hubspot, Service Desk Plus, Zoho Projects, Jira, Zoho CRM, Zoho Desk, Zoho Recruit, DocuSign, or Webex, select the desired app integration from the list. The default connection is set as Automatic.
- Provide a connection name in the designated Connection Name box.
- Click the Authorize button.

- You will be redirected to the respective sign-in page of the chosen application.
- Follow the sign-in process of the application, providing the necessary credentials.
- Click Accept to allow SaaS Manager Plus to access data from the application.
- Once the authorization process is completed, the API integration will be established.
To integrate with ServiceNow
- Provide a connection name in the Connection Name box.
- Enter the existing instance name in the Instance Name box.
- Provide the username and password of that instance.
- Provide the client ID and client secret of that application.
- Click Authorize to complete the integration.

To integrate with Mailchimp
- Provide a connection name in the Connection Name box. The default connection is set as Automatic.
- Enter the existing instance name in the Instance Name box.
- Click Authorize to complete the integration.
To integrate with Zoho Books
Zoho Books can be integrated as a service or as a third-party source. When integrating Zoho Books as a service, it is treated as a normal app integration, allowing for synchronizing users' data and license information. However, when integrating Zoho Books as a third-party application, it functions specifically as a finance integration, pulling only invoices without integrating user data.
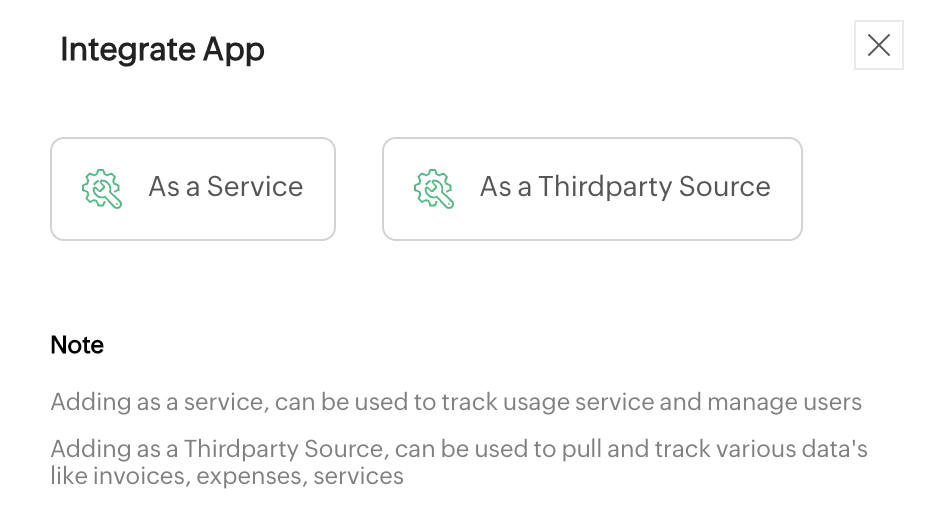
To integrate as a service
- Click the As a Service button.
- Provide a connection name in the Connection Name box.
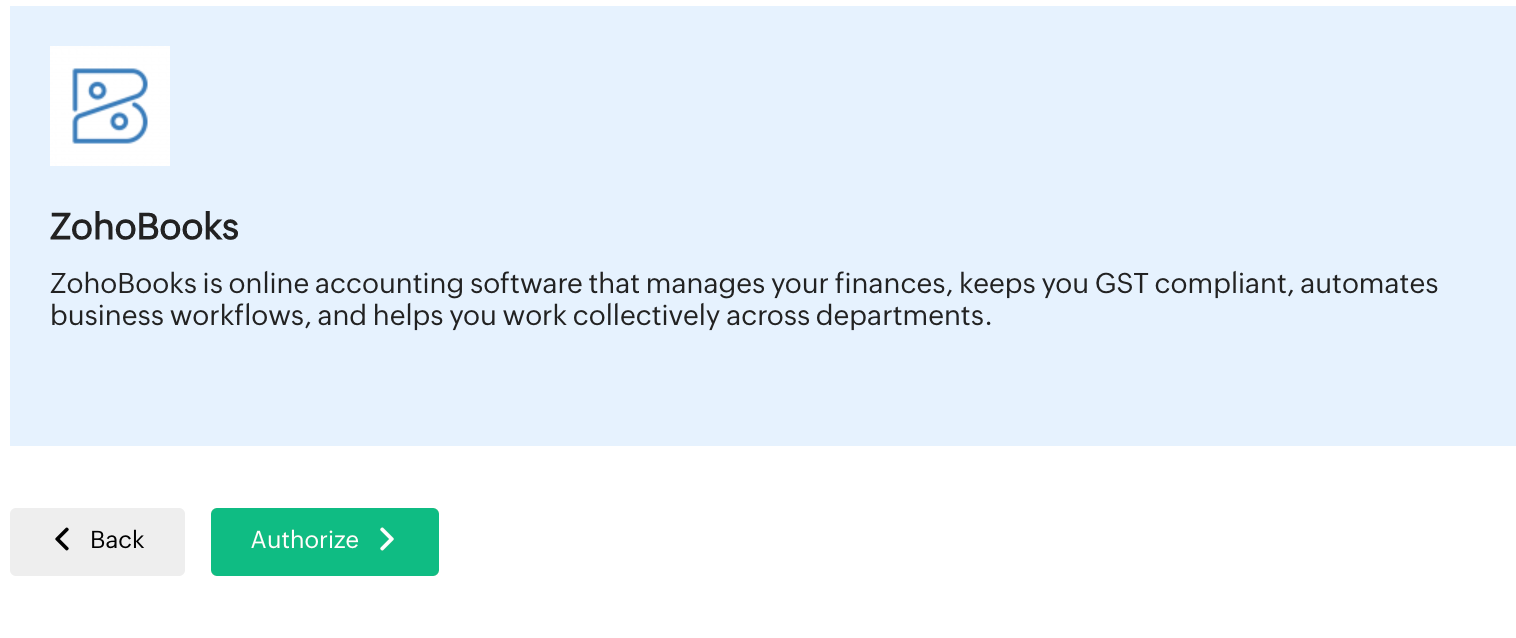
- Click Authorize and follow the sign-in process of Zoho Books.
- Click Accept to allow SaaS Manager Plus to access data from the application.
- Once the authorization process is completed, the API integration will be established.
To access invoices from Zoho Books as a third-party source
- Click the As a Thirdparty Source button.
- Click Authorize and follow the sign-in process of Zoho Books.
- Click Accept to allow SaaS Manager Plus to access data from the application.
- Once the authorization process is completed, the API integration will be established.
- Provide the relevant Reporting Tags and click Submit.
- Now, the data from the specific tags will be synced in SaaS Manager Plus on a weekly basis.

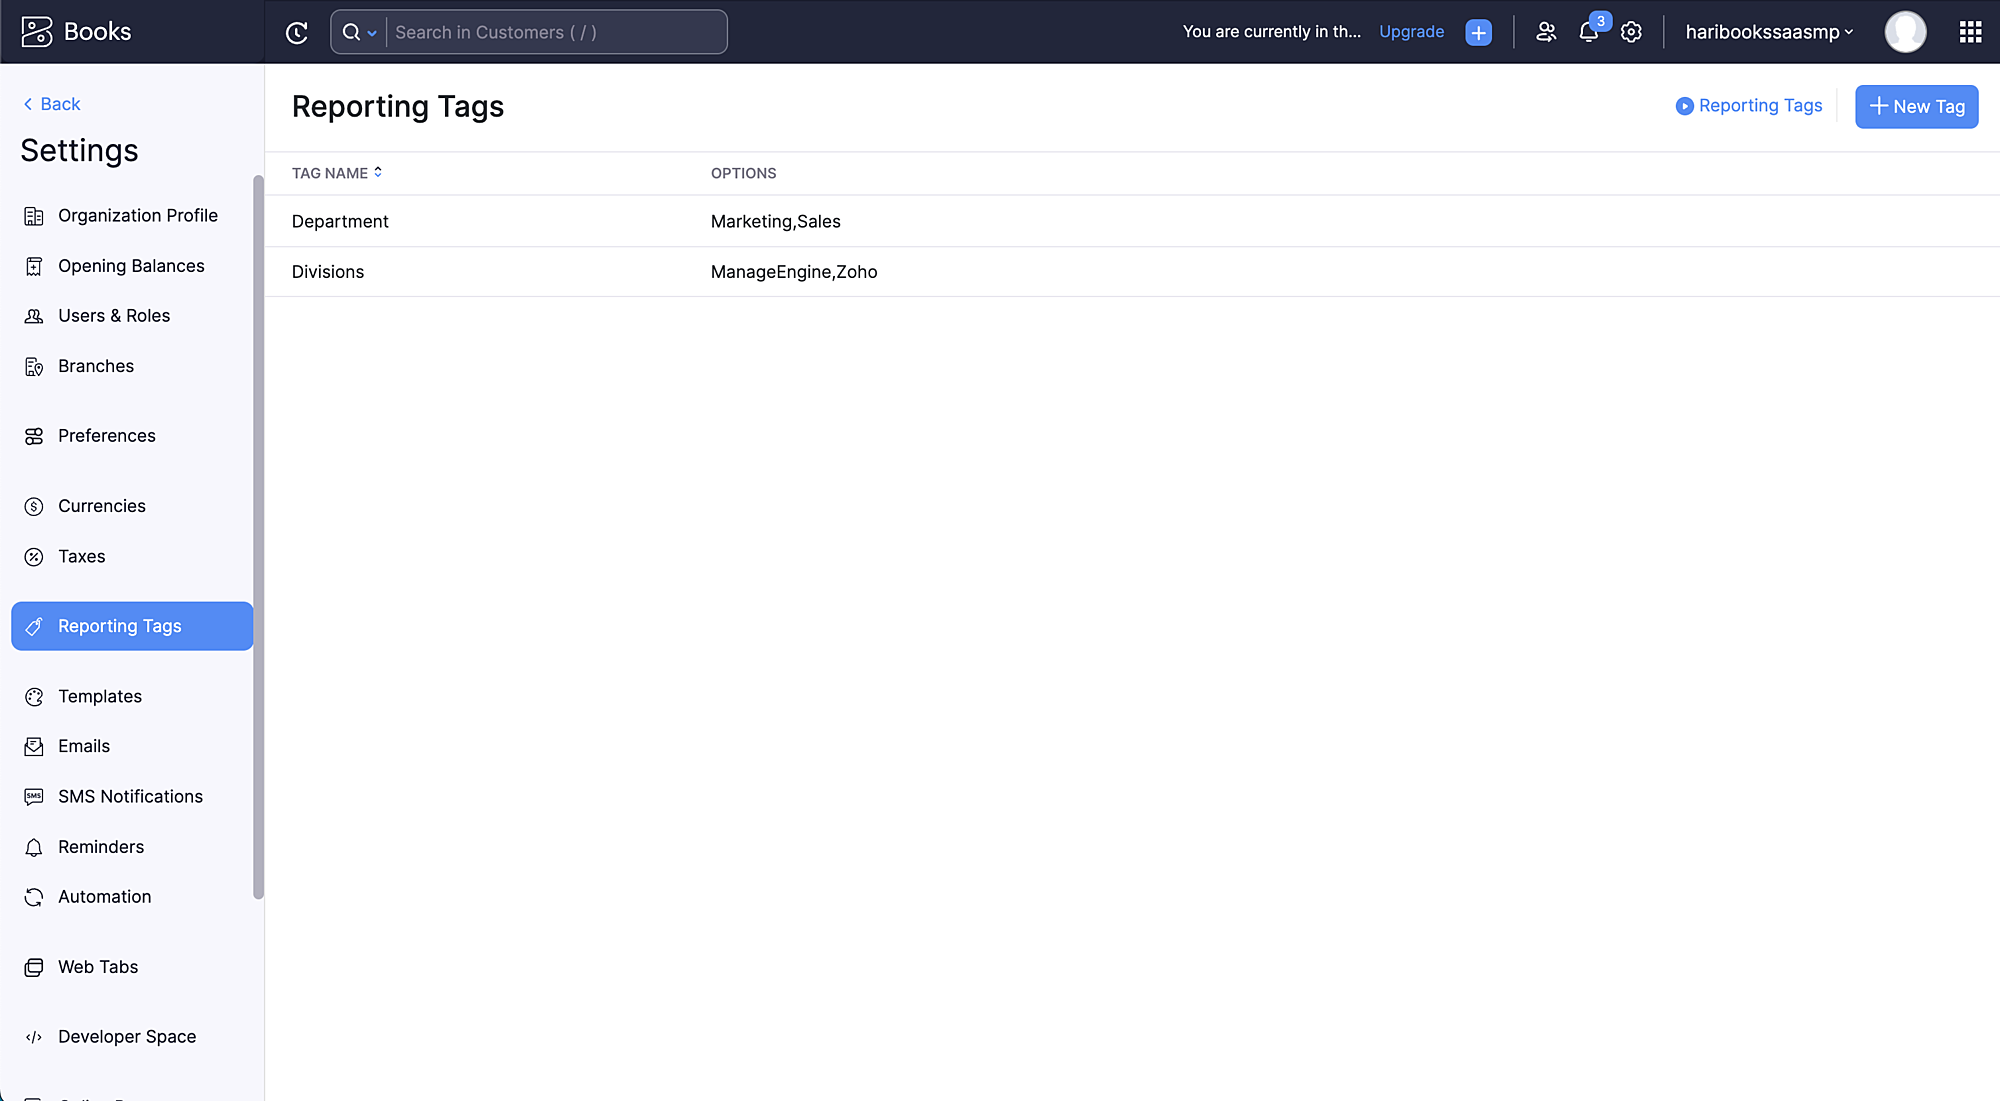
To add or select tags in Zoho Books
- Log in to your Zoho Books account.
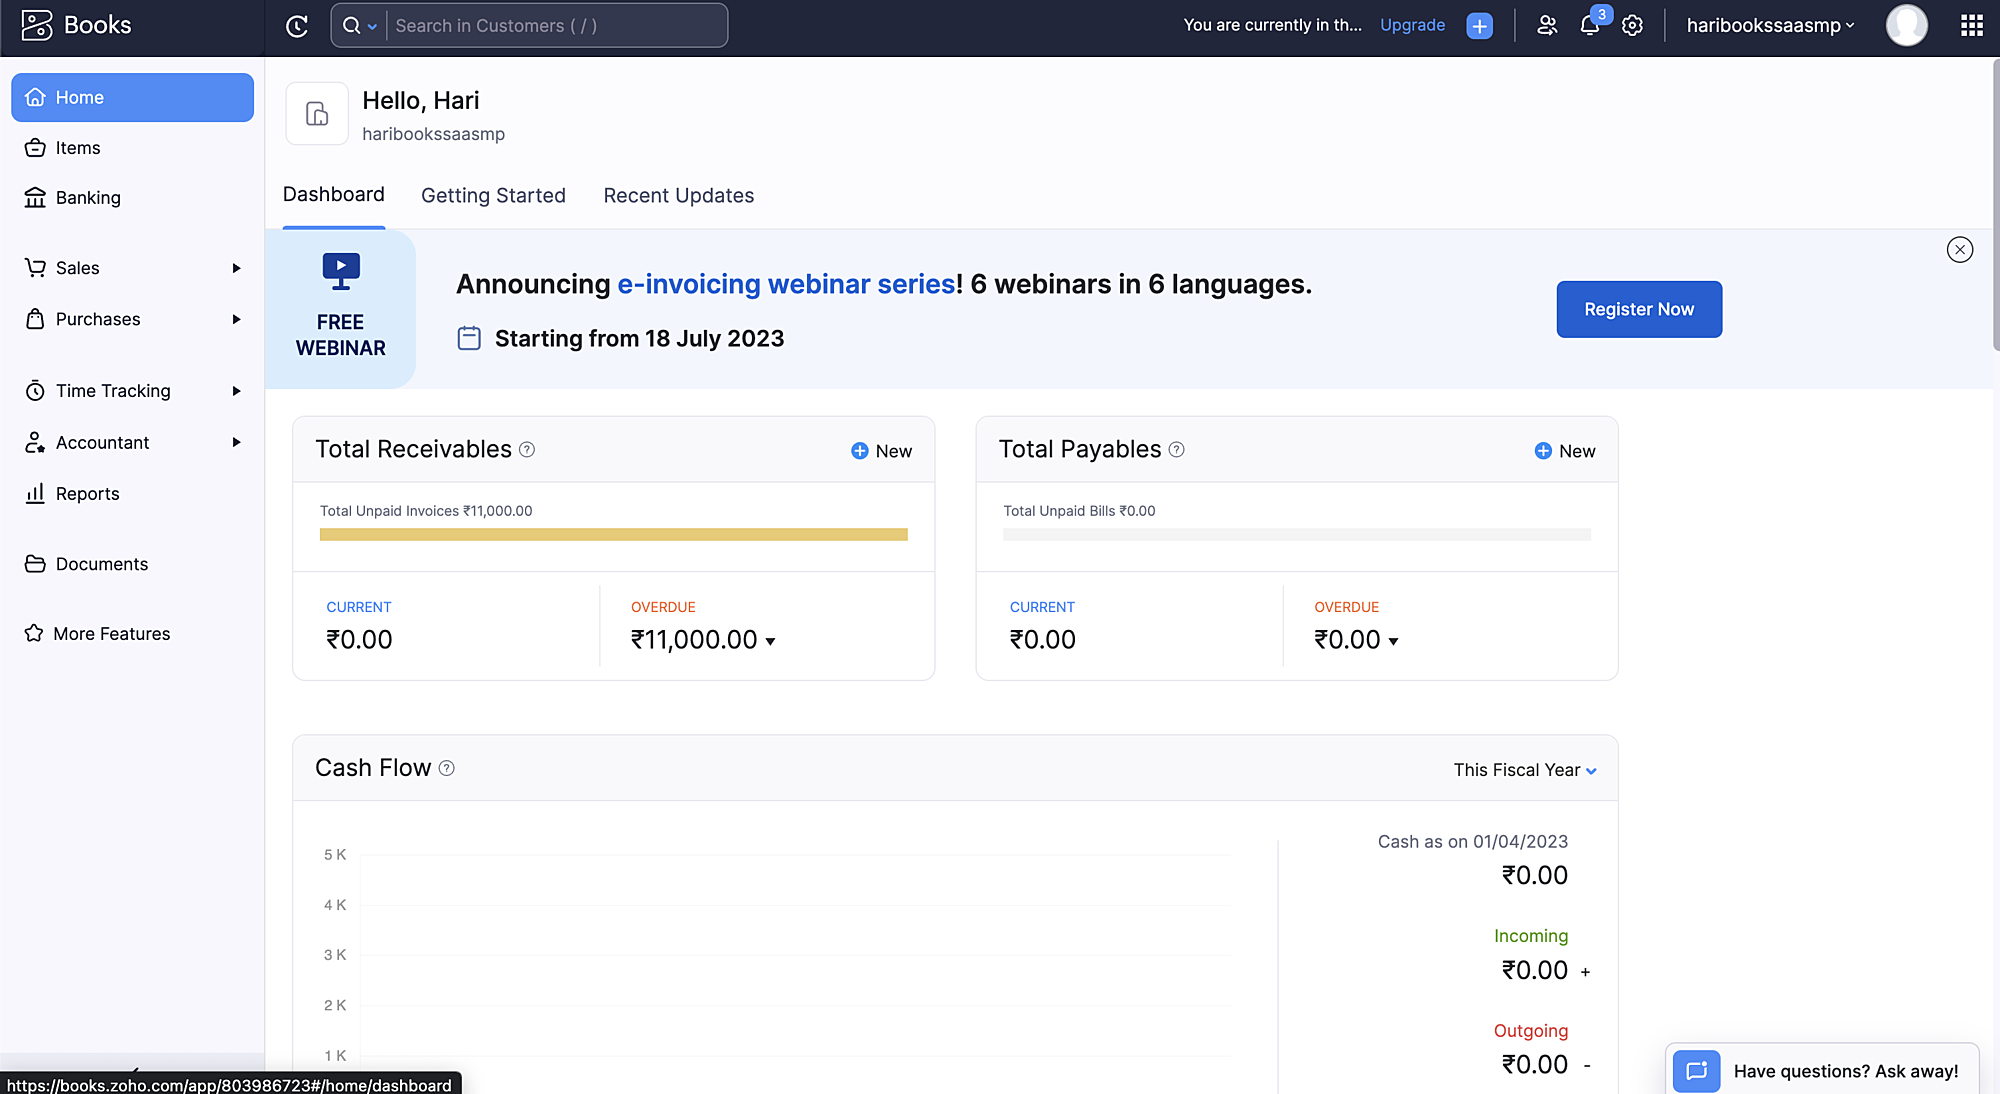
- Navigate to the Settings section within Zoho Books.
- Search for reporting tags in the Settings menu.
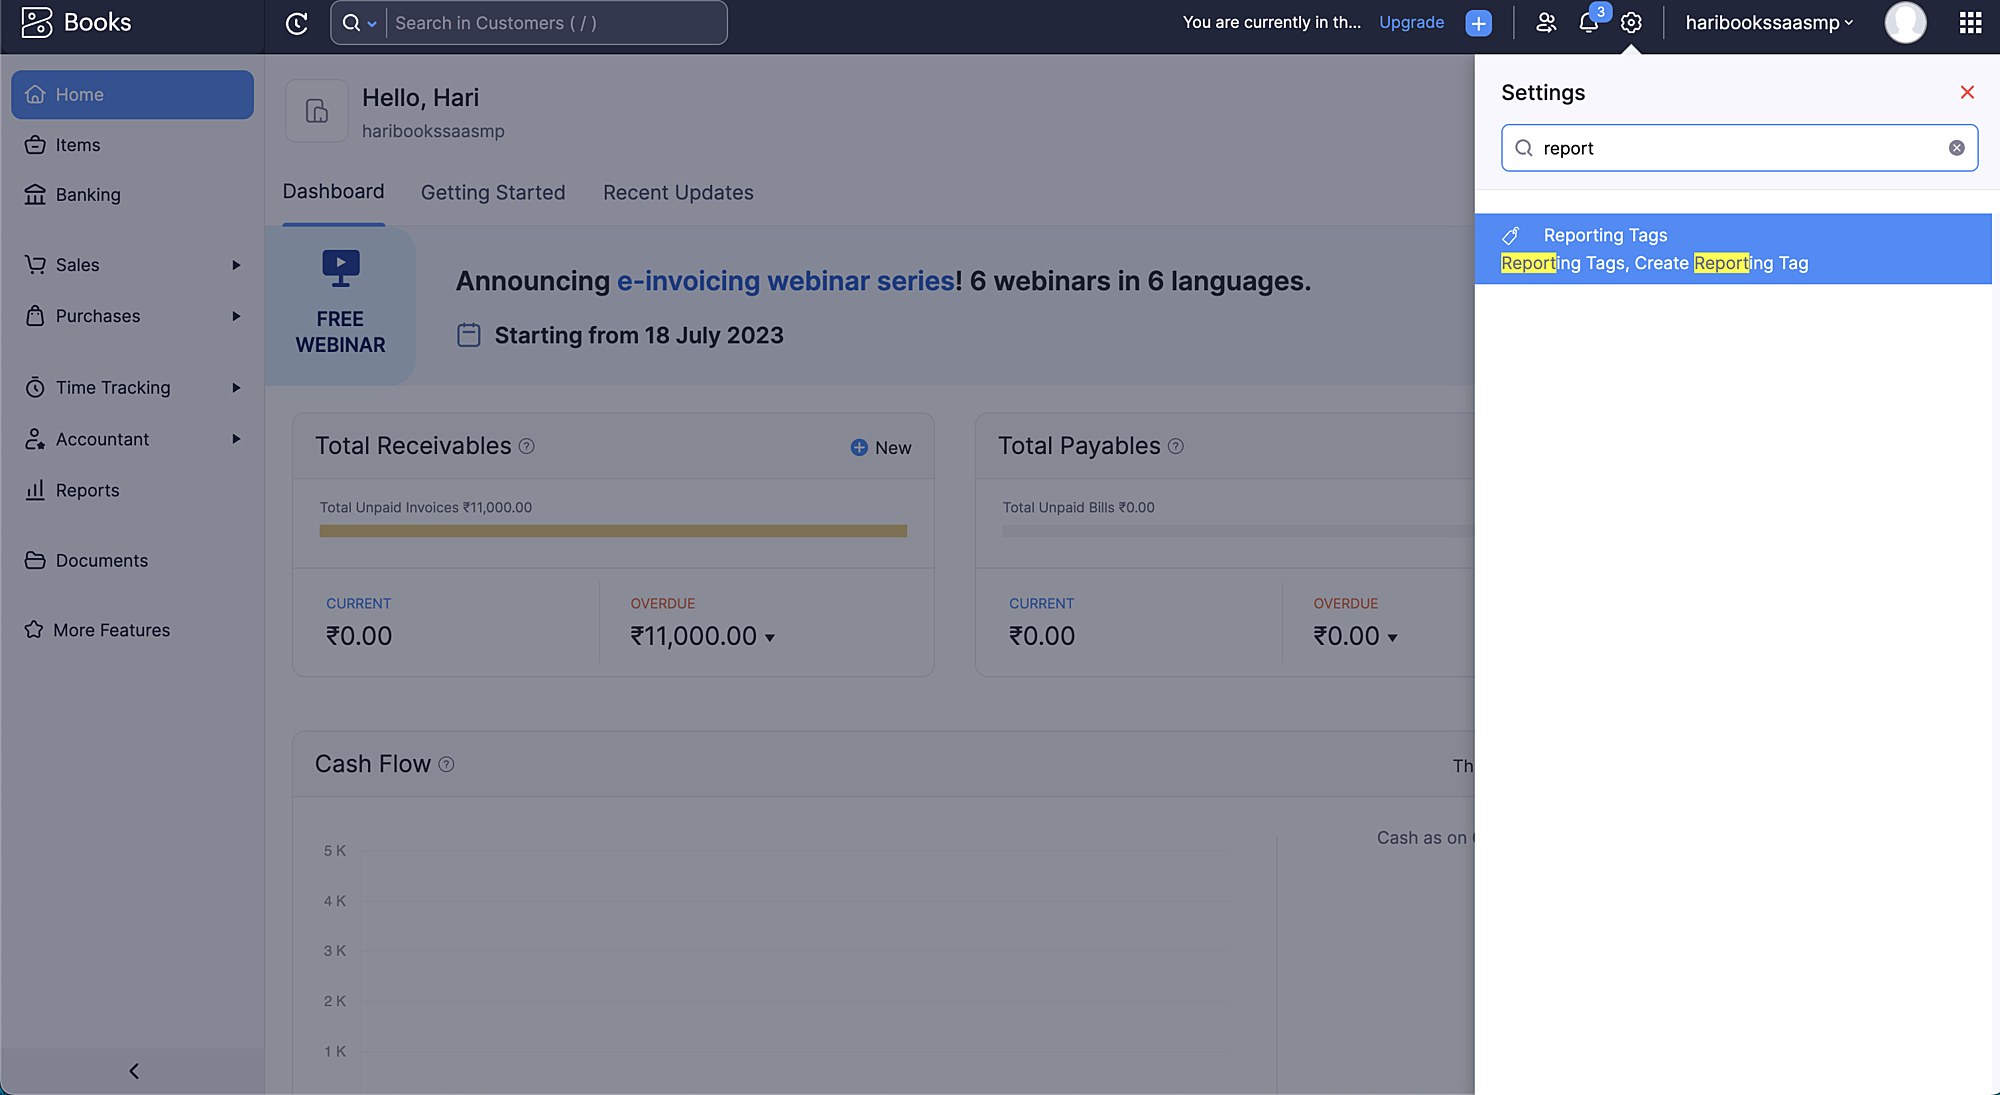
- View the existing reporting tags or click the New Tag button in the top-right corner to create a new tag, if required.
- Click the Items tab and add a new item or select an existing item to associate the reporting tags.
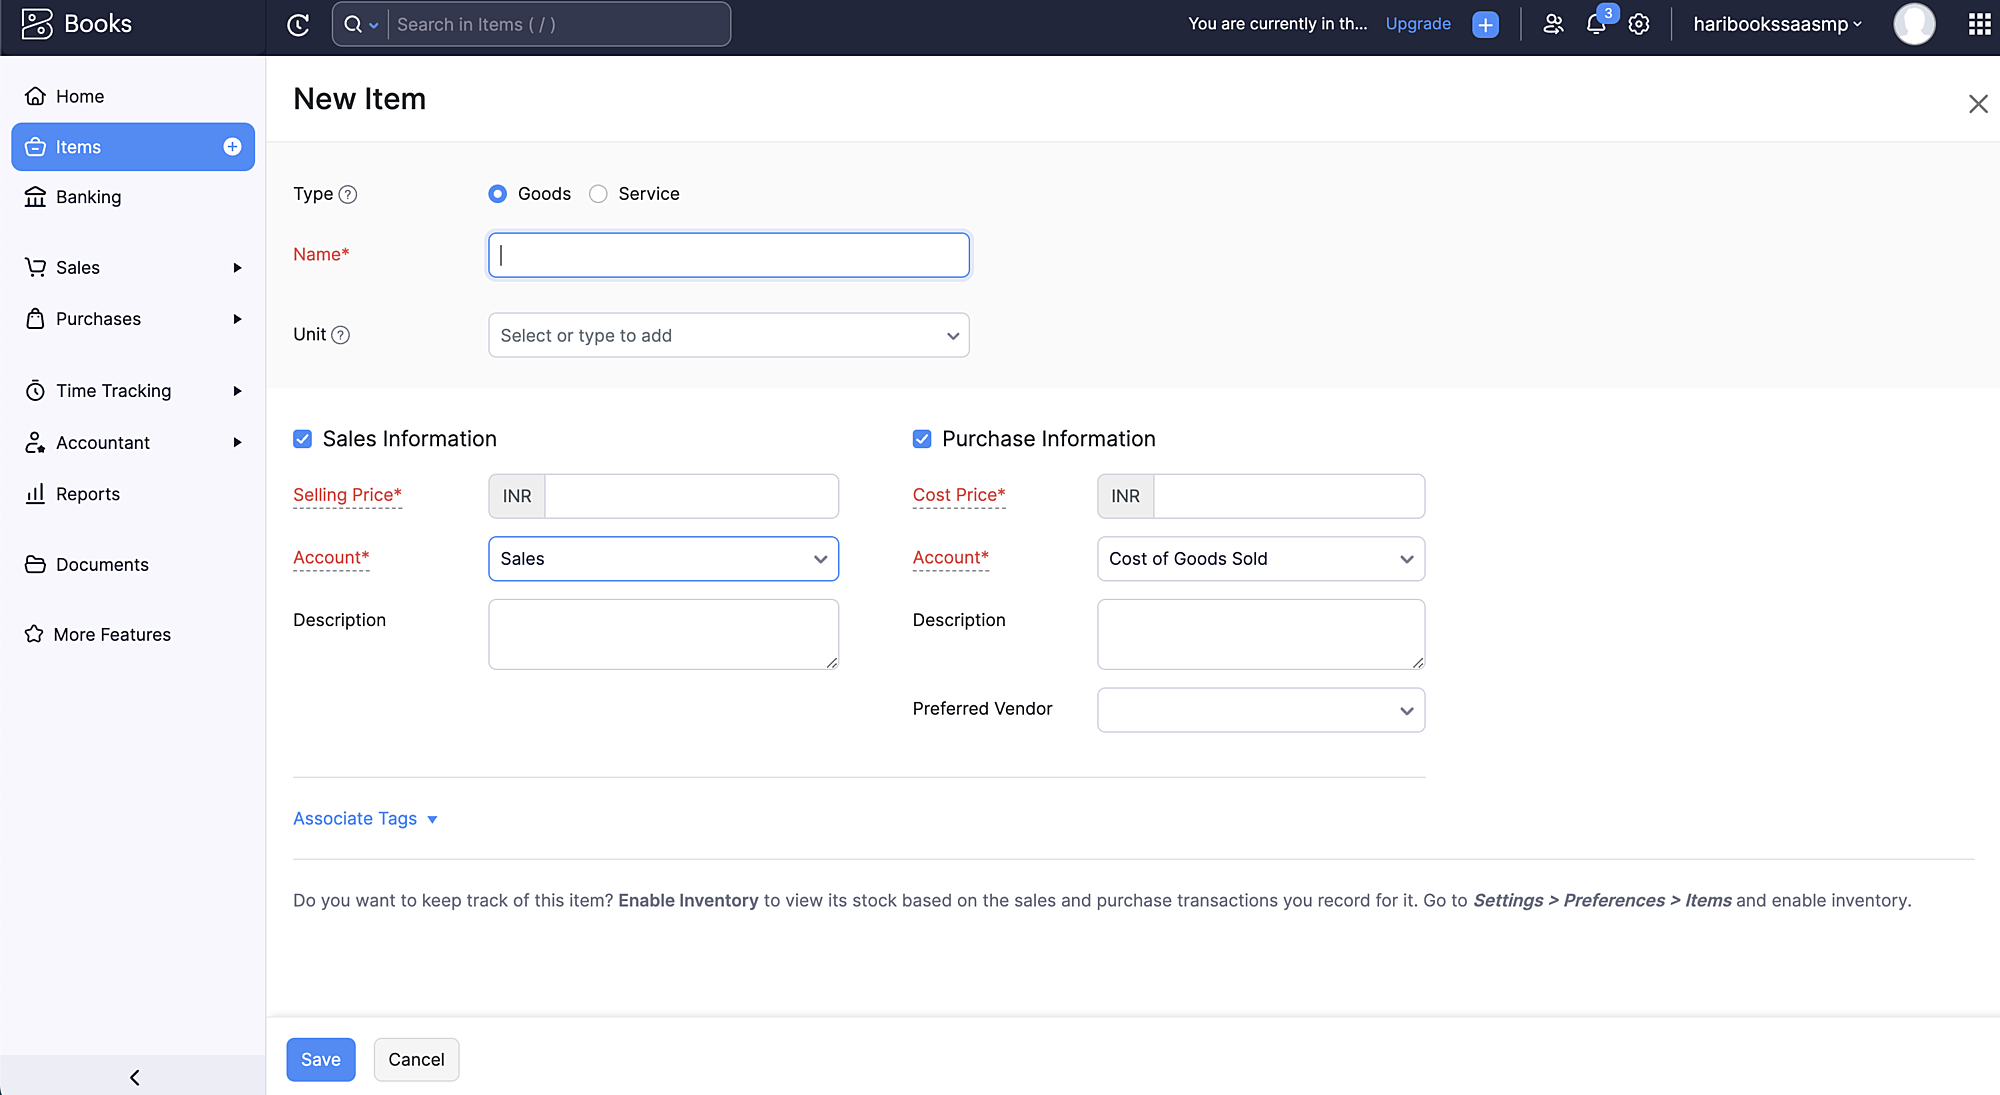
- Click Associate Tags to add the relevant reporting tags, such as Department and Divisions, to the items in Zoho Books.
- Provide the necessary details and select the appropriate reporting tags for the item.
- Click Save to save the changes and apply the settings. This helps in pulling invoices and adding them to SaaS Manager Plus.
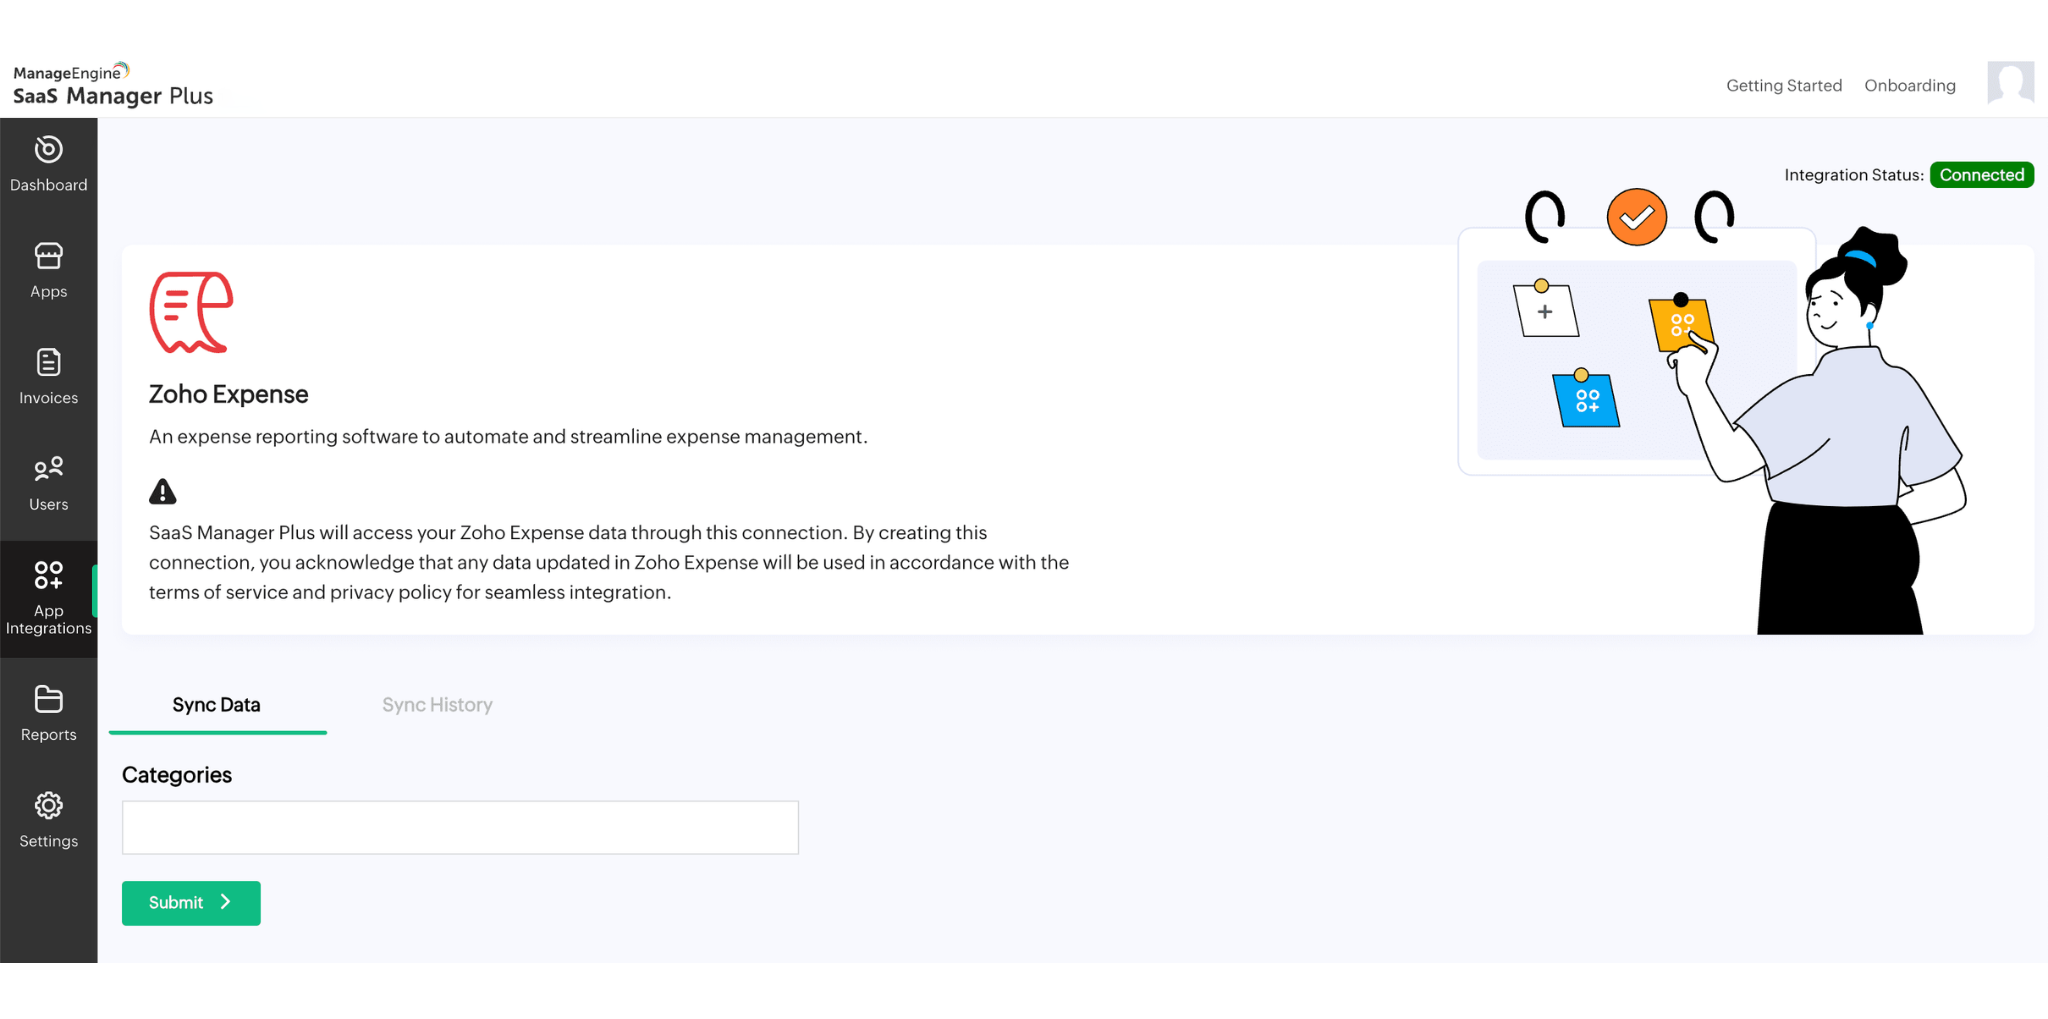
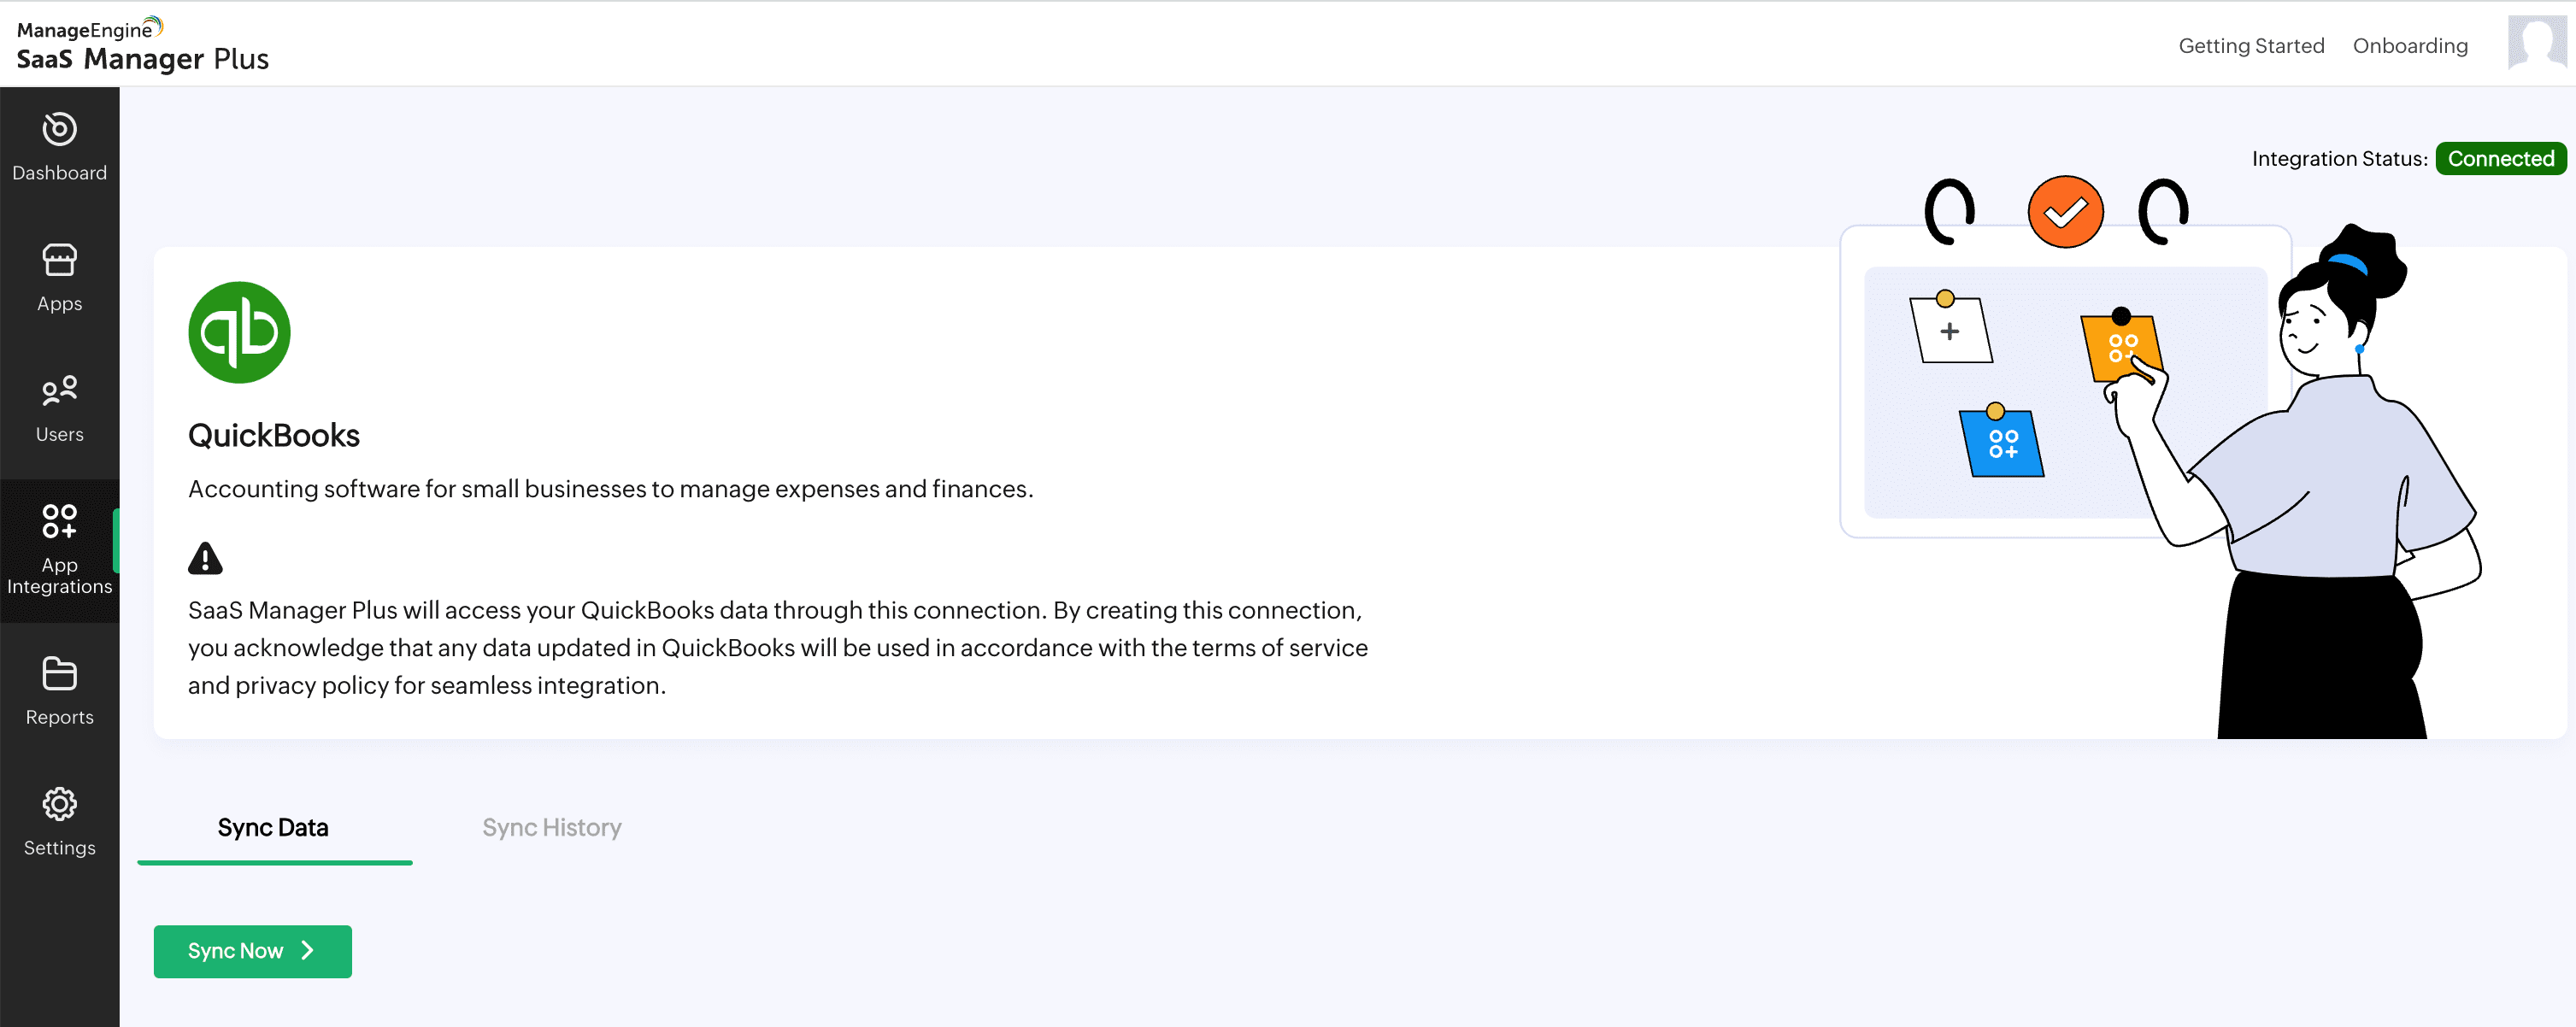
To integrate with QuickBooks or Zoho Expense
- Click Authorize and follow the sign-in process of the respective application.
- Click Accept to allow SaaS Manager Plus to access data from the application.
- Once the authorization process is completed, the API integration will be established.
- For Zoho Expense, after successful integration, select the required tags in Categories box and click Submit to complete the synchronization.
By following these steps, you can connect with the desired applications and leverage their functionalities within SaaS Manager Plus.
To fetch necessary information from Okta
- Sign in to your Okta account.
- Complete the authentication process to access your Okta dashboard.
- Utilize the Okta API to retrieve the list of active applications from Okta and their respective users.
- Integrate with Okta manually by providing your instance name in the instance name box, client ID in the app client ID box and client secret in the app client secret box.
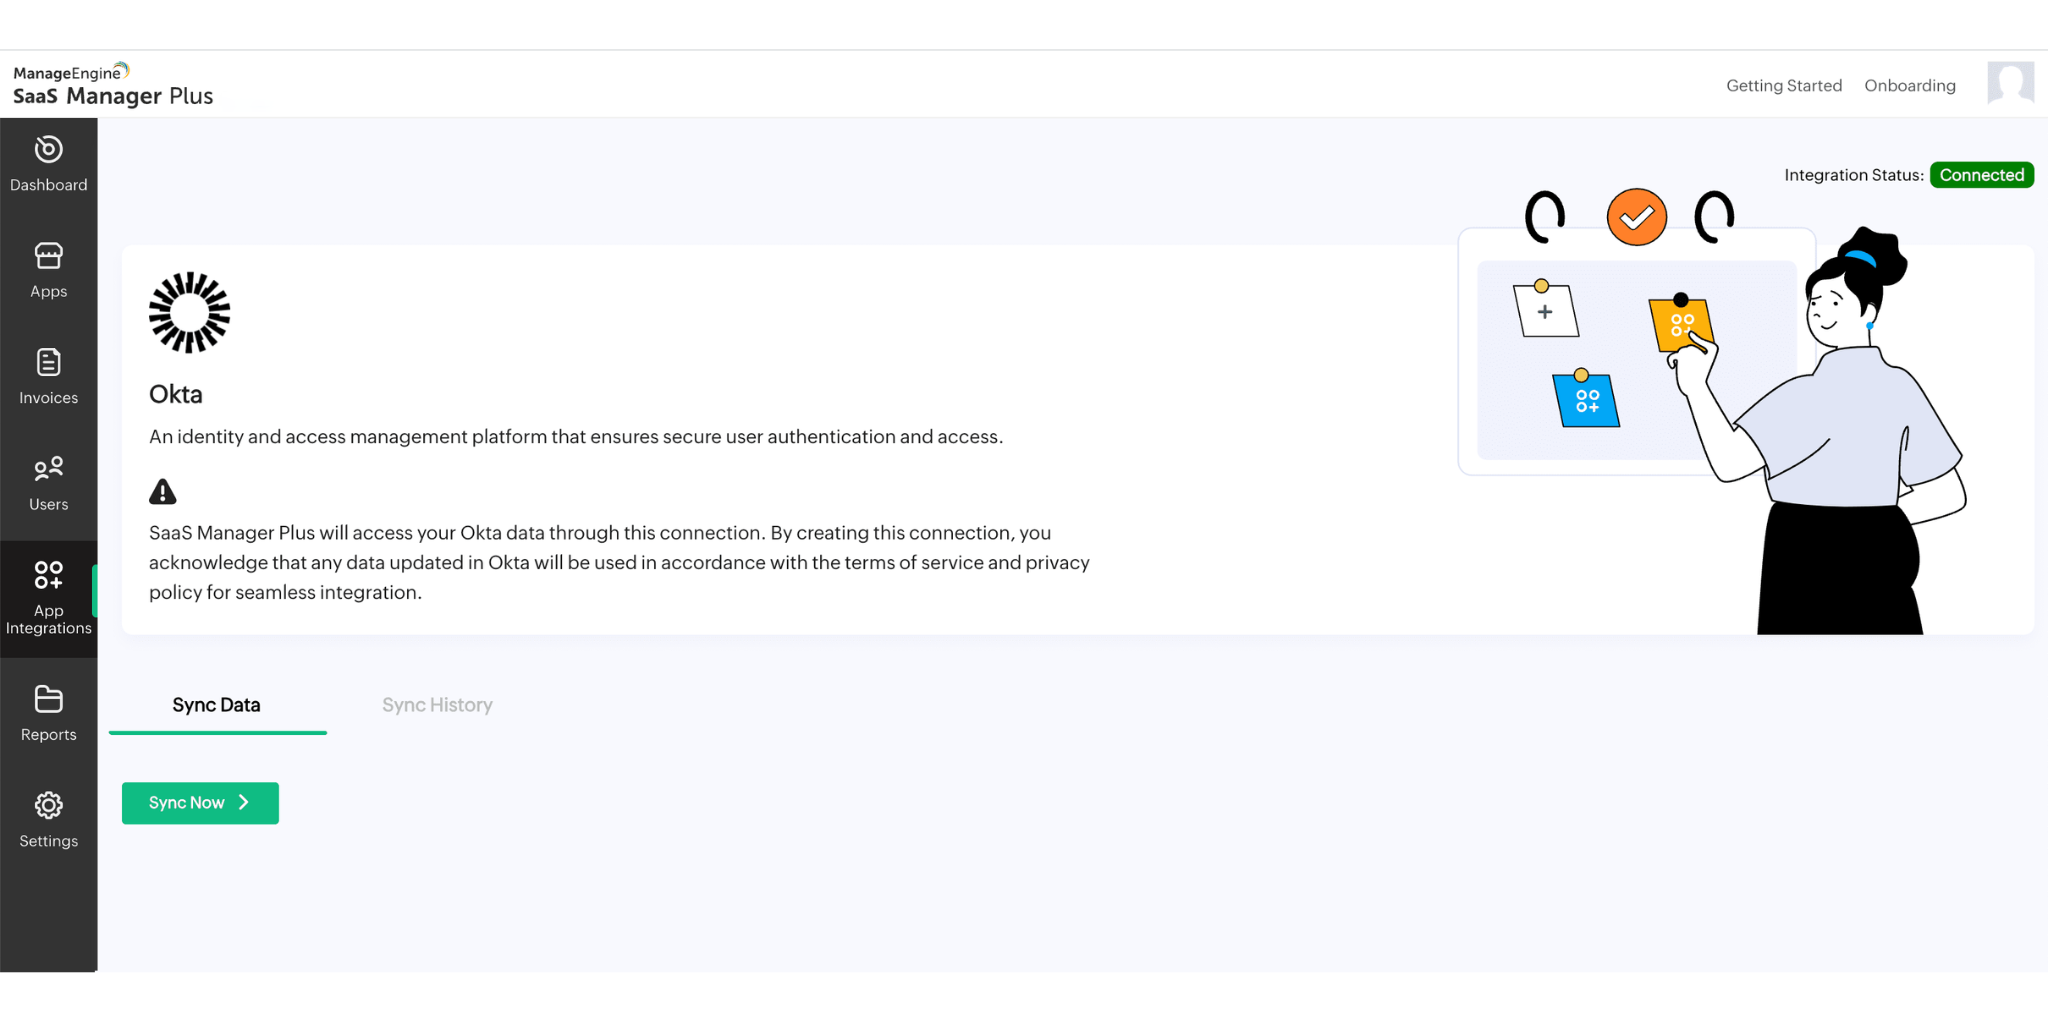
- Click Authorize to integrate.
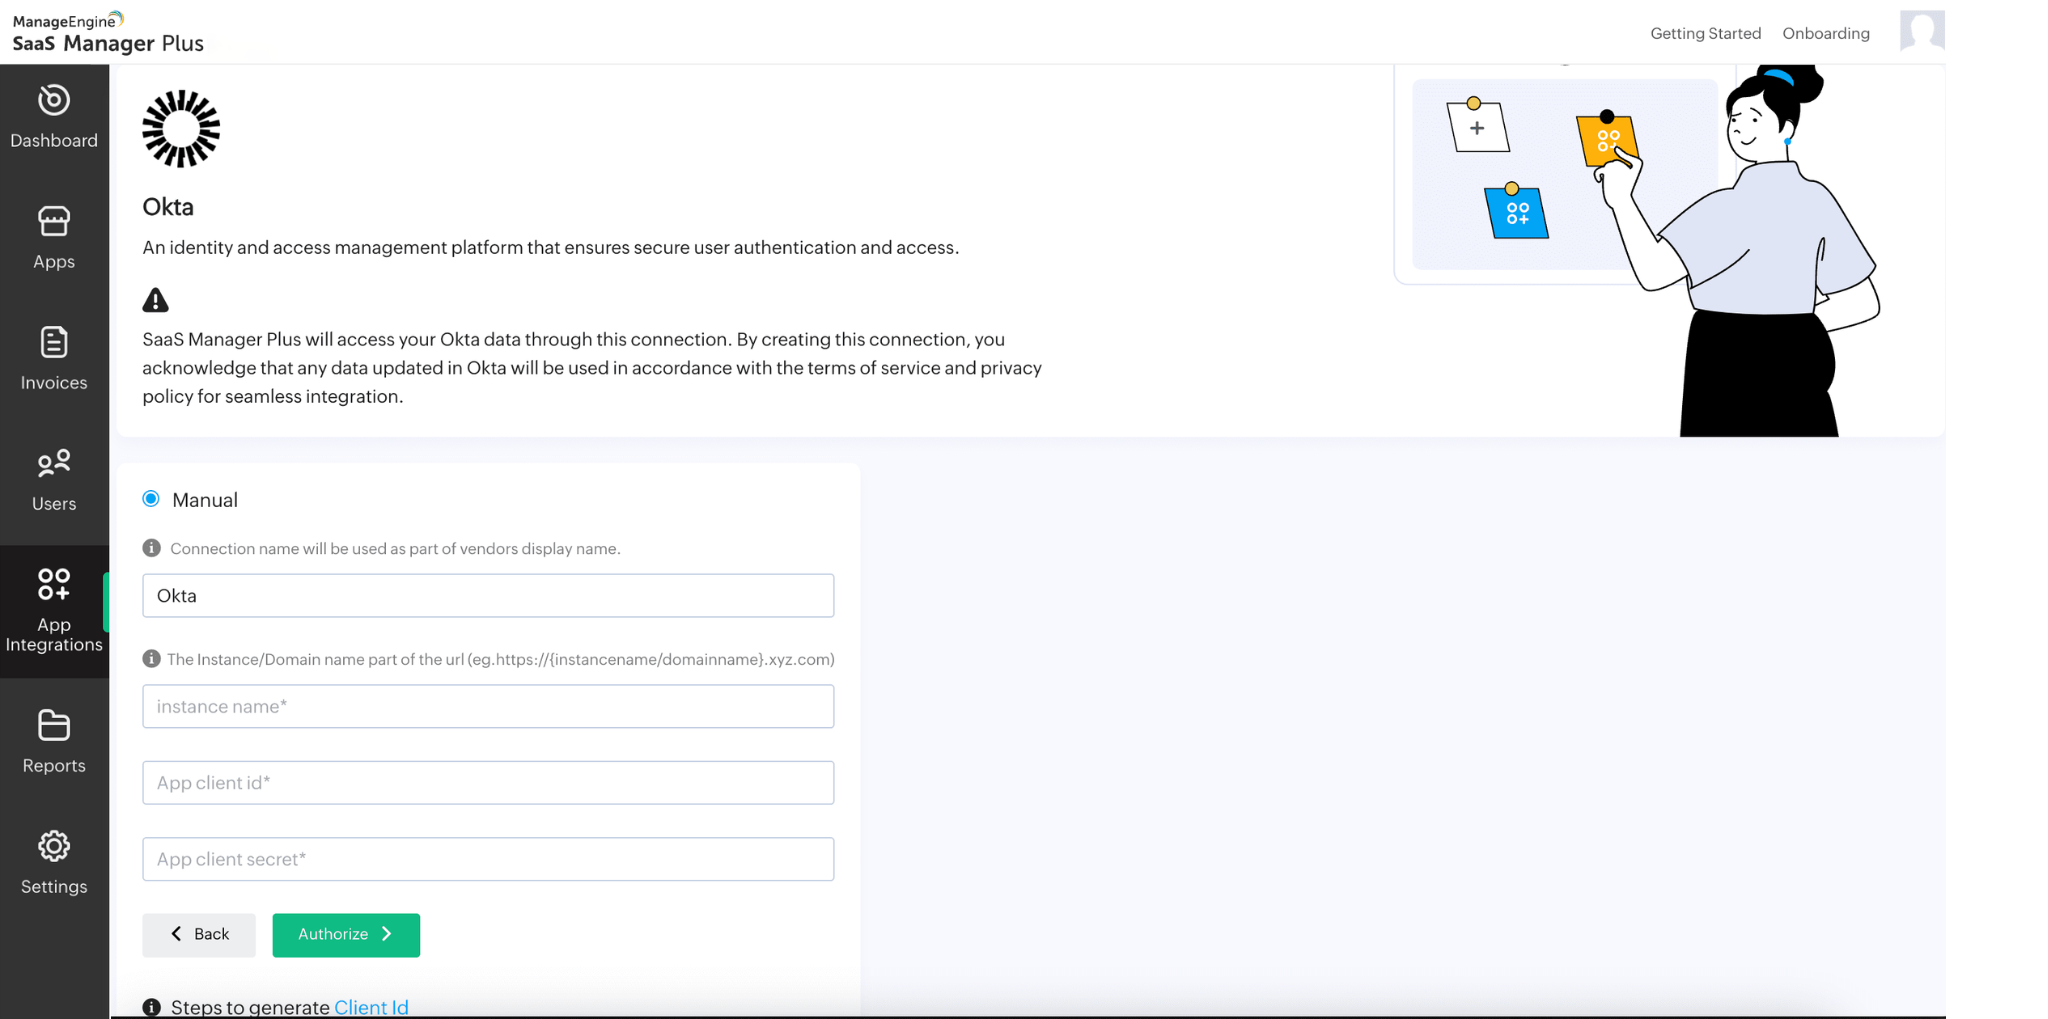
- After successful integration, click Sync Now button to sync data.
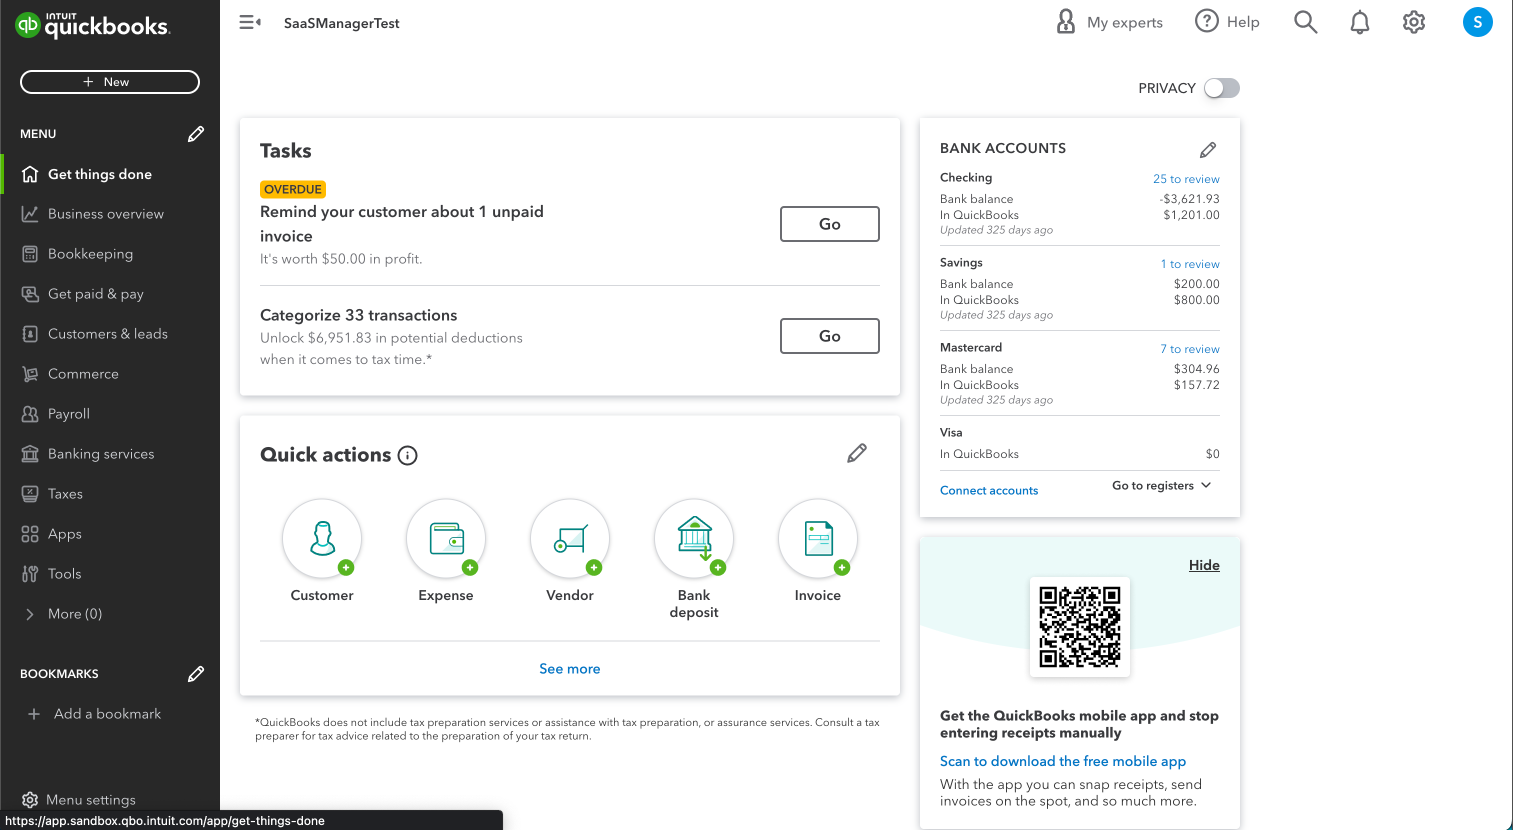
To add or select tags in QuickBooks
- Log in to your QuickBooks account.
- Navigate to the Settings section within QuickBooks.
- Under the Lists categories, locate and click Tags.
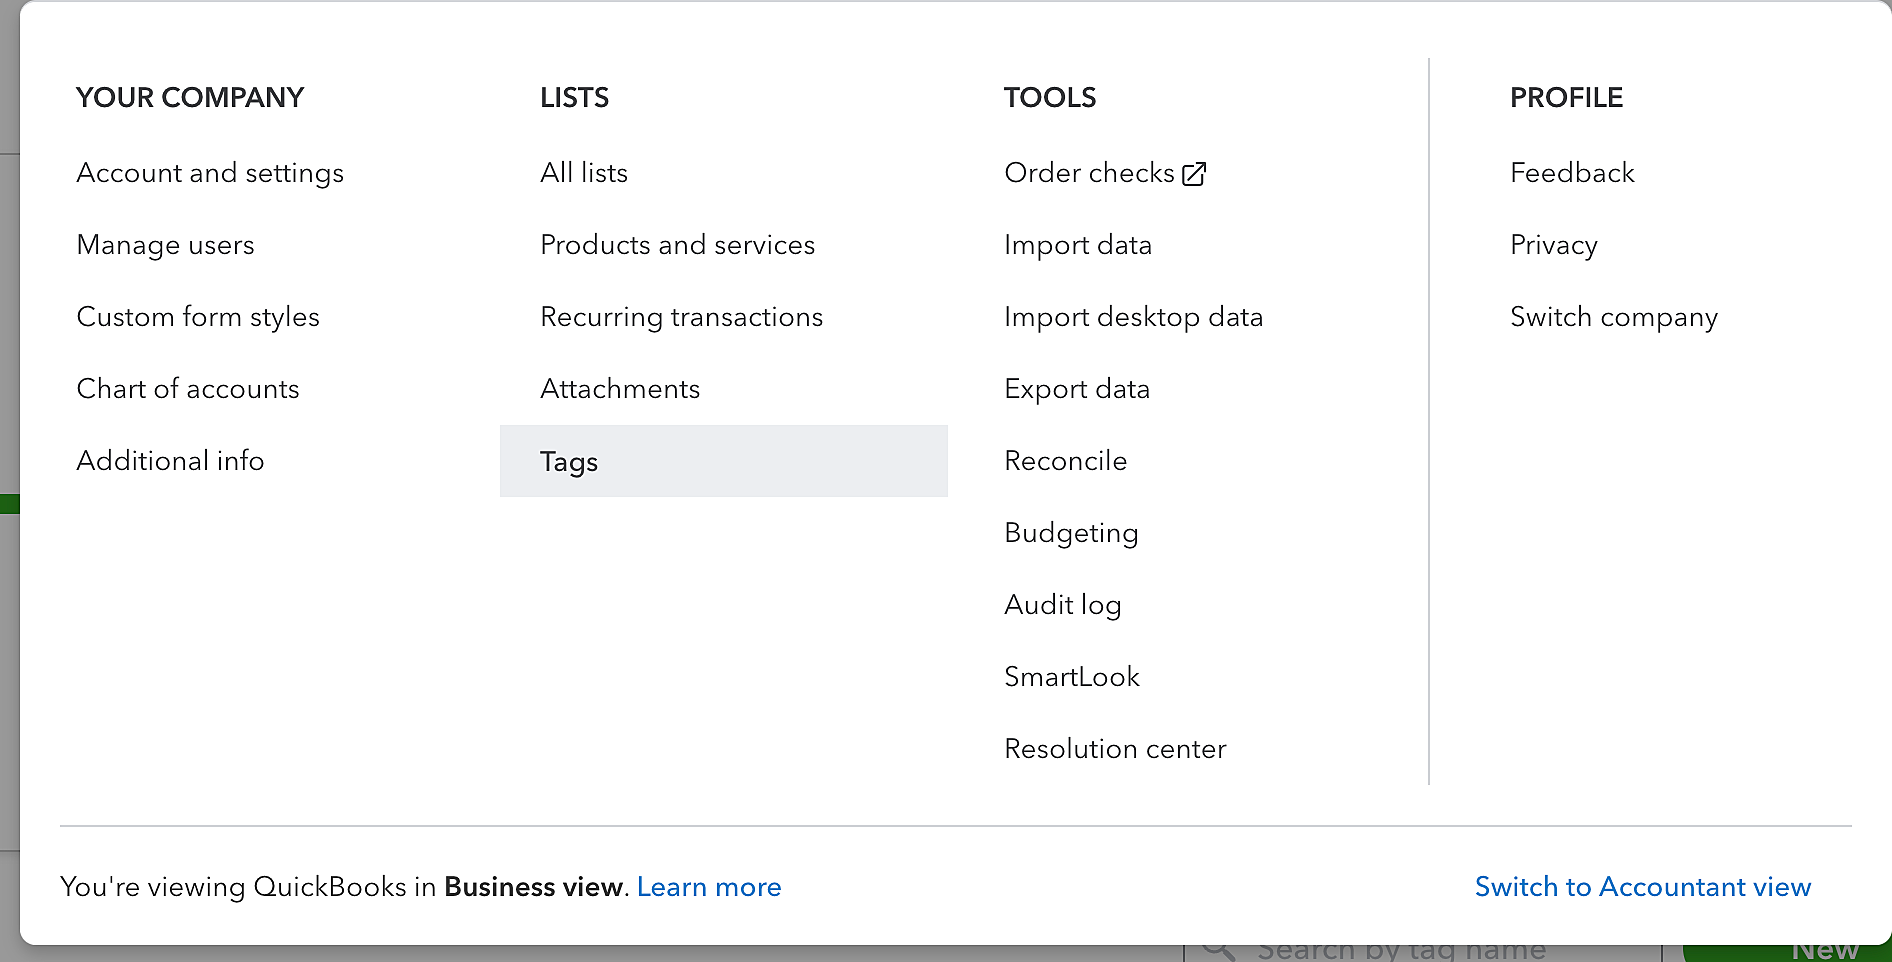
- In the Tags, you can create a new tag or view existing tags.
- To create a new tag, click New Tag and provide the necessary details.
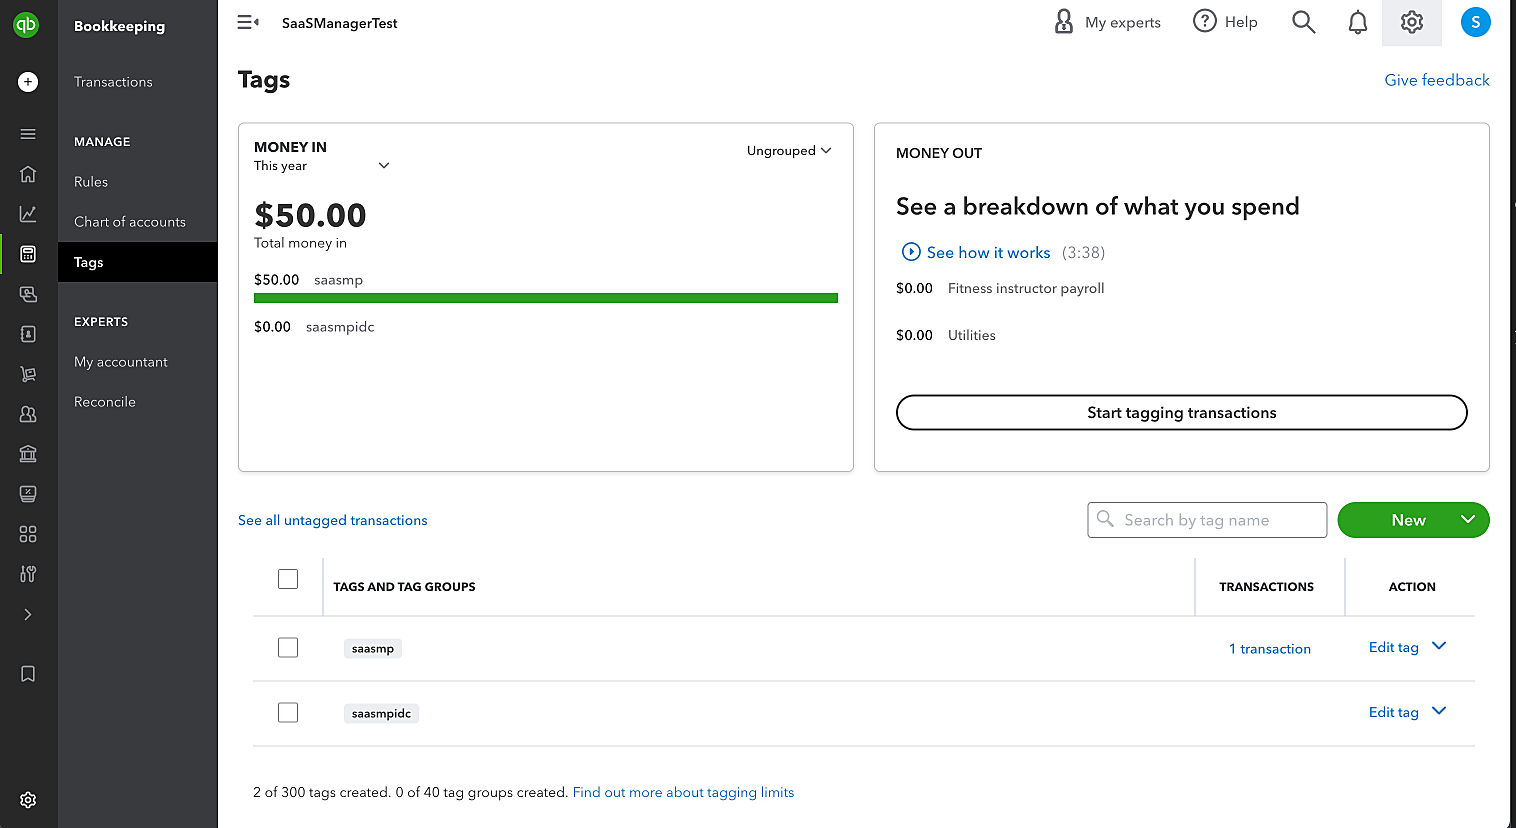
- Alternatively, you can view an existing tag from the list.
- Next, go to the Invoices tab.
- While creating or editing an invoice, you will find the Tags pick list.
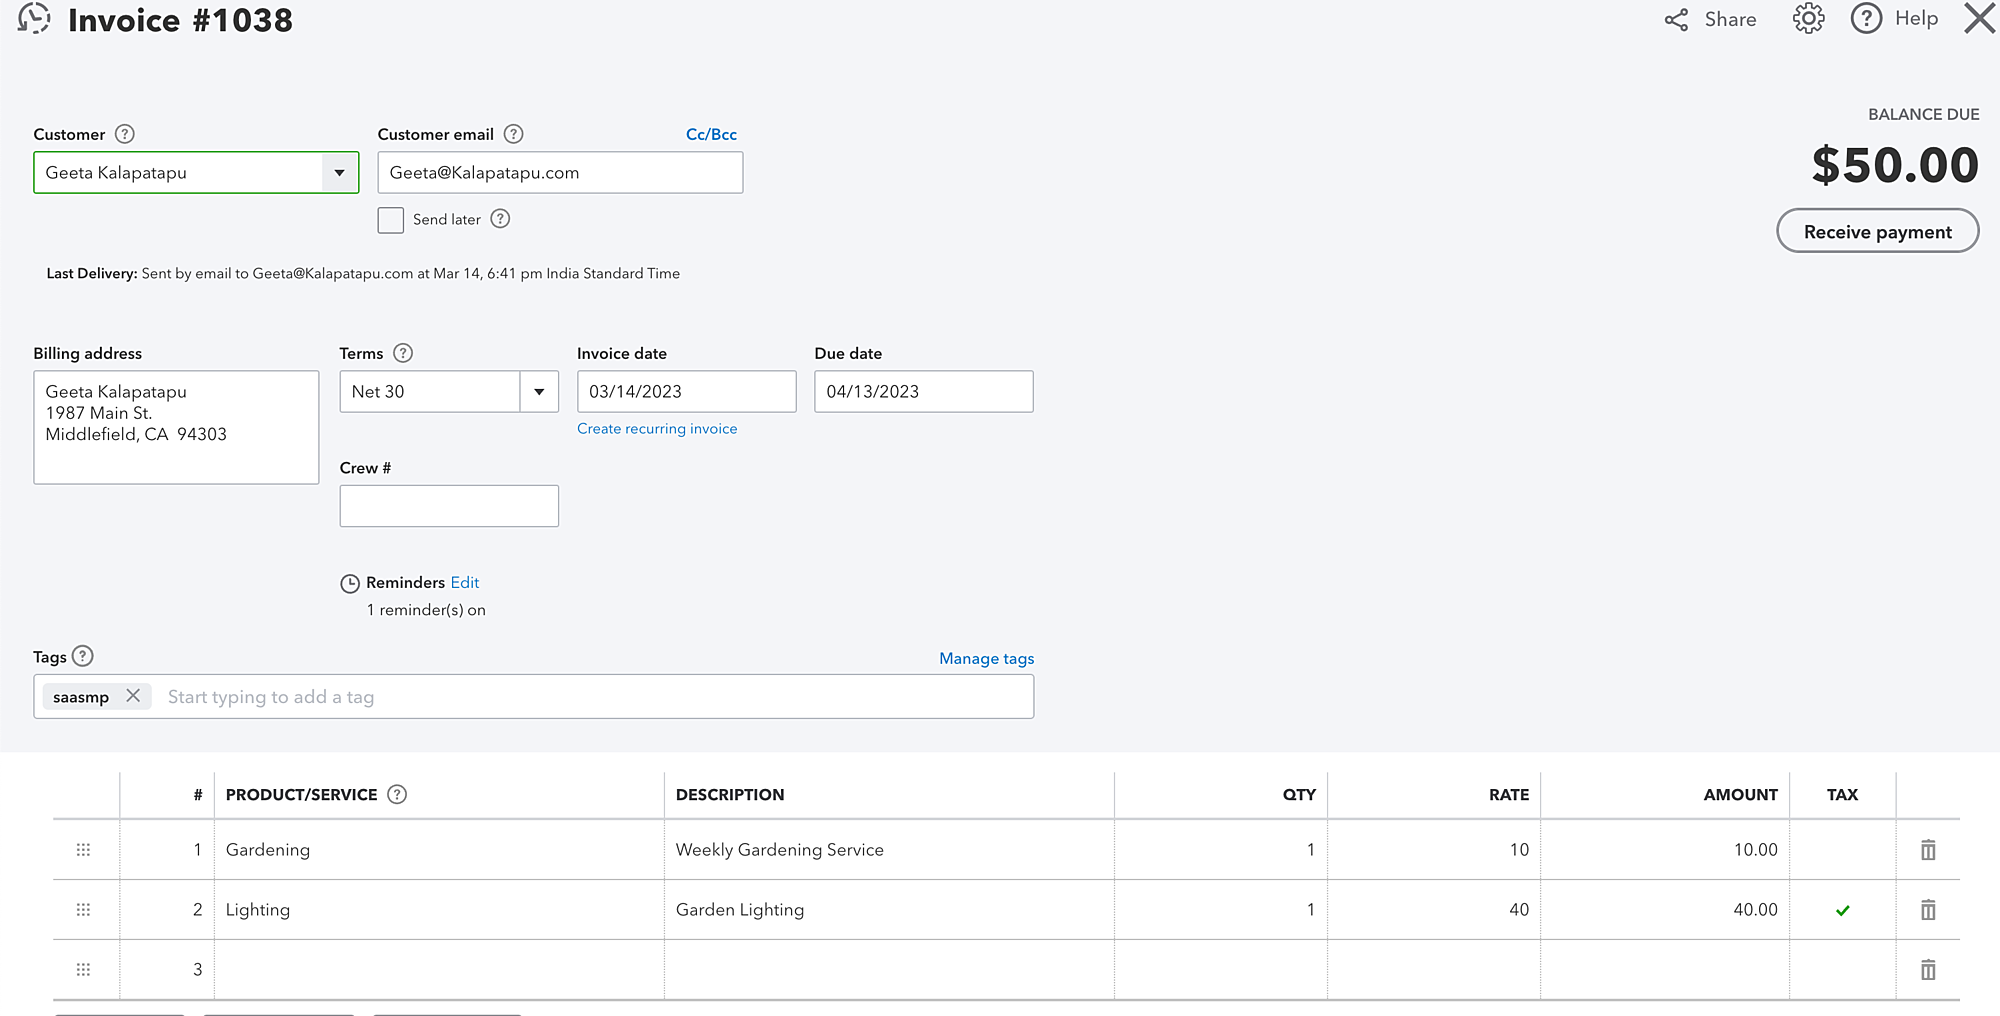
- Add the relevant tags to the invoice by providing the reporting tags in the pick list.
- Click Save to update the invoice with the assigned tags.
To sync QuickBooks data with SaaS Manager Plus
- After successful integration, click Sync Now button to sync data.
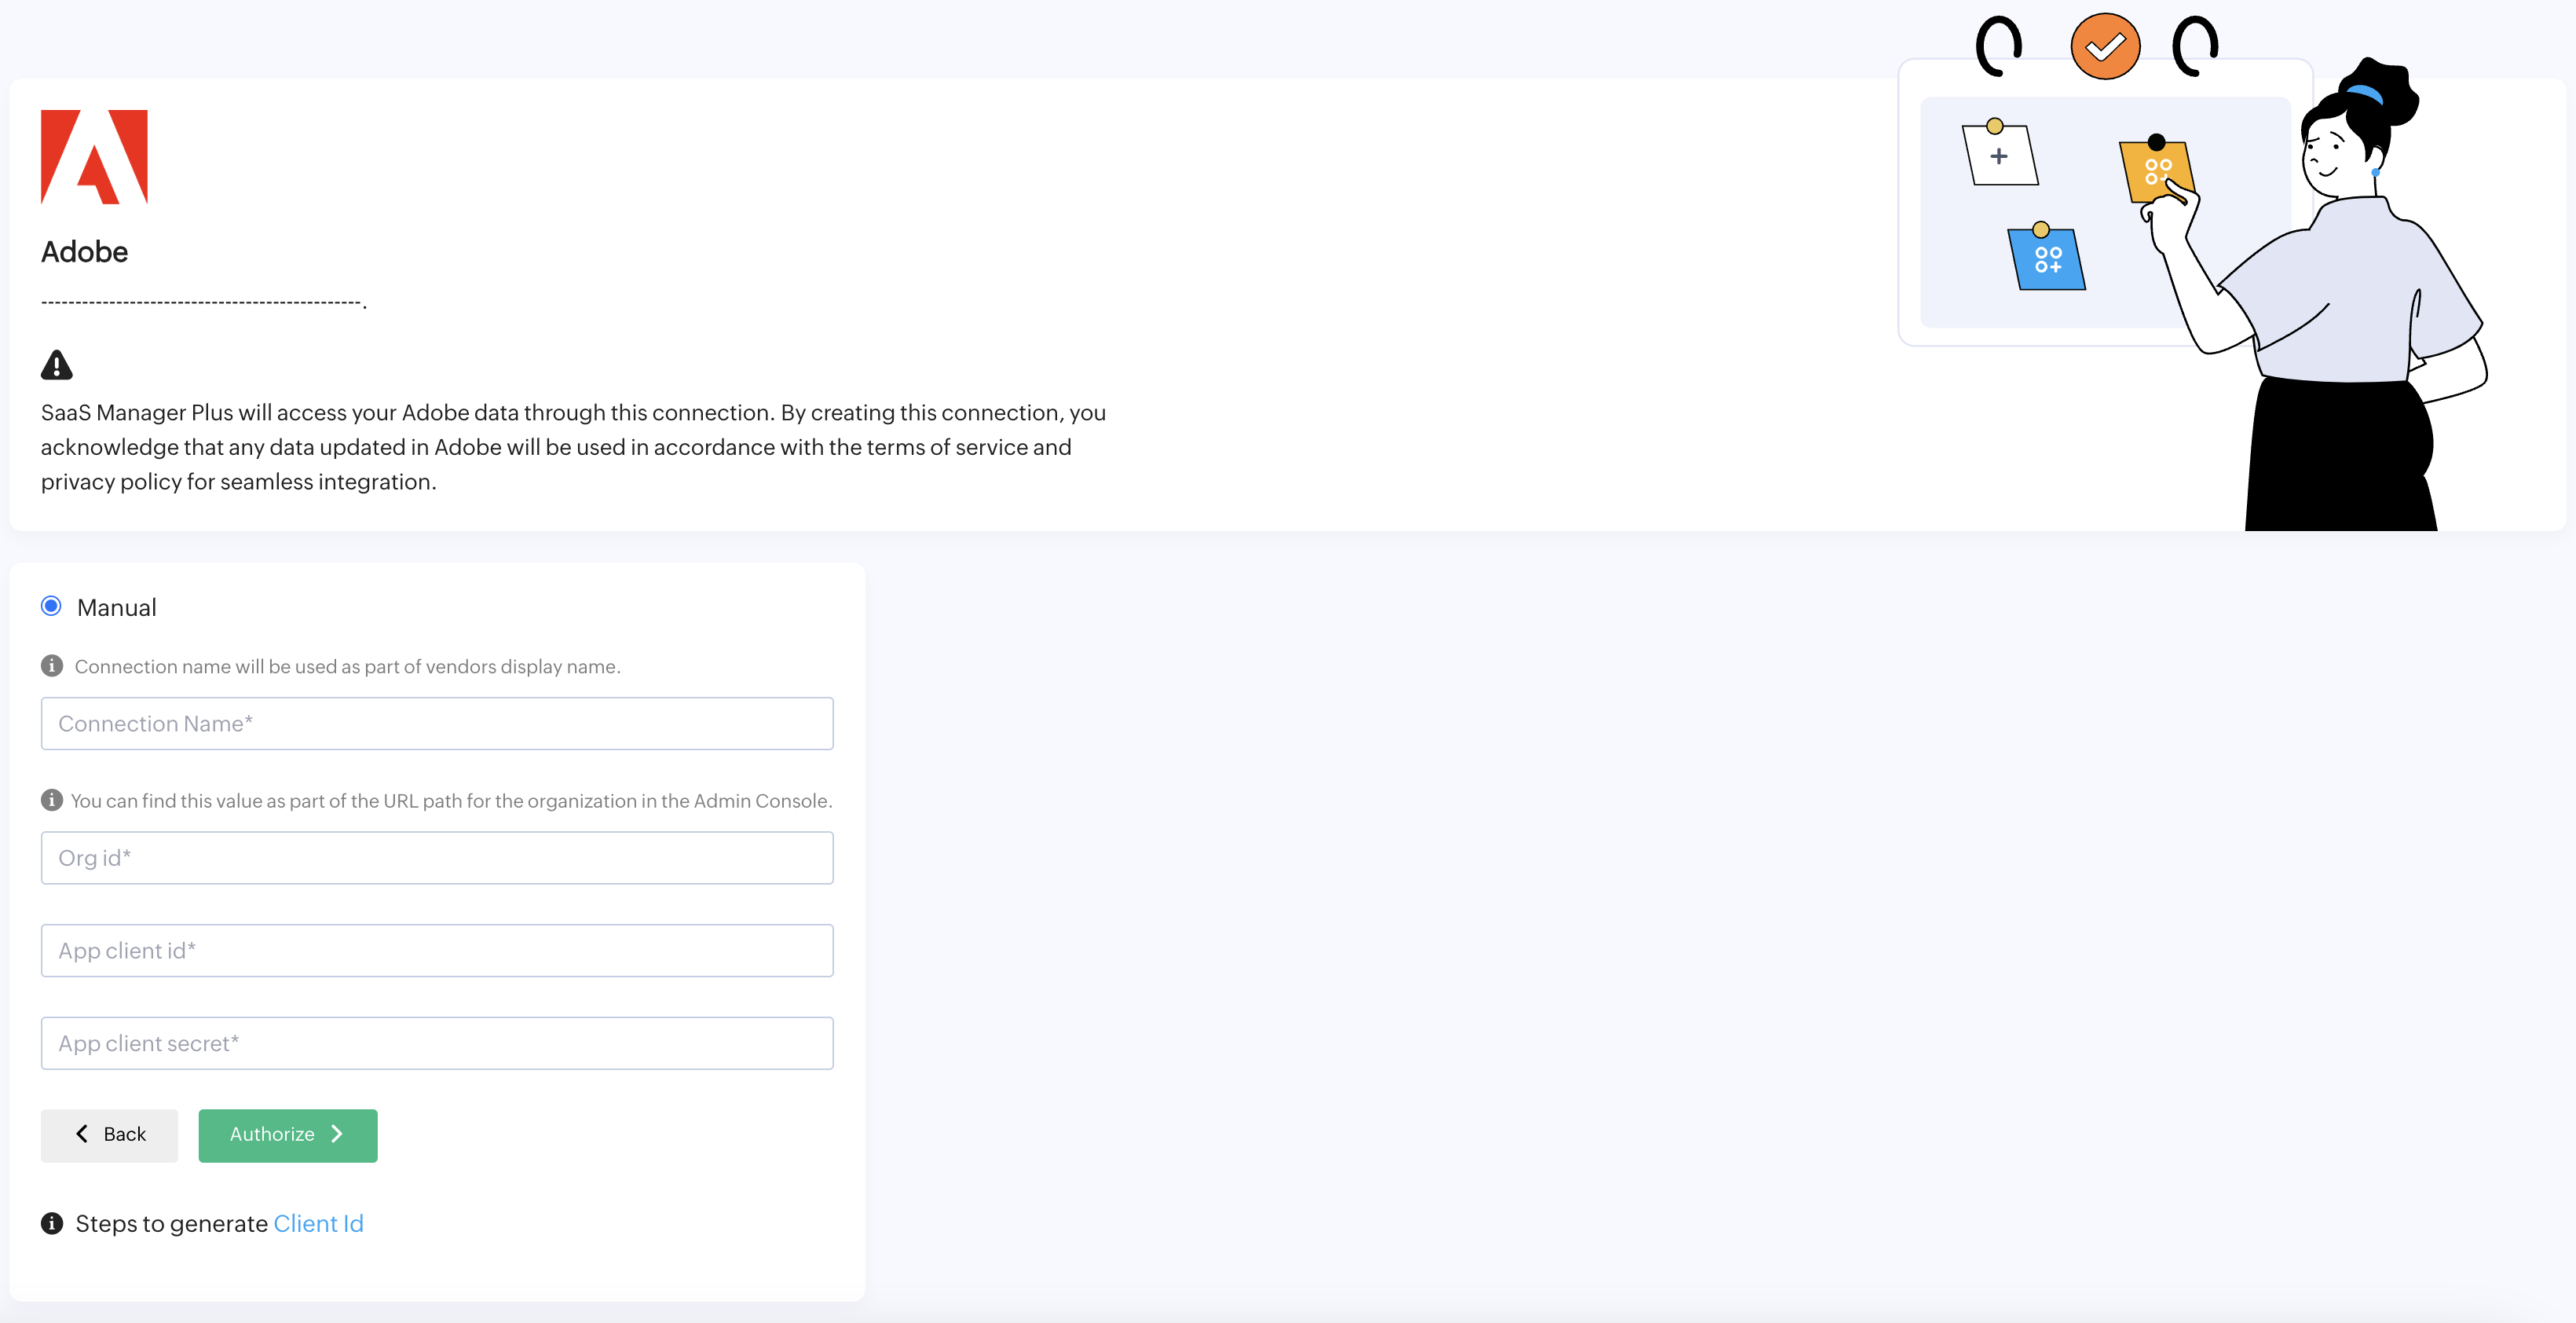
To integrate with Adobe
- Click Adobe from the list of applications.
- Provide a connection name in the designated Connection Name box.
- Enter the Org ID which is available in the URL of Admin Console of your Adobe application.
- Enter your client ID in the app client ID box.
- Enter your client secret in the app client secret box.
- Click Authorize to complete the integration.
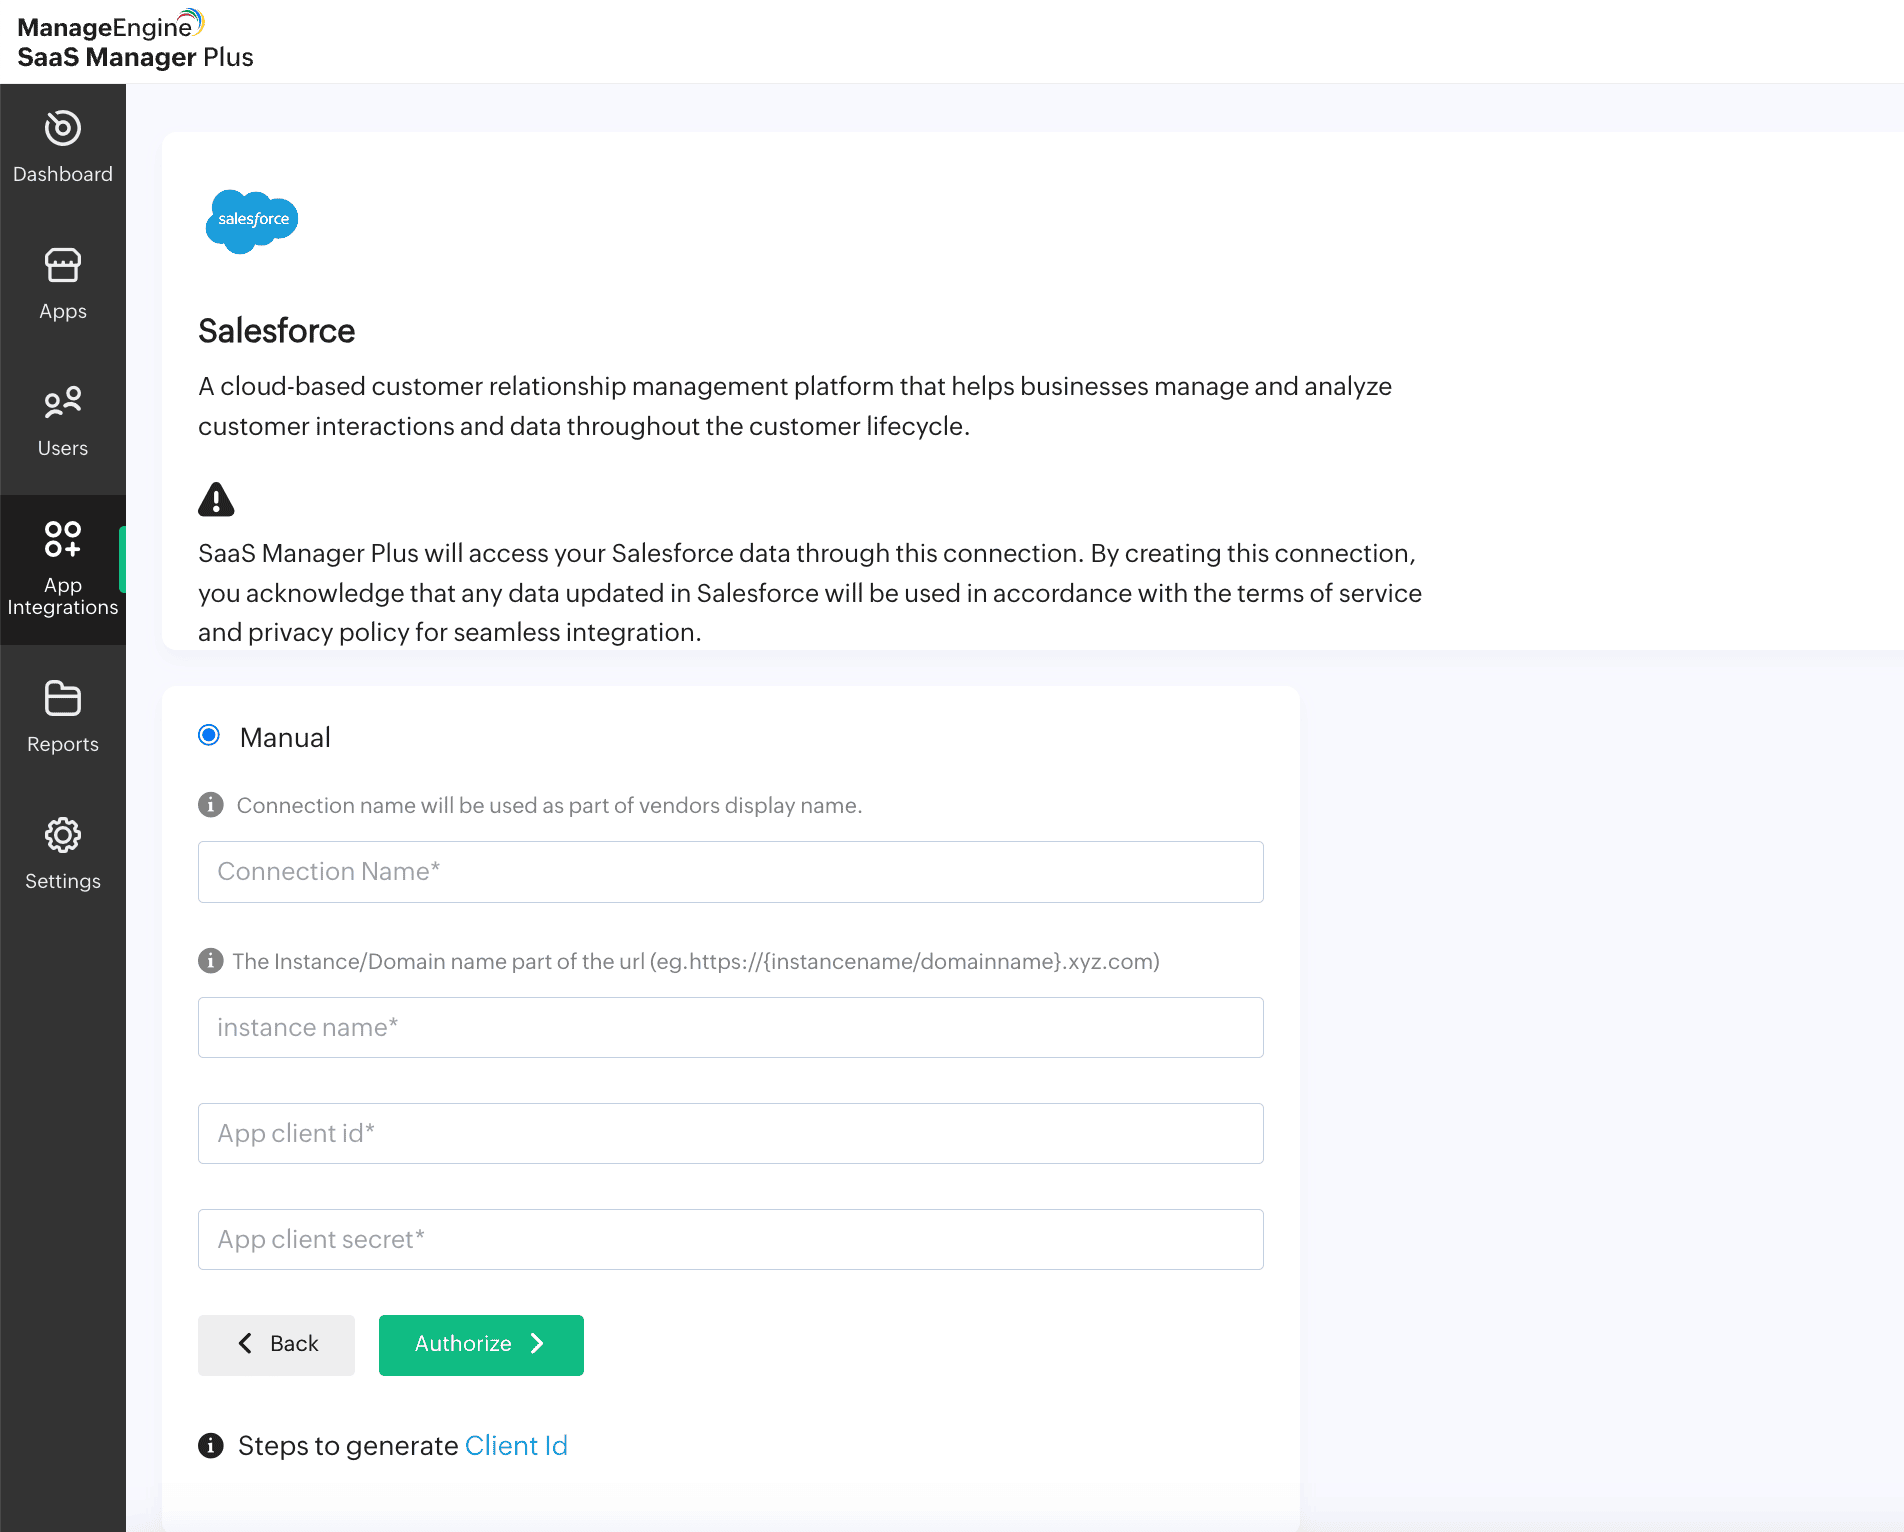
To integrate with Salesforce
- Click Salesforce from the list of applications.
- Provide a connection name in the designated Connection Name box.
- To get the instance name, go to Setup -> Company Settings -> My Domain -> My Domain Details and get the instance name of your Salesforce application.
- Enter your client ID in the app client ID box.
- Enter your client secret in the app client secret box.
- Click Authorize to complete the integration.
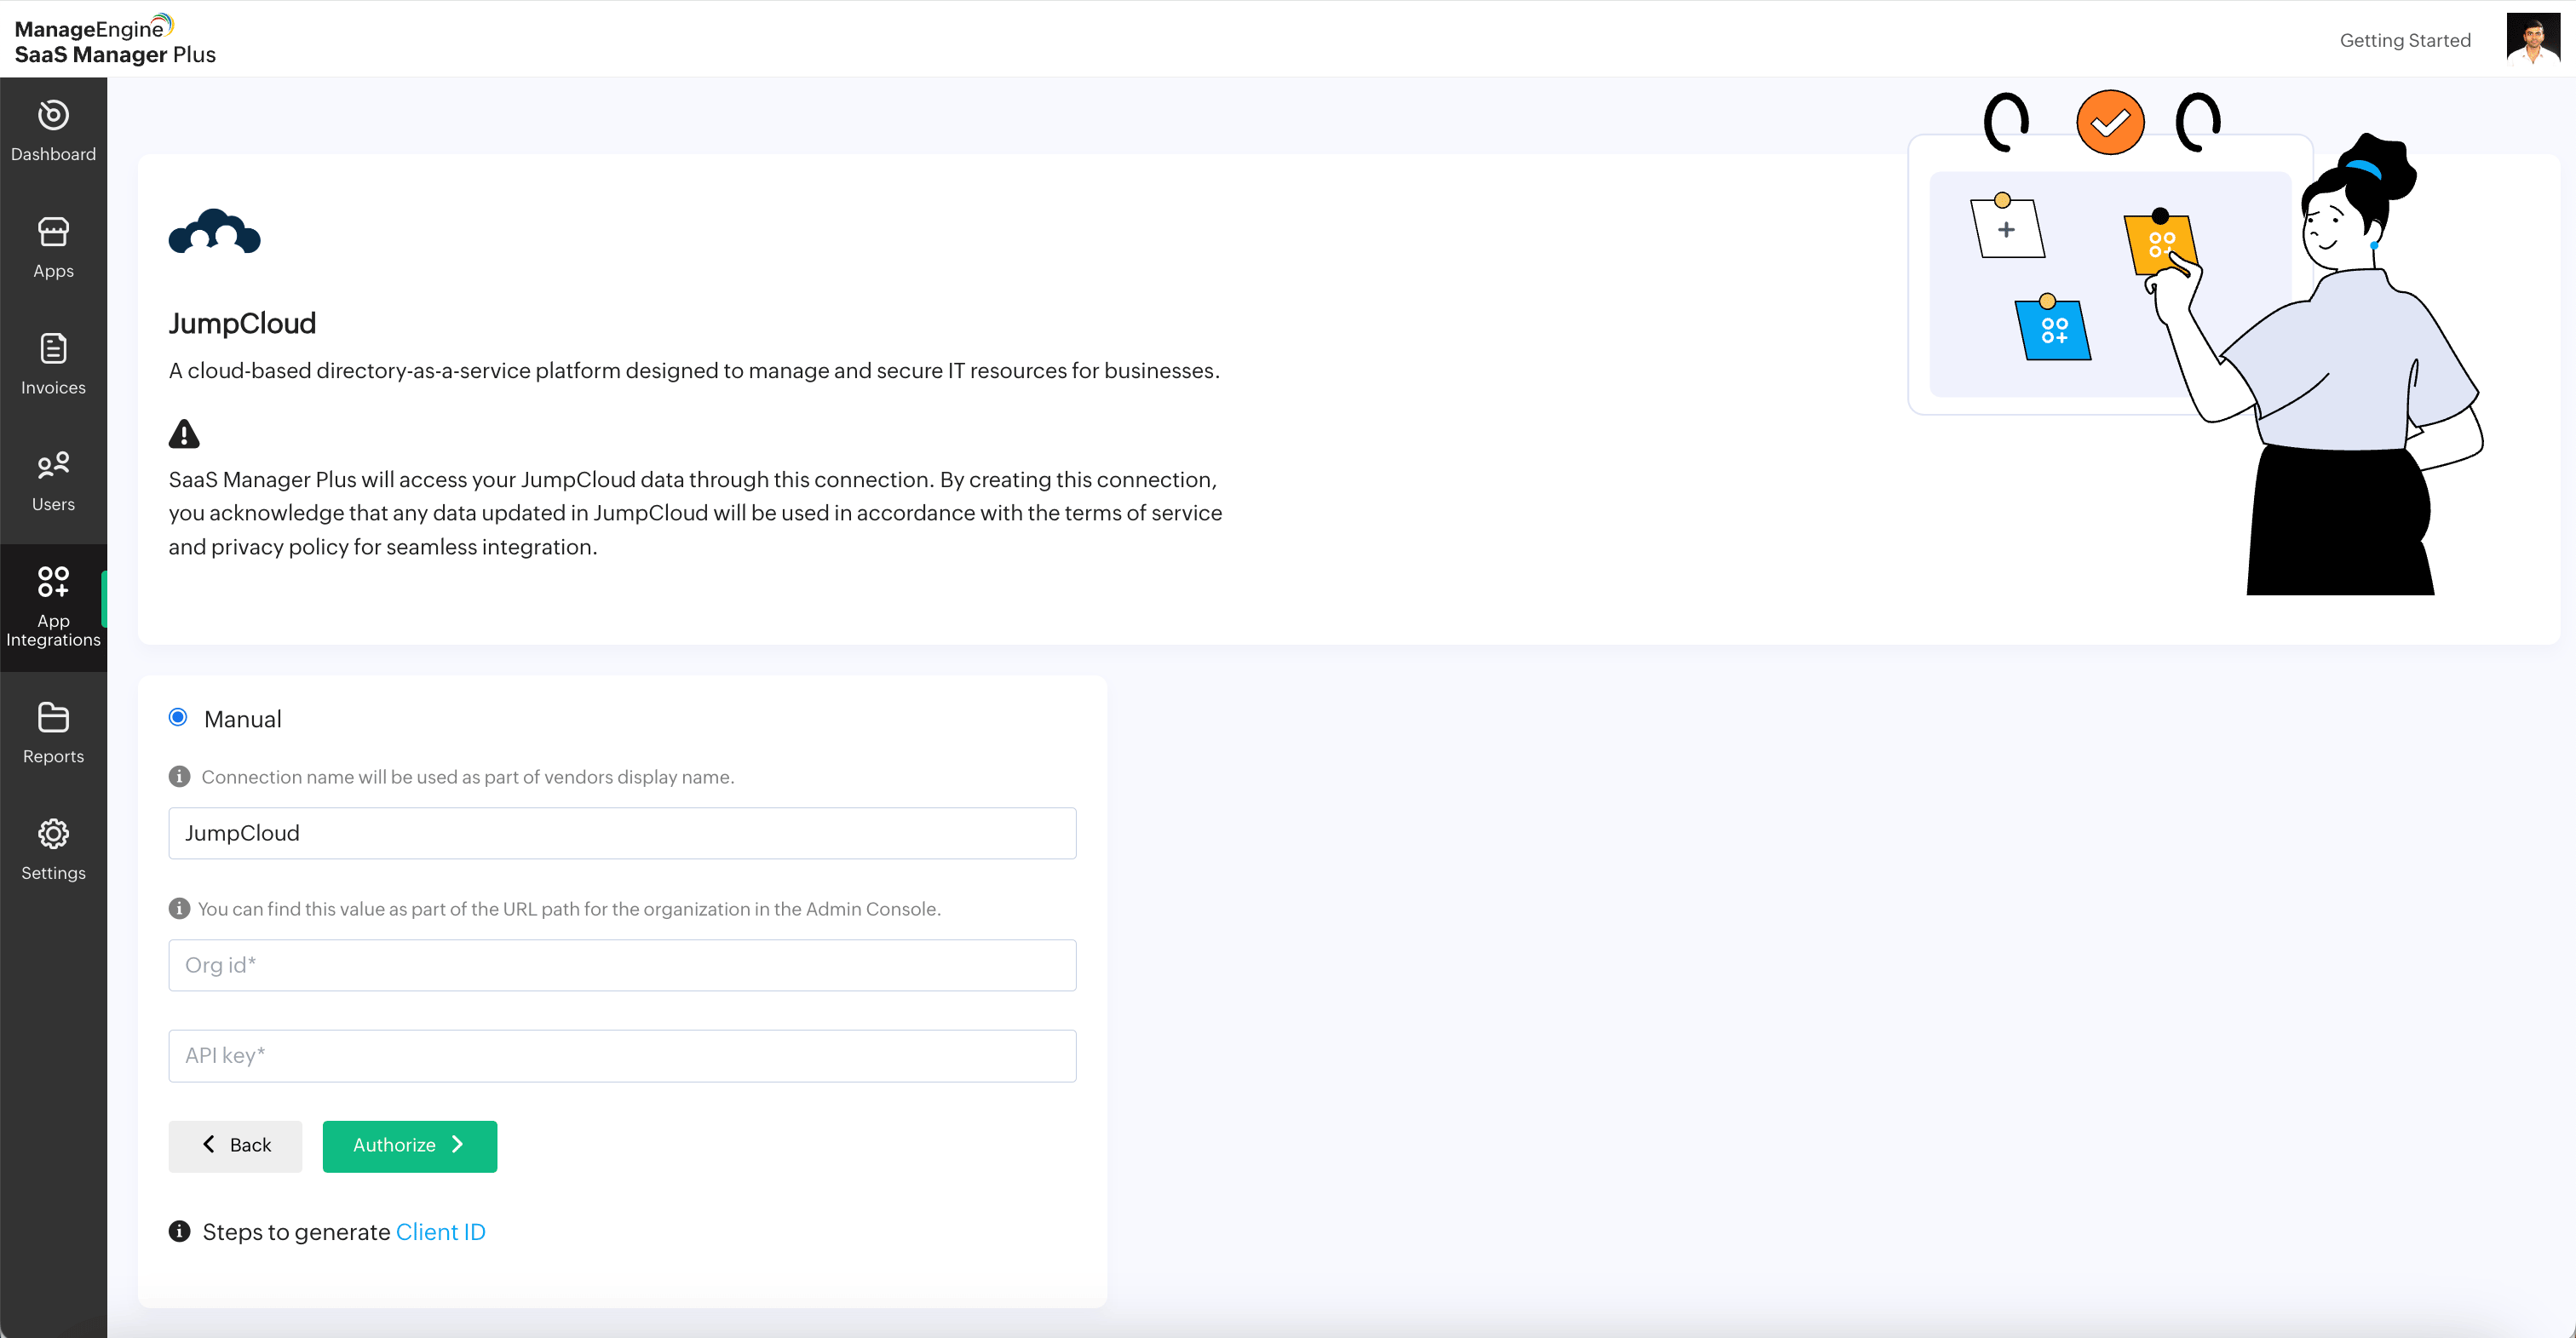
To integrate with JumpCloud
- Click Jumpcloud from the list of applications.
- Enter the Org ID which is available in the URL of Admin Console of your Adobe application.
- Enter your API key in the API key box.
- Click Authorize to complete the integration.
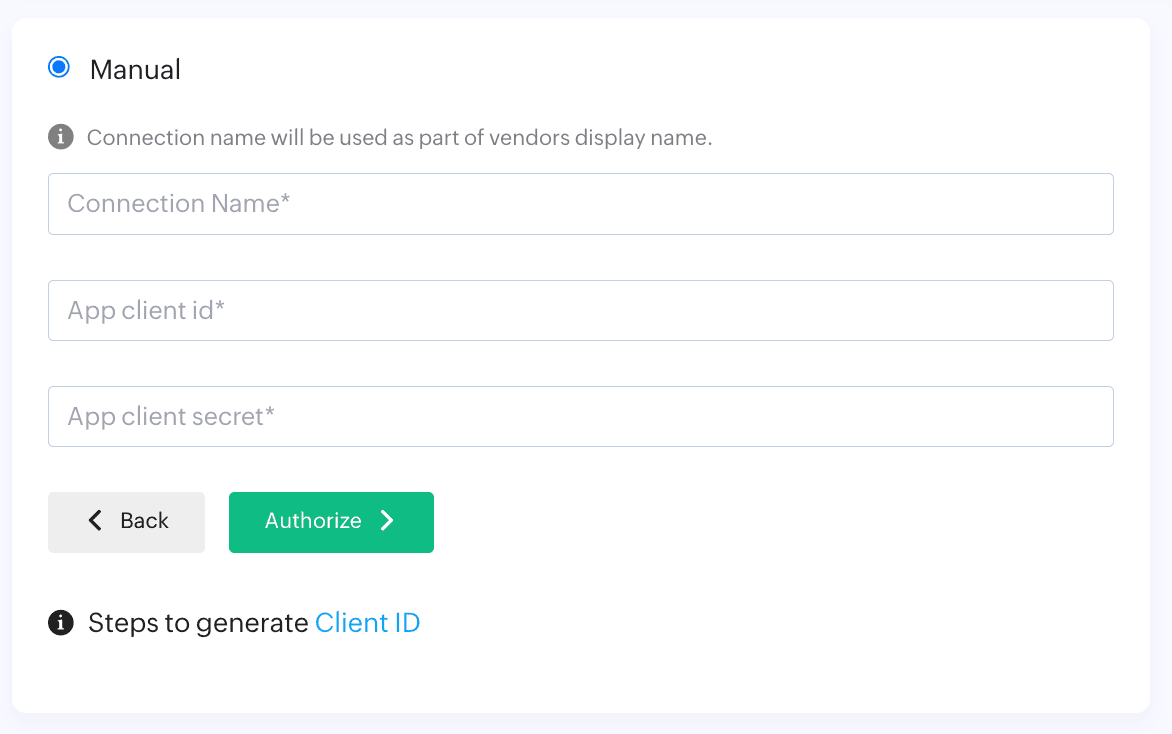
Connecting with applications manually
Authorize your developer app by creating your client ID and client secret, follow these steps:
- Slack, Zendesk, Zoom, Adobe, Azure, Smartsheet, and ServiceNow are available only as manual connection. Choose Manual on the respective application
- Provide a connection name in the Connection Name box.
- Enter your client ID in the app client ID box.
- Enter your client secret in the app client secret box.
- Click Authorize to complete the integration.
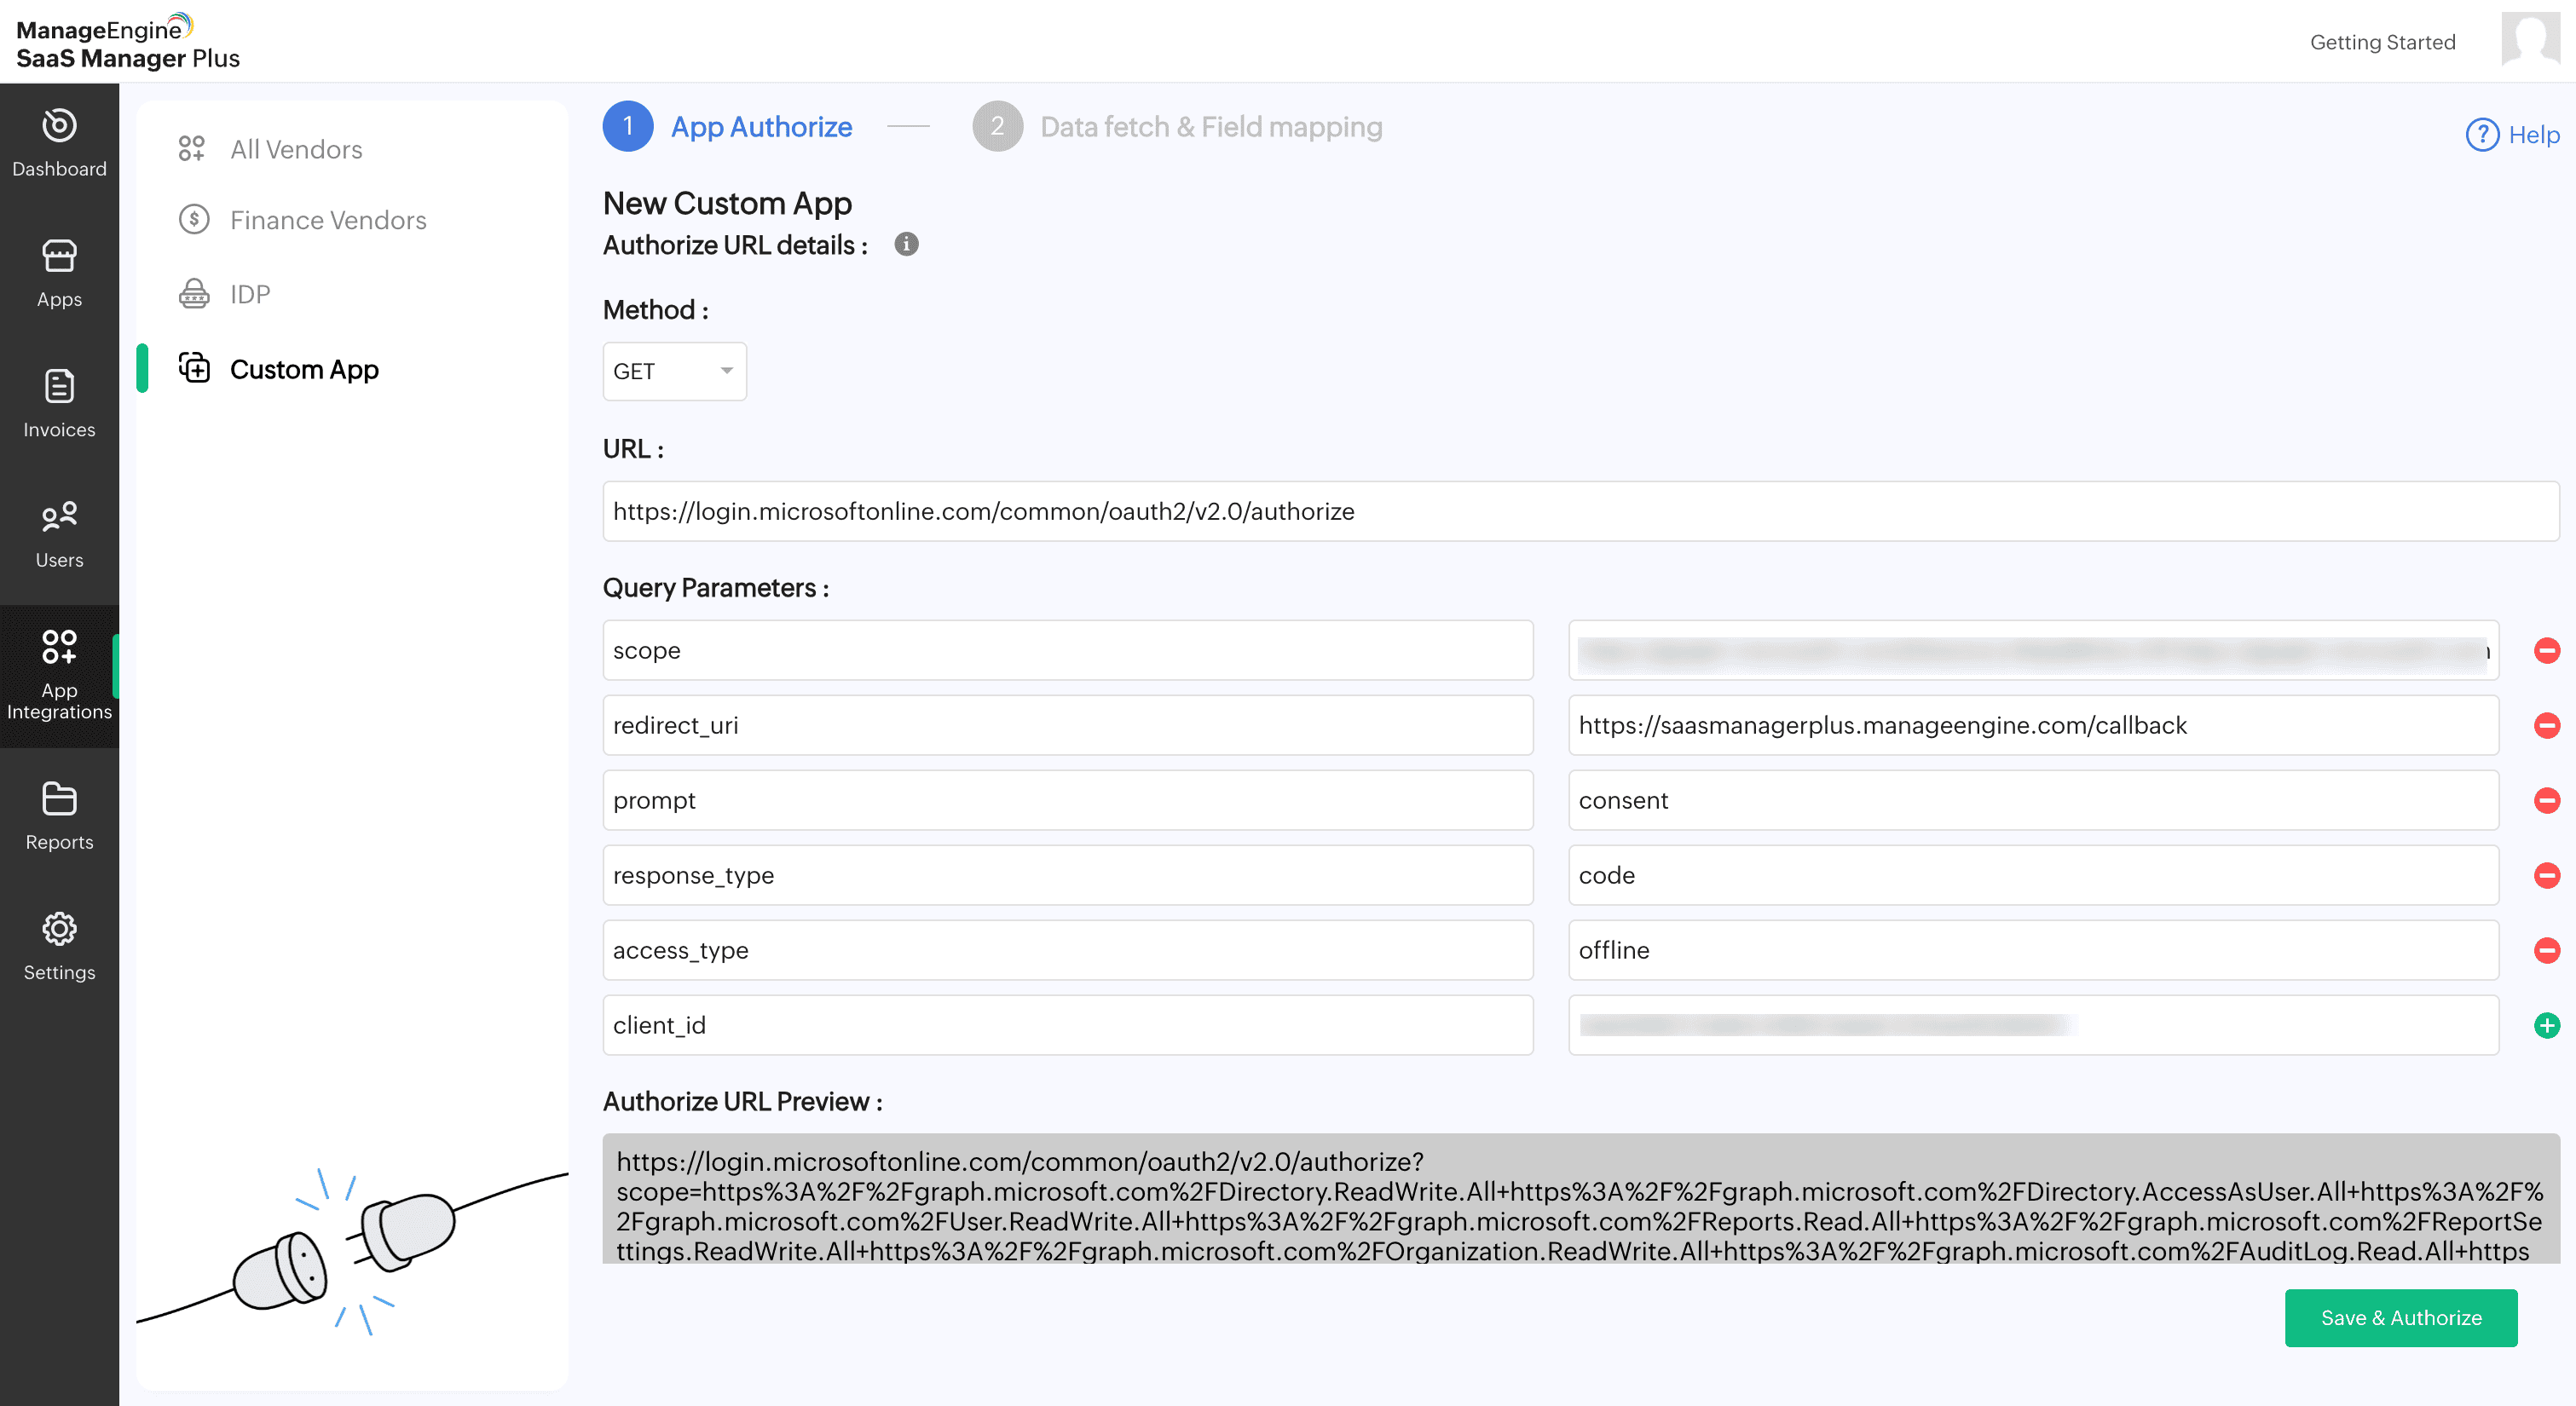
Custom App
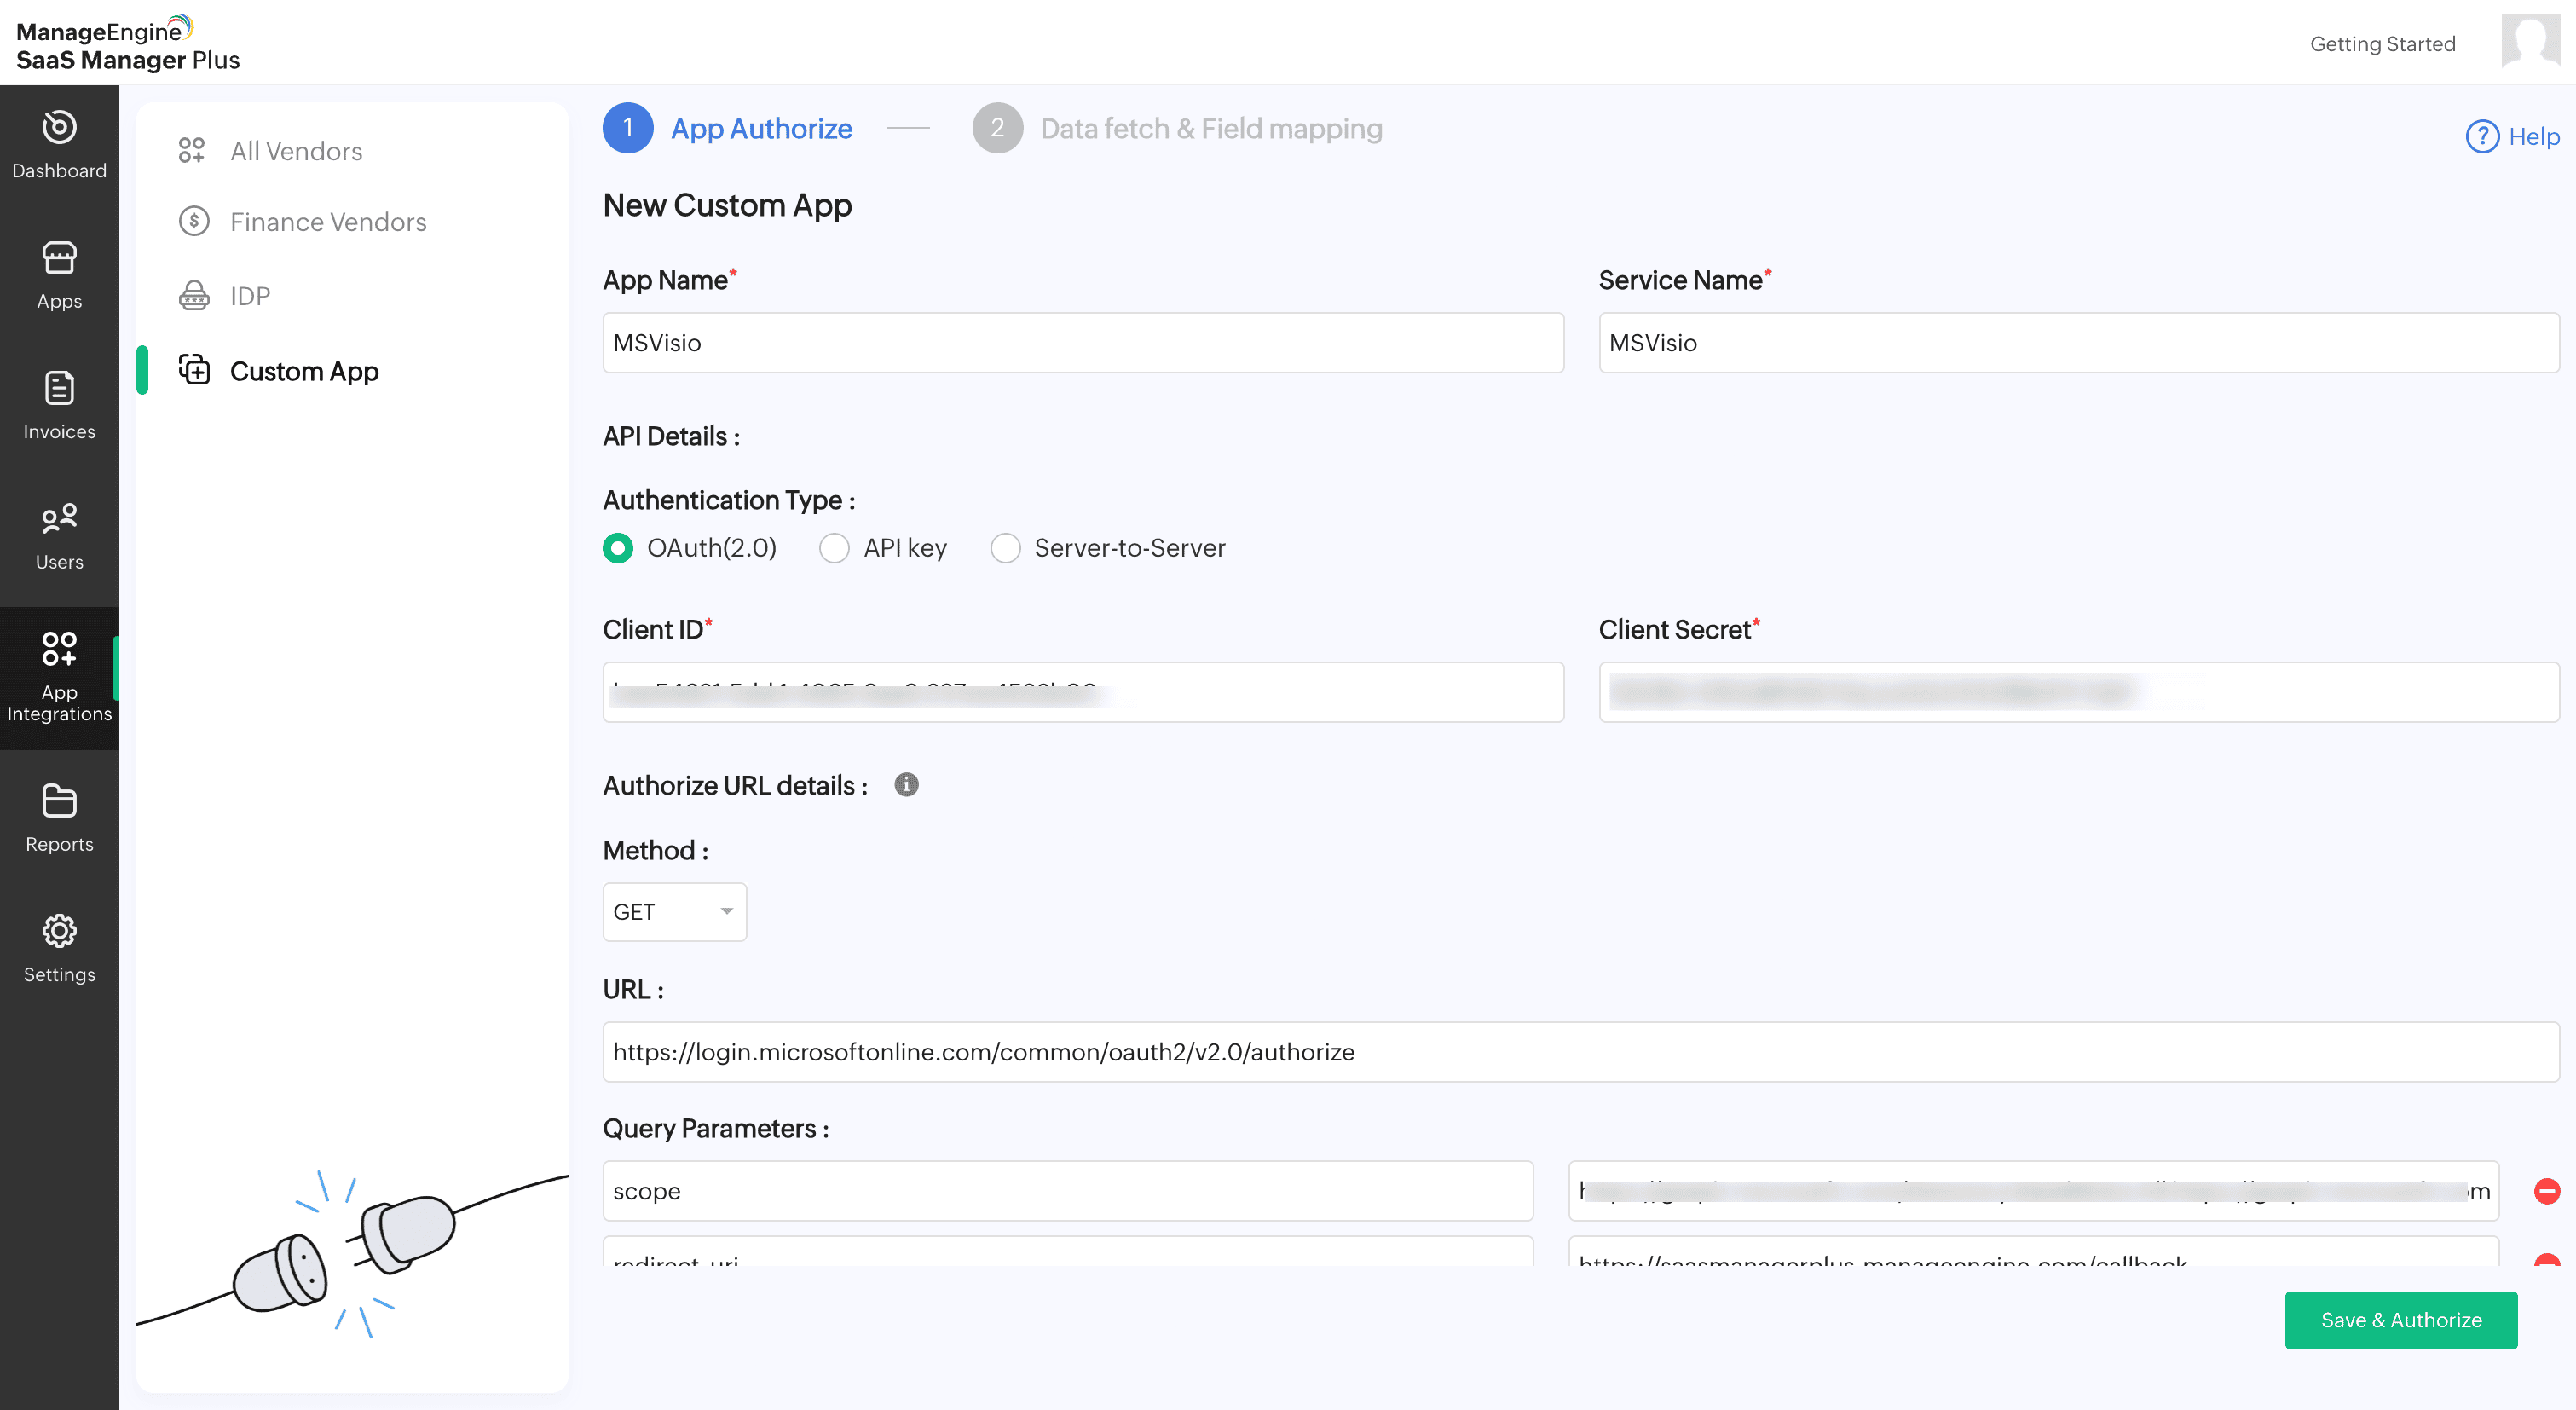
- Go to the App Integrations section and click Custom App in the top-right corner.
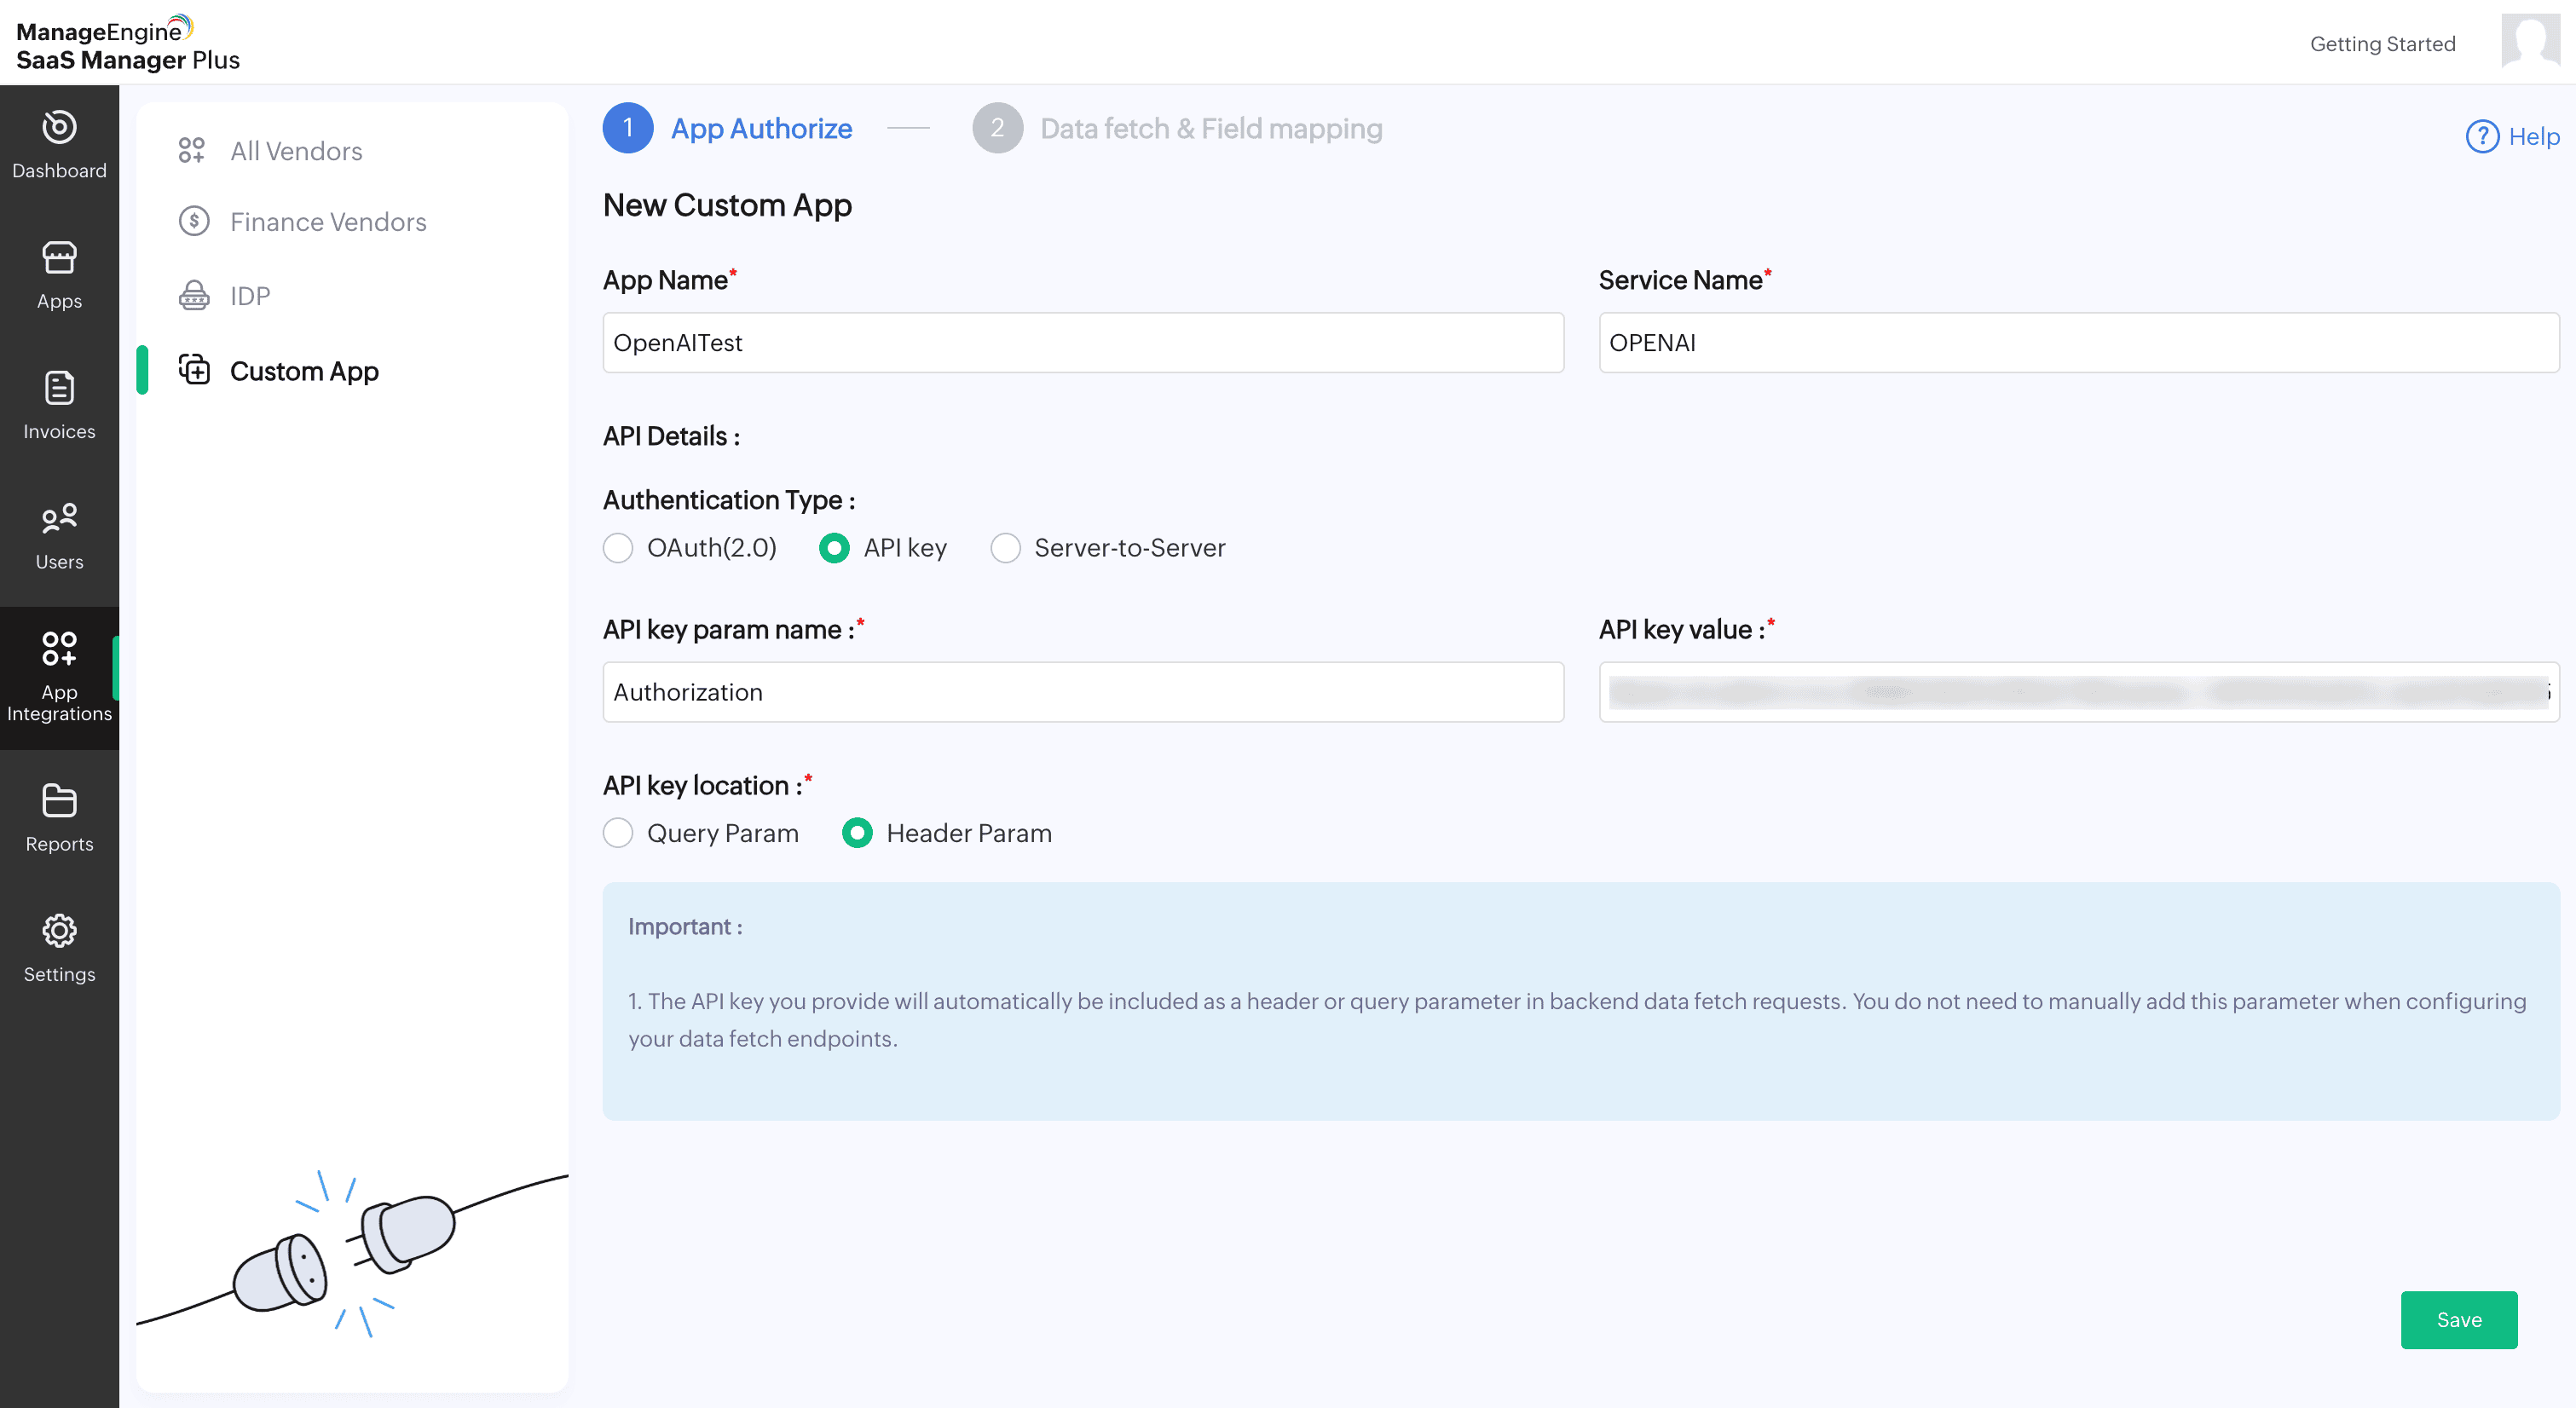
- Provide a suitable App Name and Service Name for the application you want to integrate.
- Choose the required Authentication Type from the available options.
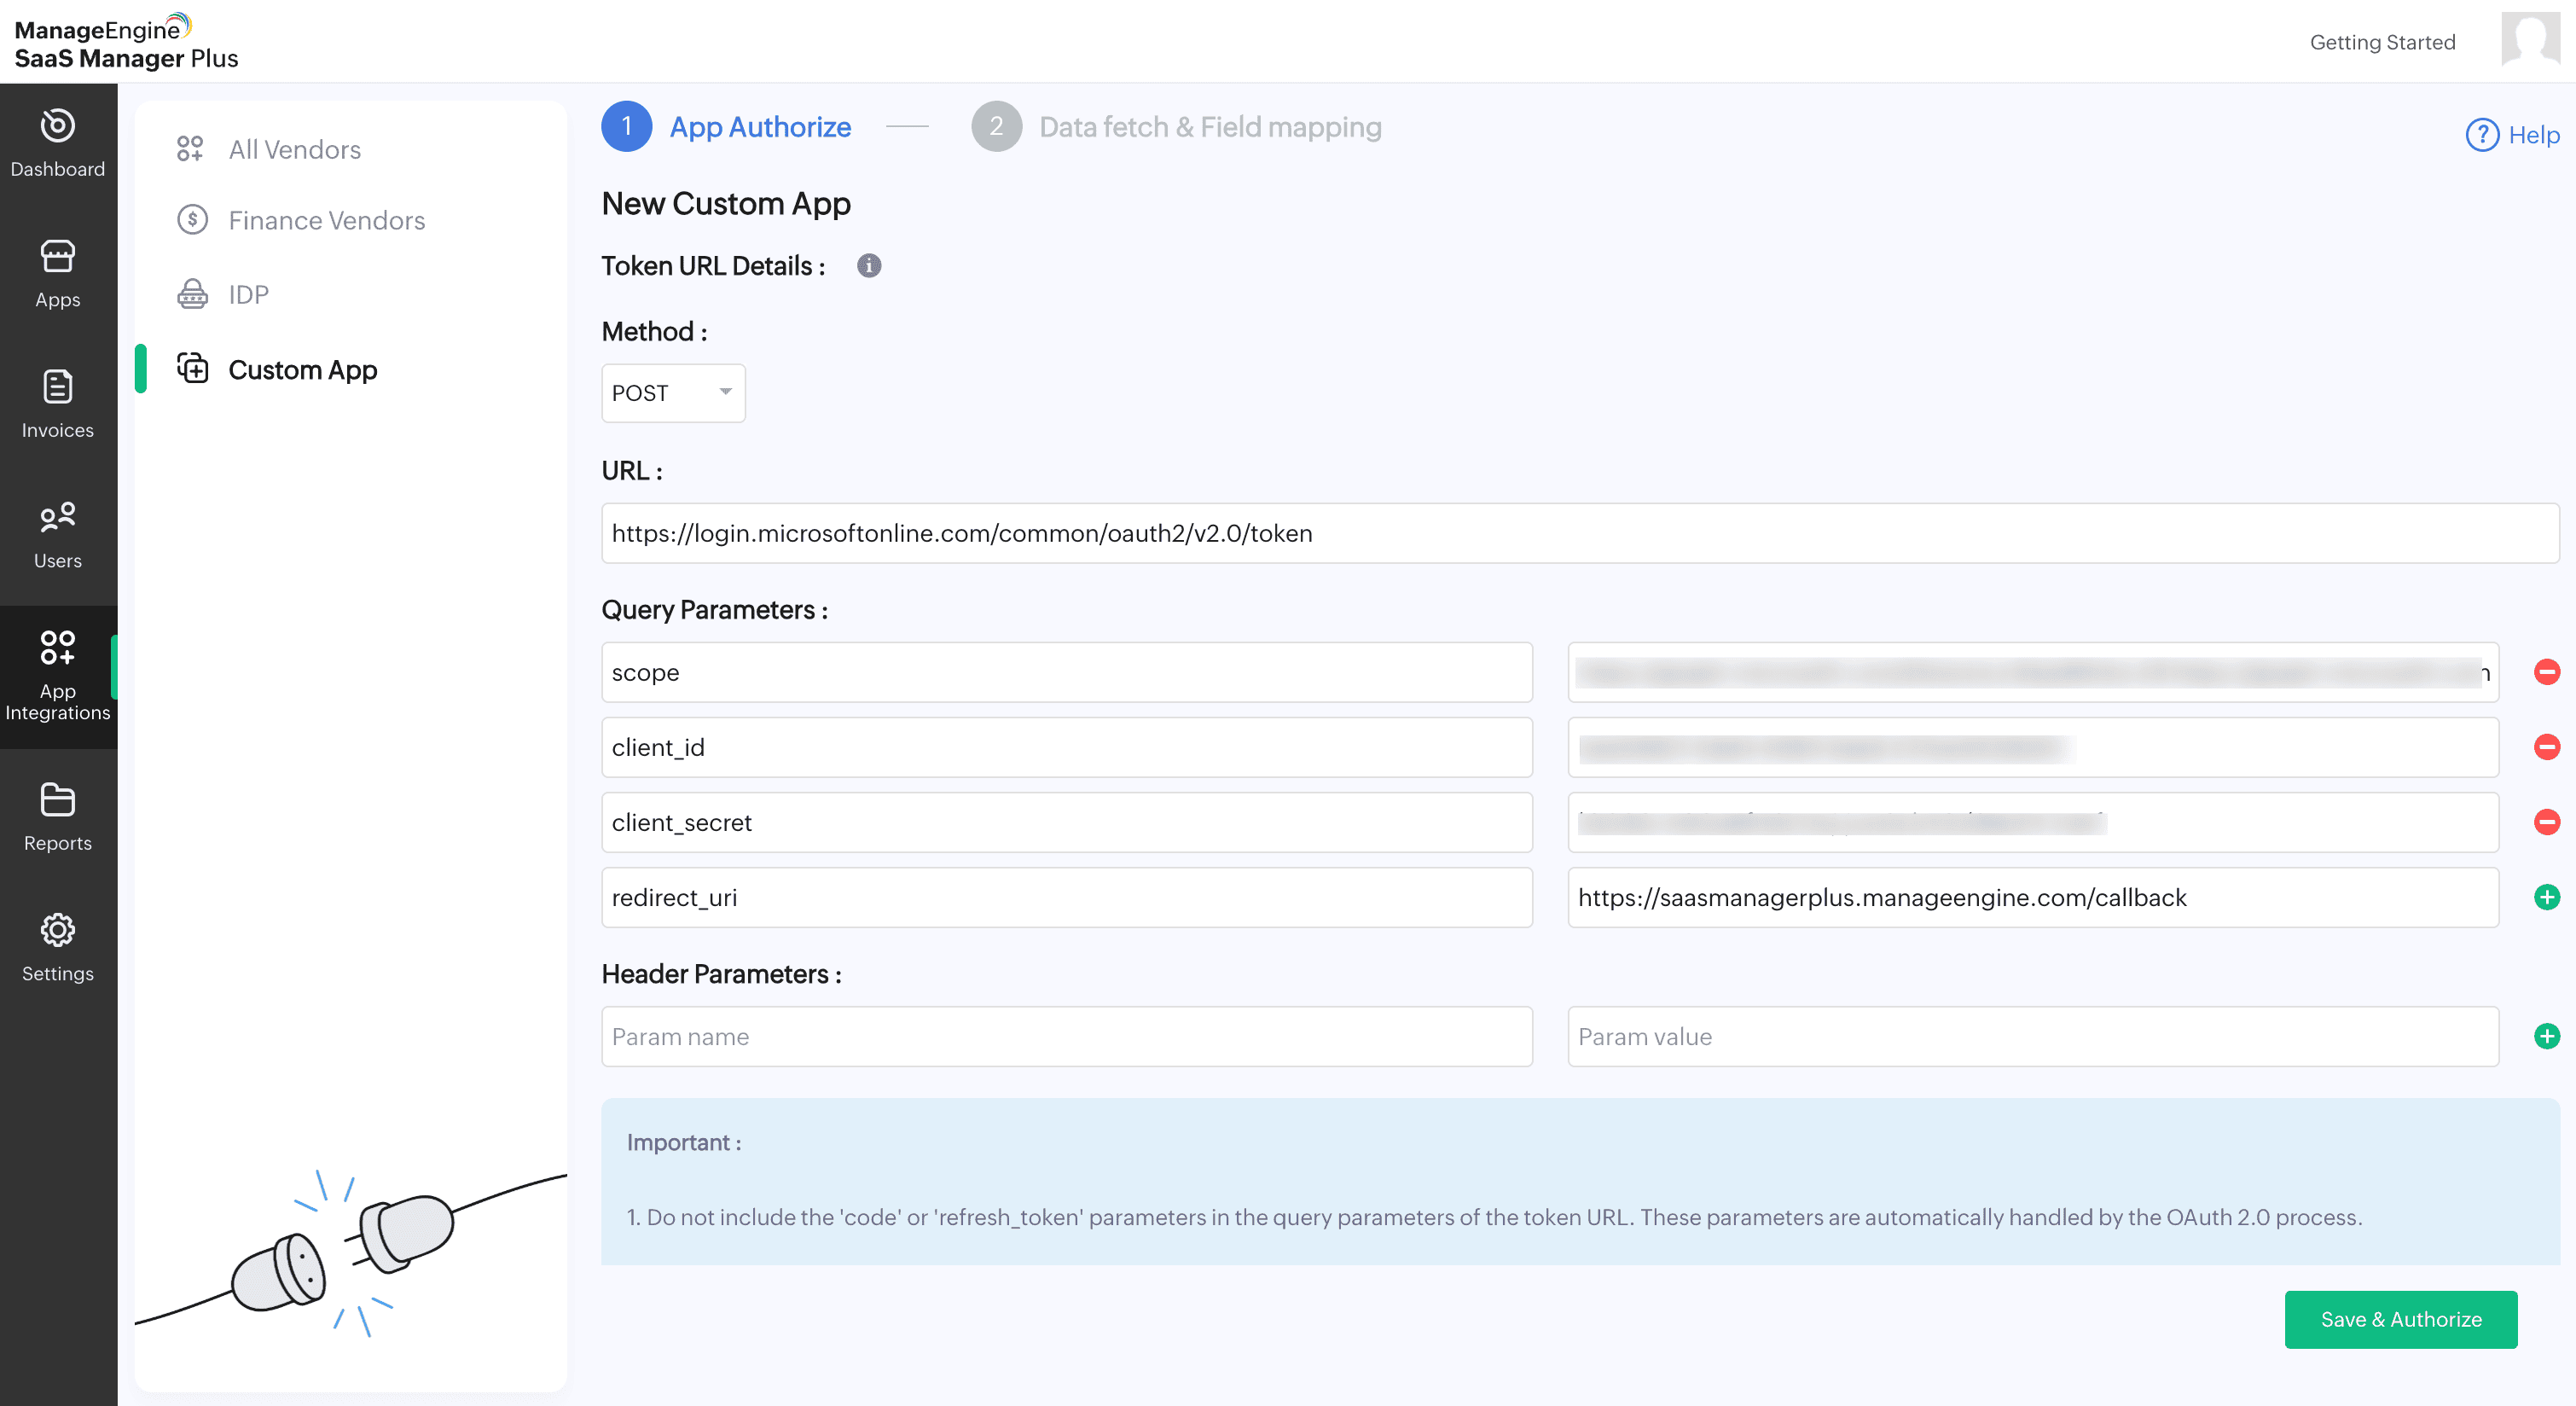
- For OAuth(2.0) authentication:
- Enter the Client ID and Client Secret of your application.
- Select the Method type for the Authorize URL from the dropdown.
- Enter the Authorization URL.
- Add the necessary Query Parameters by specifying the parameter name and value.
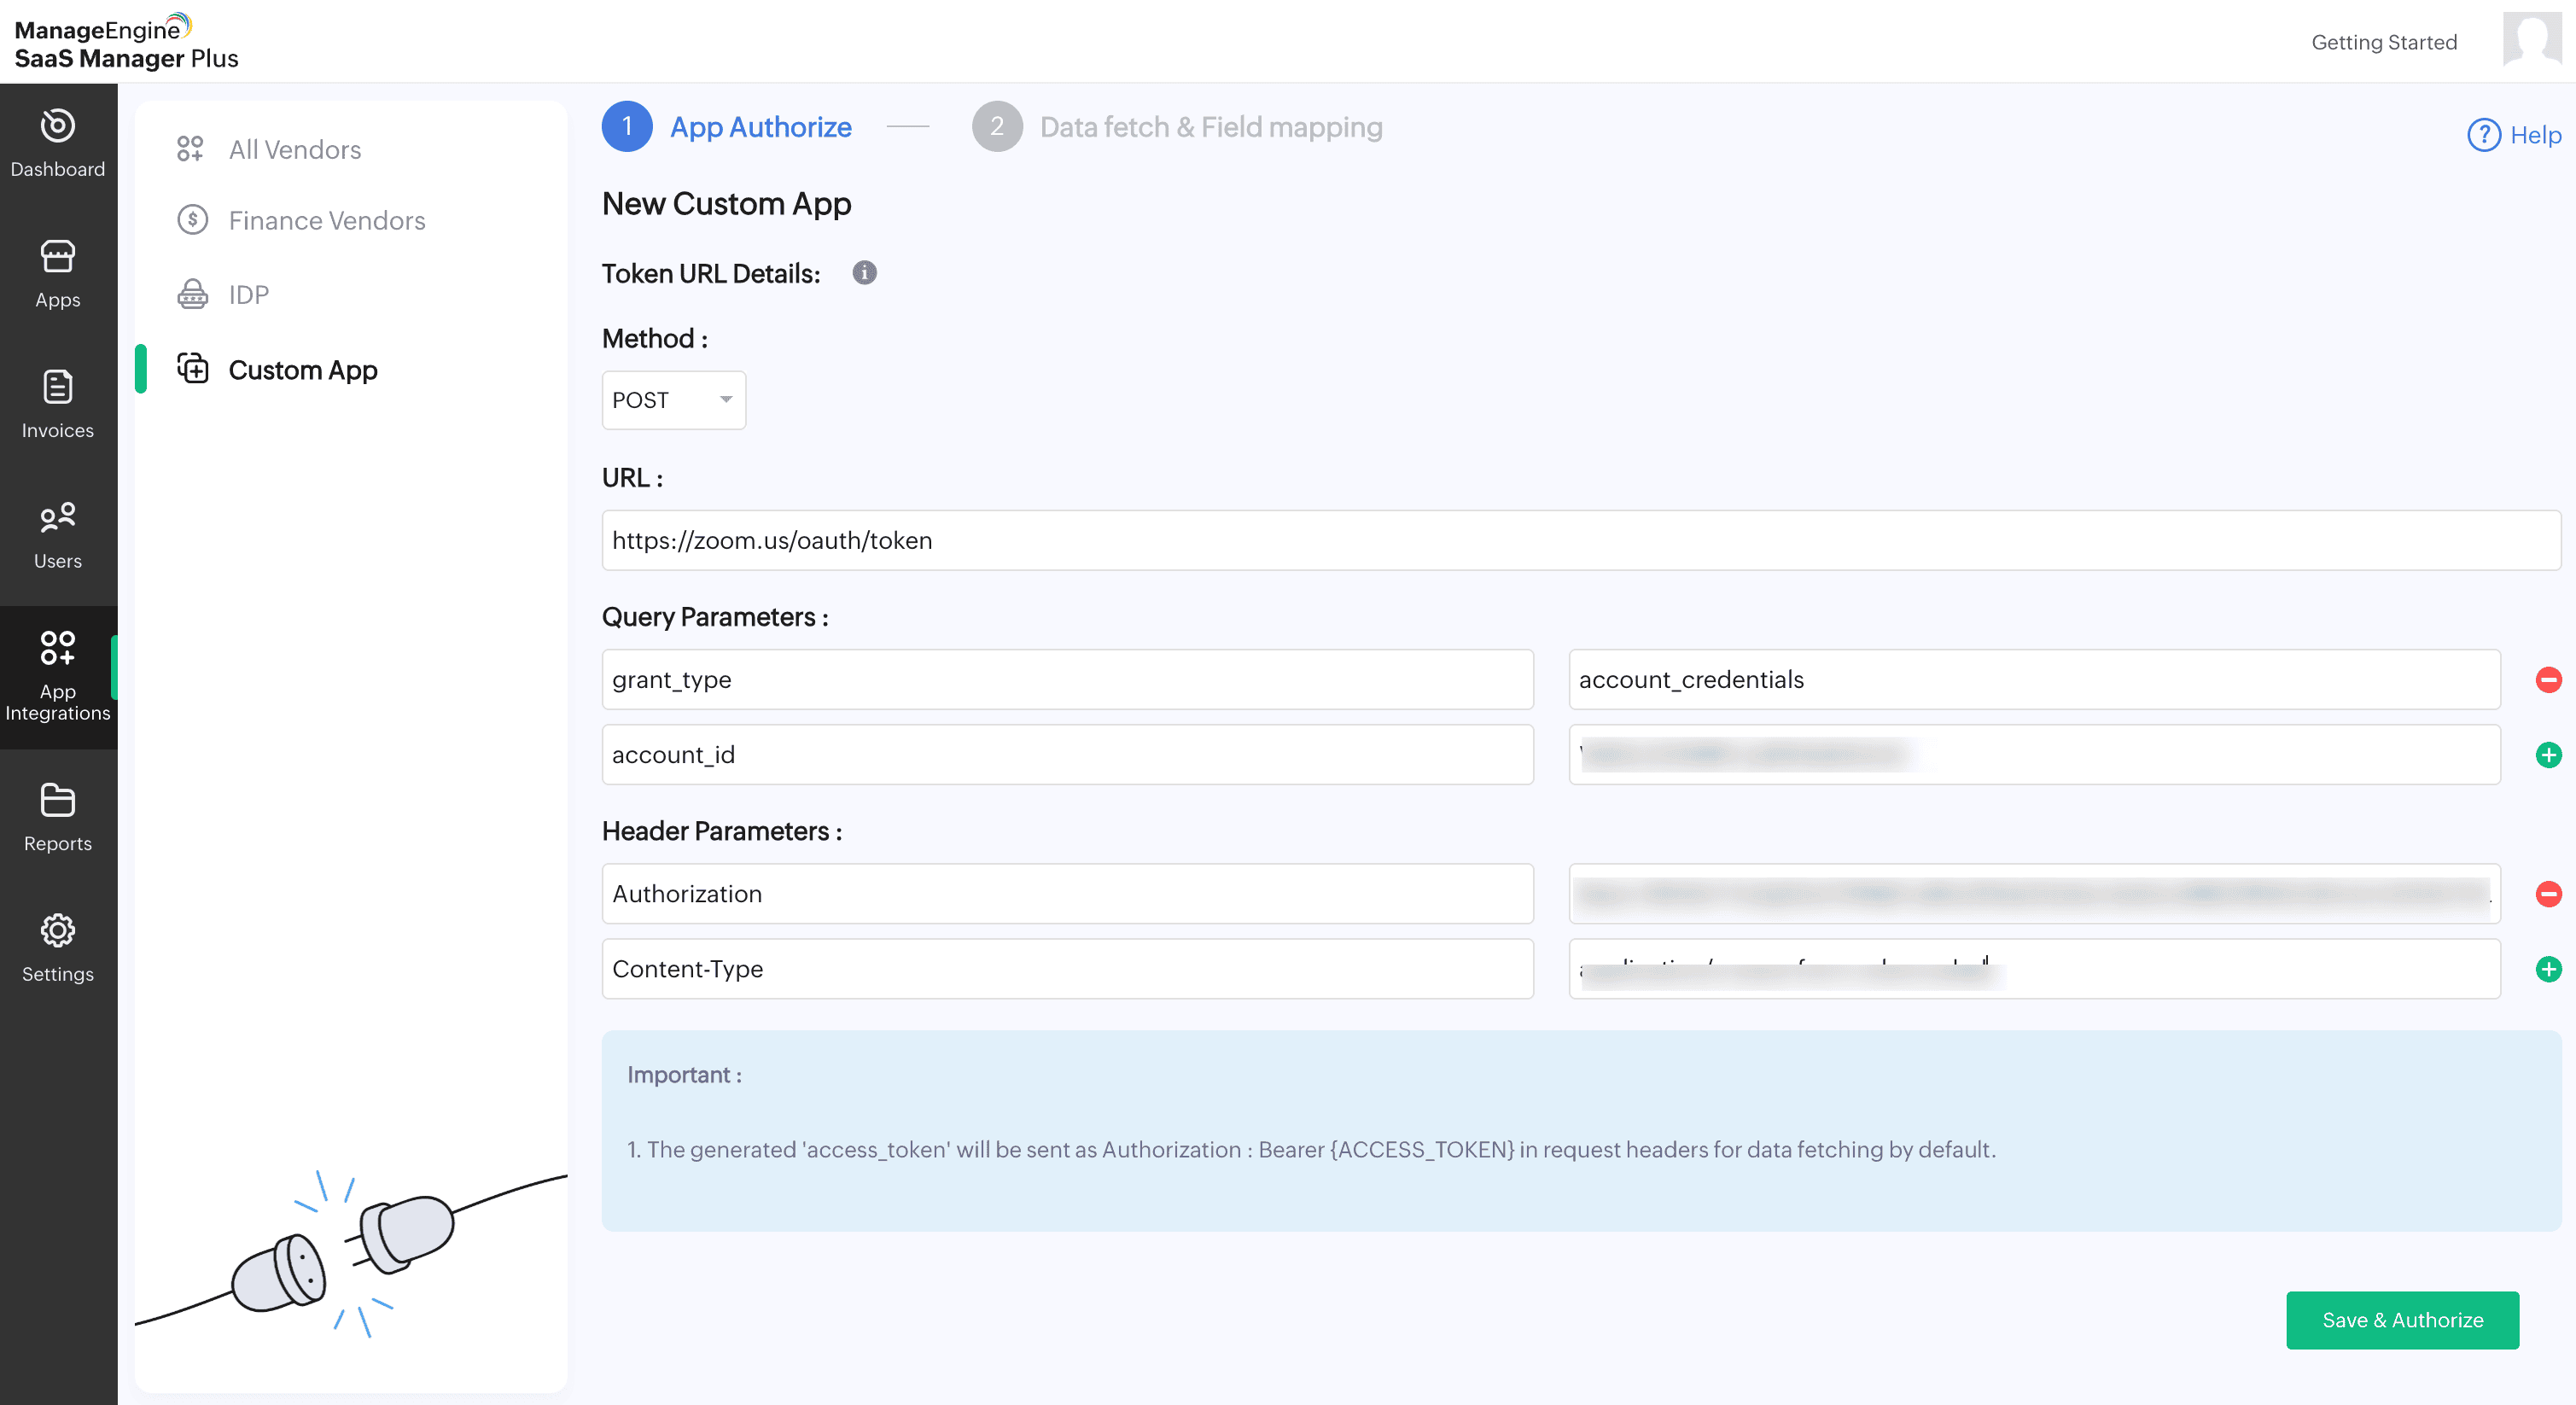
- Next, select the Method type for the Token URL.
- Enter the Token URL.
- Add the required Query Parameters and Header Parameters with their respective names and values.
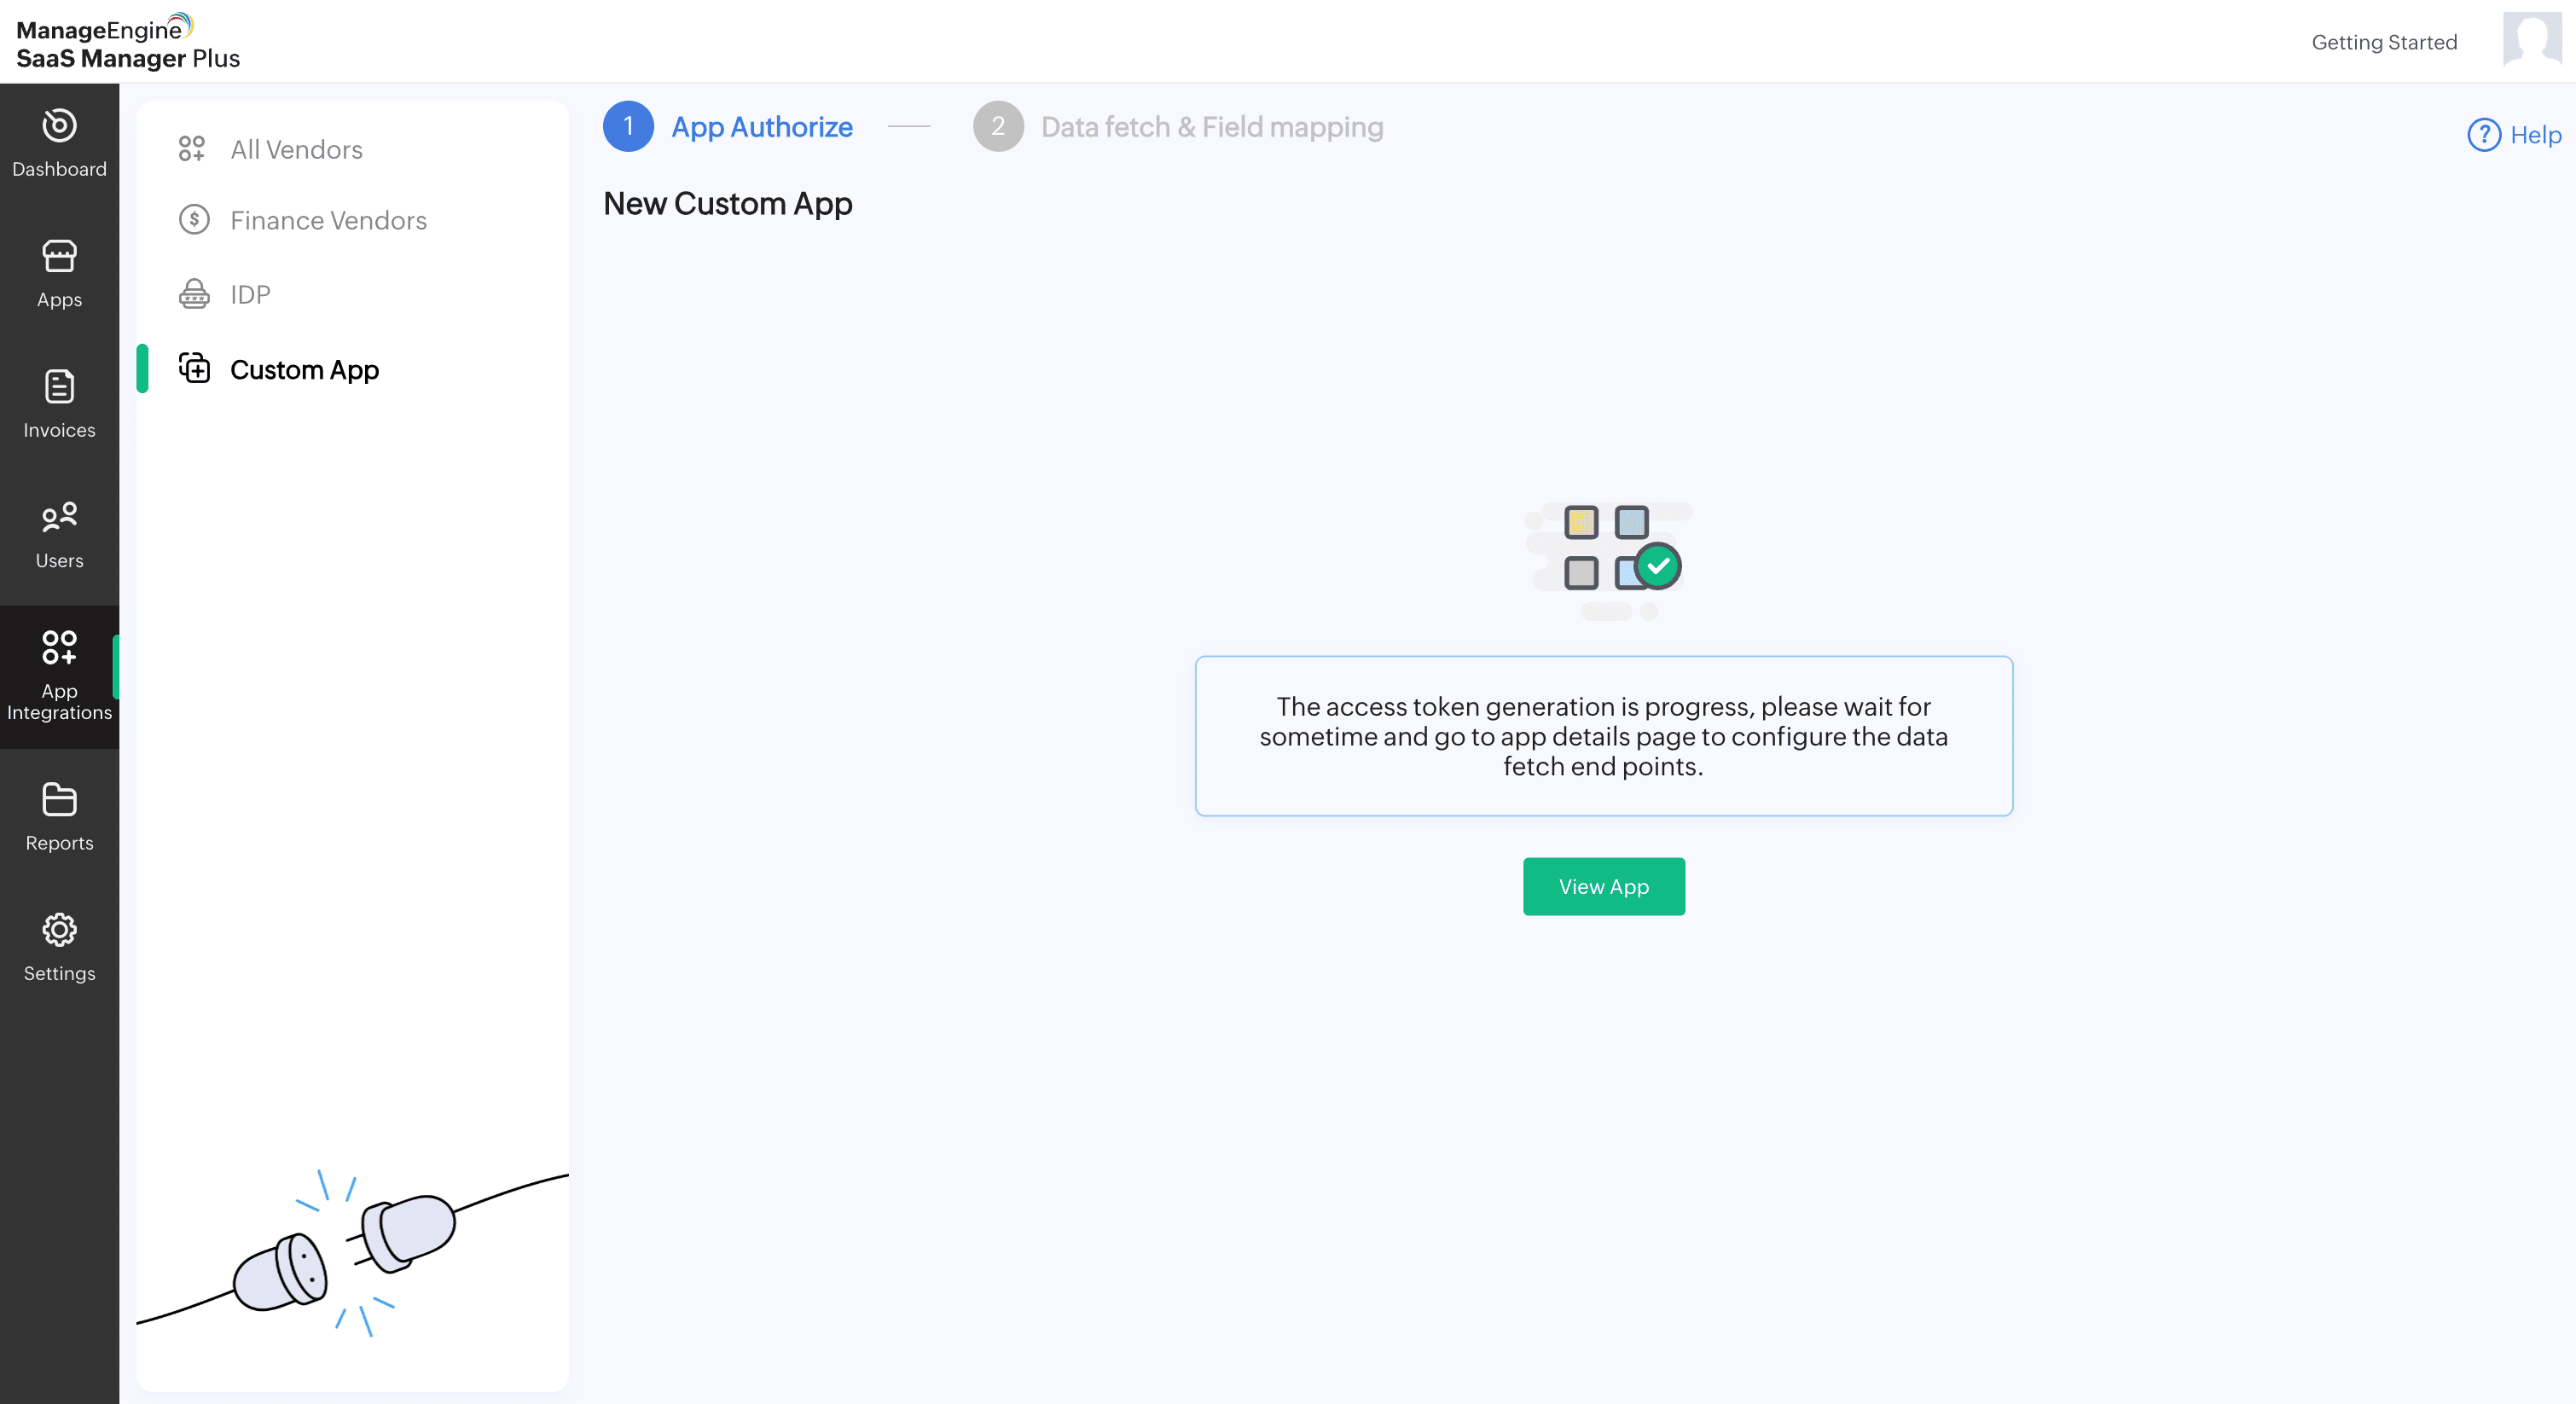
- Once all details are filled in, click Save & Authorize to complete the authorization.
- Once the authorization is completed, you will get a token generated message.
- For API key authentication:
- Enter the API key param name and API key value of your application.
- Select the required API key location.
- Click Save to complete the authorization.
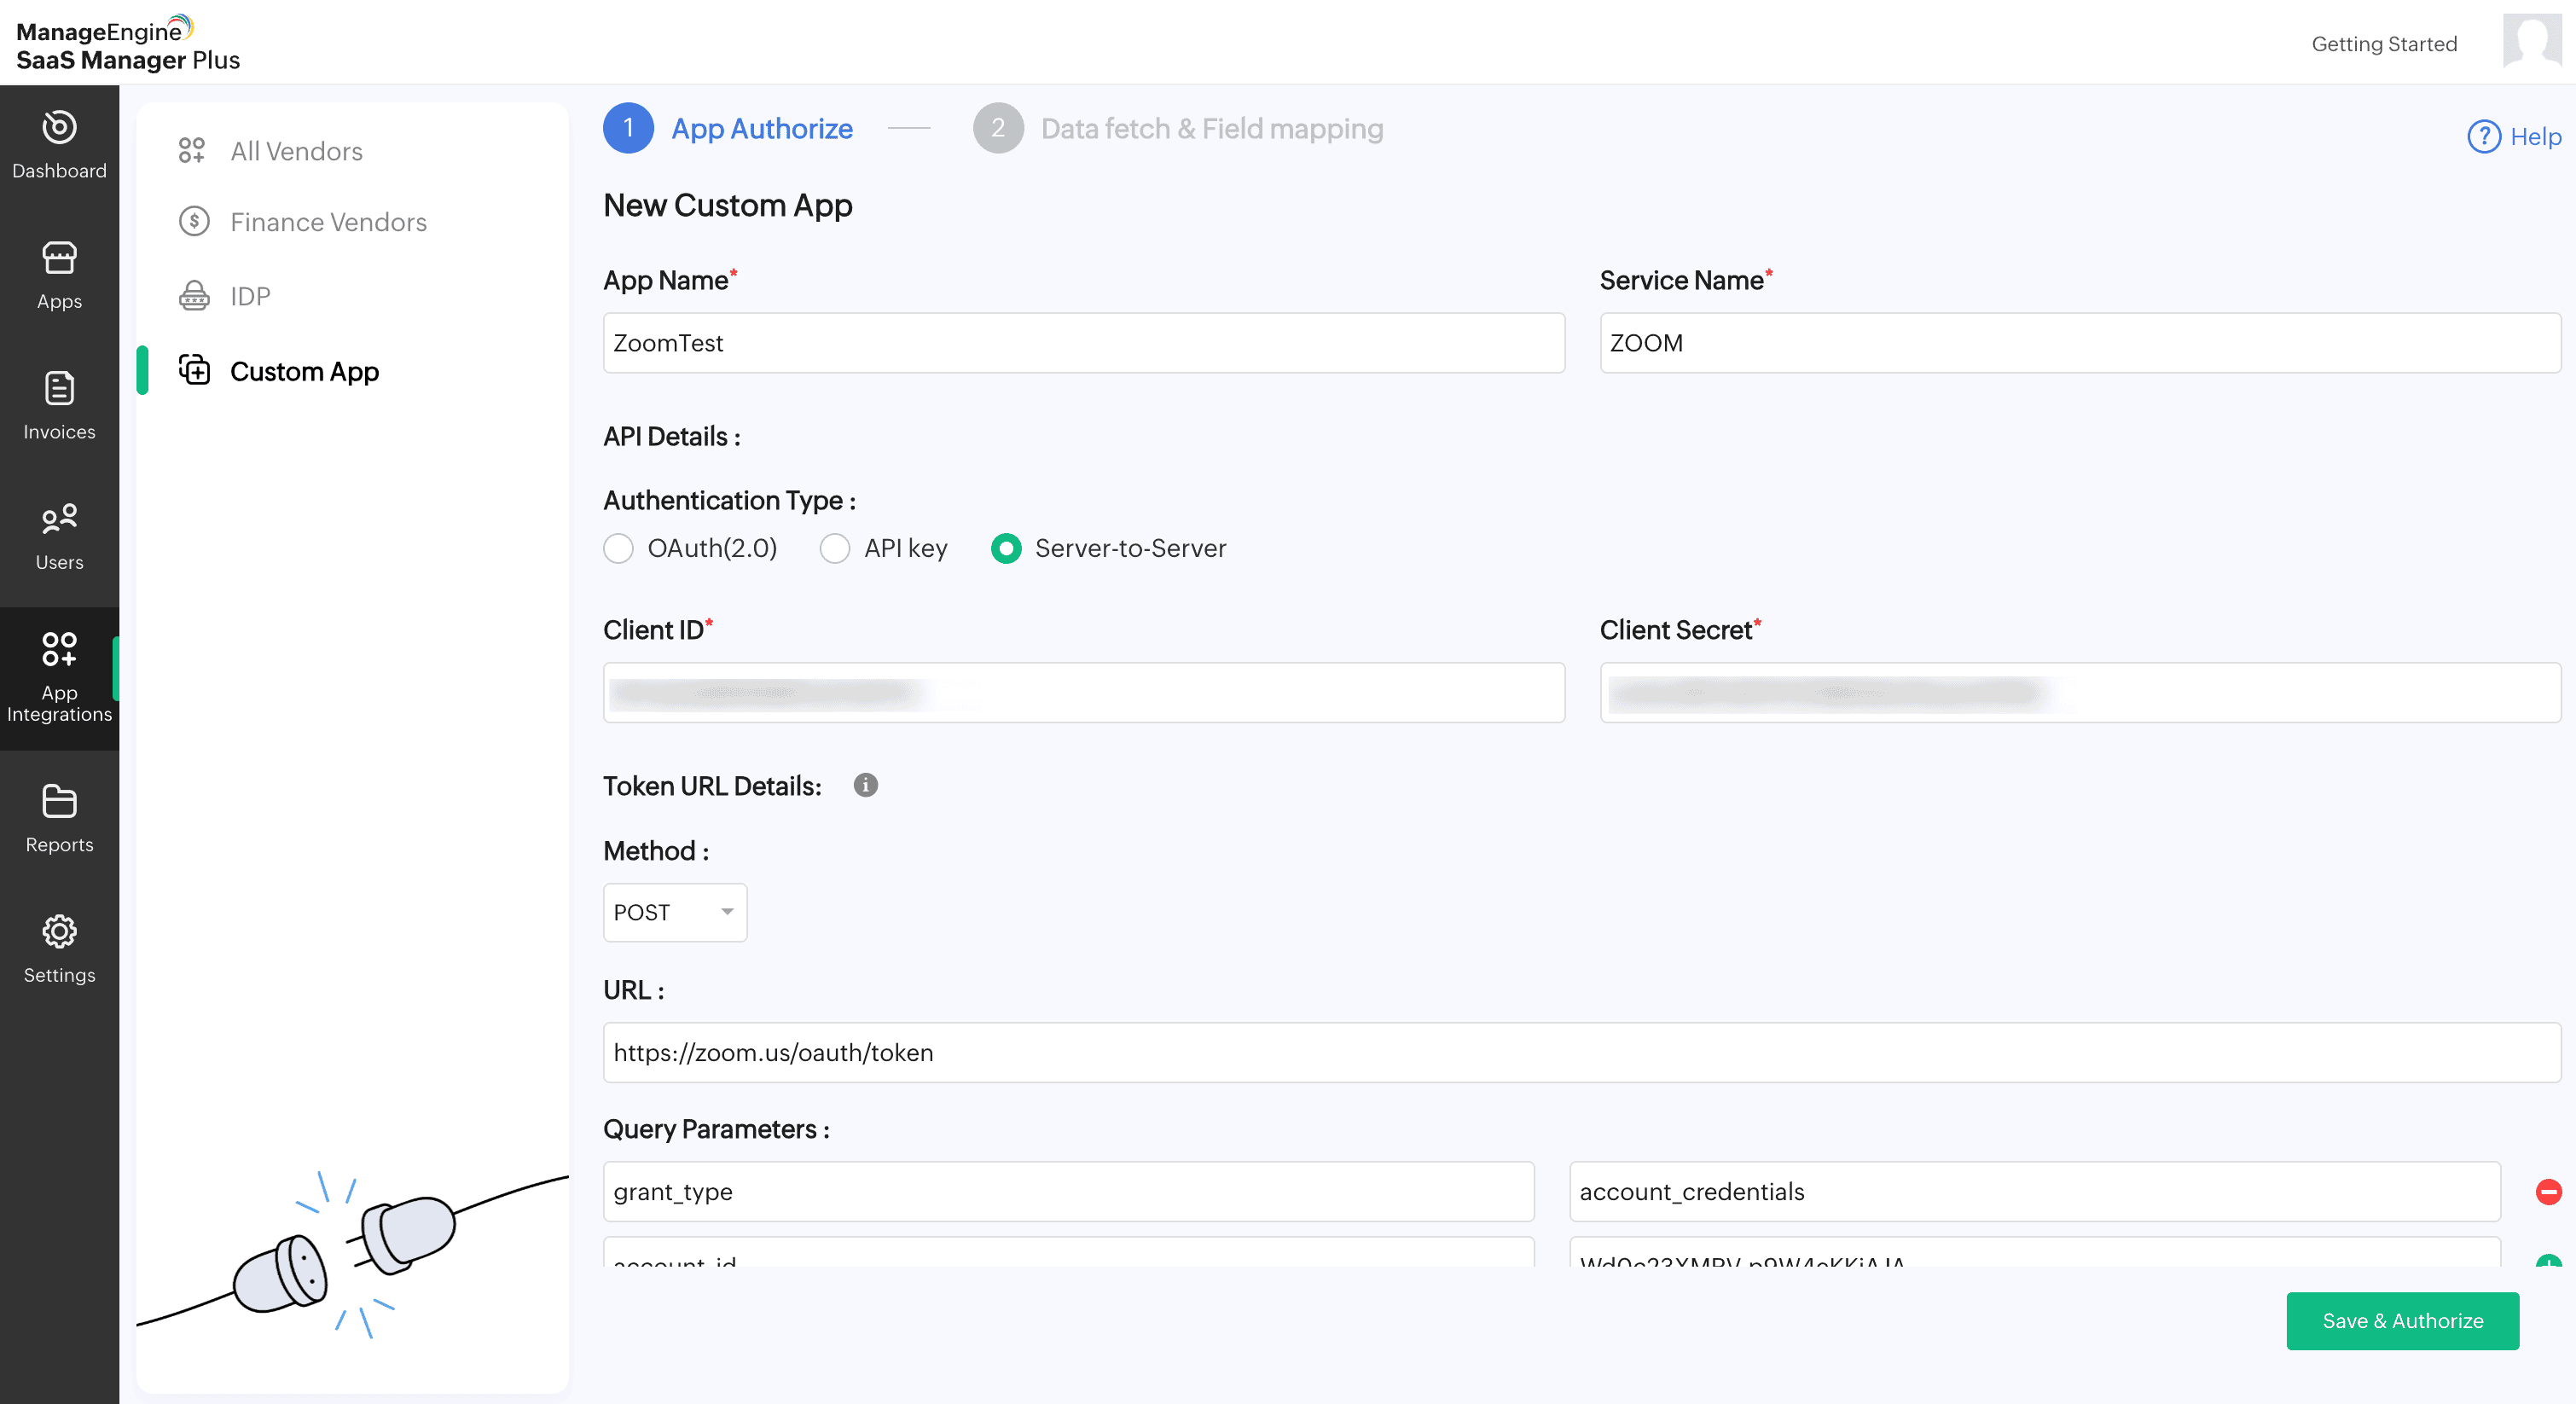
- For Server-to-Server authentication:
- Enter the Client ID and Client Secret of your application.
- Select the Method type for the Token URL.
- Enter the Token URL.
- Add the required Query Parameters and Header Parameters with their respective names and values.
- Once all details are filled in, click Save & Authorize to complete the authorization.
- Once the authorization is completed, you will get a token generated message.
- Now, go to Data fetch & Field mapping to continue the setup.

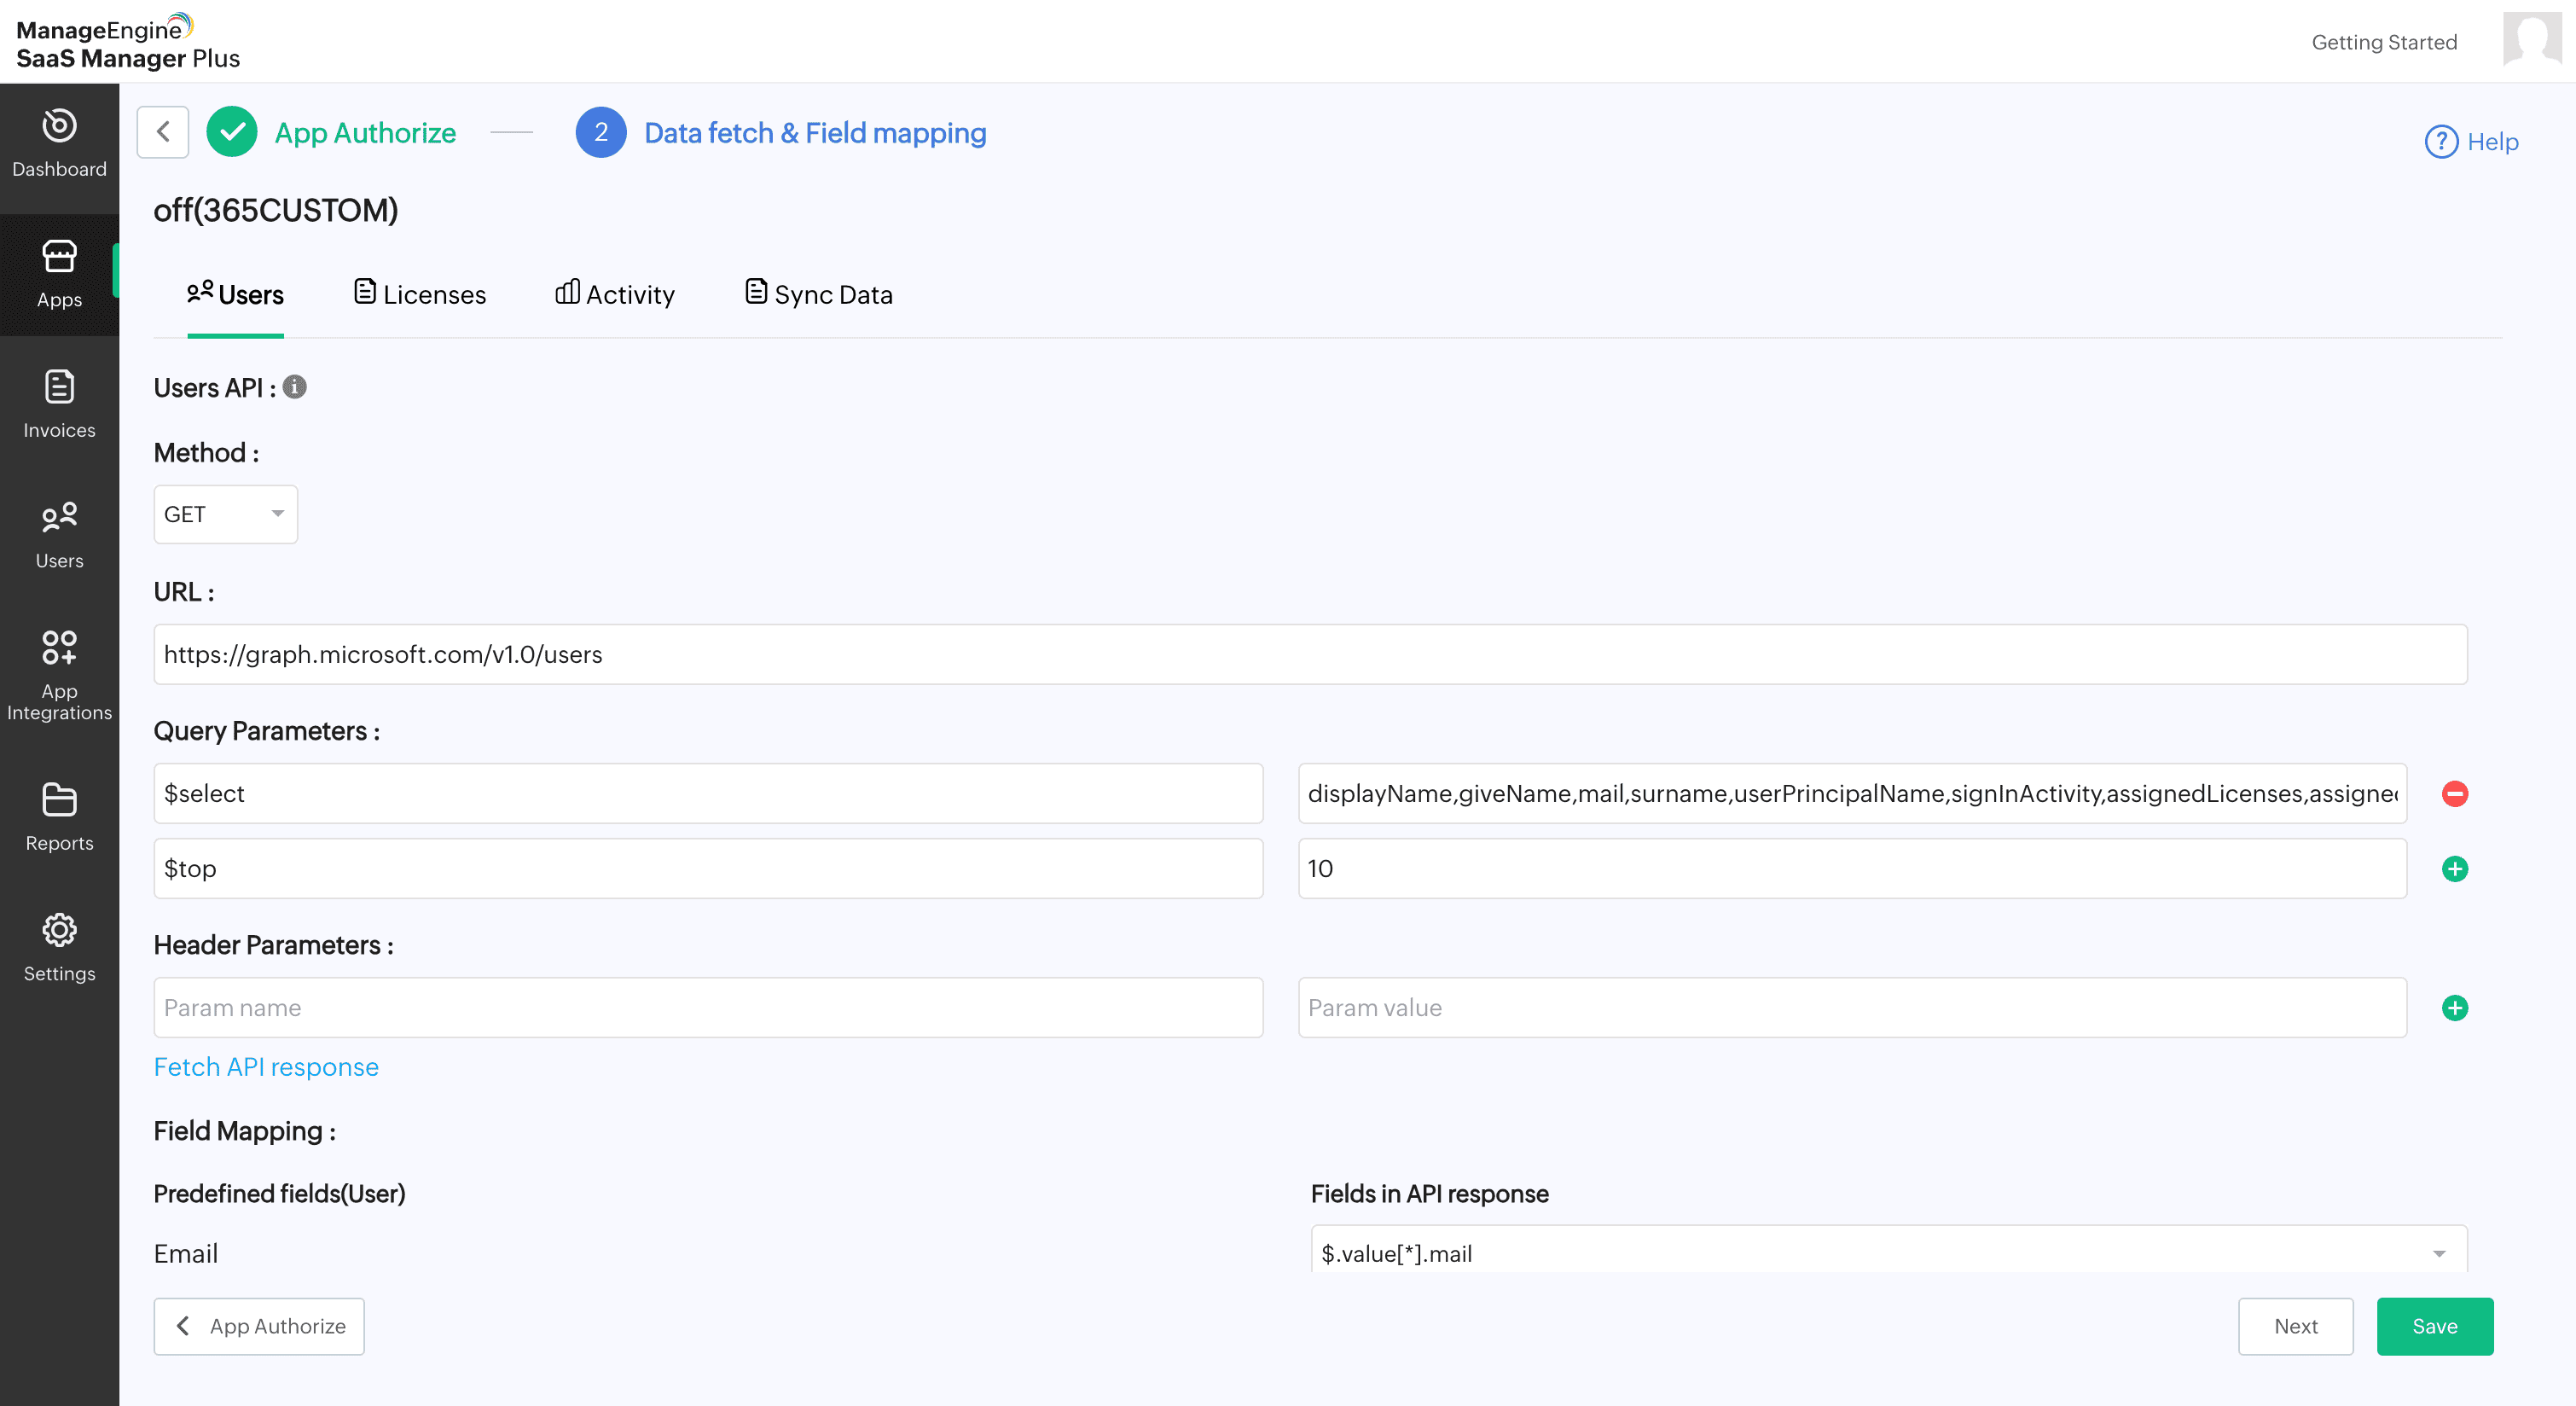
Users API
- Under Users API, select the required Method from the drop-down list.
- Provide the required URL.
- Enter the necessary Query Parameters and Header Parameters.
- Click Fetch API Response to retrieve the available fields.
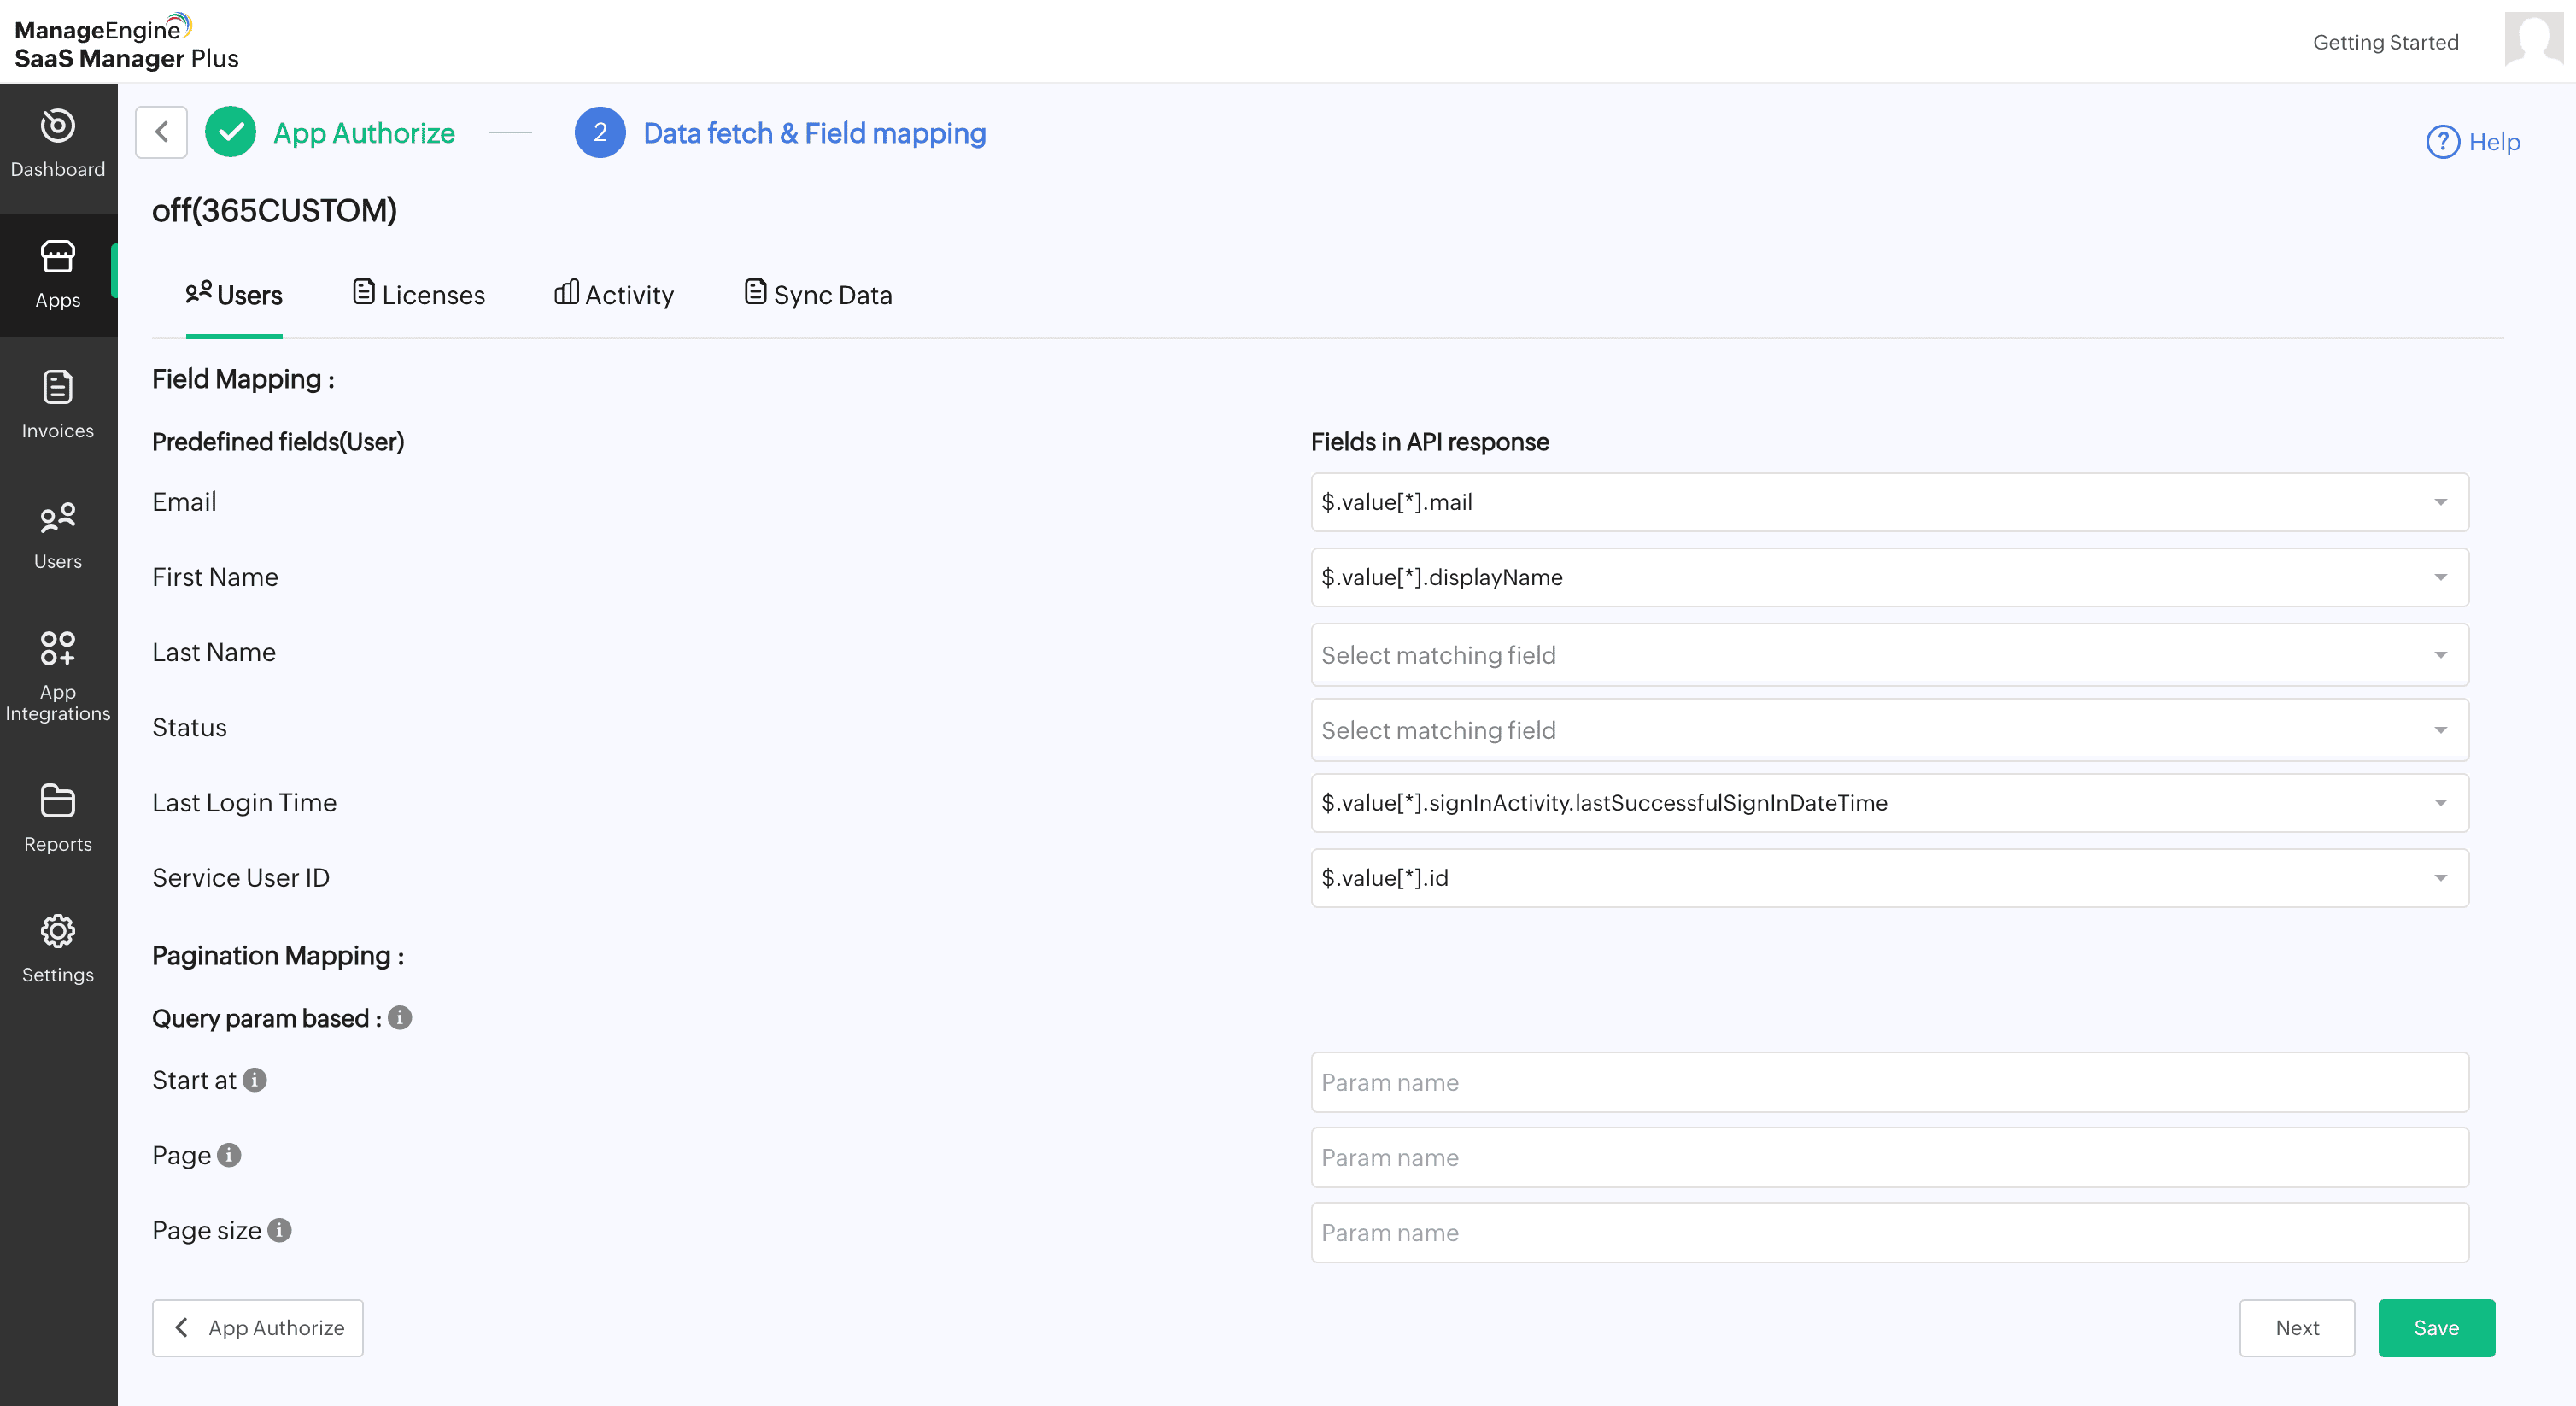
- Under Field Mapping, select the required fields for Email, First Name, Last Name, Status, Last Login Time, and Service User ID. Note: Only the mapped fields will be fetched.
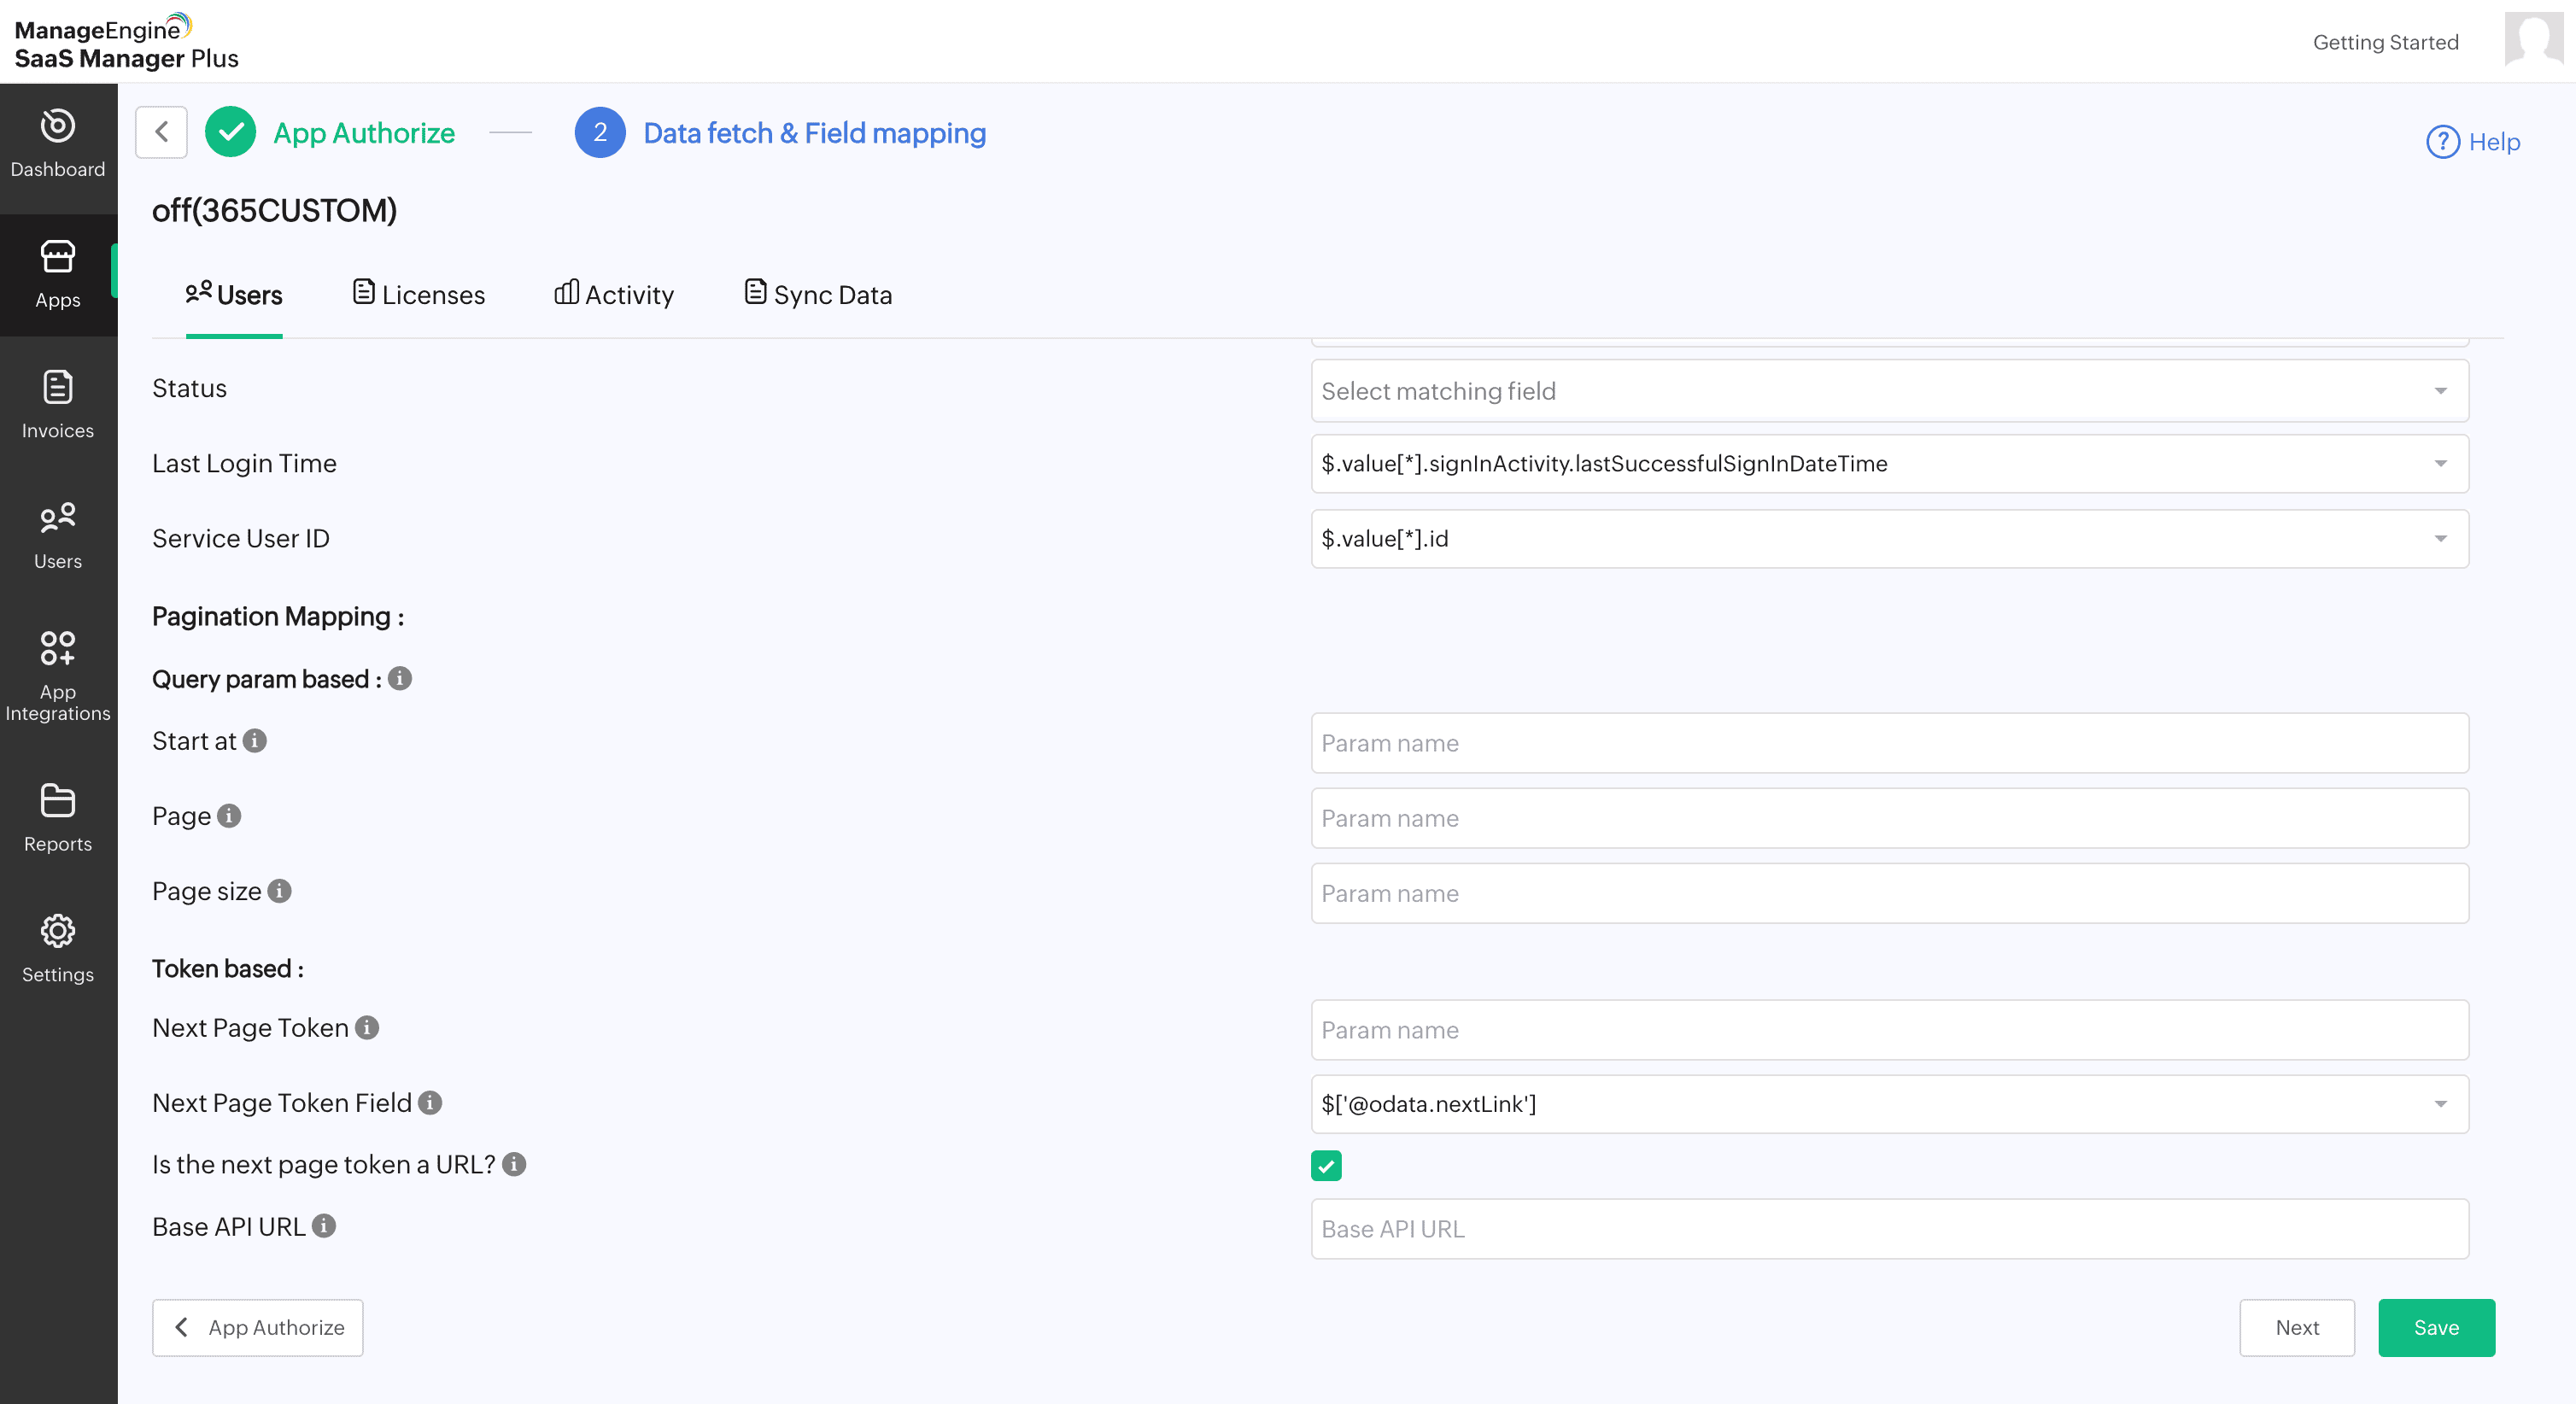
- Under Pagination Mapping, choose either query parameters or token-based parameters.
- For Query param based: Provide appropriate values for Start at, Page, and Page Size.
- For Token-based:
- Provide the Next Page Token.
- Select the Next Page Token Field.
- If the next page token is a URL, select Is the next page token a URL?
- Provide the Base API URL.
- Click Save, then click Next.
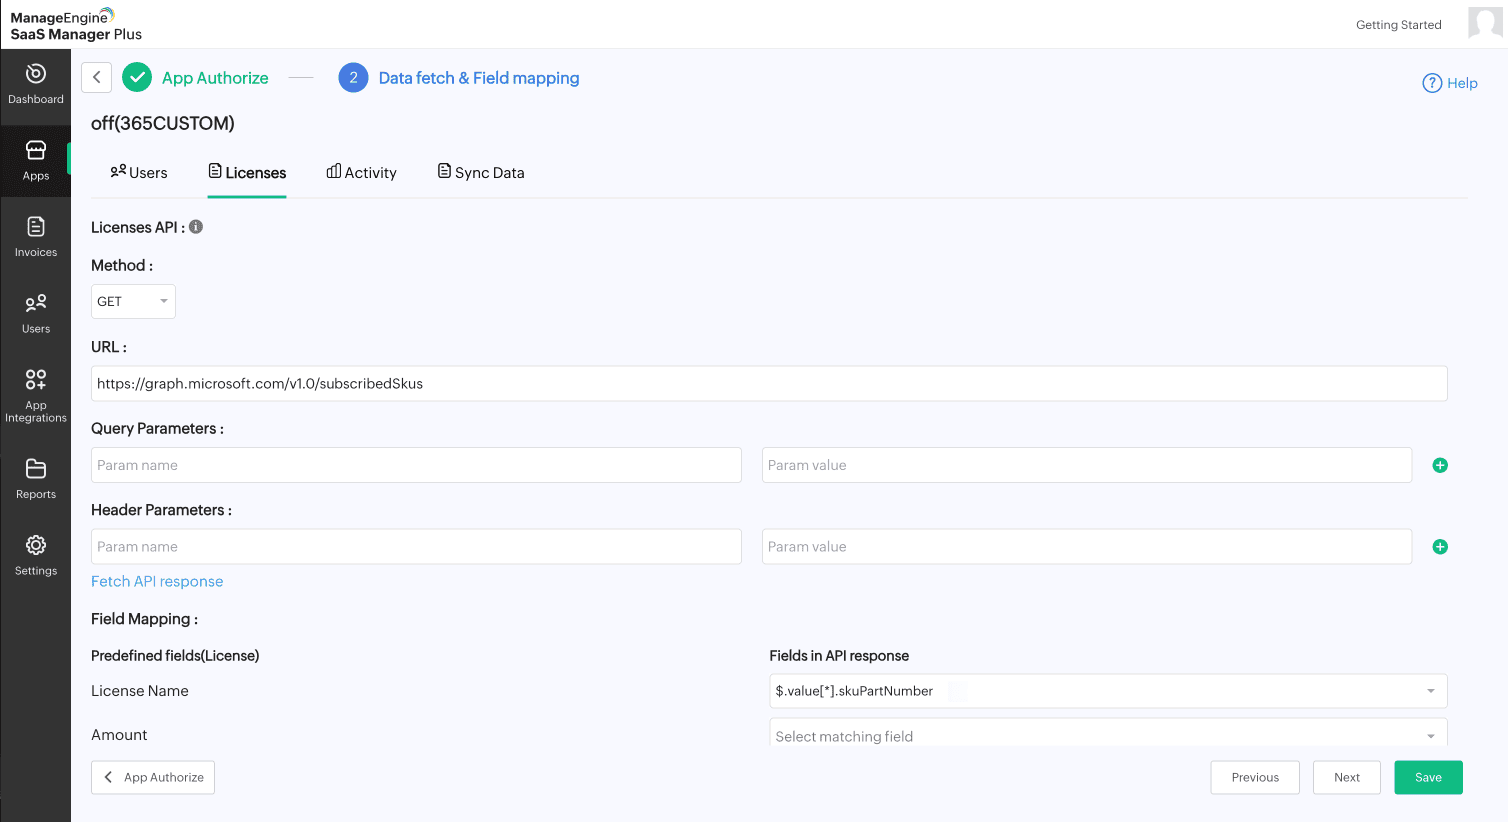
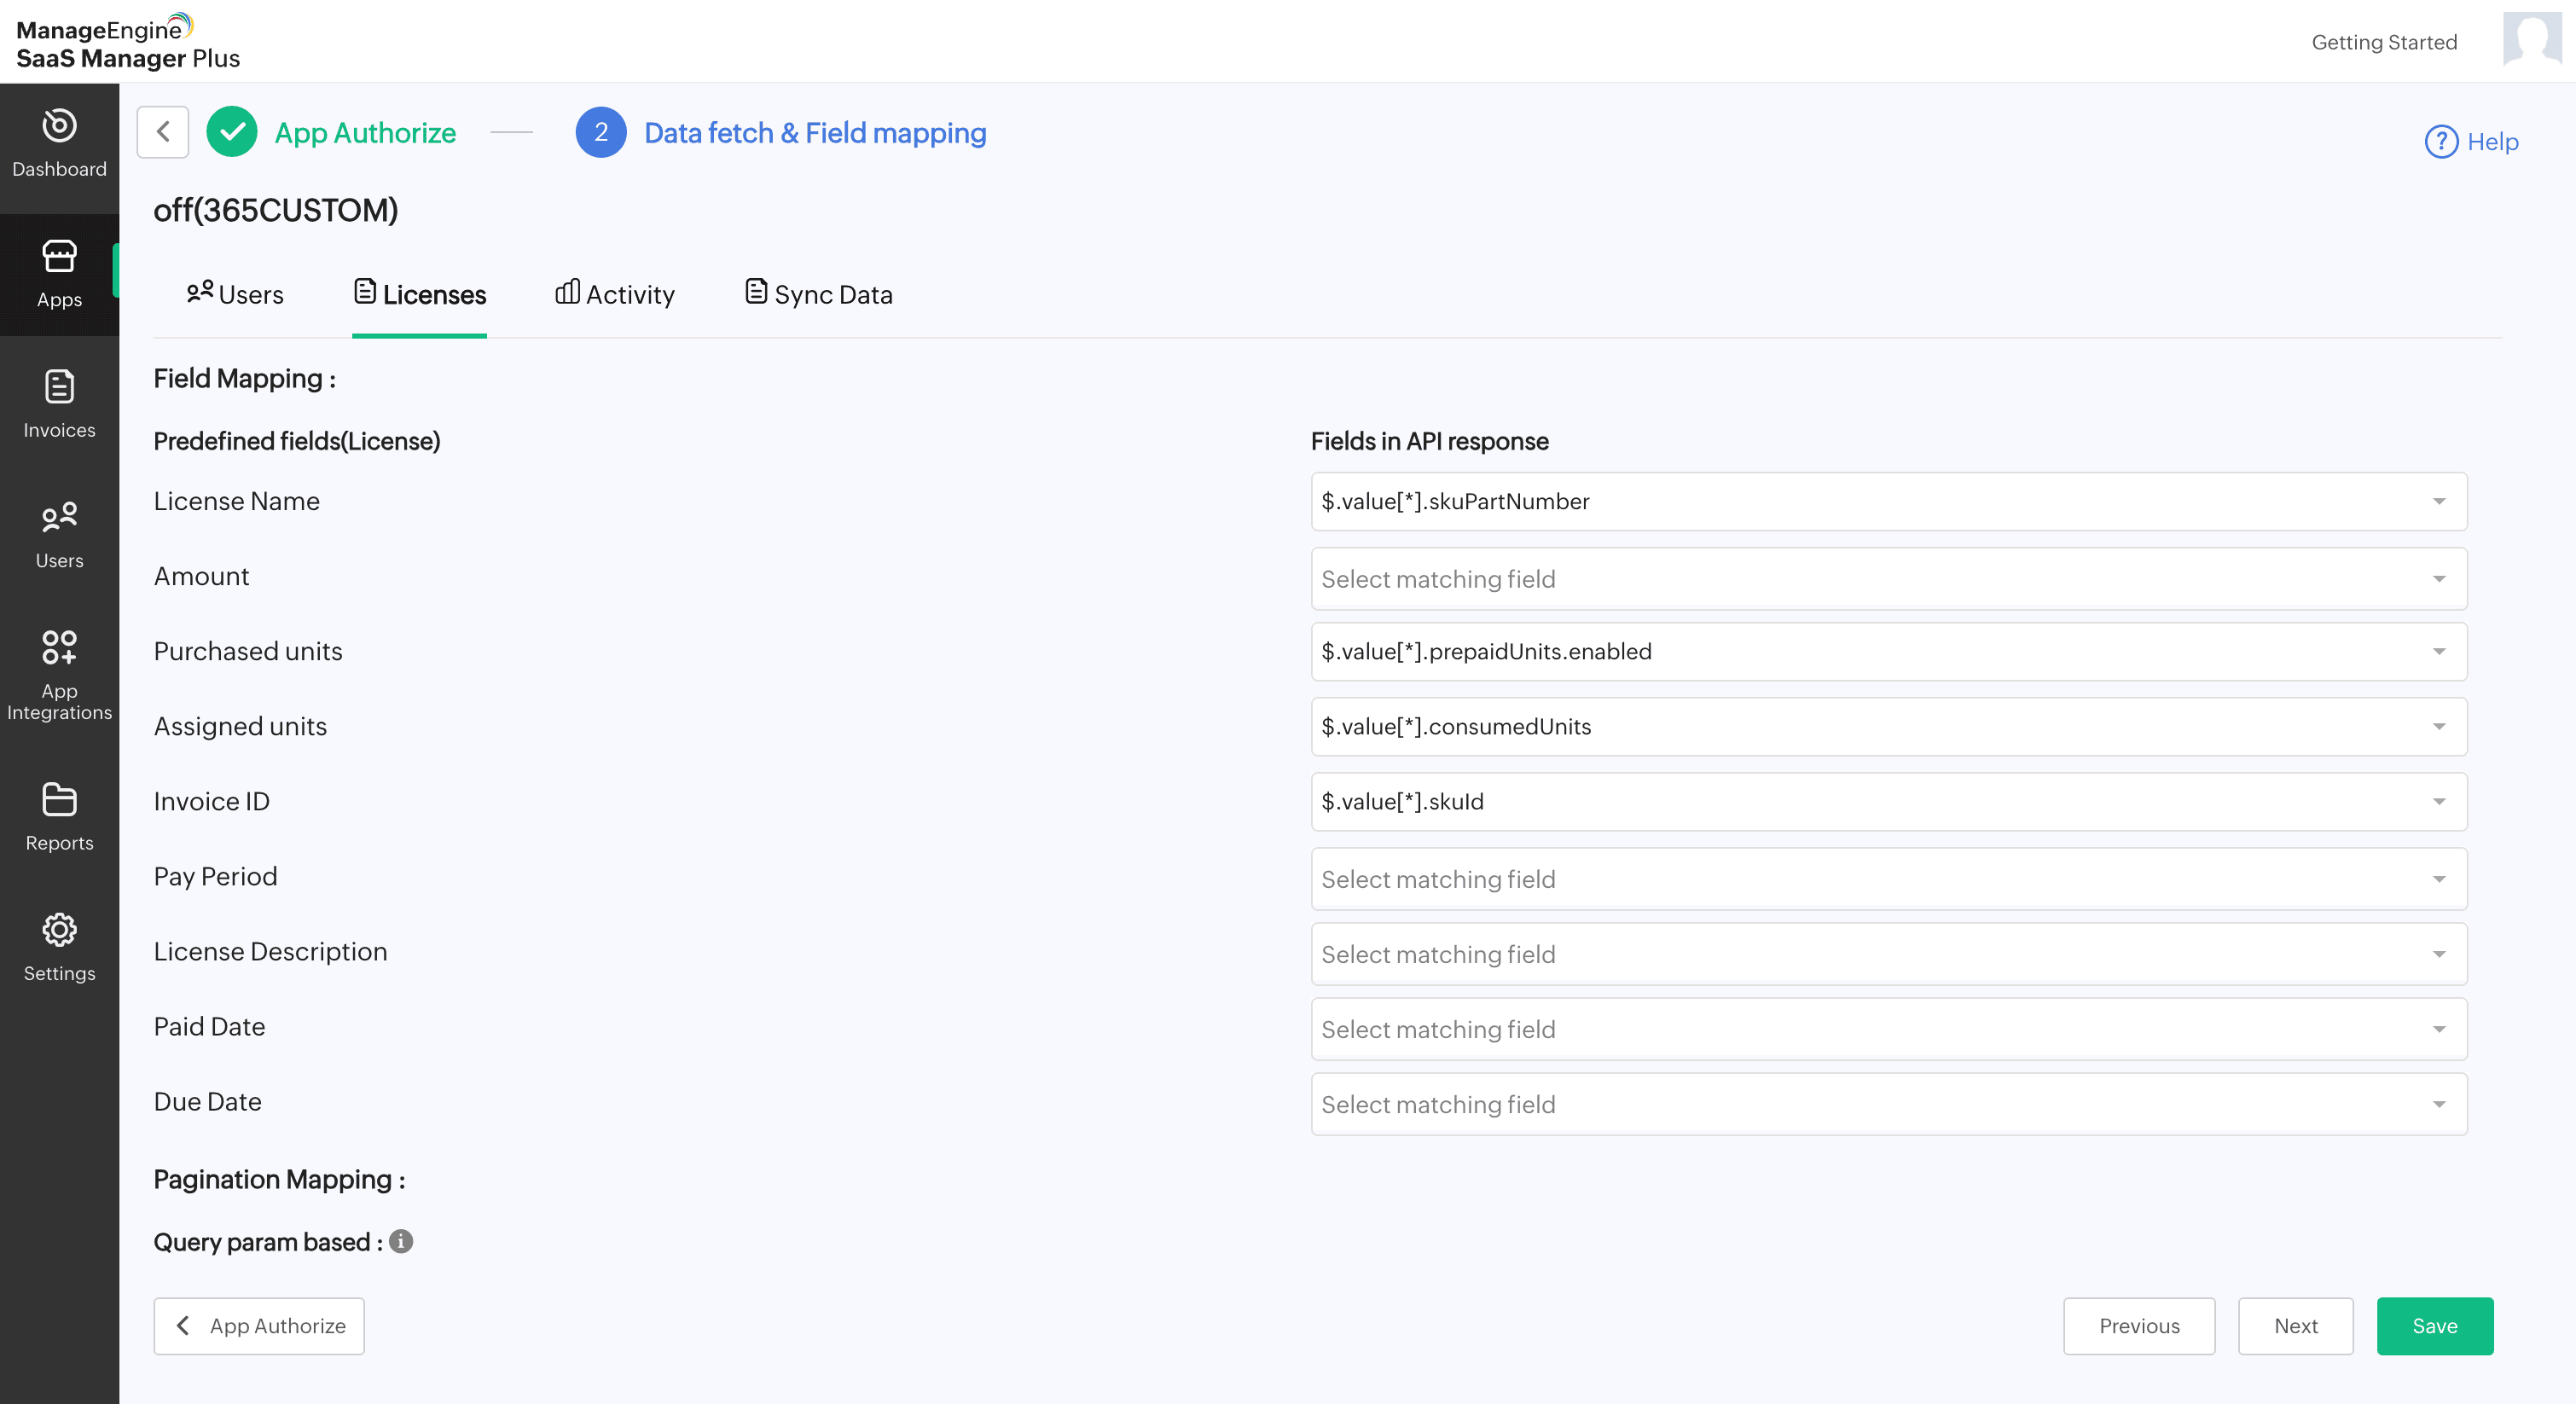
License API
- Under License API, select the required Method from the drop-down list.
- Provide the required URL.
- Enter the necessary Query Parameters and Header Parameters.
- Click Fetch API Response to retrieve the available fields.
- Under Field Mapping, select the required fields for License Name, Amount, Purchased Units, Assigned Units, Invoice ID, Pay Period, License Description, Paid Date, and Due Date.
Note: Only the mapped fields will be fetched. - Under Pagination Mapping, choose either query parameters or token-based parameters.
Note: Pagination mapping helps break large sets of data into smaller, manageable parts so the system can fetch and display information more efficiently.- For Query param based: Provide appropriate values for Start at, Page, and Page Size.
- For Token-based:
- Provide the Next Page Token.
- Select the Next Page Token Field
- If the next page token is a URL, select Is the next page token a URL?
- Provide the Base API URL.
- Click Save, then click Next.
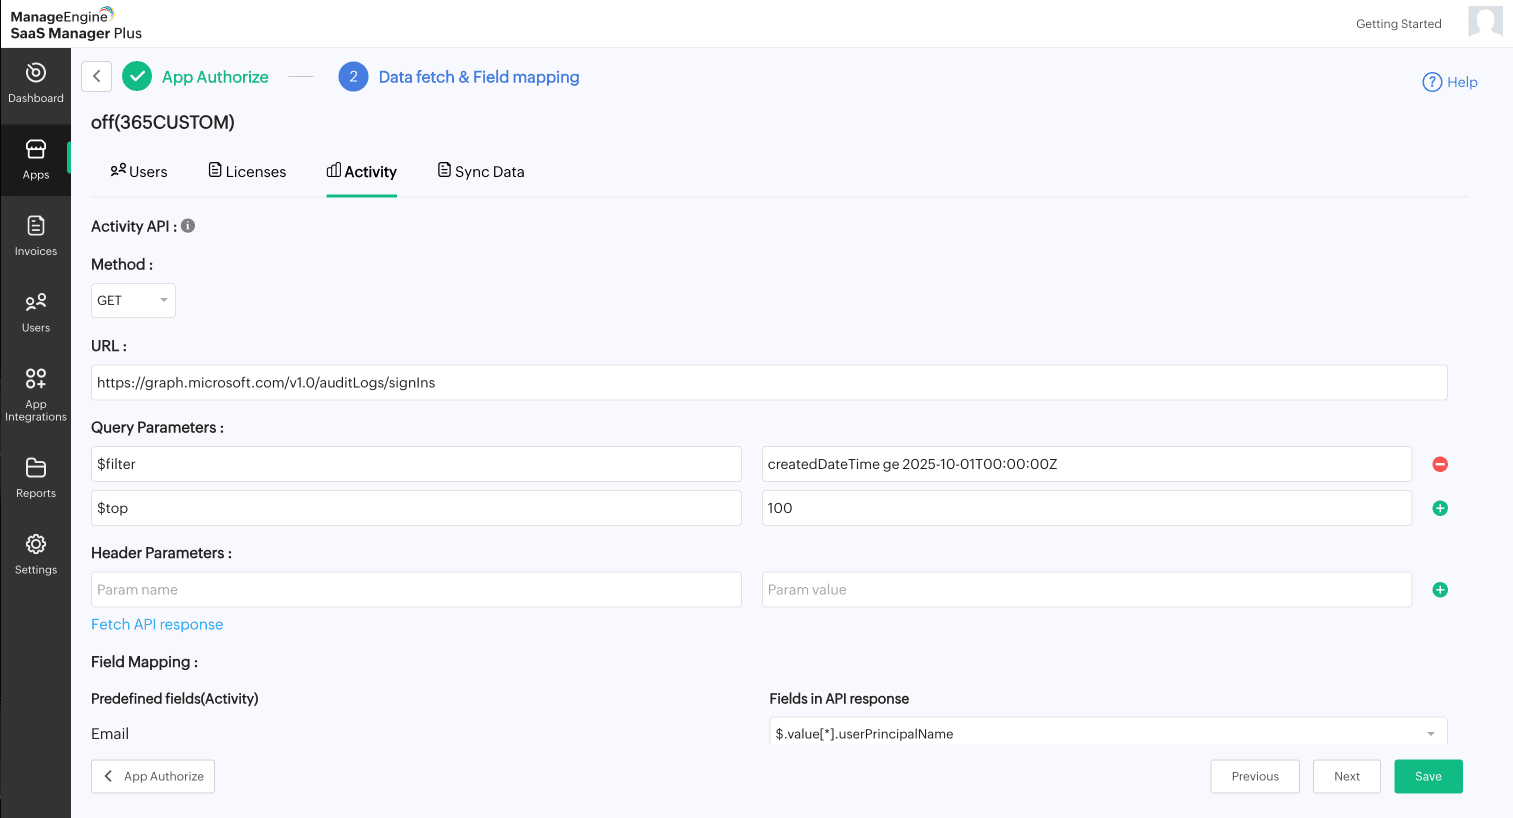
Activity API
- Under Activity API, select the required Method from the drop-down list.
- Provide the required URL.
- Enter the necessary Query Parameters and Header Parameters.
- Click Fetch API Response to retrieve the available fields.
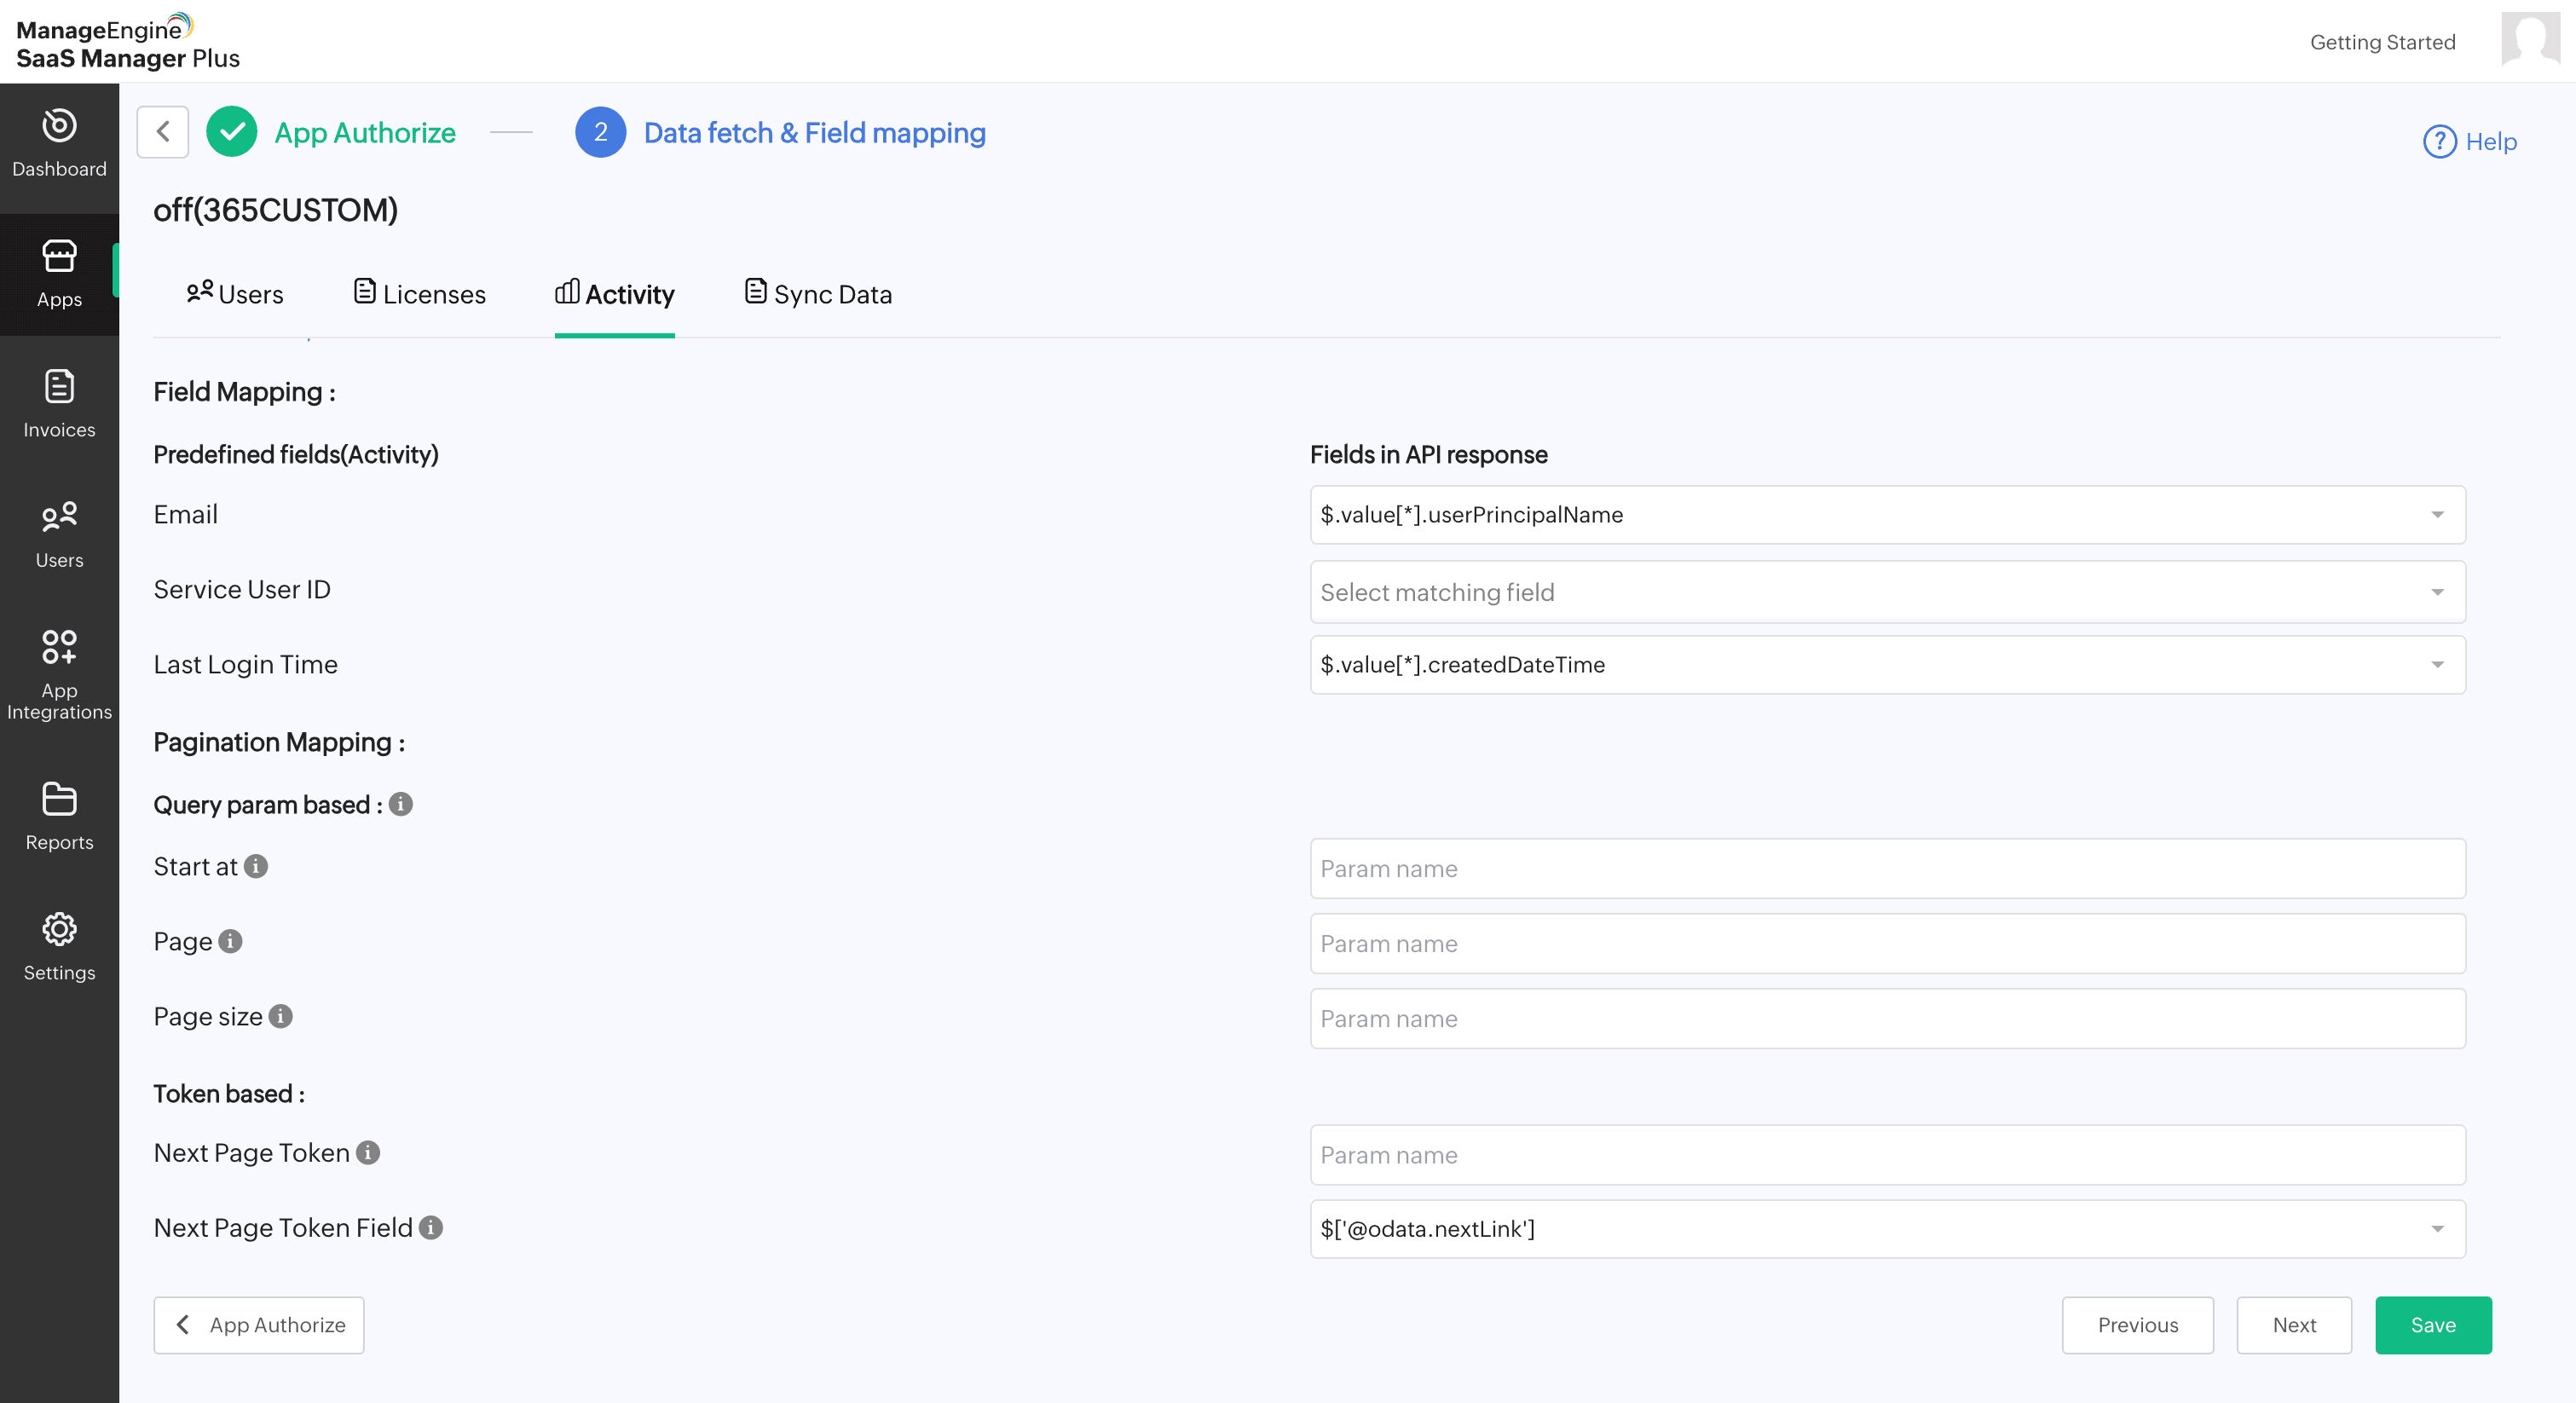
- Under Field Mapping, select the required fields for Email, Service User ID, and Last Login Time.
Note: Only the mapped fields will be fetched. - Under Pagination Mapping, choose either query parameters or token-based parameters.
- For Query param based: Provide appropriate values for Start at , Page and Page Size.
- For Token-based:
- Provide the Next Page Token.
- Select the Next Page Token Field.
- If the next page token is a URL, select Is the next page token a URL?
- Provide the Base API URL.
- Click Save, then click Next.
- Click Sync Data to retrieve data from the respective app.
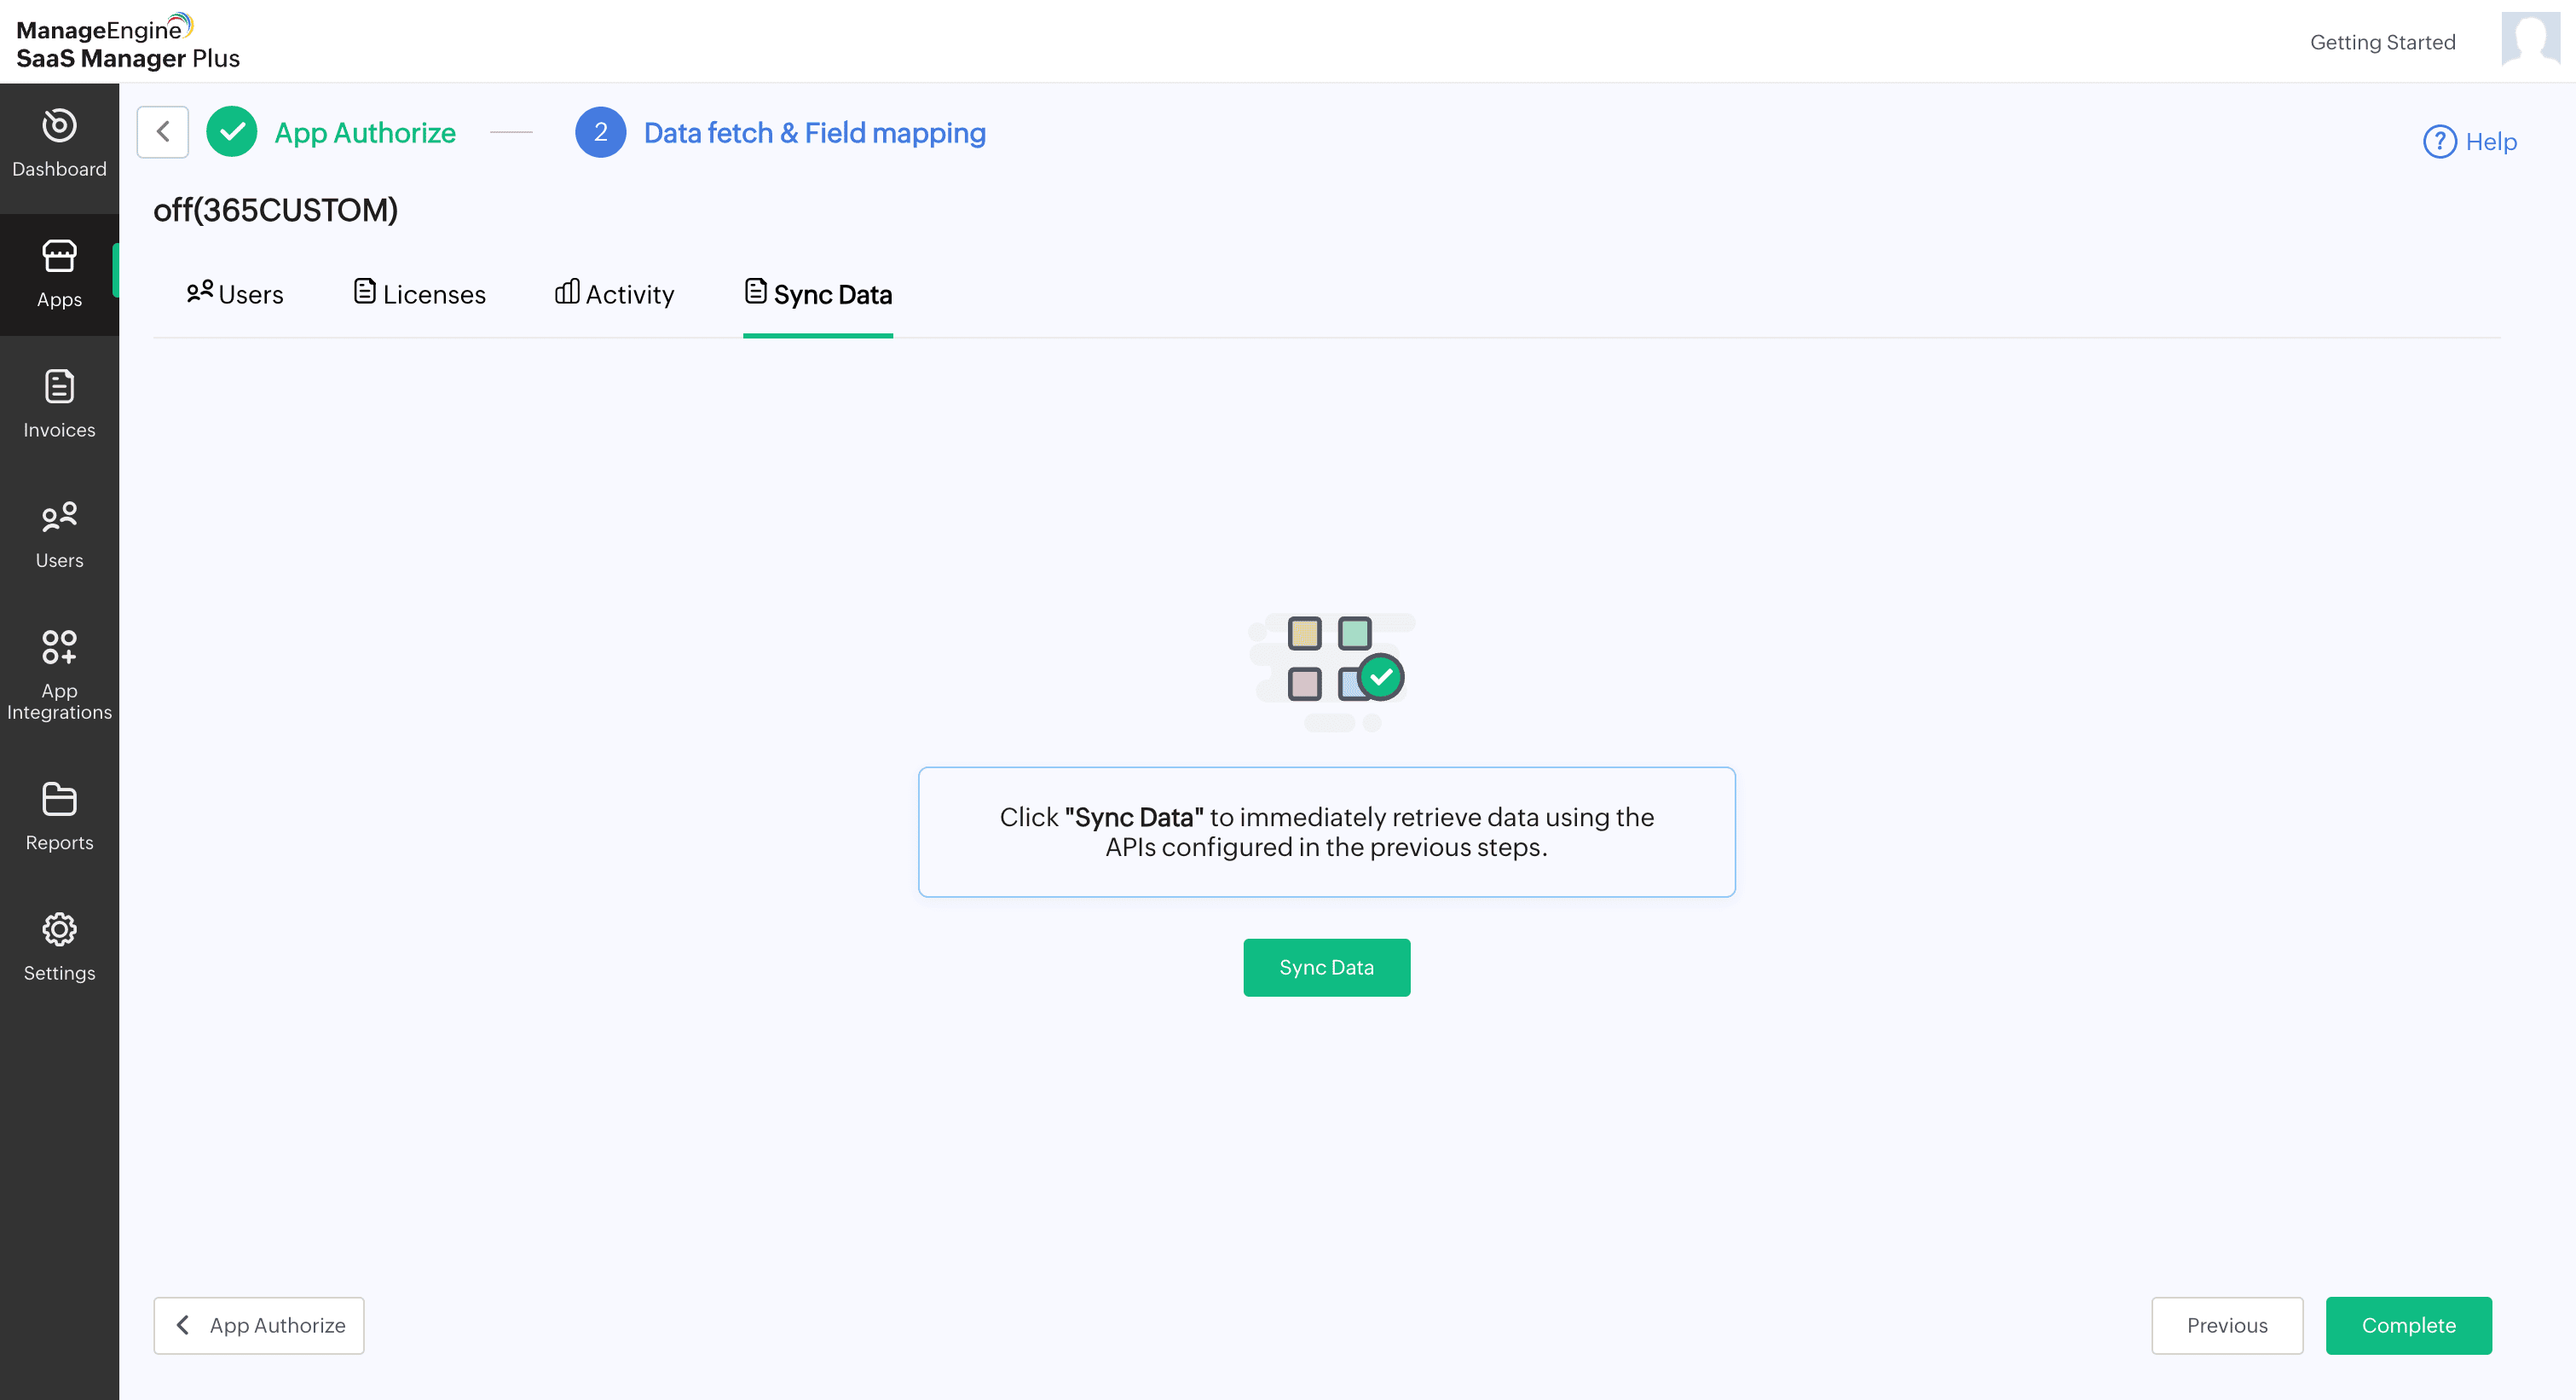
Note: Ensure your API requests stay within the vendor's rate limit to avoid request failures and/or potential increases in usage costs.
Redirect URL
After creating client ID and client secret, add our product URL as redirect URL. Choose the URL based on your domain
https://saasmanagerplus.manageengine.com/callback
https://saasmanagerplus.manageengine.com.au/callback
https://saasmanagerplus.manageengine.eu/callback
https://saasmanagerplus.manageengine.uk/callback
https://saasmanagerplus.manageengine.in/callback
Note: Once you establish the manual connection, the client ID and client secret will be reused for subsequent integrations with the same service provider.
Learn more about creating client ID and client secret here.