High Availability for MS SQL with Replication using SQL Server Management Studio
(Feature available only in Premium and Enterprise Editions. Procedure applicable only for builds 6400 and later)
In mission-critical environments, one of the crucial requirements is to provide uninterrupted access to passwords. Password Manager Pro provides the High Availability feature just to ensure this. While configuring High Availability (HA) for the setup running in Microsoft SQL (MS SQL) server, you can carry out the replication between master and slave MS SQL databases using the MS SQL Server Management Studio. There is another document, which discusses the same High Availability configuration for the MS SQL server, with the only difference that the replication between master and slave MS SQL databases is carried out using Password Manager Pro itself.
Steps Required for Manual Replication using SQL Server Management Studio
1. Prerequisites
- If you have the primary server with the Password Manager Pro instance running, stop it to continue with your manual replication.
- The MS SQL server (primary server) used by the Password Manager Pro will act as the master database. You need to specify another instance of MS SQL as the slave database during your manual replication configuration via MS SQL Server Management Studio.
- Import the SSL certificate of the MS SQL server slave database into the Password Manager Pro primary server. Before proceeding with this step, ensure that the MS SQL slave server is also configured with SSL. You can do this by carrying out these steps. To import the SSL certificate of the slave SQL server into the Password Manager Pro primary, navigate to <Password Manager Pro Primary Installation Folder>/bin directory and execute the command importCert.bat <slavecert.cer >.
- Navigate to <Password Manager Pro Primary Installation Folder>/conf directory, open the file masterkey.key, and copy the SQL Master Key. You will use this in the next step. (In case you have moved this key to a secure location as recommended while integrating the SQL server, keep the key ready for use in the next step).
- Ensure that MS SQL Server Management Studio is installed in your system.
- Verify if replication is installed on the instance of the MS SQL server. Only then the Microsoft SQL Server Management Studio will be able to access the replication components.
- Before you configure the SQL server replication in the secondary server, create a database in the secondary server and execute the below-mentioned queries:
- CREATE TABLE SeqGenState ( ROWGUID UNIQUEIDENTIFIER ROWGUIDCOL UNIQUE DEFAULT NEWSEQUENTIALID(), SEQNAME VARCHAR(100) NOT NULL, CURRENTBATCHEND BIGINT NOT NULL, CONSTRAINT SeqGenState_PK PRIMARY KEY CLUSTERED (SEQNAME));
- CREATE TABLE Ptrx_ResGrpNotifyActionList ( ROWGUID UNIQUEIDENTIFIER ROWGUIDCOL UNIQUE DEFAULT NEWSEQUENTIALID(), NOTIFY_ID BIGINT, ACCOUNT_ID BIGINT NOT NULL, ACTION_TYPE VARCHAR(200), SHARECHANGEUSER_ID VARCHAR(1000), OPERATED_NAME VARCHAR(300), OPERATED_TIME DATETIME, IPADDRESS VARCHAR(255), PRIMARY KEY CLUSTERED (NOTIFY_ID));
- CREATE TABLE "MSPSeqGenState" ( ROWGUID UNIQUEIDENTIFIER ROWGUIDCOL UNIQUE DEFAULT NEWSEQUENTIALID(), "ORGANIZATIONID" BIGINT NOT NULL, "SEQNAME" NVARCHAR(100) NOT NULL, "CURRENTBATCHEND" BIGINT NOT NULL, CONSTRAINT "MSPSeqGenState_PK" PRIMARY KEY CLUSTERED ("ORGANIZATIONID", "SEQNAME"));
2. Configuring MS SQL Server Replication between the Master and Slave MS SQL Databases
The configuration steps are categorized into five sections for clear understanding. Launch the MS SQL Server Management Studio installed in your system, connect to the MS SQL primary server and proceed with the steps that follow.
Important Notes:
- Read the instructions carefully in each wizard before you click Next.
- Click Finish only when the complete replication process is over. Clicking Finish in the middle of the process would result in a broken or incomplete configuration.
- Click Cancel anytime to abort the configuration process.
Section 1 - Create a Distribution
- Under the Object Explorer menu in the MS SQL Server Management Studio, right-click over the Replication module and click Configure Distribution.
- In the Configure Distribution Wizard that opens, click Next to continue.
- In the SQL Server Agent Start page that opens, select the SQL server agent service to start automatically to avoid the unattended run of replication agents that synchronize subscriptions.
- In the Distributor page that opens, choose the first option, i.e., choose to use this primary server as its distributor, and click Next.
- Specify the root folder where you want the snapshots to be stored and click Next.
- Enter the distribution database name as pmpdistribution. Choose the folders where you want the distribution database file and log file, respectively, and click Next.
- Select the primary server which this distributor will use when they become the publishers.
- Enable the Configure Distribution checkbox and click Next.
- Click Finish to complete the process or click Back to verify the options you have chosen in the previous screens. This wizard page will show in detail on what happens after you close this wizard.
- Once you click Finish, you will see the configuration processing, as shown in the below screenshot. Click Stop if you want to stop configuring the distribution.
- Close the window once you see the Success message, as shown in the below screenshot.


Section 2 - Create a Publication
- In the Object Explorer menu, under the Replication module, right-click on Local Publication, and click New Publication.
- In the New Publication Wizard that opens, click Next to continue.
- From the New Publication Wizard, choose the database created in the primary server that contains the data and objects to be published and click Next.
- Choose the Publication Type as Merge Publication. Make sure that the publication type you choose is compatible with your application requirements, and click Next.
- Select the Subscriber Type as SQL Server 2008 or later to be used by the subscribers to this publication. Click Next.
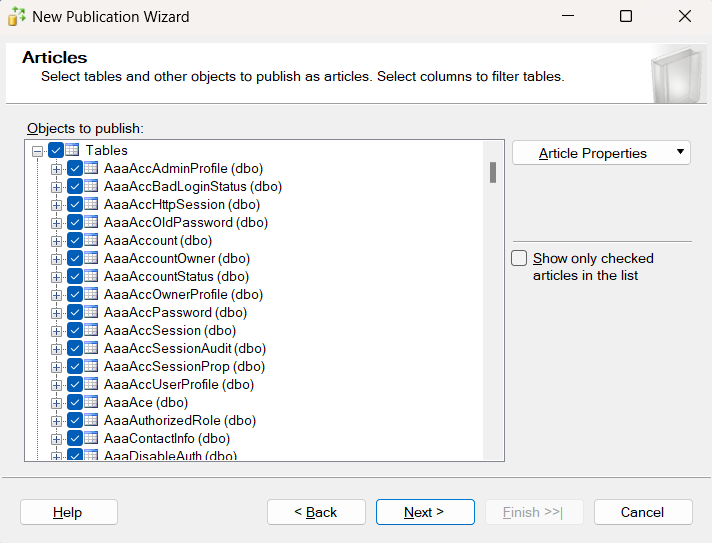
- The next step is to select the tables that are to be published as articles. Select all the tables except the below ones and click Next:
- SeqGenState
- Ptrx_ResGrpNotifyActionList
- MSPSeqGenState

- Select the issue displayed on the screen that may require changes to your application and click Next. So that it continues to function as expected.
- This step allows you to Filter Table Rows. Click Next if you do not want to filter the data in your application. Click Add to start adding filters to your publication.
- Select whether to run the Snapshot Agent immediately or schedule the agent to run on the specified day/time. Click Next.
- Click the Security Settings to specify the account details for the agent to run and its connection settings.
- Choose the domain or machine account where the Snapshot Agent will run. Choose the option "Run under the SQL Server Agent service account". Also, choose method "By impersonating the process account" to connect to the publisher and then click OK to continue.
- Enable the Create the Publication checkbox and click Next.
- Specify the Publication name as PMP-HA and click Finish to complete the process, or click Back to verify the options you have chosen in the previous screens. To know in detail what happens after you close this wizard, see the below screenshot.
- Once you click Finish, you will see the publication is created, as shown in the below screenshot. Click Stop if you want to stop creating the publication.
- Close the window once you see the Success message, as shown in the below screenshot.


To View Snapshot Agent Status:
Right-click on Publication and click View Snapshot Agent Status. You will see the below window showing the progress of snapshot creation, and the process takes a few minutes. Close the window once the snapshot is successfully generated. You can also Start the agent or Monitor it by clicking the respective buttons.

Section 3 - Create a Subscription
- In the Object Explorer menu, under Replication >> Local Publications, right-click on the publication that is created in section 2 and then click New Subscriptions.
- In the New Subscription Wizard displayed, select the publication (created in section 2 (PMP-HA)) for which the subscription is to be created, and then click Next.
- Choose the location to run the Merge Agent(s). Choose the first option as shown in below screenshot and click Next.
- In the Subscribers wizard that opens, select subscriber and choose the secondary server database for the subscription. Now, click Add SQL Server Subscriber to add the secondary server information.
- In the pop-up that opens, enter the secondary MS SQL server information and then click Connect.
- Once you are connected to the secondary database server, click Next from the New Subscription Wizard.
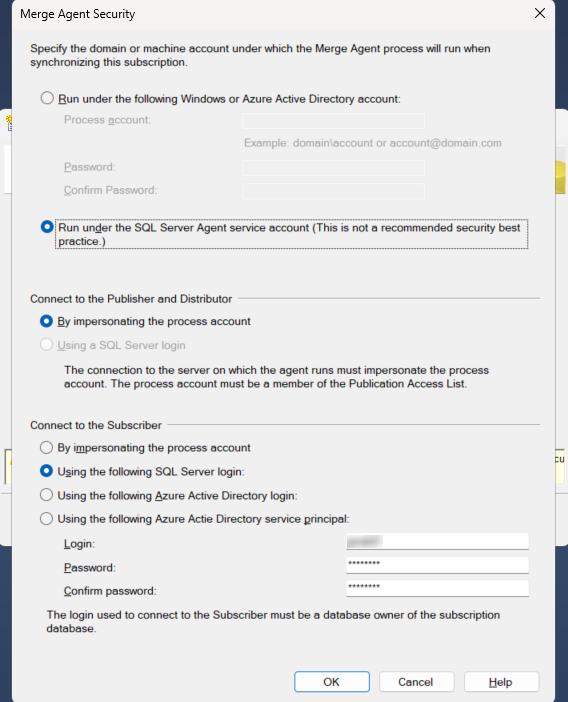
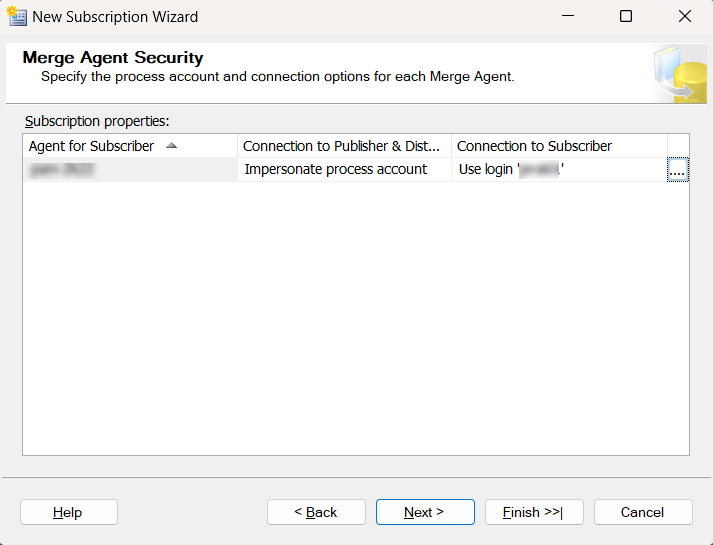
- Complete the security information for the subscriptions. Mention the process account and connection options for each Merge Agent.
- As shown in the below screenshot, specify the account where the Merge Agent will run when the subscription is synchronized. Choose the way to connect to the publisher and distributor. In addition, choose the SQL Server login to connect to the subscriber with the respective secondary server login credential, and click OK.


- Choose a Synchronization Schedule for each agent from the available options under the Agent Schedule drop-down and click Next.
- Choose whether to initialize or not initialize the subscriptions with a snapshot of the publication data and schema and then click Next.
- Choose a Subscription Type for the subscriptions from the available options. Also, choose a Priority for conflict resolution and then click Next.
- Enable the Create the subscription(s) checkbox and click Next.
- Click Finish to complete the process, or click Back to verify the options you have chosen in the previous screens. To know in detail what happens after you close this wizard, see the below screenshot.
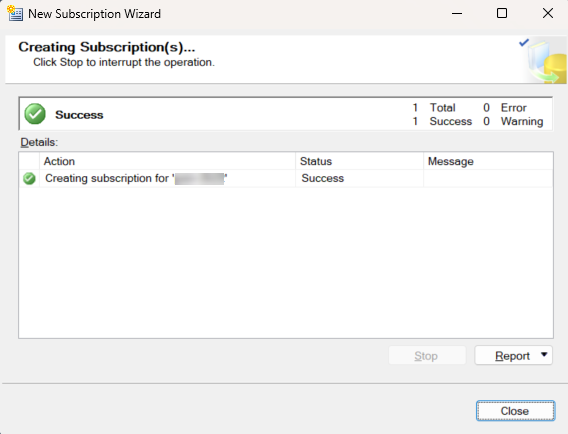
- Once you click Finish, you will see the subscription(s) being created, as shown in the below screenshot. Click Stop if you want to stop creating the subscription(s).
- Close the window once you see the Success message, as shown in the below screenshot.


Viewing Synchronization Status
Right-click on Subscription and click View Synchronization Status. You will see the below window showing the progress of the synchronization, and it takes a few minutes. Close the window once the synchronization is 100% complete. You can also Stop the synchronization or Monitor it by clicking the respective buttons.

Now, the SQL server replication has been completed successfully.
Section 4 - Executing Queries in the Primary Server
Execute the below-mentioned queries in the primary server:
- update Ptrx_HighAvailability set INSTANCENAME='MASTER_INSTANCE' where Ptrx_HighAvailability.ISMASTER='true';
- update Ptrx_HighAvailability set INSTANCEPORT='MASTER_PORT' where Ptrx_HighAvailability.ISMASTER='true';
- update Ptrx_HighAvailability set INSTANCENAME='SLAVE_INSTANCE' where Ptrx_HighAvailability.ISMASTER='false';
- update Ptrx_HighAvailability set INSTANCEPORT='SLAVE_PORT' where Ptrx_HighAvailability.ISMASTER='false';
Where MASTER_INSTANCE is the primary SQL server, SLAVE_INSTANCE is the secondary SQL server, and the MASTER/SLAVE_PORT is the port used by the SQL server. For example:
- update Ptrx_HighAvailability set INSTANCENAME='pmp-win11' where Ptrx_HighAvailability.ISMASTER='true';
- update Ptrx_HighAvailability set INSTANCEPORT='1433' where Ptrx_HighAvailability.ISMASTER='true';
- update Ptrx_HighAvailability set INSTANCENAME='pmp-secwin11' where Ptrx_HighAvailability.ISMASTER='false';
- pdate Ptrx_HighAvailability set INSTANCEPORT='1433' where Ptrx_HighAvailability.ISMASTER='false';
Now start the primary MS SQL server.
If you face any issues with the replication, navigate to Replication >> Local Publications, right-click on the created publication and click Launch Replication Monitor. In the pop-up that opens, you can check the synchronization status, last sync details, etc.

Section 5 - Secondary Server Configuration
Install another instance of Password Manager Pro as the secondary server in a separate workstation. To install Password Manager Pro as the secondary, during installation process, choose the option "Configure this server as High availability secondary server (Read Only)".After installation, the Password Manager Pro Secondary server should not be started.
After installing the Password Manager Pro secondary server, change it to run with MS SQL by carrying out the following steps:
- Execute ChangeDB.bat.
- Provide the details about the SQL server to Password Manager Pro by editing the file <Password Manager Pro Standby Installation Folder>/bin ChangeDB.bat (Windows) or <Password Manager Pro Standby Installation Folder>/bin sh ChangeDB.sh (Linux).
- Select SQL Server and enter the values as given below:
- Host Name of Slave Database: The Name or the IP address of the machine where MS SQL server is installed.
- Port: The port number in which Password Manager Pro must connect with the database. Default is 1433.
- Database Name: Name of the Slave database. Here, take care to specify the name of the slave database exactly as done in Step 4 above.
- Authentication: The way in which you would like to connect to the SQL server. If you are connecting to the SQL server from Windows, you have the option to make use of the Windows Single Sign On facility provided Password Manager Pro service is running with a service account, which has the privilege to connect to SQL server. In that case, choose the option "Windows". Otherwise, select the option "SQL". It is recommended to choose the option 'Windows' as the username and password used for authentication are not stored anywhere.
- User Name and Password: If you have selected the option "SQL", specify the user name and password with which Password Manager Pro needs to connect to the database. The username and password entered here will be stored in Password Manager Pro. So, take care of hardening the host.
Here, you have the option to use even your Windows login credentials, if you are connecting to the database from Windows. In this case, enter the username as <domain-name>\<username>. - Encryption Key: The key with which your data is to be encrypted and stored in the SQL server. You may either leave it "Default" making Password Manager Pro to generate a key. If you have configured Master database with custom key, choose "Custom' here also.
- If you have selected the option "Custom:" After doing the above, provide the certificate name and the symmetric key name in the GUI as mentioned in the Master database:
- Click Test and then Save.
To apply Password Manager Pro license, custom icons and rebranding settings, if any, in secondary server, copy the respective files from primary and place them in secondary.
Copy the manage_key.conf from primary to secondary and edit the file to specify the location of the file, pmp_key.key (encryption master key). Then, start the secondary server. Remember, Password Manager Pro requires the pmp_key.key file to be accessible with its full path, each time it starts up. Anyway, after the successful start-up, the key is not required, hence the device with the key file can go offline.
3. Verify High Availability Setup
Click here to view the steps to verify the high availability setup.