Logon Settings
Learn how to configure the following logon settings.
- General: Learn how to configure CAPTCHA and block users after a certain number of invalid login attempts.
- Password policy: Learn how to customize password policy for all technicians logging into EventLog Analyzer.
- Two-factor Authentication: Learn how to enable two-factor authentication for users logging into EventLog Analyzer.
- Smartcard Authentication: Learn how to configure EventLog Analyzer to authenticate users through smart cards, bypassing other first-factor authentication methods.
- External Authentication: Learn how to configure EventLog Analyzer to authenticate users through Active Directory and RADIUS server.
- Allow/restrict IPs: Learn how to allow or restrict access to EventLog Analyzer based on the users’ IP address.
General
Under the General tab of Logon Settings, you can configure the following.
- CAPTCHA Settings
- Block User Settings
CAPTCHA Settings
CAPTCHA stands for Completely Automated Public Turing test to tell Computers and Humans Apart. Login CAPTCHA serves as a security measure against bot-based brute force attacks. Enabling this setting will display a CAPTCHA image on the login page. End-users must enter the characters shown in the CAPTCHA image to log into the EventLog Analyzer web portal.
You can configure whether to show CAPTCHA always or after a certain number of invalid login attempts. Apart from the CAPTCHA image, you can also enable Audio CAPTCHA.
Steps to enable CAPTCHA:
- Log into EventLog Analyzer as an administrator.
- In the Settings tab, navigate to Admin Settings > Logon Settings > General.
- Tick the Enable CAPTCHA on login page checkbox.
- Select Always show CAPTCHA if you want users to go through CAPTCHA verification every time they login.
- Select Show CAPTCHA after invalid login attempts if you want only those users who failed at login to go through the CAPTCHA verification process.
- Enter the number of invalid login attempts after which the CAPTCHA verification should appear.
- Enter the threshold (in minutes) to reset the invalid login attempts. After the specified duration, the invalid login attempts will be reset.
- Select Enable Audio CAPTCHA to assist visually impaired users.
- Note: When Audio CAPTCHA is enabled, only digits will be shown in the CAPTCHA image. If a browser doesn't support audio CAPTCHA, then the default CAPTCHA image (with letters and digits) will be shown.
- Click Save Settings.
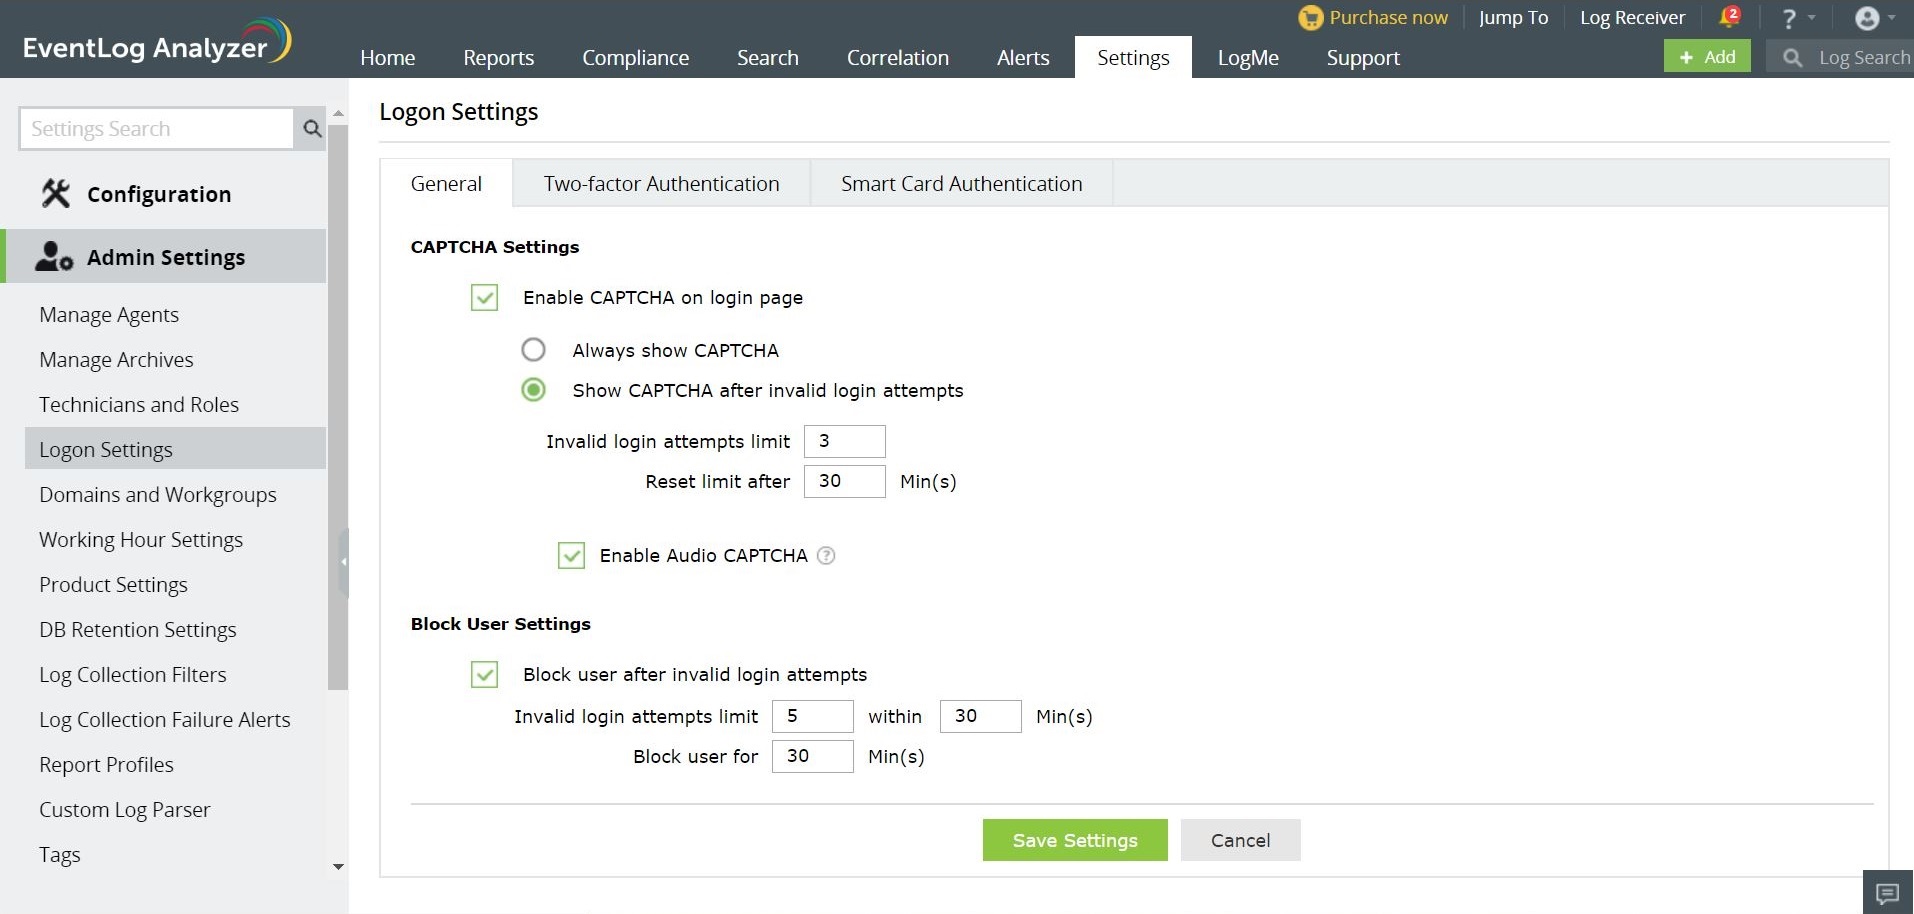
Block User Settings
Using this option you can block users from accessing EventLog Analyzer after a certain number of invalid login attempts for a defined duration. A blocked user cannot log into EventLog Analyzer until the threshold for reset is reached.
Steps to block users:
- Log into EventLog Analyzer as an administrator.
- In the Settings tab, navigate to Admin Settings > Logon Settings > General.
- Select the Block user after invalid login attempts checkbox.
- Set the number of invalid login attempts after which users should be blocked and the number of minutes the user should be blocked by entering the appropriate values in the given fields.
- Set the threshold (in minutes) to reset the invalid login attempts. After the specified duration, the user will be allowed to attempt login.
- Click Save Settings.
Password Policy
To strengthen logon security, EventLog Analyzer allows the administrator to customize password policy for all technicians.
To configure password policy,
- Login to EventLog Analyzer as an administrator.
- Navigate to Settings → Admin Settings → Logon Settings.
- Click on the Password Policy tab.
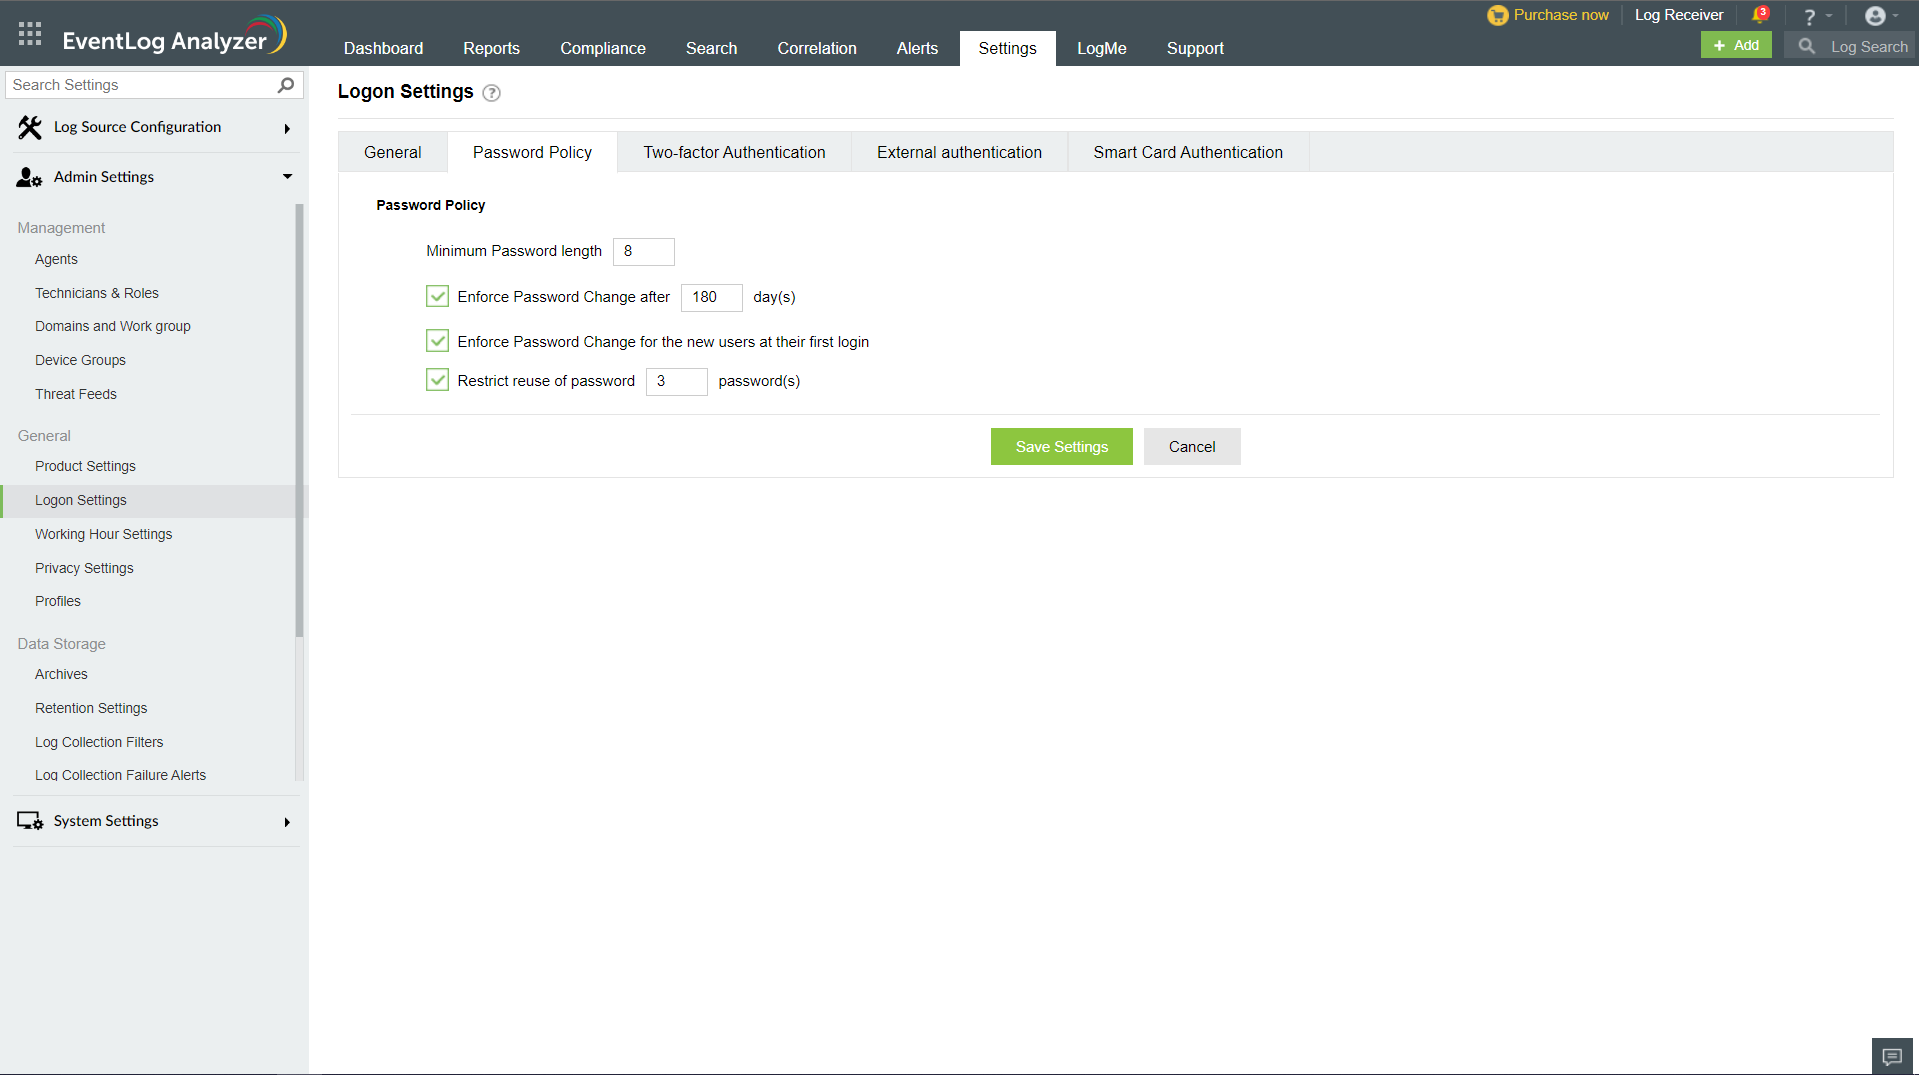
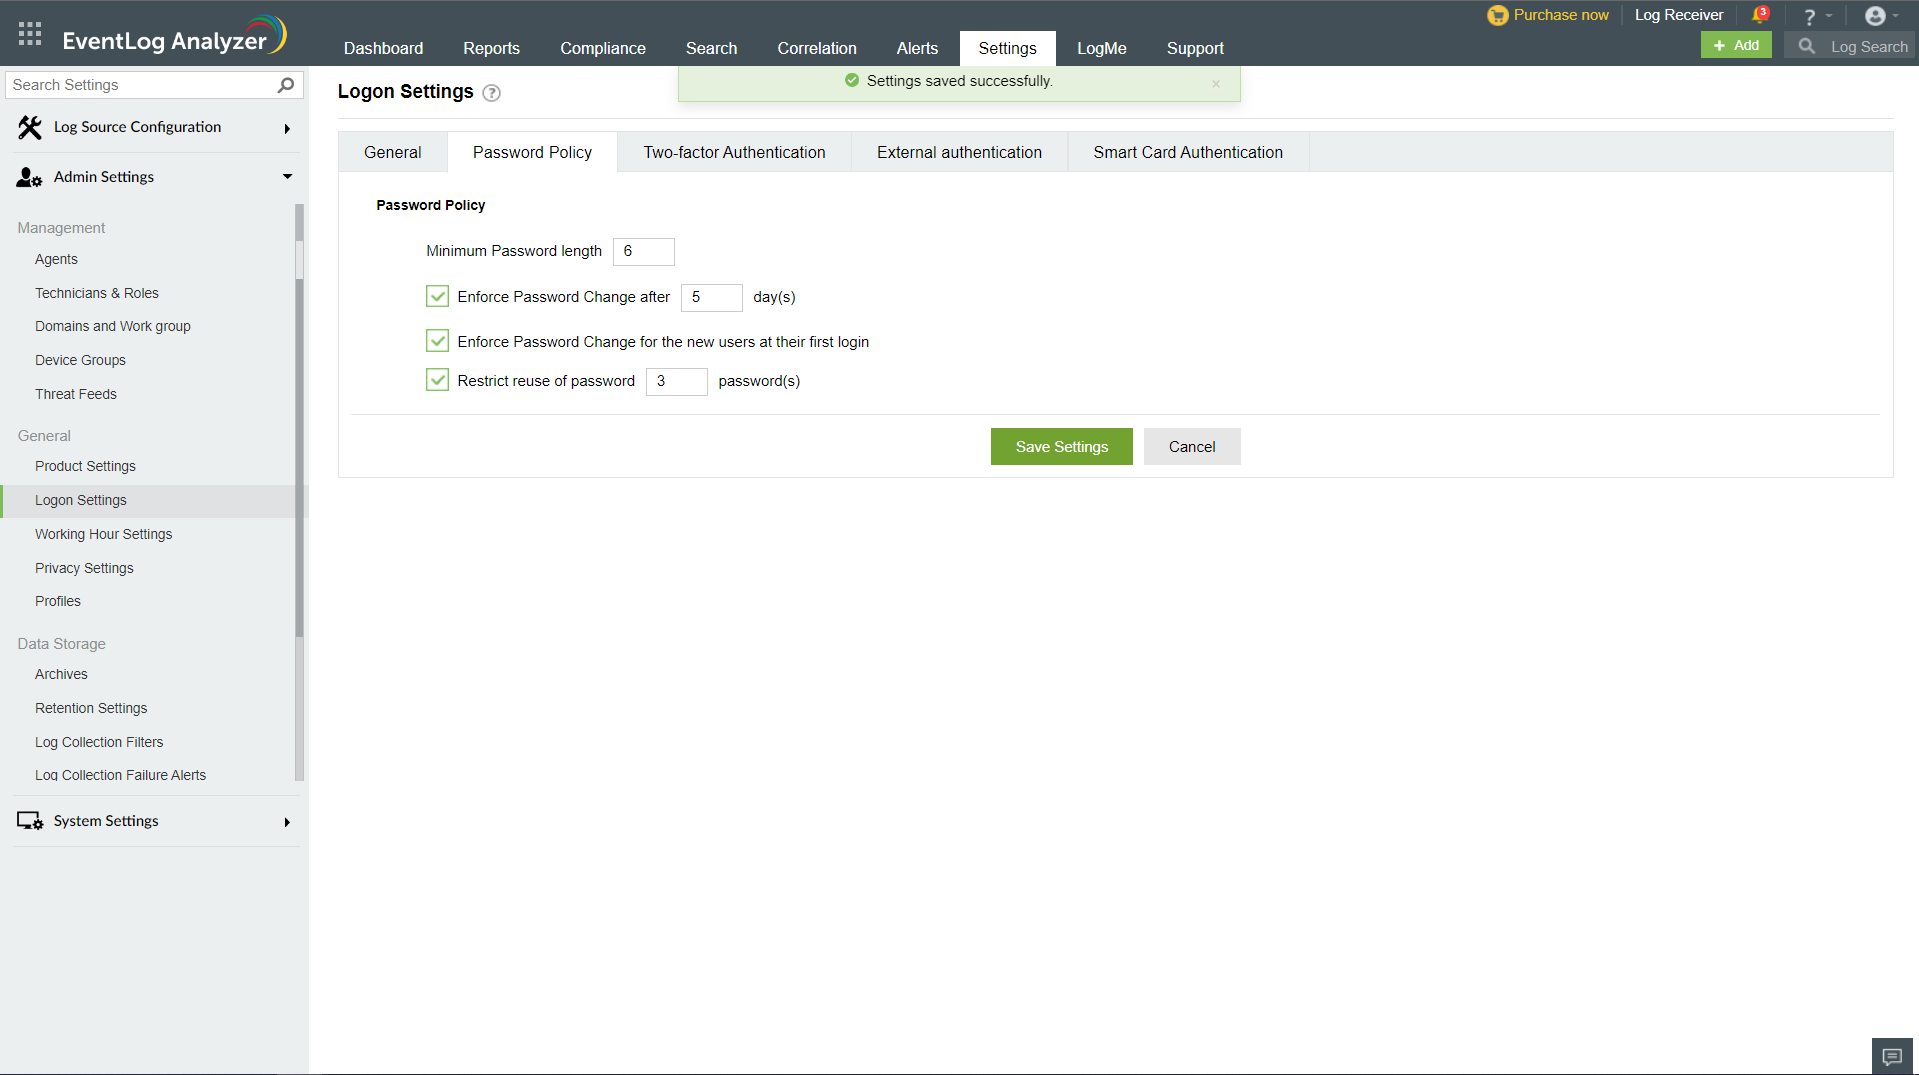
The administrator can configure the following parameters:
- Minimum password length - This parameter indicates the minimum number of characters the password must contain.
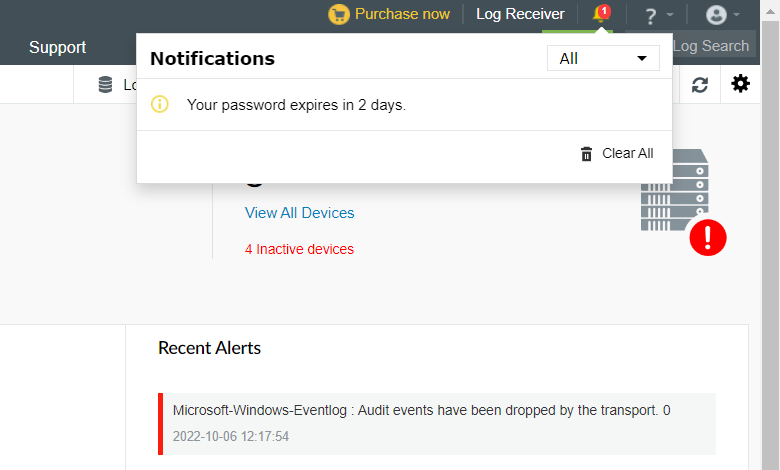
- Enforce password change after 'n' days - This parameter indicates the number of days after which the password will automatically expire. If this parameter has been enabled, a notification alert will be triggered in the notification center 3 days before the password expires.
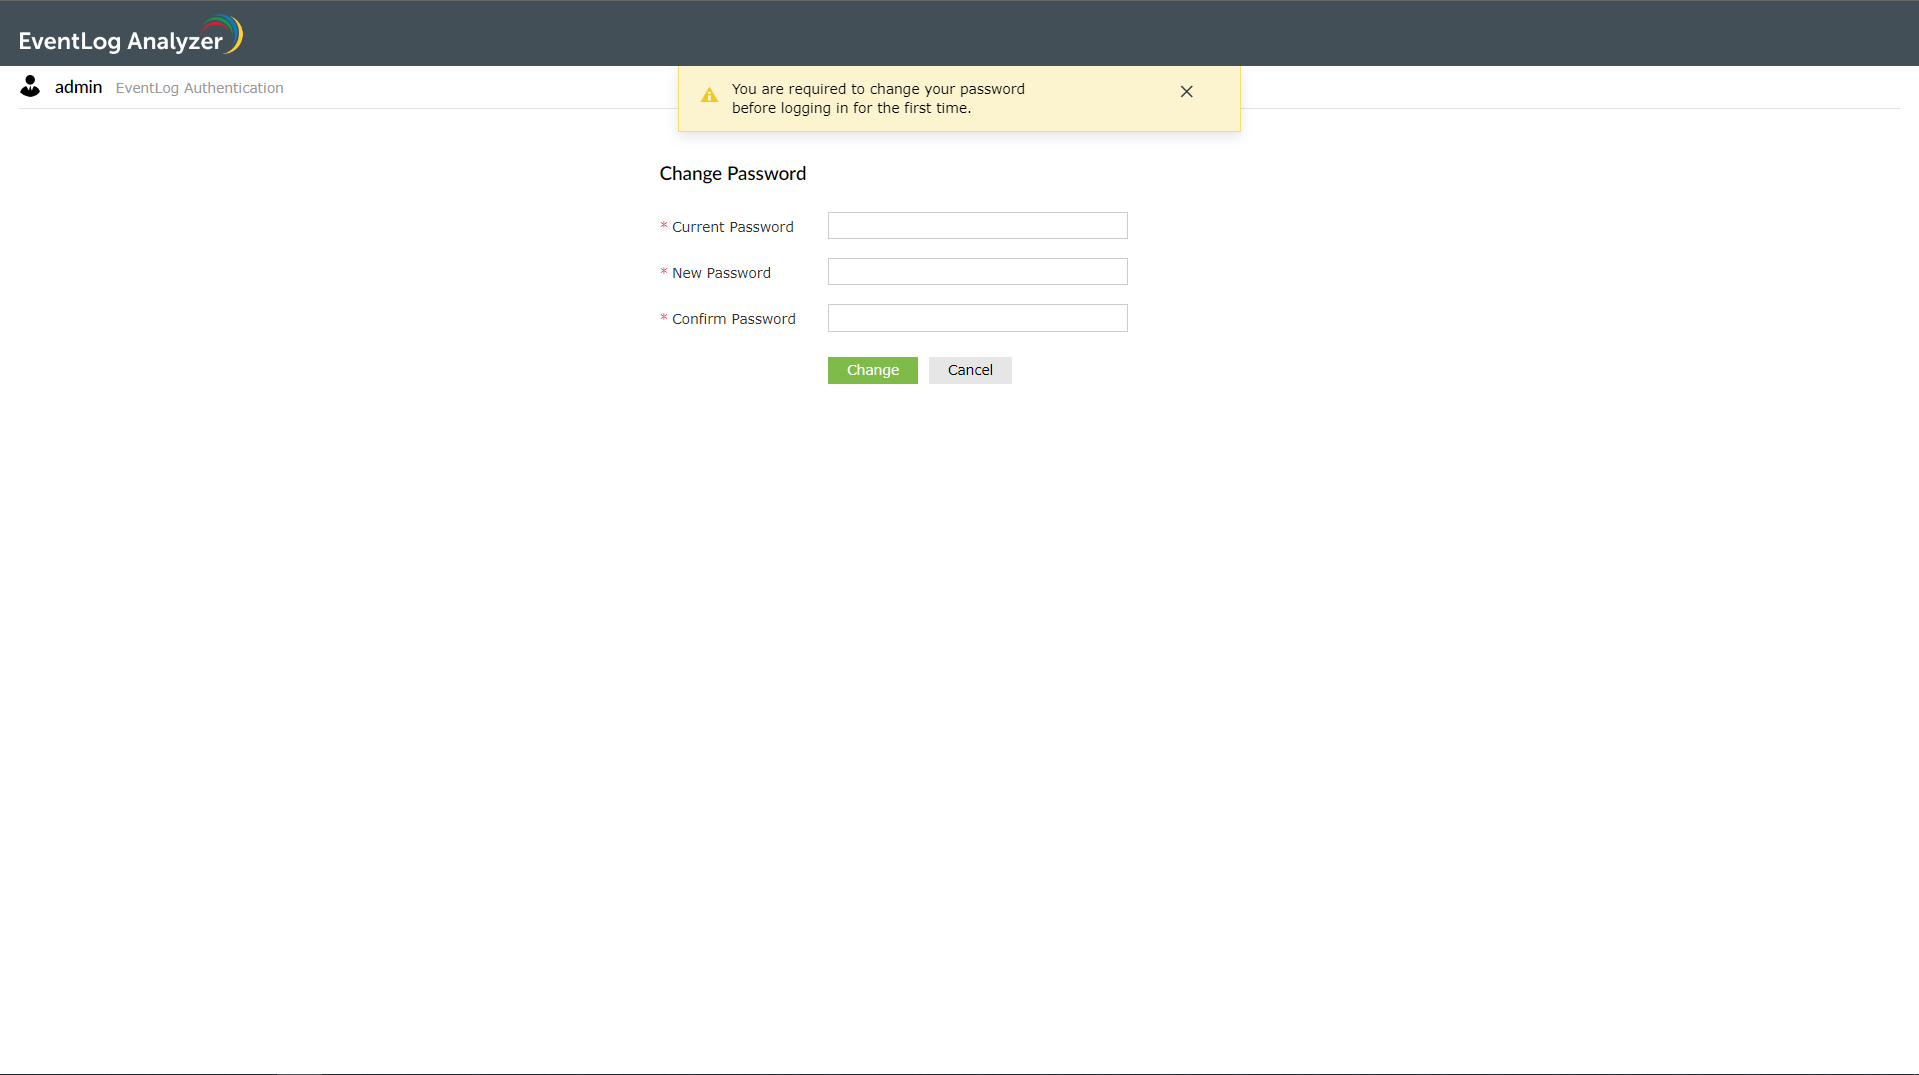
After the password expires, the following page will be displayed to the user on their subsequent login so that they can create a new password.
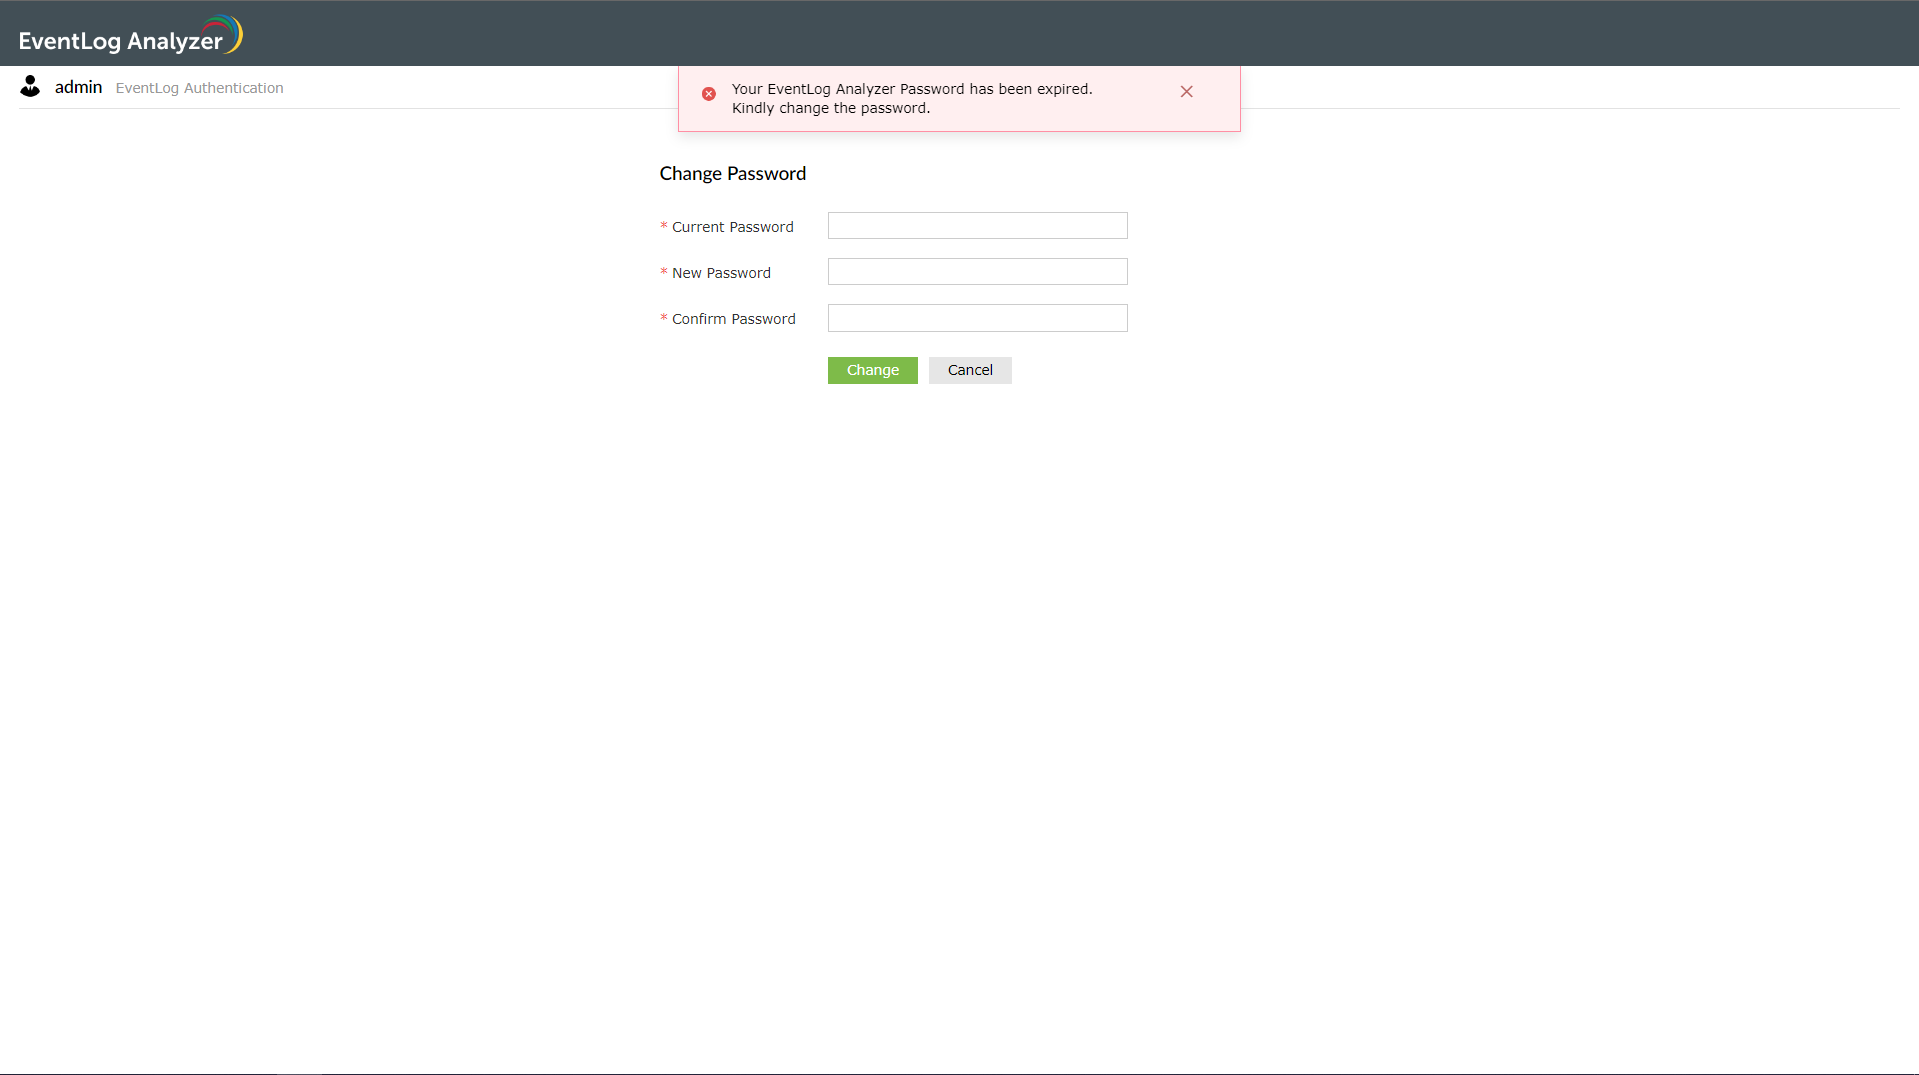
- Enforce password change for new users at their first login - This parameter makes it mandatory for new users to change their password when they login for the first time. If this parameter has been enabled, when new users try to login, they will be redirected to the following page to set up a new password.
- Restrict reuse of password - While changing the password, users cannot reuse the last 'n' passwords they had used previously. For example, if the administrator has configured the value as 3, users will not be able to re-use their last 3 passwords as their new password.
After configuring the parameters, click Save Settings to save the updates.
Two-Factor Authentication
To strengthen logon security, EventLog Analyzer supports two-factor authentication (TFA).
If TFA is enabled, EventLog Analyzer will require its users to authenticate using one of the following authentication mechanisms in addition to Active Directory or RADIUS authentication.
Note: As a preventive measure against lockout, it has been made possible for an administrator to skip two-factor authentication during logon.
Setting up Two-factor Authentication
To enable two-factor configuration,
- Login to EventLog Analyzer as an administrator.
- Move to the Settings tab and click Admin Settings > Logon Settings.
- Switch the Two-factor Authentication toggle button to the Enabled position.
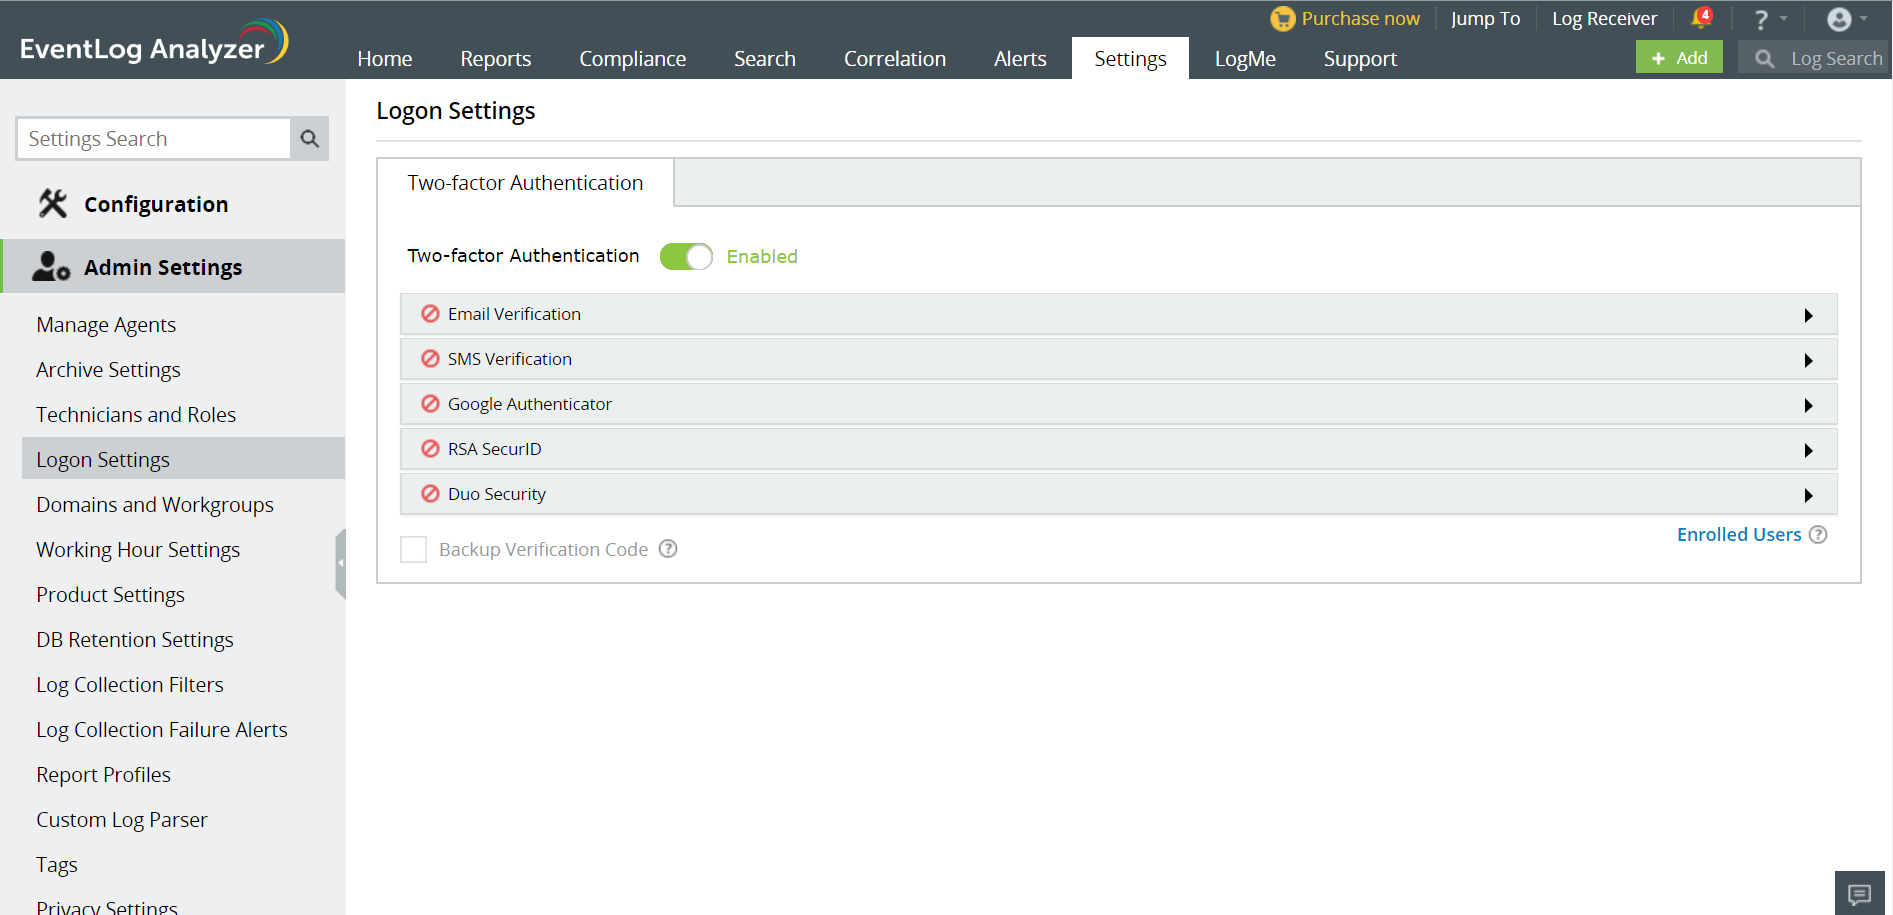
- Click on the authentication mechanism of your choice and enter the necessary details.
Note: If multiple authentication options are enabled, the user will be asked to choose one at the time of logging in.
Email Verification
When email verification is enabled, EventLog Analyzer sends a verification code to the configured email address. That verification code would need to be entered to successfully login.
To configure email verification as the second authentication mechanism,
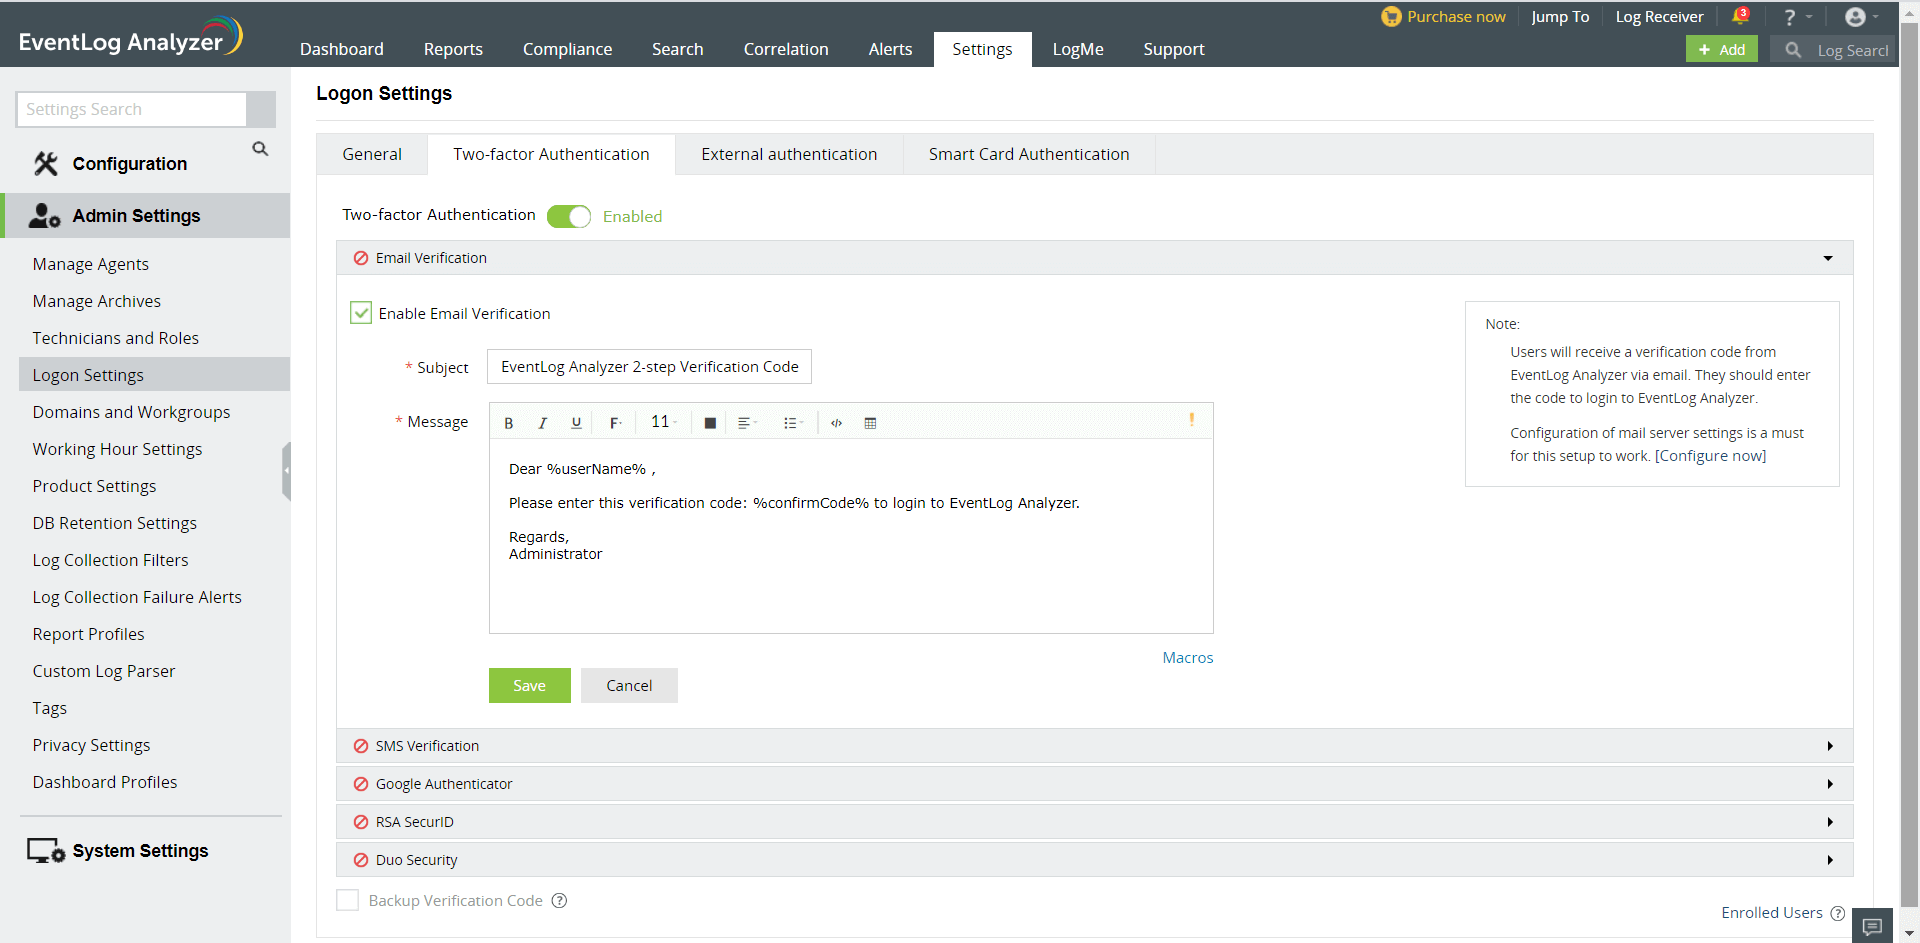
Click the Enable Email Verification check box to enable it.
Enter the subject and body of the email containing the verification code.
Set the priority of the mail according to your requirement.
Click the Macros button at the bottom to include them in the email.
Click Save to save the email verification settings.
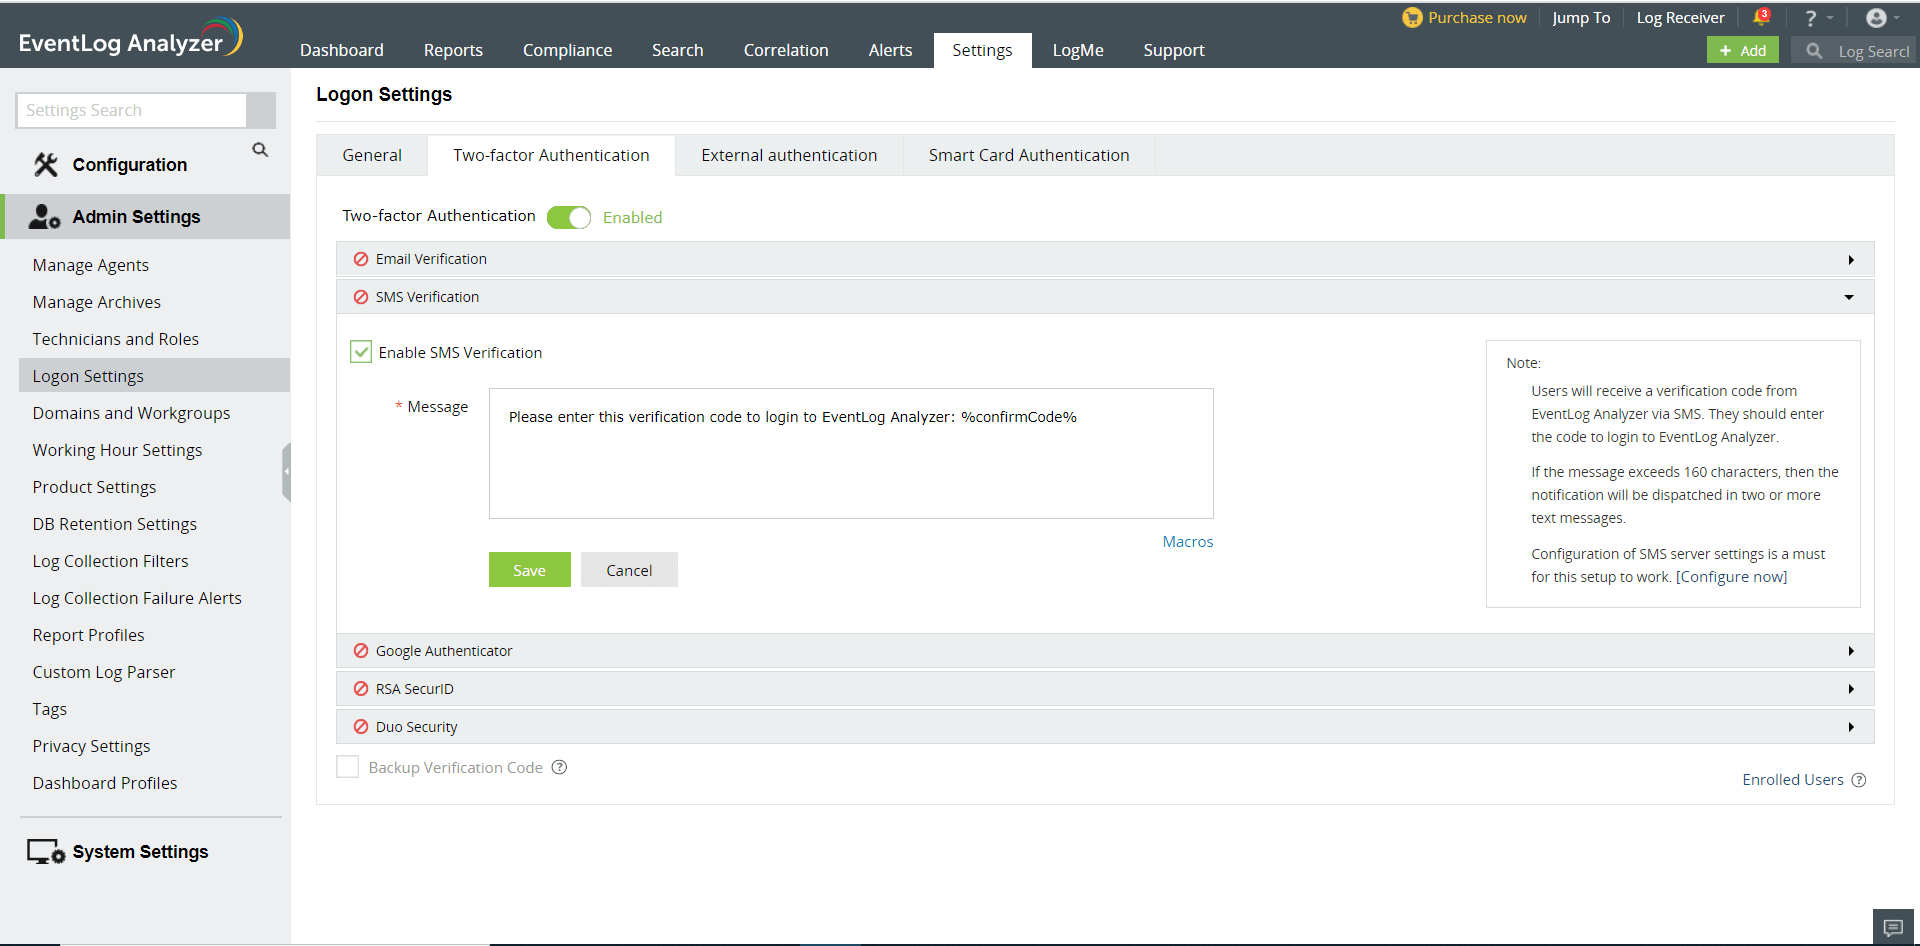
SMS Verification
When SMS verification is enabled, EventLog Analyzer sends a verification code via SMS to the configured mobile number. That verification code would need to be entered to successfully login.
To configure SMS verification as the second authentication mechanism,
Click the Enable SMS Verification check box to enable it.
Enter the body of the message containing the verification code.
Click the Macros button at the bottom to include them in the SMS.
Click Save to save the email verification settings.
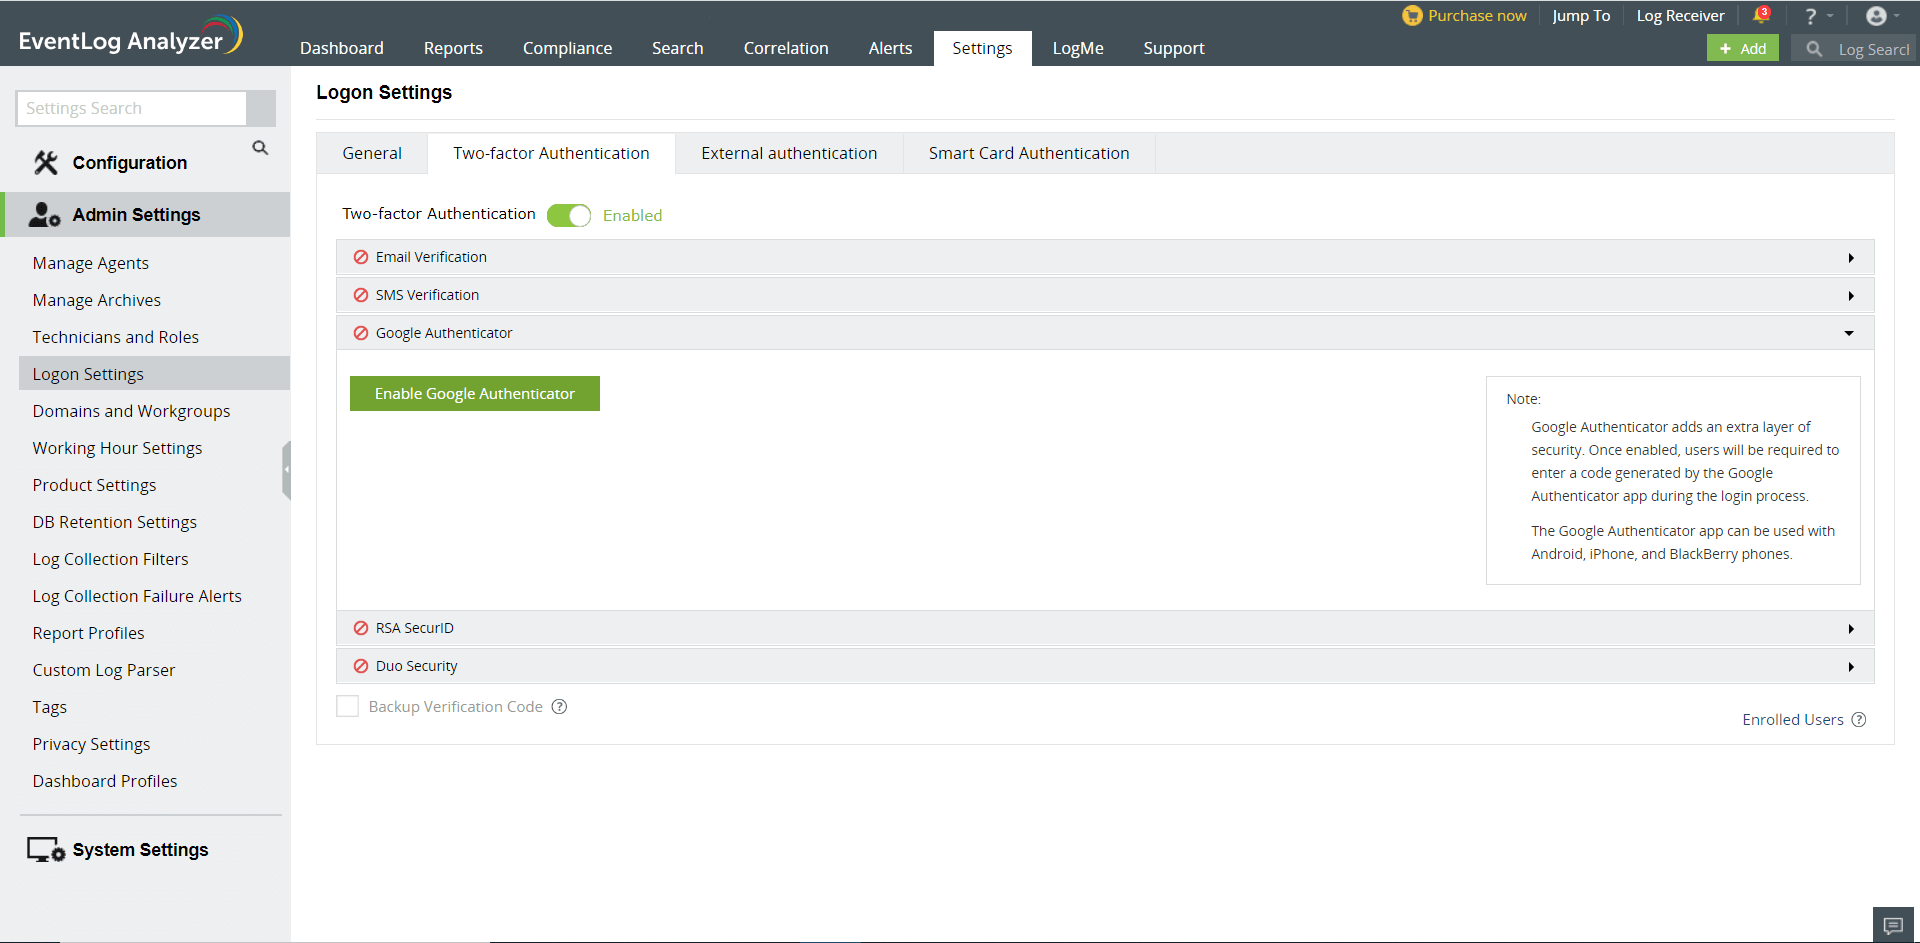
Google Authenticator
When verification via Google Authenticator is enabled, a six-digit security code will be generated in the Google Authenticator application in the configured mobile. This code would need to be entered to successfully login.
To configure Google Authenticator as the second authentication mechanism,
Note: Ensure that the client time and device (mobile) time are syncronized.
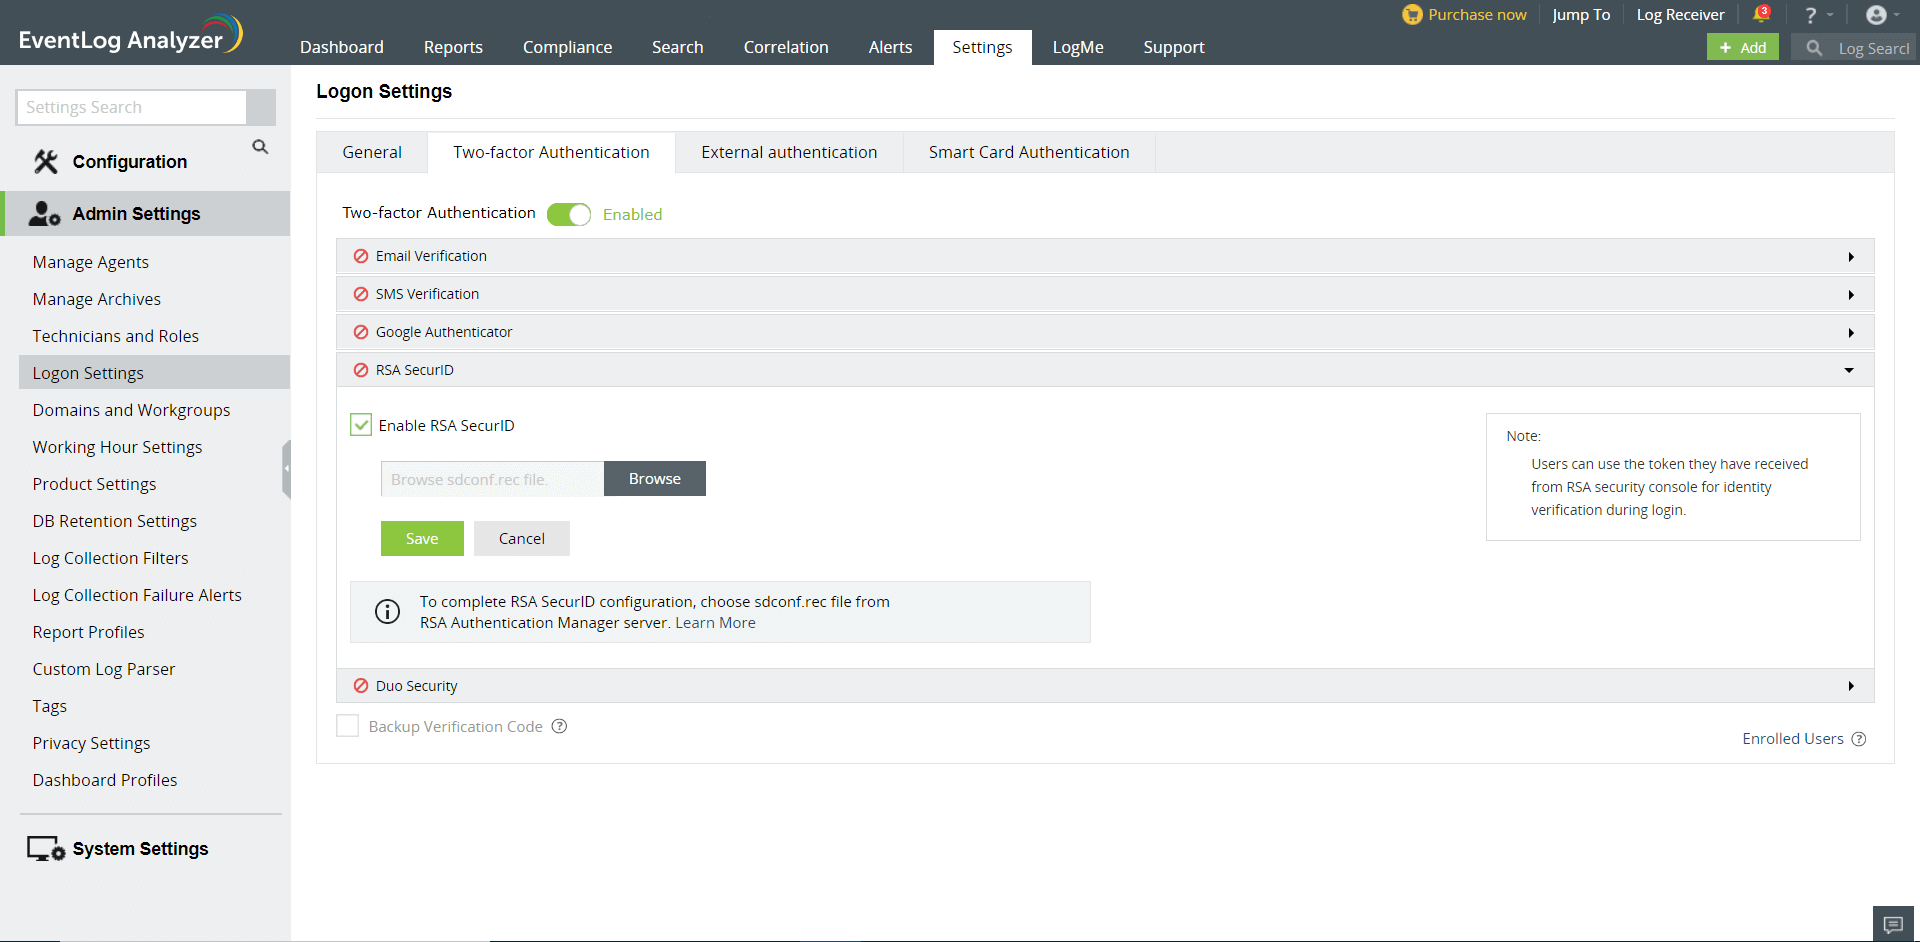
RSA SecurID
When verification via RSA SecurID is enabled, the security codes generated by the RSA SecurID mobile app, hardware tokens, or tokens received via mail or SMS would need to be entered to successfully log in.
To configure RSA SecurID as the second authentication mechanism,
Duo Security
If your organization uses Duo Security for two-factor authentication, it can be integrated with Eventlog Analyzer to secure logins. Users can approve or deny the Eventlog Analyzer login requests using a push notification or by entering the six-digit security code generated by the Duo mobile app. Authentication via Duo Security can be configured in two ways in Eventlog Analyzer: Web v2 SDK and Web v4 SDK.
Web v2 SDK uses a traditional Duo prompt which will be displayed in an iframe in Eventlog Analyzer, whereas Web v4 SDK uses Duo's OIDC-based universal prompt with a redesigned UI that redirects users to Duo for authentication.
Duo Security has phased out Web v2 SDK, so it is recommended to switch to Web v4 SDK, which features the new Universal Prompt.
Prerequisites
- Add the API hostname and admin console (e.g., https://admin-325d33c0.duosecurity.com) as a trusted site or intranet site in the users' machine if they are using older versions of Internet Explorer.
- Please follow these steps in the Duo Admin Panel to migrate from Web v2 SDK, which uses the traditional prompt, to Web v4 SDK, which employs the new Universal Prompt.
Web v4 SDK configuration steps
Note: It is required to have a secure connection to set up the Web v4 SDK authentication. Please make sure that you have enabled HTTPS connection.
- Log in to your Duo Security account (e.g., https://admin-325d33c0.duosecurity.com) or sign up for a new account and log in.
- Go to Applications and click Protect an Application.
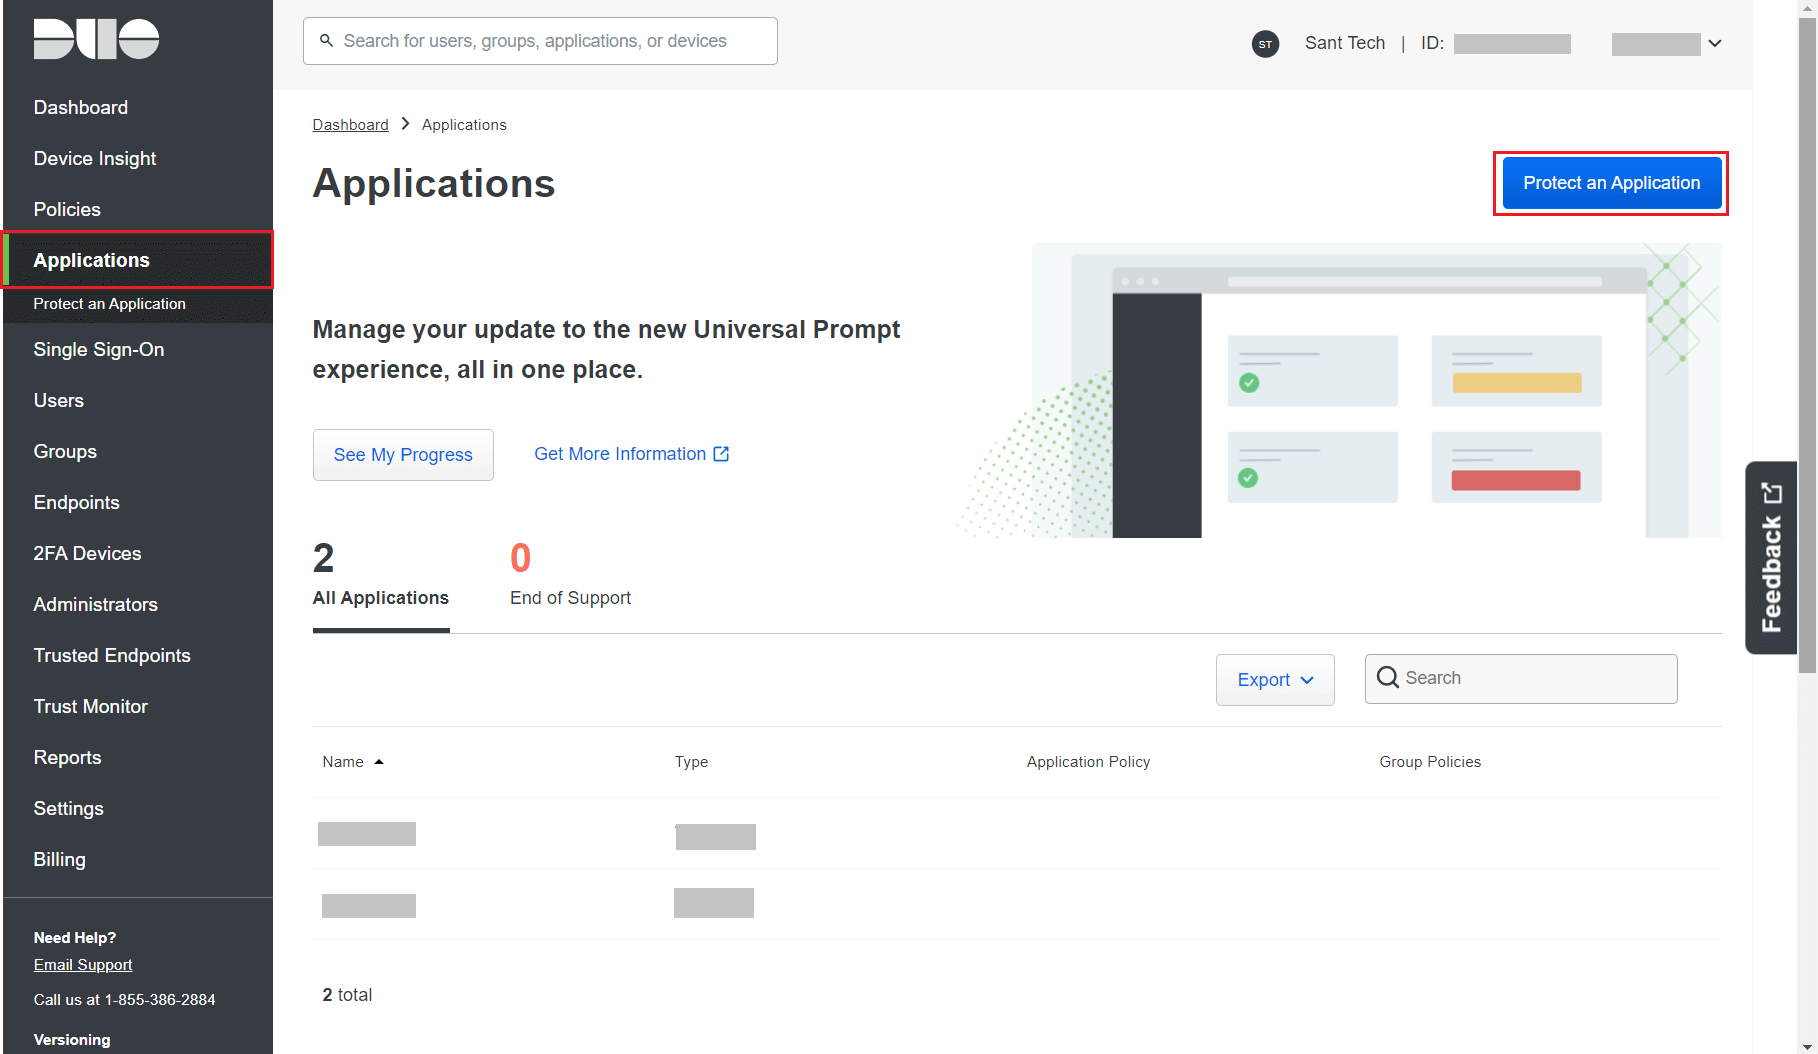
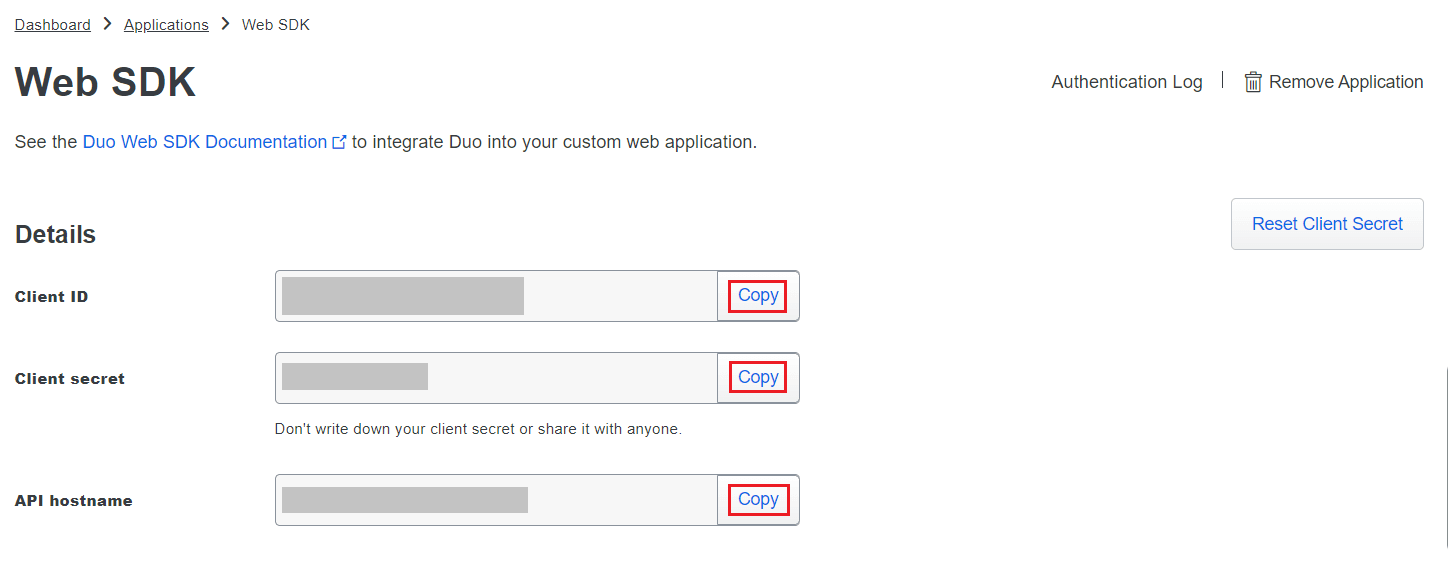
- Search for Web SDK and click Protect.

- Copy the Client ID, Client secret, and API hostname values.
- In Eventlog Analyzer, navigate to Admin > Logon Settings > Two-Factor Authentication > Duo Security.
- Check the Enable Duo Security box and select Web v4 SDK for Integration Type.
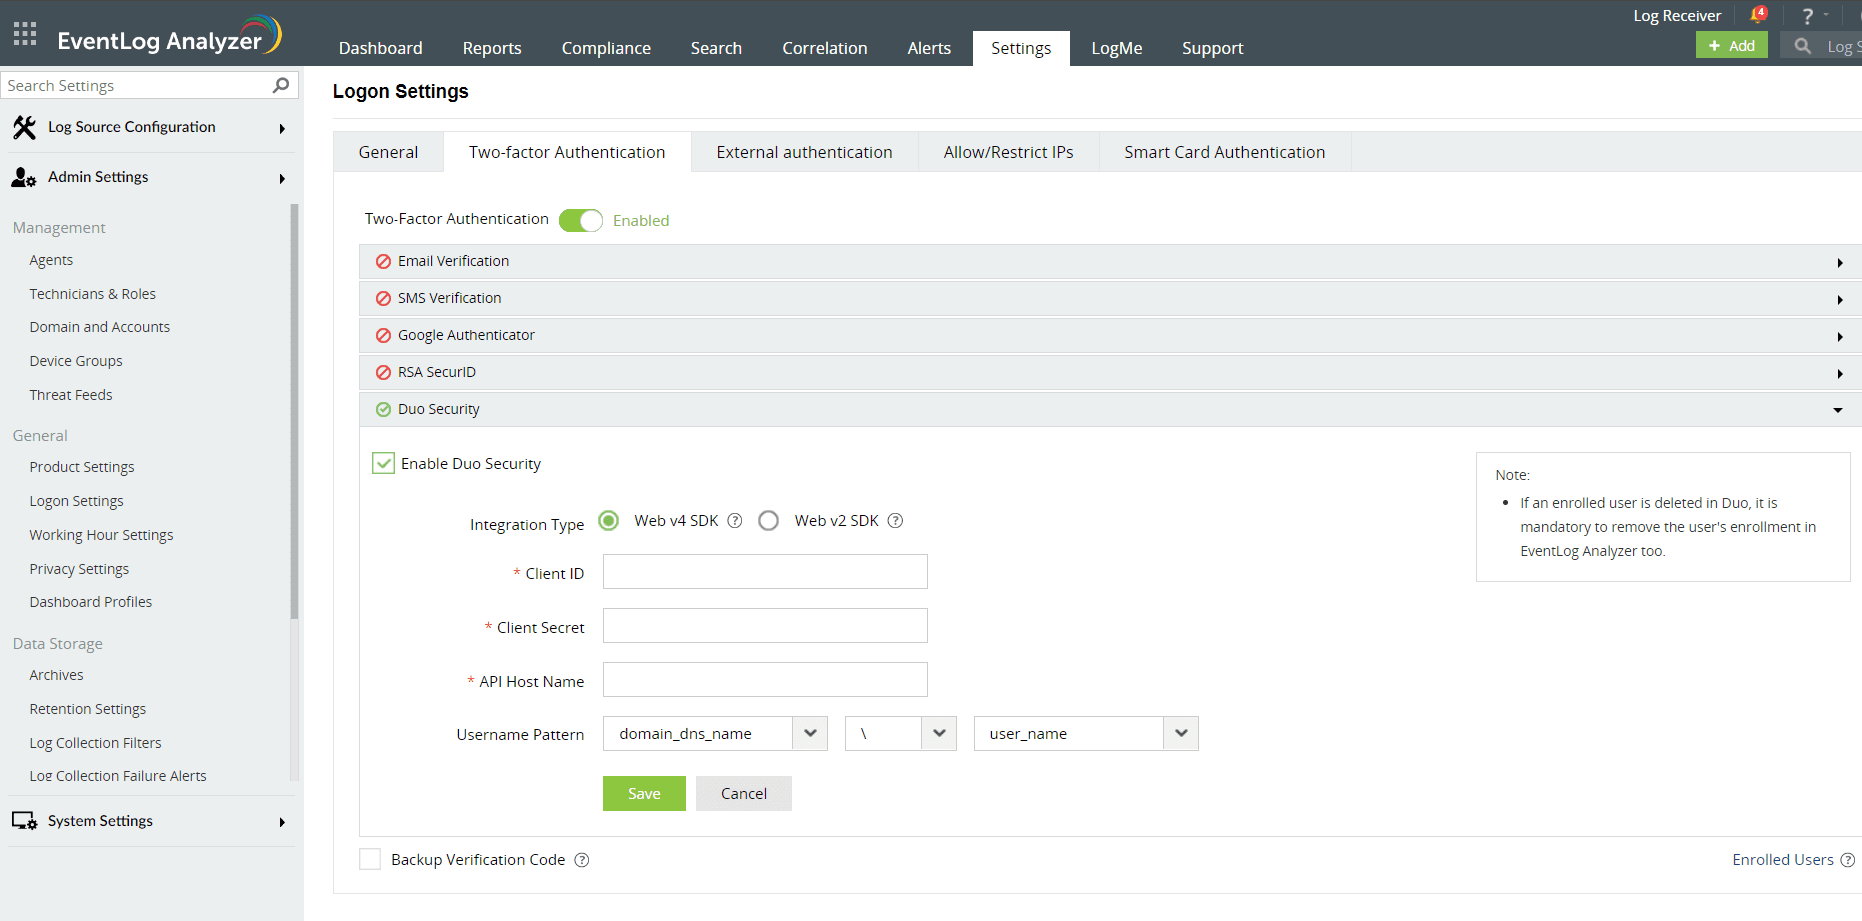
- Paste the Client ID, Client secret, and API hostname obtained from the Duo Admin Panel in the respective fields.
- Enter the same username pattern used in Duo Security in the Username Pattern field.
- Click Save.
Steps to migrate to the new Universal Prompt
- In the Duo Admin Panel, select the Web SDK application, which was previously configured for Eventlog Analyzer, and copy the Integration key, Secret key and API hostname values.
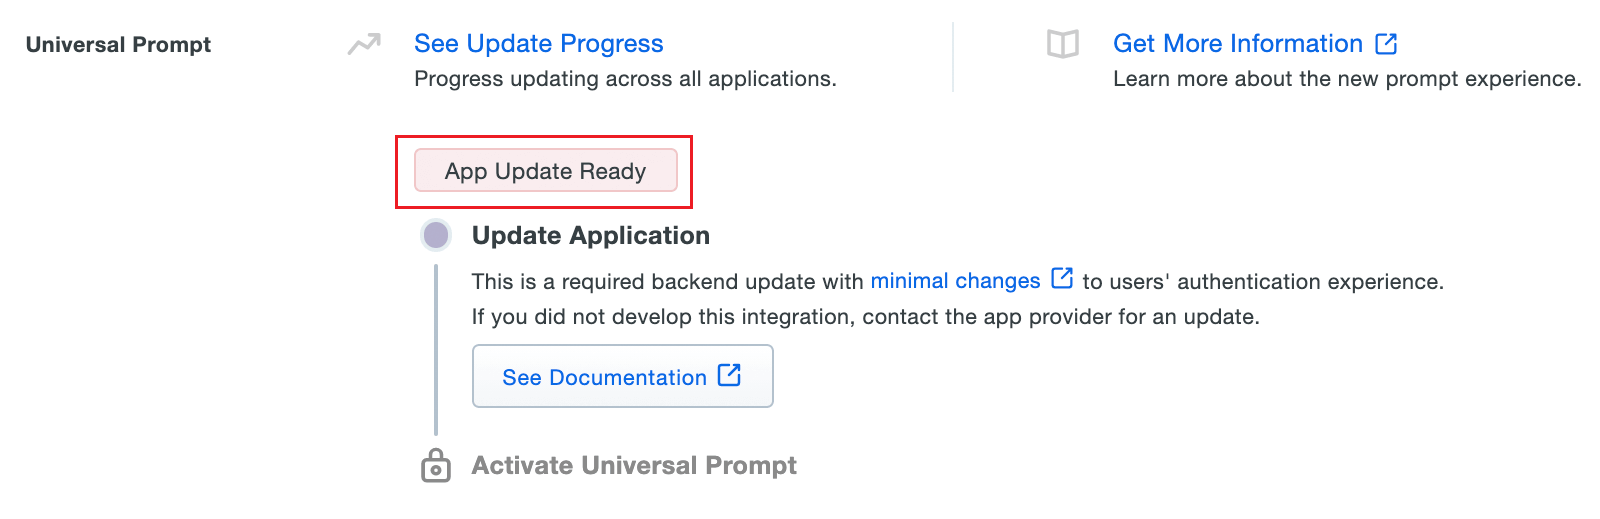
- Scroll down to the Universal Prompt section. The App Update Ready message will be displayed, indicating that Universal Prompt can now be activated for Eventlog Analyzer.
- In Eventlog Analyzer, navigate to Admin > Logon Settings > Two-Factor Authentication > Duo Security.
- Click Web v4 SDK and paste the Integration key, Secret key, and API hostname values in the Client ID, Client Secret, and API Host name fields respectively.
- Once the Web v4 SDK is configured in Eventlog Analyzer and a user authenticates through the frameless Duo v4 SDK, the App Update Ready message in Duo Admin Panel will be updated and the New Prompt Ready message will be displayed.
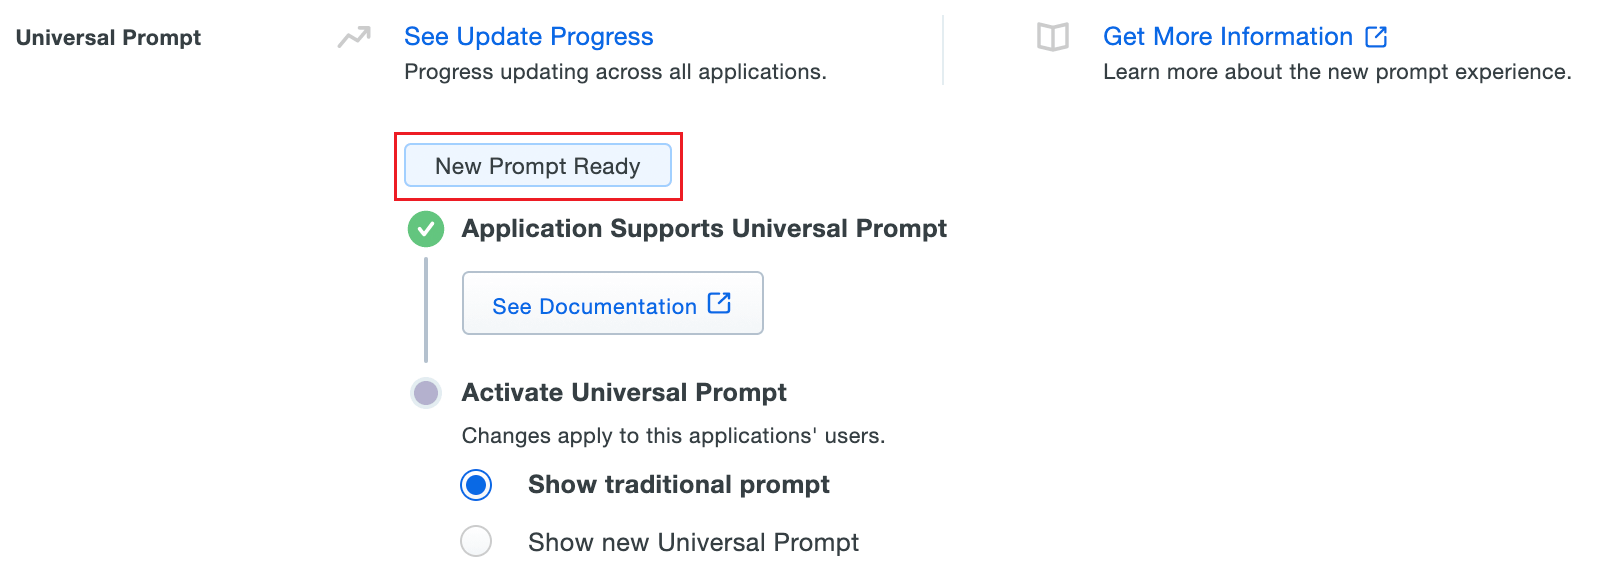
- Select Show new Universal Prompt to activate the universal prompt for Eventlog Analyzer.
Backup Verification Codes
As a backup mechanism against user lockout because of two-factor authentication failure, EventLog Analyzer has backup verification codes. Each user can generate a set of backup verification codes, which will have five, and use one code each time they are unable to login by authenticating using the configured mechanism.
To allow users to login using backup verification codes, enable the Backup Verification Code check box.
To generate backup verification codes, go to Two-factor Authentication in My Account.
Managing Enrolled Users
As an admin, you can view the authentication method users have enrolled for and also remove users’ enrollment for two-factor authentication. To manage enrolled users,
- In the Settings tab, navigate to Admin Settings > Logon Settings.
- Click Enrolled Users at the bottom of the authentication mechanisms list to view the list of users enrolled for two-factor authentication and the authentication method they have chosen.
- To remove a user, select the user and click the delete icon.
Managing Account Two-factor Authentication
To manage the two-factor authentication settings of the logged in account, check Manage Account TFA.
Smart card Authentication
If you have a smart card authentication system enabled in your environment, you can configure EventLog Analyzer to authenticate users through it, bypassing other first-factor authentication methods.
This feature provides an additional authentication option for EventLog Analyzer login by enabling the use of smart cards/PKI/certificates to grant access to the tool. Smart card authentication strengthens the security further because getting access to EventLog Analyzer shall then require the user to possess the smart card and know the personal identification number (PIN) as well.
Steps to configure smart card authentication settings:
- Login to EventLog Analyzer as an administrator.
- SSL port must be enabled for configuring smart card authentication settings. To check your SSL port settings, select the Settings tab and navigate to System Settings > Connection Settings > General Settings. If not enabled already, select the checkbox against Enable SSL [HTTPS], and specify the port number in the field. Click Save.
- In the Settings tab, navigate to Admin Settings > Logon Settings > Smart Card Authentication.
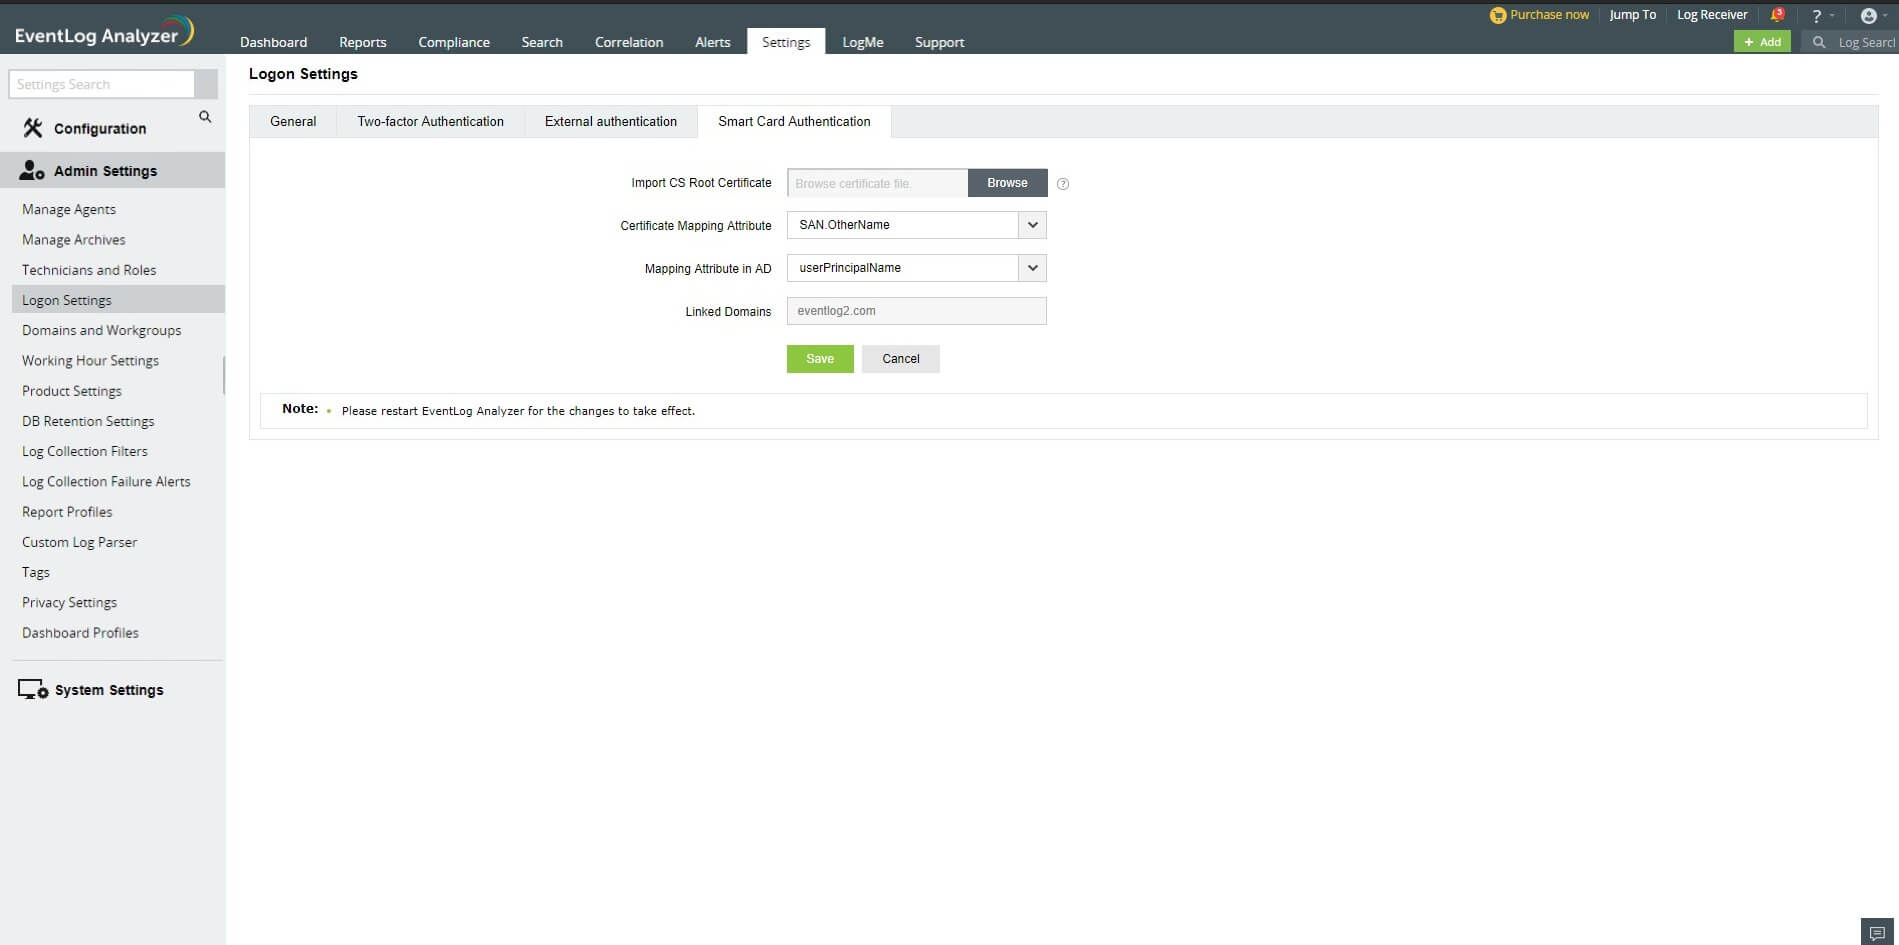
- Click the +Add a New Smartcard button at the top-right corner of the screen.
- In the Import CA Root Certification field, click Browse and import the required Certification Authority root certification file from your computer.
- In the Mapping Attribute in Certificate field, specify the certificate attribute for mapping.
- The user details need to be mapped between the smart card certificate and the EventLog Analyzer database. This denotes that the attribute in the smart card certificate that uniquely identifies the user should match with the corresponding value in the EventLog Analyzer user database. This mapping involves specifying which attribute in the certificate should be taken up for comparison with which attribute in EventLog Analyzer user store.
- EventLog Analyzer provides the flexibility to specify any attribute of the smart card certificate that you feel uniquely identifies the user in your environment. You may choose any attribute among SAN.OtherName, SAN.RFC822Name, SAN.DirName, SAN.DNSName, SAN.URI, email, distinguishedName, and CommonName. In case if any other attribute is used to uniquely identify the user in your environment, contact EventLog Analyzer support to add that attribute.
- In the Mapping Attribute in AD field, specify the LDAP attribute that should be matched with the specified certificate attribute. Here you need to specify the particular LDAP attribute that uniquely identifies the user in EventLog Analyzer user store, e.g., sAMAccountName. During authentication, EventLog Analyzer reads the value corresponding to the certificate attribute that you specified in Mapping Attribute in Certificate and compares it with the specified LDAP attribute in Mapping Attribute in AD.
- In the Linked Domains field, select the appropriate domains from the drop-down menu.
- Click Save.
Note: Only internal CA certificates are supported. Third-party certificates are not supported.
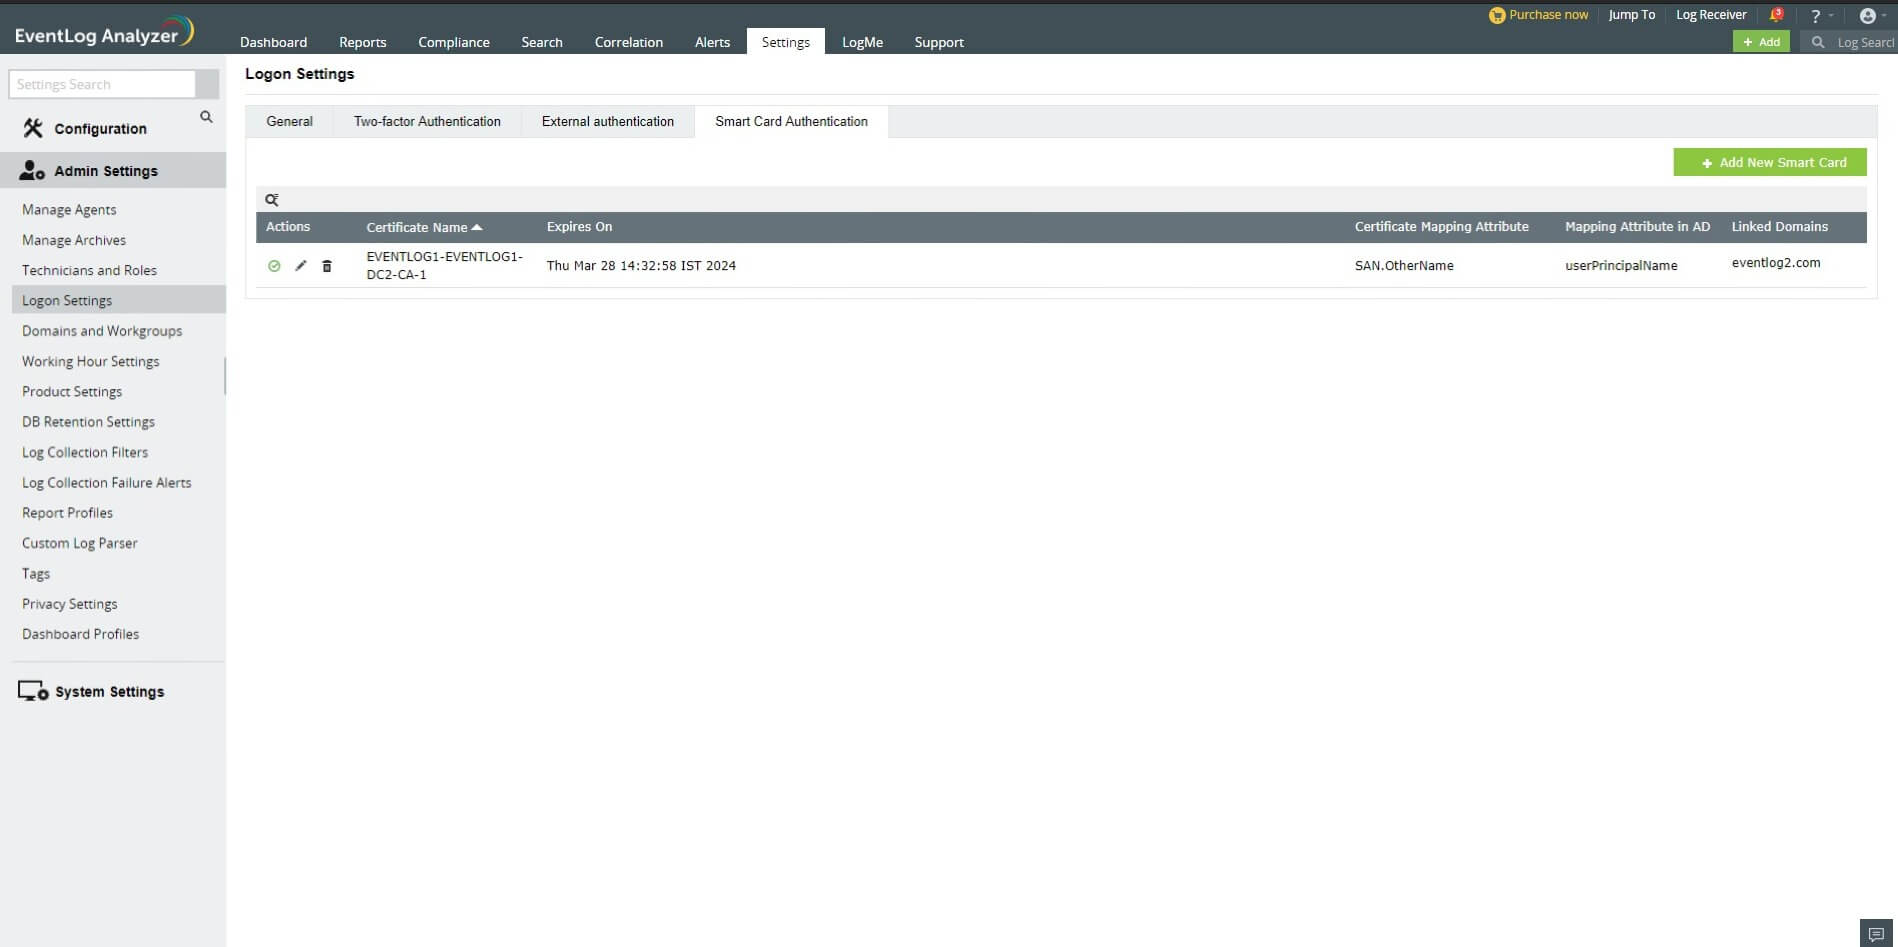
After you have added a smart card for authentication, you can perform any of the following functions:
Edit a configured smart card
To edit a configured smart card, follow the steps given below:
- In the Settings tab, navigate to Admin Settings > Logon Settings > Smart Card Authentication.
- Click the Edit icon located in the Action column of the particular smart card.
- Modify the settings you wish to change.
- Click Save.
Enable/Disable a smart card
To enable/disable a configured smart card, follow the steps given below:
- In the Settings tab, navigate to Admin Settings > Logon Settings > Smart Card Authentication.
- To enable/disable a configured smart card, click on the Enable/Disable icon located in the Action column of the particular smart card.
Delete a configured smart card
To delete a configured smart card, follow the steps given below:
- In the Settings tab, navigate to Admin Settings > Logon Settings > Smart Card Authentication.
- Click the corresponding Delete icon corresponding to the smart card which you wish to delete.
- Click Yes to confirm the deletion.
Enabling external authentication
Technicians can logon to EventLog Analyzer with their Active Directory and RADIUS server credentials.
Steps to enable Active Directory authentication in EventLog Analyzer
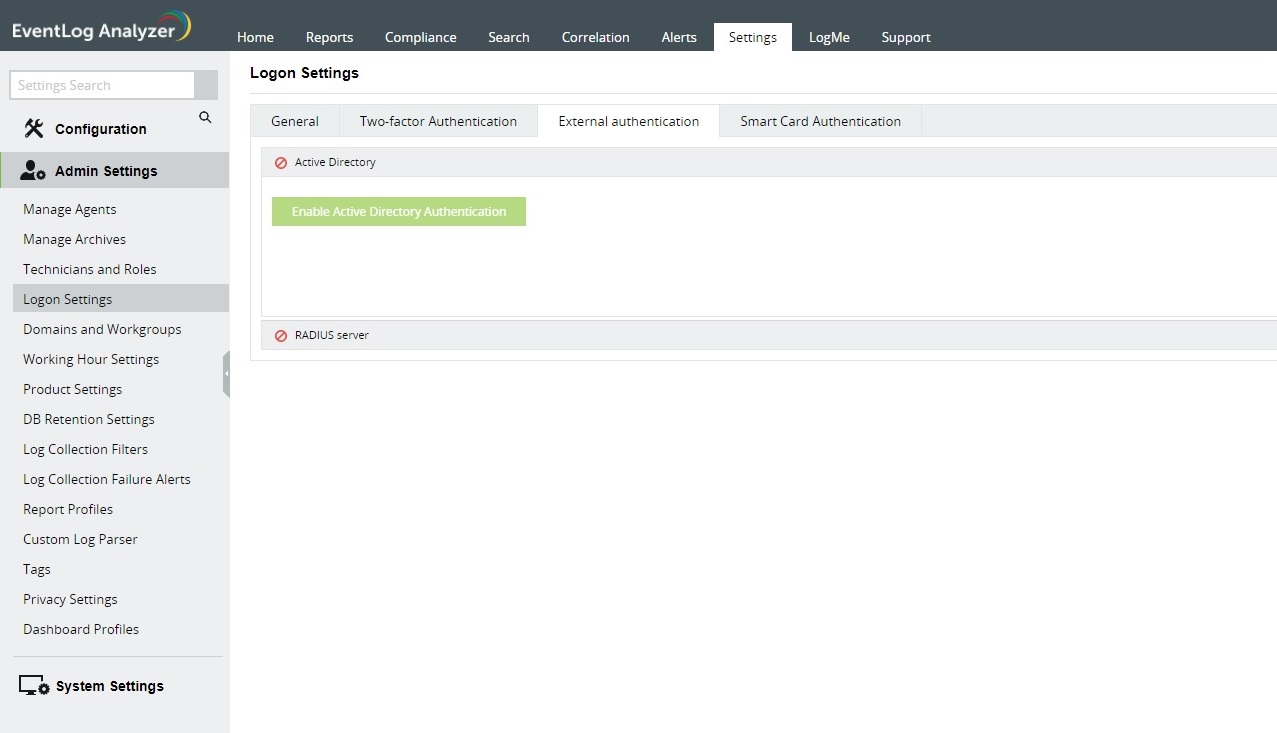
- Navigate to Settings → Admin Settings → Logon Settings.
- Click on the External Authentication tab.
- Under the Active Directory section, you will see the Enable Active Directory Authentication button.
- Click on the button to enable all the users imported from Active Directory to logon to EventLog Analyzer using their domain credentials.
Steps to enable RADIUS server authentication in EventLog Analyzer
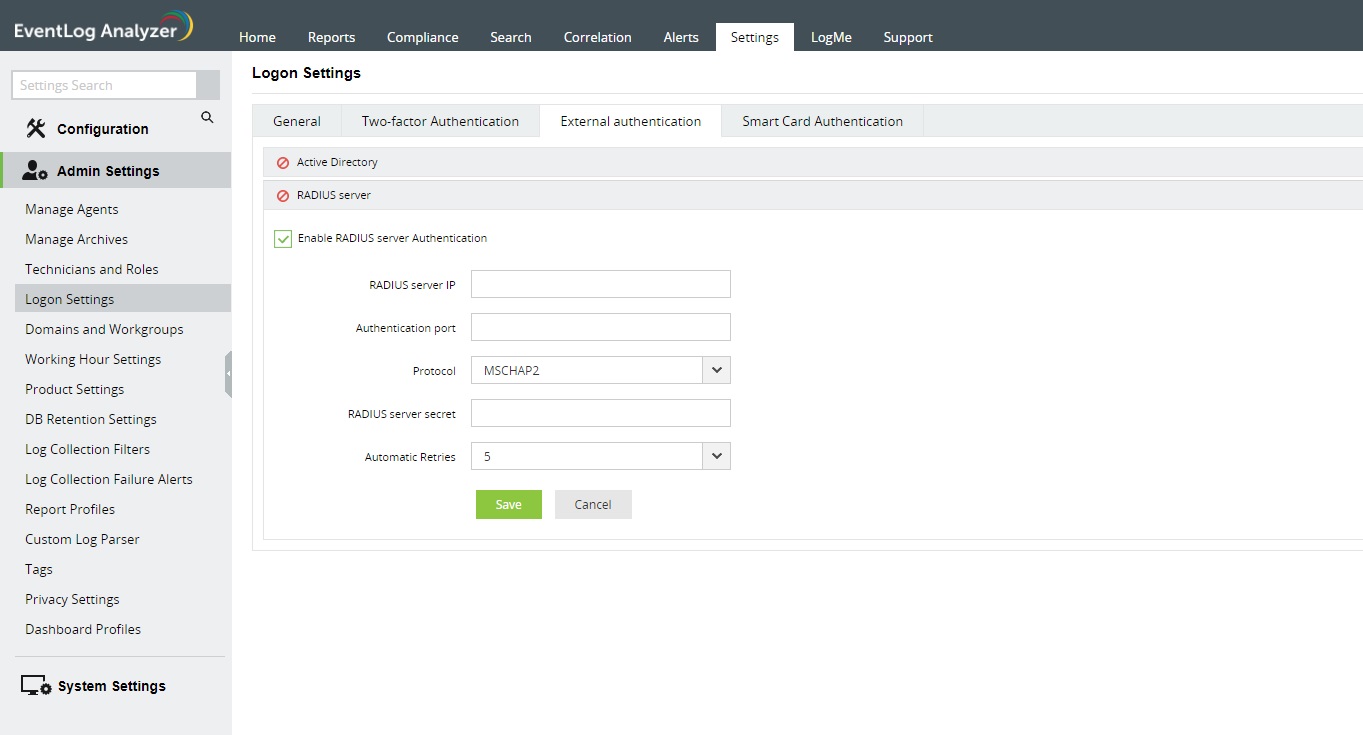
- Navigate to Settings → Admin Settings → Logon Settings.
- Click on the External Authentication tab.
- Click on the RADIUS server section.
- Select the Enable RADIUS server Authentication check box.
- Enter the RADIUS server IP and the Authentication port number.
- Choose the authentication protocol from the Protocol drop-down menu.
- Enter the RADIUS shared secret password in the RADIUS server secret field.
- Specify the maximum number of authentication attempts that can be made from the Automatic Retries drop-down menu.
- Click on Save to enable the users to logon to EventLog Analyzer by authenticating with the configured RADIUS server.
Allow/restrict IP addresses
One way to secure EventLog Analyzer is by allowing or restricting inbound connections to specific IPs or IP ranges. This adds an additional layer of security by allowing connection from only trusted sources and blocking unwanted and malicious traffic.
The IP restriction can be applied for the entire product, specific URLs within the product, or APIs.
Controlling access to the product
- Navigate to Settings → Admin Settings → Logon Settings.
- Click the Allow/Restrict IPs tab.
- Tick the Enable Allow/Restrict IPs Checkbox to enable IP restriction.
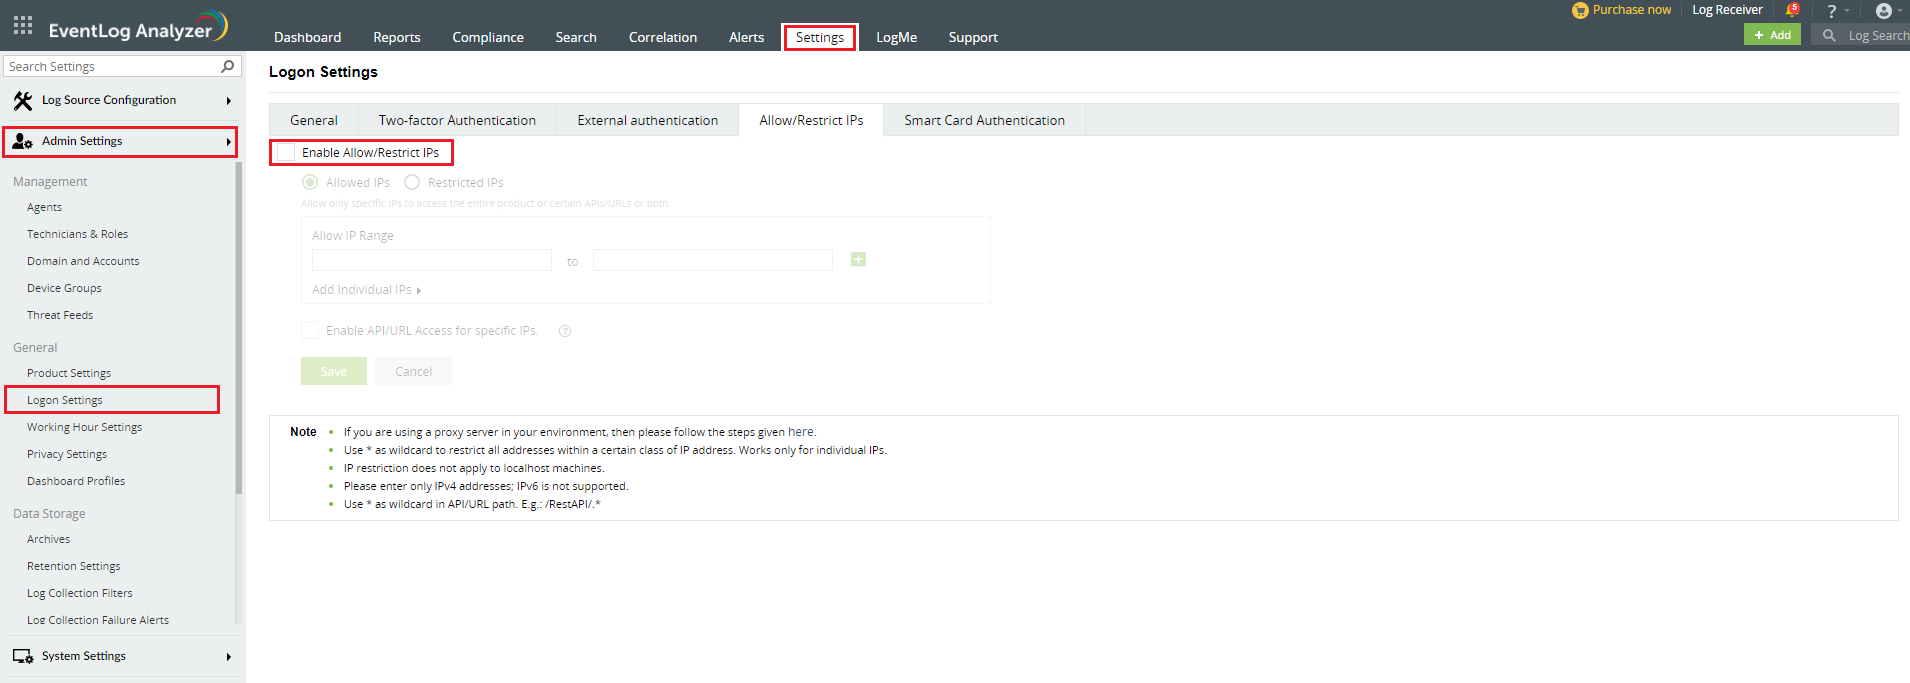
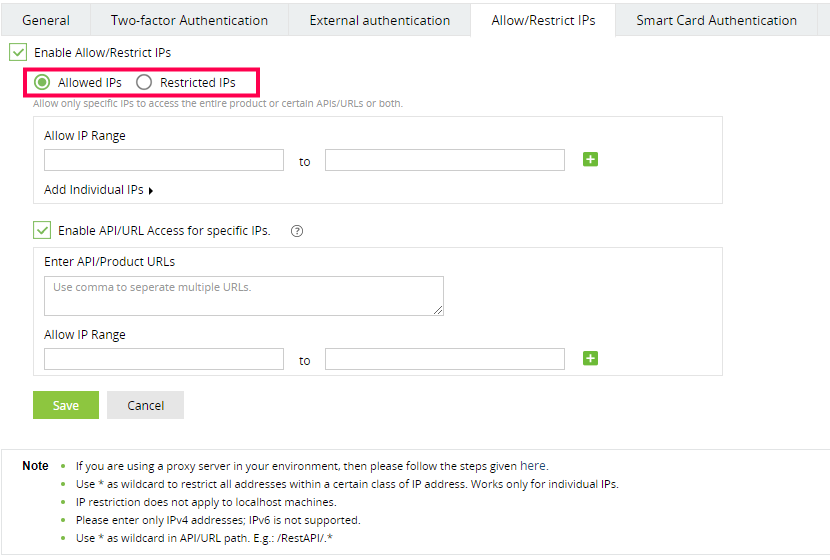
- In the textbox that appears, select either Allowed IPs or Restricted IPs option.
- Enter the IP addresses as per your requirement.
- Adding multiple IP ranges: Click [
 ] icon if you want to allow or restrict access to multiple IP address ranges.
- Allow/restrict individual IPs: Click Add Individual IPs if you want to allow or restrict access to individual IP addresses. You can add multiple individual IP addresses by separating the values using comma.
- Refer to the Appendix for more information.
- Finally, click Save to save the settings.
- If you have changed the 3rd party reverse proxy settings of EventLog Analyzer for which you are enabling IP-based restriction, then:
- Add the following line to the server.xml file (default location: <InstallationDirectory>/conf/server.xml).
- <Valve className="org.apache.catalina.valves.RemoteIpValve"
internalProxies="192\.168\.0\.10|192\.168\.0\.11"
trustedProxies="172\.168\.0\.10|176\.168\.0\.11" />
- Edit the values of internalProxies and trustedProxies as per your environment.
- Enter IP address while specifying the values for internalProxies and trustedProxies, and use the vertical bar (|) character to enter multiple values.
- Restart for the changes to take effect.
- Repeat these steps for the integrated components as well.
Controlling access to APIs and product URLs
- Navigate to Settings → Admin Settings → Logon Settings.
- Click the Allow/Restrict IPs tab.
- Tick the Enable Allow/Restrict IPs Checkbox to enable IP restriction.
- In the textbox that appears, check the Enable API/URL Access for Selected IPs box.
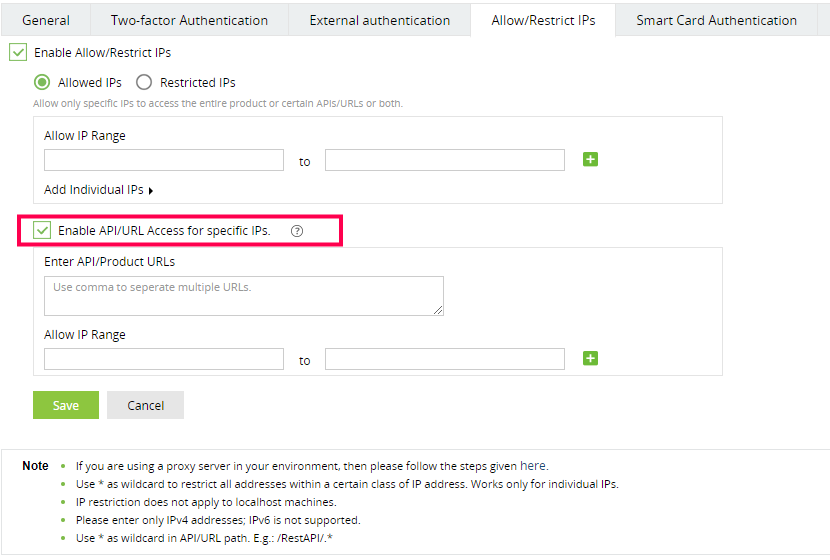
- Enter the API/Product URLs in the box provided.
- Sample URL paths: /Admin.do, /Configuration.do, /Dashboard.do
Sample API paths: /RestAPI/WC/Integration, /RestAPI/WC/LogonSettings
Note:
- Use * as a wildcard character to restrict access to a broader range of APIs or URLs. For example, use /RestAPI/WC/* to restrict all API calls that start with /RestAPI/WC/.
- The API/URL path should start with /. For example, /Admin.do and /RestAPI/WC/.
- Enter only the path of the API or URL. For example, if the entire product URL is https:testserver:8400/Admin.do, then enter only /Admin.do.
- Only alphanumeric characters (A-Z, a-z, 0-9) and the following special characters are allowed: period (.), forward slash (/), and asterisk (*).
- Enter the IP addresses as per your requirement. Click [] icon if you want to allow access to multiple IP address ranges.
- Finally, click Save to save the settings.
- If any changes are made to 3rd party reverse proxy for EventLog Analyzer, or any of its integrated components, then:
- Add the following line to the server.xml file (default location: <InstallationDirectory>/conf/server.xml).
- <Valve className="org.apache.catalina.valves.RemoteIpValve"
internalProxies="192\.168\.0\.10|192\.168\.0\.11"
trustedProxies="172\.168\.0\.10|176\.168\.0\.11" />
- Edit the values of internalProxies and trustedProxies as per your environment.
- Enter IP address while specifying the values for internalProxies and trustedProxies, and use the vertical bar (|) character to enter multiple values.
- Restart EventLog Analyzer for the changes to take effect.
Note:
- The purpose of configuring InternalProxies and TrustedProxies is to determine which IP addresses are regarded as internal or trusted. By configuring these settings, organizations can improve their network security by controlling the access and use of IP addresses within their network.
- InternalProxies are IP addresses that are trusted and from within the organization network. These IP addresses are typically used by internal services, such as printers and servers.
- TrustedProxies are IP addresses that are external to the network but still maintain a high level of trust and reliability. These IP addresses are typically associated with external services like websites and databases.
Managing IP restriction
You can also make the following changes to this setting:
- Disable/enable IP-based restriction: Use the Checkbox under the Allow/Restrict IPs to enable or disable IP-based restriction.
- Edit IP-based restriction settings: Use the Allowed/Restricted IP Range textbox to add, delete, or edit the IP ranges and individual IP addresses.
Appendix
- Use * as wildcard character: Individual IP addresses can include wildcard characters, so that all addresses within a certain class of address will be restricted. For example, denying access to address 192.168.2.* denies access to all addresses for that subnet.
- You can also enter hostname instead of IP addresses.
- You can allow or restrict only IPv4 addresses. IPv6 is not supported.
- The IP addresses corresponding to the following servers cannot be restricted in EventLog Analyzer.
- Remote Integrated Child/Parent Components server
- Admin server
- Managed server
- The implementation of IP restriction for forward proxy is not supported.
- After initially configuring IP Restriction or Reverse Proxy in the parent product, you need to manually restart EventLog Analyzer.
- If EventLog Analyzer is installed remotely and the Reverse Proxy is configured in the parent product, add the parent product server's IP as an internal proxy in EventLog Analyzer. Following this, manually restart EventLog Analyzer.
 Click here to expand