Importing data from Elasticsearch
Analytics Plus enables data import from Elasticsearch, allowing you to create visualizations that reveal trends and generate valuable insights. Additionally, you can schedule imports and cross-blend data from other data sources for comprehensive analysis.
- Import data from Elasticsearch
- Manage data import configuration
- Logs
- Import rollback
- Resolve synchronization failure
- Data blending
Import data
Manage data import configuration
Logs
Audit history
Analytics Plus provides a detailed record of all actions performed with respect to data synchronization from various sources. The history captures the type of action performed along with the timestamp and information about the administrator who performed it.
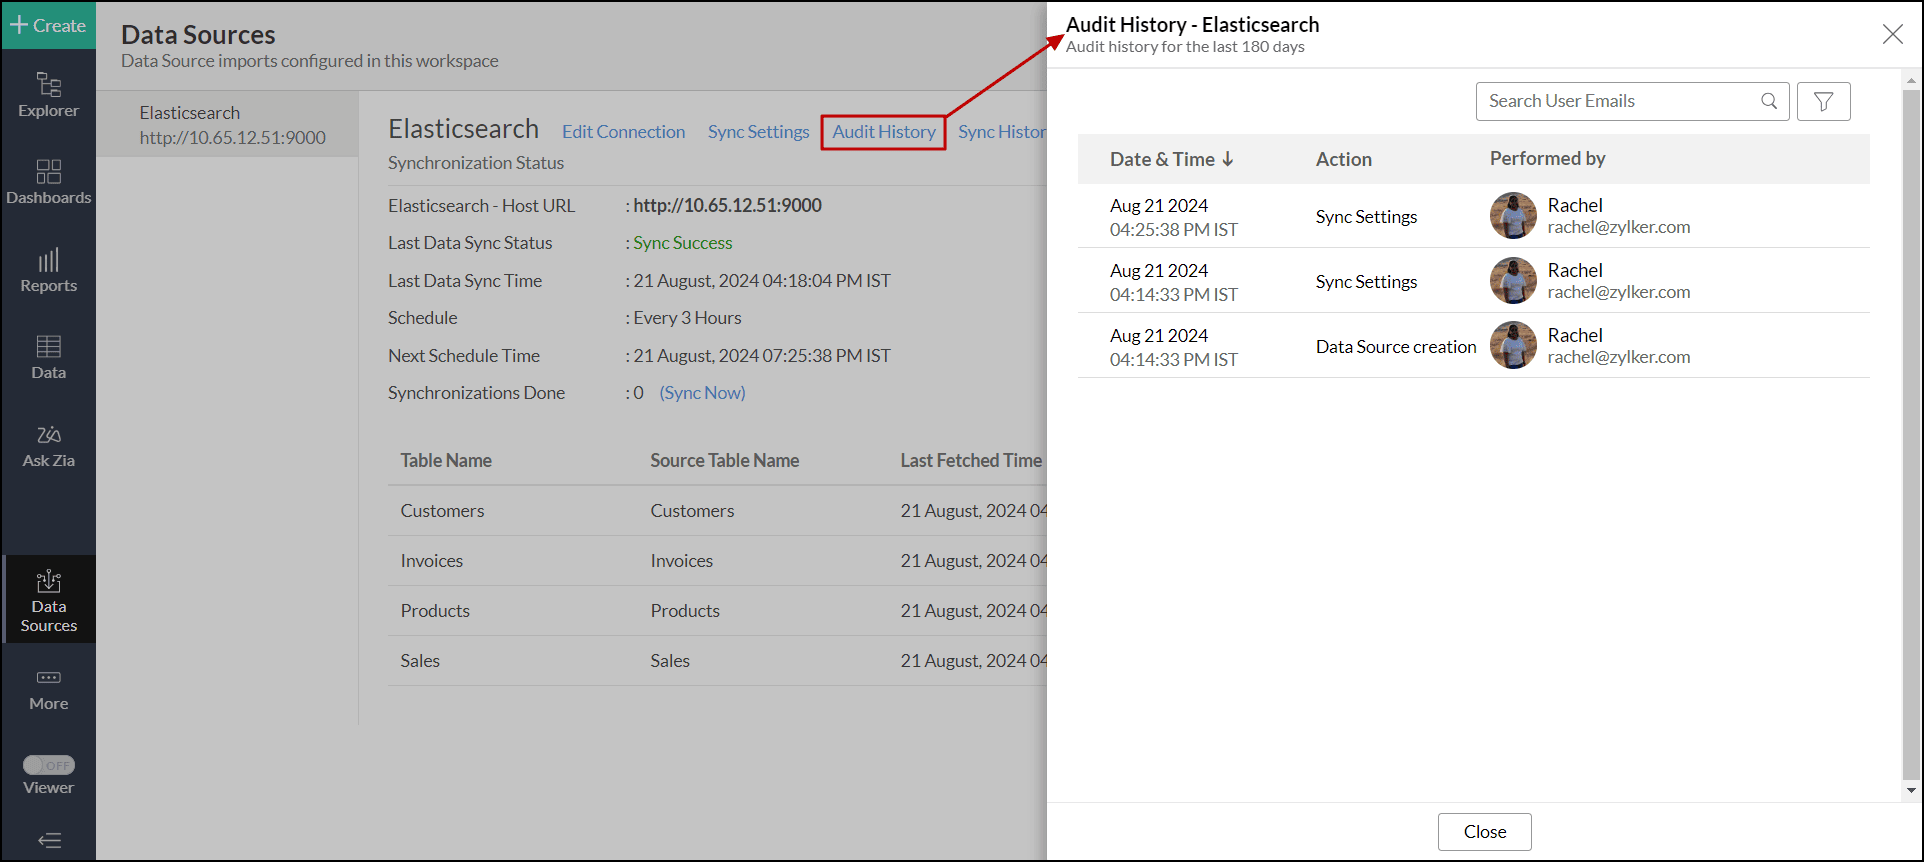
The following are the user and system actions that are logged in Analytics Plus.
| Type | Action | Description |
| User Action | Data Source Creation | Provides the details of the admin who configured the connection. |
| Table Creation | Displays the details of new tables added to the workspace. | |
| Remove Table from Data source | Provides details of the tables that are deleted. | |
| Edit Setup | Provides the details of configuration changes like re-authentication. | |
| Import Settings | Displays the details of changes made to the data fetch settings. | |
| Sync Settings | Shows the details of any changes made to the data synchronization settings. | |
| Table-level Sync now | Displays the details of the records imported when the Sync Now option is used. | |
| System Activities | Schedule Import | Displays the details of data import at scheduled intervals. |
Sync history
Analytics Plus' sync history delivers a comprehensive log of data synchronization activities with color-coded indicators, allowing administrators to track the status of each sync. Successful data syncs are indicated in green, signaling that the data sync is completed without any issues. Failed data syncs are marked in red with the reasons for failure along with the necessary action to be taken.

Import rollback
Import rollback allows users with administrator privileges to revert datasets to a previously stable configuration by undoing any changes made during recent sync cycles. This feature helps correct errors in the data without interrupting operations and reduces the risk of data loss. It is useful in collaborative environments where multiple users access the data and make changes.
Note:
- Data can be reverted to its previous state within 4 hours of the import.
- Deleted columns will not be reverted during the import rollback.
- Any actions, such as adding a new column, creating formulas, formatting columns, and having lookups defined, will be preserved during the import rollback.
Follow the below steps to revert the data import to the previous version,
- Open the data table, which needs to be reverted.
Click Import Data > Last Import Details.
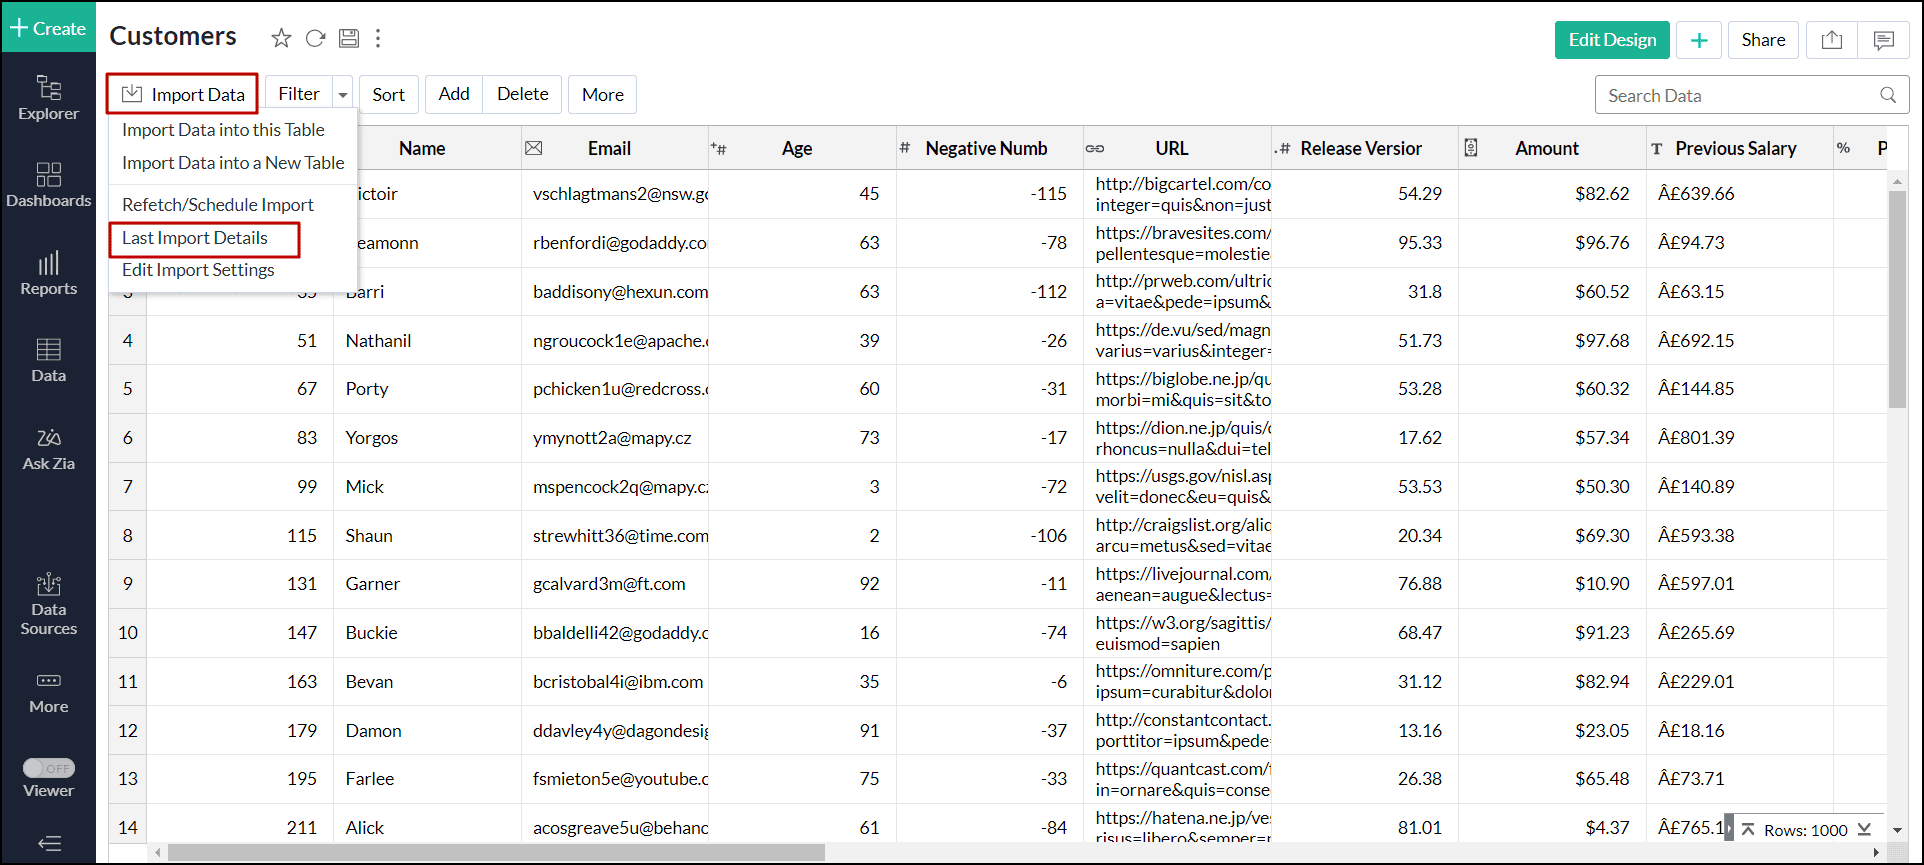
Click Rollback to revert to the previous instance.
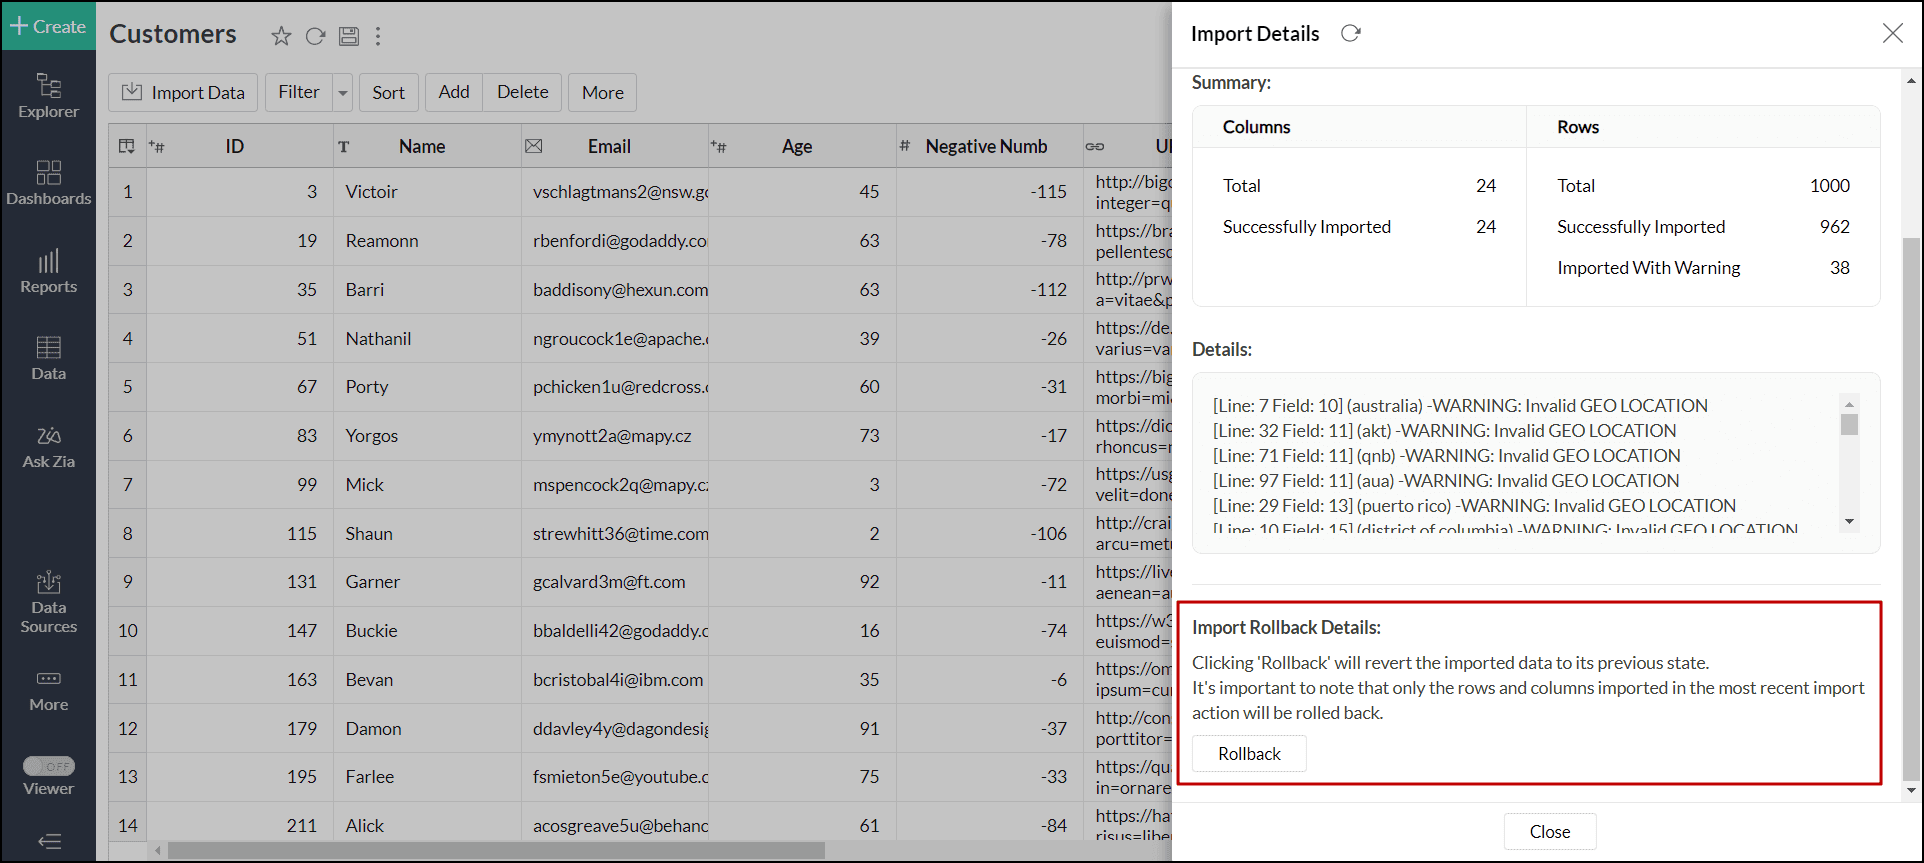
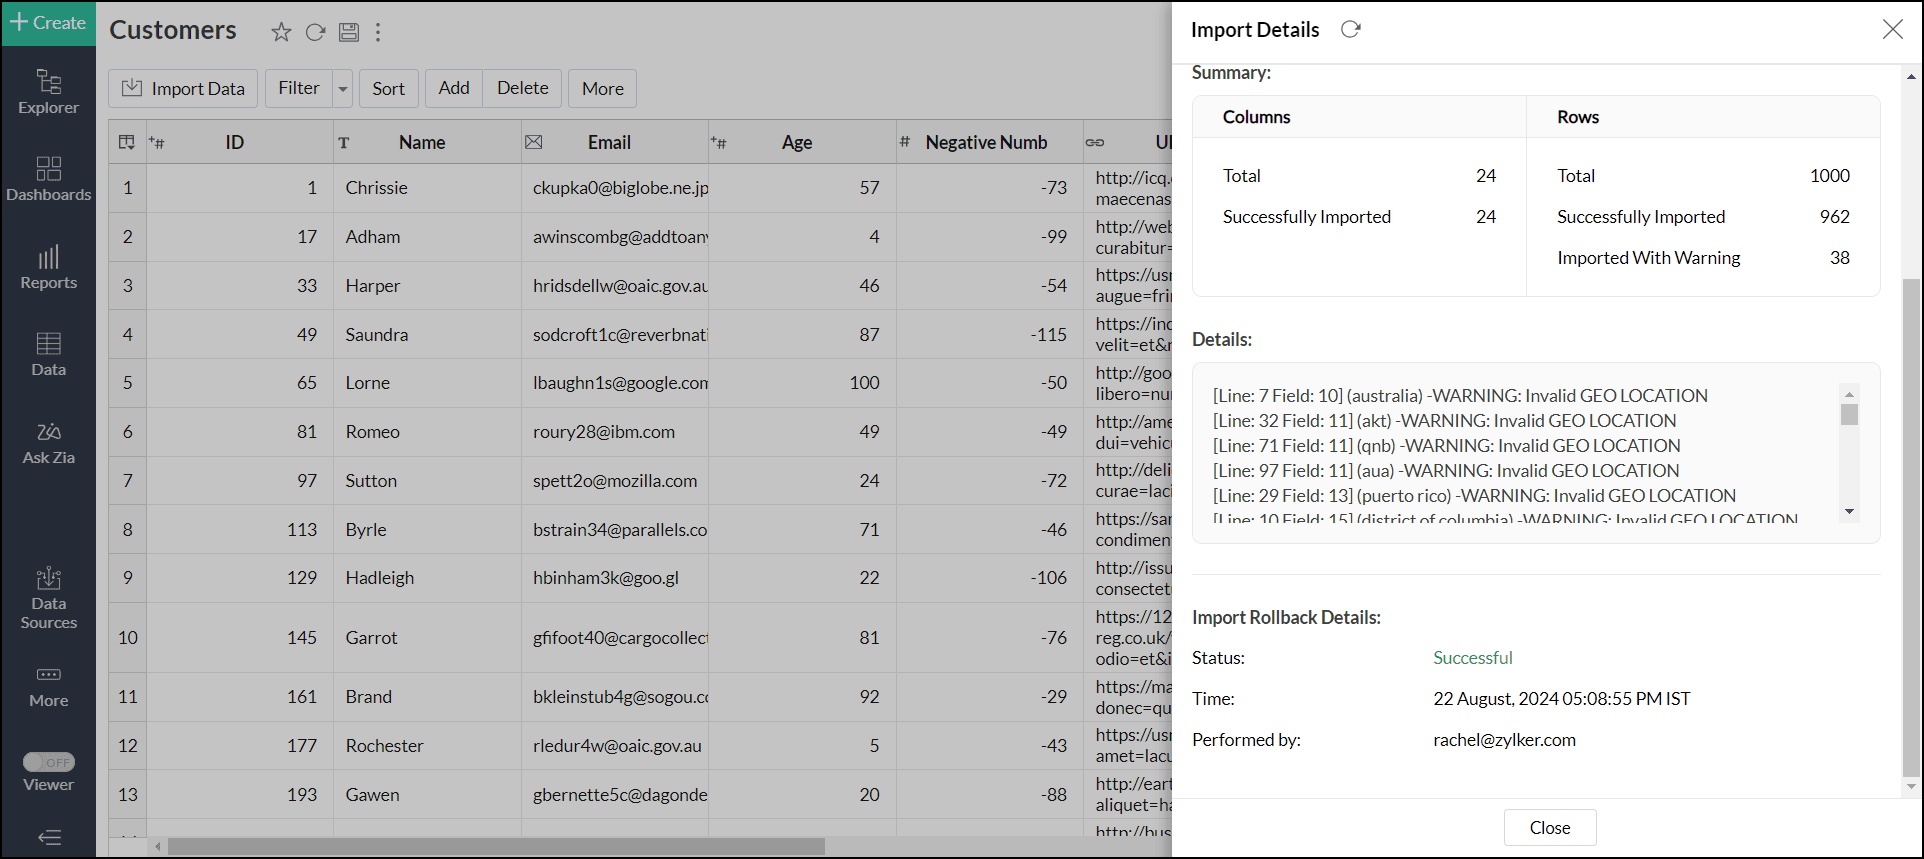
Import rollback will be initiated, displaying the status along with the details of the admin who performed the action and the time of execution.
Resolve synchronization failure
The import or synchronization process can sometimes fail due to a variety of reasons. To understand the reason behind the failure and to resolve the synchronization failure, follow the below steps.
- Click Data Sources from the side panel, and navigate to the Elasticsearch data source detail page.
- Navigate to the table where the data sync failed.
- Hover over the table name, and click the View Last Import Details icon. This opens the Import Details page, which provides detailed insight on the reason for the synchronization failure.
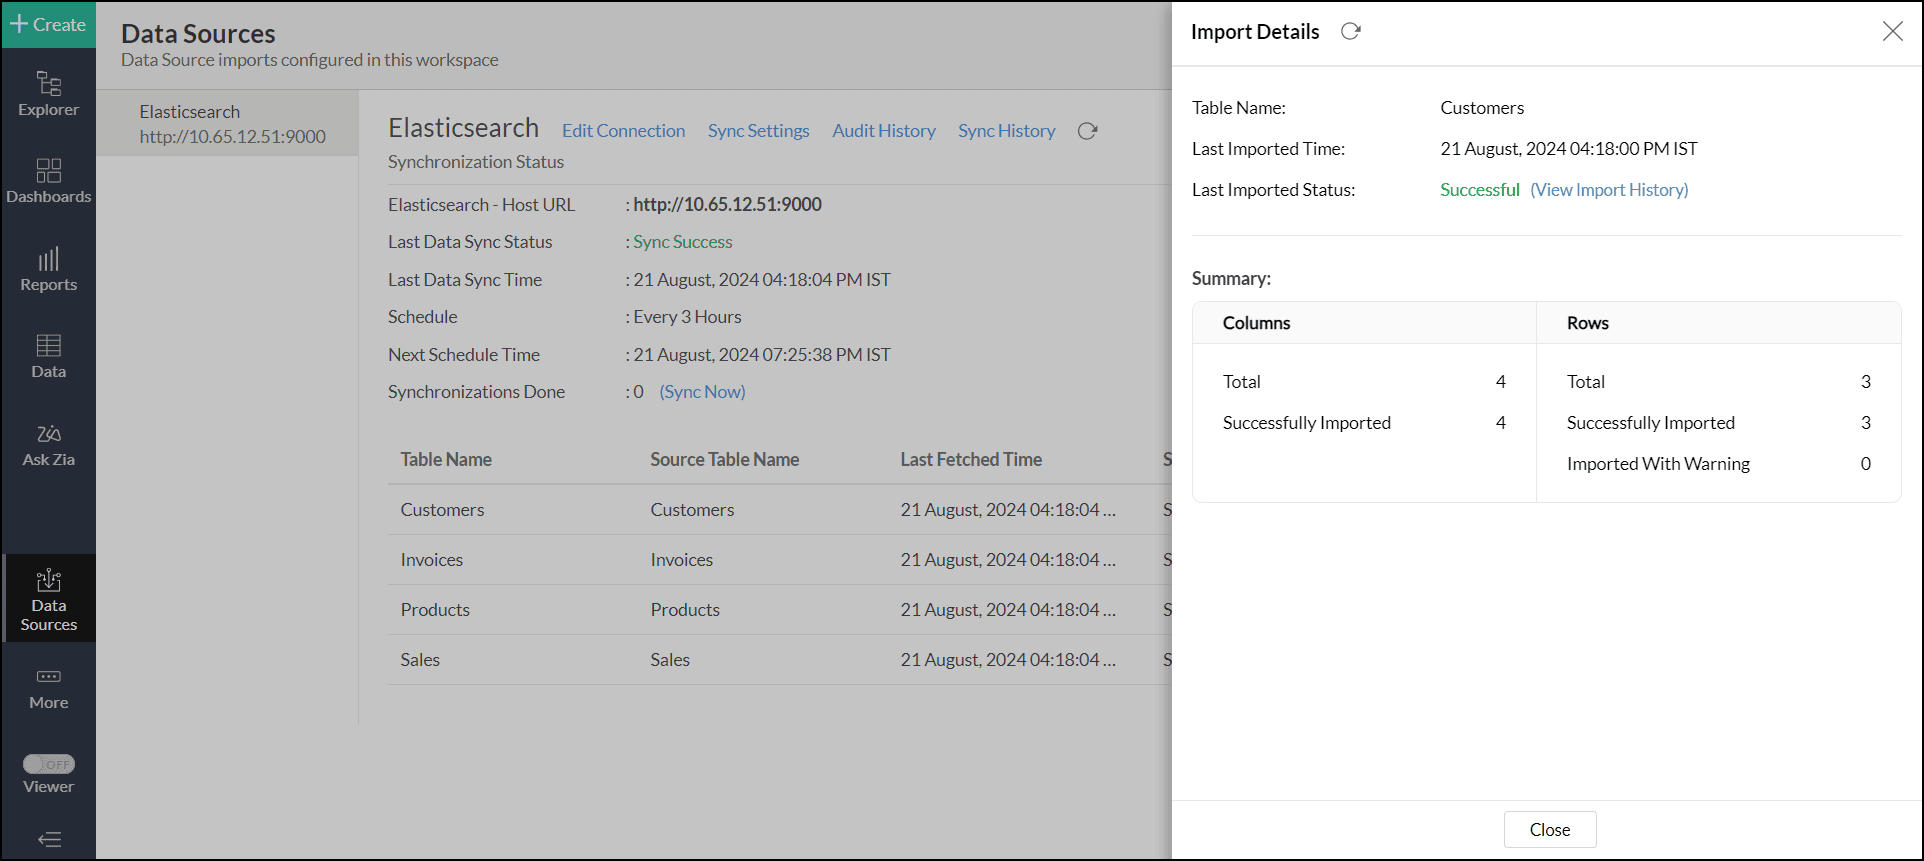
You can also view the Import Details page by opening the required table and selecting the Import Data > Last Import Details option.
Data Blending
Analytics Plus lets you import data from various data sources, such as Files, Feeds, Cloud storage, Databases, and Business applications, and relate them using lookup relationships or query tables for in-depth analysis.
Import data into an existing workspace
Follow the below steps to import data into an existing workspace:
- Open the required workspace.
Click + Create from the side panel, and select the New Table / Import Data option.
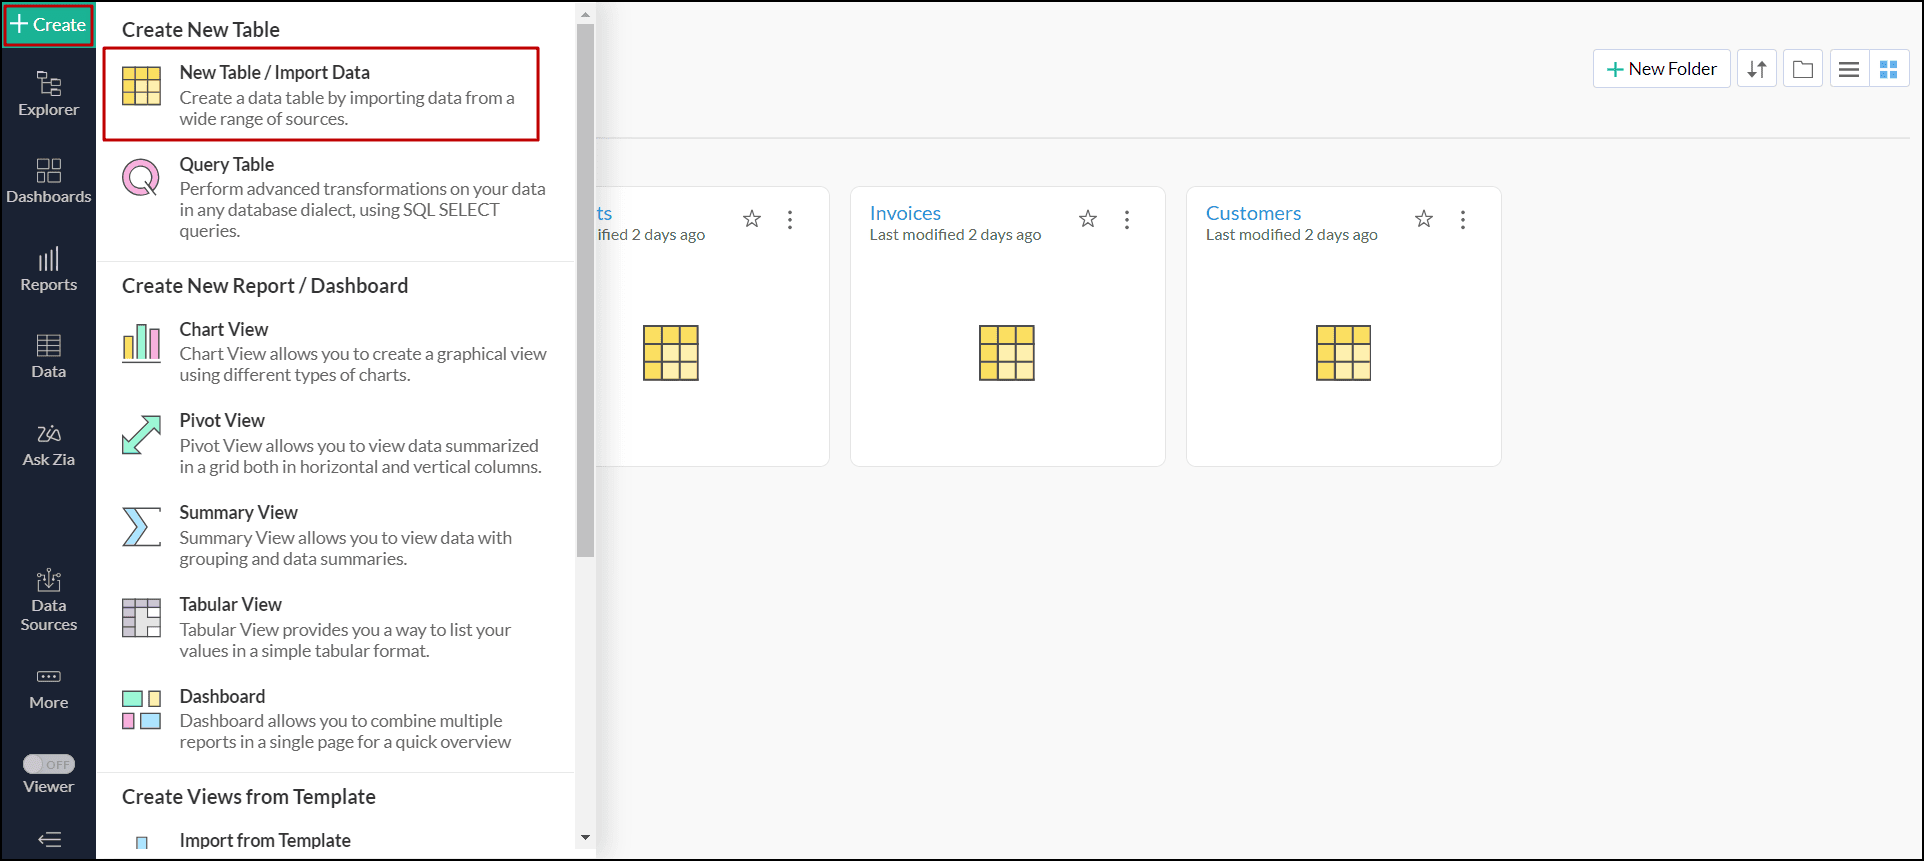
- Click the Elasticsearch tile, and follow the steps detailed in the import data section.
Import data into an existing table
- Open the desired table.
Click Import Data > Import Data into this Table option.
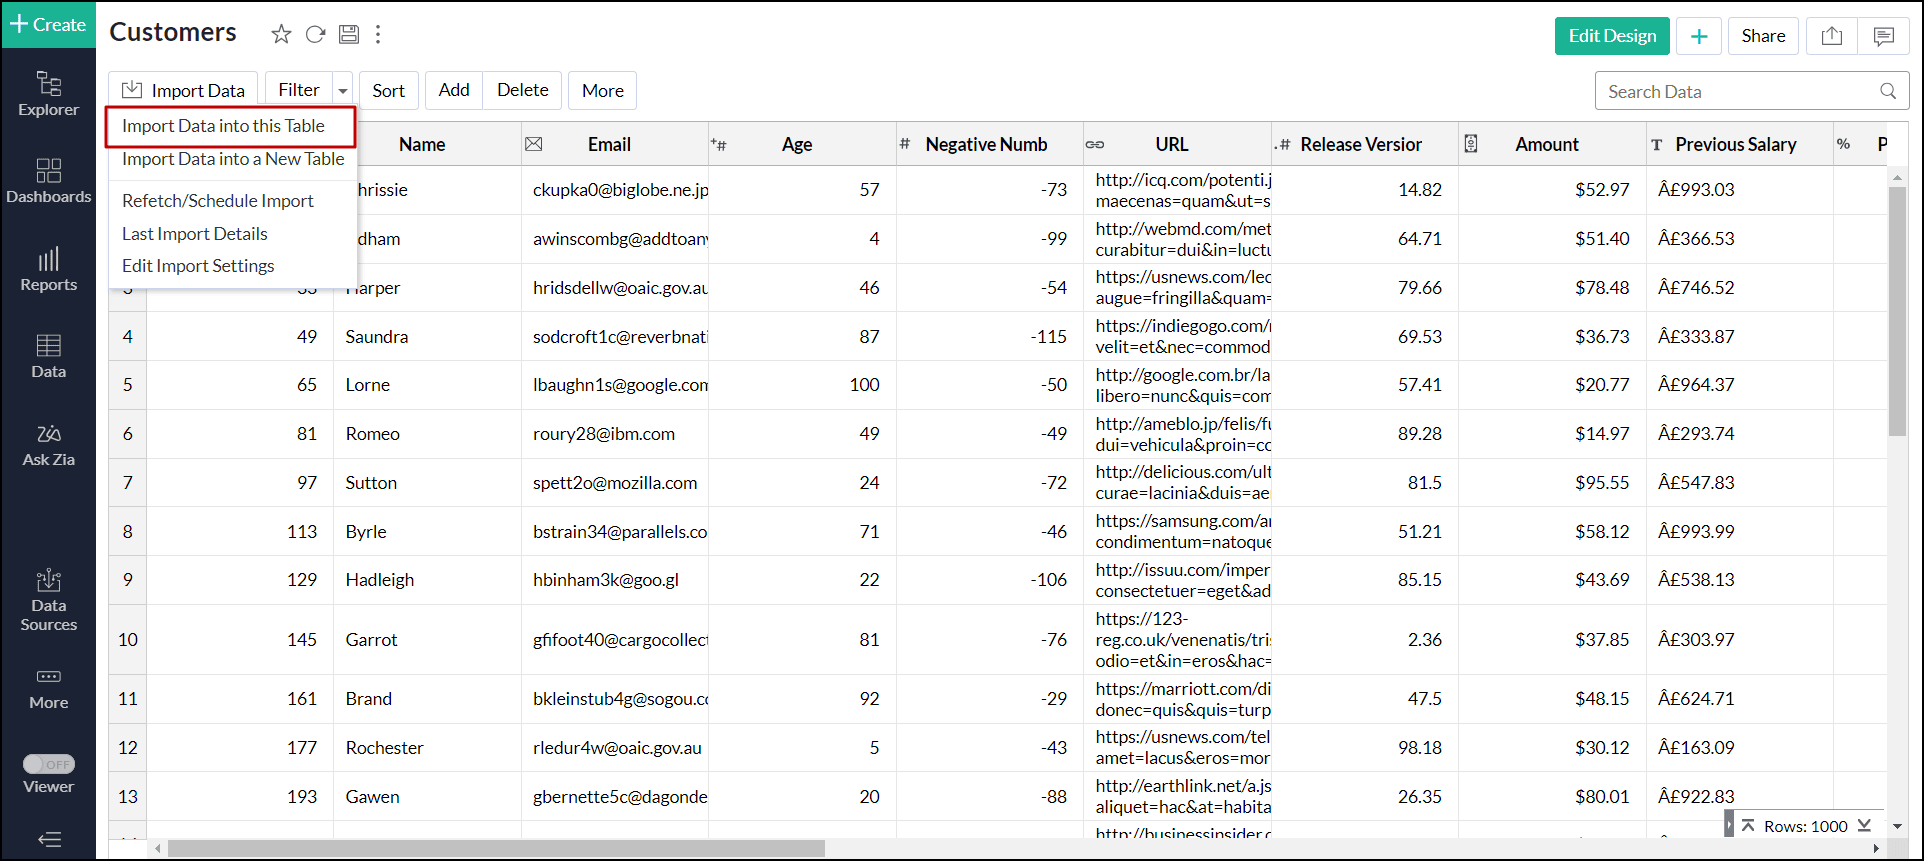
- Click the Elasticsearch tile, and follow the steps detailed in the import data section.
Note: To import data into an existing table, at least one column header should match the data that is set to import.