OpManager allows you to discover Layer2 devices that are connected to your network and draws a visual representation of the same. This includes a detailed topologic map of all the nodes, interconnected layers and port-to-port connectivity in addition to the interfaces.
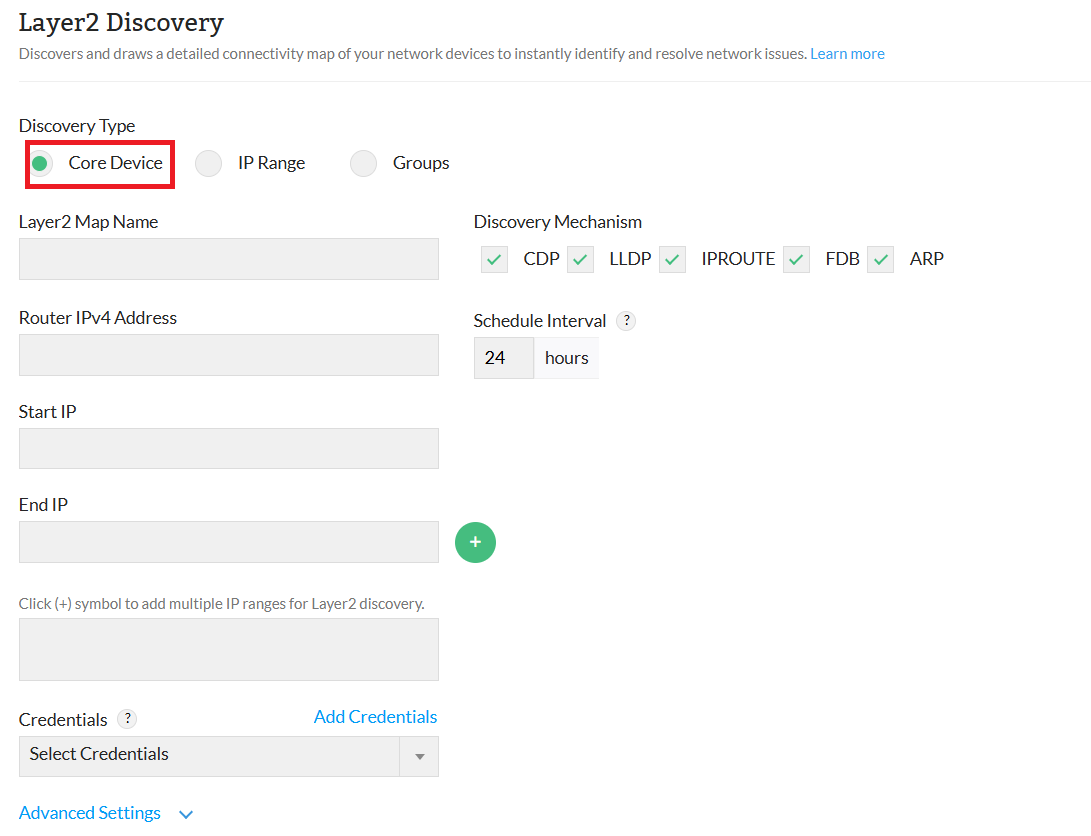
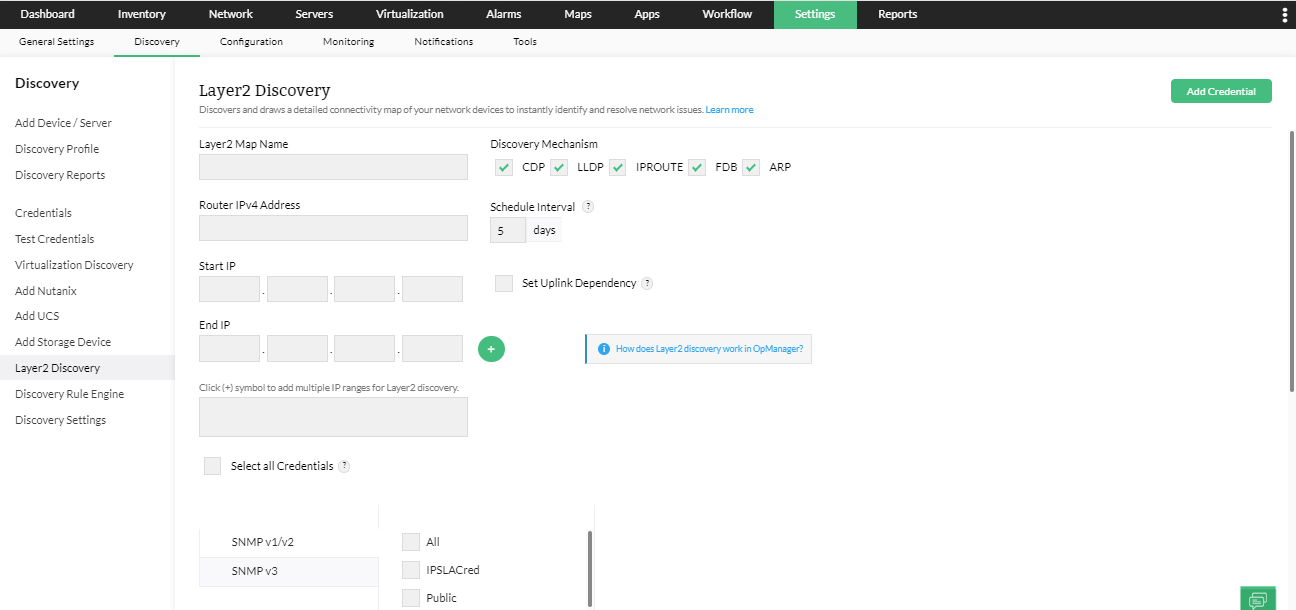
Go to Settings > Discovery > Layer 2 Discovery and select Core Device as discovery type.
Provide the following details:
Layer 2 Map Name: Unique name for the map.
Router Address: Must be as the seed router or Layer 3 switch.
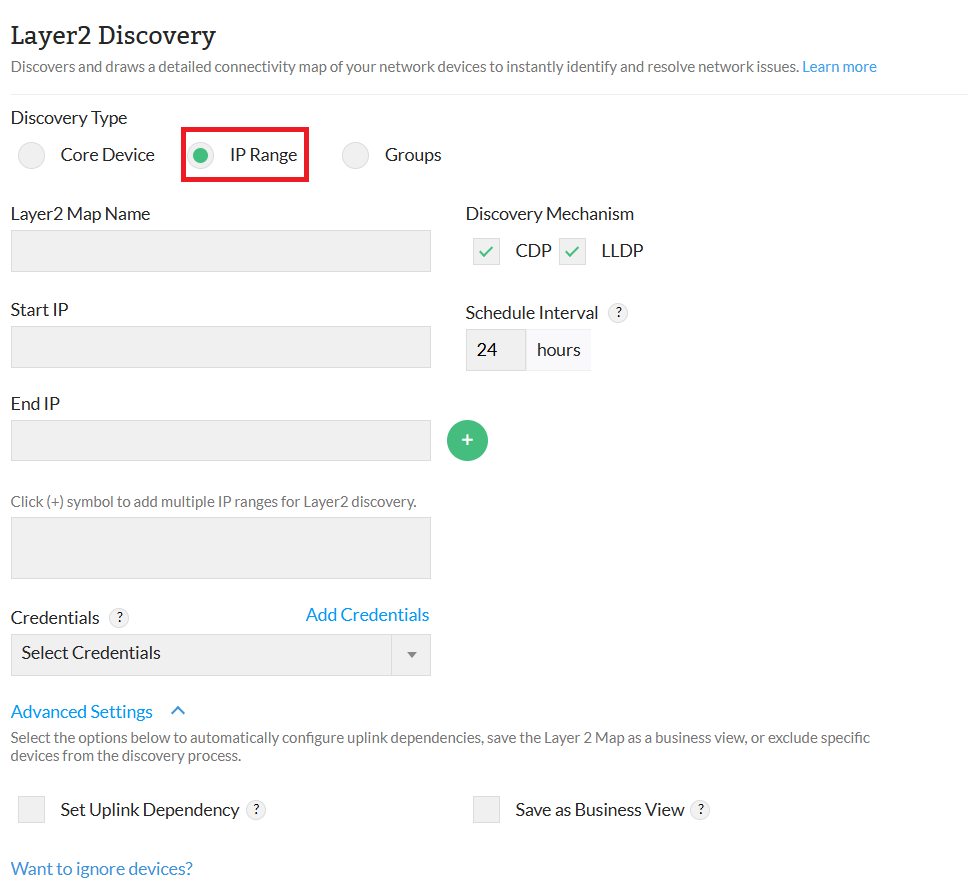
IP Range: Provide the start and end IPs.
Discovery Mechanism: CDP, LLDP, IPROUTE, FDB, or ARP.
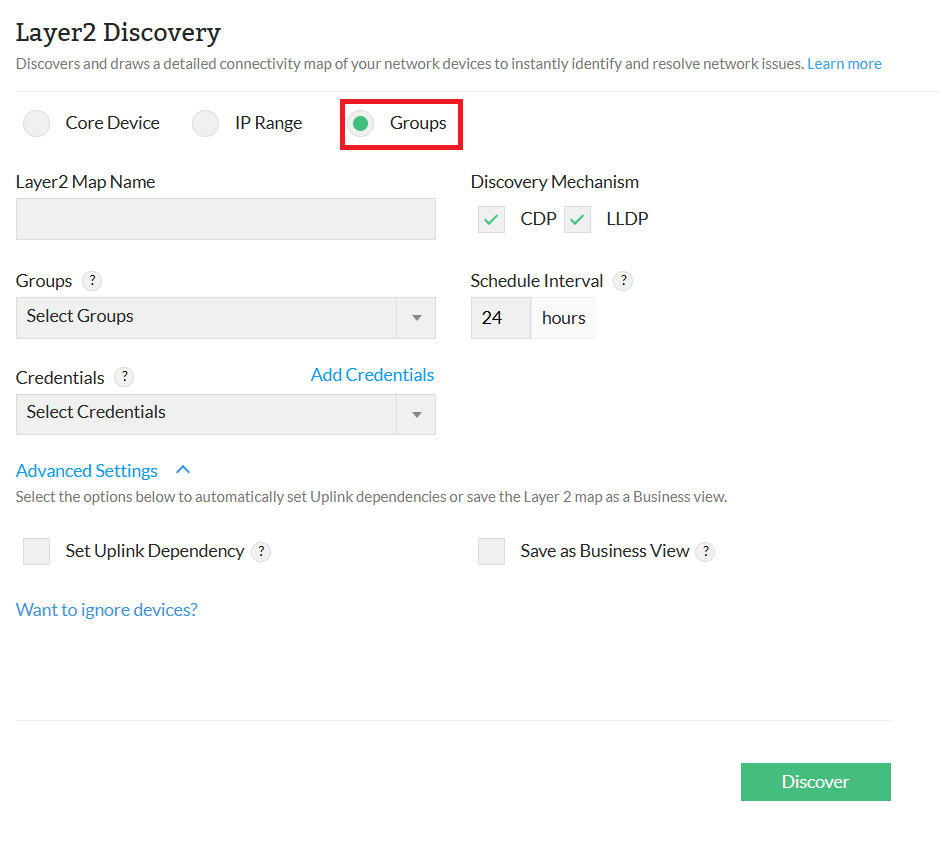
Schedule Interval: Set refresh frequency (in hours).
Credentials: Select the respective credentials.
Advanced Settings: Provides options to set Uplink dependency, save the Layer 2 map as a business view, and configure display preferences for labels and traffic usage.
Ignore Devices:Exclude specific devices or devices within a specified IP range.
When creating a Layer2 Map, selecting the Save as Business View option automatically generates a business view once the Layer2 discovery is complete. This business view stays synchronized with the Layer2 Map, reflecting any updates made to the map. However, while in sync, the business view cannot be directly edited.
A new icon appears under the Actions section of the Layer2 Map when it is saved as a business view. Clicking this icon redirects you to the corresponding business view.
You can view detailed interface information for both source and destination devices, provided their interfaces are being monitored in OpManager.
If new interfaces are added to OpManager after saving the Layer2 Map as a business view, these changes will not automatically reflect in the business view.
A Resync option is available for business views synchronized with the Layer2 Map, allowing you to manually update the business view with the latest map details.
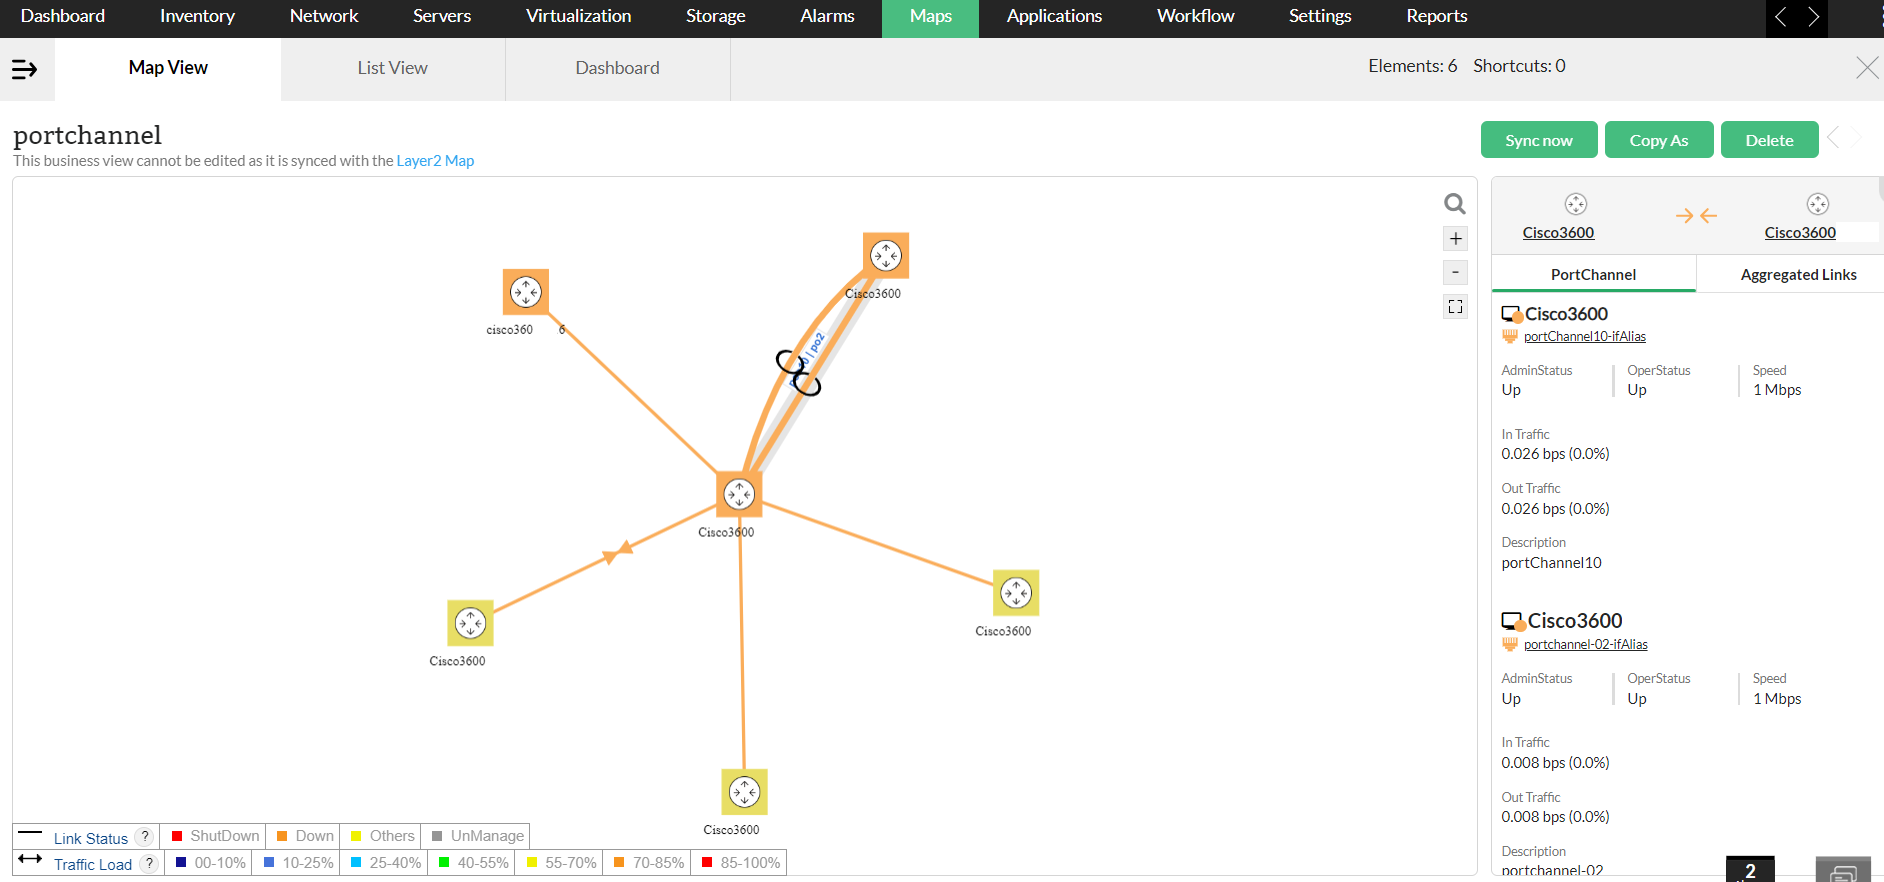
A port channel, also known as link aggregation or an EtherChannel, is a networking method that combines multiple physical Ethernet ports into a single logical interface.
If the Layer2Map is saved as a business view, information about redundant links and multiple links can be viewed.
When two devices have redundant links between them that are part of a port channel, the business view displays the port-channel details.
When the port-channel link is selected, a new tab opens, displaying the port-channel details and the aggregated links included in the port channel.
The port-channel link is visually differentiated by a ring symbol.
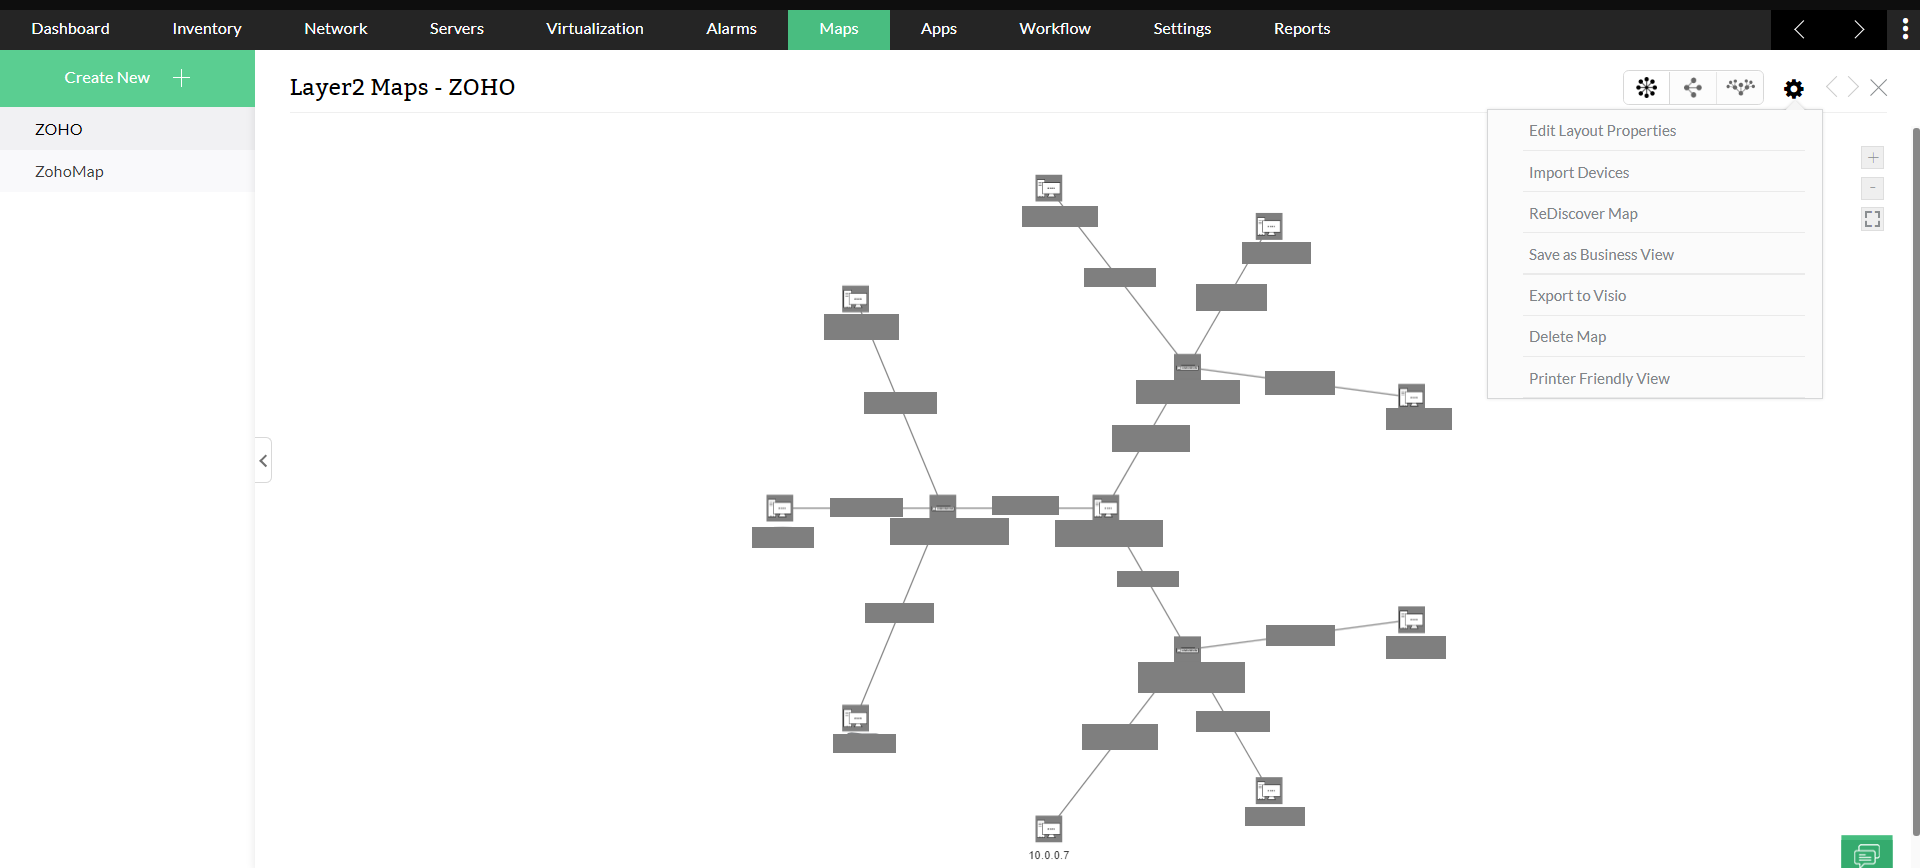
The devices that are discovered in Layer2 maps will not be added to OpManager for monitoring purposes, unless they have been imported.
Click on Settings and choose Import Devices. A screen containing all the devices that have been identified by the Layer2 Map will be displayed. This list also includes the ones that have already been imported to OpManager.
From the list, select the devices that are yet to be imported to OpManager and click on Discover. Discovery process will commence and a list of all the newly imported devices will be displayed in the device snapshot page (navigate to the Inventory → Devices and click on the device name).
OpManager allows you to export the network topology that is discovered by Layer2 maps to Microsoft Visio, a diagramming and flowchart designing tool. This process has been greatly simplified by the introduction of an exclusive add-on. Follow the steps below to export Layer 2 maps to Visio:
Go to Maps > Layer 2 map
Choose a discovered layer 2 map, click on the Settings icon and choose Export to Visio. An XML file will be generated.
Add-on for Visio:
Download the OpManager Add-on for Visio from here. If you are using the 2010 version of Visio, download this Add-on.
The downloaded file will contain two installation options, a 64-bit and a 32-bit version. Choose a compatible version and install the Add-on with the administrator account.
Restart the Visio tool.
A new option, OpManager will be added to the menu-bar of Visio.
In the Visio menu-bar, go to OpManager > Load Map > Choose the XML file, that was generated in step 2.
Your Layer 2 Map will be successfully uploaded to Visio.
You can print a physical copy of your network layout using this option. Click on this button and you will be taken to the Print page. Choose your print preferences and click print. You can also save this layout to your PC as a PDF.
Layer 2 Map Name > Unique name of Map to be referenced from all the places.
Router Address > The device must be a Seed Router or an L3 Switch.
Start IP -> Network range starting IP Address.
End IP -> Network range ending IP Address.
Select the Discovery Mechanism: CDP, LLDP, IPROUTE, FDB, ARP.
Schedule Interval > Specify the interval (in days) at which the map must be re-drawn.
Selecting the Uplink dependency option helps in avoiding multiple device-down alerts when the parent device is down. Besides the layer2 discovery window, Uplink Dependency can also be set from the Quick Configuration Wizard.
Select the respective credential and click Discover to let OpManager draw the map.
Configure a seed device : A seed device is the core router or L3 switch in your network. The device must be SNMP-enabled so OpManager can query the device and draw the links automatically. The seed device should have "ipForwarding" set to 1 for the OID - .1.3.6.1.2.1.4.1.0 and must have at least two or more interfaces. (identified by querying the OID - 1.3.6.1.2.1.4.20.1.1)
The seed router will be connected to a vast number of devices. If you wish to restrict your Layer2 Map to a certain IP range, enter their Start IP and End IP and press the ‘+’ icon. You can specify multiple such entries to add more criteria.
Note: Uplink Dependency happens only during Device Import and not during Layer2 Map discovery.
OpManager allows you to perform edits on Layer2 Maps that have already been discovered. Click on the Maps tab and scroll down to the Layer2 Maps section. In the Actions column, there is a provision to perform the following:
You can edit the discovery parameters (such as modifying the IP range, editing the seed router, changing the discovery mechanism, set device dependency, change schedule discovery time) of the existing Layer2 Map and rerun the discovery process.
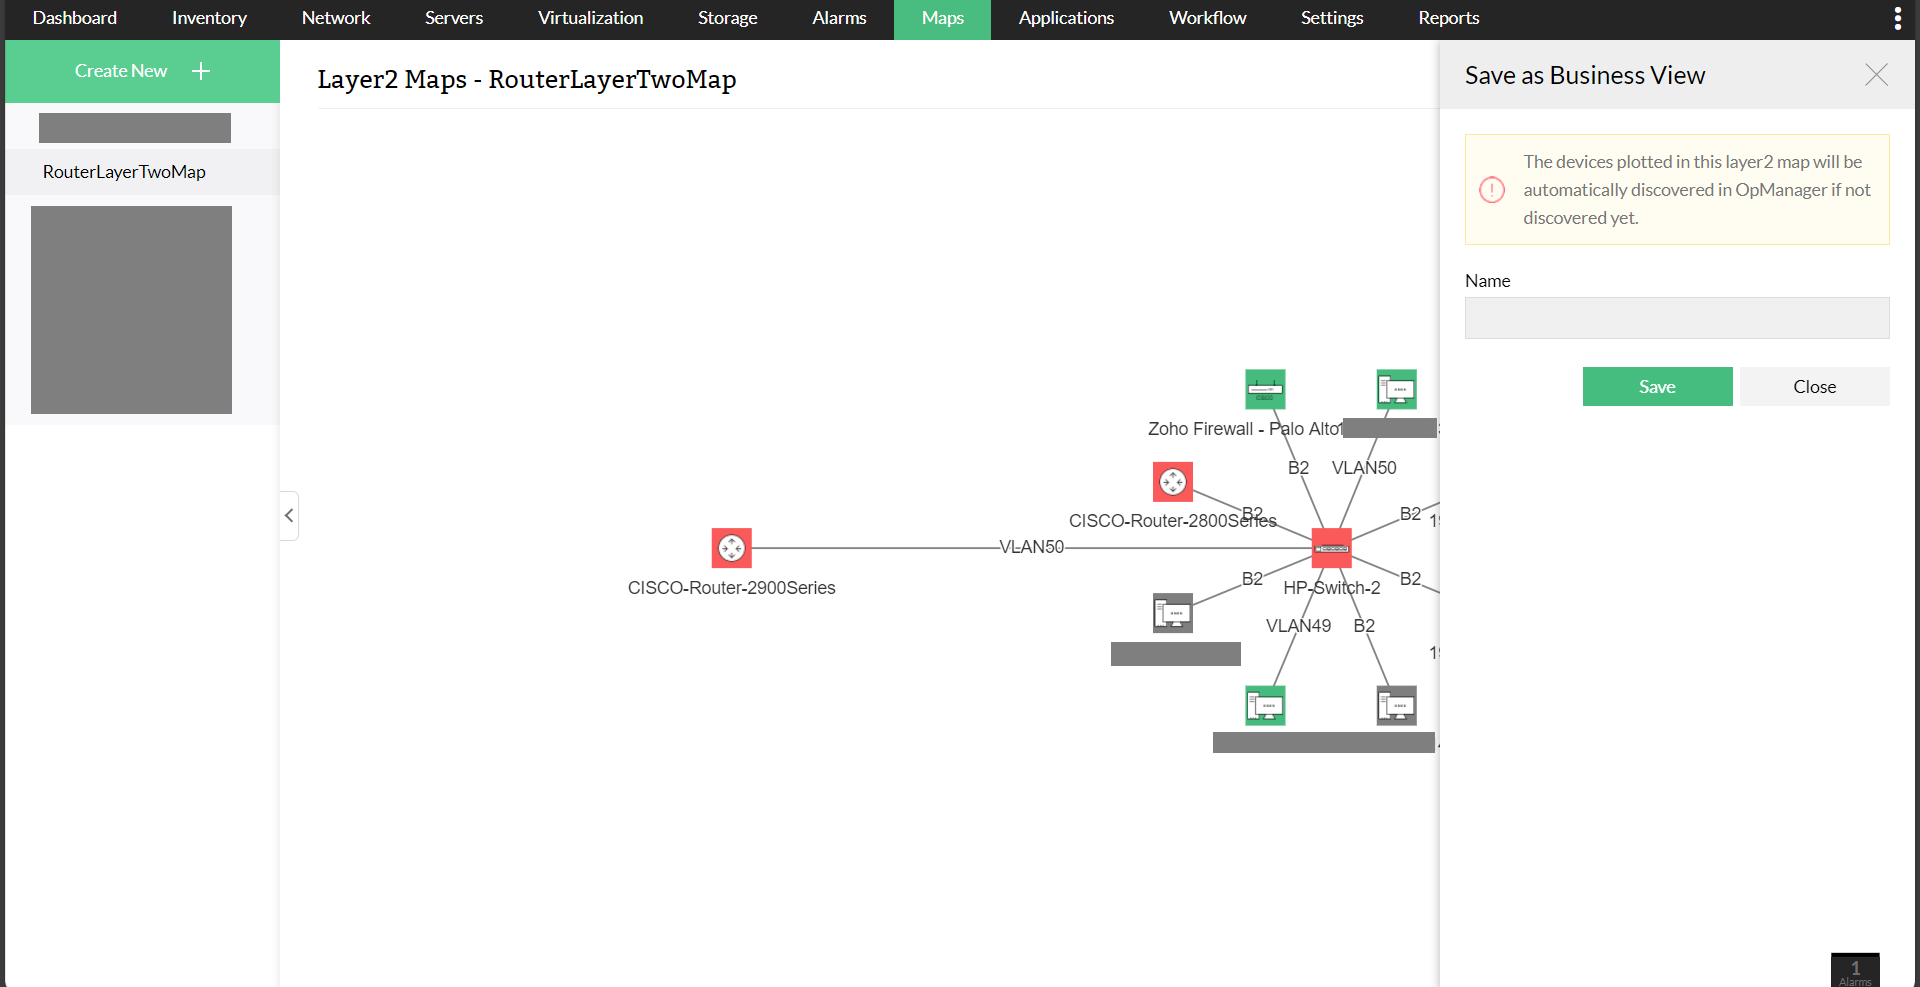
The devices identified in the Layer 2 Map can be saved as a Business View, visually representing the connections between Layer 2 devices.
To do this, click on Save as Business View, give the layout a name and press Save. The result can be viewed in the Business View section.
Alternatively, create a business view, and then associate an existing layer 2 map with the created business view. The links between devices will be added automatically after successfull association.