Integrate PAM360 with Network Configuration Manager
PAM360 provides a secure solution for overseeing, validating, recording, auditing, and examining privileged access and actions within a corporate IT environment. By integrating PAM360 with Network Configuration Manager, you can scrutinize privileged access and activities within the IT framework of a business.
To ensure a seamless integration of PAM360 via synchronization, it is imperative to configure their settings within Network Configuration Manager. This process entails specifying details such as the server name, port number, Auth Token, and Application Server Name.
Steps to integrate PAM360 from ITOM application
- Go to Settings and select Integrations.
- Find PAM360 under Password Manager and click on Configure on any one of them.
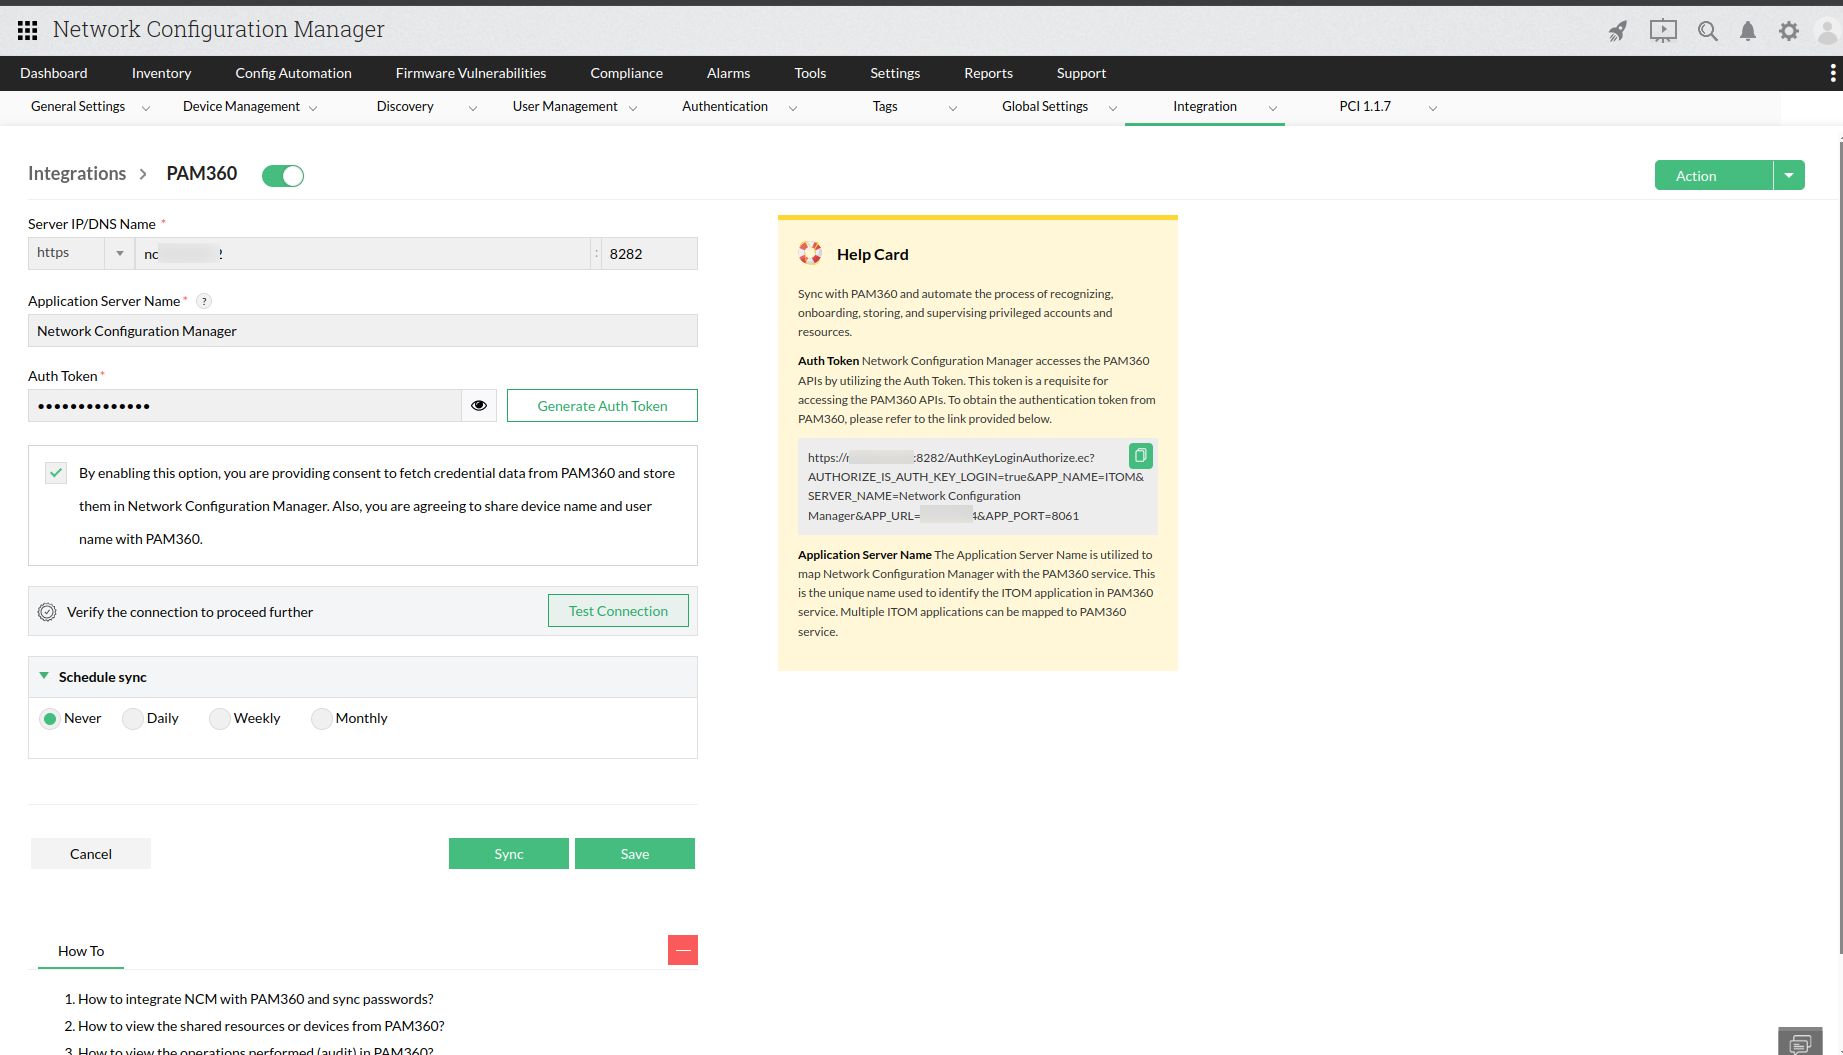
- Provide details such as Server Protocol, IP/DNS Name, Auth Token, and Application Server Name.
- IP/DNS Name and port number: Enter the server name and port number where the PAM360 application is hosted.
- Application Server Name: The Application Server Name is used to link ITOM applications with the PAM360 service. It serves as a unique identifier for the ITOM application within the PAM360 service, enabling the mapping of multiple ITOM applications to the same PAM360 service. Provide the unique ITOM Application Server Name added in PAM360 Application into the input field in the ITOM application. To find the application server name in PAM360 application, go to Admin > Integrations > ManageEngine > ManageEngine ITOM.
Auth Token: Network Configuration Manager accesses PAM360 APIs using this token. It is necessary for API access. To get the authentication token from PAM360, refer to the link provided below.
To generate the auth token from PAM 360, click on the Generate Auth Token option.
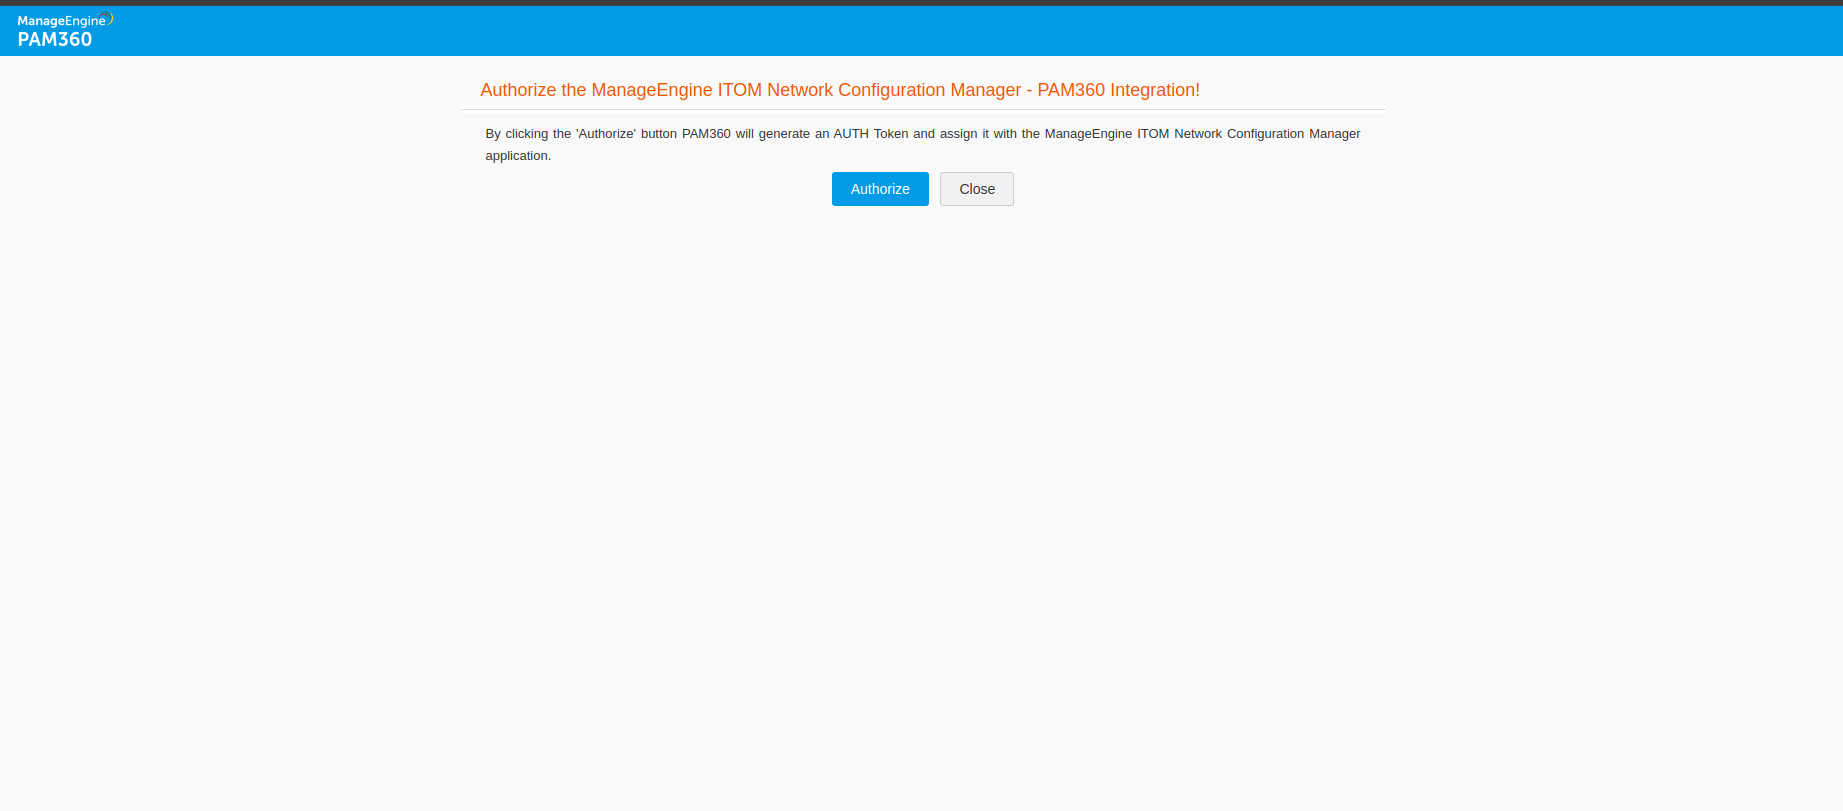
Once the above steps are completed, PAM360 application will prompt for authorization of the current integration. Click "Authorize" to generate the Auth Token.
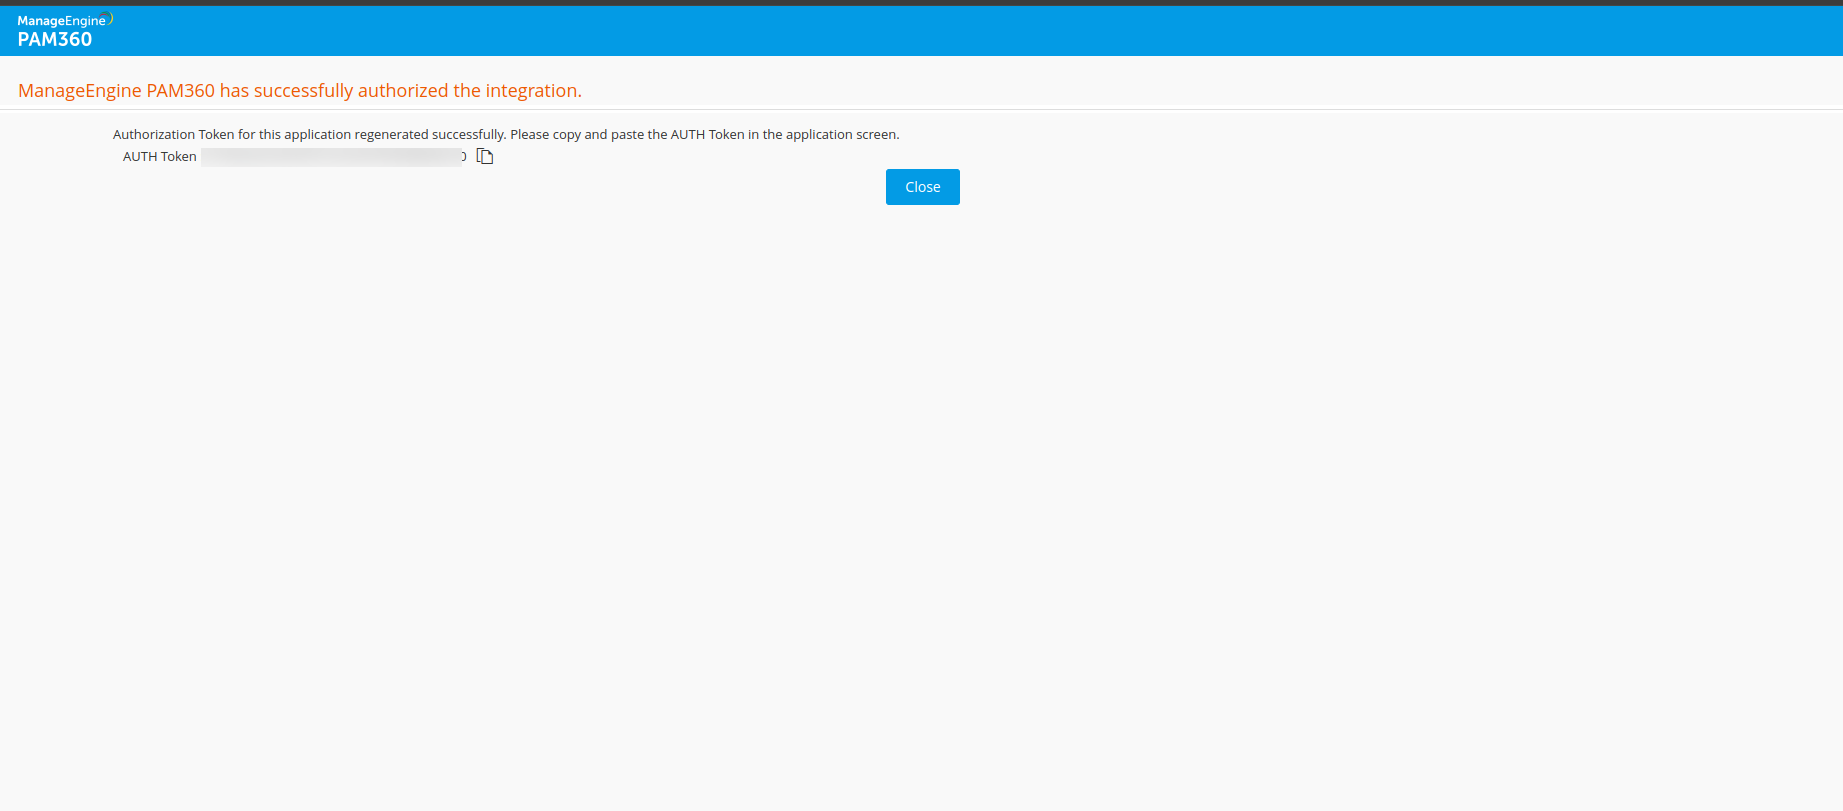
Copy the generated Auth Token and paste it into the Auth Token input field in the ITOM application.
- Check the consent box once the above details are provided and the consent message is read.
- To test the PAM360 connection with the current configured settings, click Test Connection.
- To save the settings, click Save and Sync.
- For an immediate sync, click Sync. You also have the option to schedule the sync for daily, weekly, or monthly.
- These settings will be automatically saved in the PAM360 application as well. You can verify this by navigating to Admin > Integrations > ManageEngine > ManageEngine ITOM.
Steps to integrate ITOM solution from PAM360 application
- In PAM360 application, go to Admin > Integrations > ManageEngine > ManageEngine ITOM.
- Click "Add" and provide the following details
- Application Server Name: Unique name to identify ITOM application
- Host Name: Server name where ITOM application is running
- Port: HTTPS Port where ITOM application is running
- Username: Provide the username to be mapped with this integration.
- Auth Token: Unique token to identify the ITOM application.
- In ITOM application, go to Settings > Integrations
- Locate "Generate Key" near to the Password manager title
- Click "Generate Key" and copy the unique key generated in ITOM application and paste it in the into the Auth Token input field in the PAM360 application.
- Click "Enable" to integrate the ITOM application. This will update the settings in ITOM application too. This can be checked by navigating to Settings > Integrations > PAM360
Thank you for your feedback!


