SSH Public Key Authentication
Public Key Authentication (PKI) is an authentication method that uses a key pair for authentication instead of a password. Two keys are generated for SSH authentication:
- Public key
- Private key
Note: Network Configuration Manager supports only Open SSH key format.
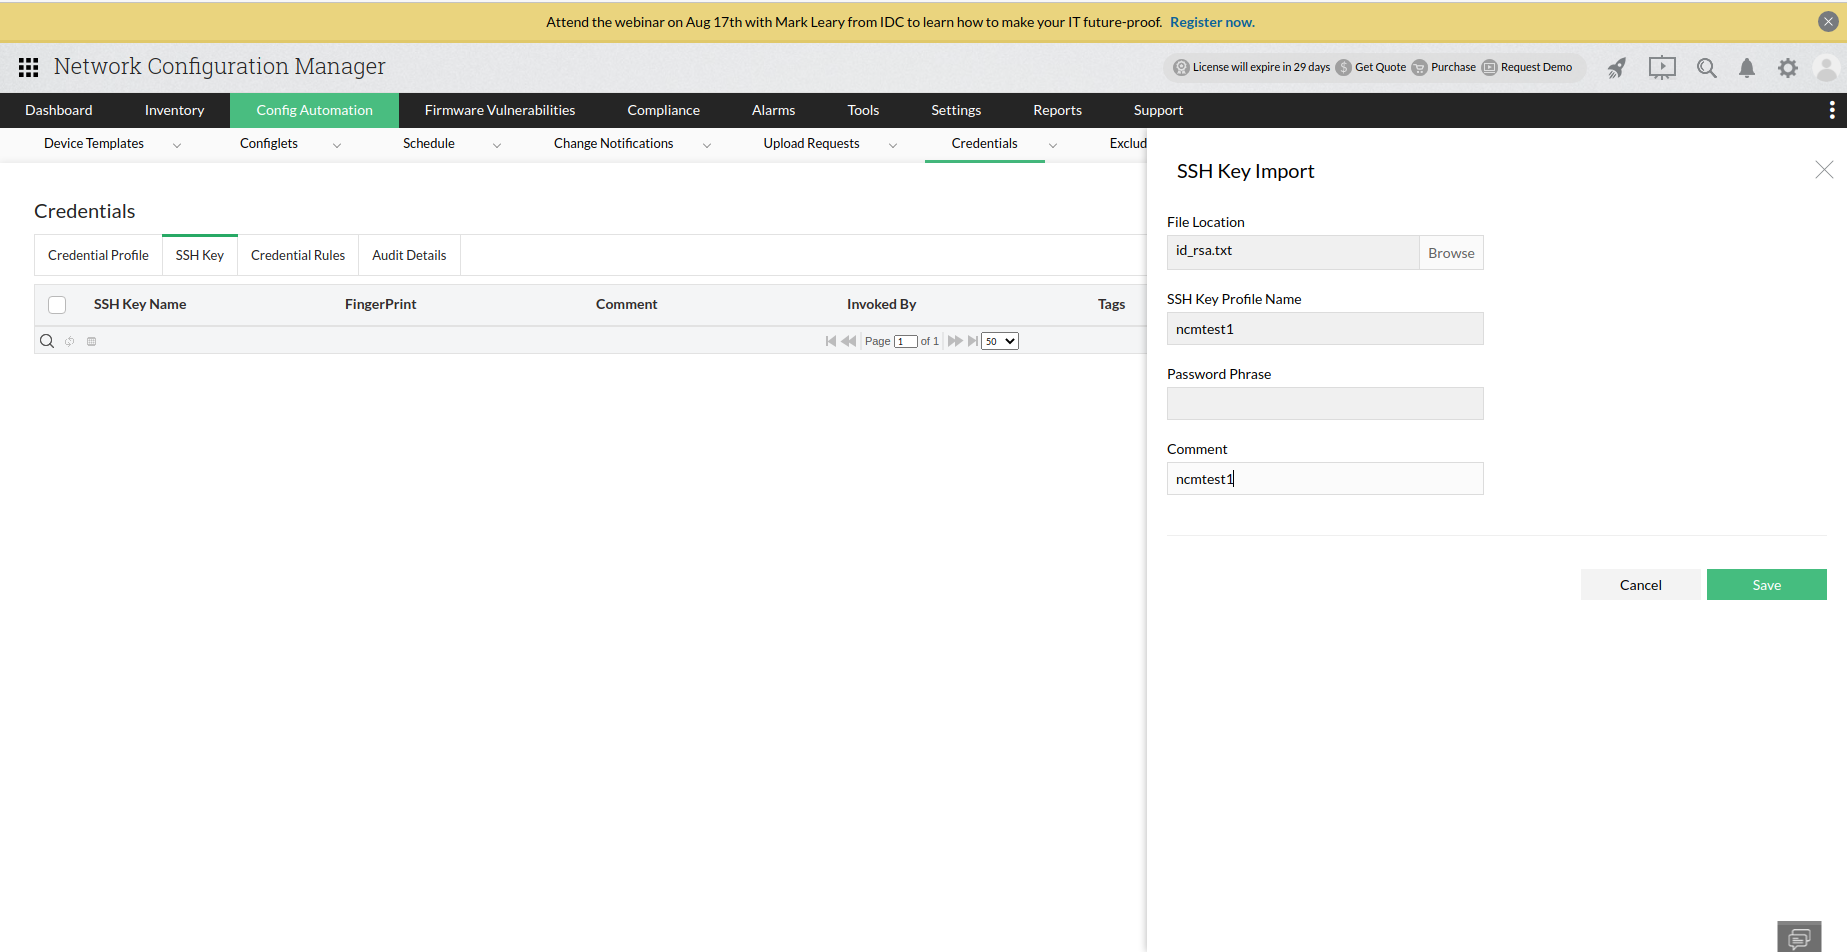
Steps to import Private key in NCM:
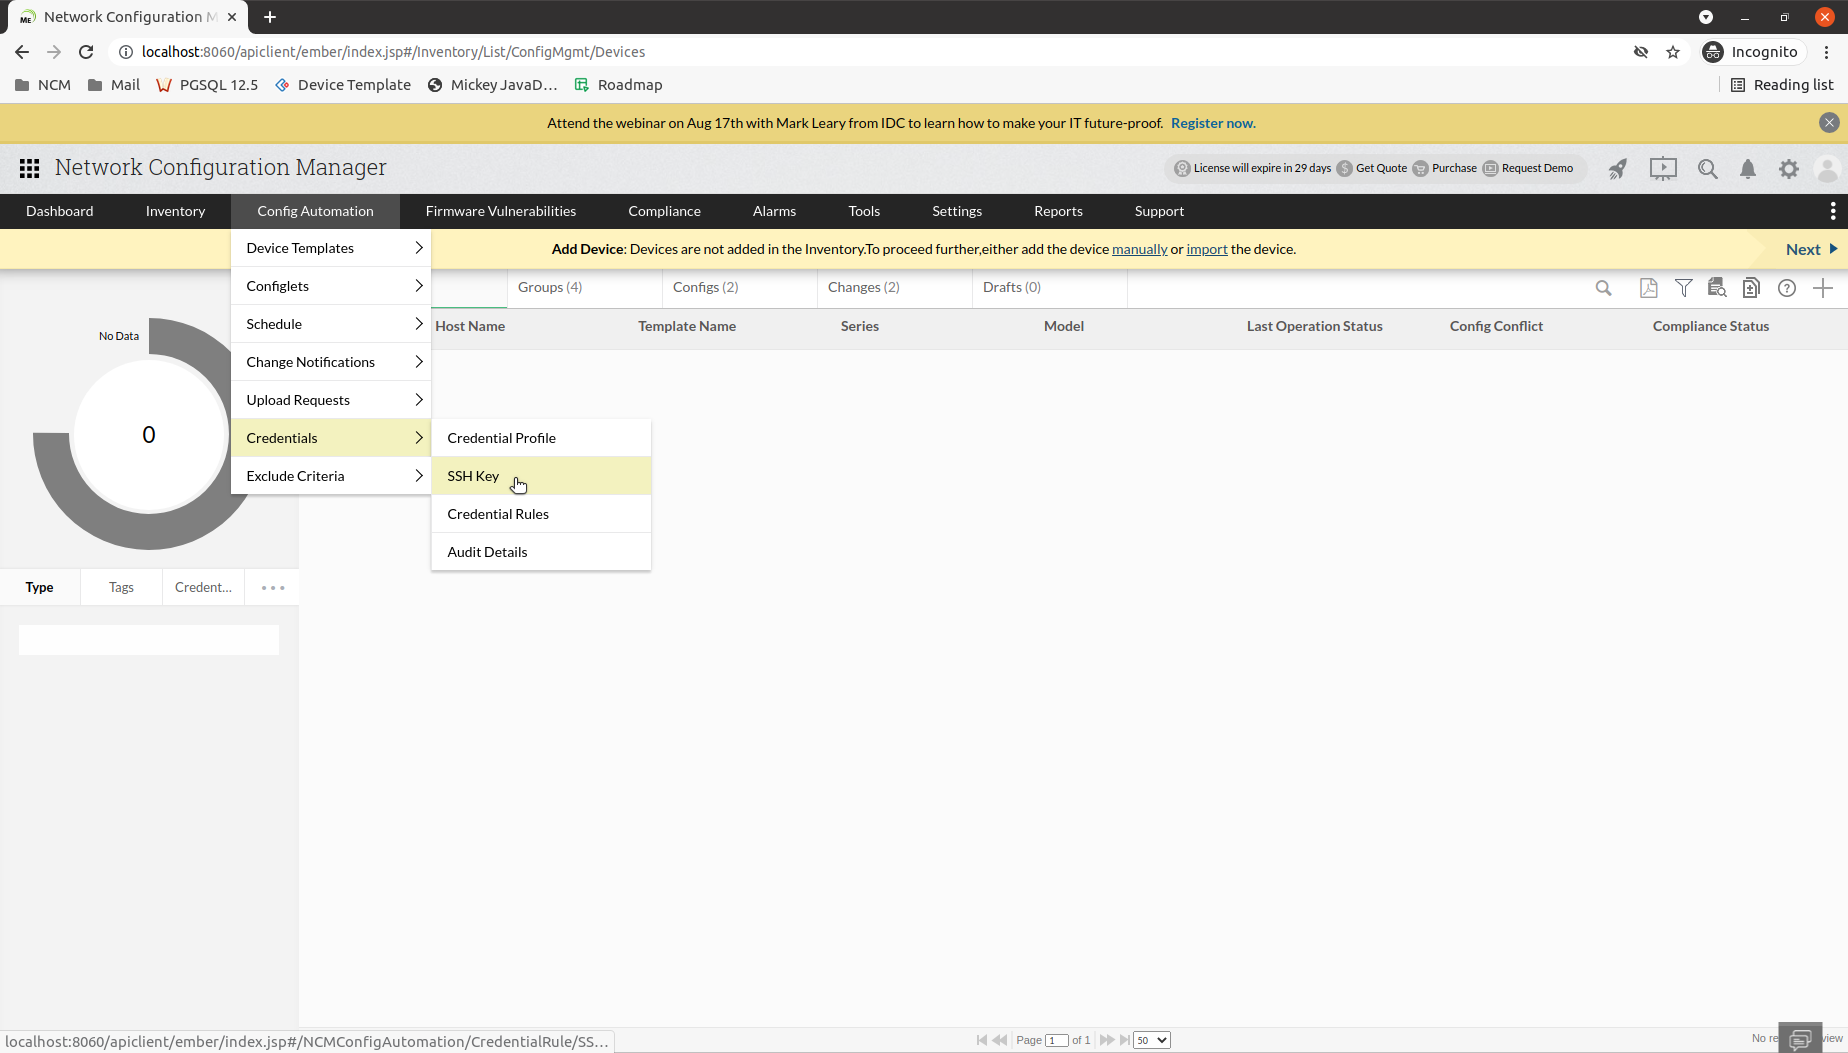
Go to Config Automation -> Credentials ->SSH Key.

Now, click on the + icon to perform an import operation.
In SSH Key Import slide, browse and select the Private key file and enter a SSH Key Profile Name, Password Phrase and Comment.

- Click on Save button.
Note: Private key file must have permission "600" - (It denotes that only the user can perform read and write operation).
Steps to generate a private and public keys:
Linux:
1. Open Terminal
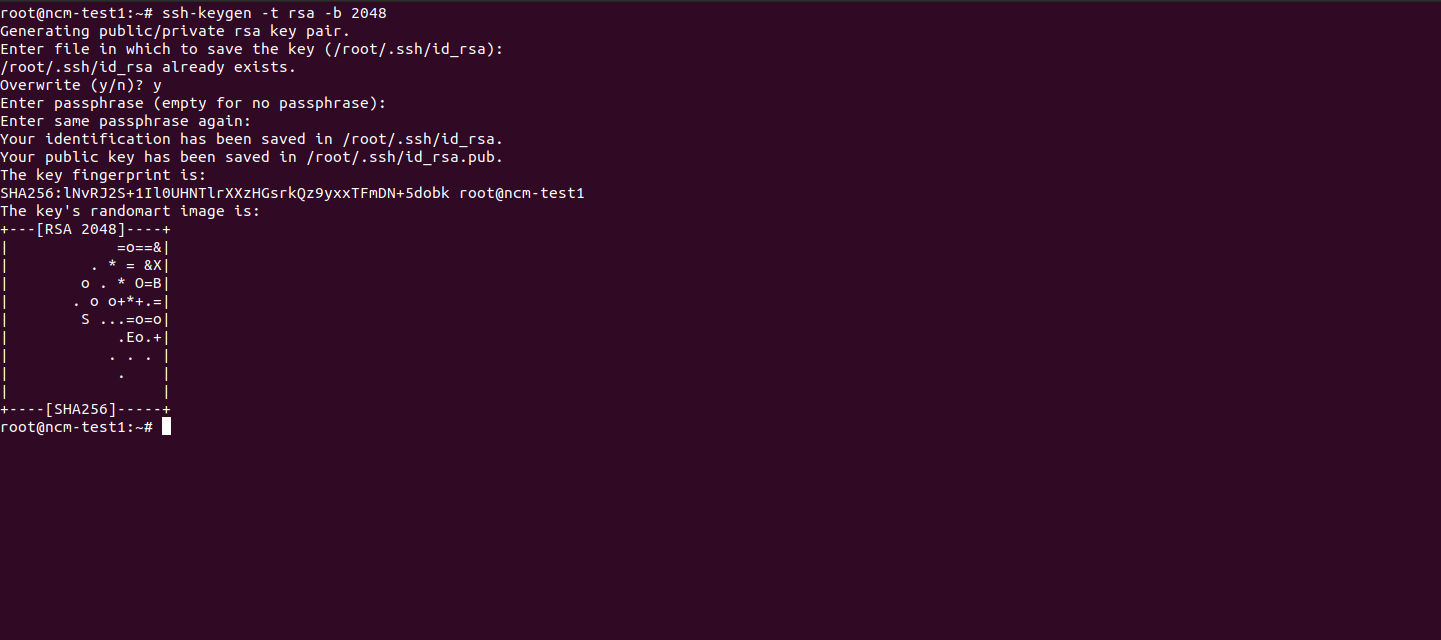
2. Execute below command.
ssh-keygen -t <algorithm-name> -b <no of bits>
Example:

For more details, please refer below link:
https://www.ssh.com/academy/ssh/keygen
3. Cisco IOS only supports a maximum of 254 characters on a single line. So you won’t be able to paste this in one go.
We can use "fold" command to break the public key in multiple parts:
fold -b -w 72 <public key file>
Example:

We can strip the contents like "ssh-rsa" and "root@ncm-test1"
4. Now we can use the stripped content in Cisco IOS Router.
Windows:
- Install OpenSSH in windows.
- Open Command Prompt with "Administrator" privilege.
- Use "ssh-keygen" command to generate the key pair (Steps used in Linux).
Adding public Key in Cisco IOS Router:
- Login to Cisco Router using privilege mode.
Execute the below commands:
configure terminal
ip ssh pubkey-chain
username <username>
key-string
Example:

- Now paste the stripped public key, line by line.
- After pasting the public key, exit from configure mode.
- Once the public key is added, execute below command to check the fingerprint.
Verification:
To check the fingerprint of public key in Cisco IOS Router, execute the below command.
command: show running-config | begin pubkey
Example output:

On Windows, check with the fingerprint copied from PuTTYgen with command output.
On Linux, execute the below command to get the fingerprint.
ssh-keygen -l -f <public key file> -E md5
Example:

Thank you for your feedback!