Blueprints Quickstart Guide
Sample Use Case
A software company can use the Blueprints feature to track and manage the software development lifecycle. Various blueprint actions are needed to mark the present status of each stage, for example -- when a feature request is received, or when the development starts, or when issues are found, and so on. The relevant team then moves the blueprint stage (status) to the next stage, using transitions, once they complete their work items. This way the entire development cycle is efficiently tracked, and fully automated using workflow actions that are triggered at each blueprint transition (action).
The following is an illustration of the above use case which can be accomplished using Blueprints.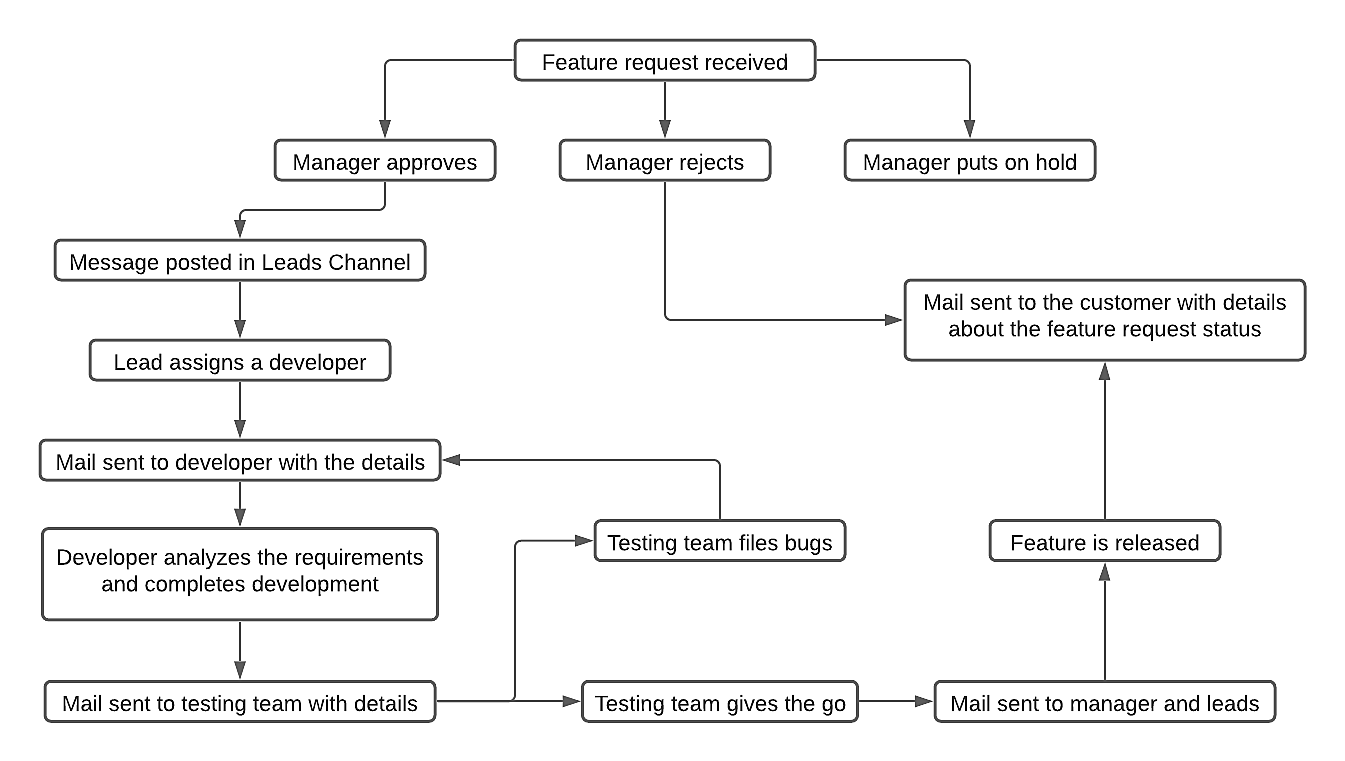
Setting up a Blueprint
Process Flow 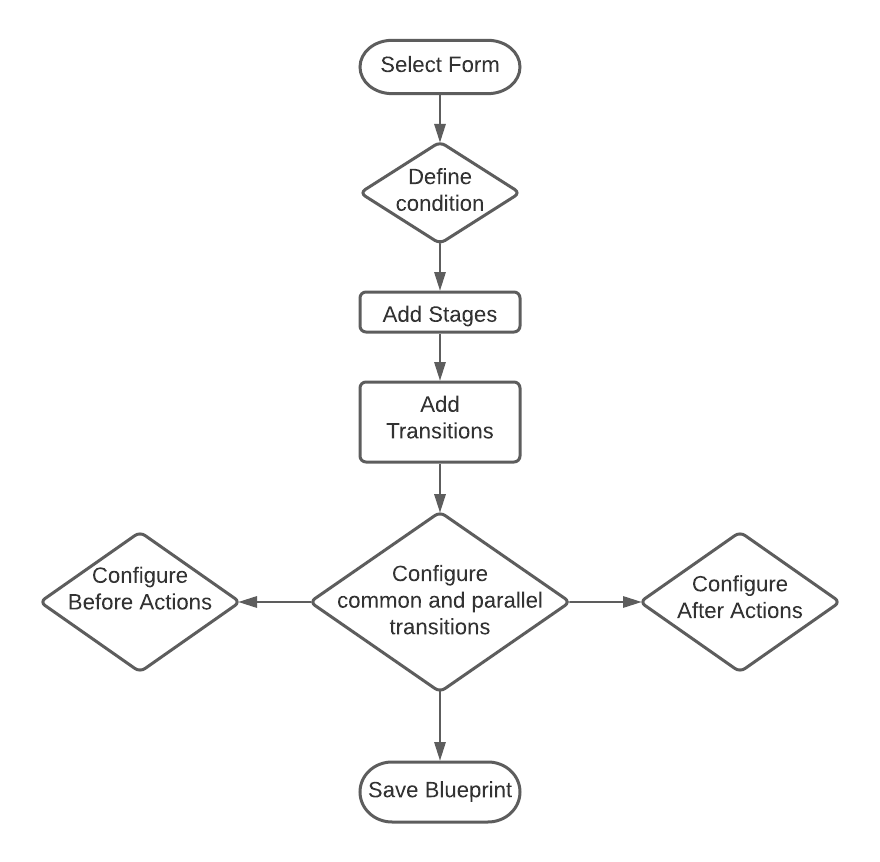
Steps
Step 1: Navigation to Blueprints section
In your application, navigate to Workflow > Blueprints > New Blueprint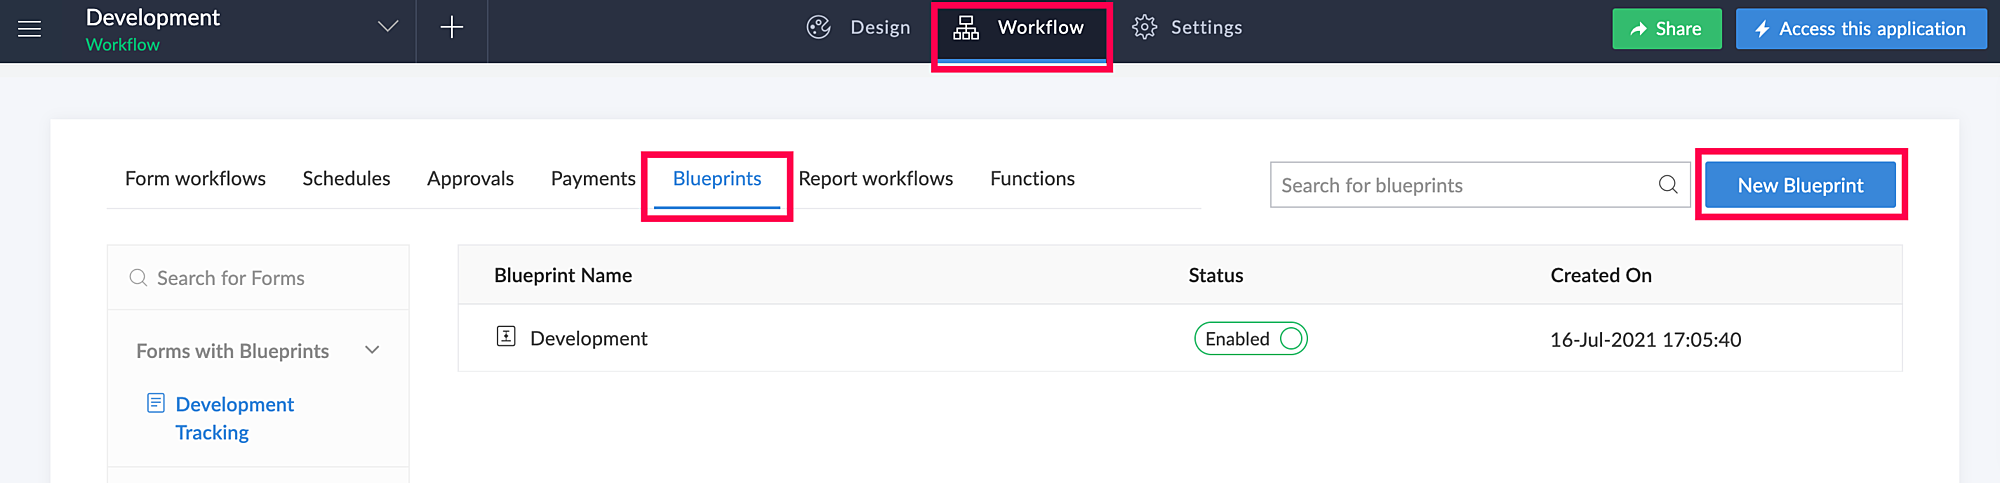
Step 2: Create blueprint by
- Associating a form - Blueprints are associated with a form. Stages and transitions in a blueprint are displayed for the records of a selected form. For example, when employees apply for a leave they submit a record using a form. The record will contain blueprint transitions like Approve Leave and Reject Leave, and stages like Leave Approved or Leave Rejected.
Select a form from the drop-down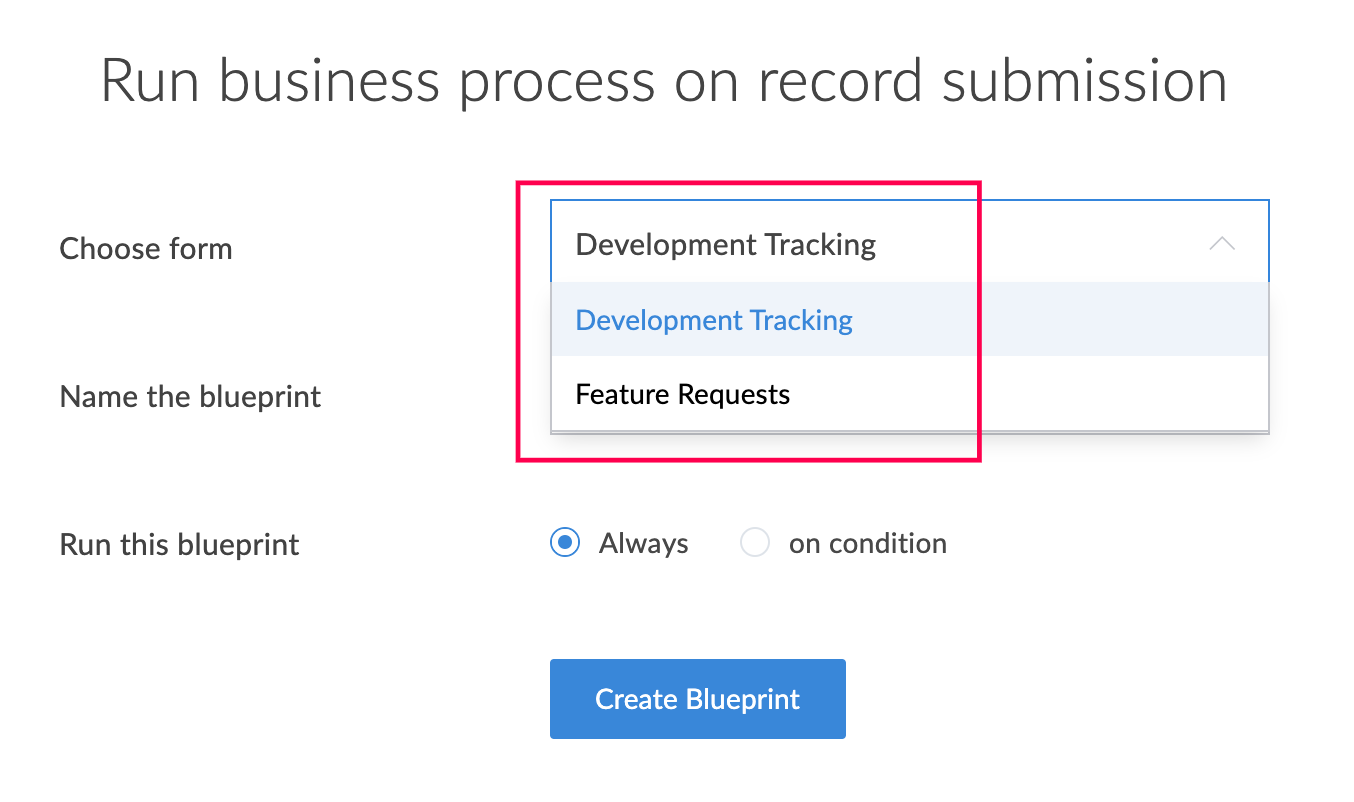
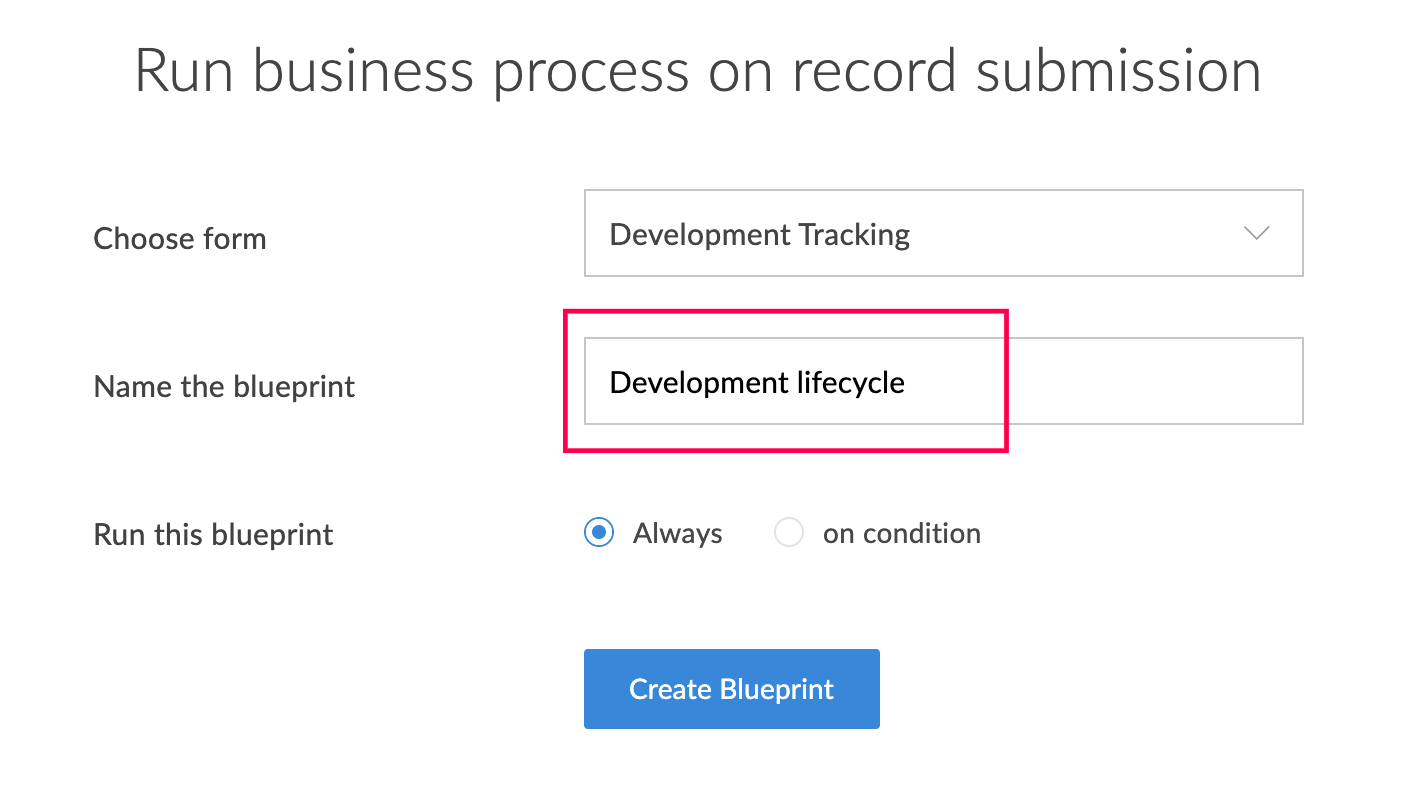
- Naming the blueprint
- Defining a condition - Blueprints can be triggered based on conditions. For example, let's say a blueprint should be enabled only when the received request is of type "New Feature Request", so that the development process of the feature can be tracked.
Define a condition as displayed below: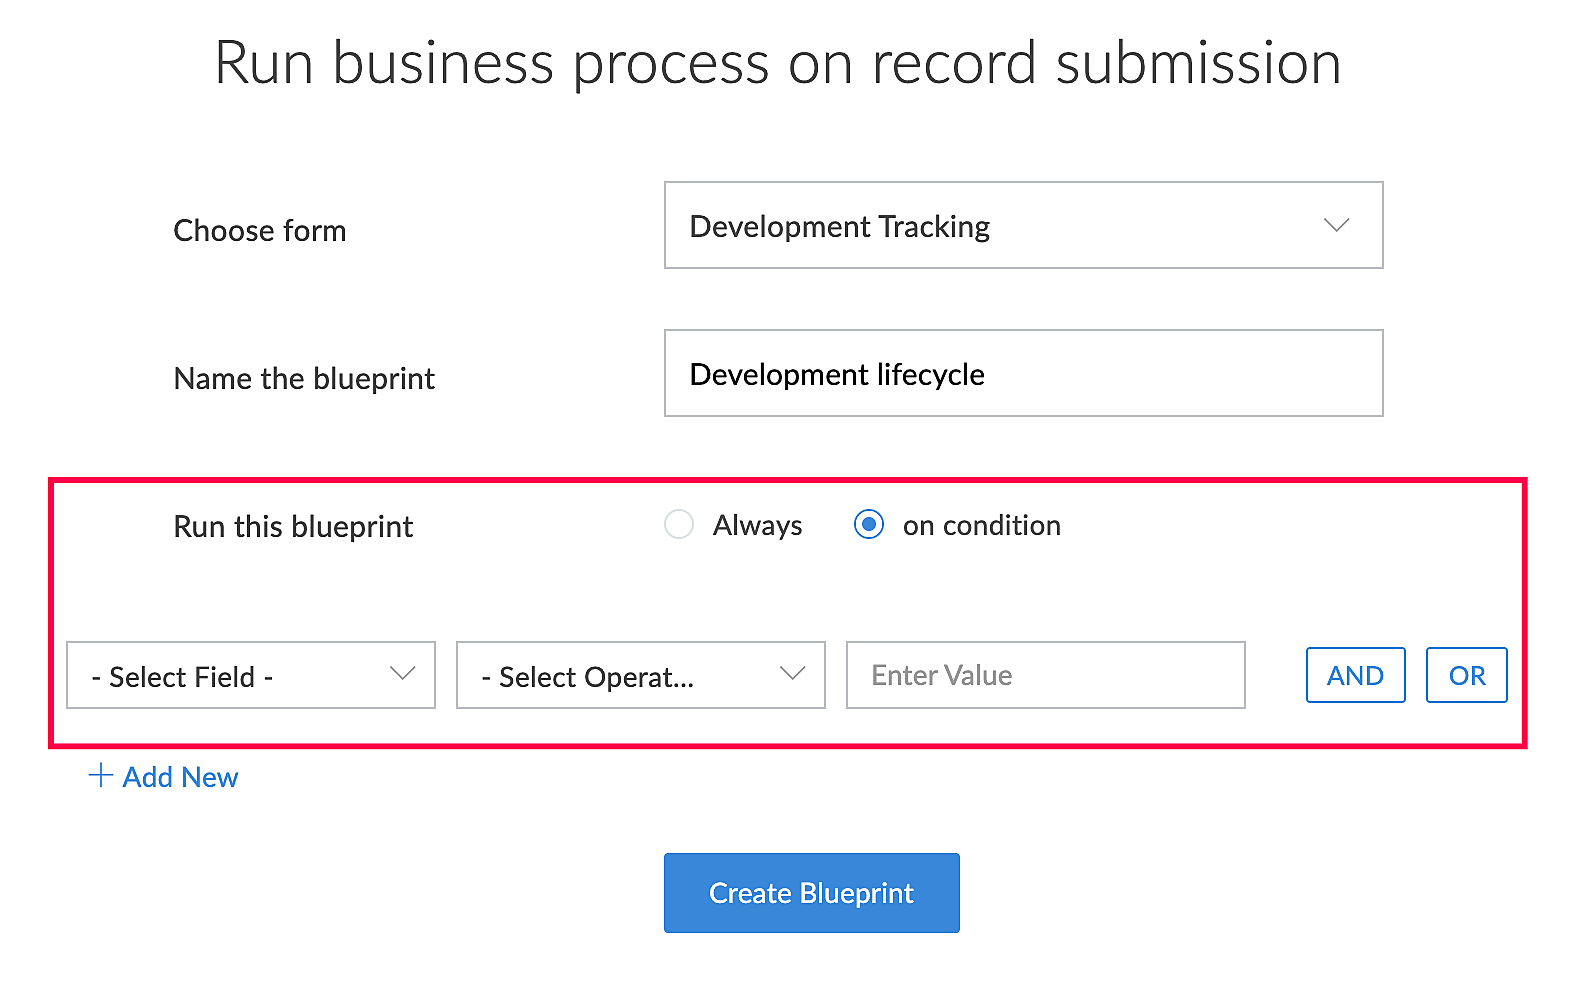
Note: Condition is not mandatory, and can be skipped when blueprint is to be enabled for all records.
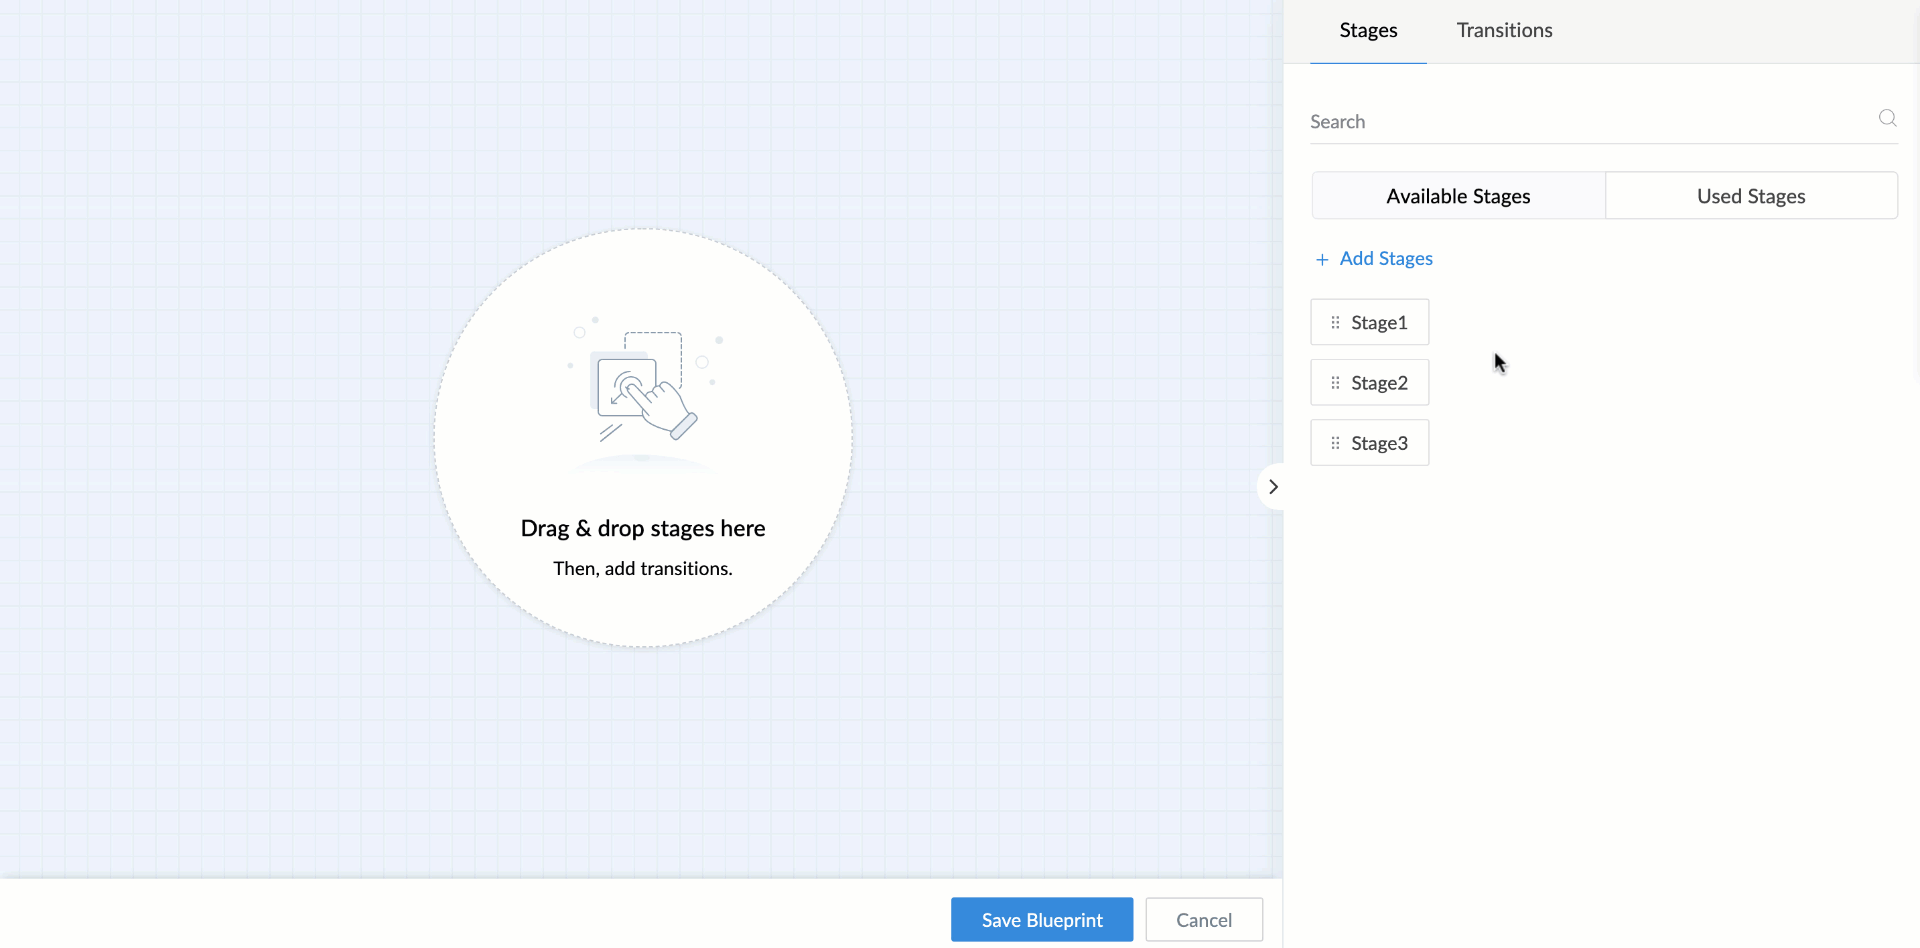
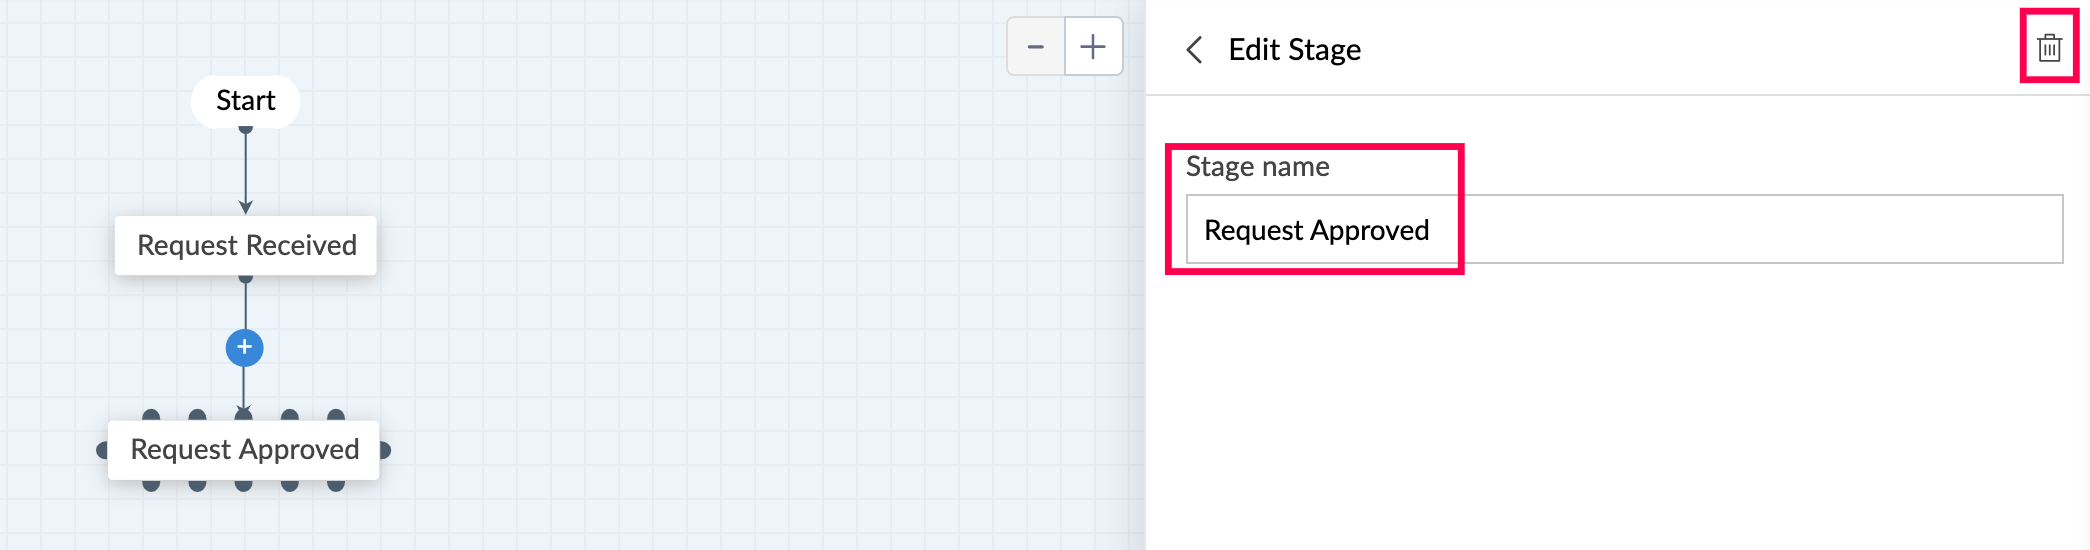
Step 3: Add Stages - These are the different milestones in the process. For a software development lifecycle process, Feature Approved, Feature Developed, and Testing Complete can be some of the stages.
Click Add Stages and drag-and-drop the newly created Stage:
Step 4: Add transitions - These are the intermediate phase between two states. They act as a link between the two states. Transitions are clickable buttons, which are used to move the blueprint to the next stage. Using the same example, Approve Feature, Development Started, and Bugs Found can be some of the transitions. When the Approve Feature transition is performed, the blueprint stage is moved to Request Approved stage.
Click on the + icon to add a transition between the stages: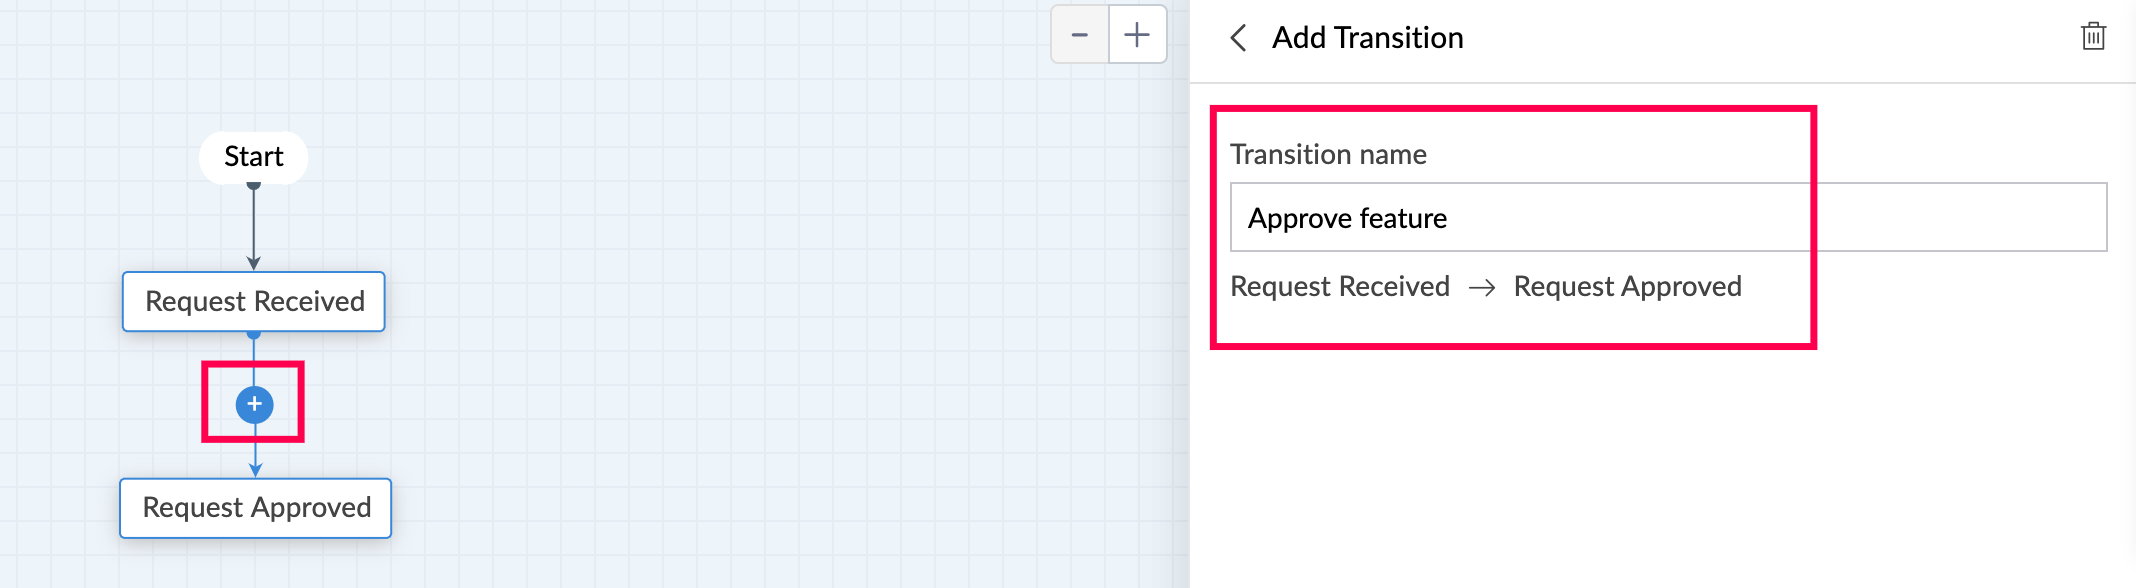
- Transitions contain two parts, Before Actions and After Actions. Before Actions are to configure who can view the transition, criteria to display the transition, tooltip, and confirmation message. After Actions consists of actions to be executed after the transition is triggered. The actions available are: Notification, Data access, Integrations, and Deluge script.
Set the following Before Actions:- Transition Owners - To configure who can view and perform the transitions.
Select the required option under Transition Owners.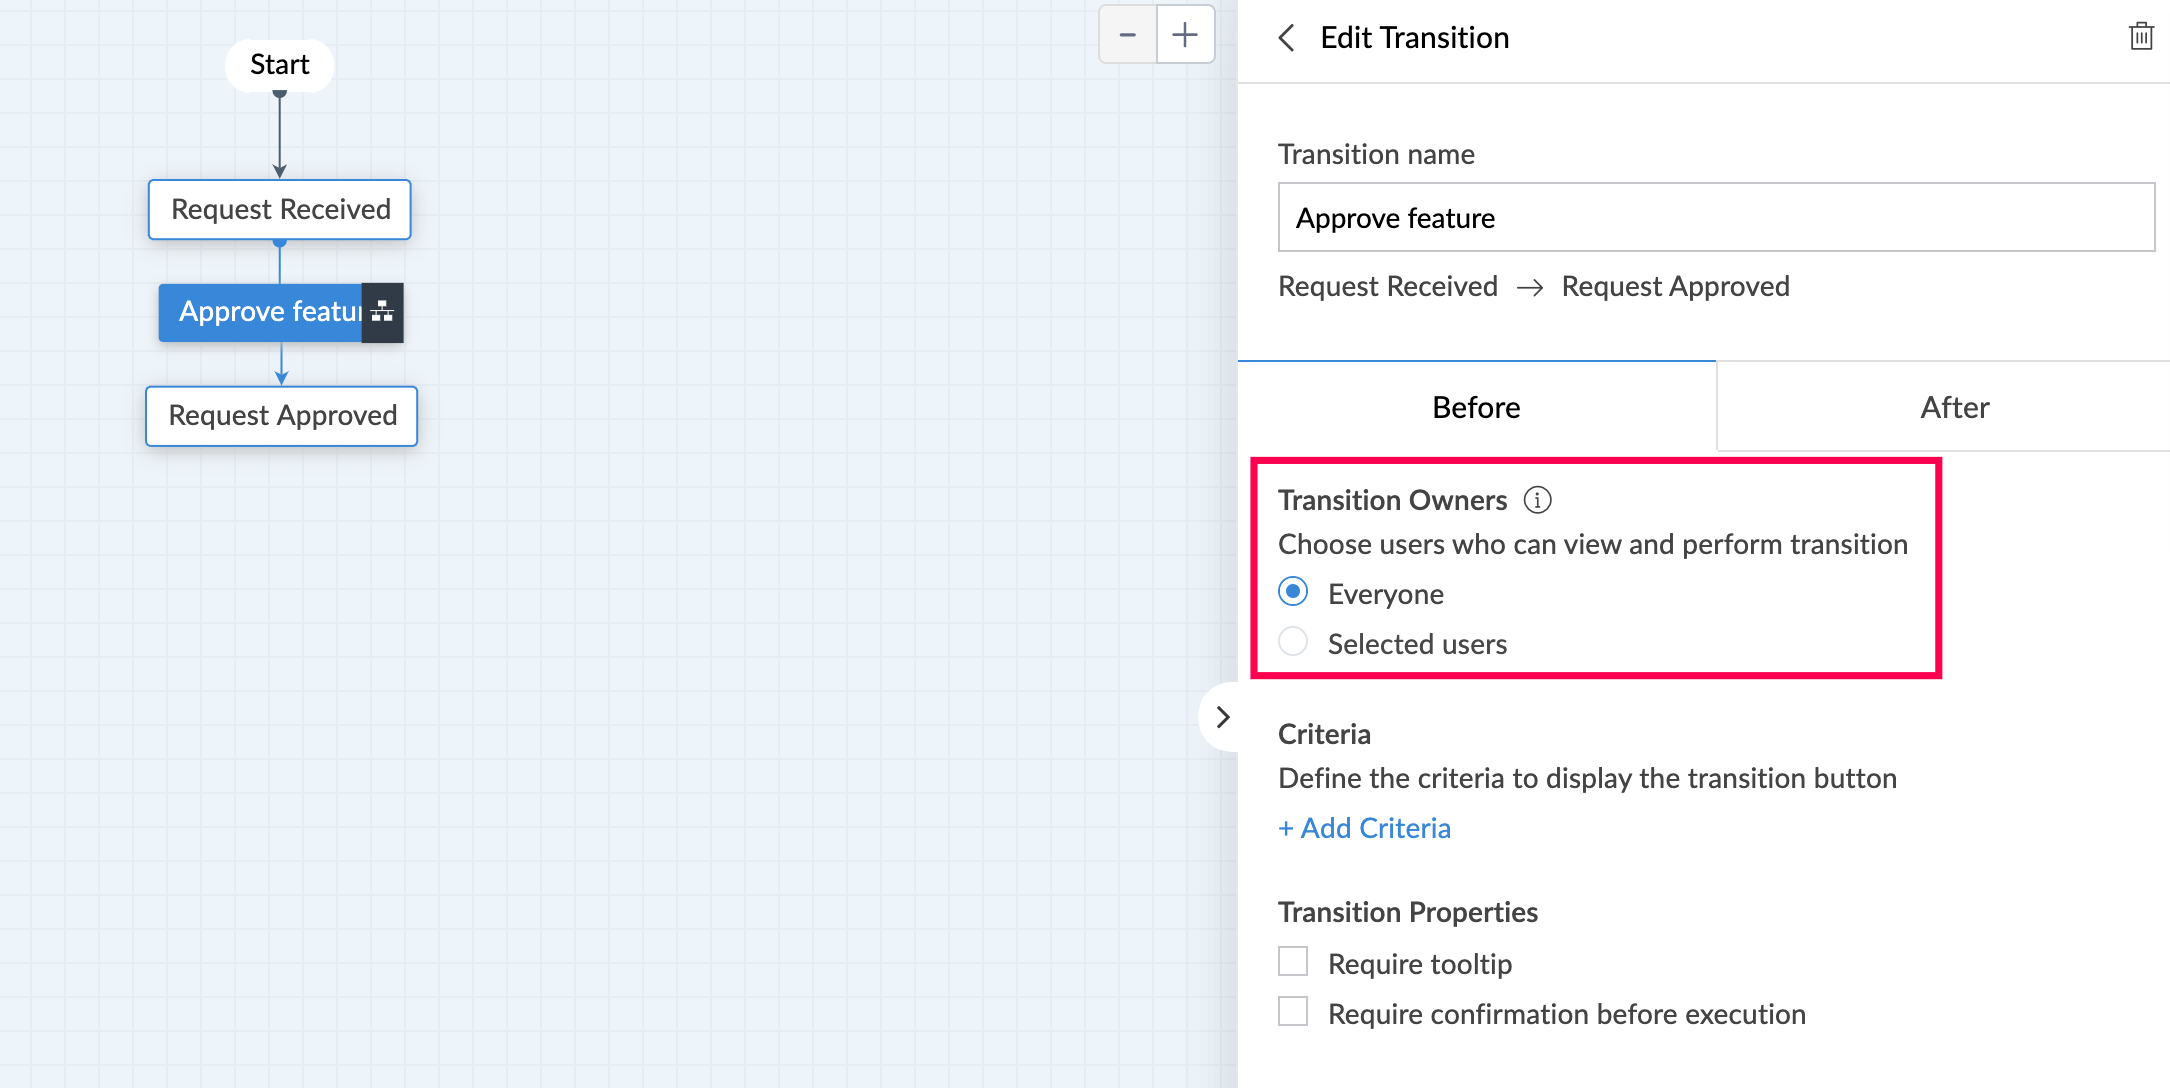 Note: Users can be selected based on email addresses, Permissions, and User field.
- Criteria - To display transition buttons for records that meet a criteria. For example, the Assign Developer transition should be enabled only when the Developer field is not null, i.e., after a developer has been assigned.
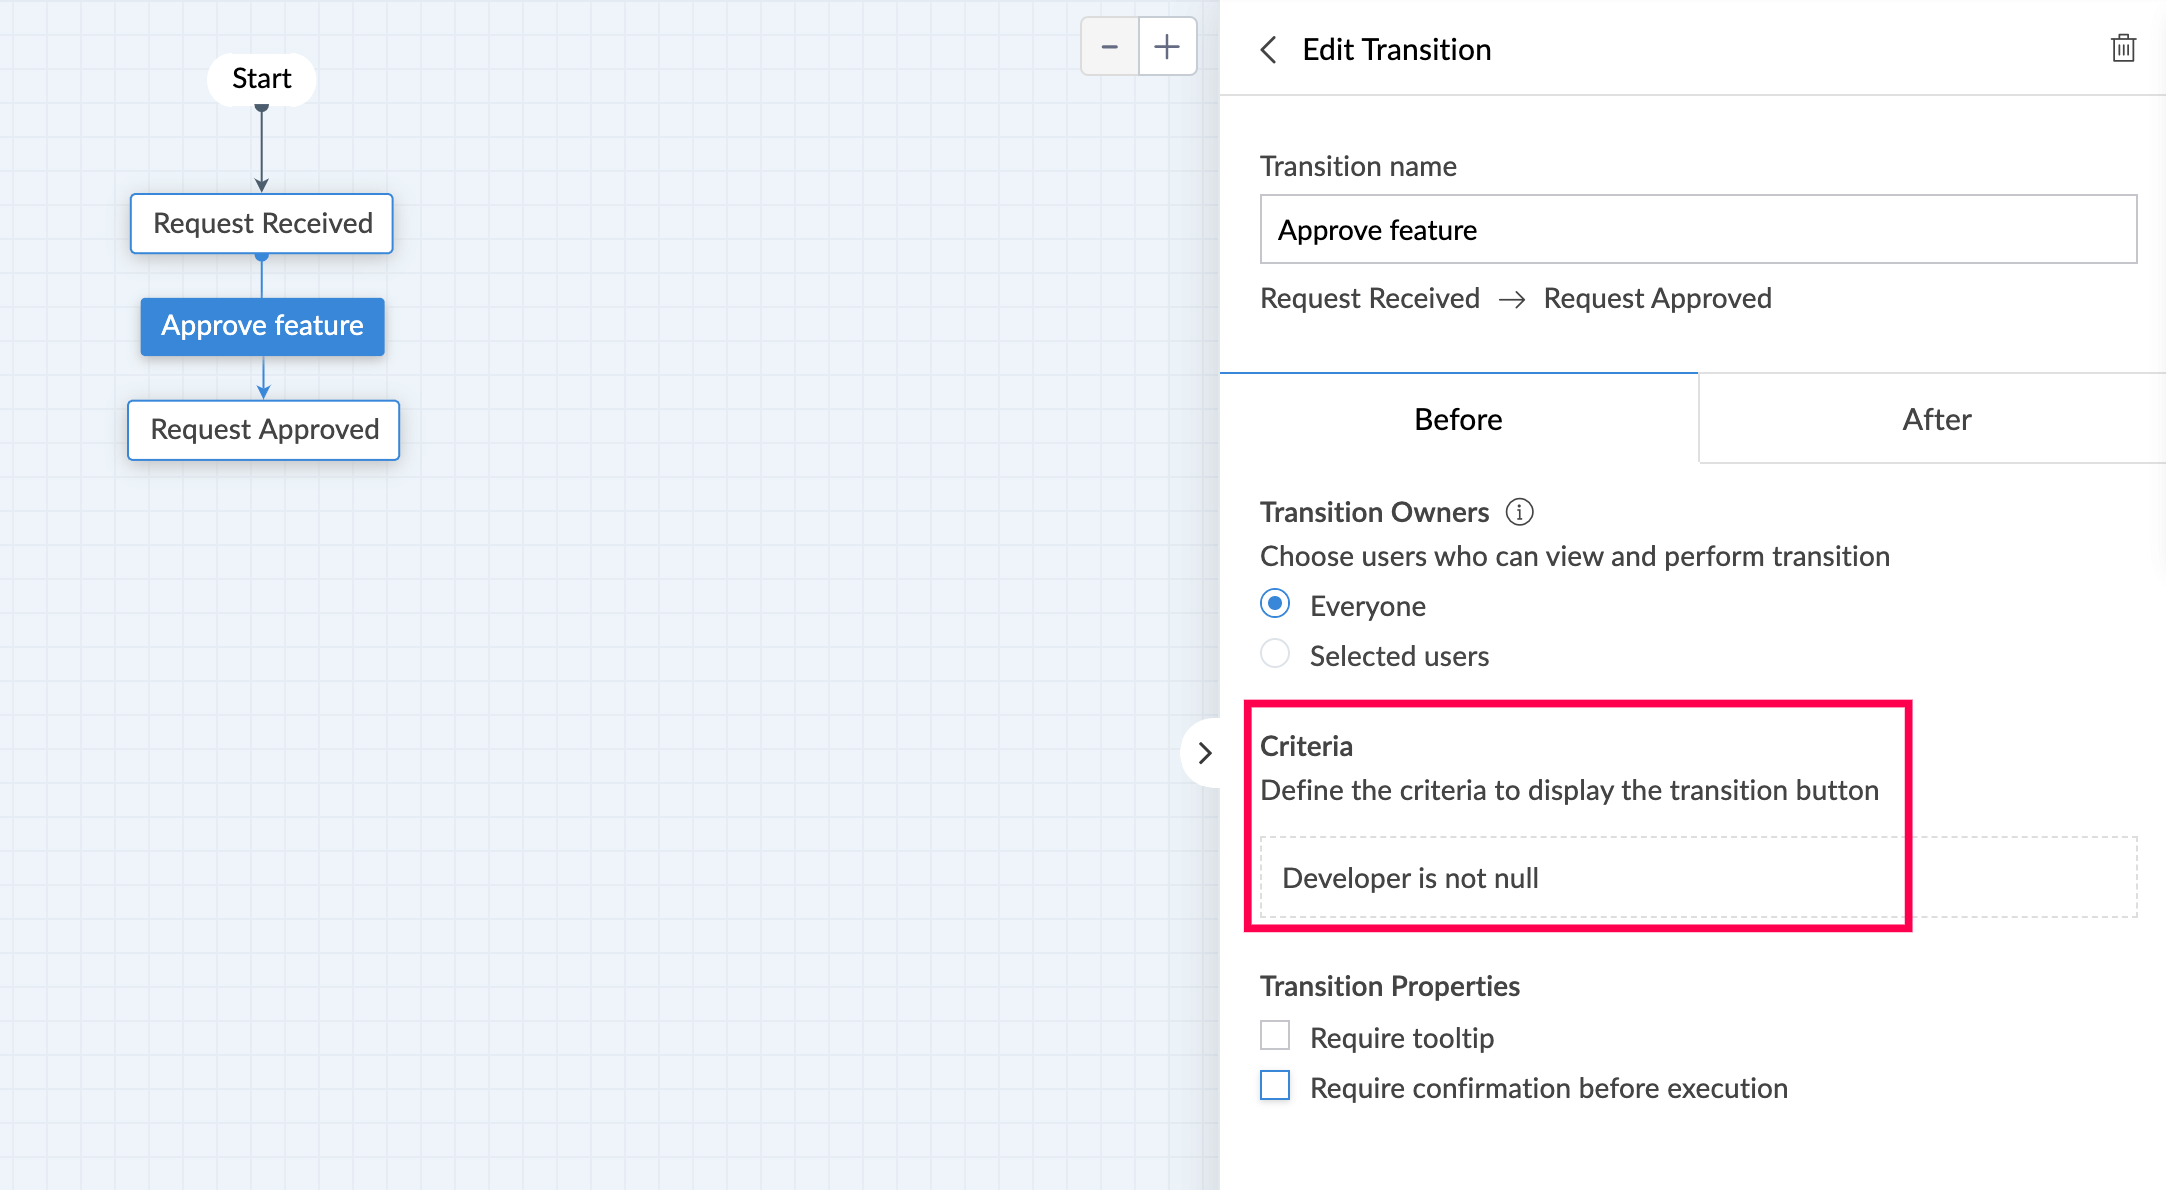 Note: Criteria is not mandatory, and can be skipped when transition is to be enabled for all records.
- Transition properties - This is used to configure tooltip and a confirmation message. Tooltips appear when the mouse is hovered over the transition, and confirmation messages are displayed when the transition button is clicked.
Check the "Require tooltip" box and enter the tooltip text.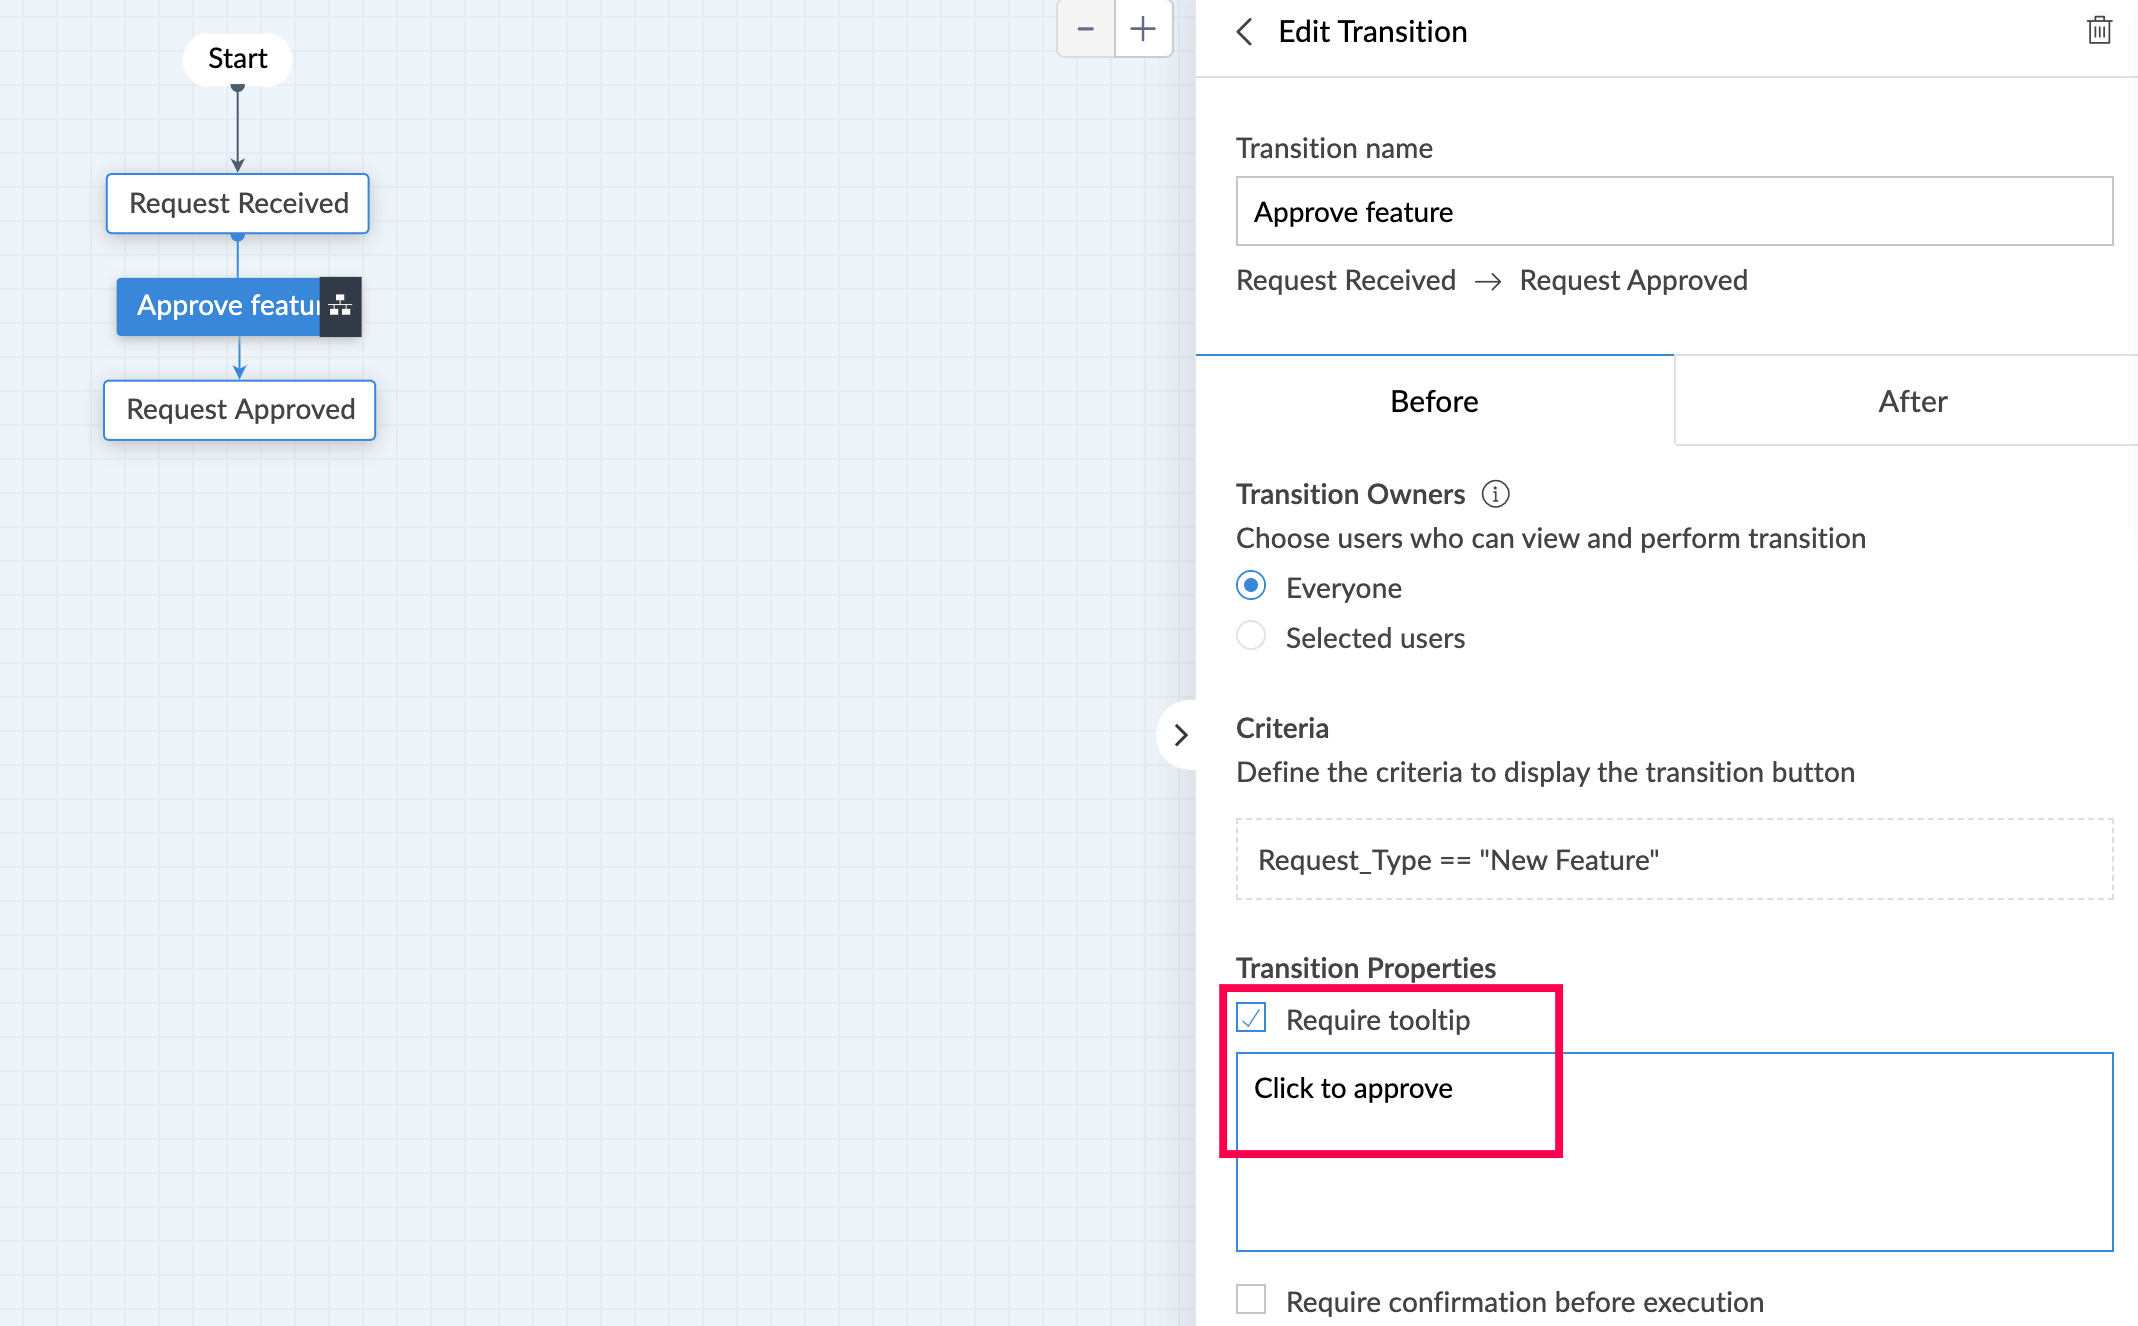
Check the "Require confirmation before execution" box to configure the confirmation action.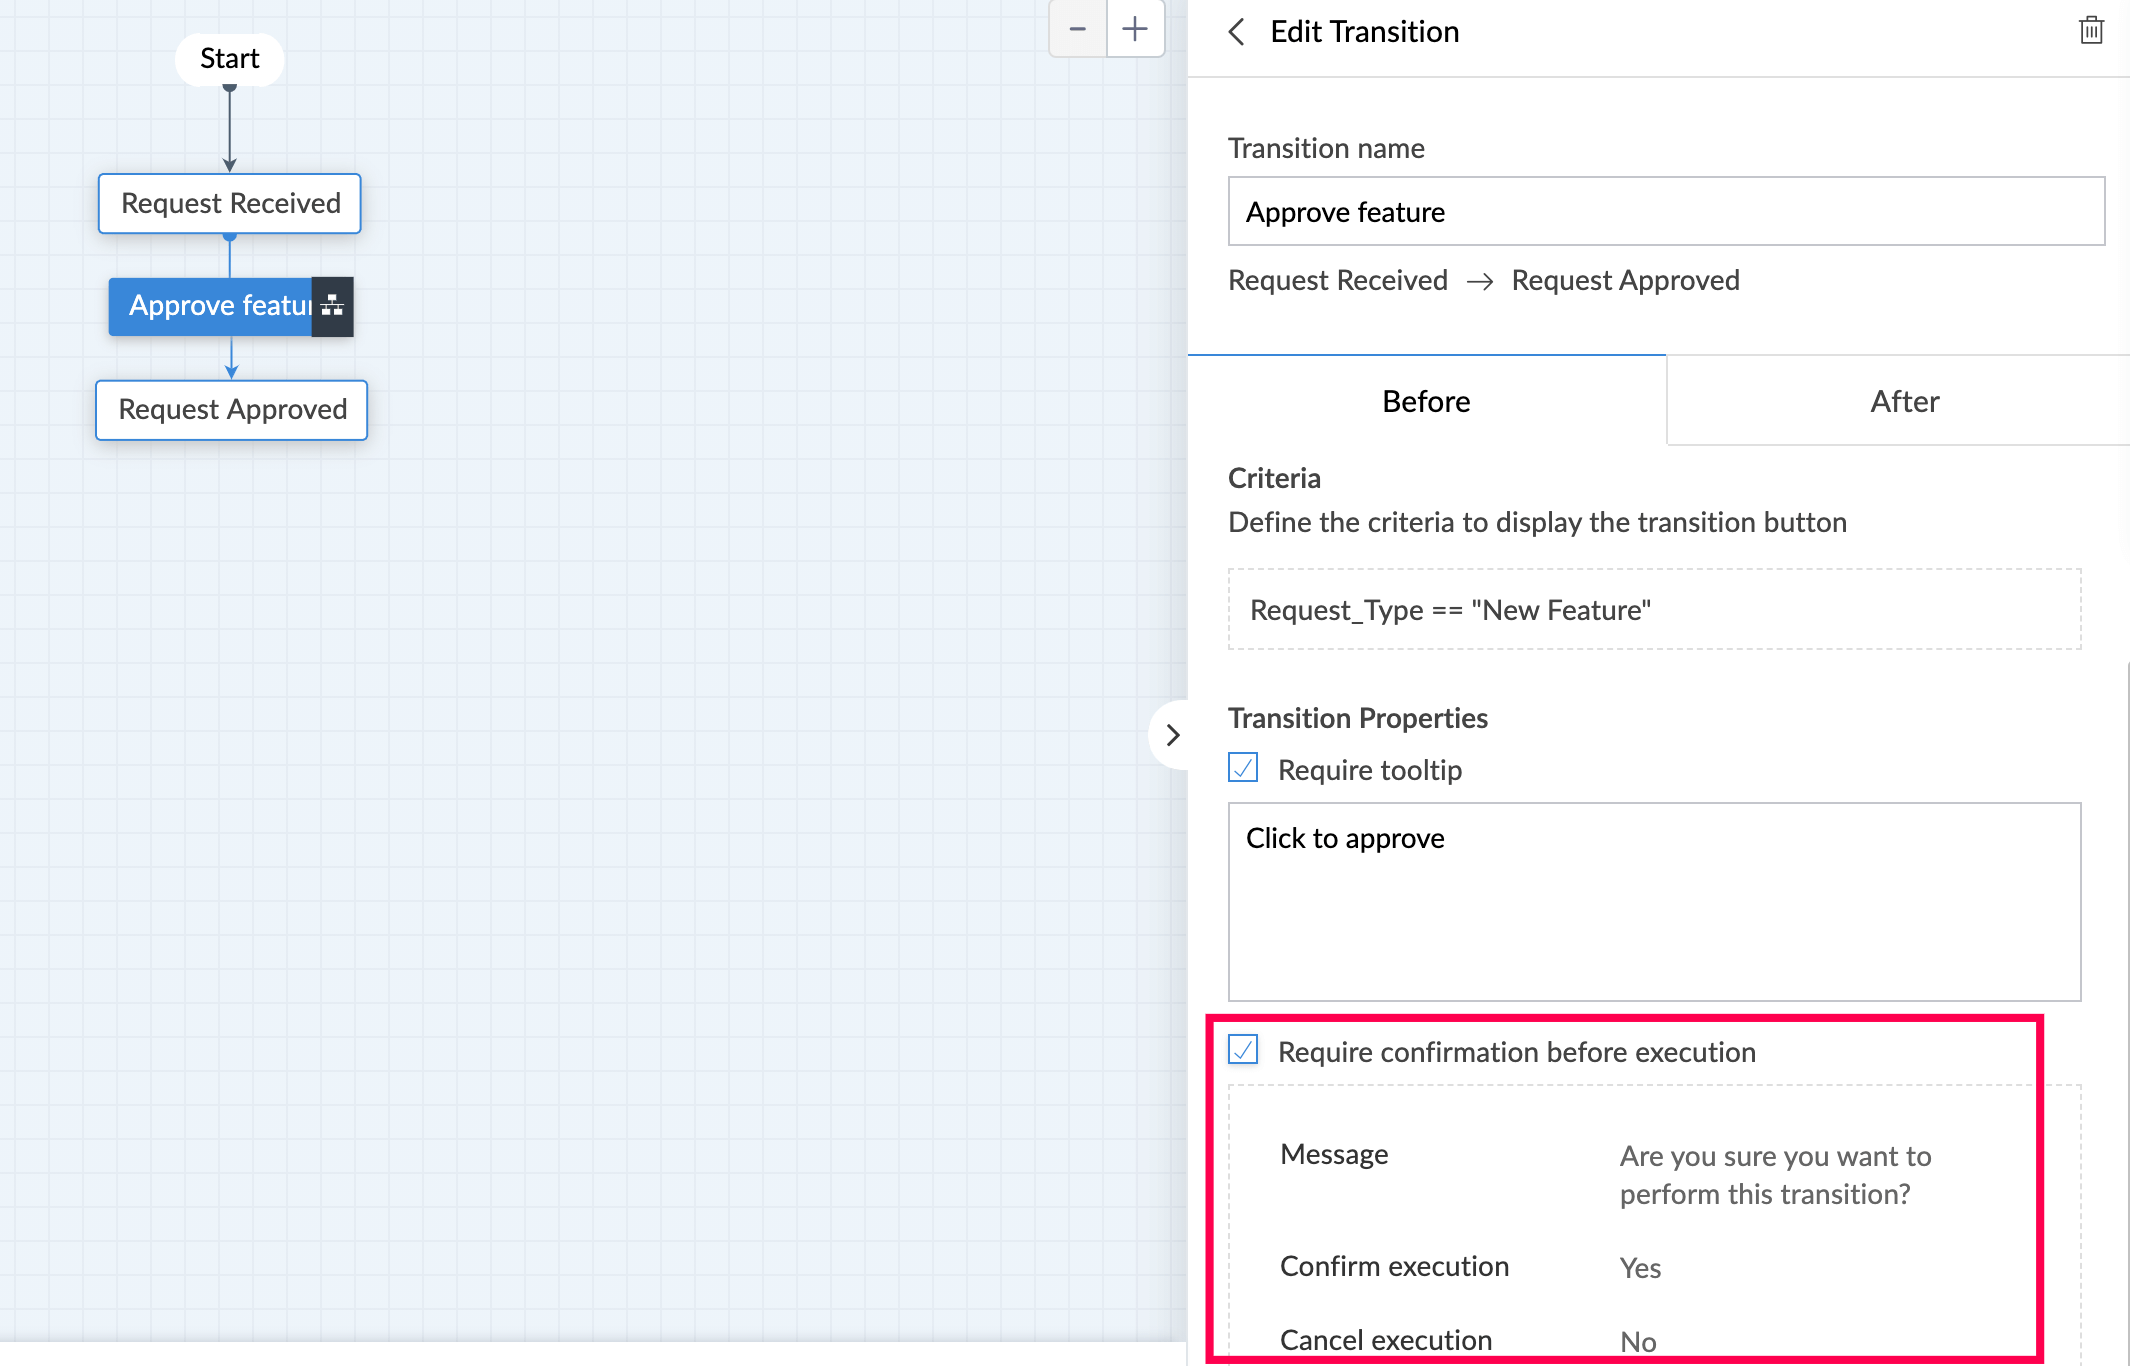
After Transitions actions are used to configure workflows that are triggered when the transition button is clicked. For example, we can use the send mail task to send an automated email notification to customers when their requests are approved.
Clicking on Add New Action under the "After" header gives options to configure various workflow actions: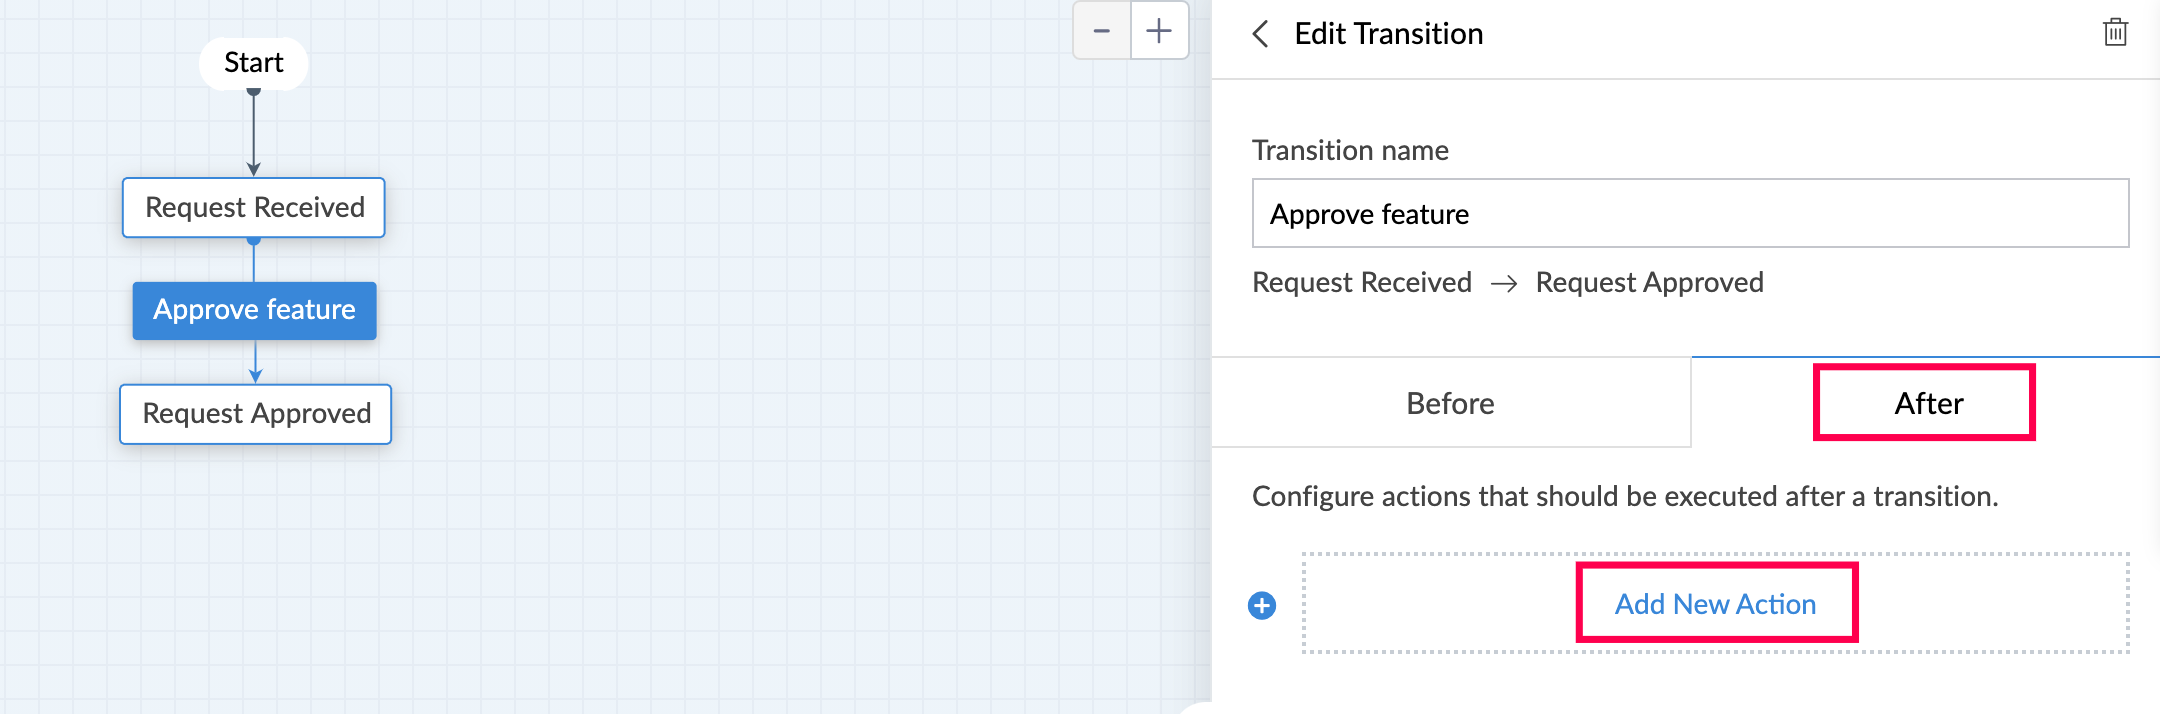
The following image shows the various workflow actions that can be configured: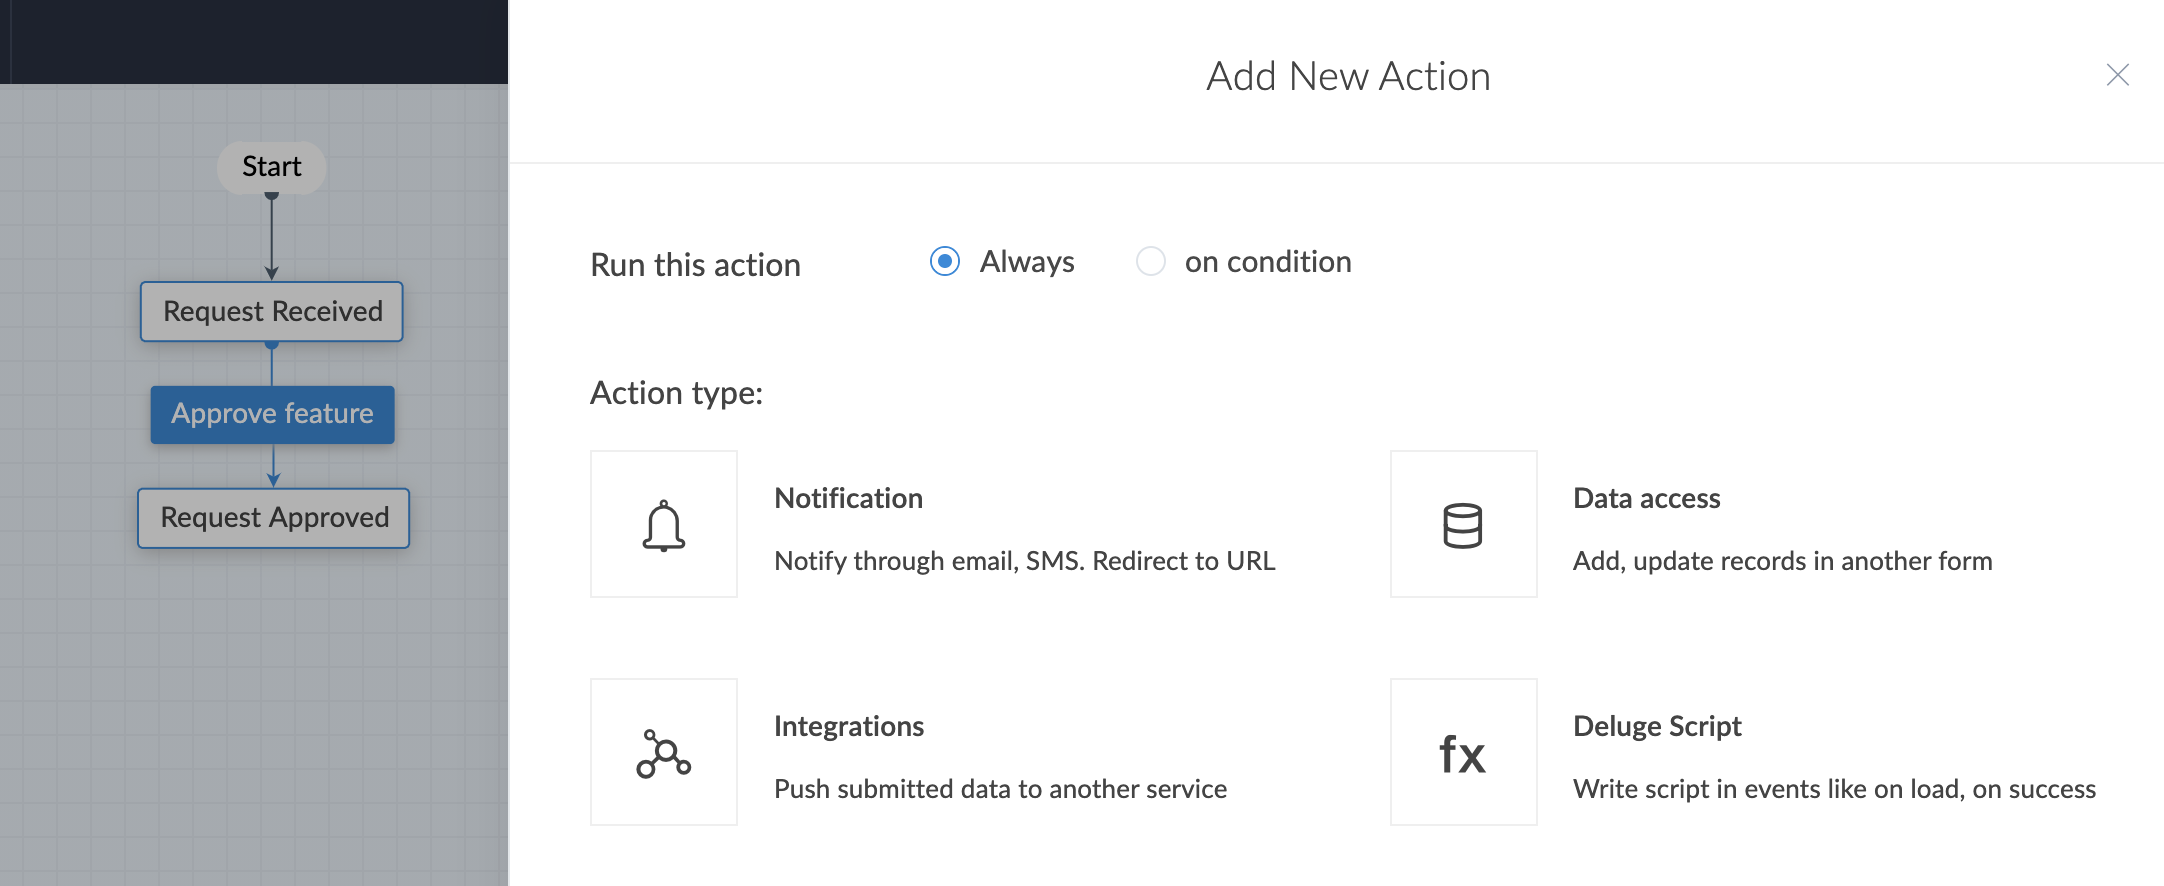 Tip: Learn about Deluge.
- Transition Owners - To configure who can view and perform the transitions.
- Transitions can further be categorized into Common and Parallel.
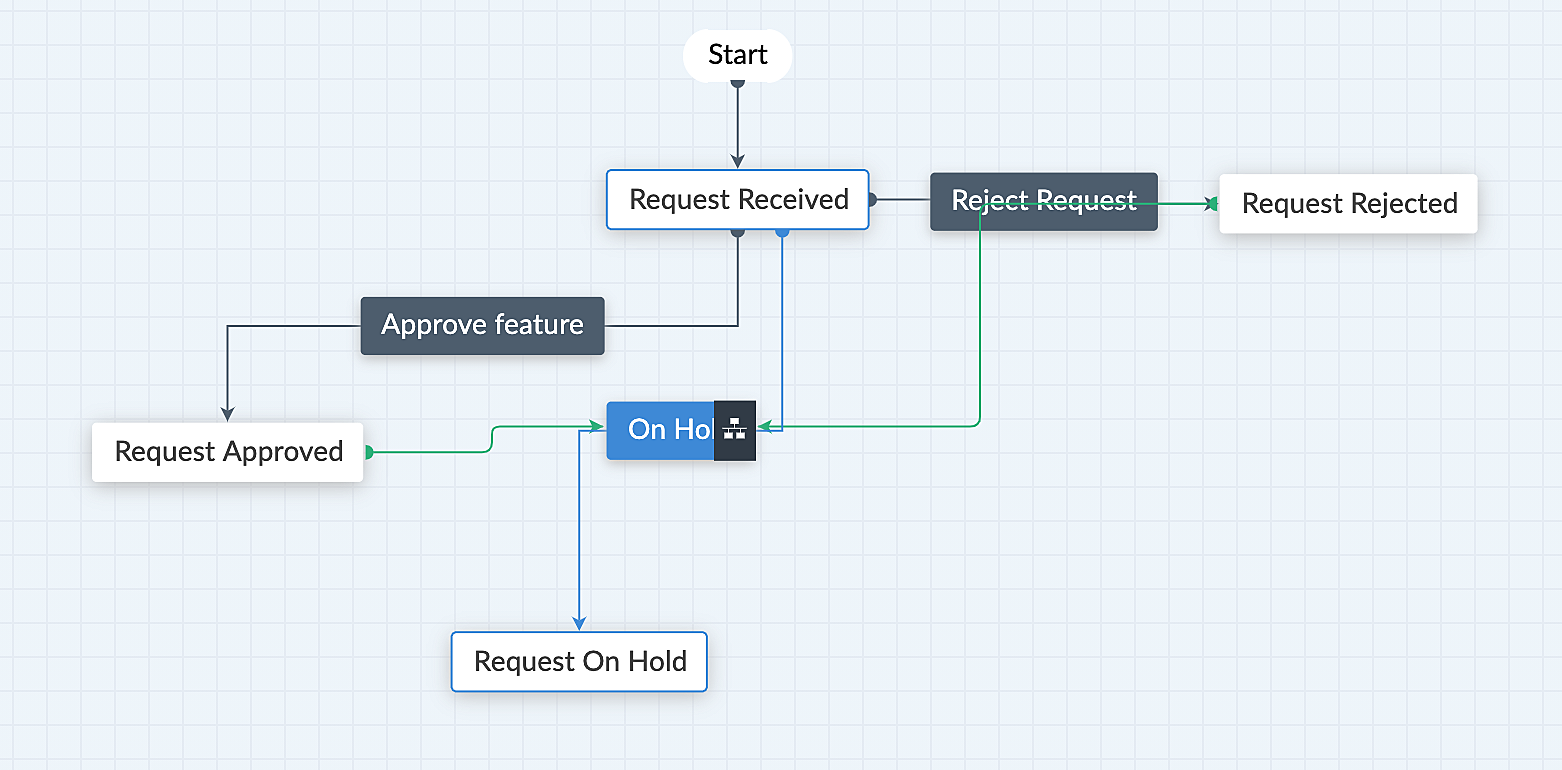
Configure Common Transition: Common transitions can be accessed from multiple stages in a blueprint. For eg: Consider online order management where the customer can cancel the order at anytime so the cancel order transition will be available across all the stages. Or think about the On Hold transition which should be available at all stages of the development lifecycle.
Click the highlighted icon next to the transition and toggle ON Common Transition.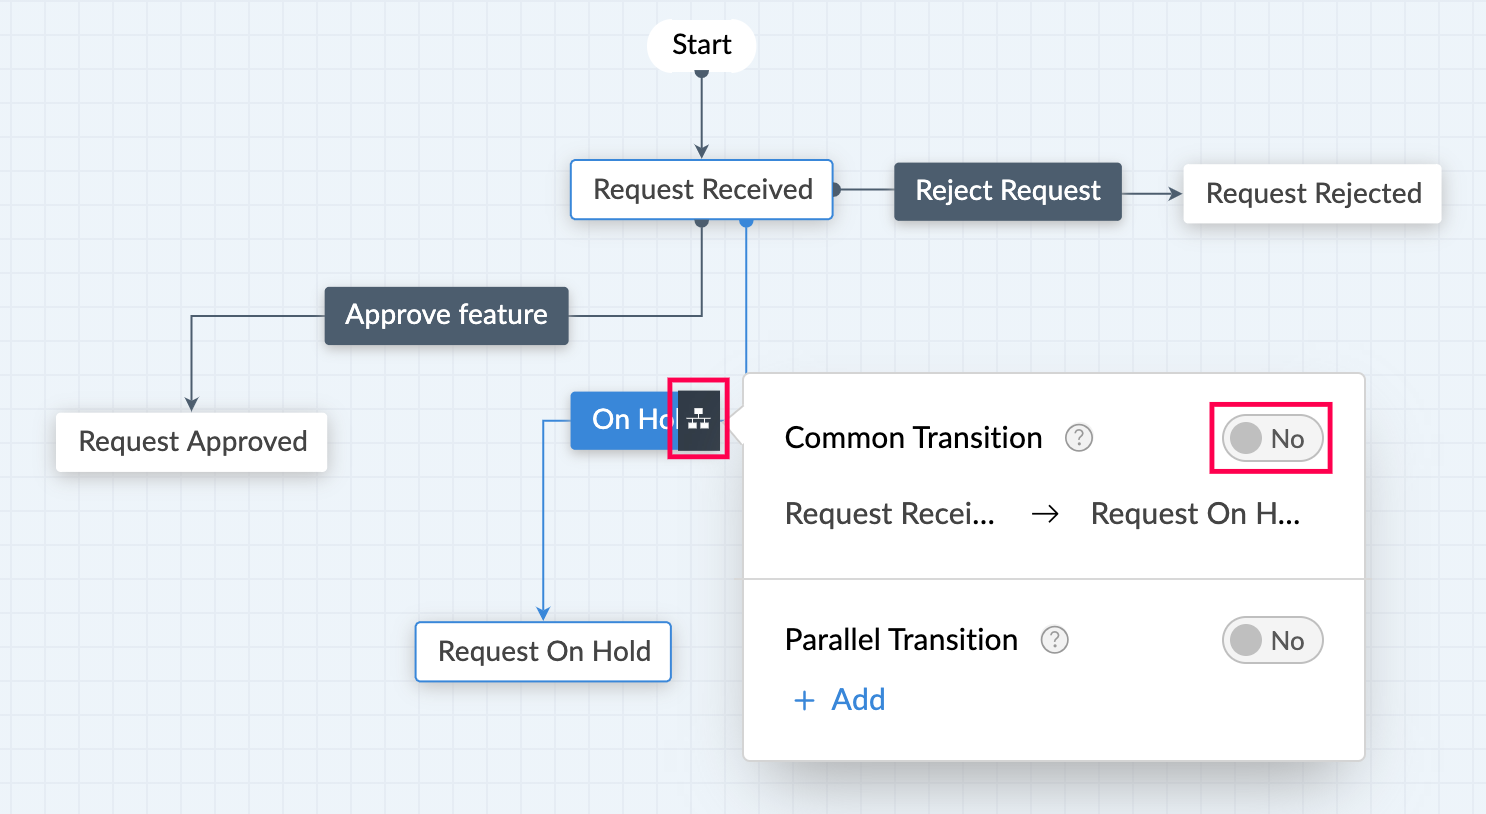
Once a transition is marked as a common transition it will appear for all the blueprint stages by default. This helps when we want a particular transition to be enabled for all the blueprint stages without having to create the transition manually for each stage.
Configure Parallel Transition: When multiple transitions are required to move from one stage to another then it known as parallel transition. For eg: hostel fee, college fee and book fee all should be paid only then the record should be marked as fee paid.
Click the highlighted icon next to the transition and toggle ON Parallel Transition.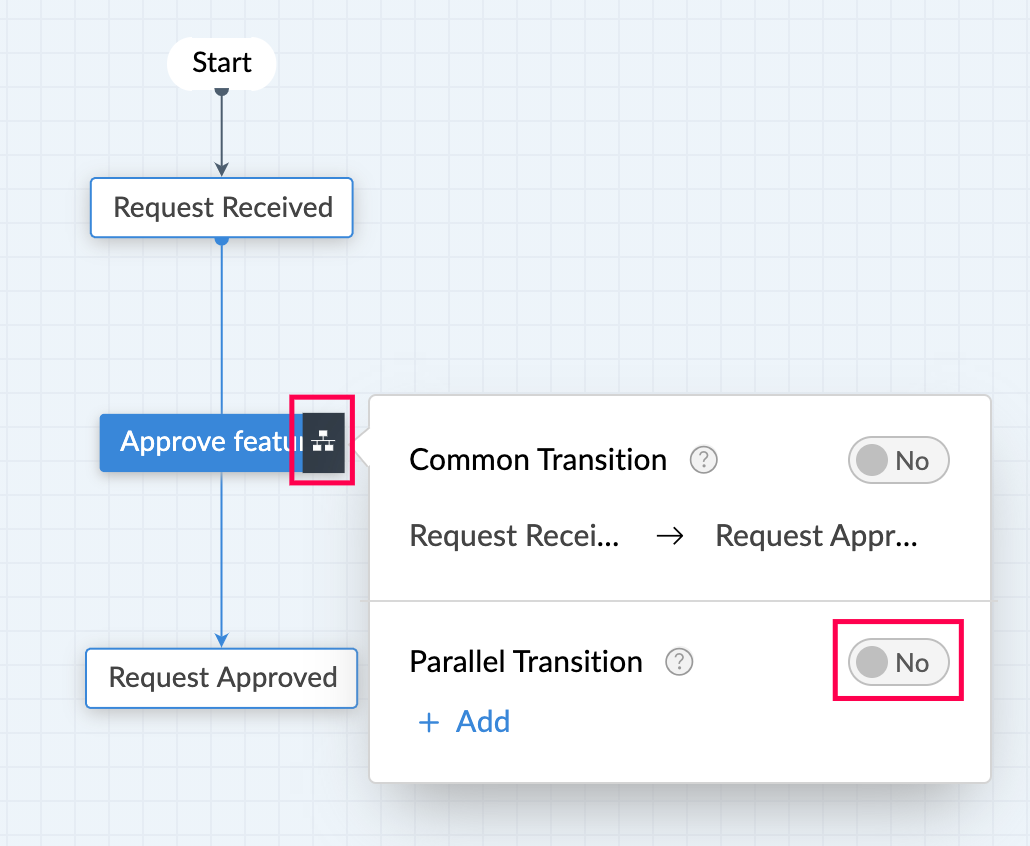
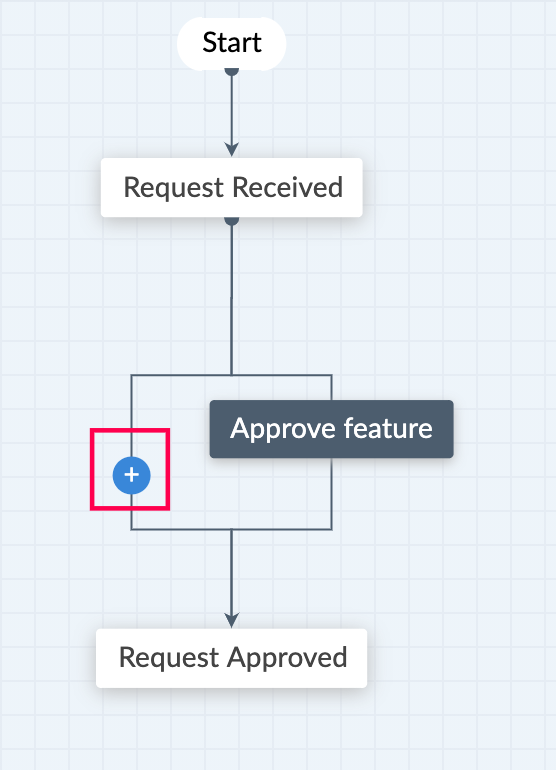
Once a transition is marked as a parallel transition we can add additional transitions between the blueprint stages. In simple words, it lets us add more than one transition between stages. The "+" icon is used to configure the additional transitions.
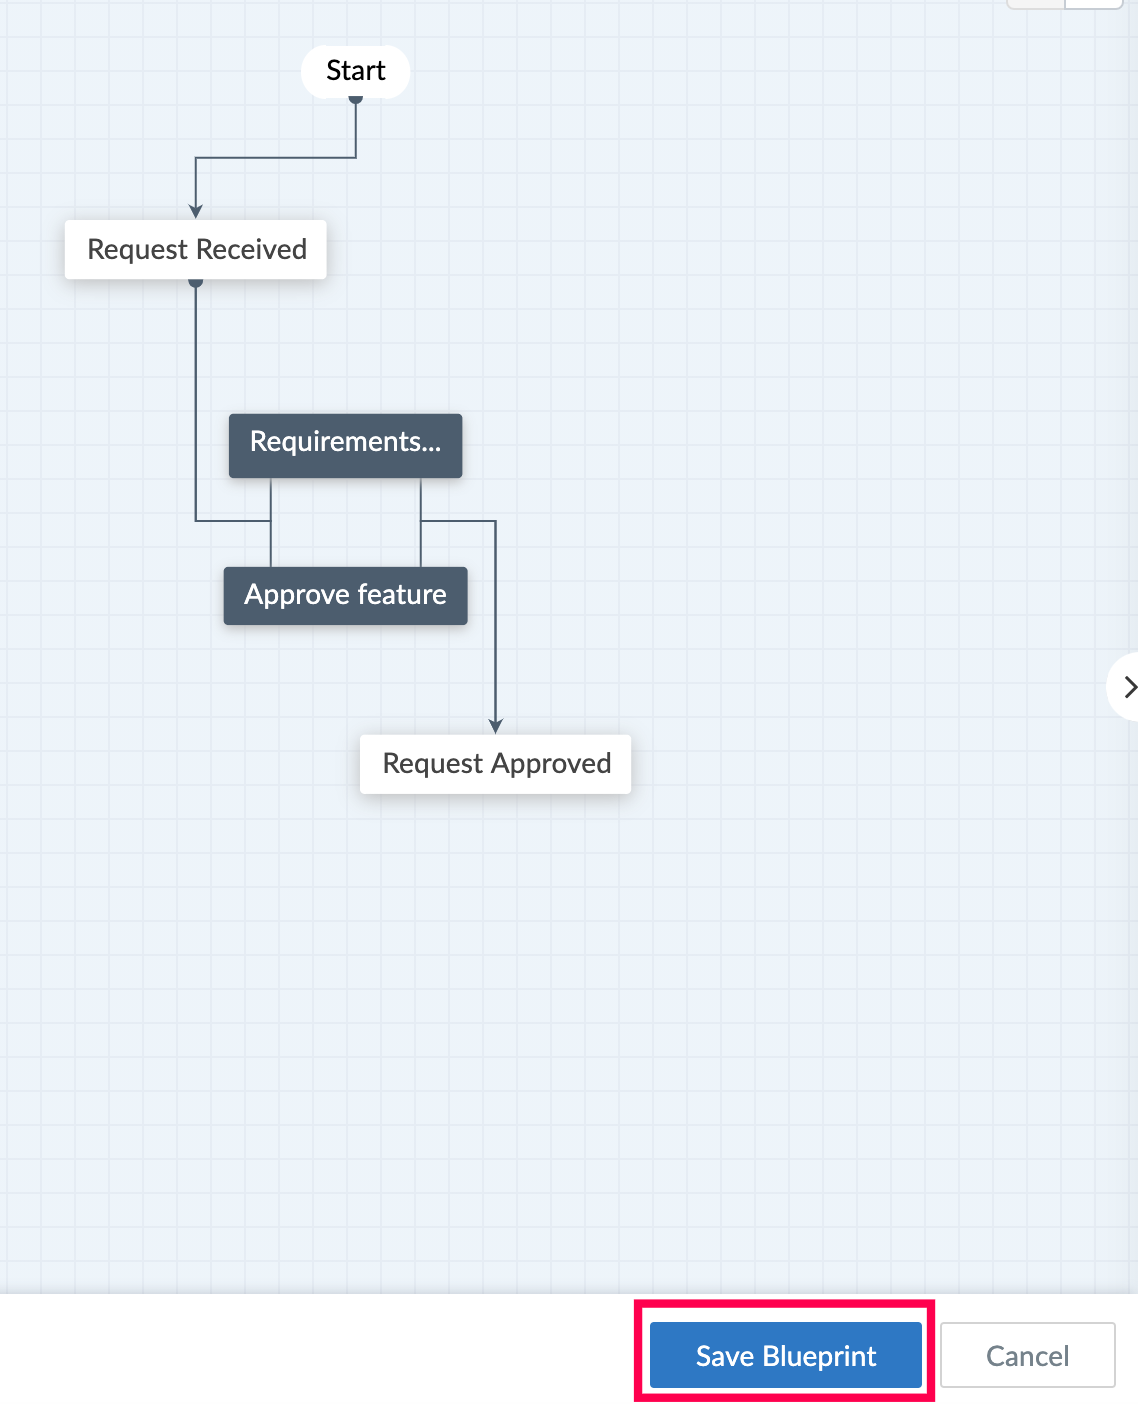
Step 5: Click Save Blueprint.