Install APM Insight Java Agent in JBoss EAP 6.3.3 & above
Note: The application server user must have access to the agent-installed folder.
Note:
- You can also configure a secure APM URL. Ensure that the connection is stable and free from certificate-related issues.
Example: https://apm-prod-server:8443
- For an Applications Manager failover setup, you can specify multiple hosts in a comma-separated format (supported from Java Agent v6.8), as shown below:
apm.host=http://apm-prod-server-A:9090, http://apm-prod-server-B:9090
- For the Standalone setup:
-Djboss.modules.system.pkgs=org.jboss.byteman,com.manageengine -javaagent:<agent_directory_full_path>/apminsight-javaagent.jar
Learn more about Applications Manager's JBoss Monitoring.
Installing Java Agent in JBoss EAP through Management Console
For version 6.2.x
Note: System Properties option is not required from Java agent v6.6.1
Open the management console through localhost:9990/console and login as “Management Realm” user.
- Select Hosts tab → Server Configurations → Server instance in which you like to install the agent → JVM Configuration tab

- Click on Edit button to create a JVM Configuration for the server. In JVM options text box, add the following lines (each JVM option must be separated by a new line)
-javaagent:AGENT_HOME/apminsight-javaagent.jar

- Click on save button, you will see “Added/Modified JVM Config” message at top of the page. If the message doesn't appear, check your configuration carefully and save it again.
- Now, select “System Properties” tab and Click “Add” button.

- In the newly opened dialog box, fill in the following values:
Name : jboss.modules.system.pkgs
Value : org.jboss.byteman,com.manageengine
Boot-Time : Check

- Finally, start/restart your configured server instance from “Runtime” tab at top left corner of the page.
For version 7.x
Note: System Properties option is not required from Java agent v6.6.1
Open the management console through localhost:9990/console and login as “Management Realm” user.
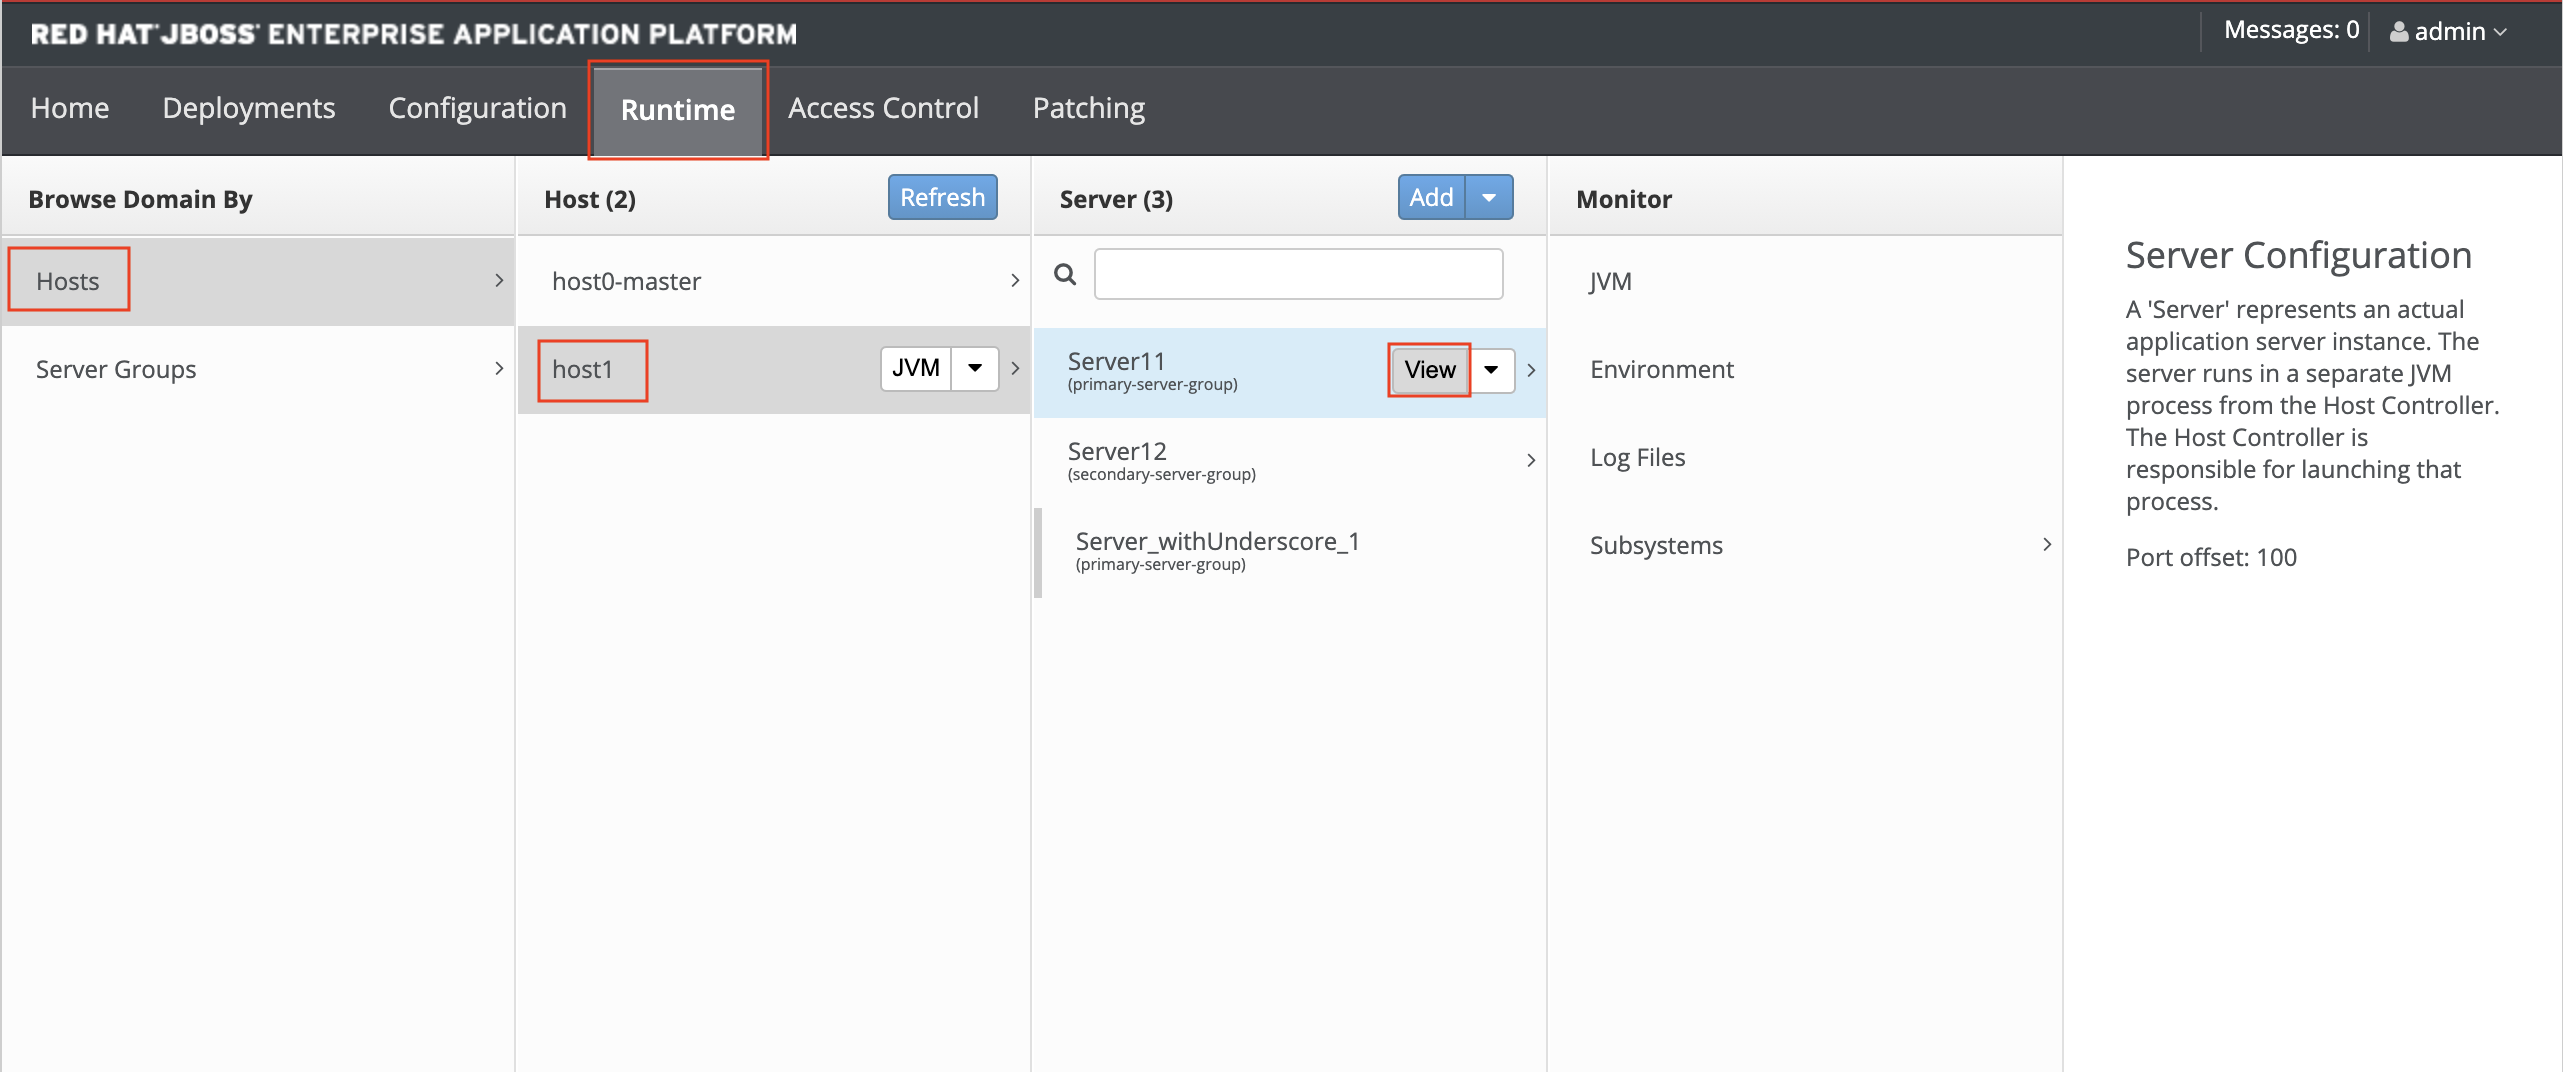
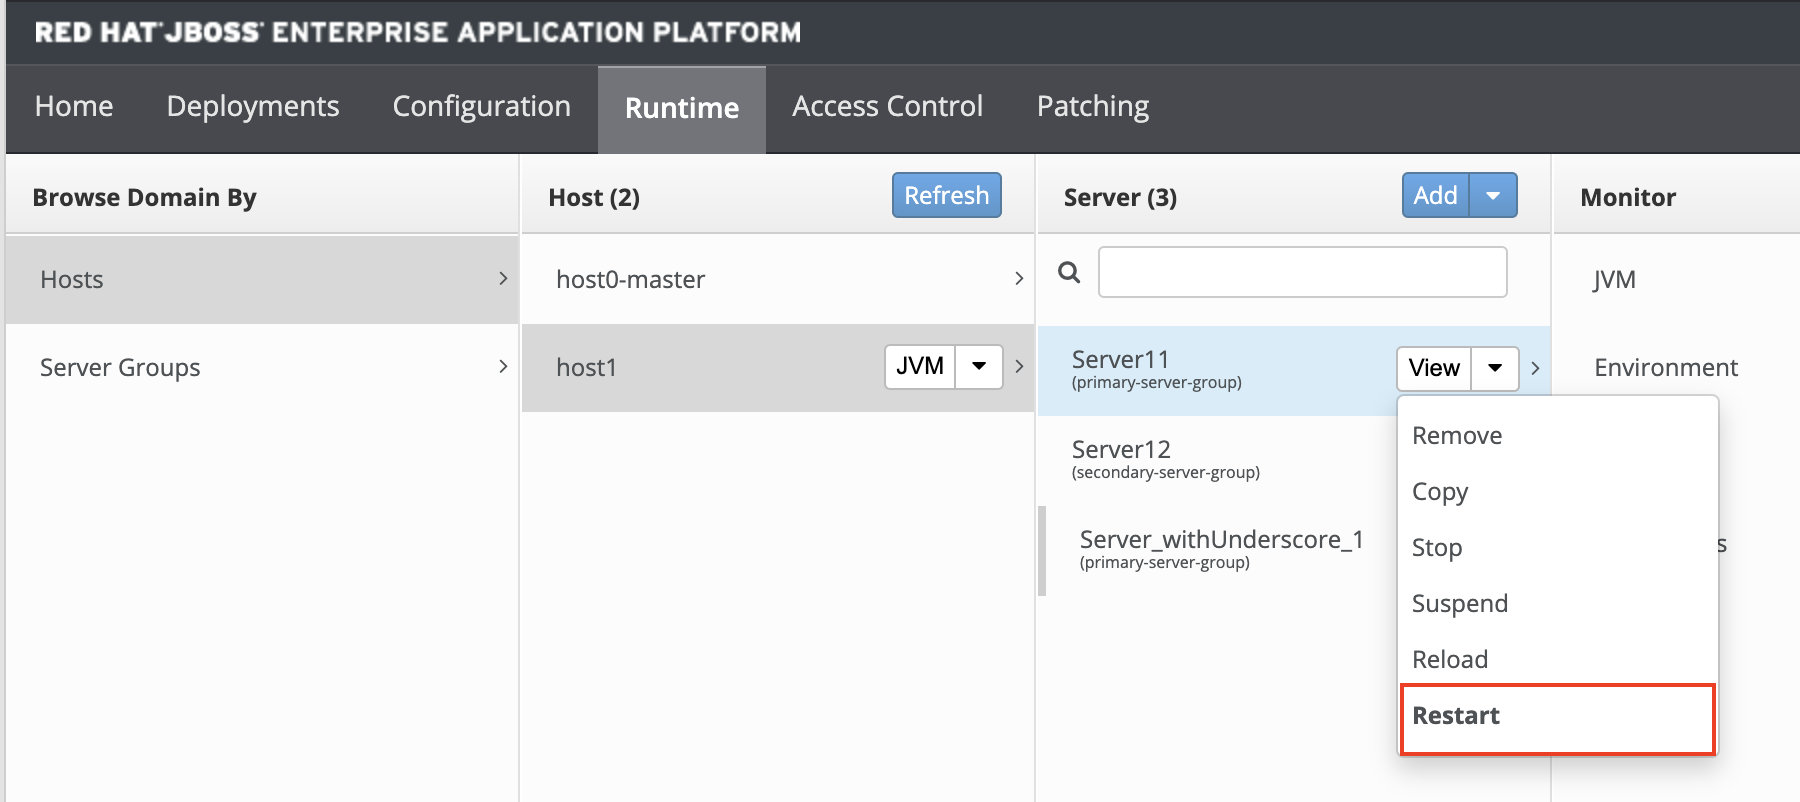
- Select Runtime tab → Hosts → Choose the Host followed by the Server instance in which you like to install the agent → Click View to view the Server configuration.
- Click on Edit button to create a JVM Configuration for the server. In JVM options text box, add the following lines (each JVM option must be separated by a new line)
-javaagent:AGENT_HOME/apminsight-javaagent.jar
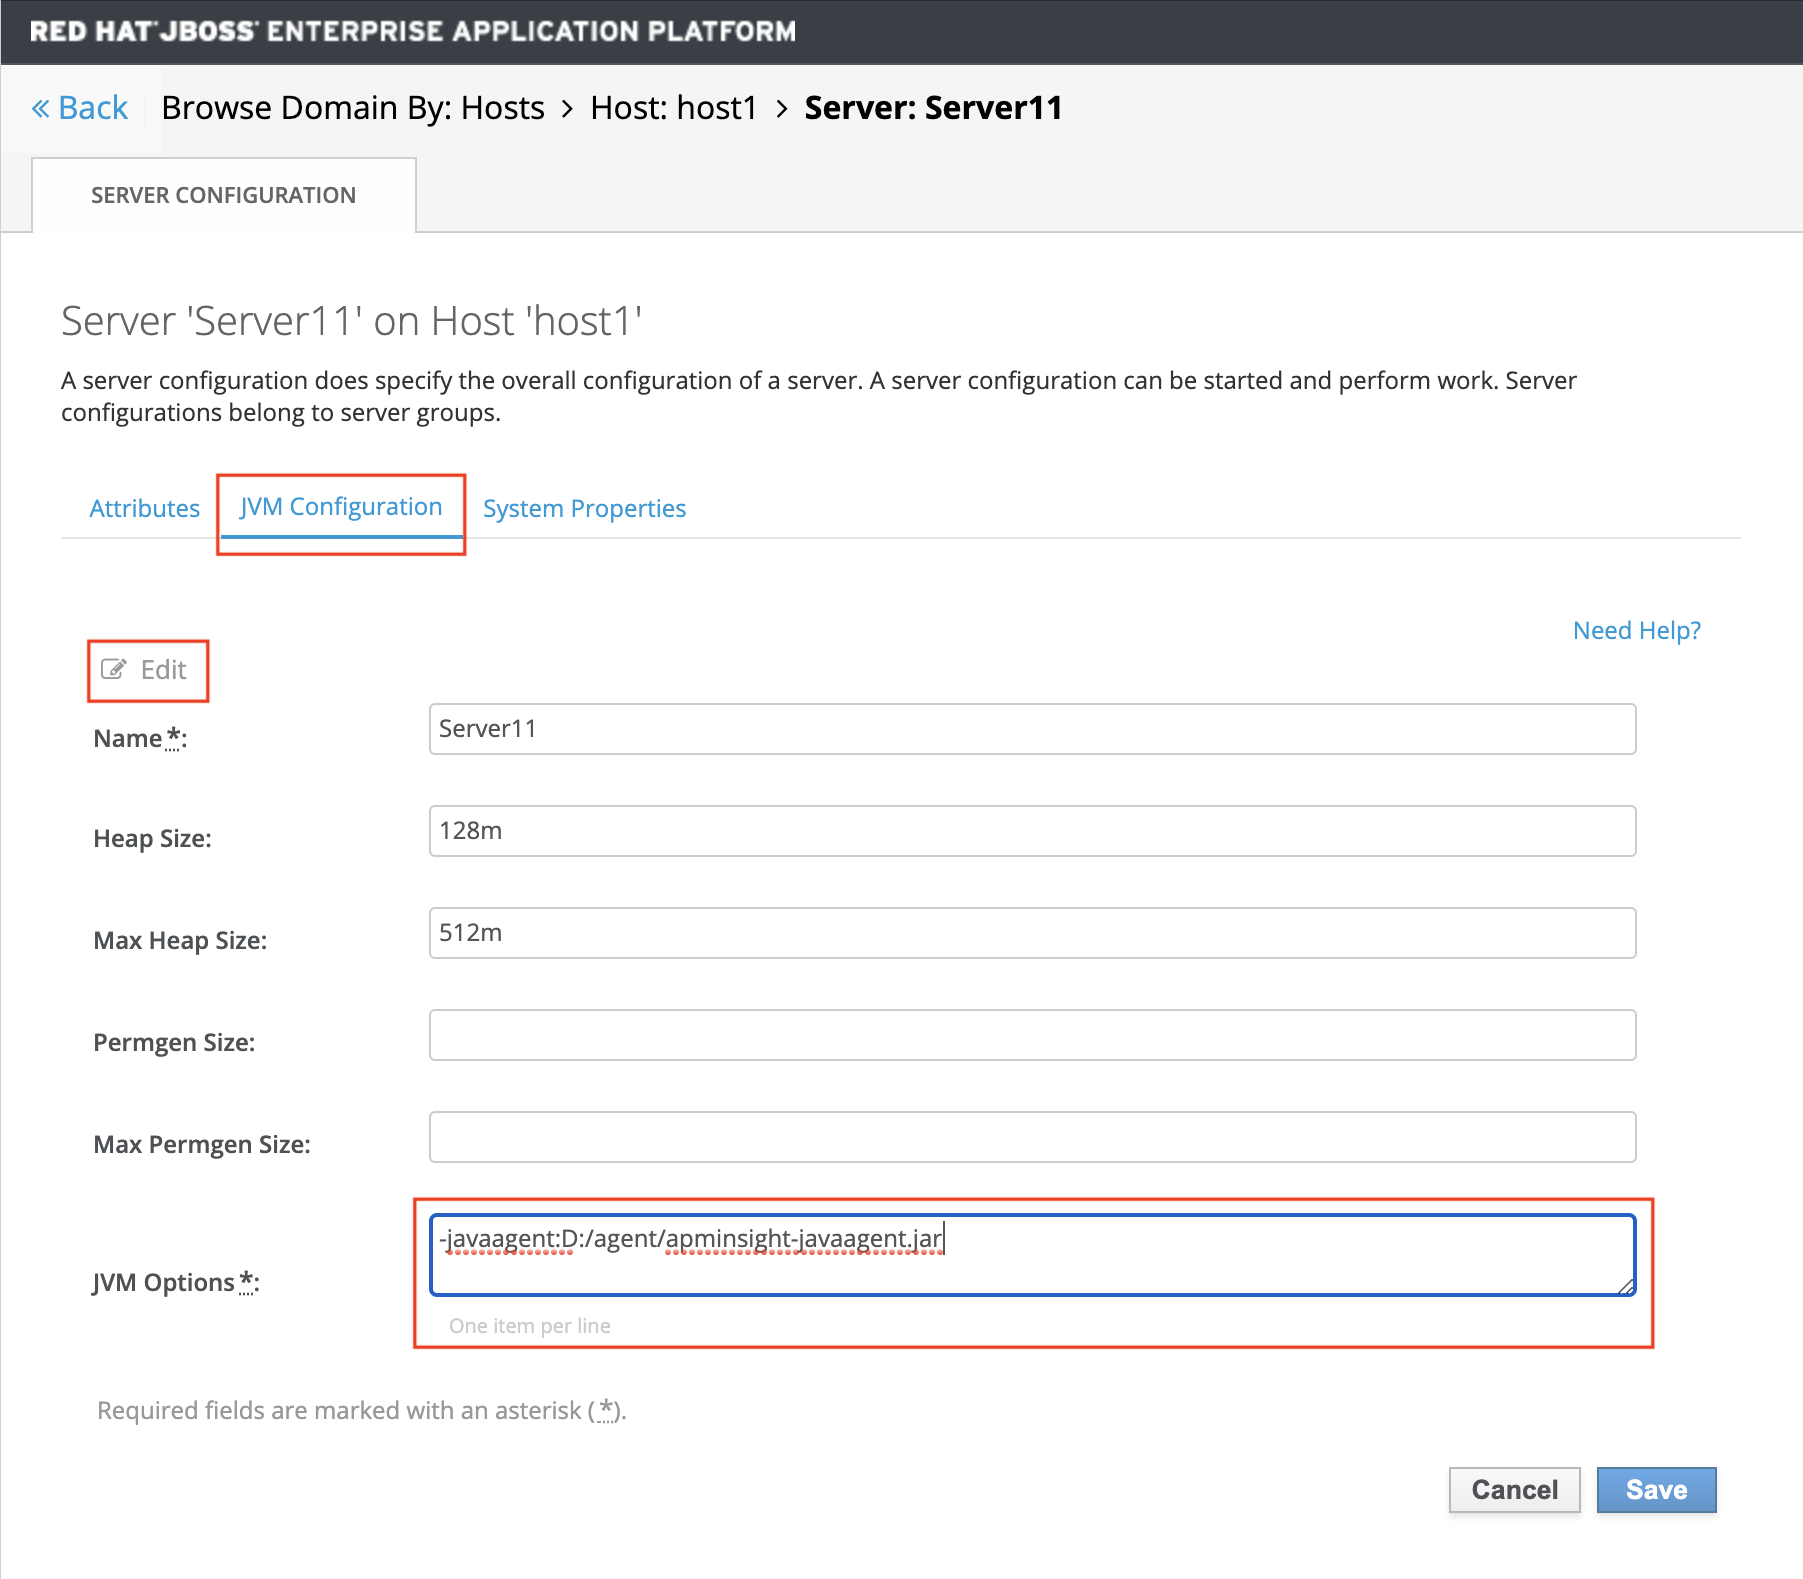
- Click on save button, you will see “Added/Modified JVM Config” message at top of the page. If the message doesn't appear, check your configuration carefully and save it again.
- Now, select “System Properties” tab and click “Add” button.
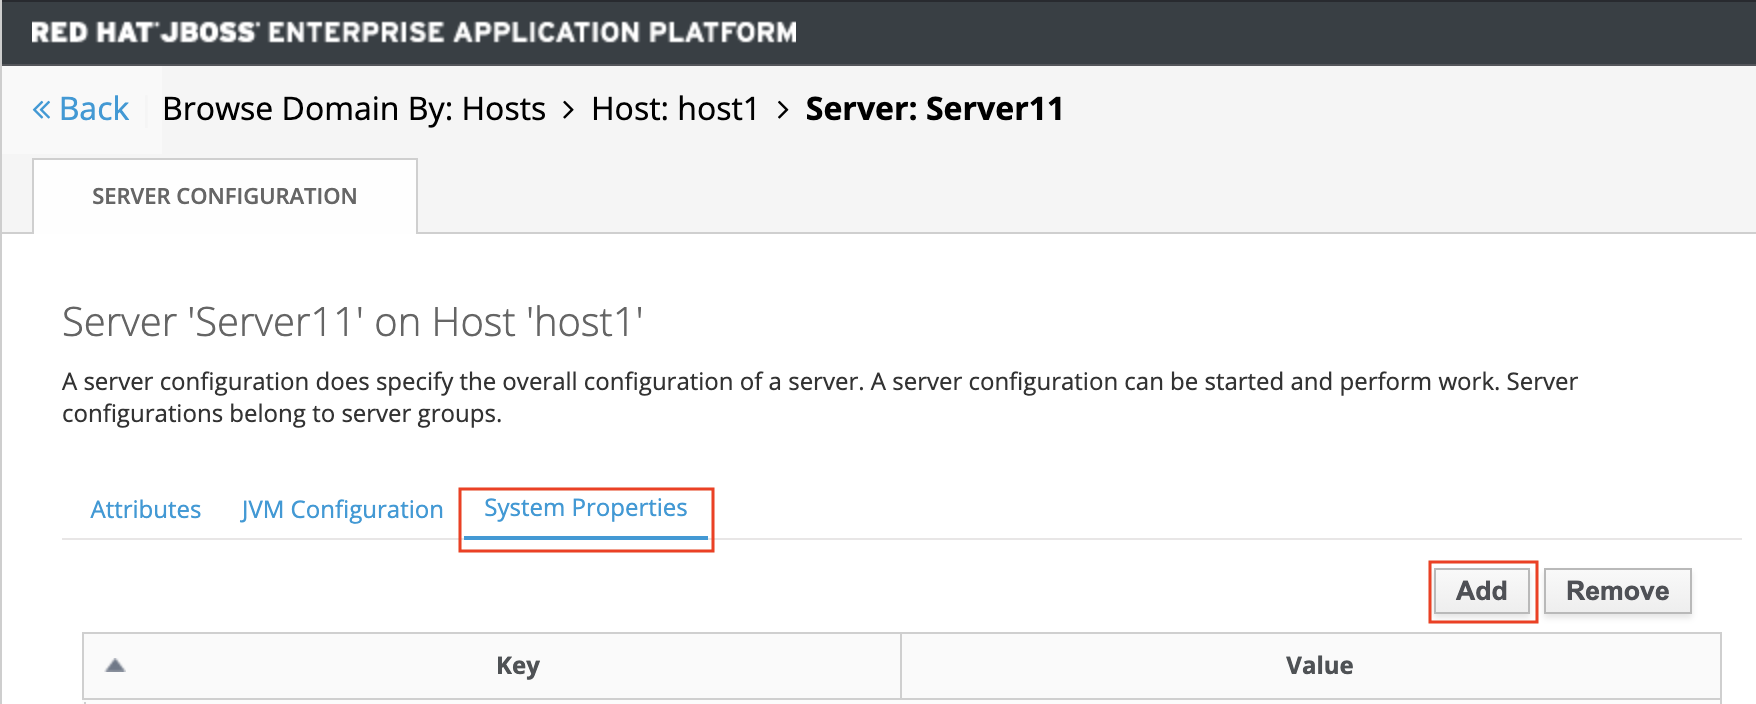
- In the newly opened dialog box, fill in the following values:
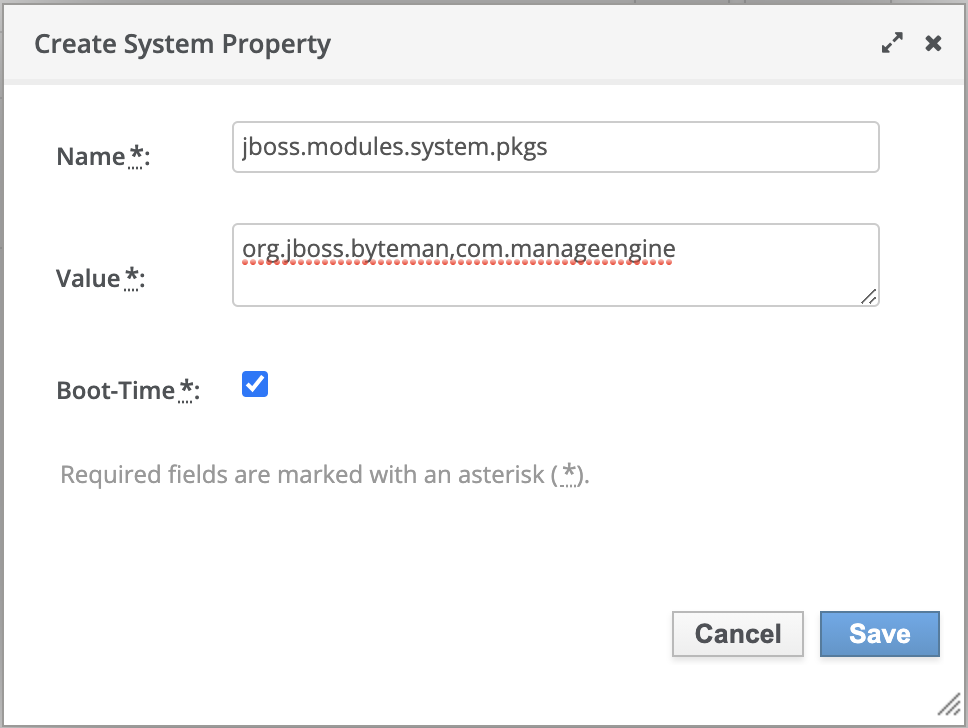
Name : jboss.modules.system.pkgs
Value : org.jboss.byteman,com.manageengine
Boot-Time : Check
- Finally, start/restart your configured server instance from “Runtime” tab at top left corner of the page.
Note: The same steps can be followed if JBoss EAP is running on JRE versions 1.6 to 22.
Thank you for your feedback!