Configuring Azure SQL Managed Instance as the Backend Database
Azure SQL Managed Instance is a fully managed cloud database service provided by Microsoft Azure, designed to deliver the robust capabilities of SQL Server with the ease of cloud deployment. It enables seamless migration of on-premises SQL Server applications, like PAM360, to the cloud with minimal configuration changes. Azure SQL Managed Instance offers high compatibility with SQL Server, ensuring feature parity and reducing the complexities of migration.
Benefits of using Azure SQL Managed Instance for PAM360
- High Compatibility: Ensures minimal changes are required when migrating PAM360's backend from an on-premises SQL server to the cloud.
- Managed Service: Reduces administrative overhead with automated backups, patching, and maintenance.
- Scalability: Allows PAM360 to grow by adding more compute and storage resources as needed.
This makes Azure SQL Managed Instance an ideal solution for organizations looking to modernize and future-proof their PAM360 database infrastructure in the cloud.
Caution
If you have installed the PAM360 application on an on-premise server instead of an Azure Virtual Machine, ensure proper connectivity between the on-premise server and the Azure server.
Additional Detail
No need to import the SSL certificate like we do for other SQL database configurations because the Azure root certificate is already present in our keystore (cacerts).
This document assists you in configuring Azure SQL Managed Instance as the backend database for PAM360. To configure Azure SQL Managed Instance as the backend database for PAM360, follow these high-level steps:
1. Creating an SQL Managed Instance in Microsoft Azure
- Log in to the Azure portal and navigate to the More services.
- From the Databases categories, select SQL managed instance under Azure SQL.
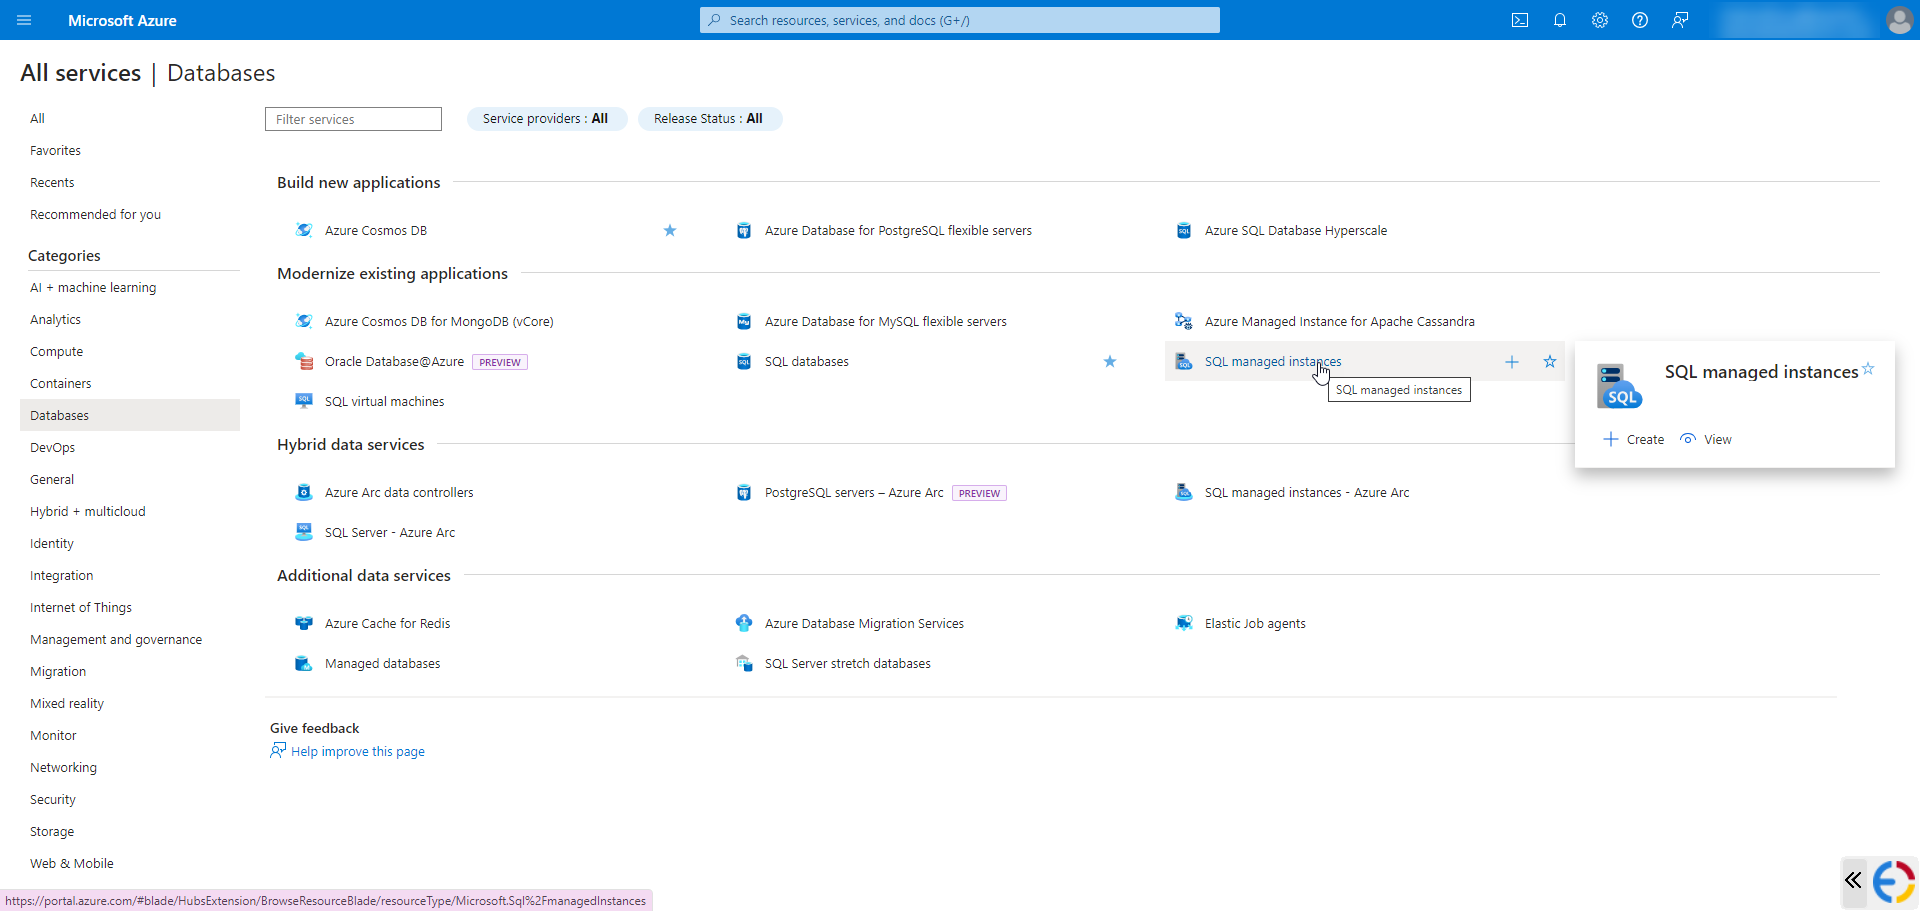
- In the SQL managed instances window that appears, click + Create.
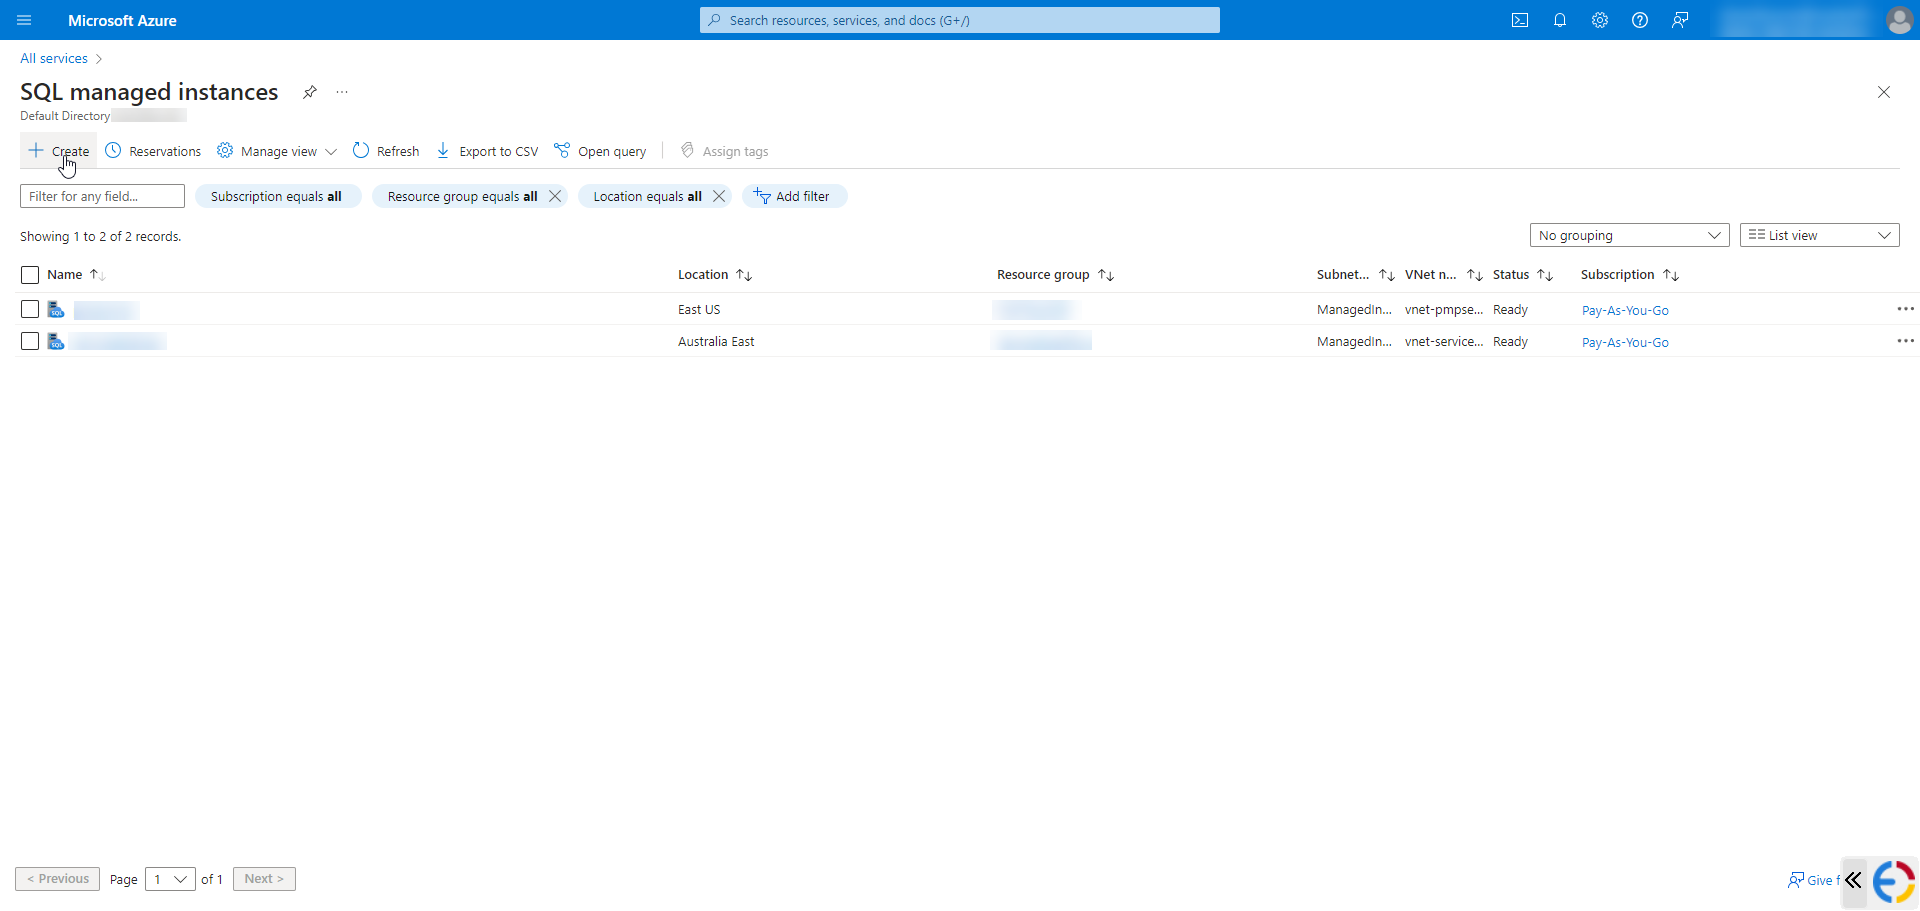
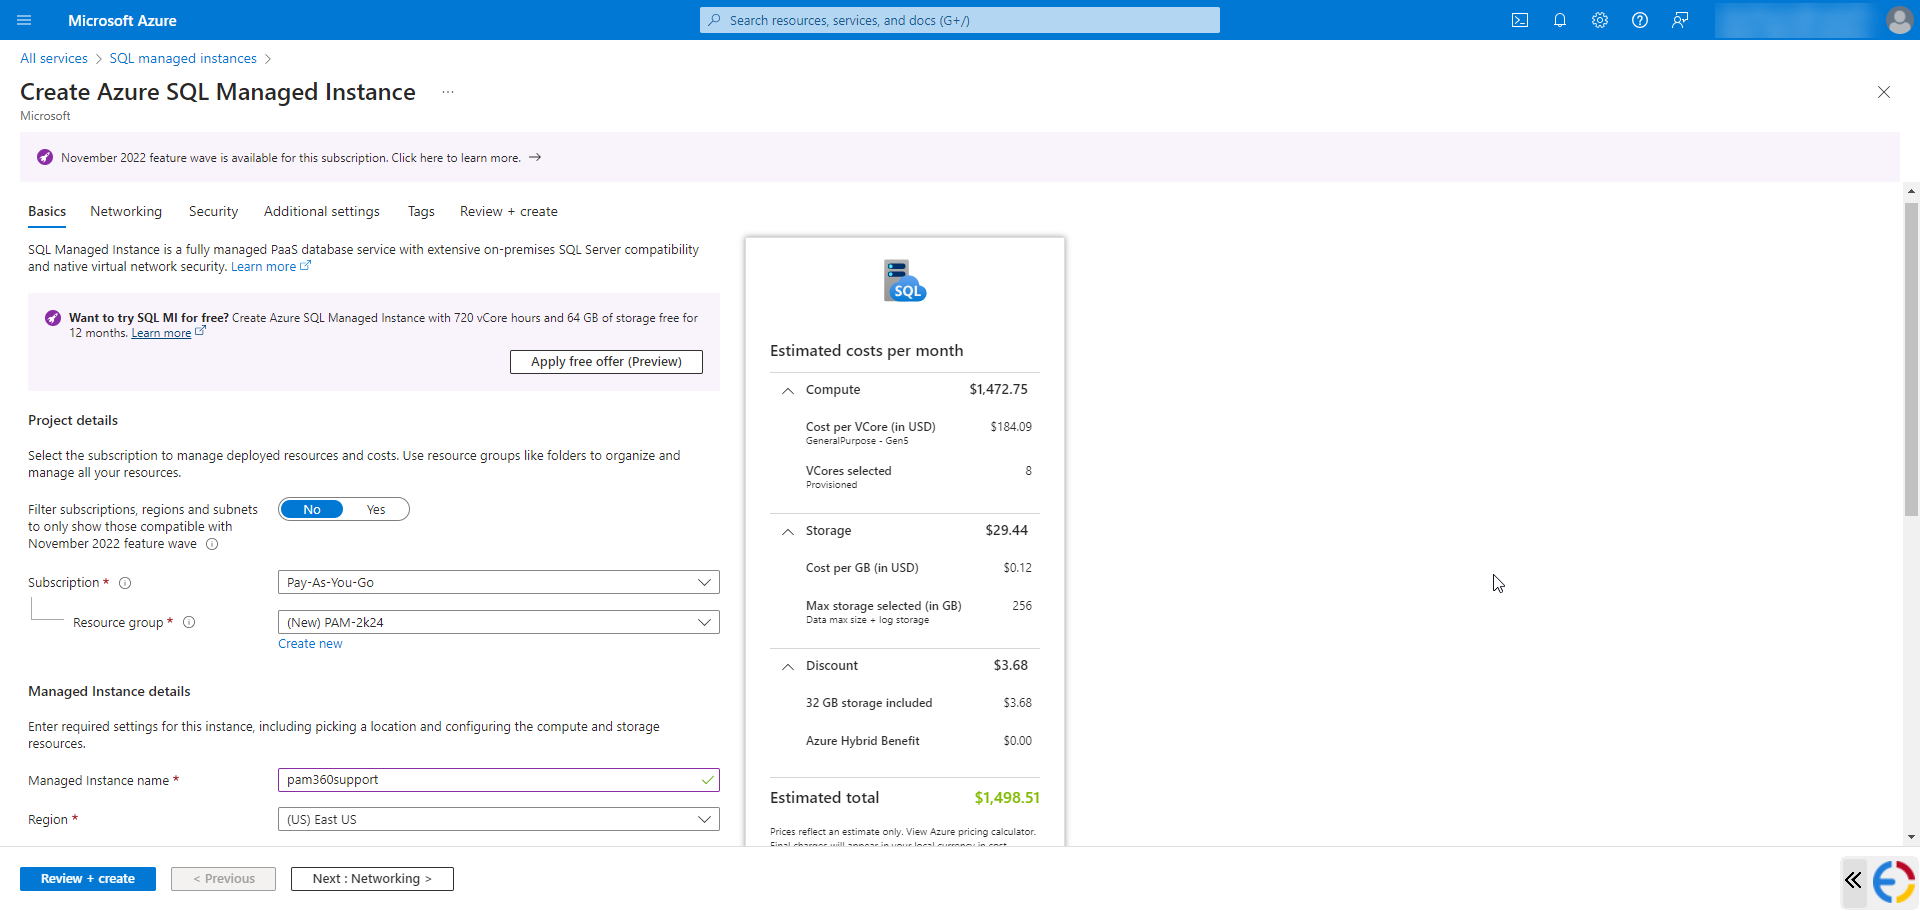
- On the Create Azure SQL Managed Instance page, follow these steps:
- In the Basics information tab, choose an existing resource group or create a new one.
Additional Detail
A resource group is a container that holds related resources for an Azure solution. It can include all the resources for the solution or only those resources you want to manage as a group.
- Provide the Managed Instance name and select the Region.
- Select an Authentication method.
Caution
If you select Use Microsoft Entra-only authentication, the PAM360 application should be on the Azure connected server.
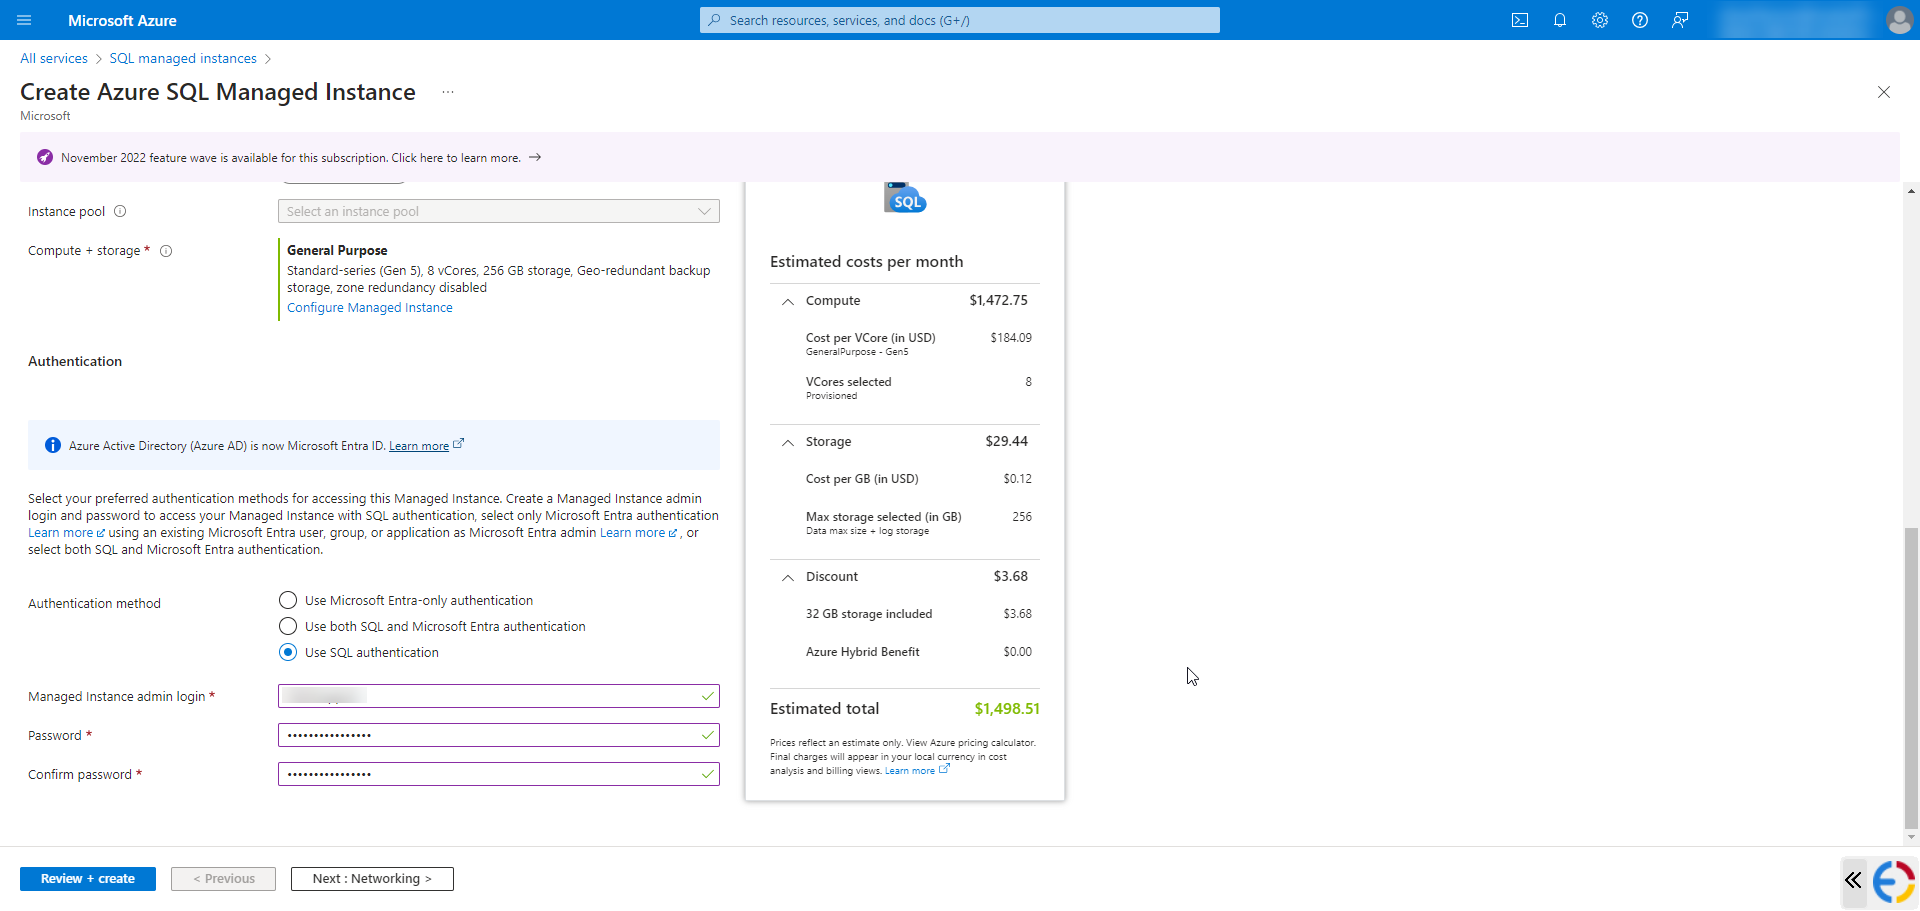
- Click Next : Networking > to continue with the Networking information.
- In the Networking tab, select the Virtual network / subnet and the Connection type (VNet-local endpoint).
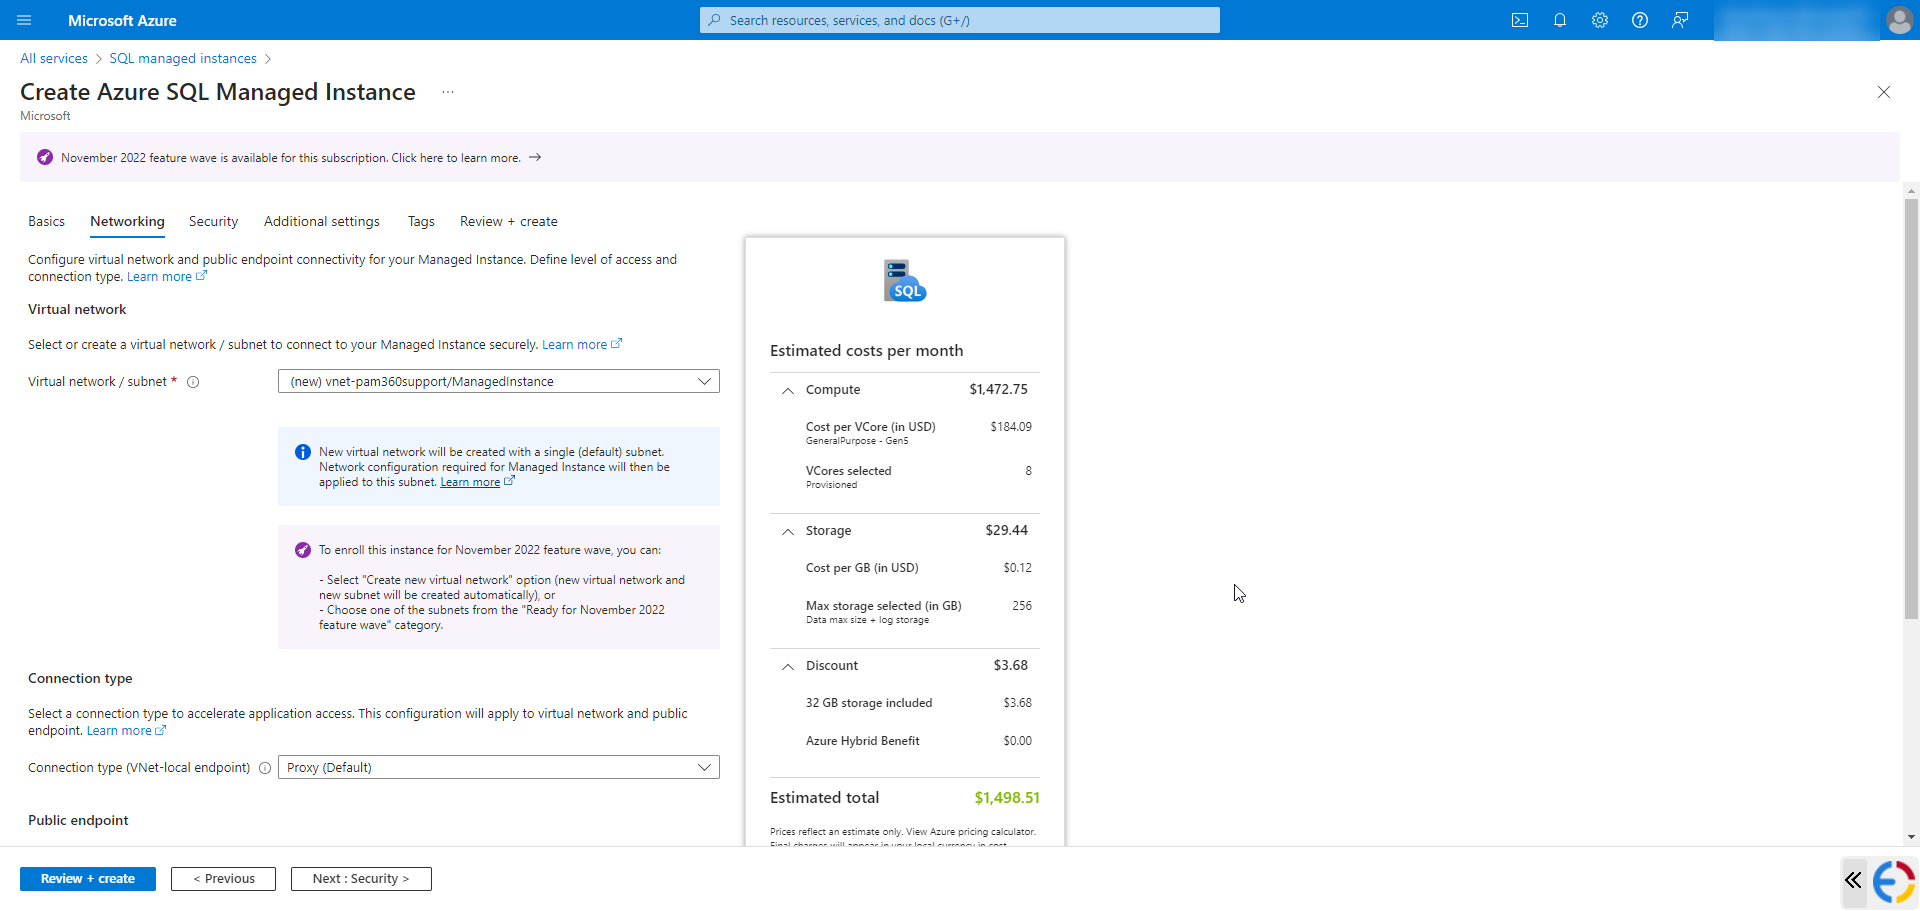
- Select the Public endpoint, Minimum TLS version and click Next : Security > to continue.
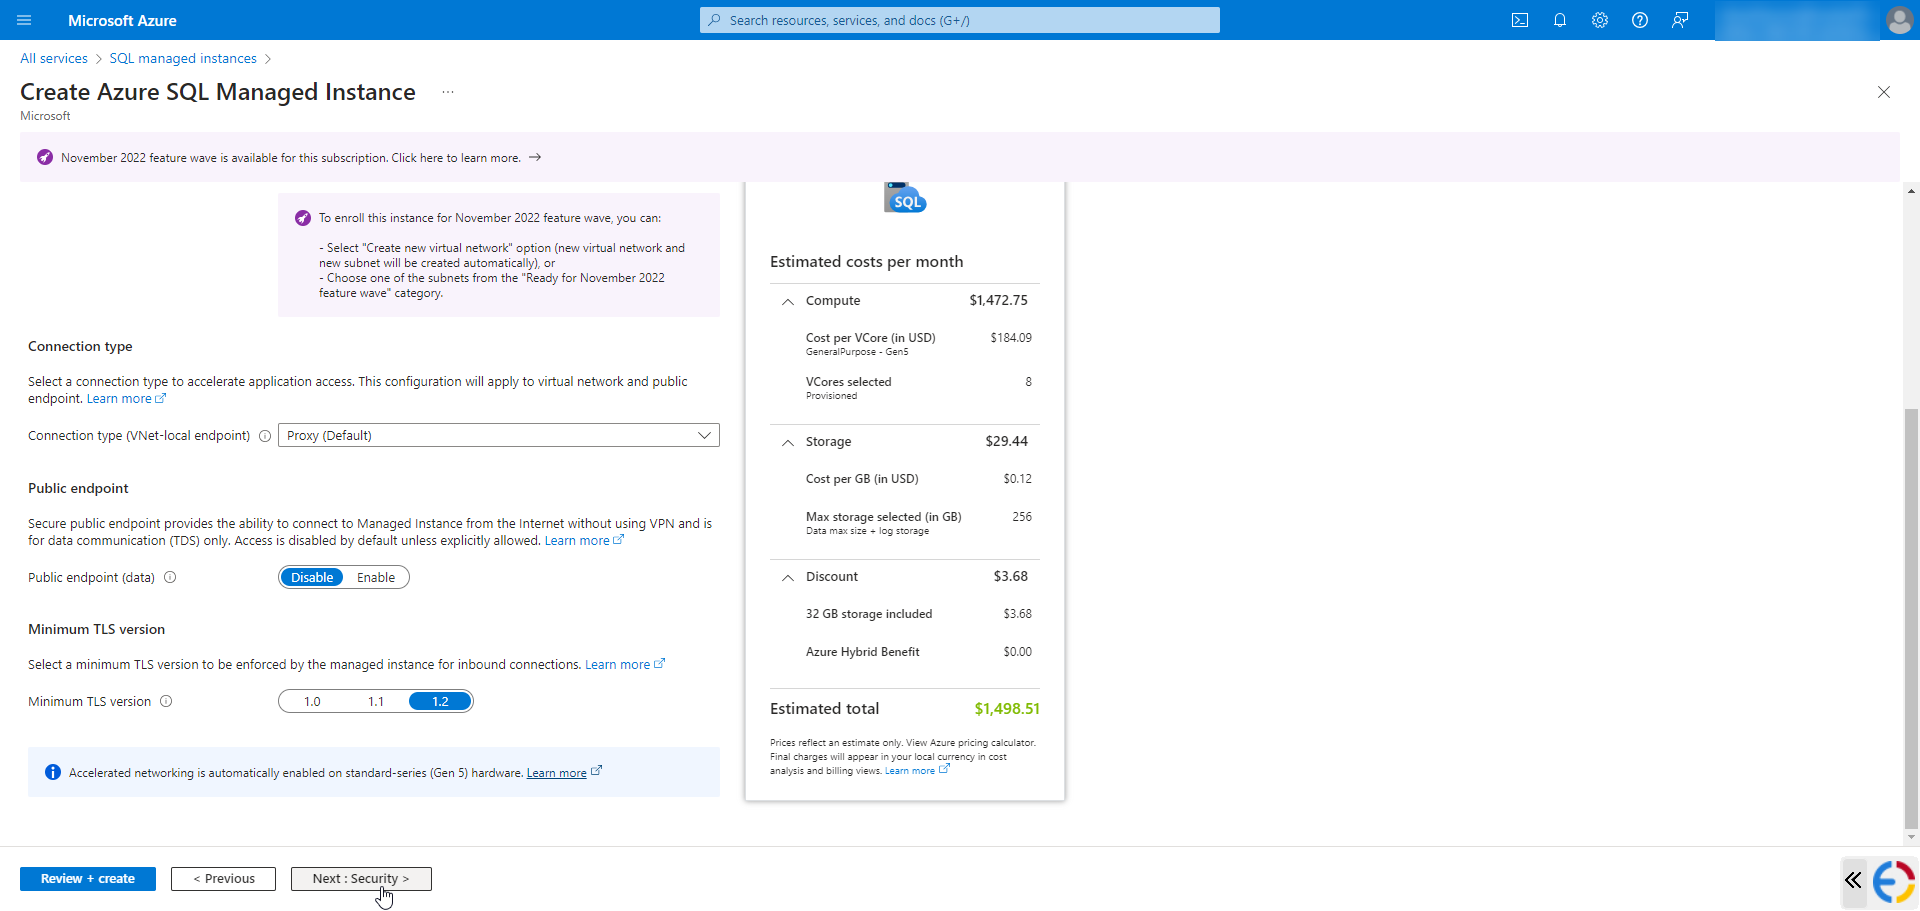
- Further, set the Security, Additional Settings, and Tags as per your requirements and click Next : Review + create >.
- Review the SQL-managed instance information and click Create. This will further proceed with the managed instance deployment process, and upon completion, you will be notified with a deployment completion message.
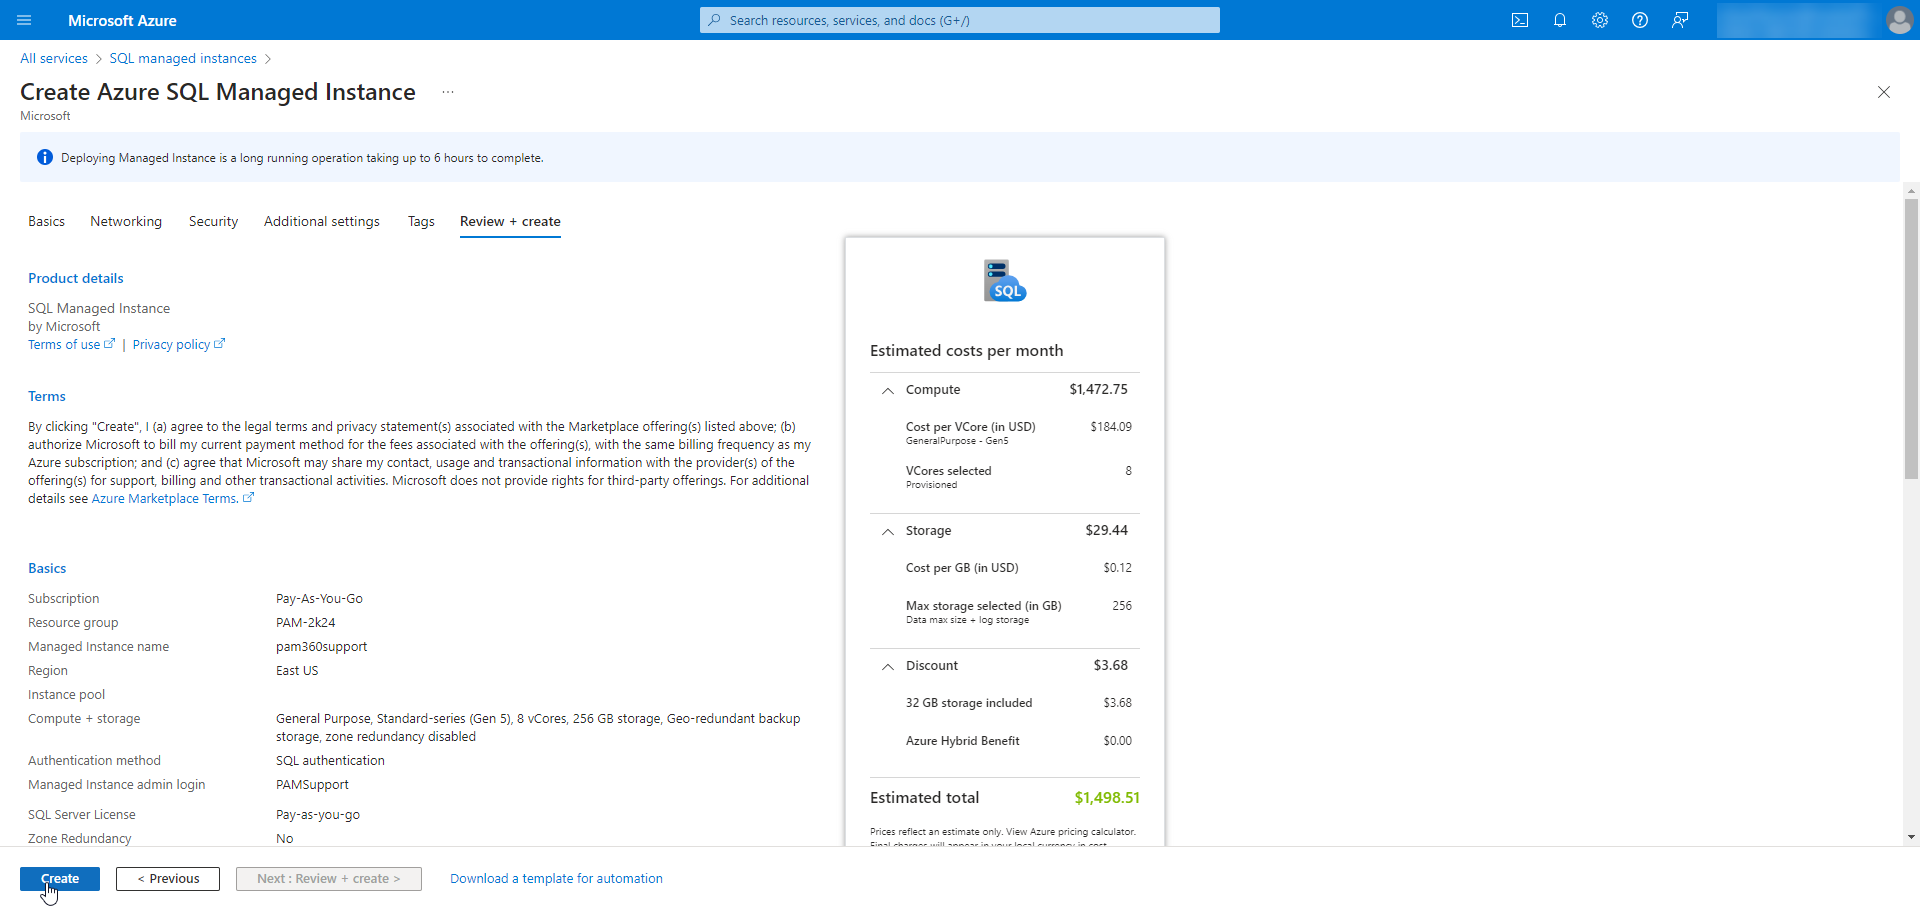
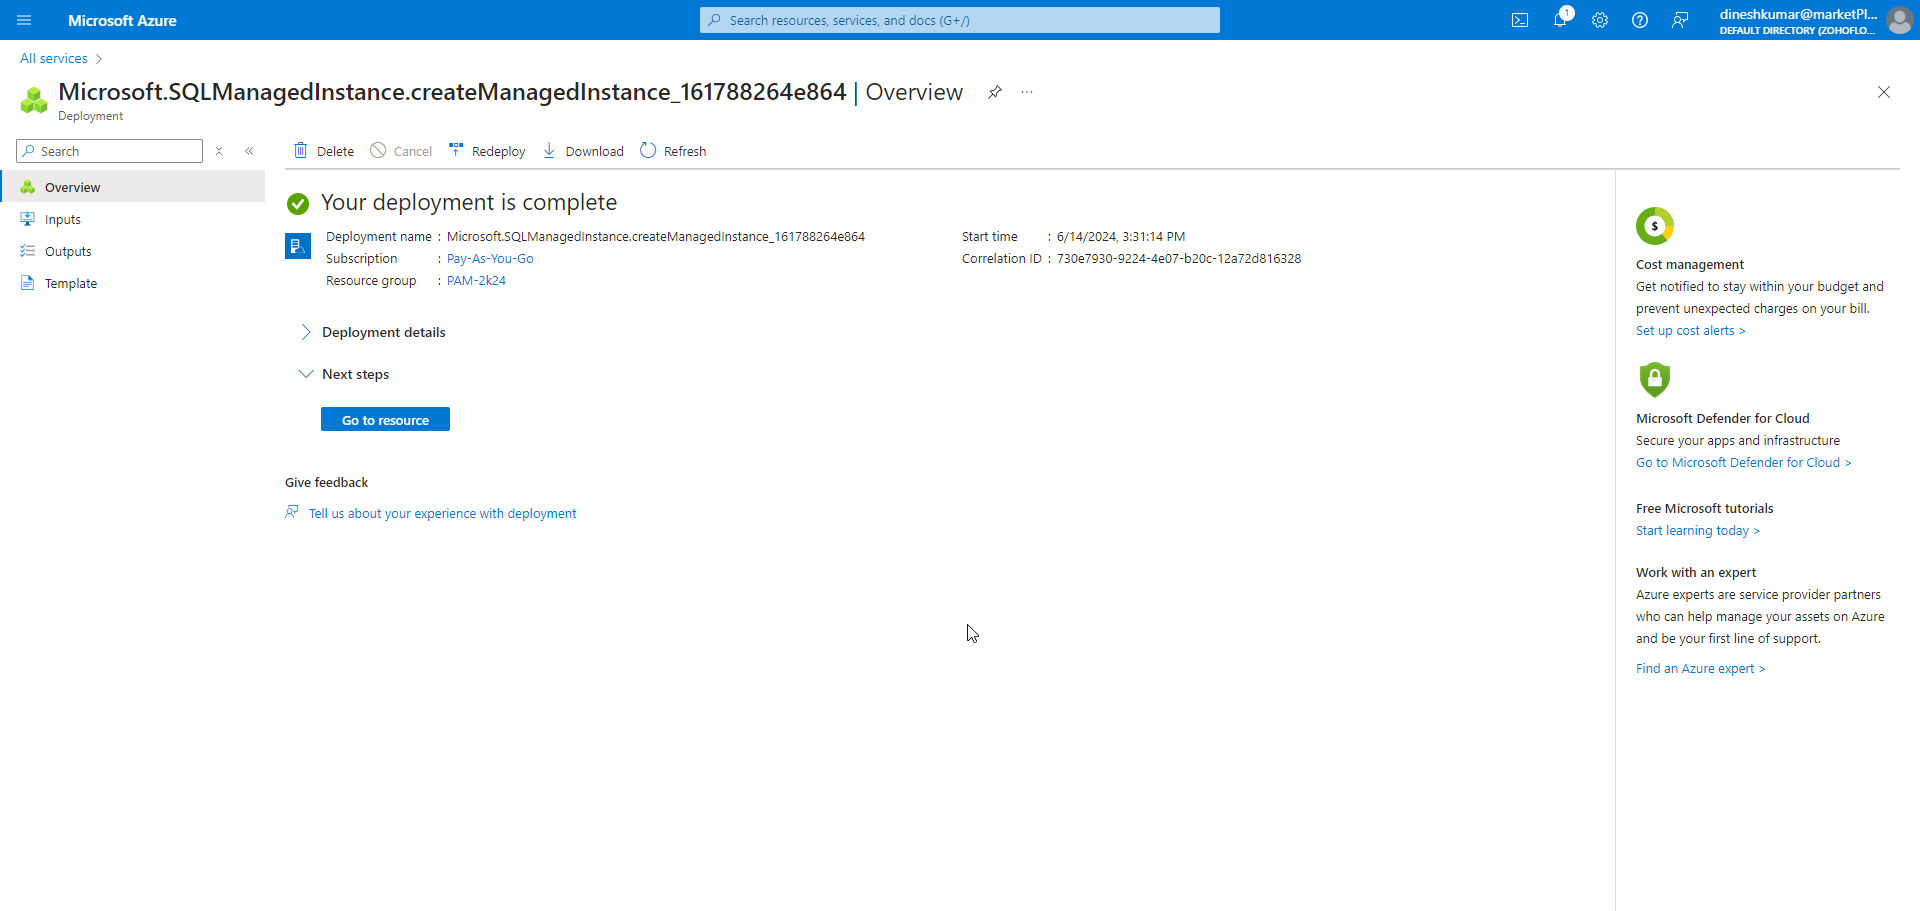
- In the Basics information tab, choose an existing resource group or create a new one.
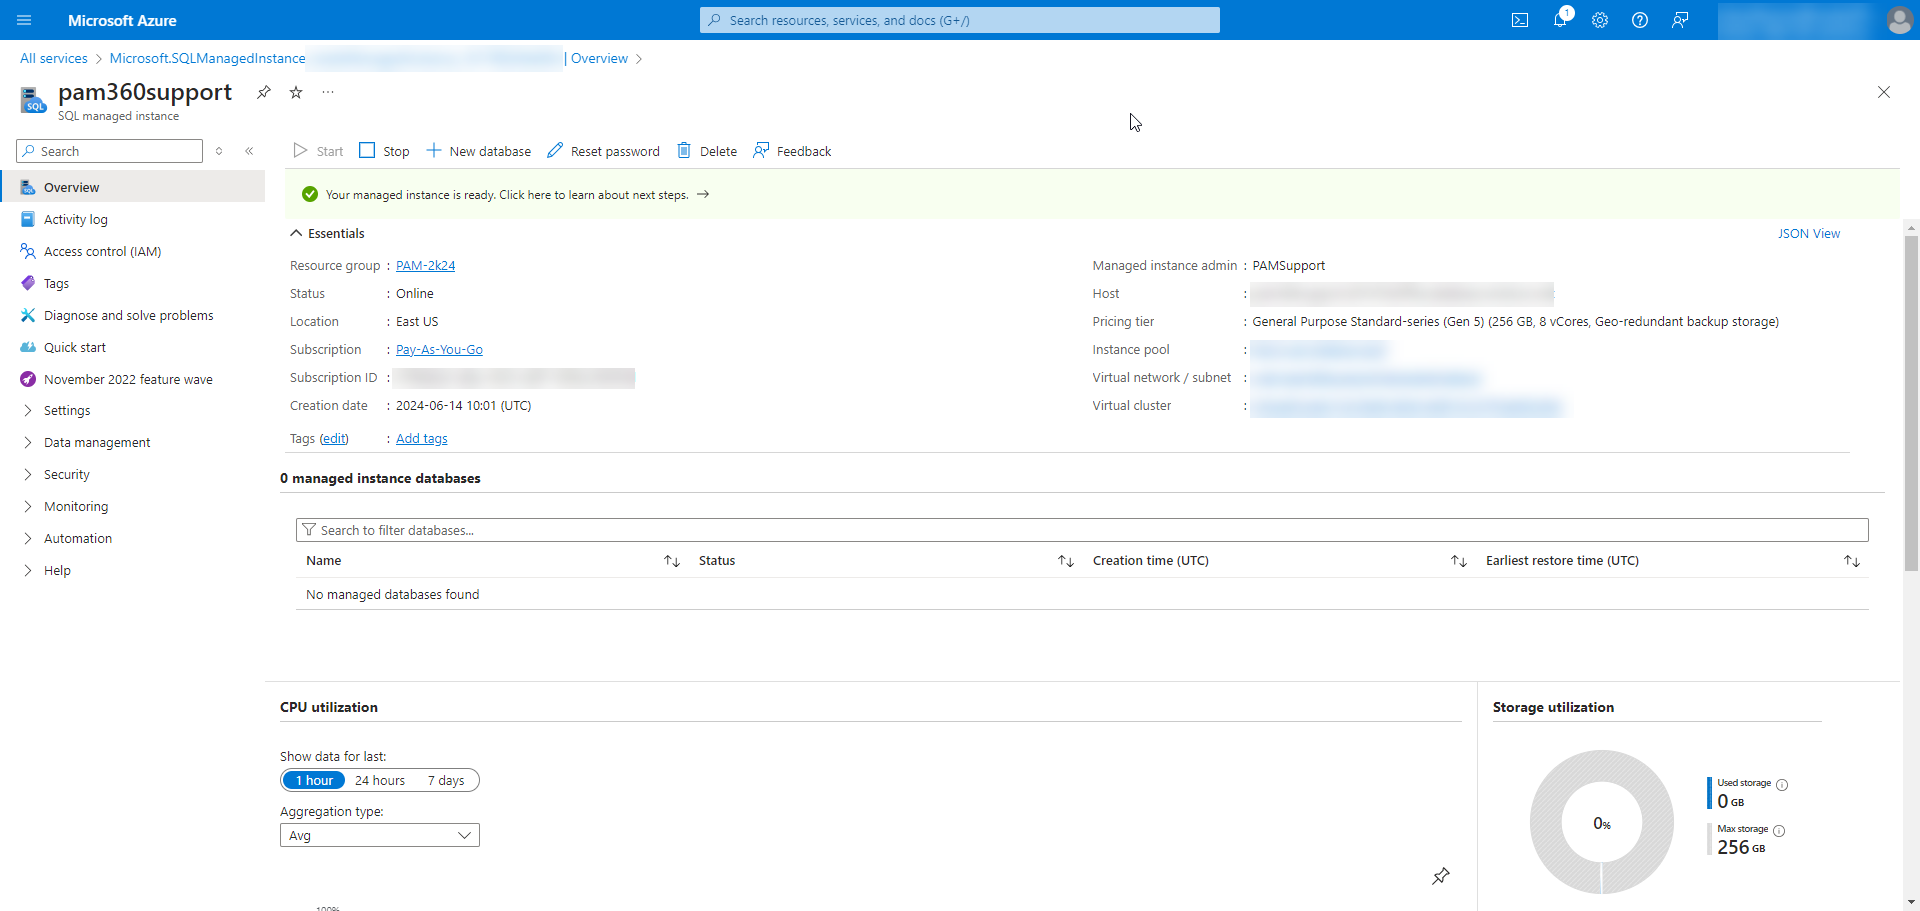
- Navigate to the newly created managed instance via Databases >> SQL managed instance >> (created instance), and from the Overview window, copy the Host detail for further PAM360 database configuration.
2. Configuring Azure SQL Managed Instance as the PAM360 Backend Database
Stop the PAM360 service if running and proceed with the following configuration process with the server administrator rights (where PAM360 is installed):
- Open the command prompt or the terminal and navigate to <PAM360 Installation Folder>/bin.
- Execute the ChangeDB.bat file.
- In the DB Change Configuration dialogue box that opens, enter the following information:
- Select the Server Type as SQL Server.
- Enter the copied Host details from Azure in the Host Name field.
Additional Detail
A managed instance operates on port 1433 locally and port 3342 publicly. If using the default port, you can specify just the host value without the port number, for example: `pam360support.##########.database.windows.net`. If it is configured as a public endpoint, include the port number in the address, such as: `pam360support.##########.database.windows.net:3342`.
- Provide a Database Name and select the Authentication method as SQL.
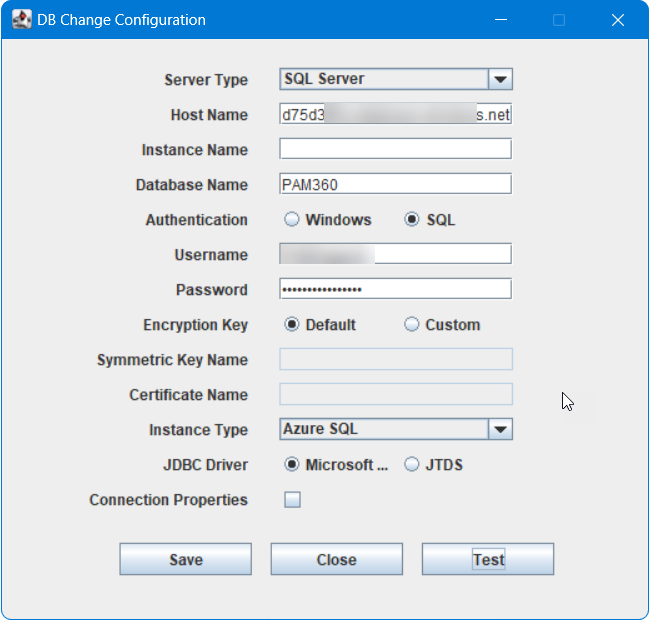
- Enter the Managed Instance admin login name as the Username and the password entered during the Create Azure SQL Managed Instance process.
- Select the Instance Type as Azure SQL and the JDBC Driver as Microsoft.
- Click Test. Upon successful testing, click Save.
Now, you have successfully leveraged Azure SQL Managed Instance to provide a robust, scalable, and secure backend database for PAM360. This setup ensures minimal disruption during migration while offering the benefits of a managed cloud service.