Adding Users Manually into PAM360
Procedure applies to builds 6611 and below
PAM360 allows administrators to create users manually and assign different user roles to them based on the level of access they need. Once created, the users will get an email with the details of their account and login credentials. While adding users manually, administrators can tailor the access levels and individual preferences such as GUI language, based on the organization's requirements.
Creating a User Account Manually in PAM360
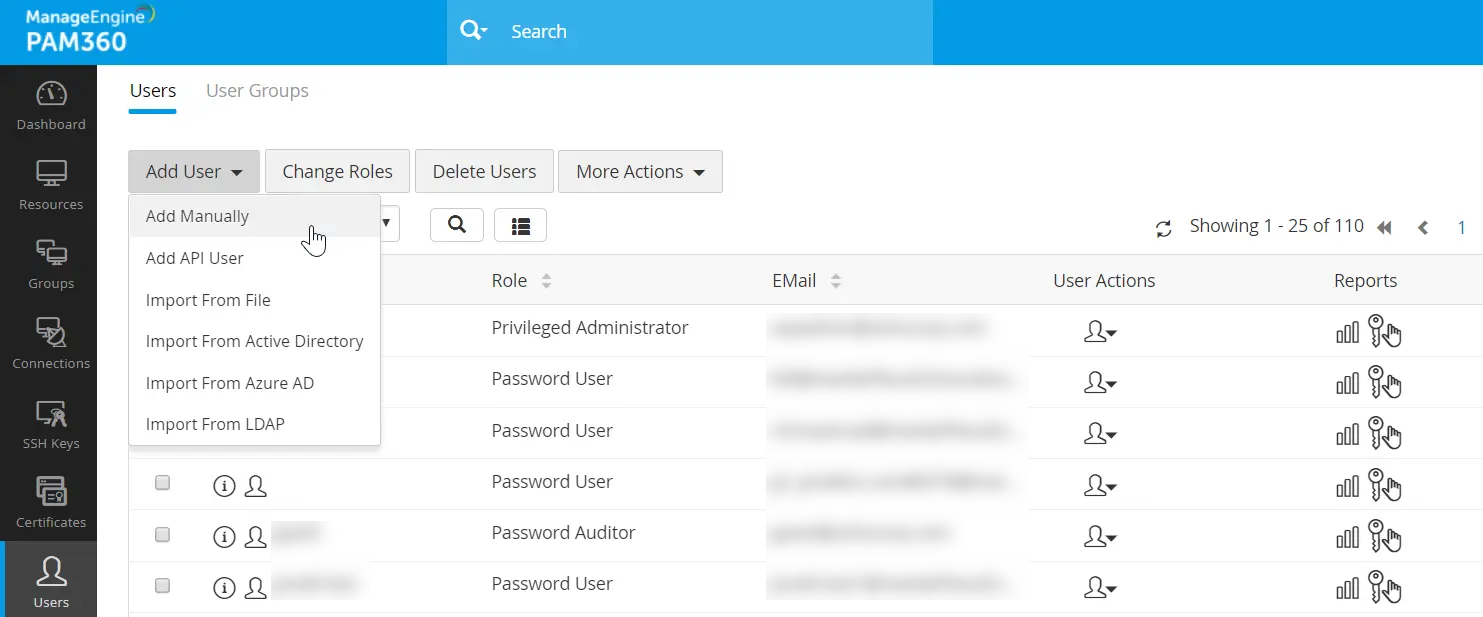
- Navigate to the Users tab, click the Add User button, and select Add Manually from the dropdown.

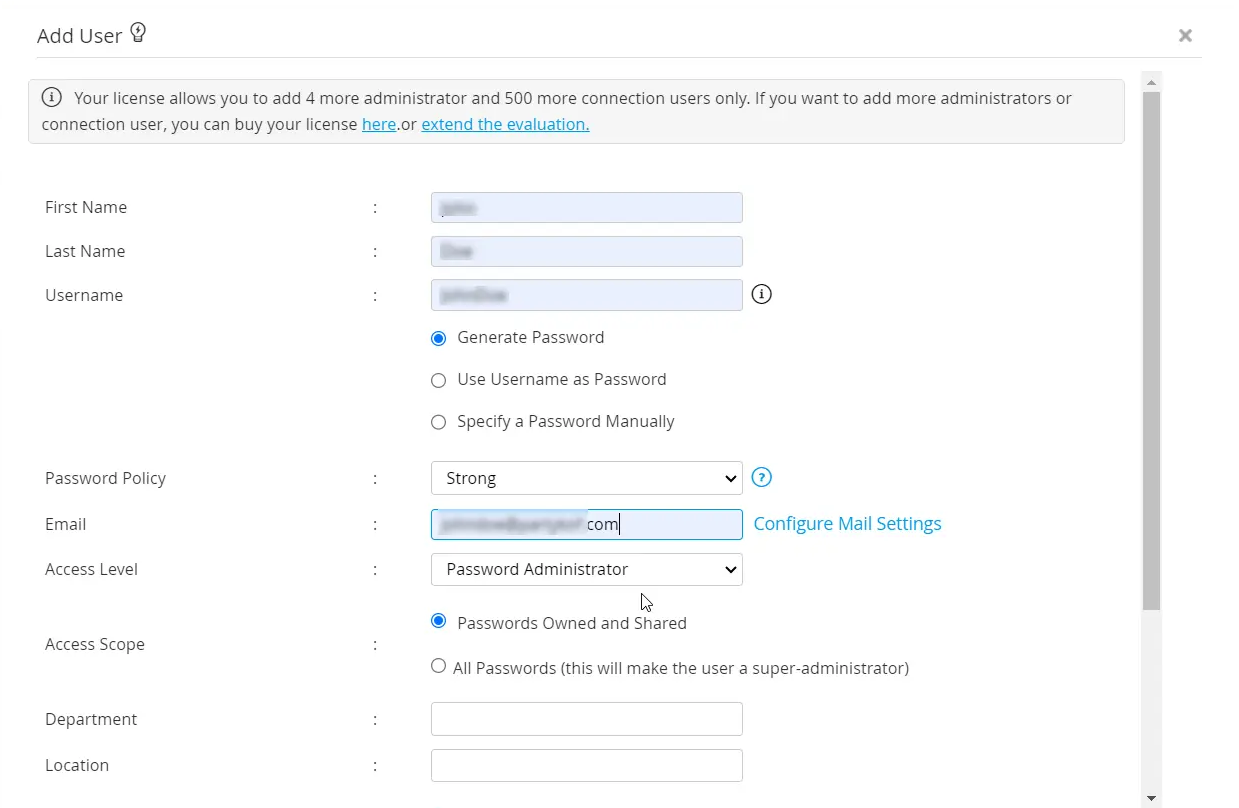
- In the Add User window that opens, enter the following attributes:
- First Name and Last Name - Enter the user's first and last names in the respective fields. This field is mandatory.
- Username - Enter a unique username with which the user can log in to PAM360. This field is also mandatory.
- For the password, choose from three options:
- Generate Password - If this option is selected, PAM360 will randomly generate a password for the account based on the password policy selected in the next step.
- Use Username as Password - The password will be the same as the username provided.
- Specify a Password Manually - Enter a password manually in the text field.
- Password Policy - Select a password policy from the dropdown.
- Email - Enter the user's email address. Login credentials for PAM360 will be emailed to this address once the account is created.
- Access Level - Select an appropriate access level for the user from the dropdown, this will determine the type of role this user will have in PAM360.
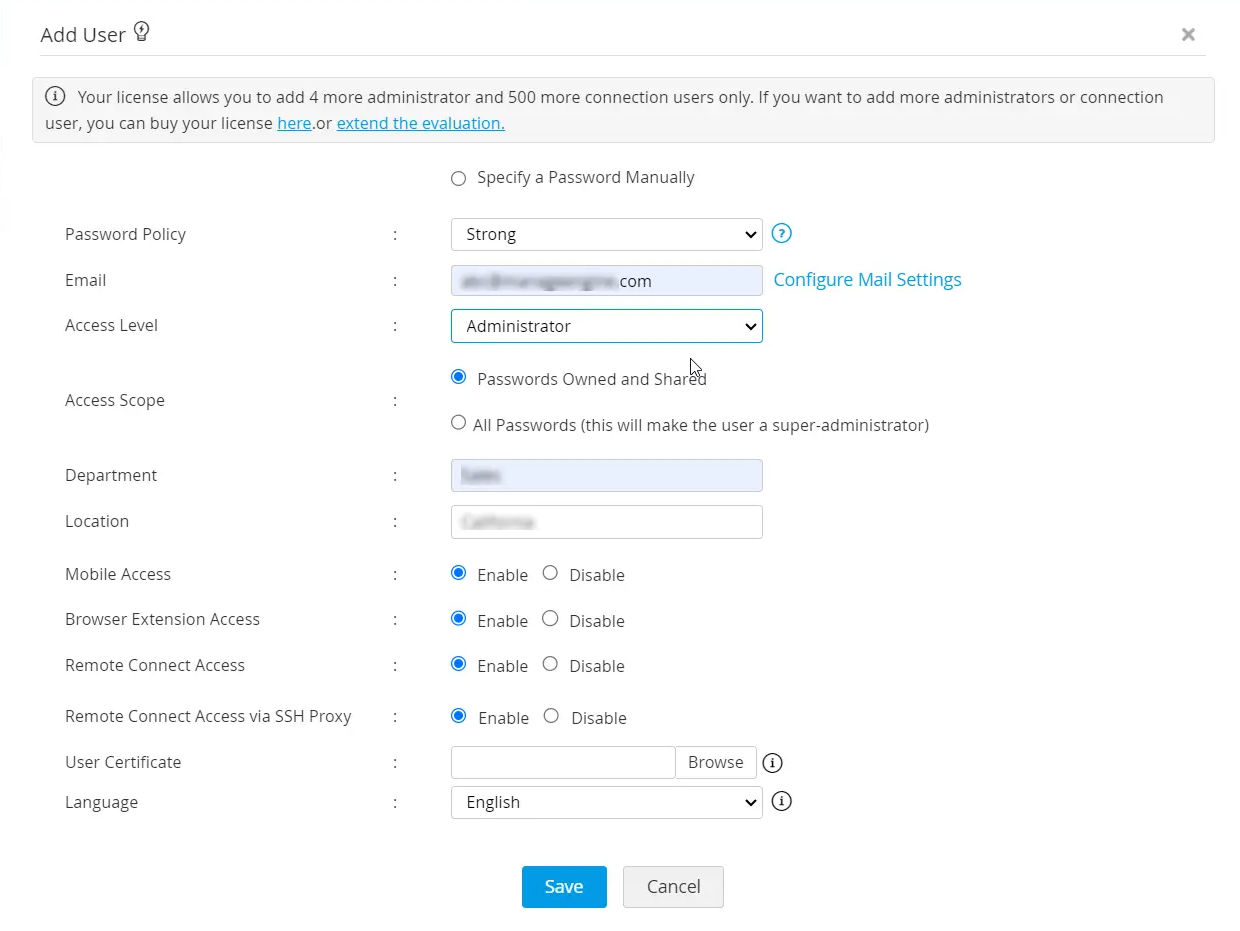
- Access Scope - Use this option to change an Administrator/Password Administrator/Privileged Administrator into a Super Administrator by choosing the option All Passwords in the system. When you do so, the user will be able to access all passwords in PAM360 without any restriction. Click here to learn more about super administrators in PAM360. Conversely, choose the Passwords Owned and Shared option to revert a Super Administrator to their earlier role of Administrator/Password Administrator/Privileged Administrator.
- Department and Location - These fields are not mandatory fields. However, populating valid data in these fields with the correct values will be helpful for searching and grouping the resources.
- Mobile Access and Browser Extension Access - Choose Enable for both fields if you wish to allow the user to access PAM360 via the PAM360 mobile app and browser extensions.
- Remote Connect Access - Choose Enable for this field to allow the user to access the PAM360 Remote Connect desktop client using their PAM360 login credentials.
- Remote Connect Access via SSH Proxy - Select Enable for this field to allow user remote sessions in the PAM360 Remote Connect application only via the configured SSH proxy.
- User Certificate - Browse and add a certificate for smart card/PKI-based authentication. Click here for more information on that.
- Language - Choose a GUI language for the user from the dropdown.
- Click Save to create the user account.


Additional Detail
PAM360 users with web access will be forced to reset their local login password when logging in for the first time.
Top