Sharing Accounts, Resources, and Resource Groups to Users and User Groups
PAM360 offers a flexible and granular control mechanism for sharing accounts, resources, and resource groups with other users or user groups. This ensures controlled access to sensitive credentials while maintaining security and compliance. Privileged accounts within PAM360 can be shared at three levels, depending on operational requirements:
- Sharing Individual Accounts: Specific privileged accounts within a resource can be shared with designated users or user groups.
- Sharing Entire Resources: A resource, along with all its associated accounts, can be shared collectively.
- Sharing Resource Groups: A resource group containing multiple resources can be shared with users or user groups, ensuring streamlined access management.
PAM360 provides two approaches to sharing:
- Individual Sharing: Assign permissions to specific users or user groups for specific accounts, resources, or resource groups.
- Bulk Sharing: Perform large-scale sharing of accounts, resources, or resource groups to grant access efficiently across multiple users or groups at once.
By the end of this document, you will gain a detailed understanding of:
- Sharing Individual Accounts with Users or User Groups
- Sharing Resources with Users or User Groups
- Sharing Resource Groups with Users or User Groups
Caution
- Remote App Only permission can be provided only for individual accounts or resources.
- PAM360 supports RemoteApp only for Windows and Windows Domain resources. Only Connection Users and Users with Remote App privilege will be able to access Remote apps. To know more about user roles and permissions, click here.
- Only two permission levels will be available while sharing individual accounts, as the Full Access permission is meant only for resources and resource groups.
1. Sharing Accounts with Users or User Groups
Follow the below steps to share a particular account with users or user groups, with View or Modify permissions.
- Navigate to Resources >> Passwords.
- Click the Account Actions drop-down beside the particular account of the resource that you want to share.
- From the Account Actions drop-down menu, hover to Share and click either With Users or With User Groups depending on whether you want to share the account with users or user groups.
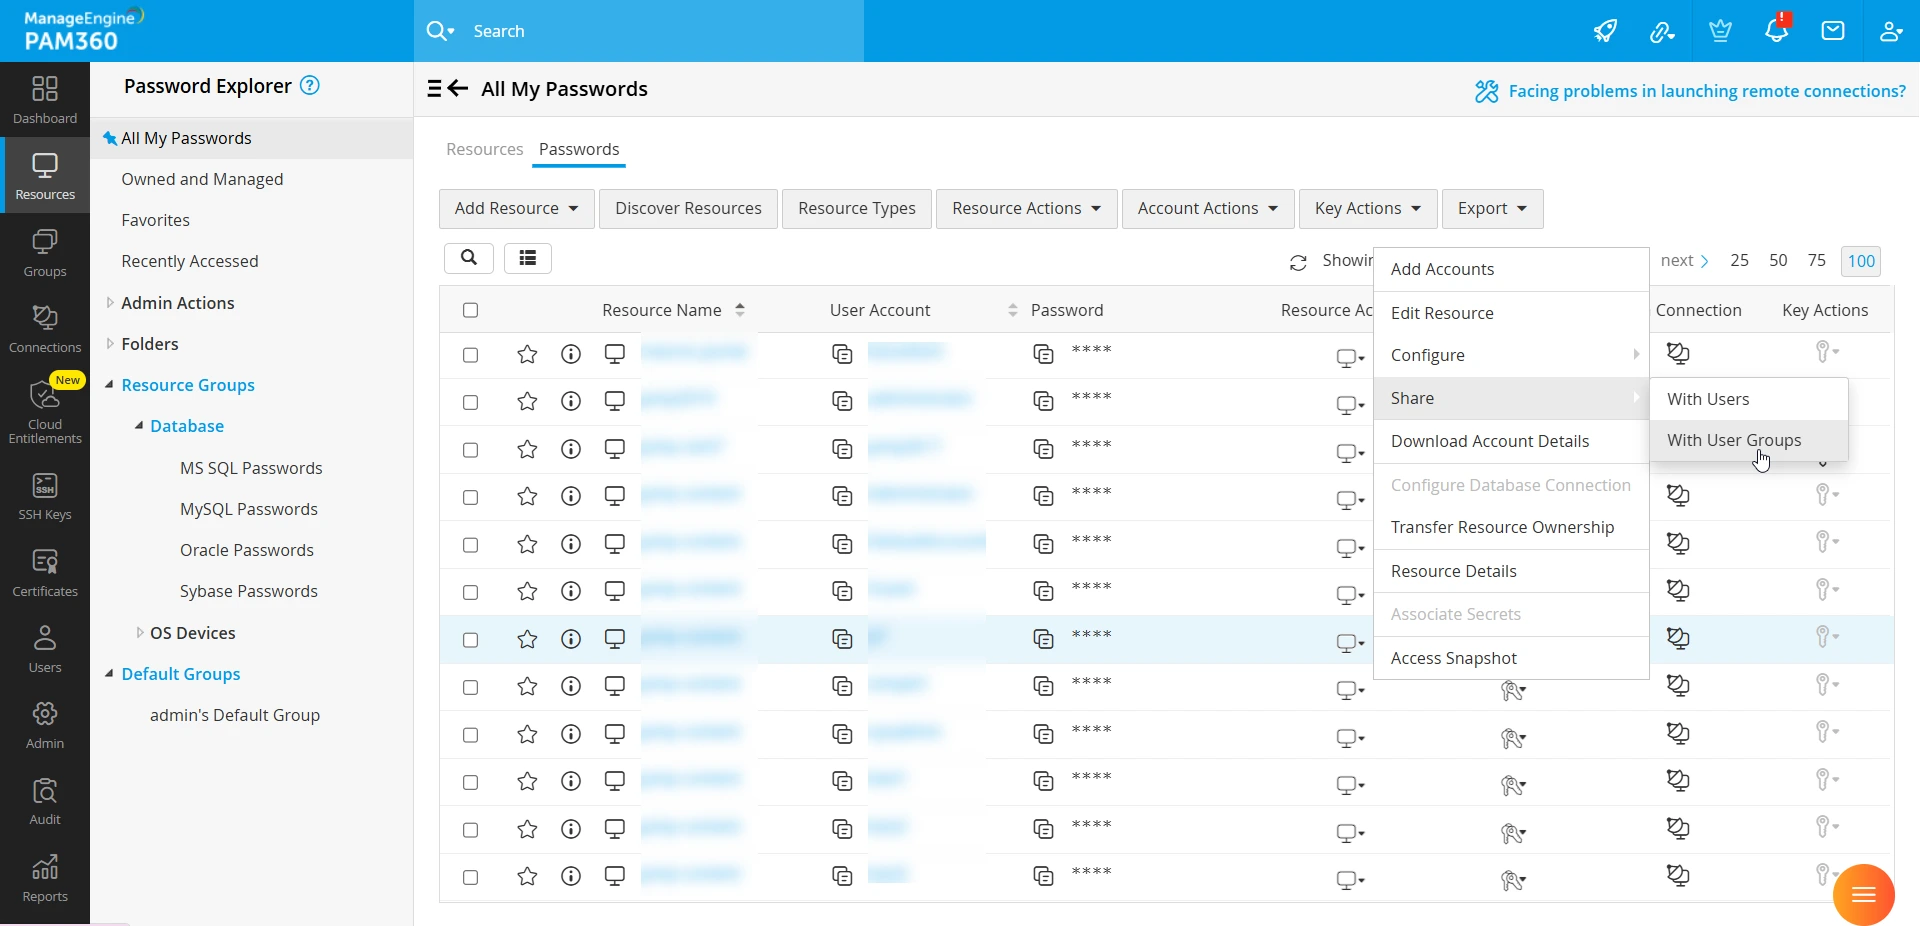
- In the pop-up box that appears, click the Grant option beside that user or user group with whom the account is to be shared. Choose either View Passwords, or Modify Passwords as the permission level, and click Save.
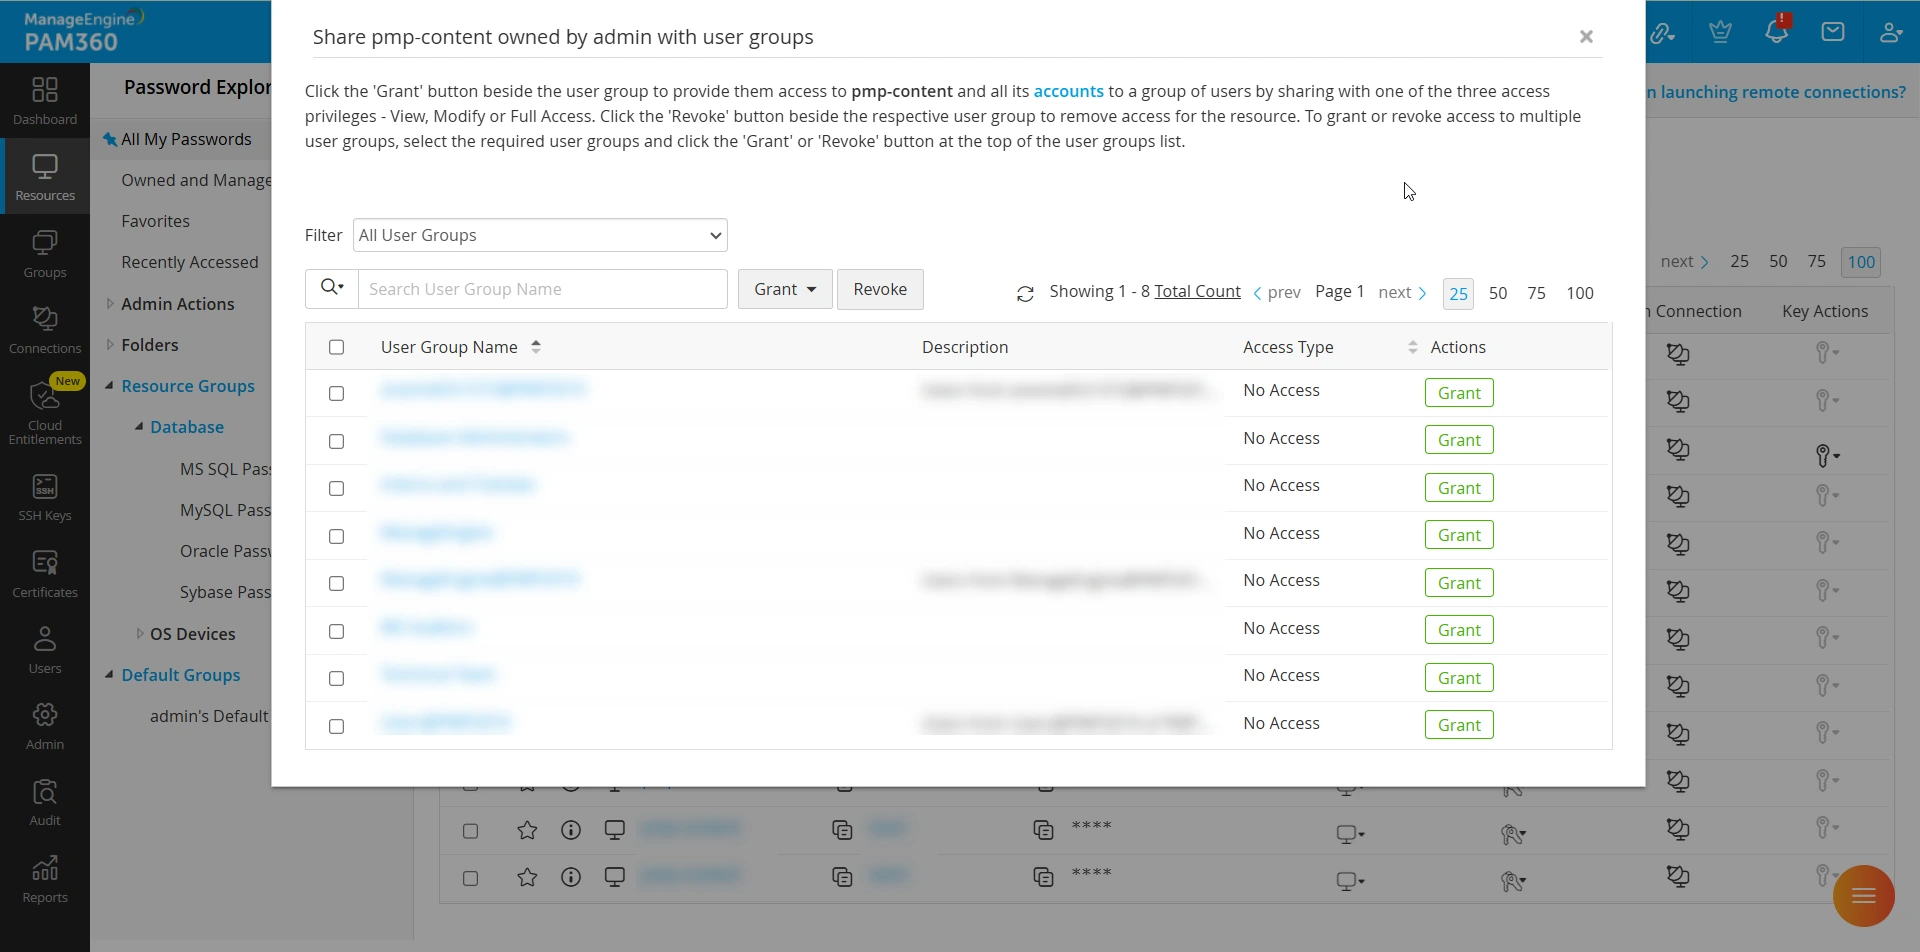
Now, you have successfully shared an account with the required users or user groups. To share numerous accounts in bulk, perform the following steps:
- From Resources >> Passwords, select the accounts in bulk that you want to share.
- Now, click the Account Actions drop-down menu at the top pane, hover to Share, and click With Users or With User Groups depending on whether you want to share the accounts with users or user groups.
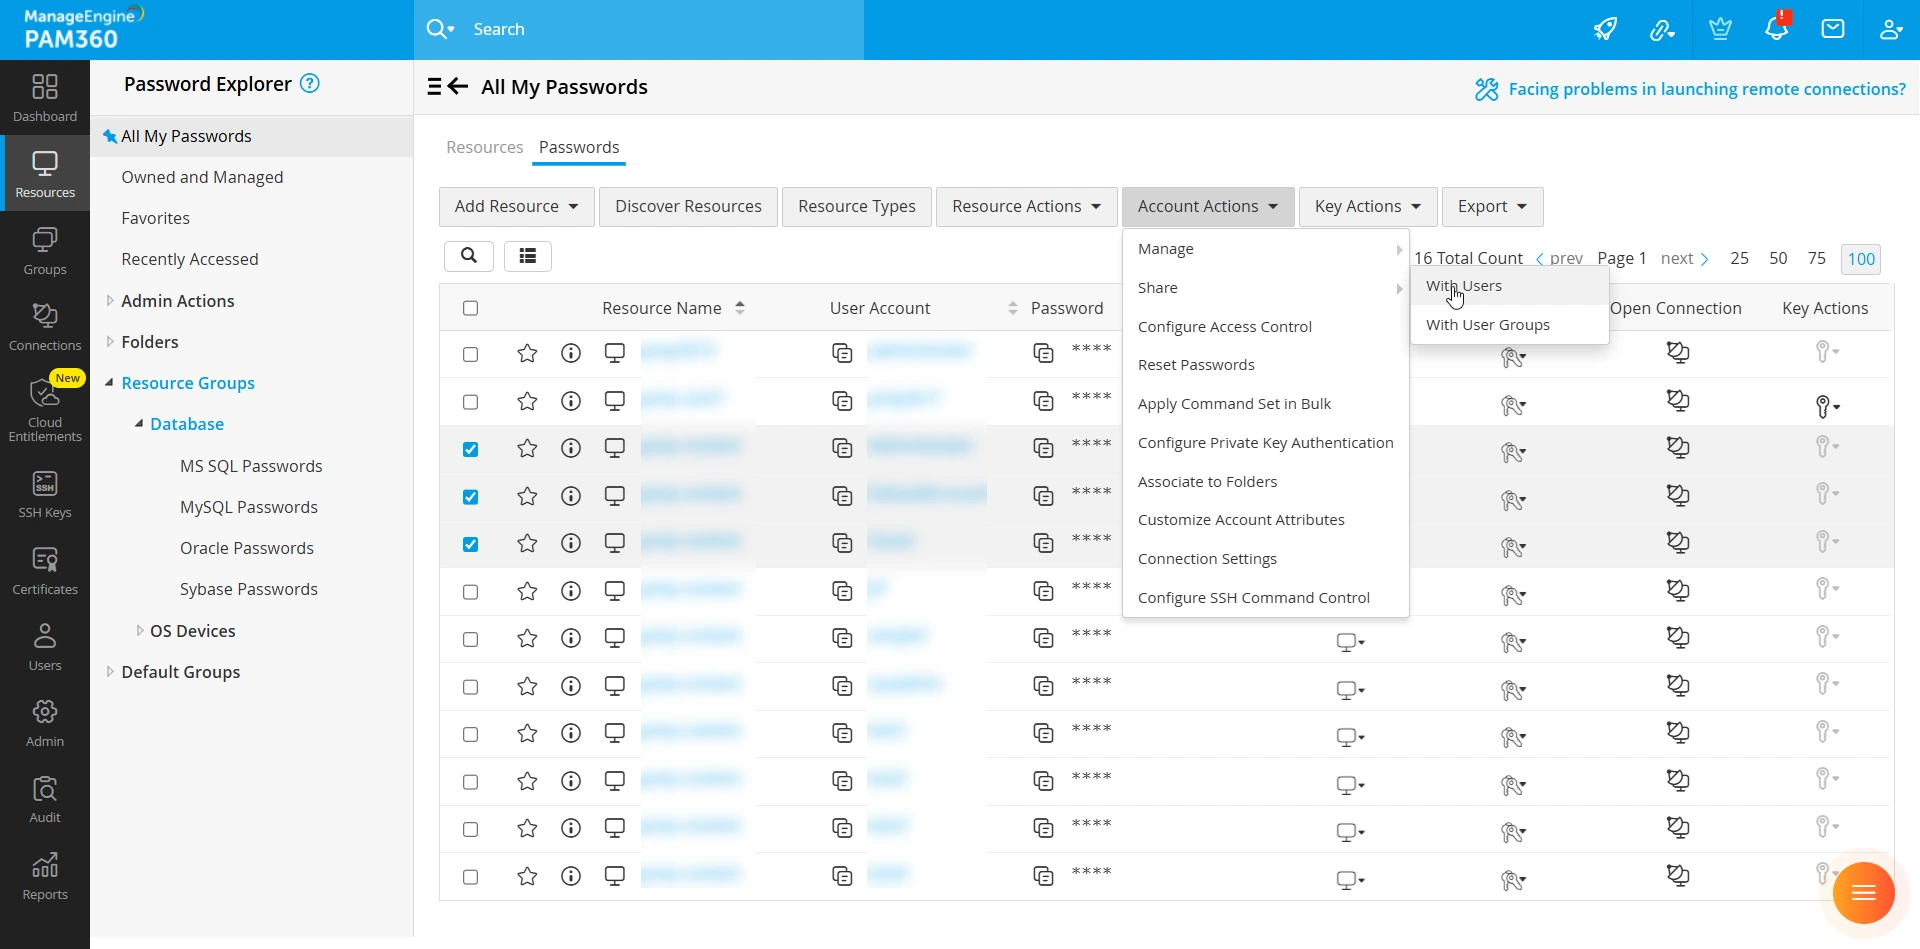
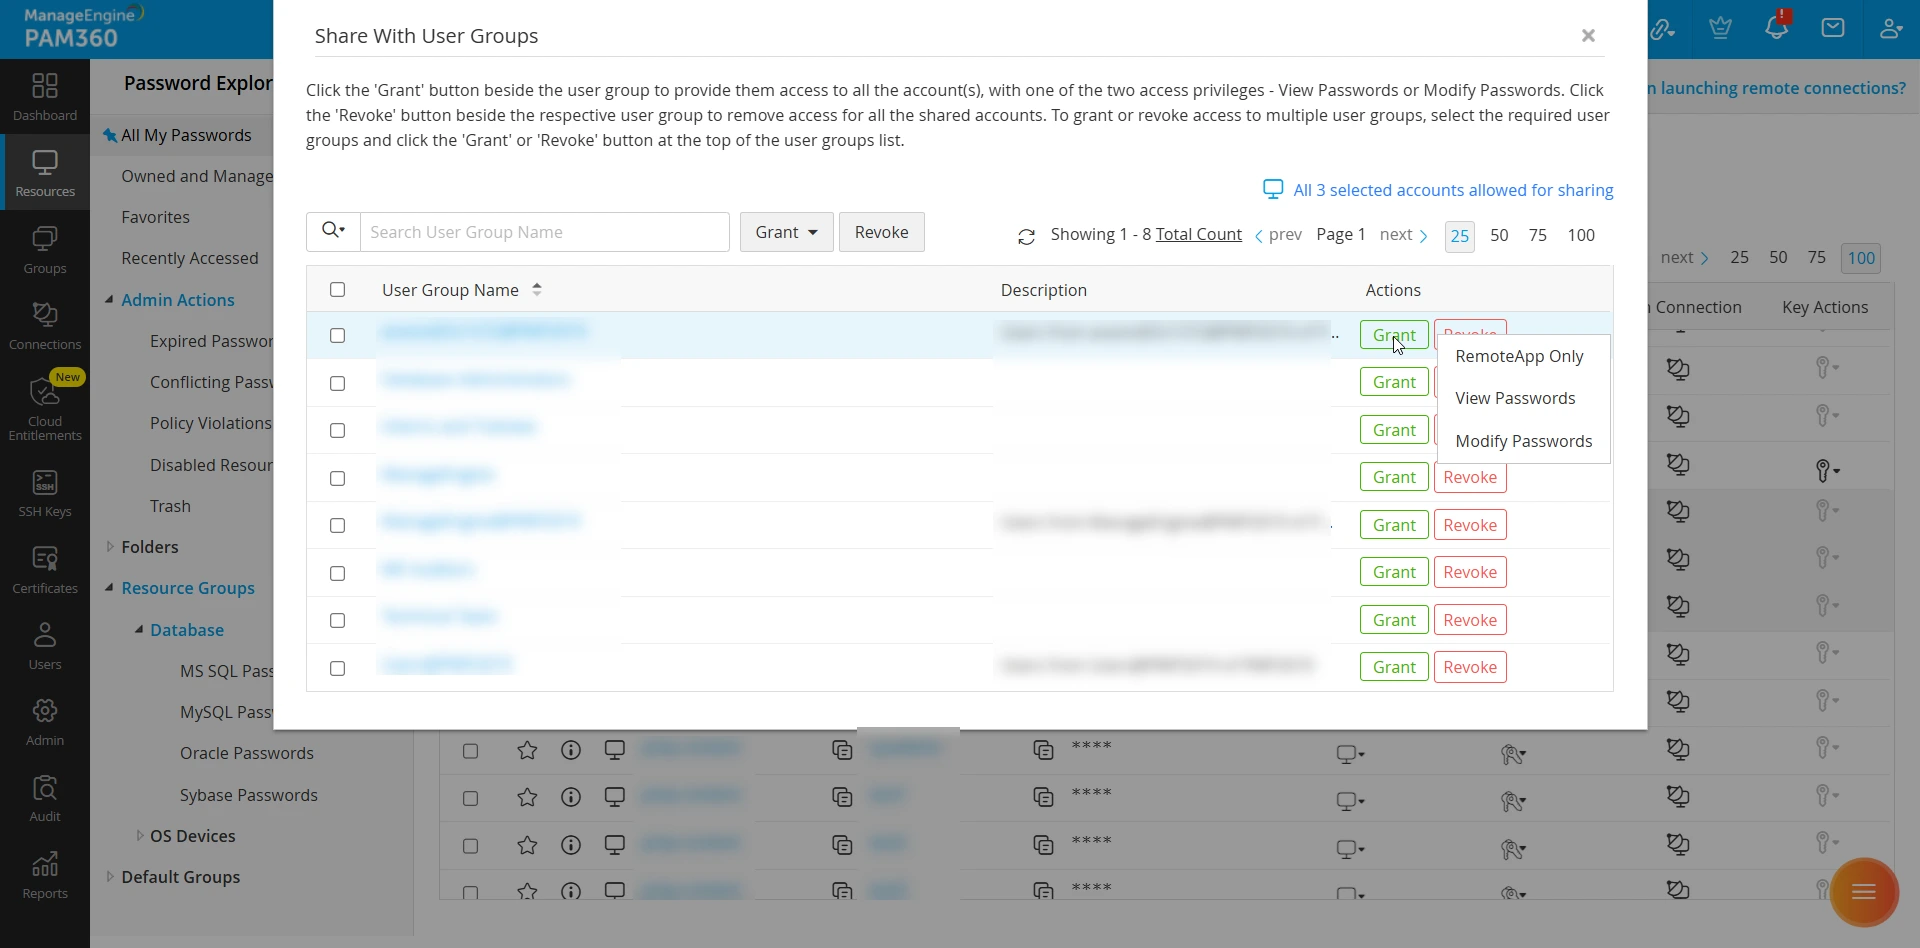
- In the pop-up box that appears, click the Grant option beside that user or user group with whom the account is to be shared. Choose either View Passwords or Modify Passwords as the permission level and click Save.
1.1 Sharing Accounts of a Particular Resource with Users or User groups
Follow the below steps to share accounts of a particular resource with users or user groups, with View or Modify permissions.
- Navigate to the Resources tab and click on the particular resource whose accounts you want to share.
- In the Account Details dialog that opens, click the Account Actions icon beside a particular account.
- Click Share with Users or Share with User Groups.
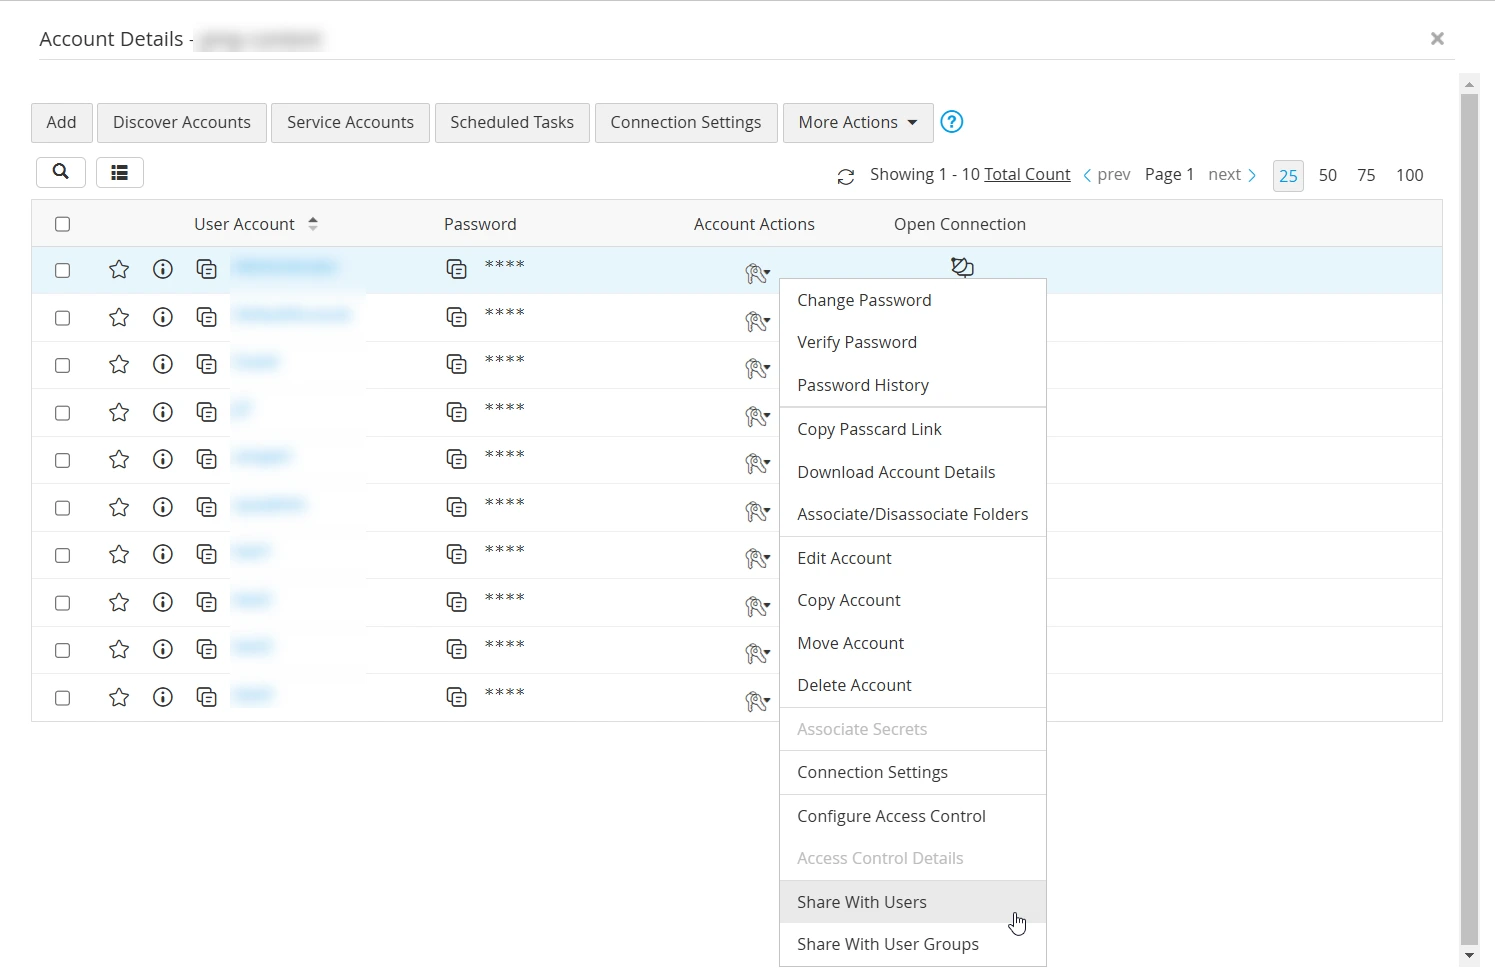
- In the pop-up box that appears, click the Grant option beside that user or user group with whom the account is to be shared. Choose either View Passwords or Modify Passwords as the permission level.
- Click Save to apply the share configuration.
Now, you have successfully shared the accounts of a particular resource with the required users or user groups. To share numerous accounts of a particular resource in bulk, perform the following steps:
- Navigate to the Resources tab and click on the particular resource whose accounts you want to share.
- In the Account Details dialog that opens, select the accounts to be shared.
- Now go to More Actions >> Share and click With Users or With User Groups depending on whether you want to share the accounts with users or user groups.
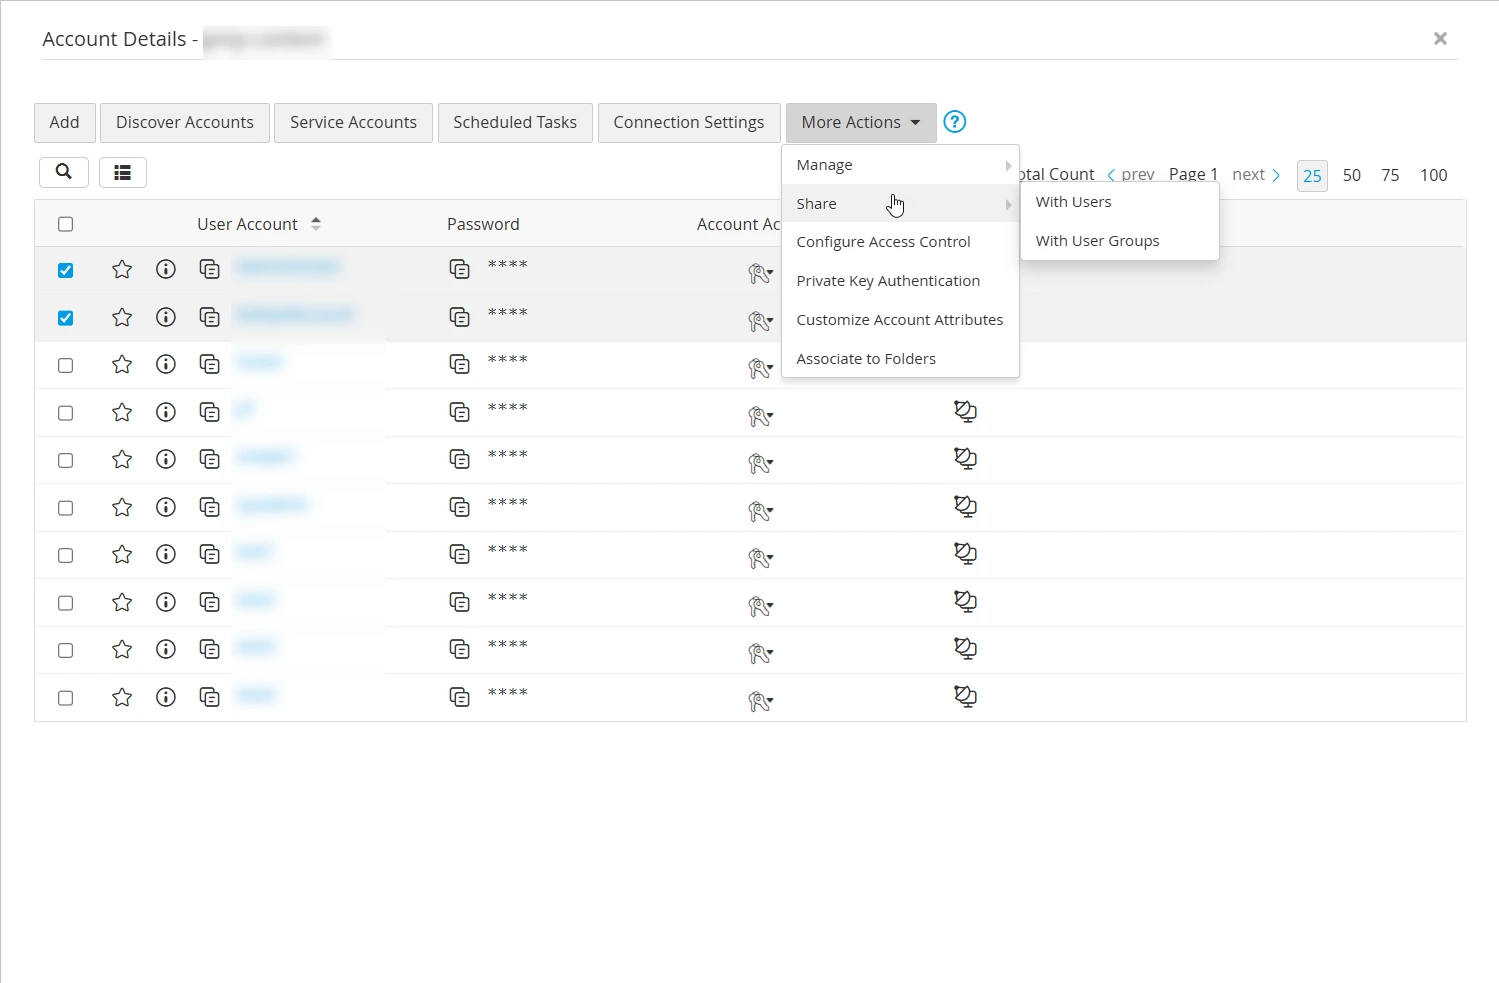
- In the pop-up box that appears, click the Grant option against that user or user group with whom the selected accounts are to be shared. Choose either View Passwords or Modify Passwords as the permission level and click Save.
- Click RemoteApp Only to share the associated remote app to a particular user group. To know more about configuring a remote app, click here.
2. Sharing Resources with Users or User groups
Follow the below steps to share a resource with users or user groups with any of the three permission levels - View, Modify, or Full Access.
- Navigate to the Resources tab and click the Resource Actions dropdown beside the particular resource that to be shared.
- From the Resource Actions drop-down menu, hover to Share and click either With Users or With User Groups depending on whether you want to share the resource with users or user groups.
- In the pop-up box that appears, click the Grant option beside that user or user group with whom the resource is to be shared. Choose from the permission levels: View Passwords, Modify Passwords, or Full Access.
- Click Save to apply the share configuration.
Now, you have successfully shared a resource with the required users or user groups. To share numerous resources in bulk, perform the following steps:
- Navigate to the Resources tab and select the required resources that are to be shared.
- Click the Resource Actions drop-down menu at the top pane, hover to Share, and click either With Users or With User Groups depending on whether you want to share the resources with users or user groups.
- In the pop-up box that appears, click the Grant option beside that user or user group with whom the resources are to be shared. Choose from the permission levels: View Passwords, Modify Passwords, or Full Access, and click Save.
3. Sharing Resource Groups with Users or User Groups
Follow the below steps to share a resource group with users or user groups, with any of the three permission levels - View, Modify, or Full Access.
- Navigate to the Groups tab and click the Actions dropdown beside the particular resource group that to be shared.
- From the Actions drop-down menu, hover to Share and click either Share With Users or Share With User Groups depending on whether you want to share the resource group with users or user groups.
- In the pop-up box that appears, click the Grant option beside that user or user group with whom the resource group is to be shared. Choose from the following permission levels: View Passwords, Modify Passwords, or Full Access.
- click Save to apply the share configuration.
Now, you have successfully shared a resource group with the necessary users or user groups. To share numerous resource groups in bulk, perform the following steps:
- Navigate to the Groups tab and select the resource groups to be shared.
- Click the Bulk Configuration drop-down menu at the top pane, hover to Share, and click With Users or With User Groups depending on whether you want to share the resource groups with users or user groups.
- In the pop-up box that appears, click the Grant option beside that user or user group with whom the resource groups are to be shared. Choose from the permission levels: View Passwords, Modify Passwords, or Full Access, and click Save.
Caution
When you share a particular set of resource groups with a user group, the resource groups will be visible to all members of that user group. That means, all the resources and the accounts that are part of those resource groups will be visible to all members of the user group. Also, the permissions granted to the user group (View, Modify or Full Access) will be applicable to all the members.