Remote File Transfer in Windows RDP Sessions
PAM360 enables you to establish a secure remote connection to Windows resources using the Remote Desktop Protocol (RDP). By leveraging the passwords stored in its repository, PAM360 automatically authenticates remote connections, eliminating the need for manual password entry. Once the secure connection is established via PAM360's session gateway, you can seamlessly transfer files to and from the remote target machine during RDP sessions.
PAM360 supports two primary file transfer operations during an RDP session:
- Upload Files from Local Machine to Remote Windows Resource
- Download Files from Remote Windows Resource to Local Machine
1. Upload Files from Local Machine to Remote Windows Resource
To upload files from your local machine to a remote Windows resource through an RDP session in PAM360, follow the steps below:
- Launch a remote session to the Windows resource from PAM360’s web interface. You can do this from the Connections tab or the Resources tab by clicking the Open Connection icon next to the respective Windows resource.
- PAM360 will authenticate the connection using the stored credentials and establish a secure RDP console.
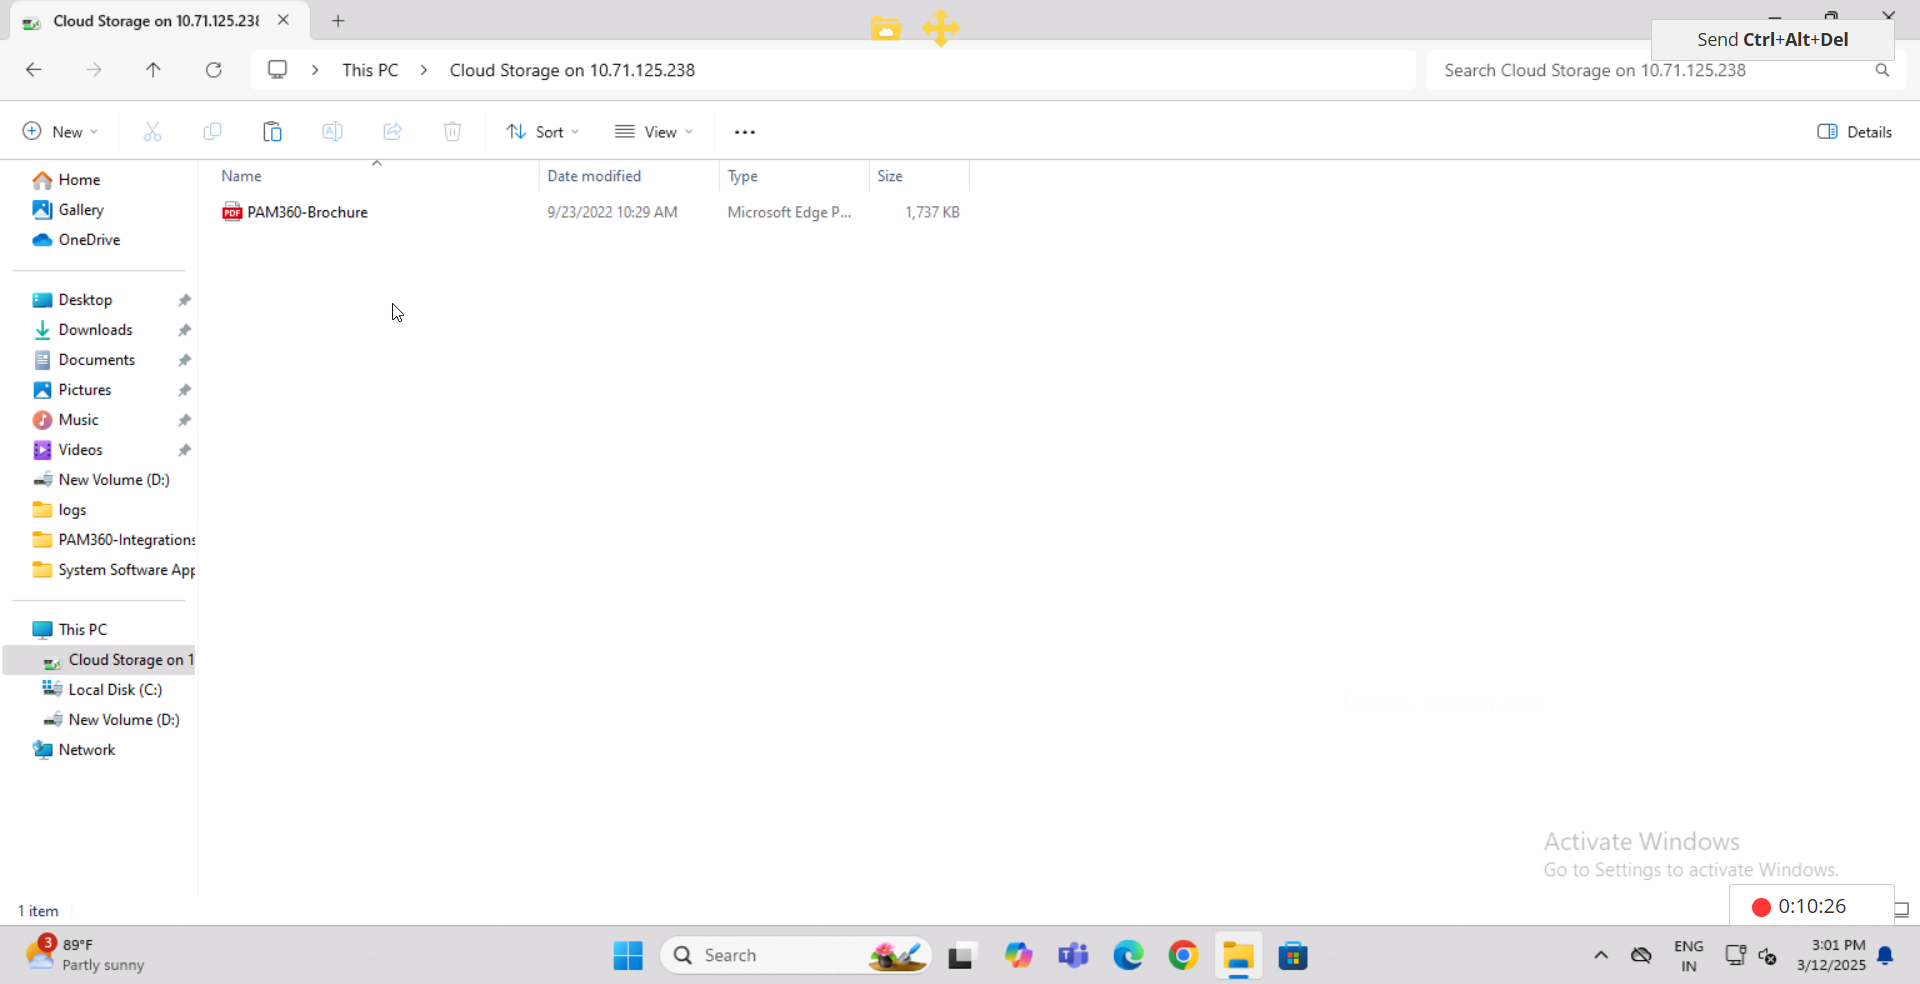
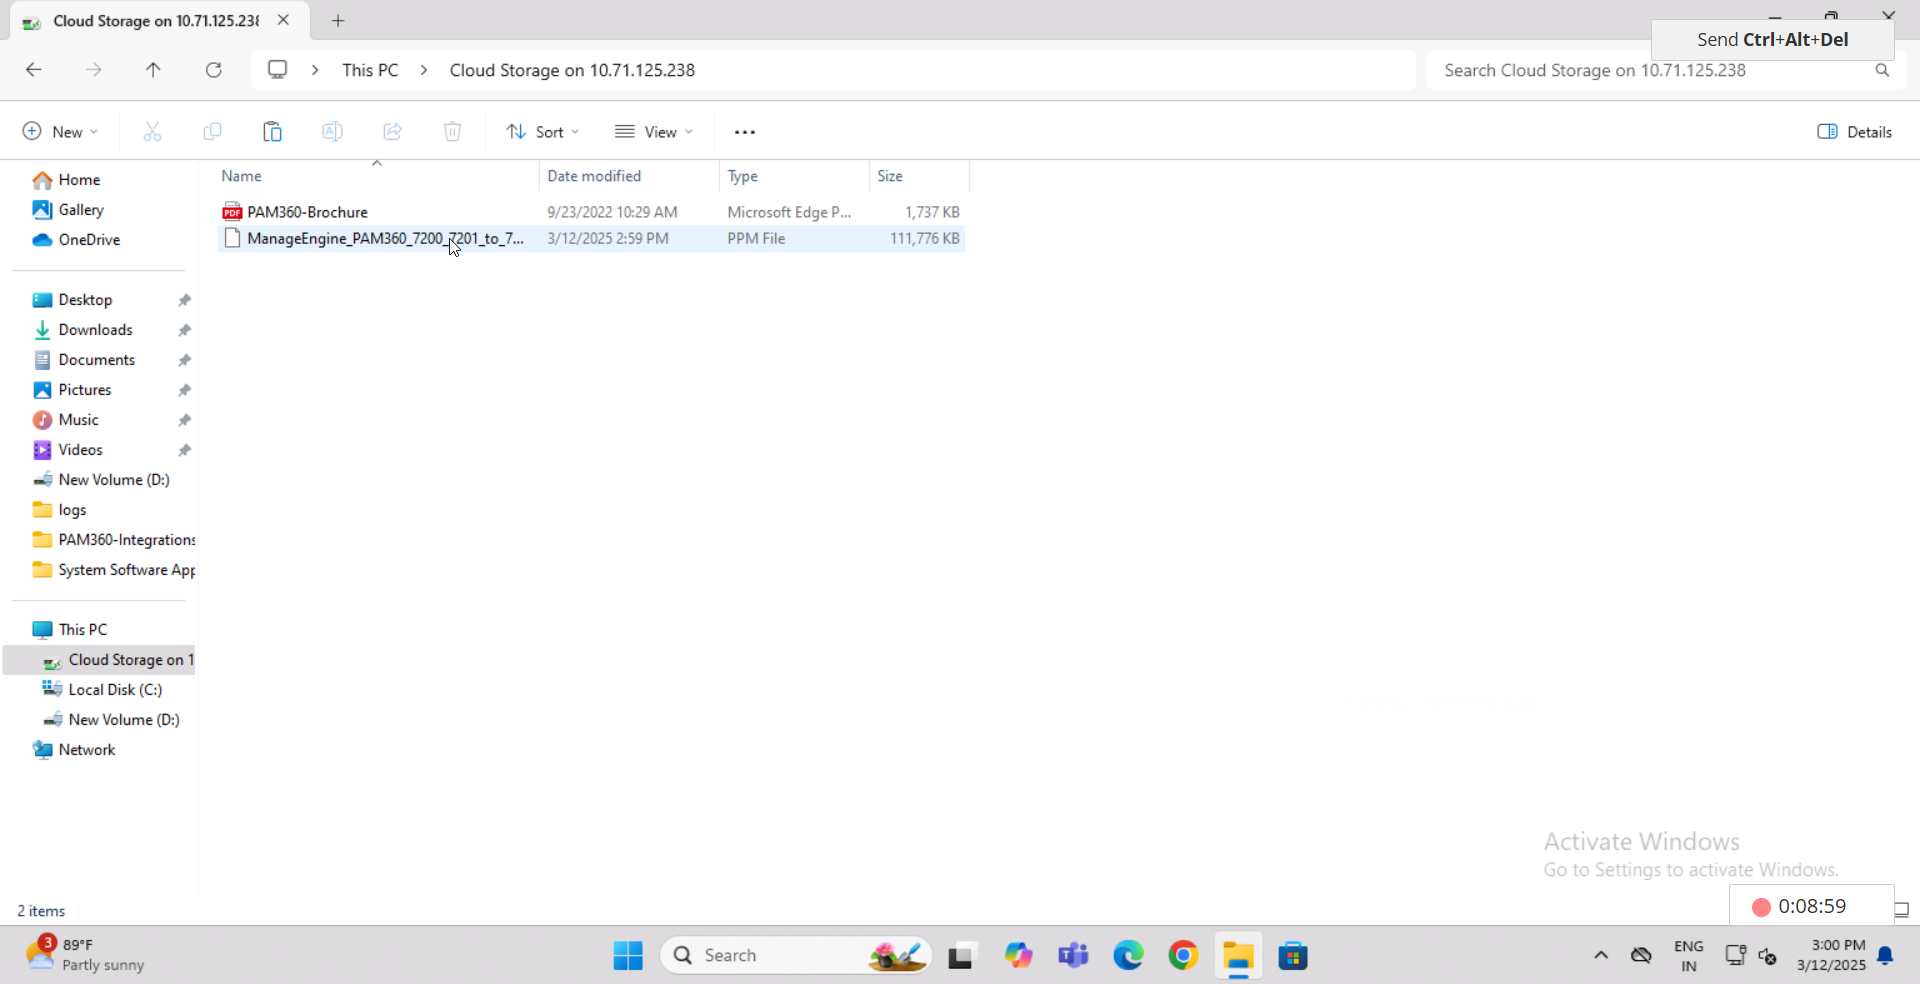
- Within the RDP console, navigate to the remote machine’s This PC folder. A newly created drive named Cloud Storage on <IP address> will be available. This serves as a temporary folder for file transfers between your local machine and the remote resource.

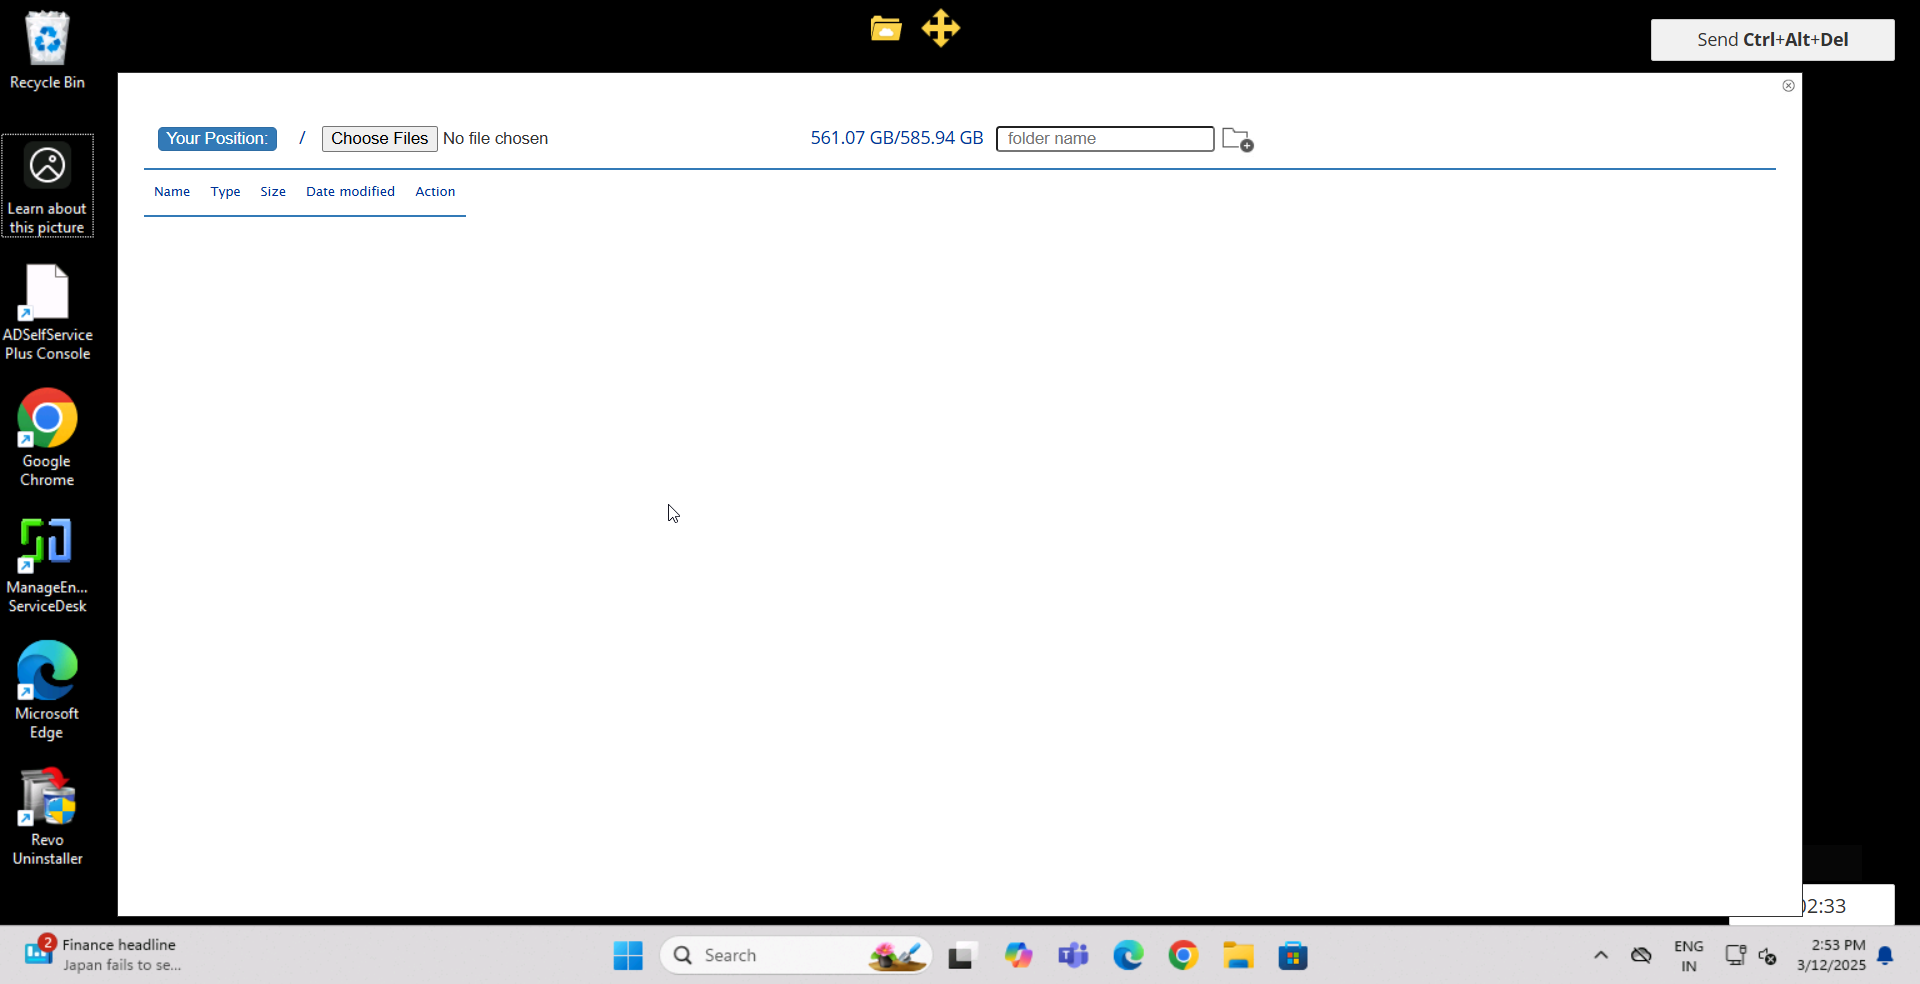
- Return to the remote machine’s desktop and click on the folder icon displayed at the top of the screen.
- A new window will open within the console. Click on the Choose Files option and select the required files from your local machine.


- The selected files will be automatically uploaded to the cloud storage drive. Open the cloud storage drive on the remote machine and copy the uploaded files to the desired location.


2. Download Files from a Remote Windows Resource to Local Machine
To download files from a remote Windows resource to your local machine during an RDP session in PAM360, follow the steps below:
- Launch a remote session to the Windows resource from PAM360’s web interface.
- In the RDP console, navigate to the remote machine’s This PC folder. The Cloud Storage on <IP address> drive will be available as a temporary folder for file transfers.
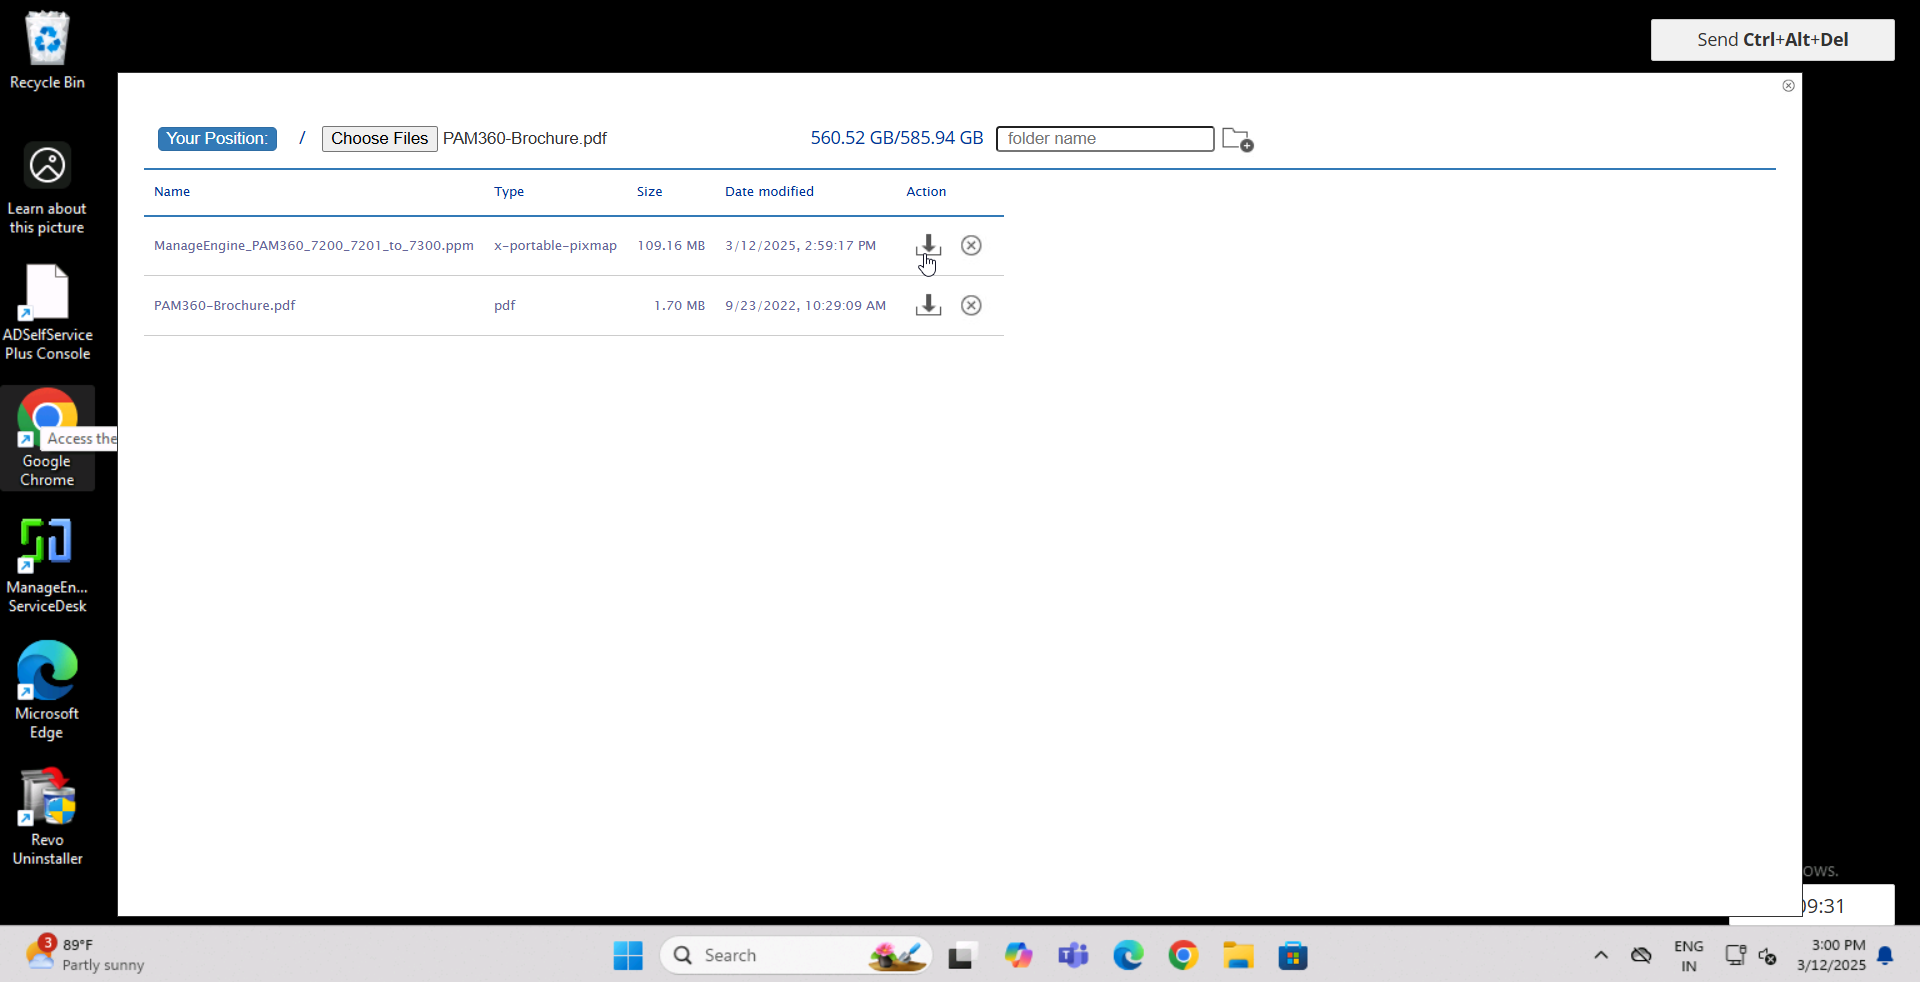
- Open the cloud storage drive and move the files you want to transfer into it. These files will instantly appear in the file transfer window within the console.

- Locate the required file in the file transfer window and click the Download icon next to the file to save it to your local machine.

By following these steps, you can efficiently and securely transfer files between your local machine and a remote Windows resource during an RDP session in PAM360.
Caution
This file transfer feature of PAM360 is primarily for the convenience of technicians and analysts who need to upload and download simple scripts, configuration files, logs, and similar items. However, it should not be considered a substitute for proper file transfer and management solutions within your organization. This is because the files are transferred through the PAM360 gateway server, and it is advisable to keep the file sizes to 100 MB or less.