•  
  • Data Source Configuration
  • NAS devices
  • Nutanix Files
  • Configure Nutanix Files auditing
Click here to shrink
Click here to expand Click here to expand

Configure Nutanix Files auditing

Prerequisites

  • Nutanix Files should be domain joined before it is configured for auditing in ADAudit Plus.
  • For seamless Nutanix Files auditing, ensure that the TCP 1468 port is open on the ADAudit Plus server.

Create a new user account to access Nutanix REST API

  1. Open the Nutanix Prism web portal and on the top left, select File Server.
  2. For the server you want to audit, click Launch Files Console under the Actions column.
  3. From the Configuration drop-down, select Manage Roles.
  4. On the REST API access users panel, click + New user.

    Create a new user account to access Nutanix REST API

  5. Enter the name and password of the local user account and click Save.

Configure the partner server to forward Syslog data

  1. Open the Nutanix Files' REST API Explorer by following the URL format below:

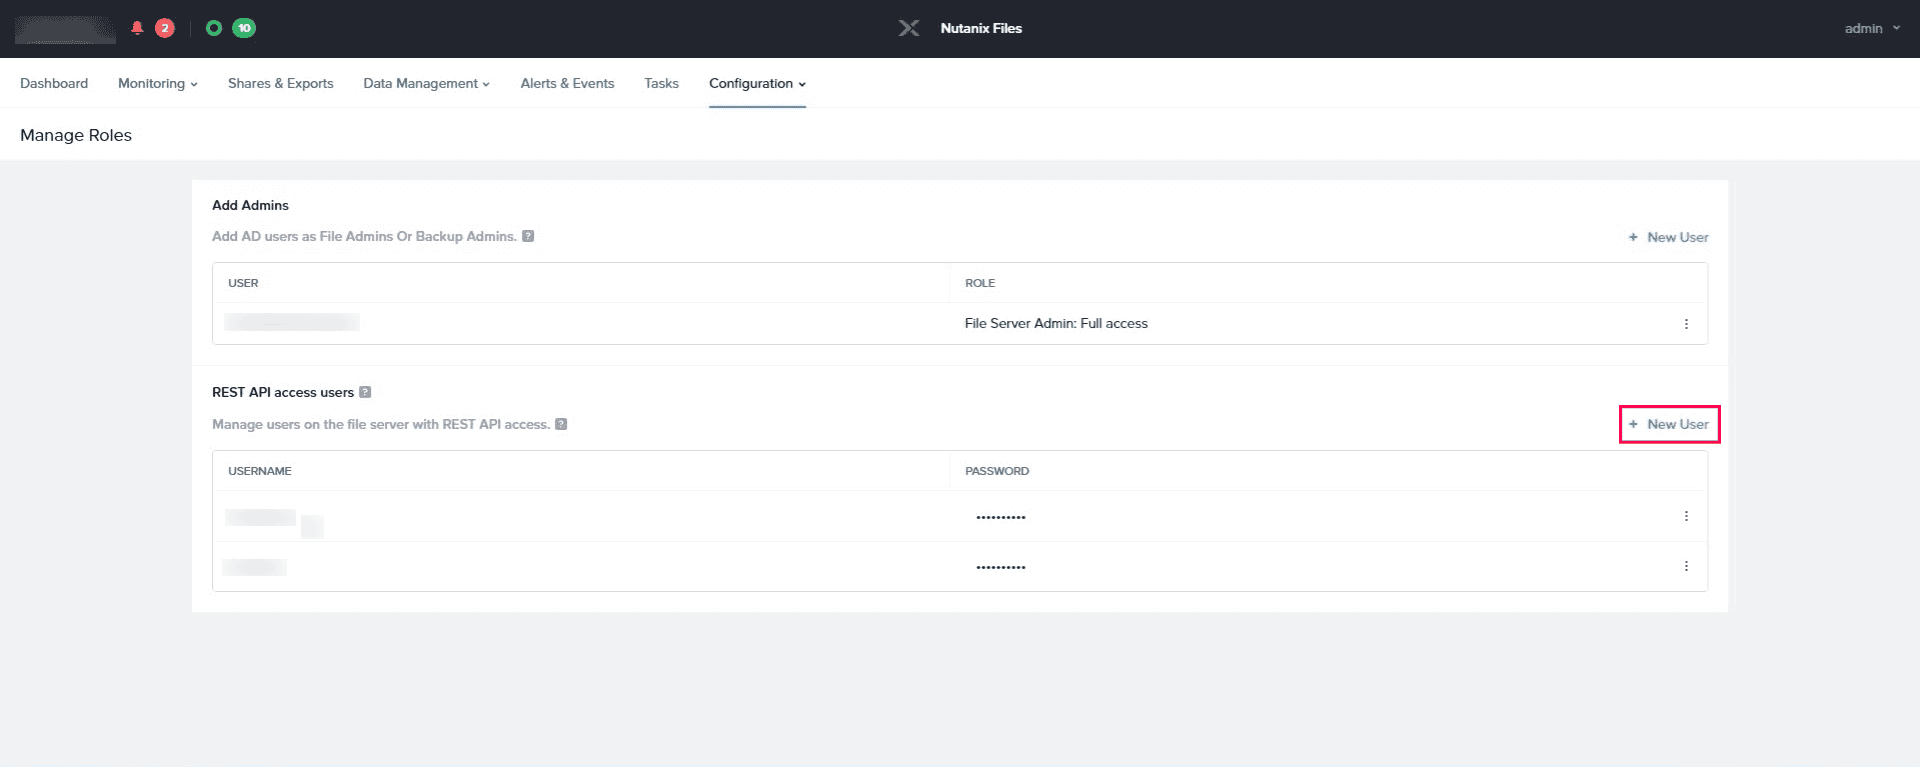
    https://<ip_address_of_nutanix_files>:9440/api/nutanix/v3/api_explorer/index.html#/

    Replace <ip_address_of_nutanix_files> with the IP address of the Nutanix Files to be audited.
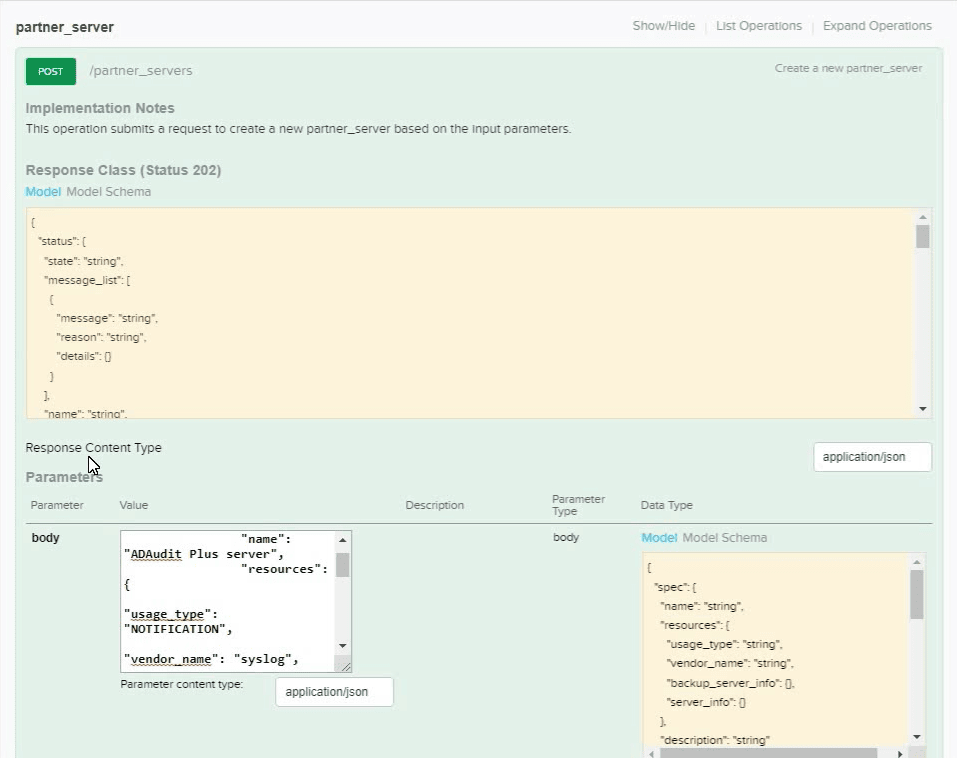
  2. Enter the credentials of the user account that you just created in the Username and Password fields.
  3. Click Explore.
  4. In the Nutanix Files' REST API Explorer, find and click partner_servers, and then click POST /partner_servers.
  5. In the request body, enter the following JSON formatted structure by replacing with the IP address of machine in which ADAudit Plus is installed:
    {
    "spec": {
    	"name": "ADAudit Plus server",
    	"resources": {
    		"usage_type": "NOTIFICATION",
    		"vendor_name": "syslog",
    		"server_info": {
    			"address": {
    				"ip": "<PARTNER-SERVER-IP>",   
    				"port": 1468
    			},
    			"server_type": "PRIMARY"
    		}
    	},
    	"description": "Audit-Syslog"
    },
    "api_version": "3.0",
    "metadata": {
    	"kind": "partner_server"
    }
    }

    Note: ADAudit Plus uses TCP port 1468 to read incoming data from Nutanix Files.

  6. Click Try it out! to send the request.
  7. In the response body, scroll down to the bottom and copy the uuid of the partner server that is created.

    Configure the partner server to forward Syslog data

Create a notification policy

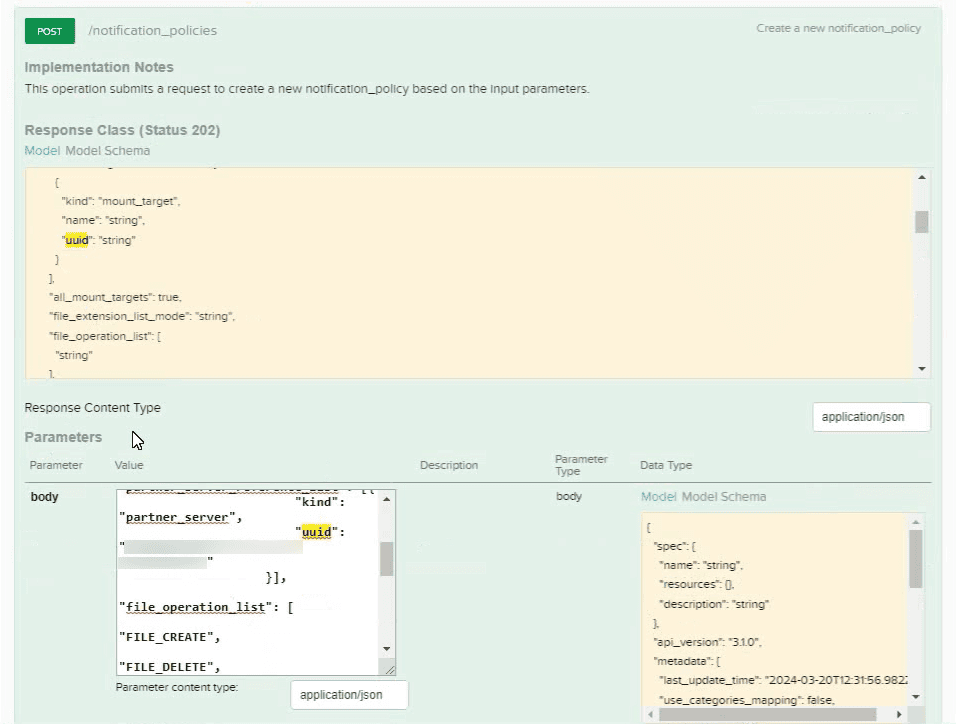
A notification policy needs to be configured to monitor files and folders on your Nutanix Files. To create a notification policy for the Nutanix Files via API:

  1. Open the Nutanix Files' REST API Explorer using the URL format below:

    https://<fileserver_ip>:9440/api/nutanix/v3/api_explorer/index.html#

    Replace <fileserver_ip >with the IP address of the Nutanix Files to be audited.

    Note: 9440 is the port used for accessing the REST API console in Nutanix. If you have configured a different port to access the REST API console, replace 9440 with the port number that you are using.

  2. Enter the credentials of the user account that you created in Step 5 of Create a new user account in the Username and Password fields.
  3. Click Explore.
  4. In the Nutanix Files' REST API Explorer, find and click notification_policies, and then click the POST /notification_policies.
  5. In the request body, enter the following JSON-formatted structure by replacing <PARTNER-SERVER-UUID> with the uuid that you had copied earlier.
    {
    "spec": {
    	"name": "Audit-Notification",
    	"resources": {
    		"all_mount_targets": true,
    		"protocol_type_list": [
    			"SMB"
    		],
    		"partner_server_reference_list": [{
    			"kind": "partner_server",
    			"uuid": "<PARTNER-SERVER-UUID>"
    		}],
    		"file_operation_list": [
    			"FILE_CREATE",
    			"FILE_DELETE",
    			"FILE_READ",
    			"FILE_WRITE",
    			"DIRECTORY_CREATE",
    			"DIRECTORY_DELETE",
    			"RENAME",
    			"SECURITY"
    		],
    		"is_secure": false
    	},
    	"description": "SMB_policy"
    },
    "api_version": "3.0",
    "metadata": {
    	"kind": "notification_policy"
    }
    }
    						
  6. Click Try it out! to send the request.

    Create a notification policy

Add Nutanix Files in ADAudit Plus

To add your target Nutanix Files for auditing in ADAudit Plus:

  1. Login to your ADAudit Plus web console with admin credentials.
  2. Navigate to the File Audit tab > Configured Server(s) > Nutanix Files and click +Add Server on the top right.
  3. In the Add Nutanix server pop-up, enter the target server name and click Next.
  4. Select the shares you want to audit and click Next.
  5. Review your selection and click OK.

Don't see what you're looking for?

  •  

    Visit our community

    Post your questions in the forum.

     
  •  

    Request additional resources

    Send us your requirements.

     
  •  

    Need implementation assistance?

    Try OnboardPro


Copyright © 2025, ZOHO Corp. All Rights Reserved.

Get download link