Security Settings - Firewall Analyzer
Until now, SSL was enabled in OpUtils manually. The steps had to be repeated on every setup in case of failover being used and in central-probe setup. When central-probe has failover setup then it becomes complex.
Understanding SSL
Secure Sockets Layer (SSL) is a standard security technology for establishing an encrypted link between a server and a client. It is implemented in client-server communication with a secure handshake process made possible using PKI (Public Key Infrastructure). The client and server perform a process called handshake in which they agree upon what encryption they can use and their shared Key before starting to communicate. This information will be encrypted using the public key (contained in certificate) and can only be decrypted using private key (server has it). So no one can intercept the communication further, even if the packets are captured.

Security Settings
SSL Configuration
Enable HTTPS Configuration
Steps to enable HTTPS in Firewall Analyzer: (for version 123181 and above)
- Go to Settings > Basic Settings > Security Settings
- Enable the Secure Mode button.
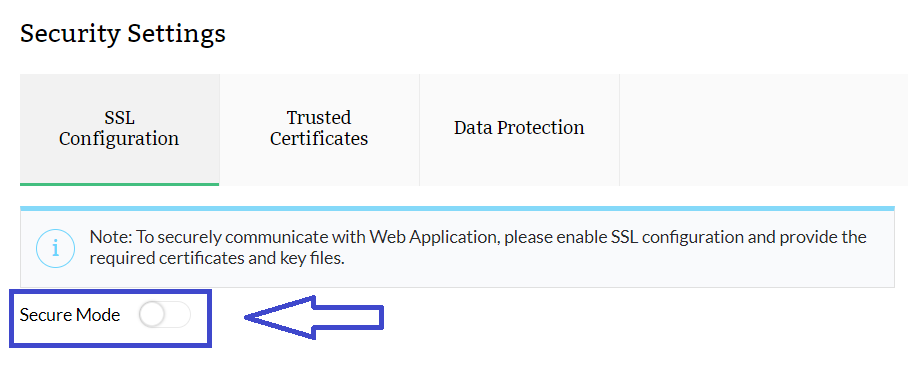
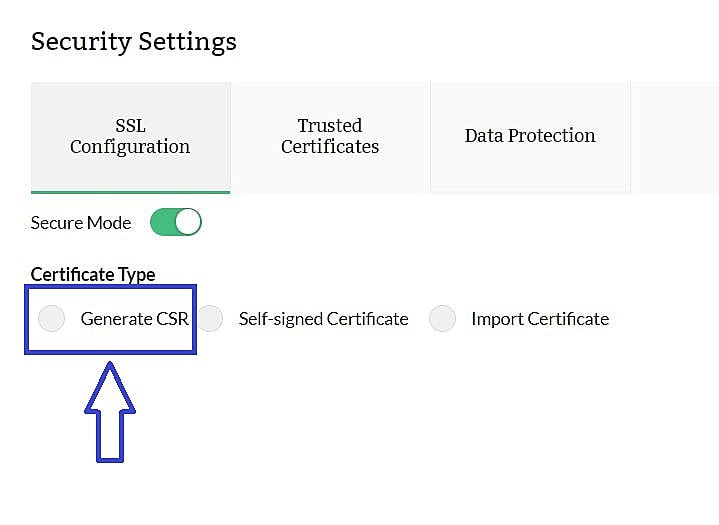
- Once the button is enabled, you will be prompted to choose from three options, namely:
- Generate a CSR
- Self-signed Certificate
- Import Certificate
Generate CSR
- This option helps you generate a Certificate Signing Request (CSR). A CSR or Certificate Signing request is a block of encoded text that is given to a Certificate Authority when applying for an SSL Certificate. It is usually generated on the server where the certificate will be installed and contains information that will be included in the certificate such as the organization name, common name (domain name), locality, and country. It also contains the public key that will be included in the certificate. A private key is usually created at the same time that you create the CSR, making a key pair. A CSR is generally encoded using ASN.1 according to the PKCS #10 specification.
- A certificate authority will use a CSR to create your SSL certificate, but it does not need your private key. You need to keep your private key secret. The certificate created with a particular CSR will only work with the private key that was generated by it. So if you lose the private key, the certificate will no longer work.
- Once you click on the Generate CSR, you will have to fill out a few information for the certificate you want to create for use in Firewall Analyzer Server.
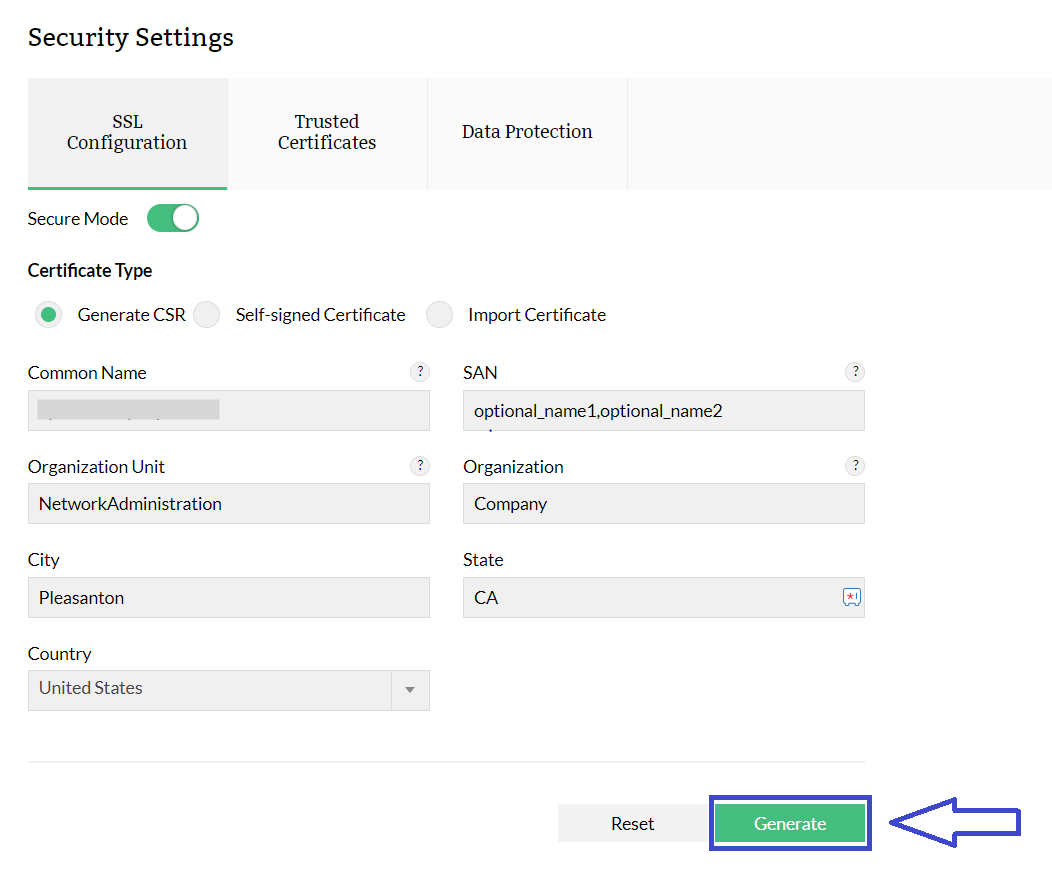
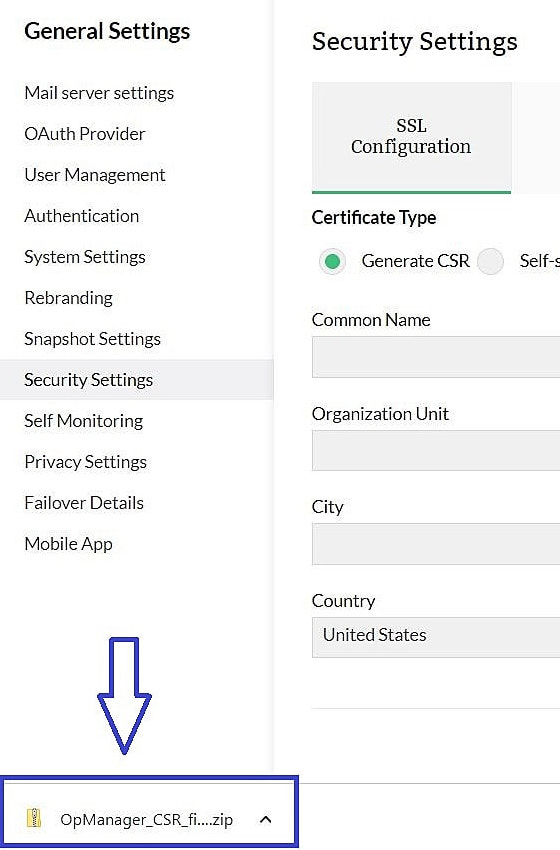
- On clicking the Generate button your CSR and Server Key files will be downloaded as a ZIP. Extract the file and use the "OpManager.csr" file to get a signed certificate from a CA of your choice.

- After getting signed by the CA, you will get a certificate file which you can import into Firewall Analyzer using the Import Certificate option discussed below.
Self-Signed Certificate
- This option lets you enable SSL in Firewall Analyzer with a self-generated and self-signed certificate. This certificate is safe to use and is equally secure. But browsers may display them as untrusted since it is not signed by a Valid CA (Certificate Authority).
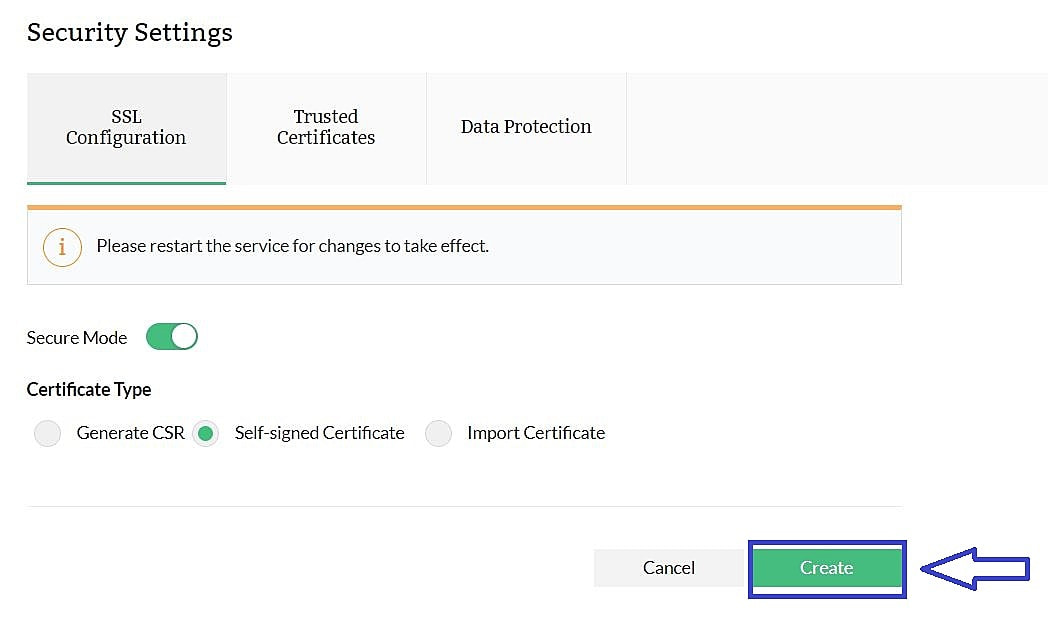
- You will be prompted to restart Firewall Analyzer for the changes to take effect.
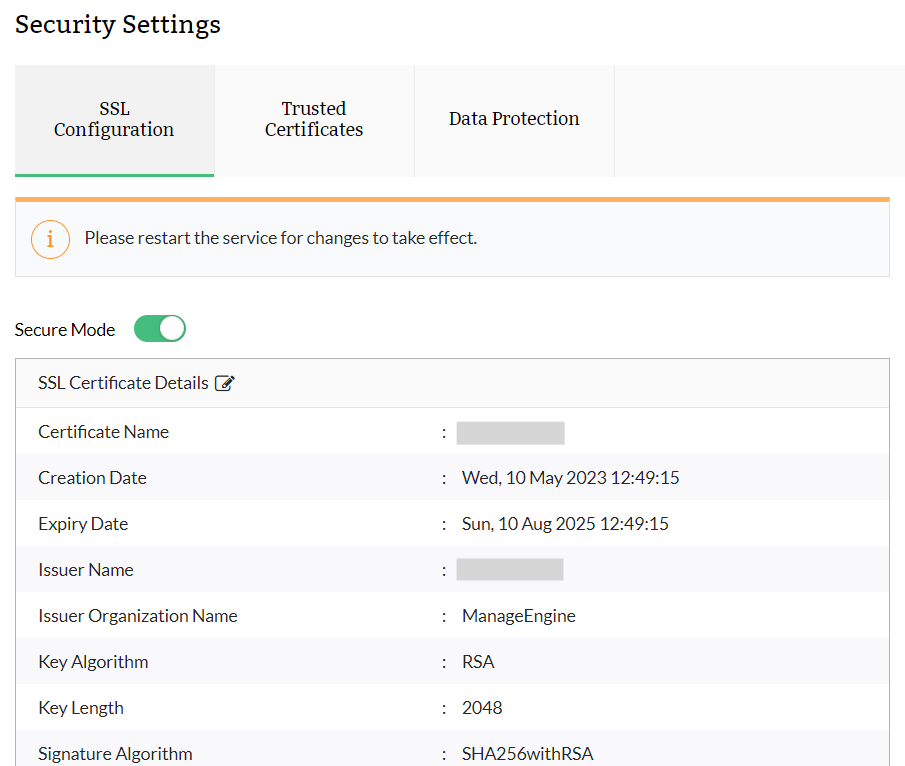
Import Certificate
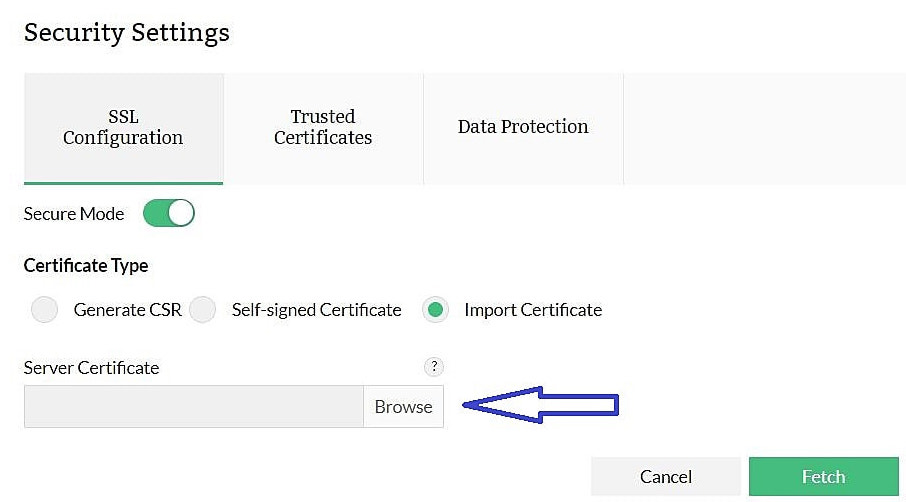
- Use this option if you already have a valid certificate and key files (or) a keystore or a PFX file with the certificate.
- Select a certificate file.
- Select the appropriate key file.
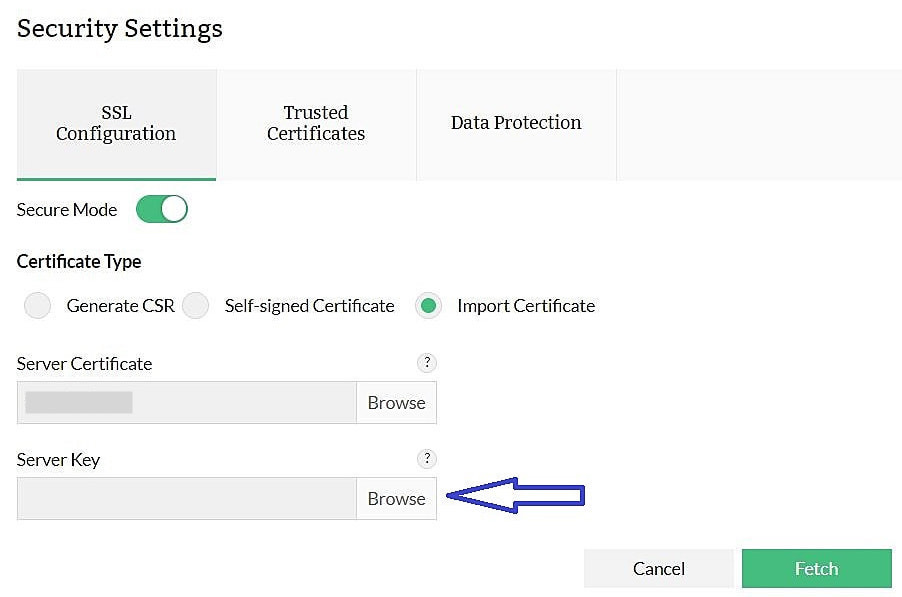
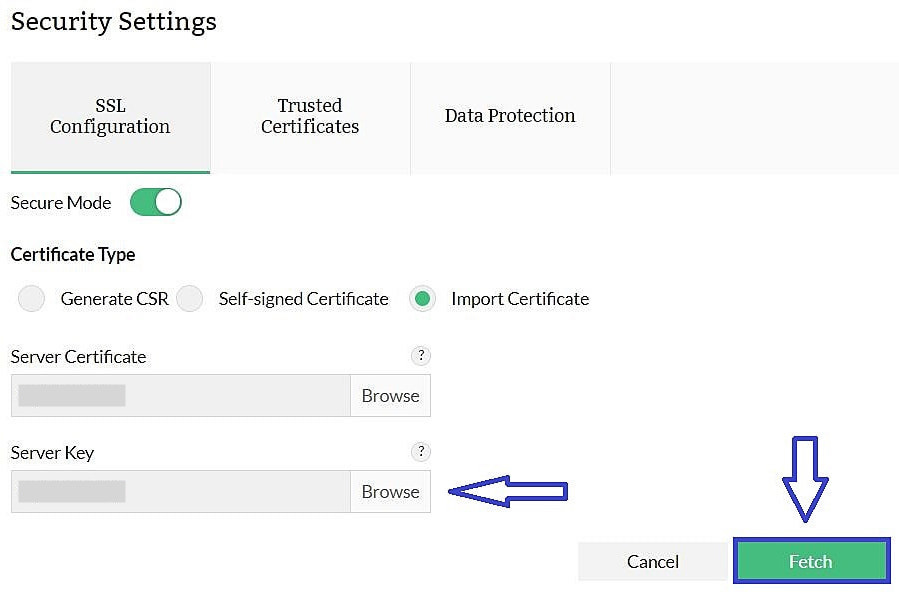
- Verify and choose Import.
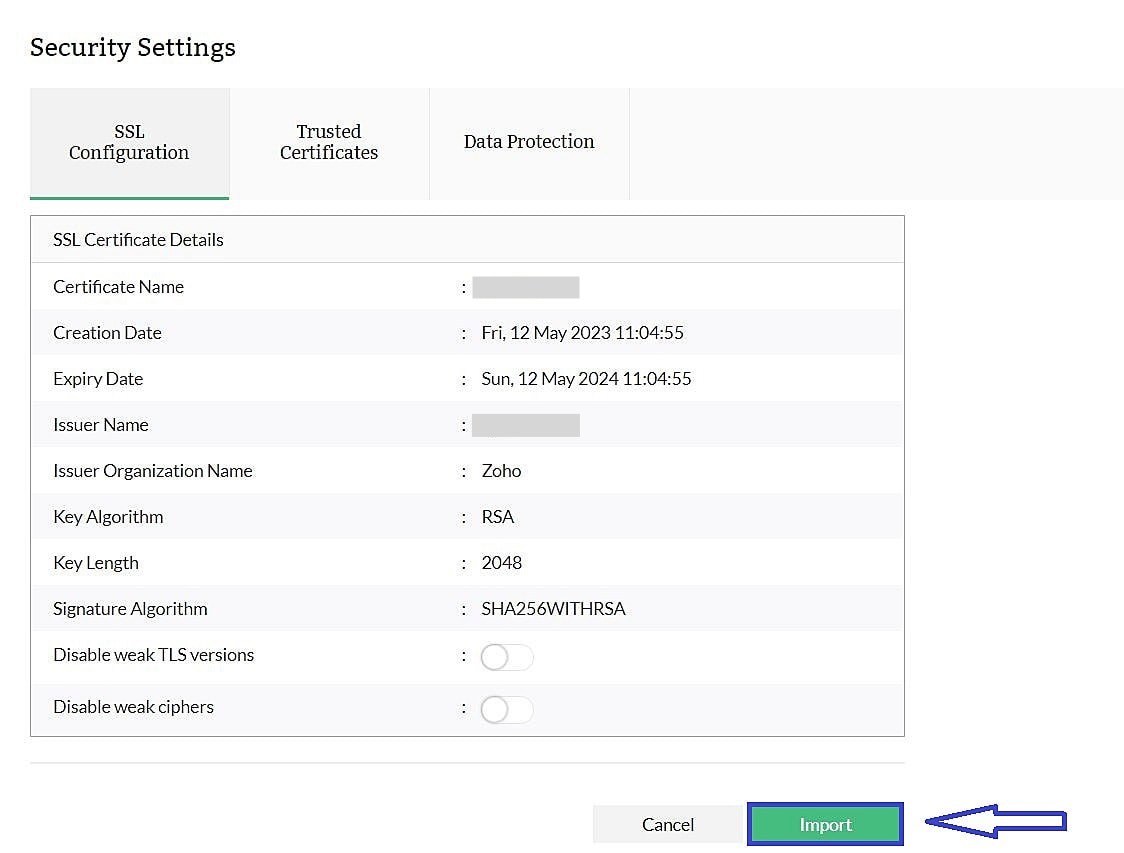
- If the certificate cannot be validated with trusted sources, you will be asked to provide the intermediate certificates and root certificate files.
- Once uploaded, verify the certificate and click Import.
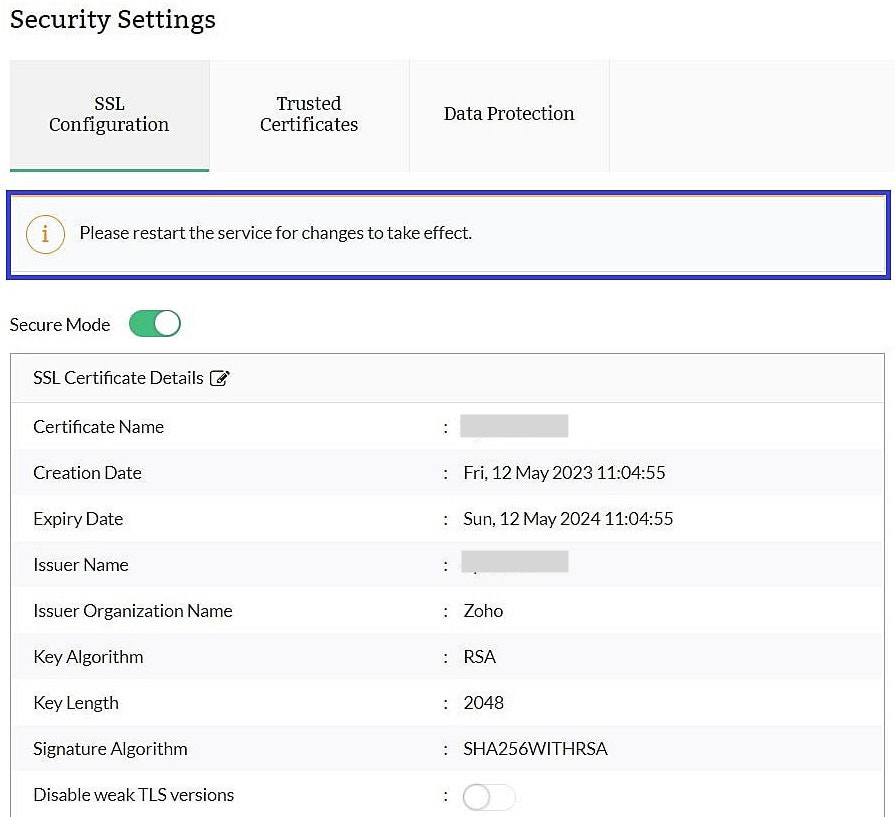
- On successful import, you will be prompted to restart Firewall Analyzer.
Importing from PFX or Keystore
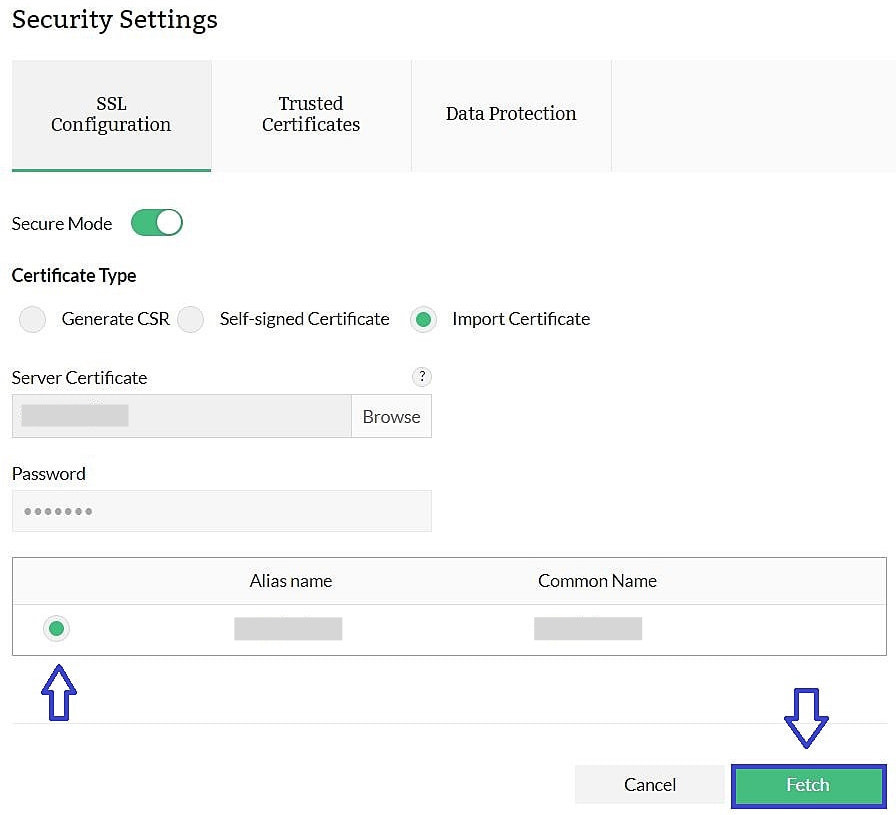
- If you are using a Keystore or a PFX file, you will be prompted to input the password for opening the file.
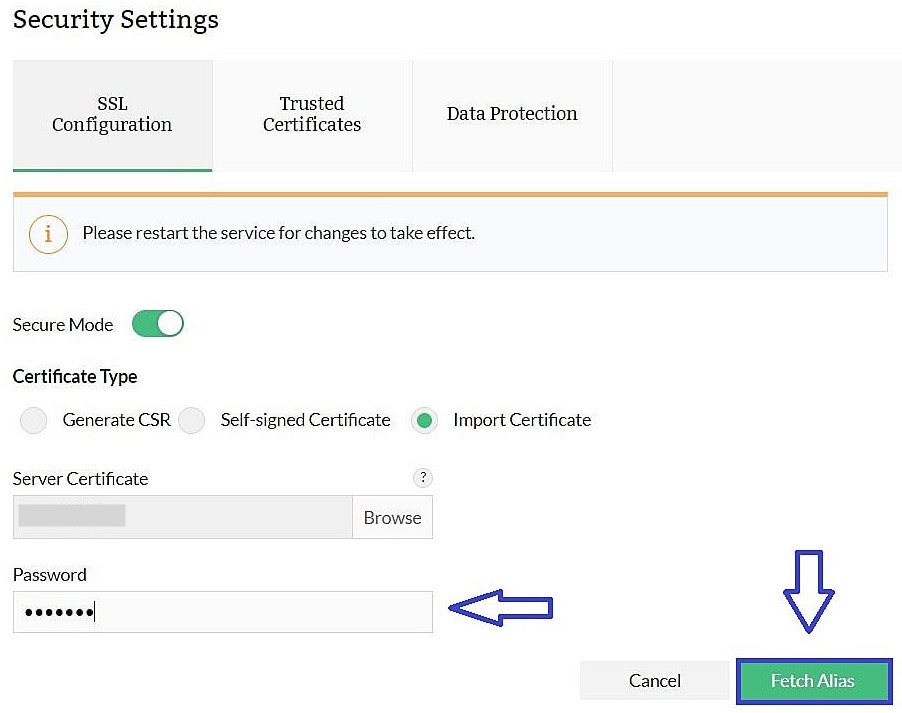
- On clicking Fetch Alias, you will be provided with a list of Key-entries present in the keystore. Choose a specific alias which is to be used to enable SSL in Firewall Analyzer.
- You will be shown a preview of the certificate information, verify and click on Import for using the certificate.

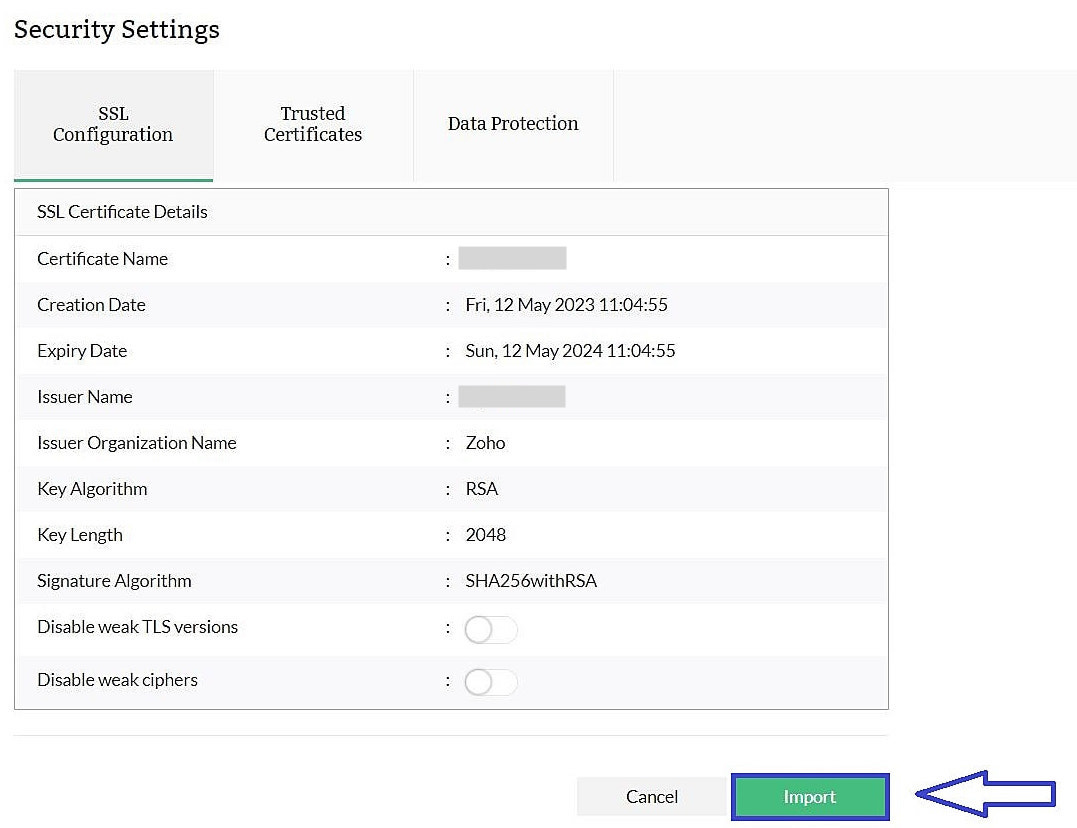
- Finally you will be prompted to restart Firewall Analyzer for the changes to take effect.

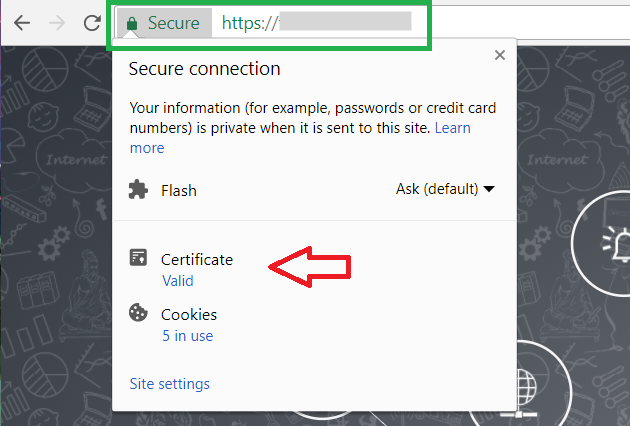
After enabling SSL through one of the above ways, you will be able to connect to Firewall Analyzer in secure mode:
Trusted Certificates
Importing Trusted Certificates in Firewall Analyzer
Firewall Analyzer validates the trusted sources with the help of certificates in Firewall Analyzer trust store. By default Firewall Analyzer trusts all major CA signed certs. If a specific certificate or service has to be trusted, the certificate has to be added to this truststore.
| Note: |
These steps are only applicable for Firewall Analyzer versions 123181 and above. |
- Navigate to Settings > Basic Settings > Security Settings
- Go to the Trusted Certificates tab.
- You have 2 options to import certificates into trusted sources, viz., URL, Certificate/Trust Store File.
- URL - Fetch certificate from a URL reachable from Firewall Analyzer server.
- Certificate/Trust Store File - Directly upload certificates as files or from a keystore/truststore.
- If you choose URL and provide the URL of the service you want to trust, you will be prompted to verify and import the fetched certificate. Click Import and it will be added to the trusted sources.

- If you choose the second option, Certificate/ Trust Store File, then you will have to browse and select the files.
- Certificate .crt files are chosen to add to trust store. On clicking Import, it will be added to Firewall Analyzer's trust store.
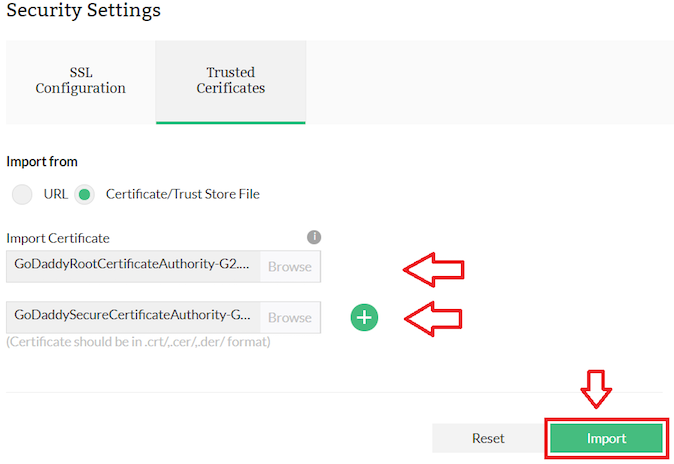
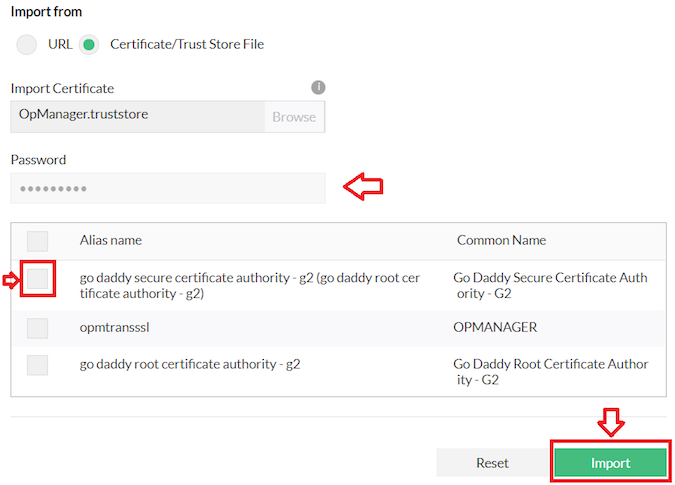
- In case you have a keystore/truststore/pfx of the source you want to trust, browse and choose the appropriate truststore file. Input the password and click Fetch. You will be shown a list of aliases availale in the truststore you can choose the ones you want and click Import.
Data Protection
You can protect the access to the docs generated by Firewall Analyzer.
Enable 'Password Protection for PDF/XLS files' switch to set a password for the PDF and XLS files (reports) generated and distributed to users by Firewall Analyzer.
Enter the password for the docs in the 'Password' field.
Click Save to save the settings and click Cancel to cancel the settings operation.
| Notes: |
On clicking the save button, the password will be sent to admin users and to the mail IDs configured in the scheduled reports. |
Thank you for your feedback!


![]()


