Understand record templates
A record template for a form allows you to present the data in each of its records in a meaningful and structured manner.
Imagine that you've created an order management application and that as users place their orders, you want to email them their invoice. Invoices contain order information, which in this example will be stored in your orders form. Creating a record template based on this form will help you automate the process of putting together the order information in the desired format. You can email the invoices using your AppCreator app by setting up an email notification upon form submission that uses a record template to include the order data in it. Below is an example of how this invoice can look:

Refer to the following sections to learn more about record templates:
Creating and designing record template
ManageEngine AppCreator offers an intuitive, WYSIWYG interface to create record templates with various customization options and simple drag-and-drop controls. Learn how to create a record template
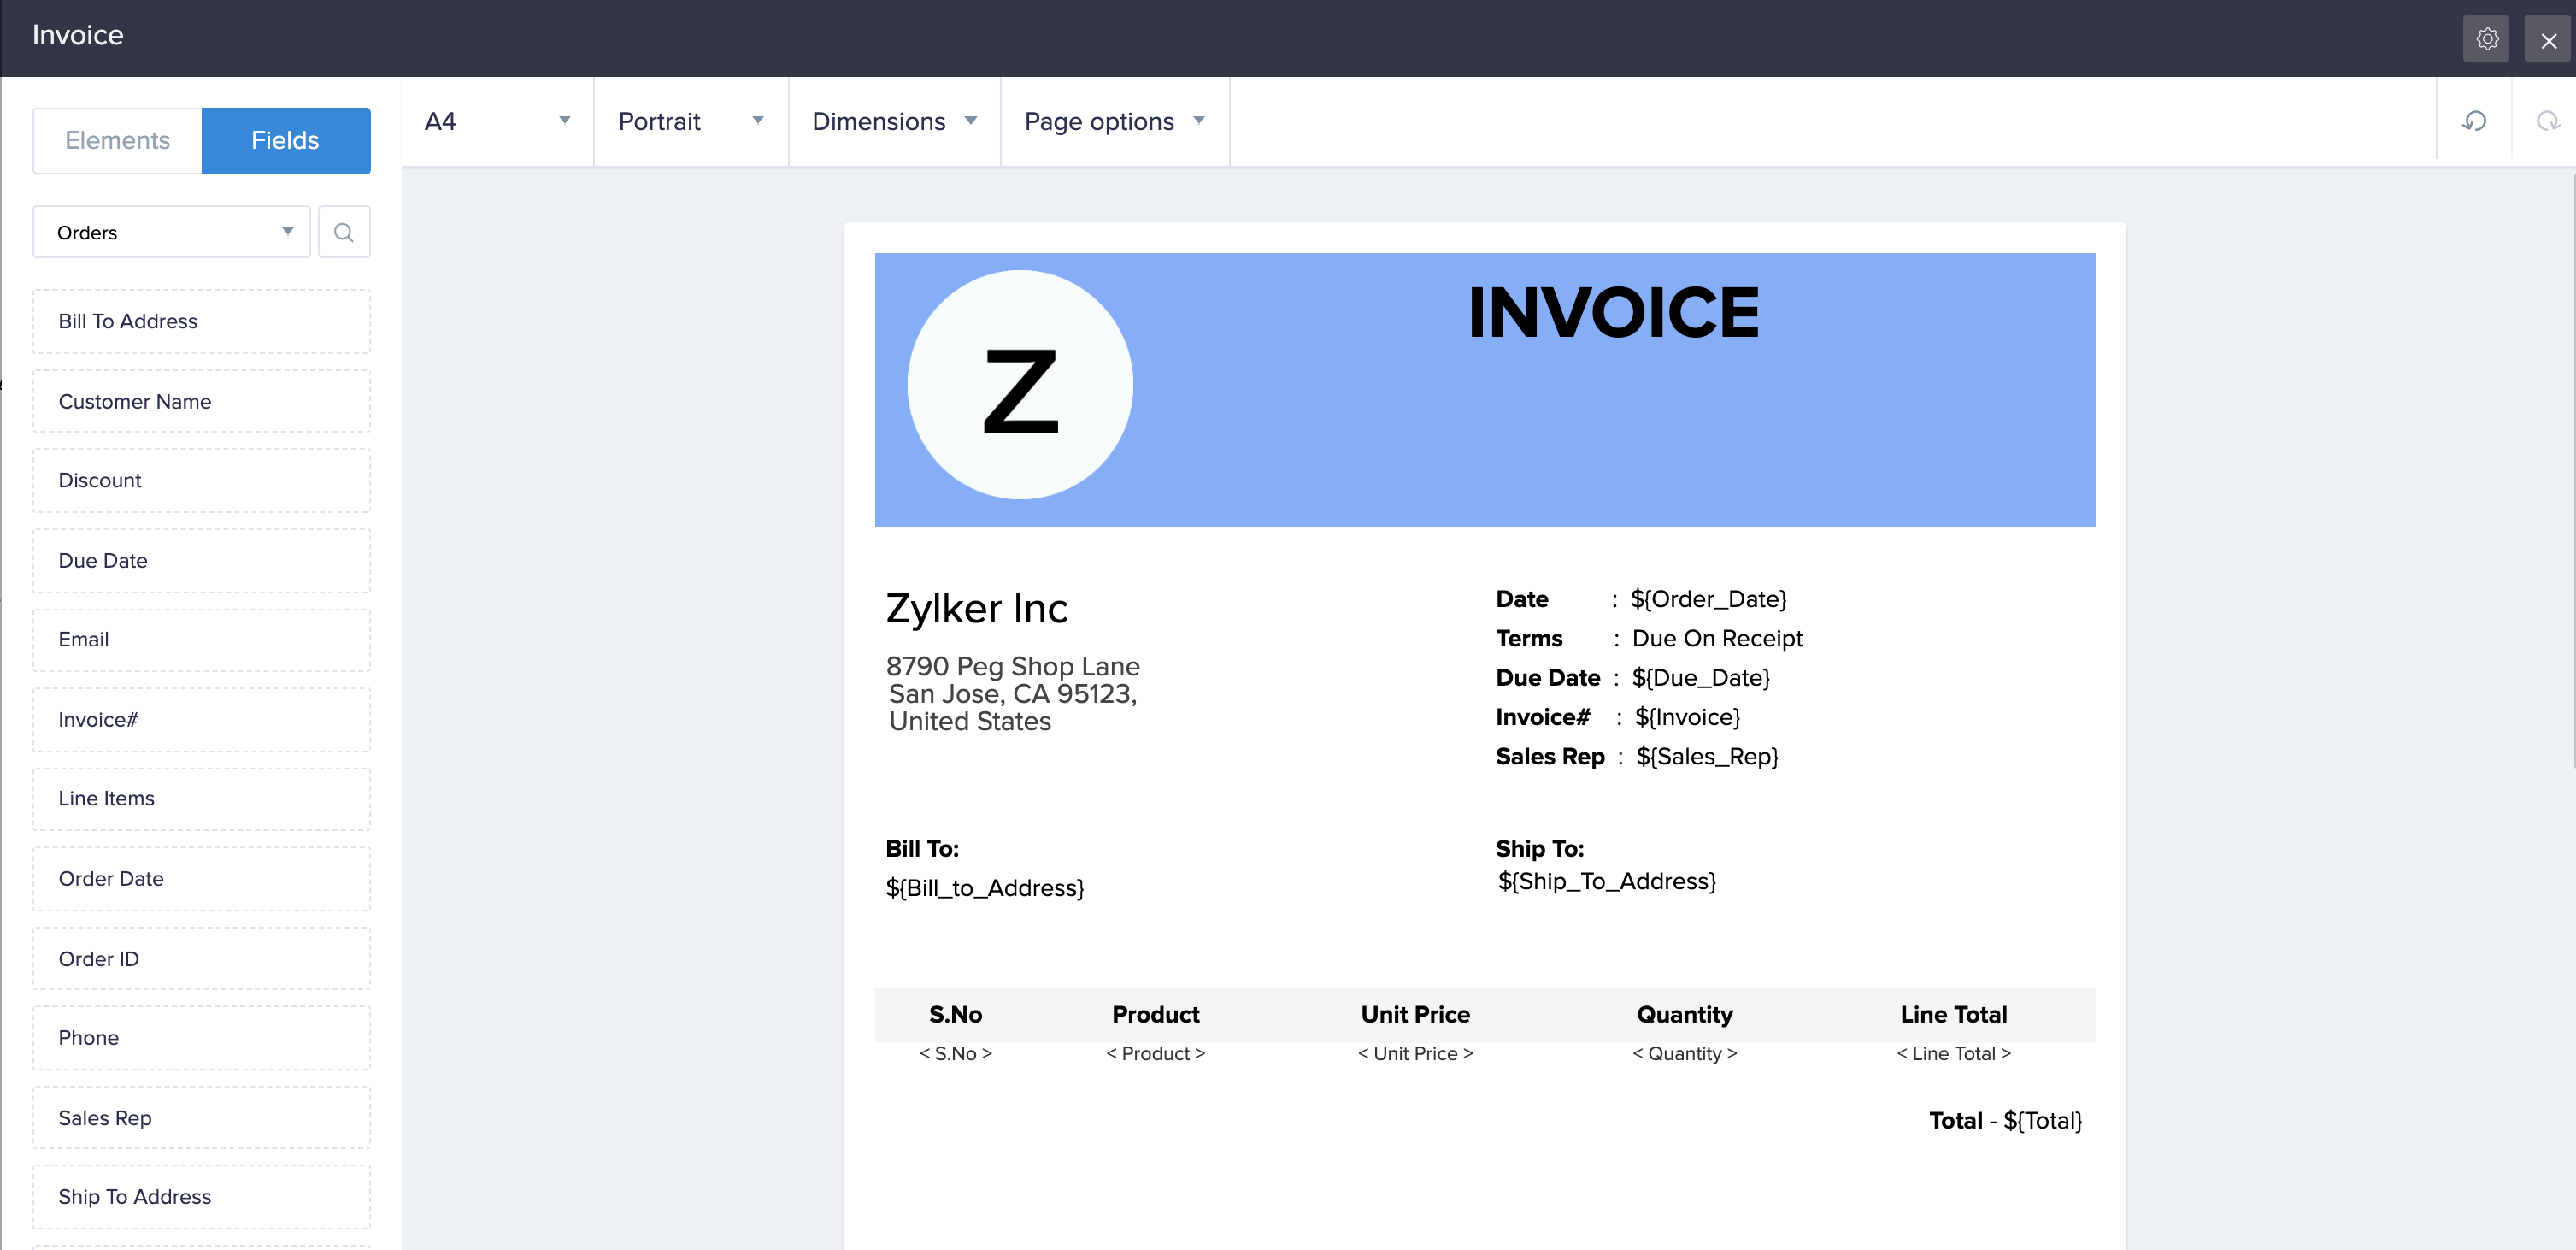
The following image shows how the record template designer looks:

The record template designer provides the following:
- Elements: The elements tab on the left features the following predesigned elements that you can add to your template: Heading, Paragraph, Image, Table, and Spacer. The designer offers element-specific toolbars that allow you to customize their display value and appearance.
- Fields: The fields tab on the left lists the fields based on the selected form as well as from its related fields (related via subform and lookup fields). The designer offers field-specific toolbars; the toolbar for subform and lookup fields allows you to select the fields of the related forms that you want to display in the template and the toolbar for multi select fields enables you to select a delimiter to separate the choices.
- Template properties: The designer allows you to customize template-level properties that allow you to enhance the visual aspects of the template, such as customizing the page size, adding a background image, and displaying a header and footer. Learn how to customize template properties
- Other features: The designer enables an easy and intuitive way to create record templates:
- It features a WYSIWYG interface
- It allows you to undo and redo up to ten changes. These buttons are displayed at the top-right corner of the designer. You can also use the standard keyboard shortcuts to perform these operations.
- It auto-saves the changes you make to the template
- It allows you to set column-width simply by dragging and dropping the resize icon when you hover over column borders
- It allows you to perform row and column-specific customizations. Learn how
Using record templates
The following are the avenues where your record templates come into play:
- Including data in emails: Email notifications allow you to select a record template to include user submitted data either inline in the message or as a PDF attachment.
- Learn how to send an email notification upon form submission
- Learn how to add an email notification action to a workflow
- Learn how to use a record template in the sendmail Deluge task
- Printing and exporting a record: The record template of a form can be associated with its reports as their print template. Each report can have a different template, which is used when your users print a record or export it as a PDF.
Examples
Below are examples that illustrate the usage of record templates:
- Estimates - A template displaying an estimate of the cost of production for various products. The products can be differentiated by displaying them as separate columns and also resizing them. Process description can be included using Paragraph. Previous year graphs can be inserted using Images. Tables can be used to list cost variations of different vendors.
- Brochures - Colorful brochures can be created using various color options provided by the template elements. Logos, if any, can be inserted using Images. Brochures mostly contain pictures, which can also be accomplished using Images.
- Certificates - Certificates mostly contain text of different fonts and sizes, which can be accomplished using various customization options in Paragraph. Date field, name field, and other form fields can be dragged and dropped on the template designer. You can also add signatures using the Image element. A background image of the institution granting the certificate can also be inserted.
- Newsletters - Different topics in the newsletter can be displayed in separate columns. The heading can be used to write headlines for different topics. Different background colors can be applied to different topics.
- Campaign emails - Various marketing campaign emails can be constructed using "Record Templates", and can be sent as in-line content or as a PDF attachment with an email.
- Visiting cards - You can create visiting card templates using name field, phone number field and various other form fields and print the same for distribution.
Things to know
When you (app Admin) or a shared user wants to download the media files in the record template sent via email notifications, you must be logged into your account. You can then click on the media file URL and download the files.