Migrating to SSL Enabled Databases in Endpoint Central
This guide provides step-by-step instructions for migrating from a non-SSL enabled MSSQL database to an SSL enabled MSSQL database in Endpoint Central. Follow the steps outlined below to ensure a successful migration.
Prerequisites
- You should have administrative privileges on the system where Endpoint Central is installed.
- Obtain the SSL certificate for your target MSSQL server.
Steps for Migration
- Import SSL Certificate to the JRE Keystore
- Open a command prompt in administrator mode.
- Navigate to the `\bin` directory.
- Execute the `AddSSLCert.bat` script with the SSL certificate file path as a parameter.
- For example: AddSSLCert.bat D:\temp\yourcert.pem
- Replace `D:\temp\yourcert.pem` with the actual path to your SSL certificate file.

- Add Connection Properties for MSSQL Server
- Create a file named `DBConnection.properties` in the `\conf` directory.
- Add the following properties to the `DBConnection.properties` file:
- encrypt=true
- trustServerCertificate=false

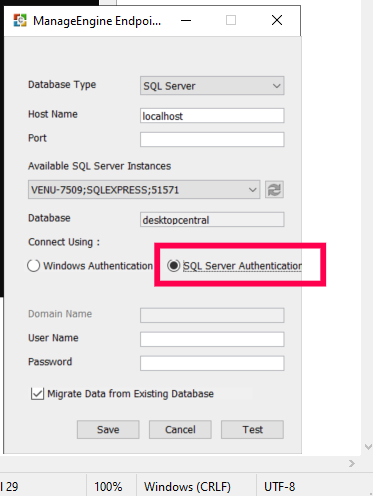
- Update the ChangeDBServer Window for MSSQL Server
- Open the ChangeDBServer window.
- Update the hostname to the Fully Qualified Domain Name (FQDN) of the target MSSQL server.
- Change the authentication type to MSSQL Server authentication. Note that Windows authentication is not supported for systems using FIPS encryption.
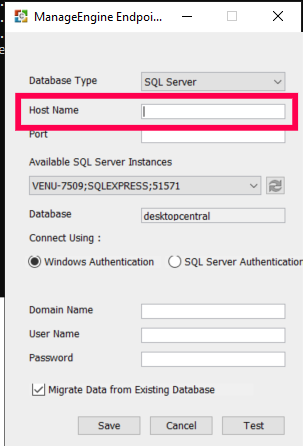
- Update the ChangeDBServer Window for MSSQL to MSSQL Server with SSL
- Open the ChangeDBServer window.
- Set the hostname to the FQDN mentioned in the SSL certificate.
- Note: Windows authentication is not supported for systems using FIPS encryption.
By following these steps, you have successfully migrated your MSSQL database to an SSL enabled MSSQL database in Endpoint Central. Ensuring the security of your database connections is essential for maintaining the integrity of your data and protecting sensitive information.


