Configuring Microsoft Entra ID SAML Single Sign-On for Active Directory Users
User accounts imported to PAM360 from Active Directory are assigned usernames in the Domain name/username (email id prefix) format. PAM360 authenticates users by matching the NameID in the SAML assertion provided by the IdP with the corresponding PAM360 username. Users cannot access their PAM360 accounts if these values do not match. To ensure seamless access when setting up SAML Single Sign-On (SSO) for AD users, you can configure the Windows account name as the incoming claim type. Although this document covers the detailed steps to configure Microsoft Entra ID as the SAML IdP for the PAM360 users imported from AD, this approach will work for all other available SAML vendors.
Scenario: Consider a user, John Doe, in your AD environment. If your AD domain is ABC.inc and you import users into PAM360 using the AD user import option, the username for John Doe in PAM360 will be in the ABC.inc\john doe format. For John Doe to successfully access PAM360 via Microsoft Entra ID SAML SSO (IdP), the IdP must be configured to include the NameID attribute in the format: ABC.inc\john doe. To achieve this, you must use an existing AD attribute with the value john doe (username), or you must create a custom attribute and populate it as john doe, sync this attribute to the Microsoft Entra ID portal, and create a new claim to match the format ABC.inc\john doe using the claim transformation option in the Entra ID portal. This configuration ensures that the NameID in the SAML response matches the PAM360 username format, allowing successful authentication and authorization of AD users via Microsoft Entra ID SAML SSO.
This document covers the following topics in detail:
- Configuring a Custom AD Attribute
- Setting up a Claim in the Entra ID Portal
- Updating SAML Properties in IdP Configuration
1. Configuring a Custom AD Attribute
- Log into your Active Directory portal.
- Navigate to the Organizational Unit (OU) that holds the PAM360 users you wish to configure SAML SSO using Microsoft Entra ID as the IdP.
- Right-click on the OU name and select Properties from the displayed options.
- Locate the attribute that contains the username value. If no such attribute exists, you should create a custom attribute.
- Populate the custom attribute with the username value in the required format for all users within the OU.
Additional Detail
For a user with the full name "John Doe," the custom attribute value should be entered as "john doe". Ensure this formatting is consistent when editing the attribute values.
- Sync this attribute to the Microsoft Entra ID portal as a parameter.
2. Setting Up a Claim in the Entra ID Portal
- Log into the Microsoft Entra ID portal.
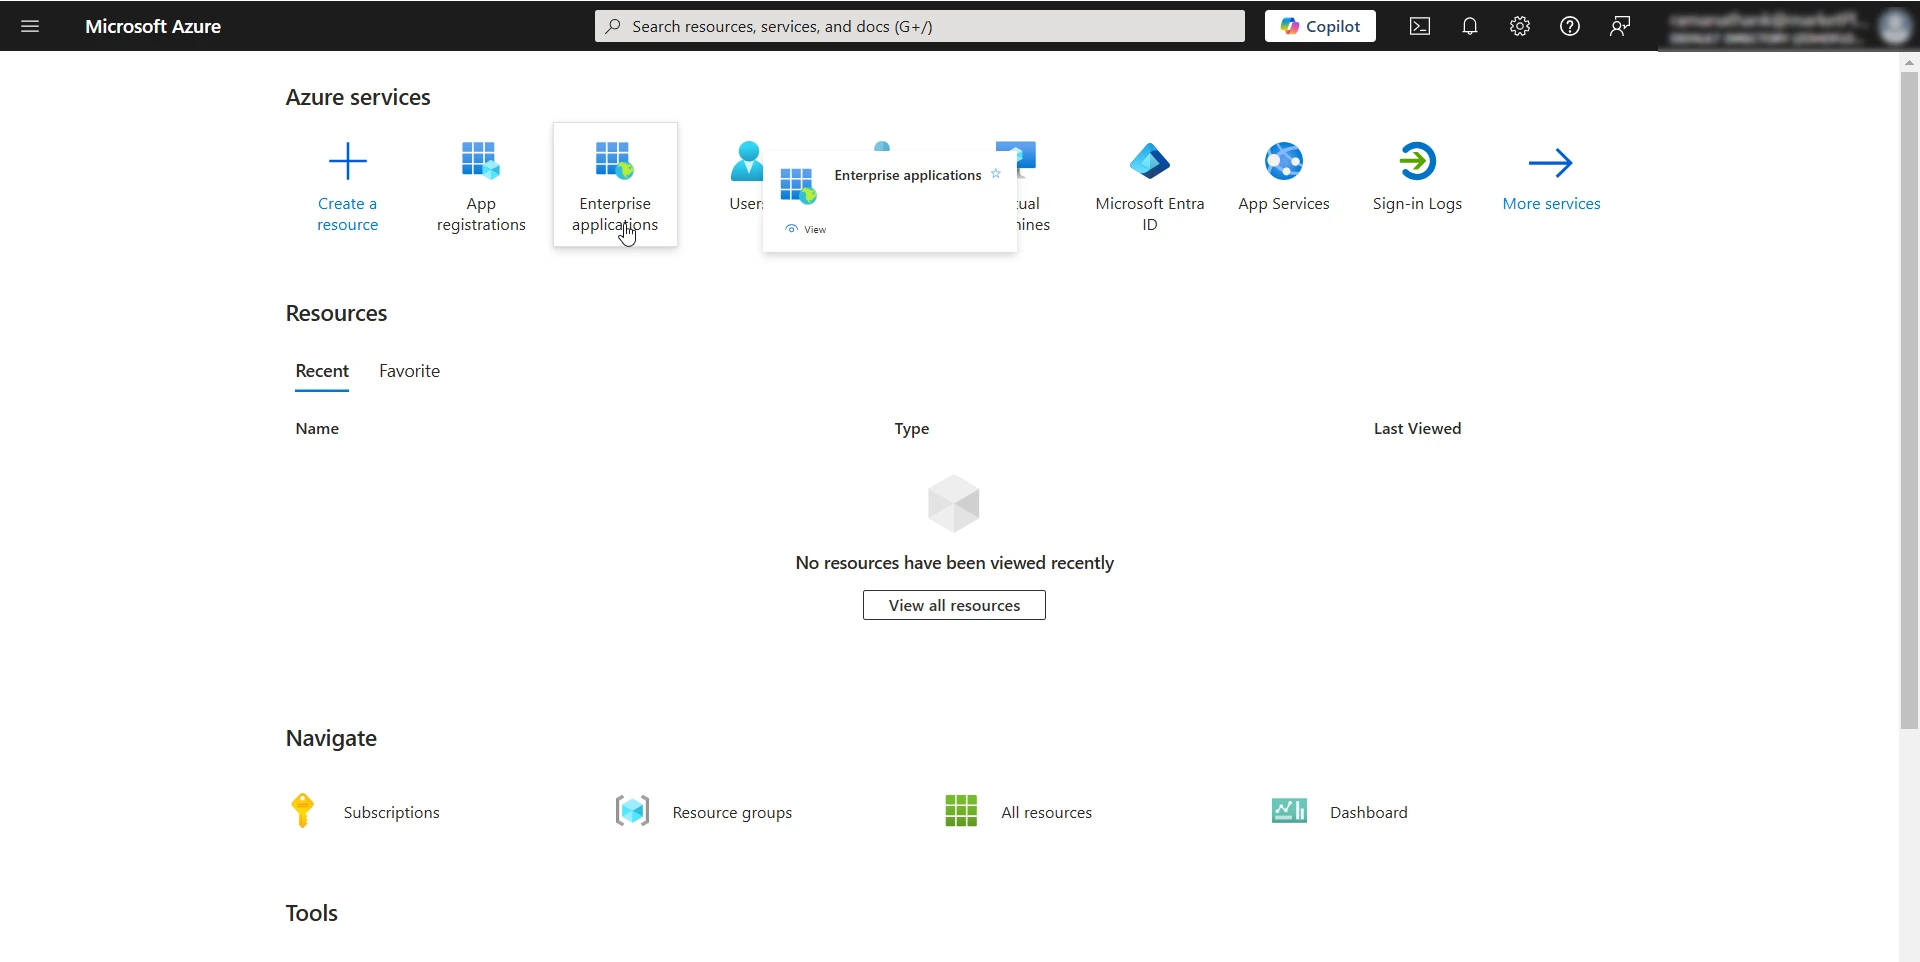
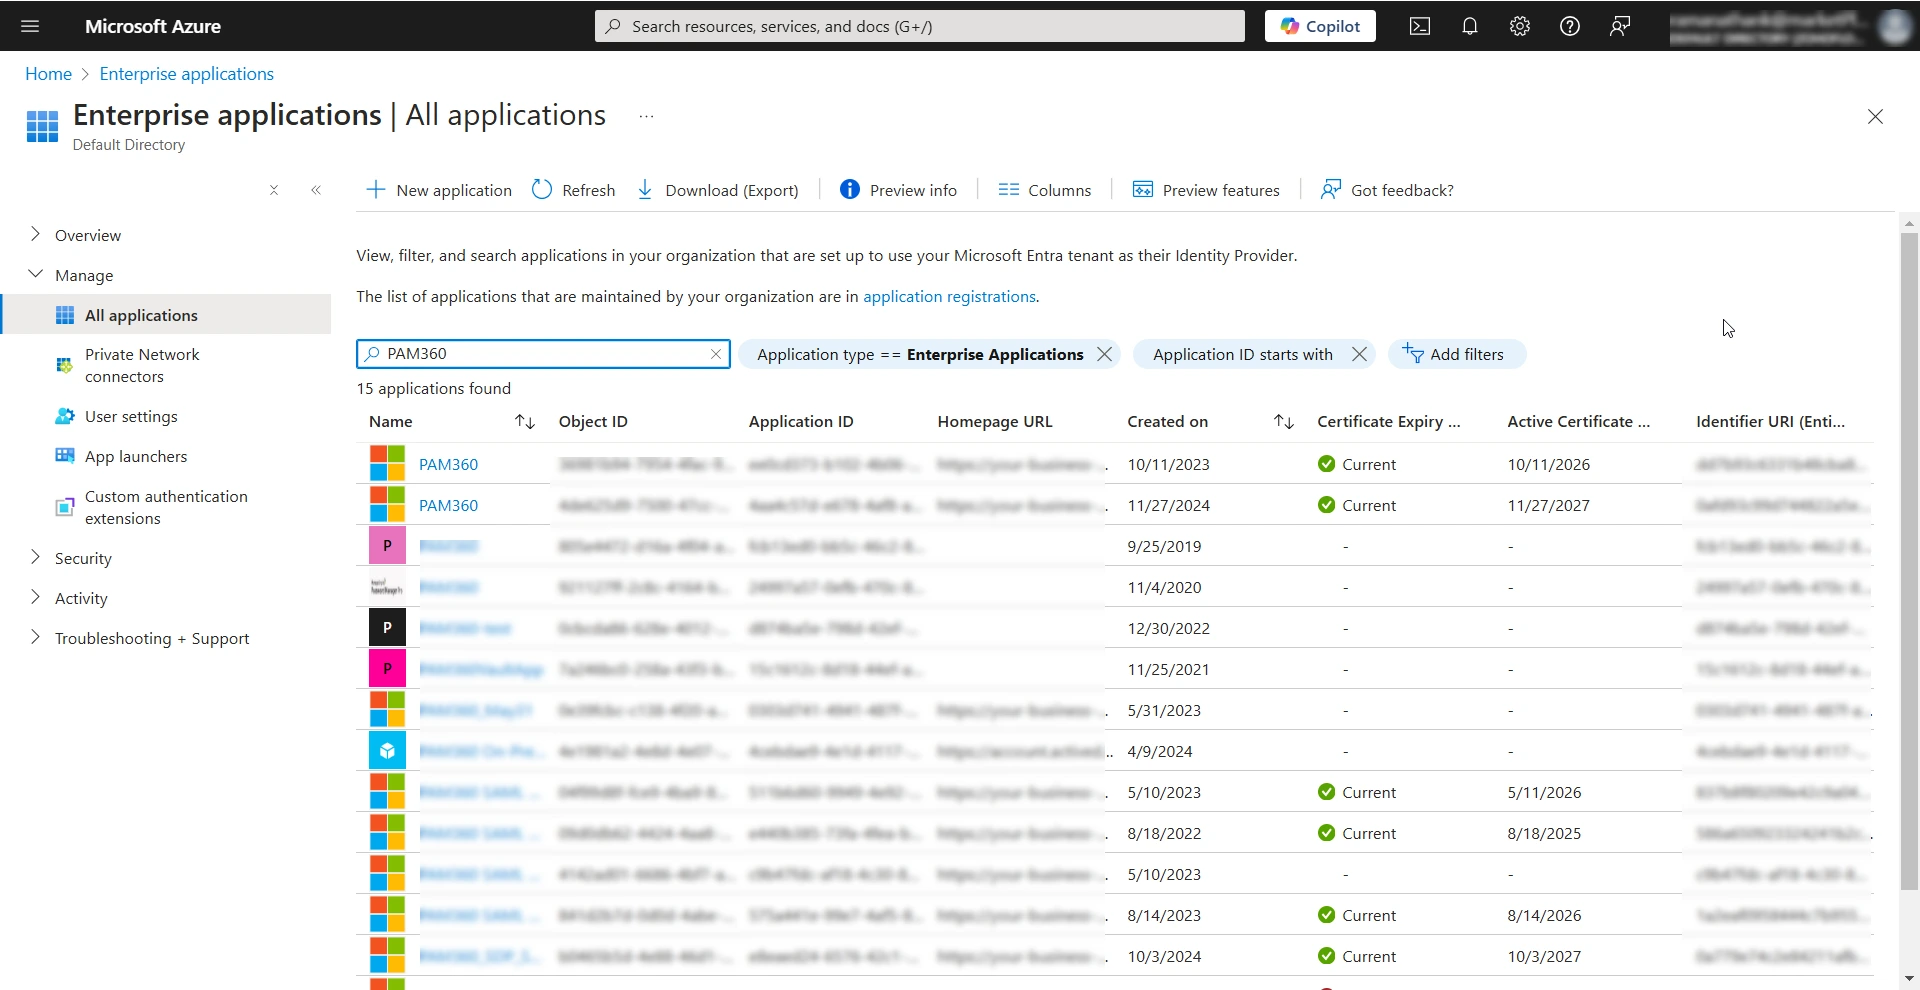
- Use the search filter to find the PAM360 enterprise application on the Enterprise applications page.
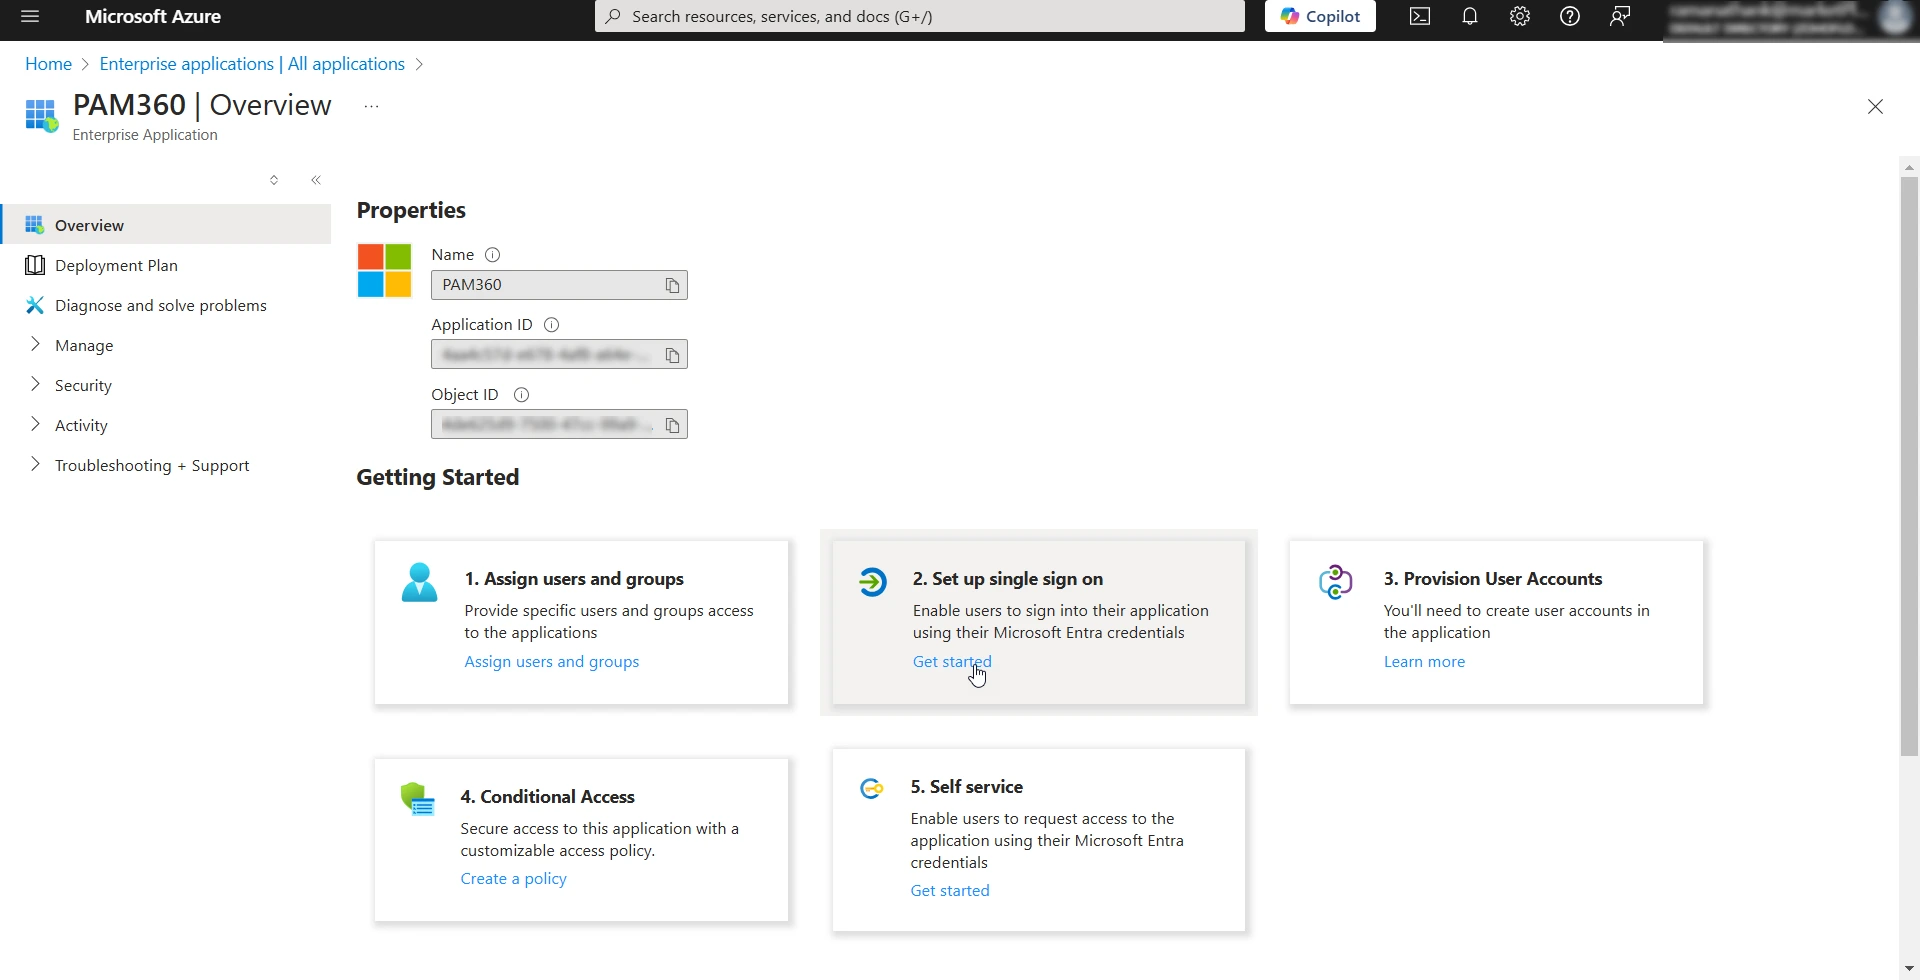
- On the PAM360 Enterprise Application page, click the Get Started button within the Setup Single Sign On section. You will see the SAML-based Sign-on page.
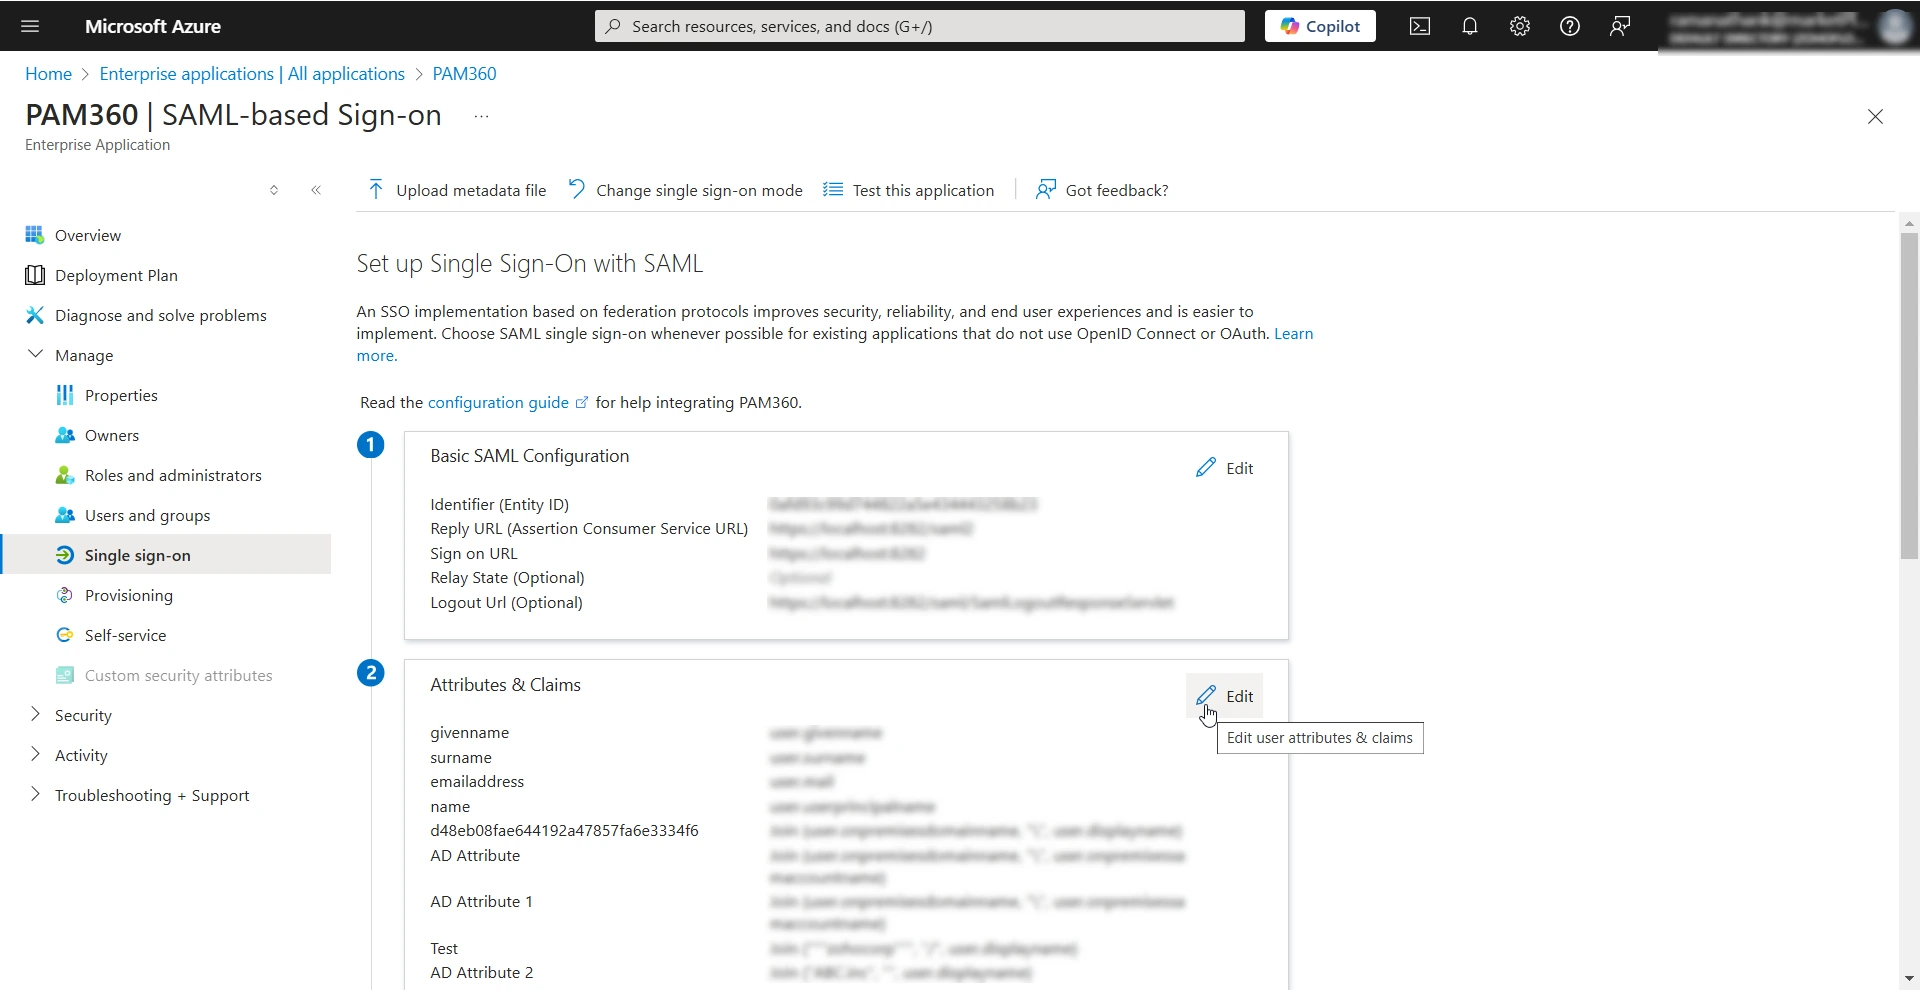
- Click the Edit button within the Attributes & Claims section under Set up Single Sign-On with SAML.
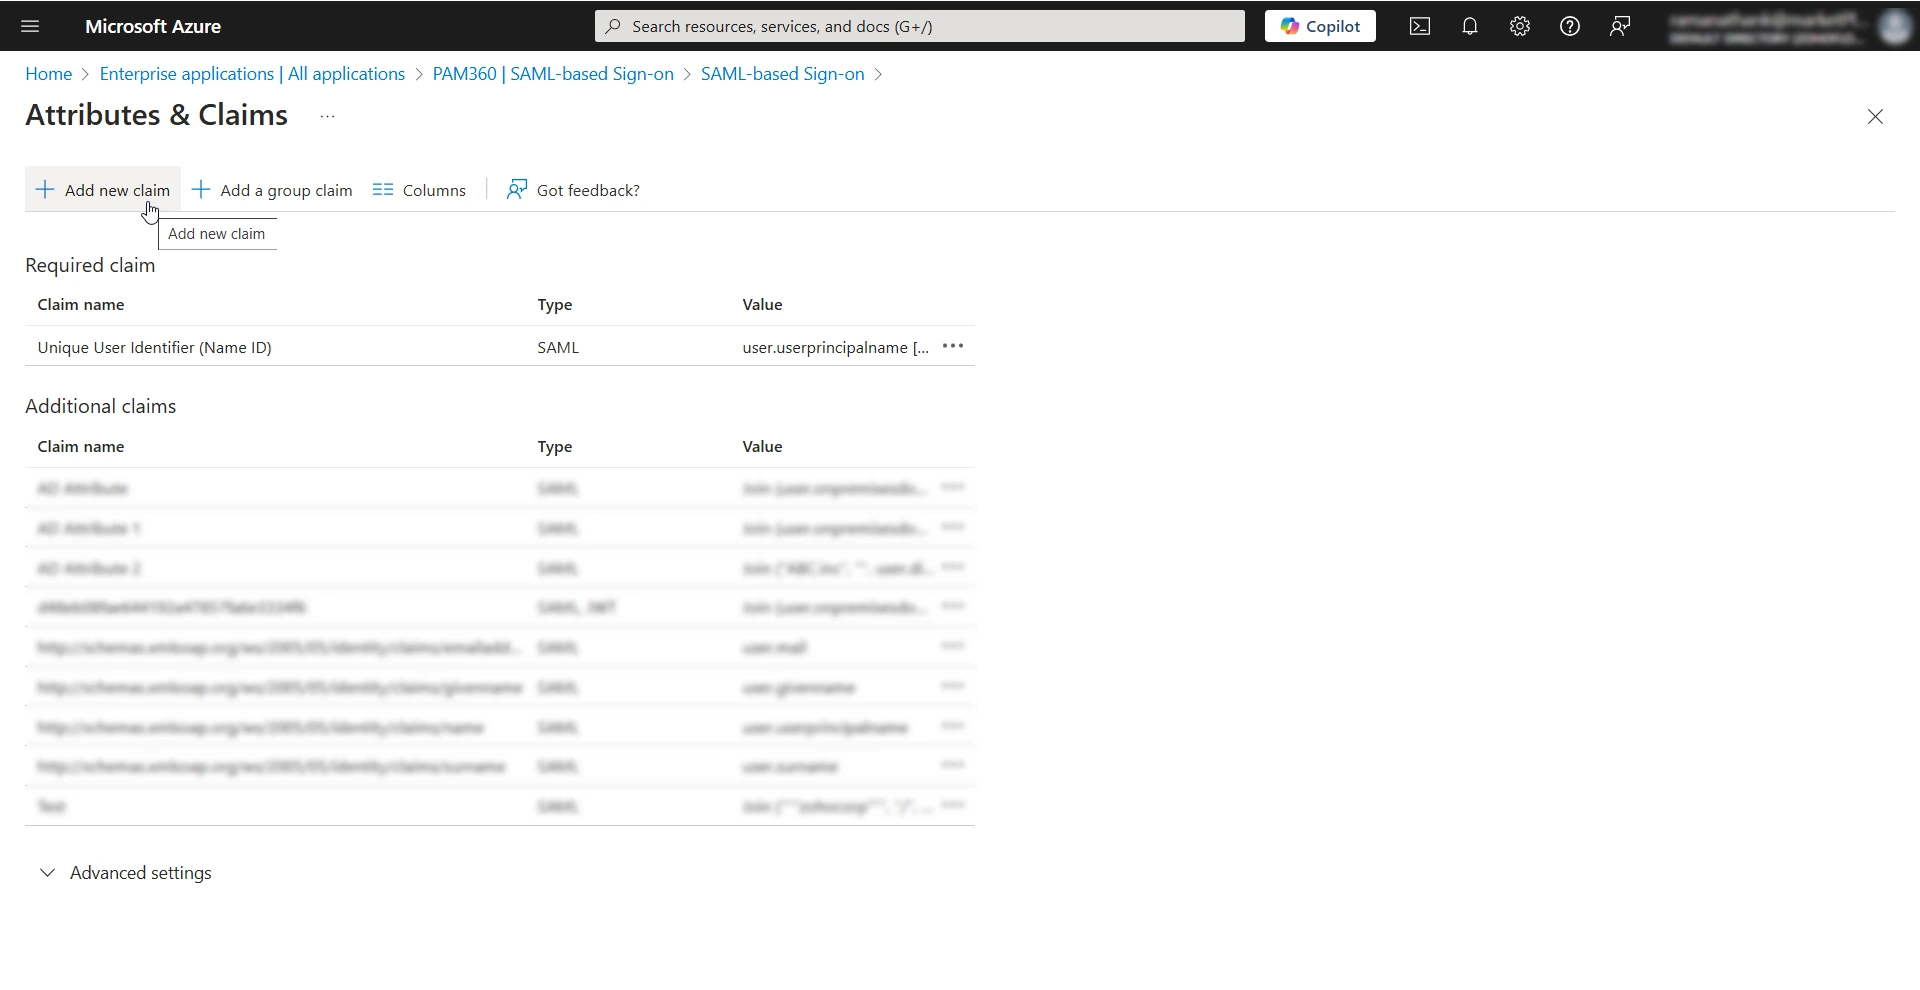
- On the Attributes & Claims page, click the + Add new claim button from the top pane. You will see the Manage claim page.
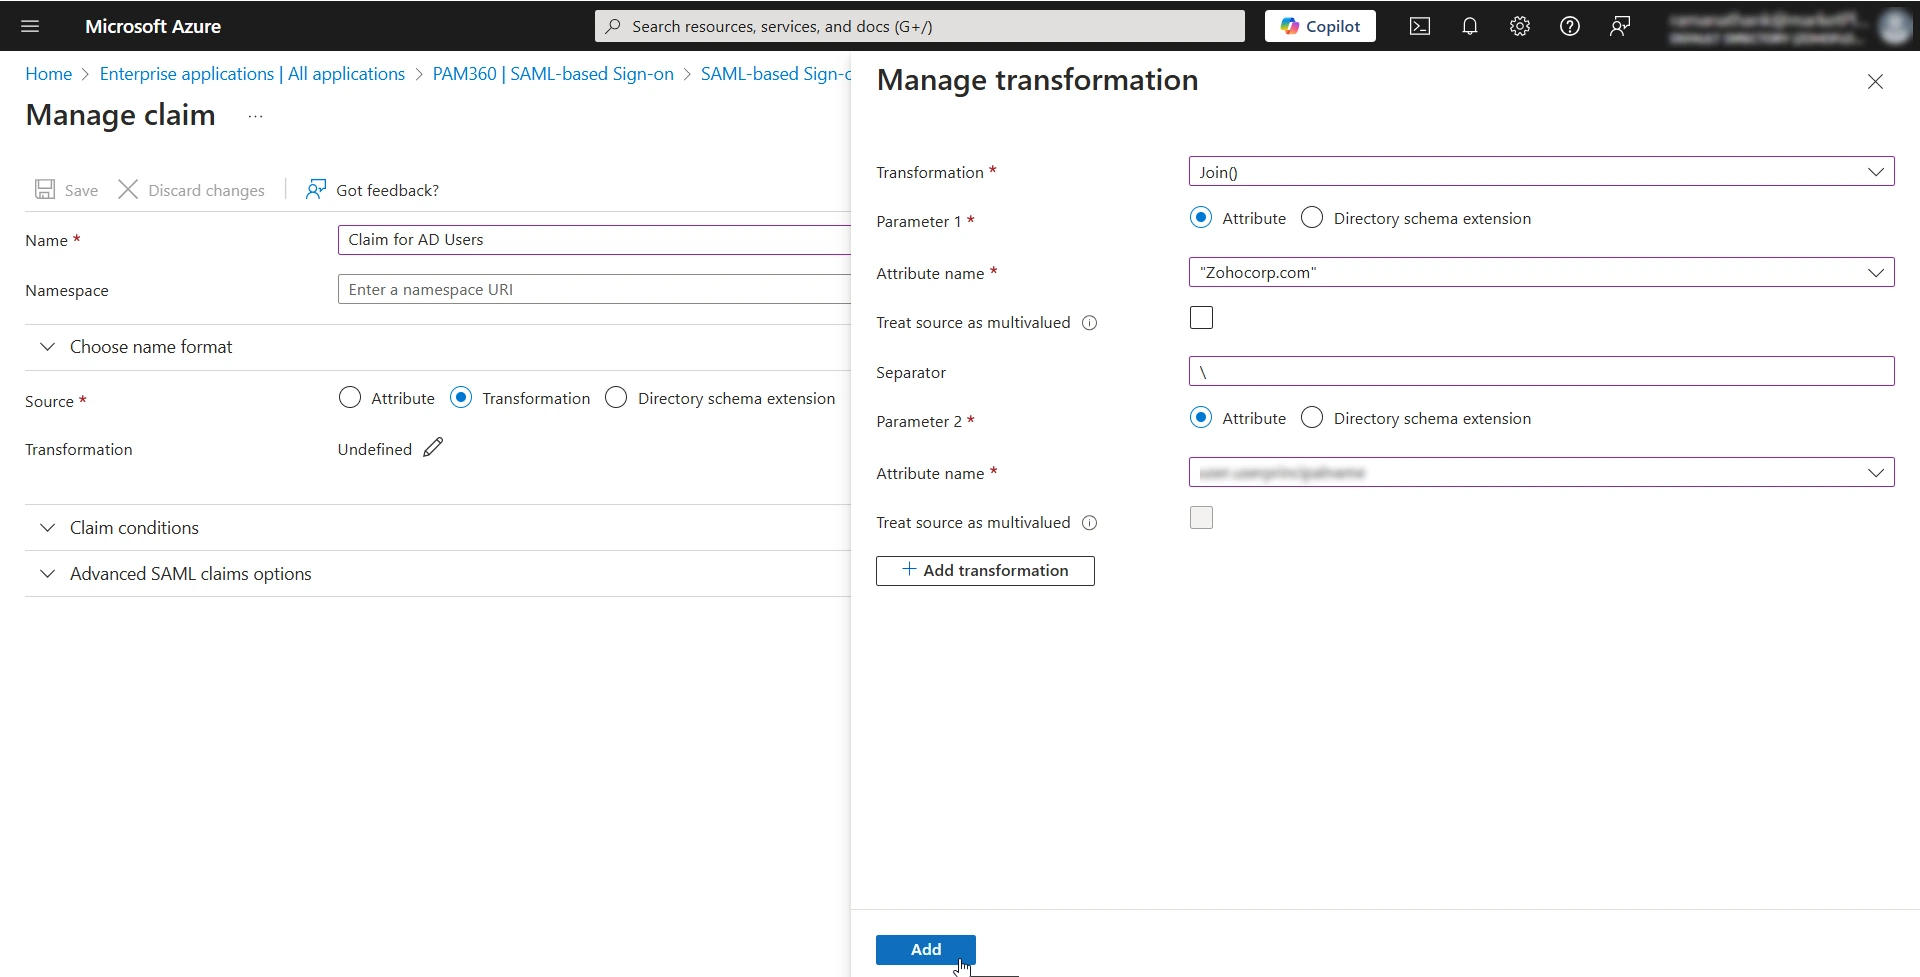
- On the Manage Claim page, perform the following actions:
- Name - Enter a name, for example, AD Attribute, for the custom claim (NameID Attribute) you are creating. Copy and save this claim/attribute name as you must enter this name in the NameID Attribute field under SAML Properties while configuring Microsoft Entra ID as an IdP in PAM360.
- Source - Select the Transformation radio button. The Manage transformation window will appear on the right-hand side of the screen
- In the Manage transformation window, enter the following details:
- Transformation - Select Join() from the list of available options.
- Parameter 1 - Select the Attribute radio button.
- Attribute name - Enter your AD domain name in this field.
- Separator - Enter "\" in this field.
- Parameter 2 - Select the Attribute radio button.
- Attribute name - Select the parameter (custom AD attribute) synced from the AD that holds the username value in the required format.
- Click Add to add the transformation, and click Save to save the new claim successfully.
You can view the newly added claim under the Additional Claims section. Microsoft Entra ID will include this claim in the SAML assertions sent to PAM360. PAM360 then compares this claim with the corresponding PAM360 username, and if they match, the user is granted access.
3. Updating SAML Properties in IdP Configuration
- Log into your PAM360 account and Navigate to Admin >> Authentication >> SAML Single Sign-On.
- Select the access URL for which you have configured Microsoft Entra ID as an IdP on the SAML SSO dashboard.
- Click the Edit icon under the Actions column beside the Microsoft Entra ID IdP.
- On the Edit IdP Details window, switch to the SAML Properties tab and click the Show Additional Settings button.
- Find the NameID Attribute field and enter the name of the claim created on the Microsoft Entra ID portal.
Additional Detail
If you have multiple access URLs in your environment and configured Microsoft Entra ID as an IdP, repeat this step for all the access URLs with Microsoft Entra ID as an IdP.