Configuring SAML Single Sign-On for Active Directory Users using ADSelfService Plus
ManageEngine PAM360 integrates seamlessly with ADSelfService Plus (ADSSP), enabling organizations to configure ADSSP as an Identity Provider (IdP) for SAML Single Sign-On (SSO). If you are currently using ADSSP to manage your AD users, this configuration will streamline the authentication process by leveraging your existing infrastructure. By configuring PAM360 as a Service Provider (SP) and ADSSP as an IdP, users can log into PAM360 with their AD credentials without needing to maintain a separate set of credentials for PAM360. Setting up ADSSP as the IdP enables SSO capabilities, allowing AD users to access PAM360 seamlessly without re-entering their credentials. This help documentation covers the following topics in detail:
1. Prerequisites
- Ensure the ADSelfService Plus server is accessible via an HTTPS connection (the Access URL must be configured to use HTTPS). To enable HTTPS connection with the ADSSP server, you must install an SSL certificate for ADSSP. Explore this link for the detailed steps to install an SSL certificate in ADSSP.
- To configure PAM360 as an SP in the ADSelfService Plus console, you need PAM360's SP details displayed in step 1 during the IdP configuration in PAM360. These details are necessary for setting up PAM360 as an SP on the ADSSP console, ensuring a seamless integration between PAM360 and ADSSP.
2. Configuring PAM360 as an SP in ADSSP
Follow these steps to configure PAM360 as an SP in the ADSSP console:
- Log into the ADSSP console with the administrator credentials.
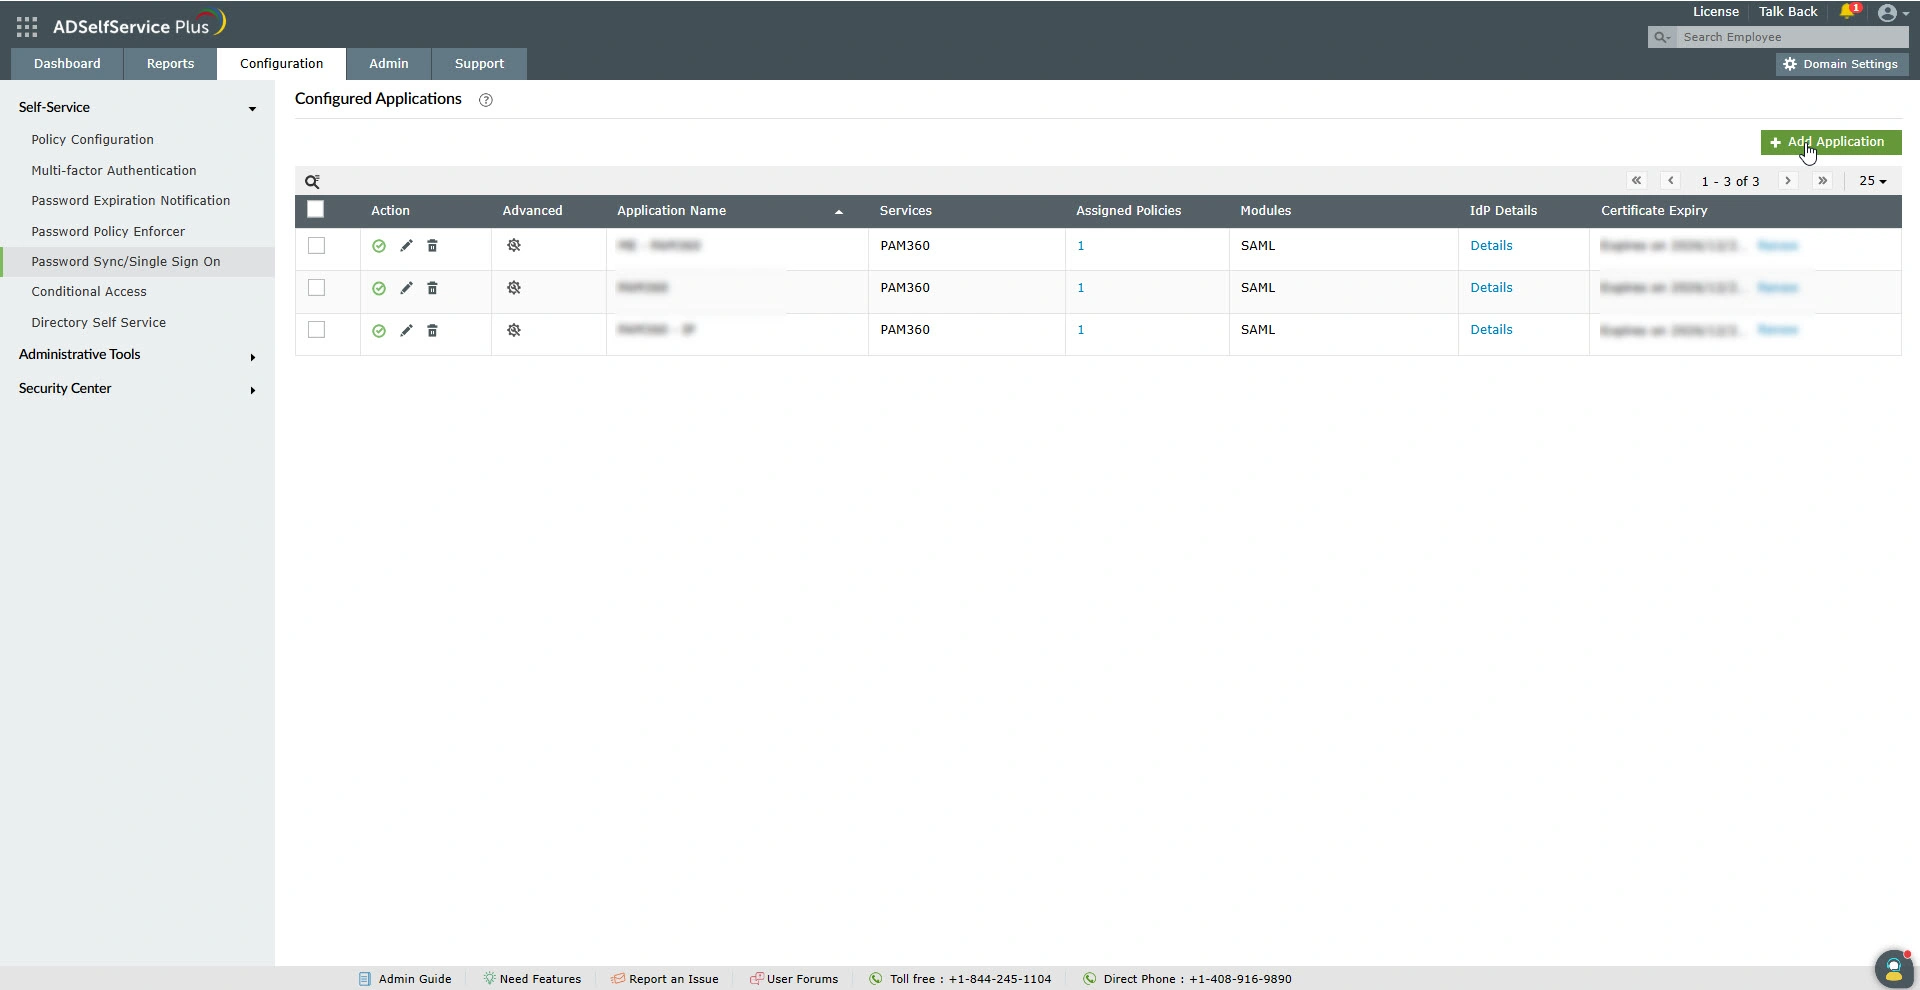
- Navigate to Configuration >> Self-Service >> Password Sync/Single Sign On.

- On the Configured Applications page, click the + Add Application button on the top-right corner of the screen.
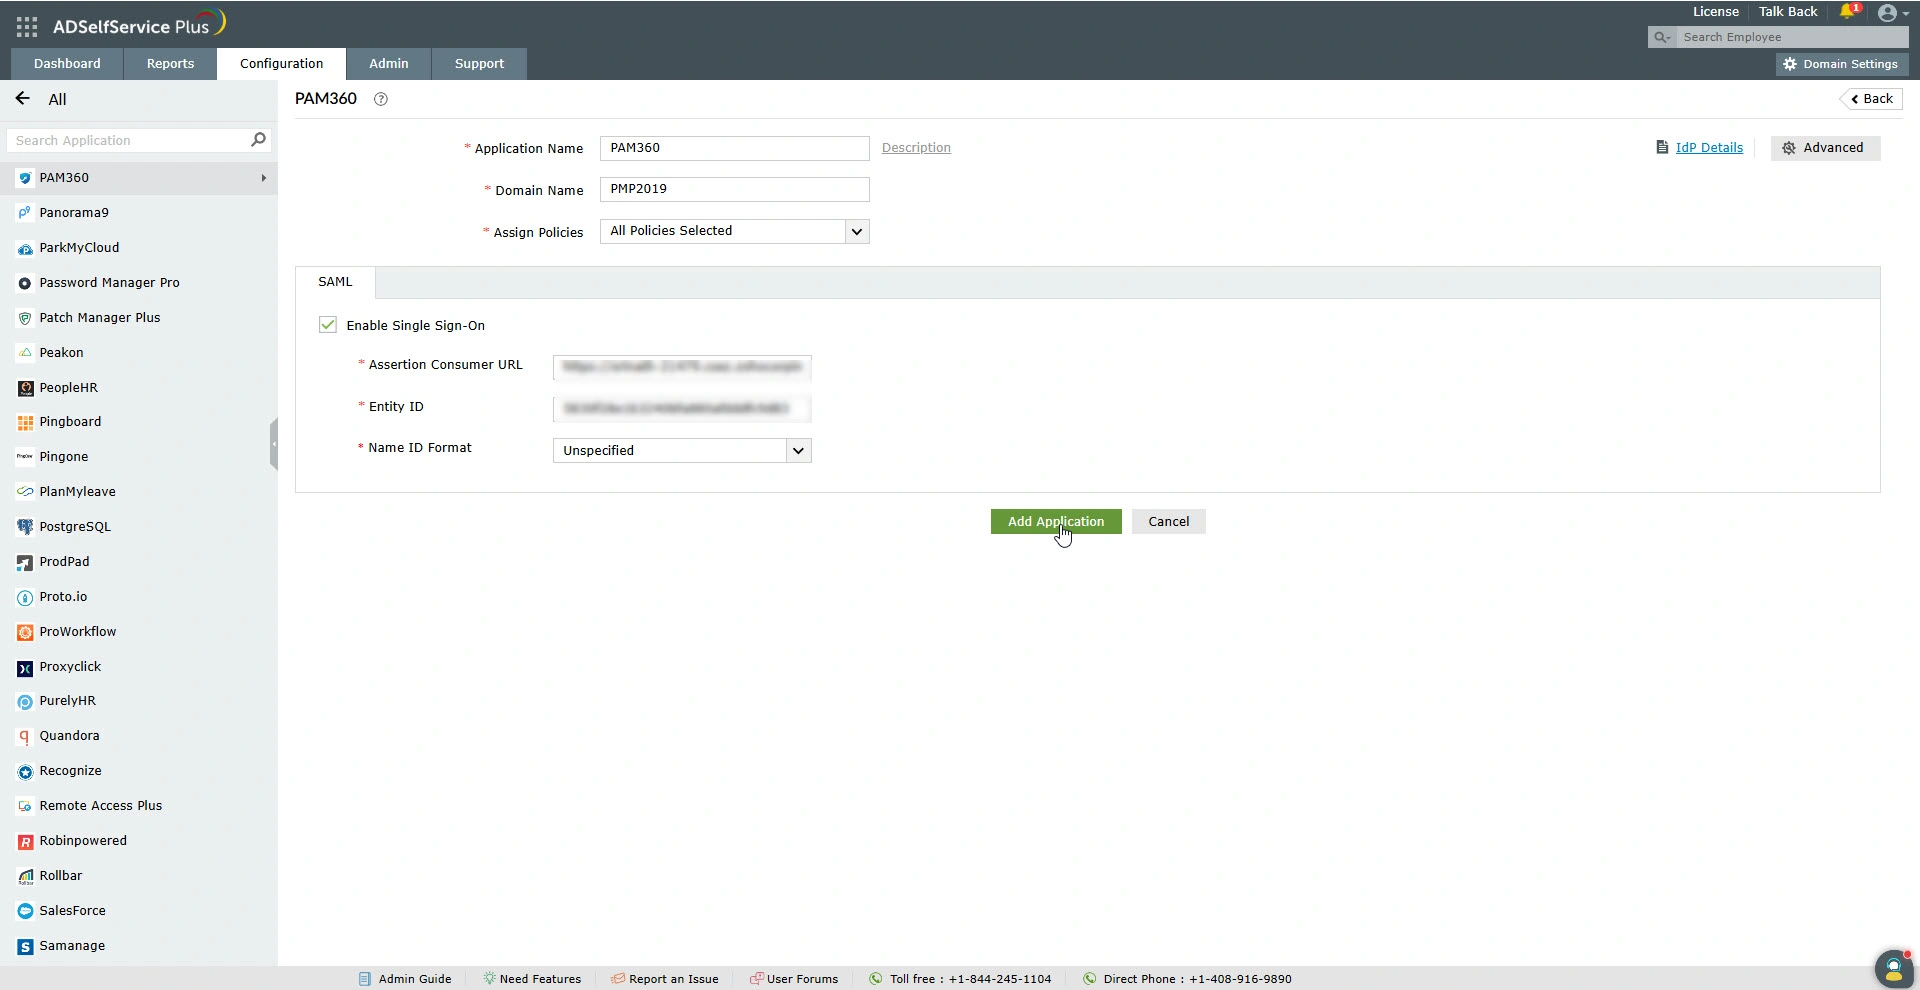
- On the All Applications page, scroll down and click the PAM360 logo.
- On the PAM360 Application page, enter the following details:
- Application Name - Enter a custom name for the application, e.g., PAM360. This name uniquely identifies the PAM360 SAML application on the Configured Applications page.
- Domain Name - Enter the AD domain name in this field. This is the domain where the users for whom you are configuring SAML SSO are available.
- Assign Policies - Modify policies for which the Single Sign-On functionality should be enabled.
- Assertion Consumer URL - Enter the PAM360's ACS URL in this field.
- Entity ID - Enter the PAM360's entity ID in this field.
- Name ID Format - Select the Name ID Format as Unspecified.

- Click the Add Application button to add the PAM360 application successfully.
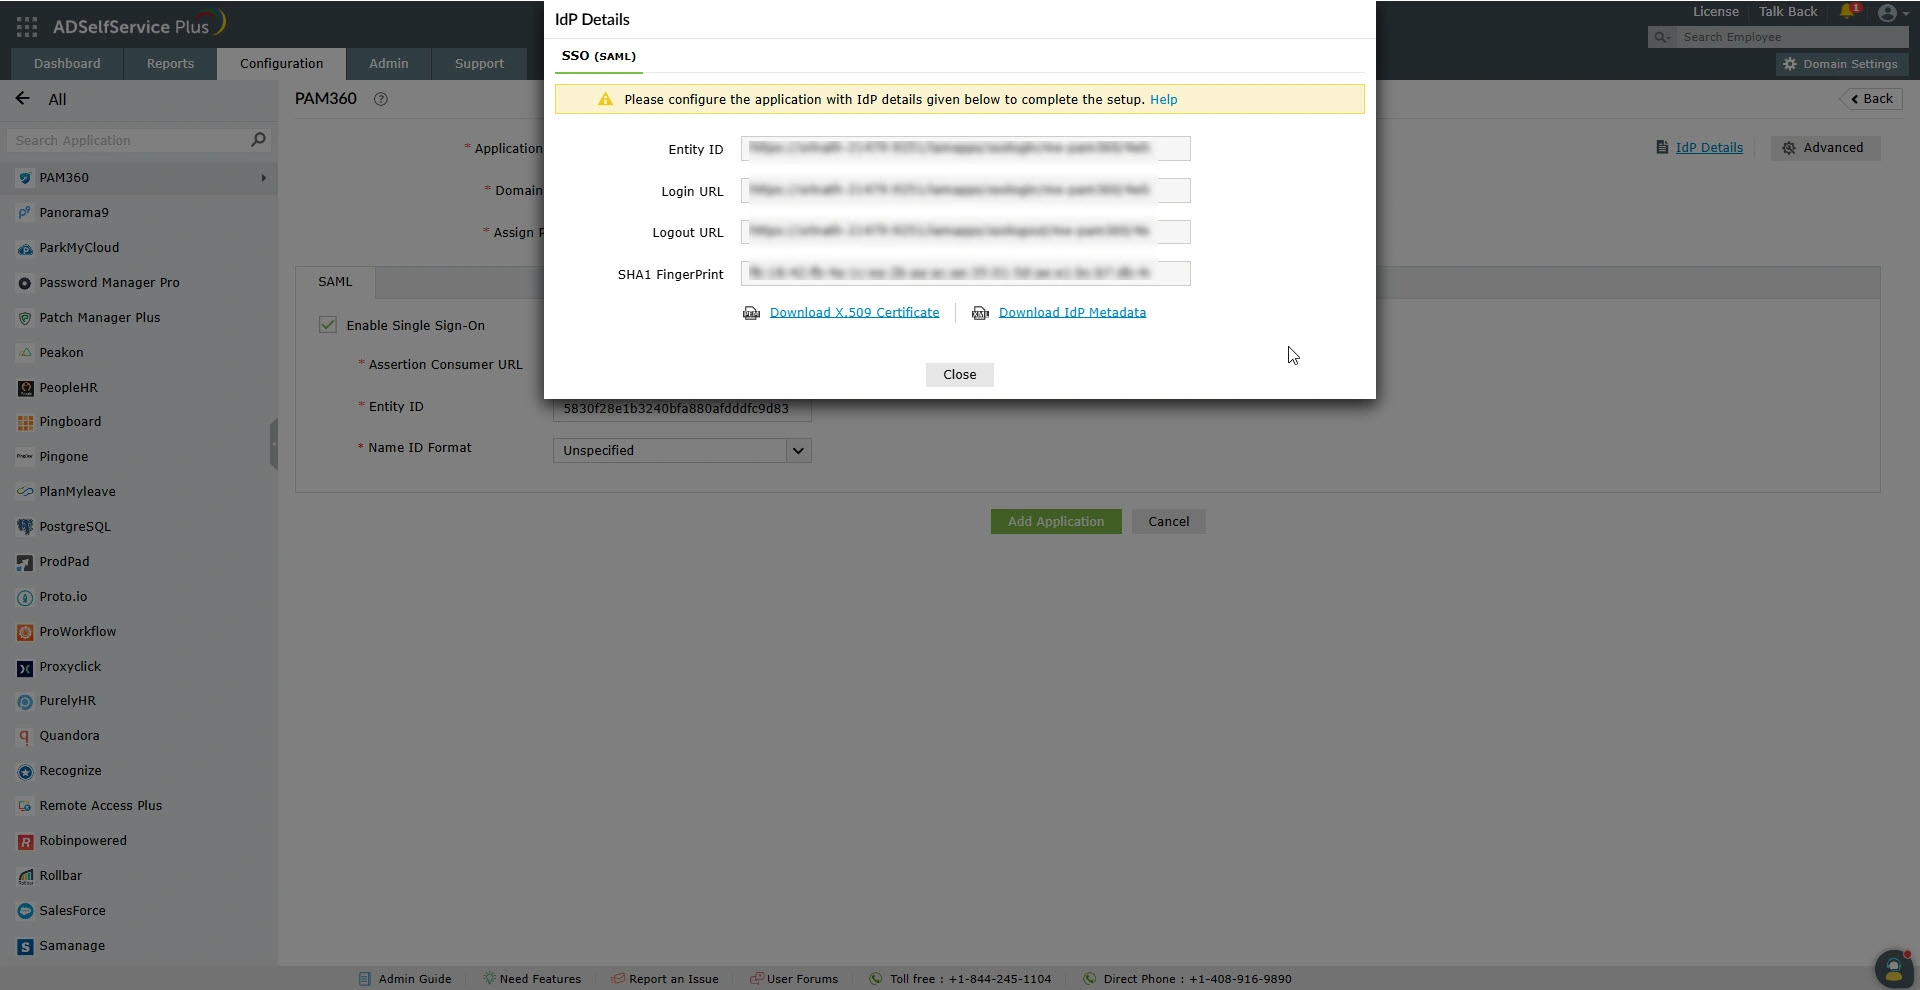
- On the IdP Details window that appears, click the Download IdP Metadata button to download the IdP details as a metadata.xml file.

3. Configuring ADSSP as an IdP in PAM360
After configuring PAM360 as an SP in the ADSSP console, you must configure ADSSP as an IdP in PAM360 to establish it as a trusted entity. Access the PAM360 browser window and proceed with IdP configuration starting from Step 2 - Configure Identity Provider Details. Explore this link for the detailed IdP configuration steps. Based on the provided steps, configure ADSSP as an IdP and configure the SAML properties on the PAM360 interface.
Caution
While configuring the SAML Properties during IdP configuration, select the Algorithm as SHA 1, Name ID Format as Unspecified, and the Protocol Binding as HTTP Post under Step 2 - Configure Identity Provider Details.