Configure an Azure application and privileges
Ensure that you have the following port open before configuring an Azure application and privileges. The HTTPS outbound port 443 needs to be open on the ADAudit Plus server as it is used for HTTPS and AMQP over WebSockets.
To enable auditing for Azure file shares, you need to register an application in the Azure portal and assign the required roles for it. Then you need to grant the minimum privileges required for the Microsoft Graph API and obtain the client ID and client secret.
Register an application
- Open the Microsoft Azure portal and log in using your Microsoft account.
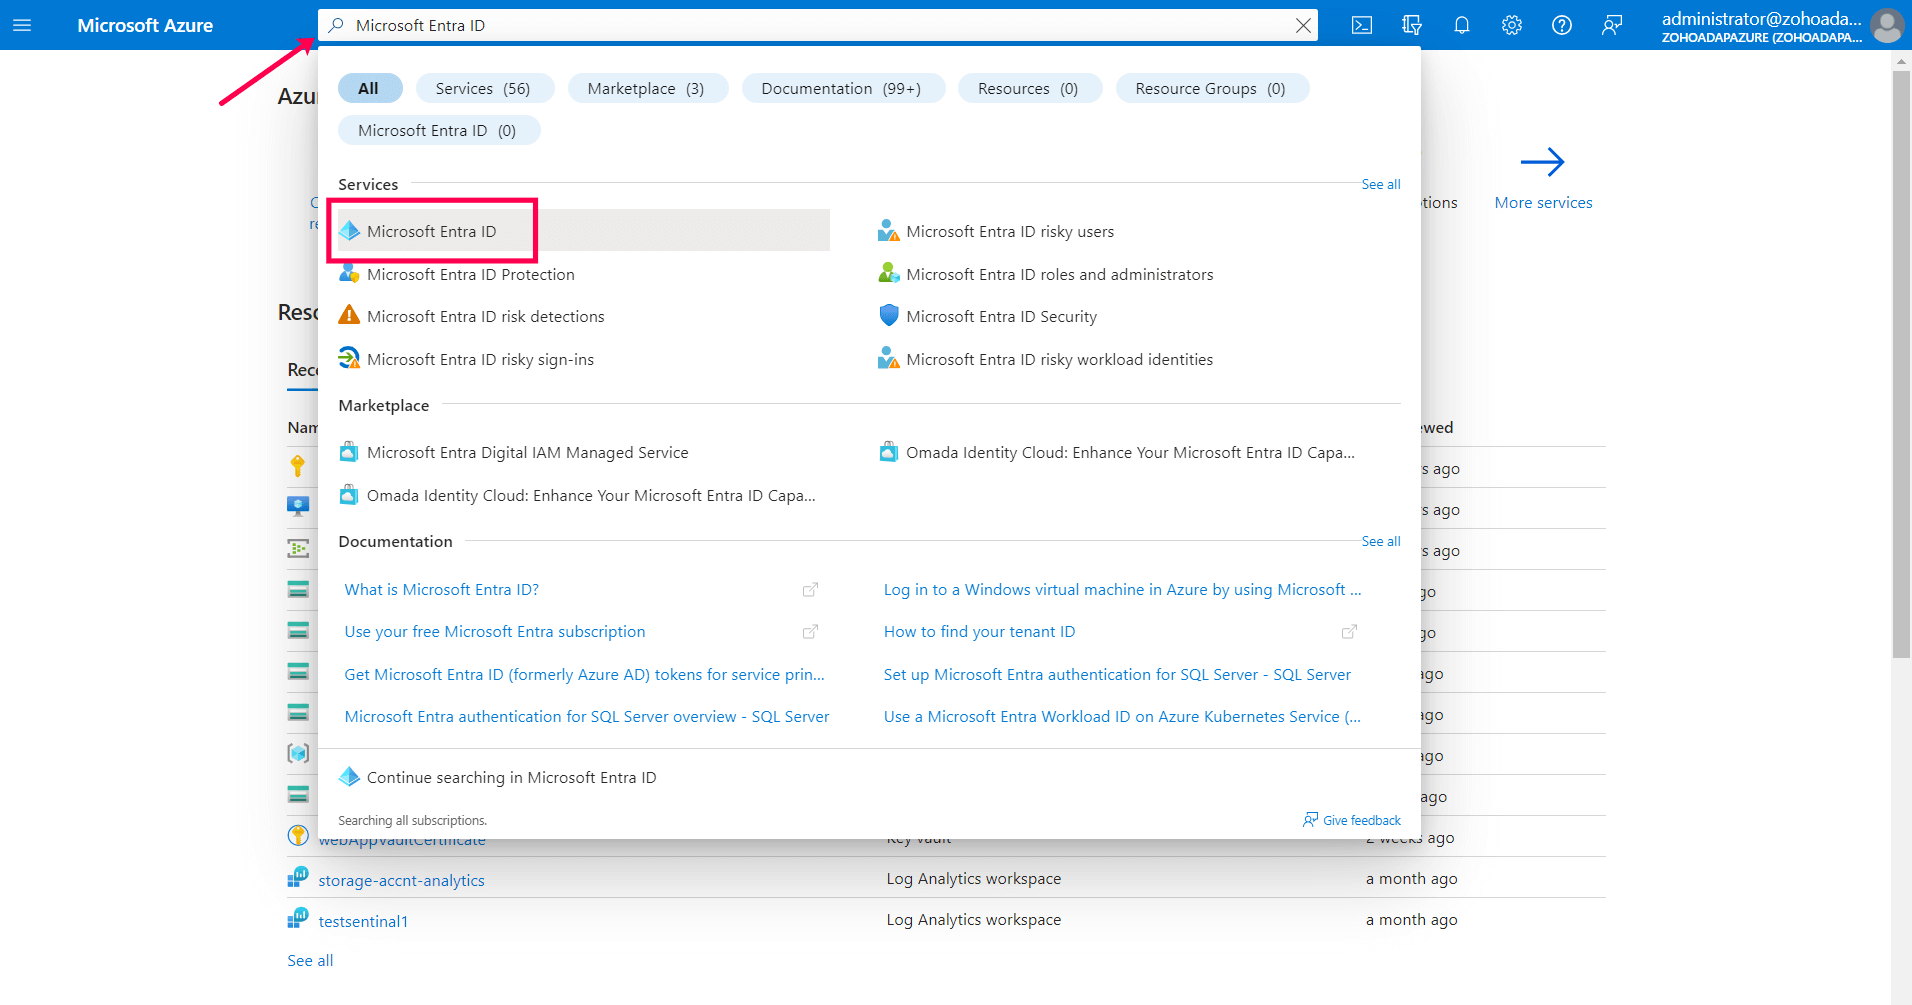
- Search for Microsoft Entra ID.
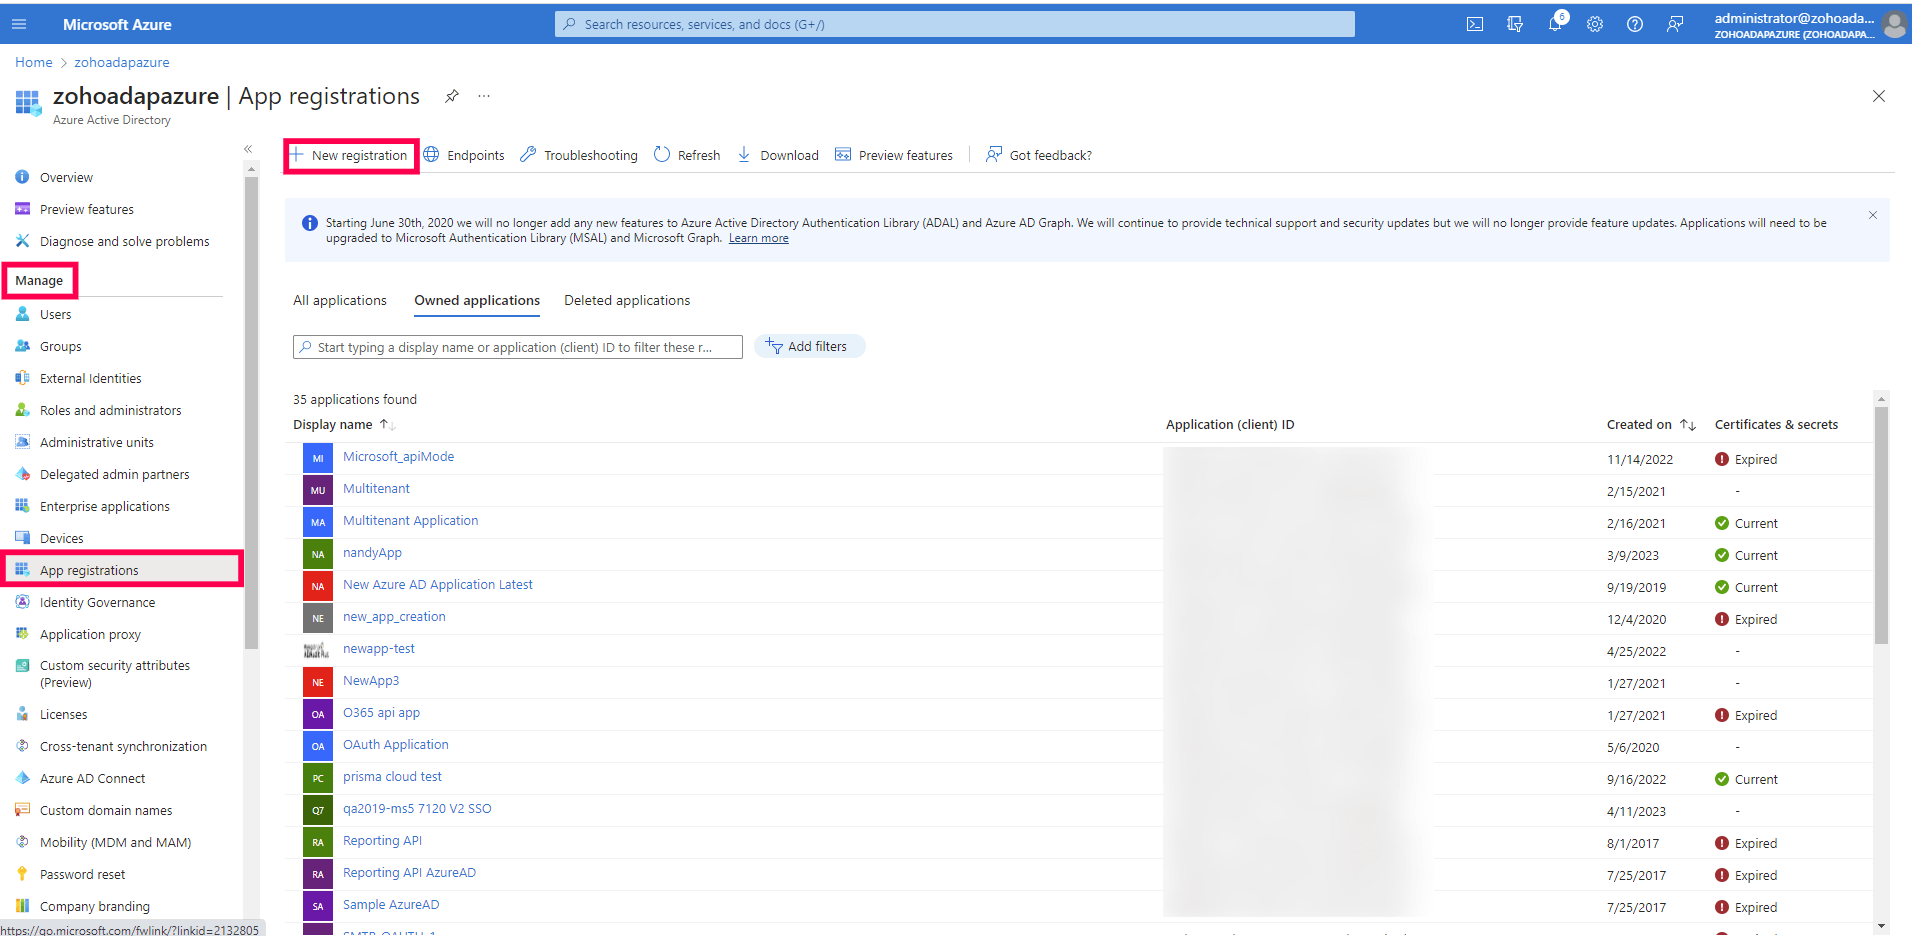
- Go to Manage > App registrations > + New registration to open the Register an application page.
- Enter the application name (e.g., ADAudit Plus App).
- Under Supported account types, ensure that the Accounts in this organizational directory only (zohoadapazure only - Single tenant) option is selected.
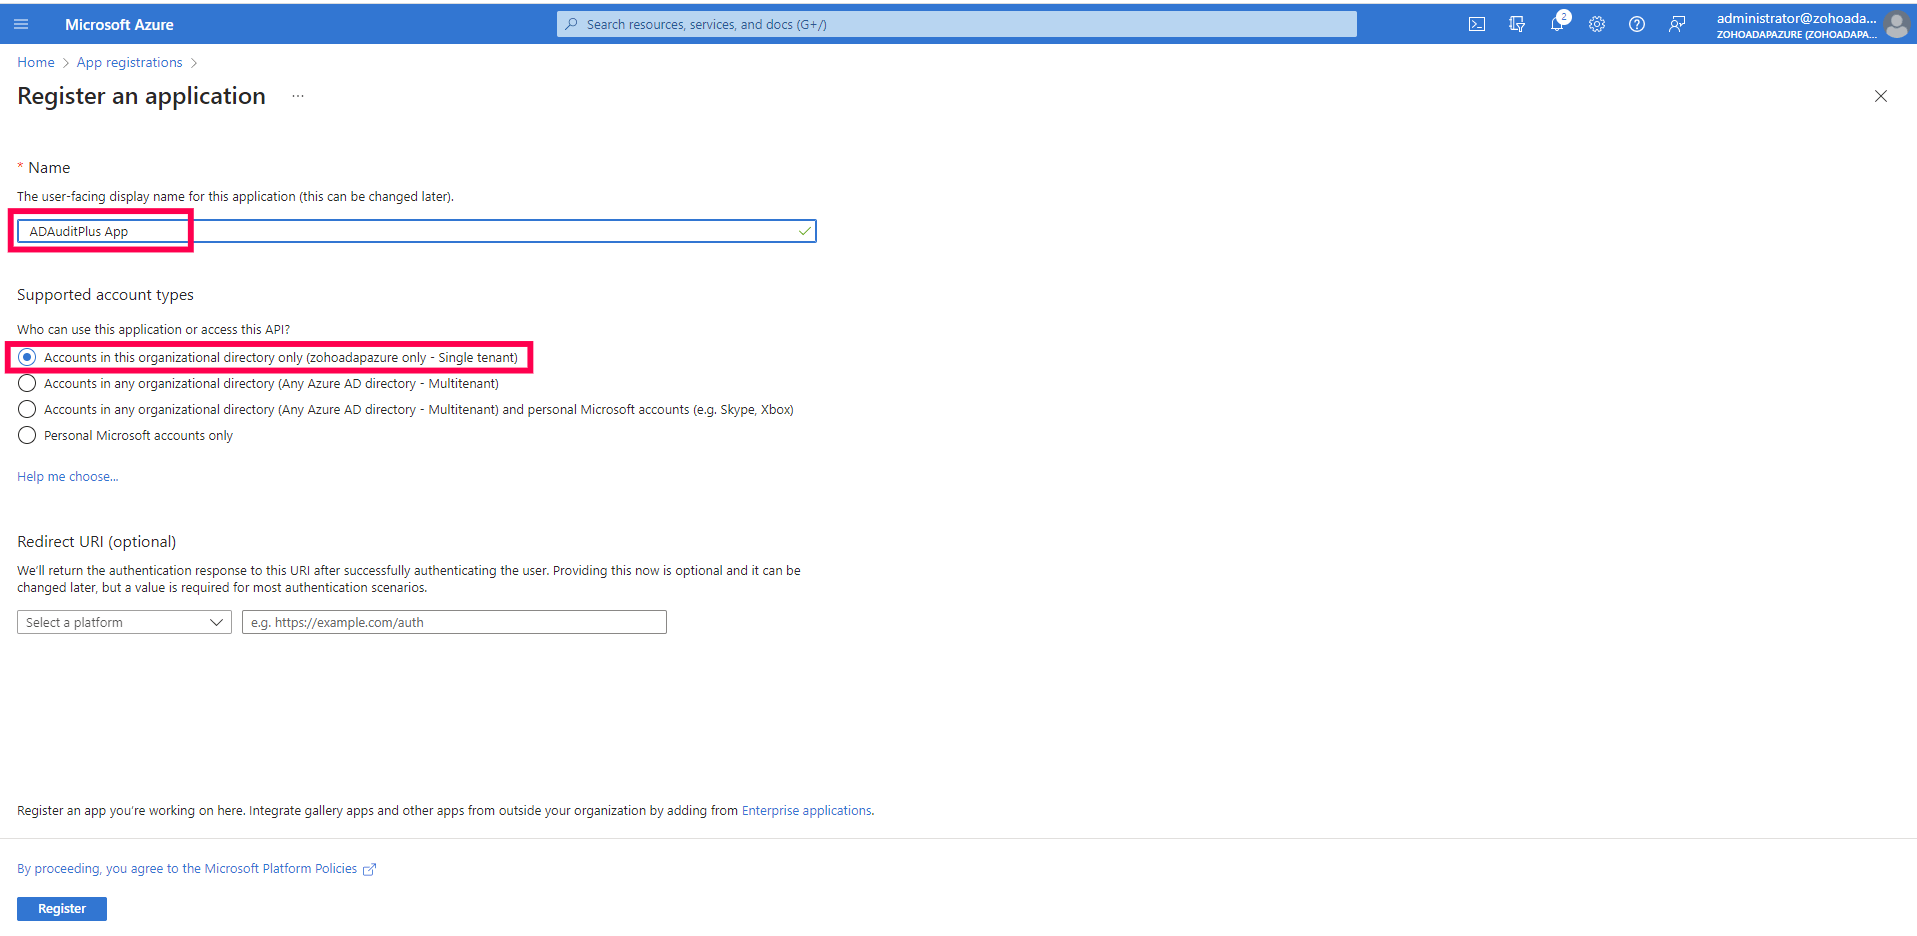
- Click Register.
Assign the required roles for the registered application
- Go to Home > Subscriptions.
- Select a subscription name (e.g., Pay-As-You-Go).
- Select Access control (IAM) from the list.
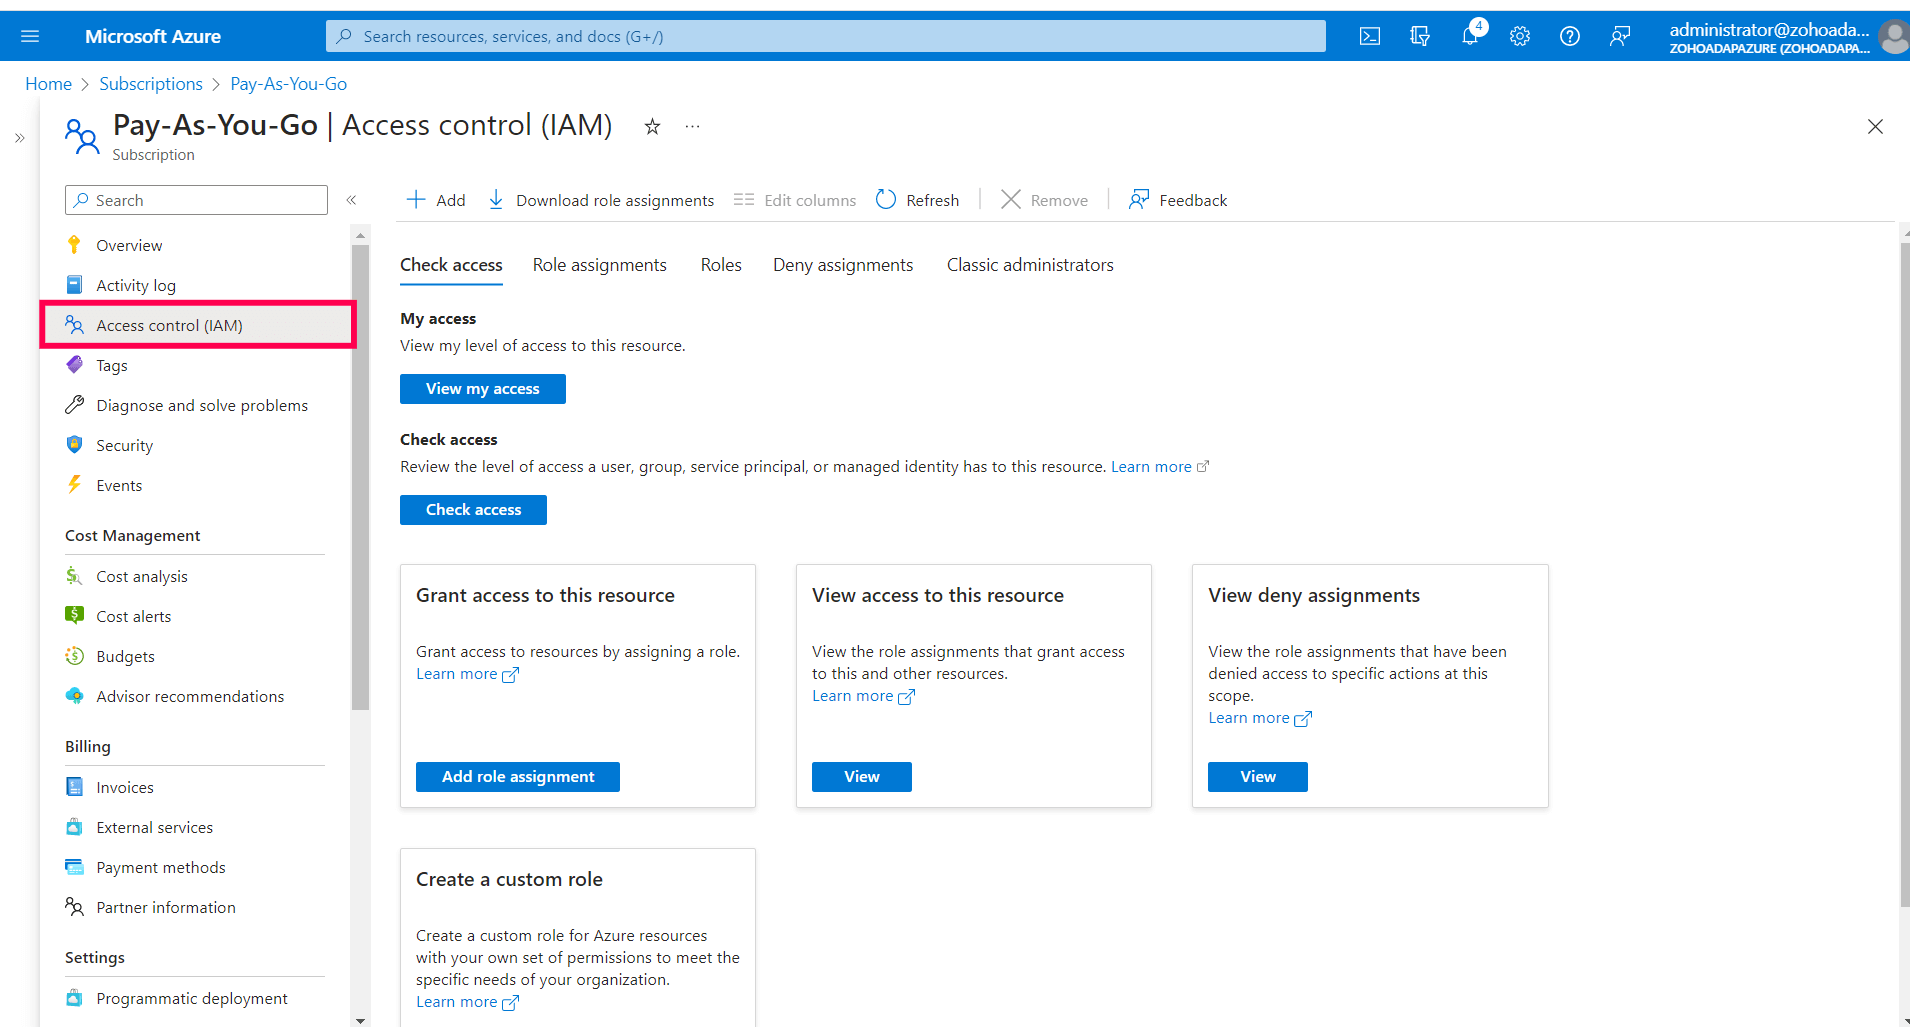
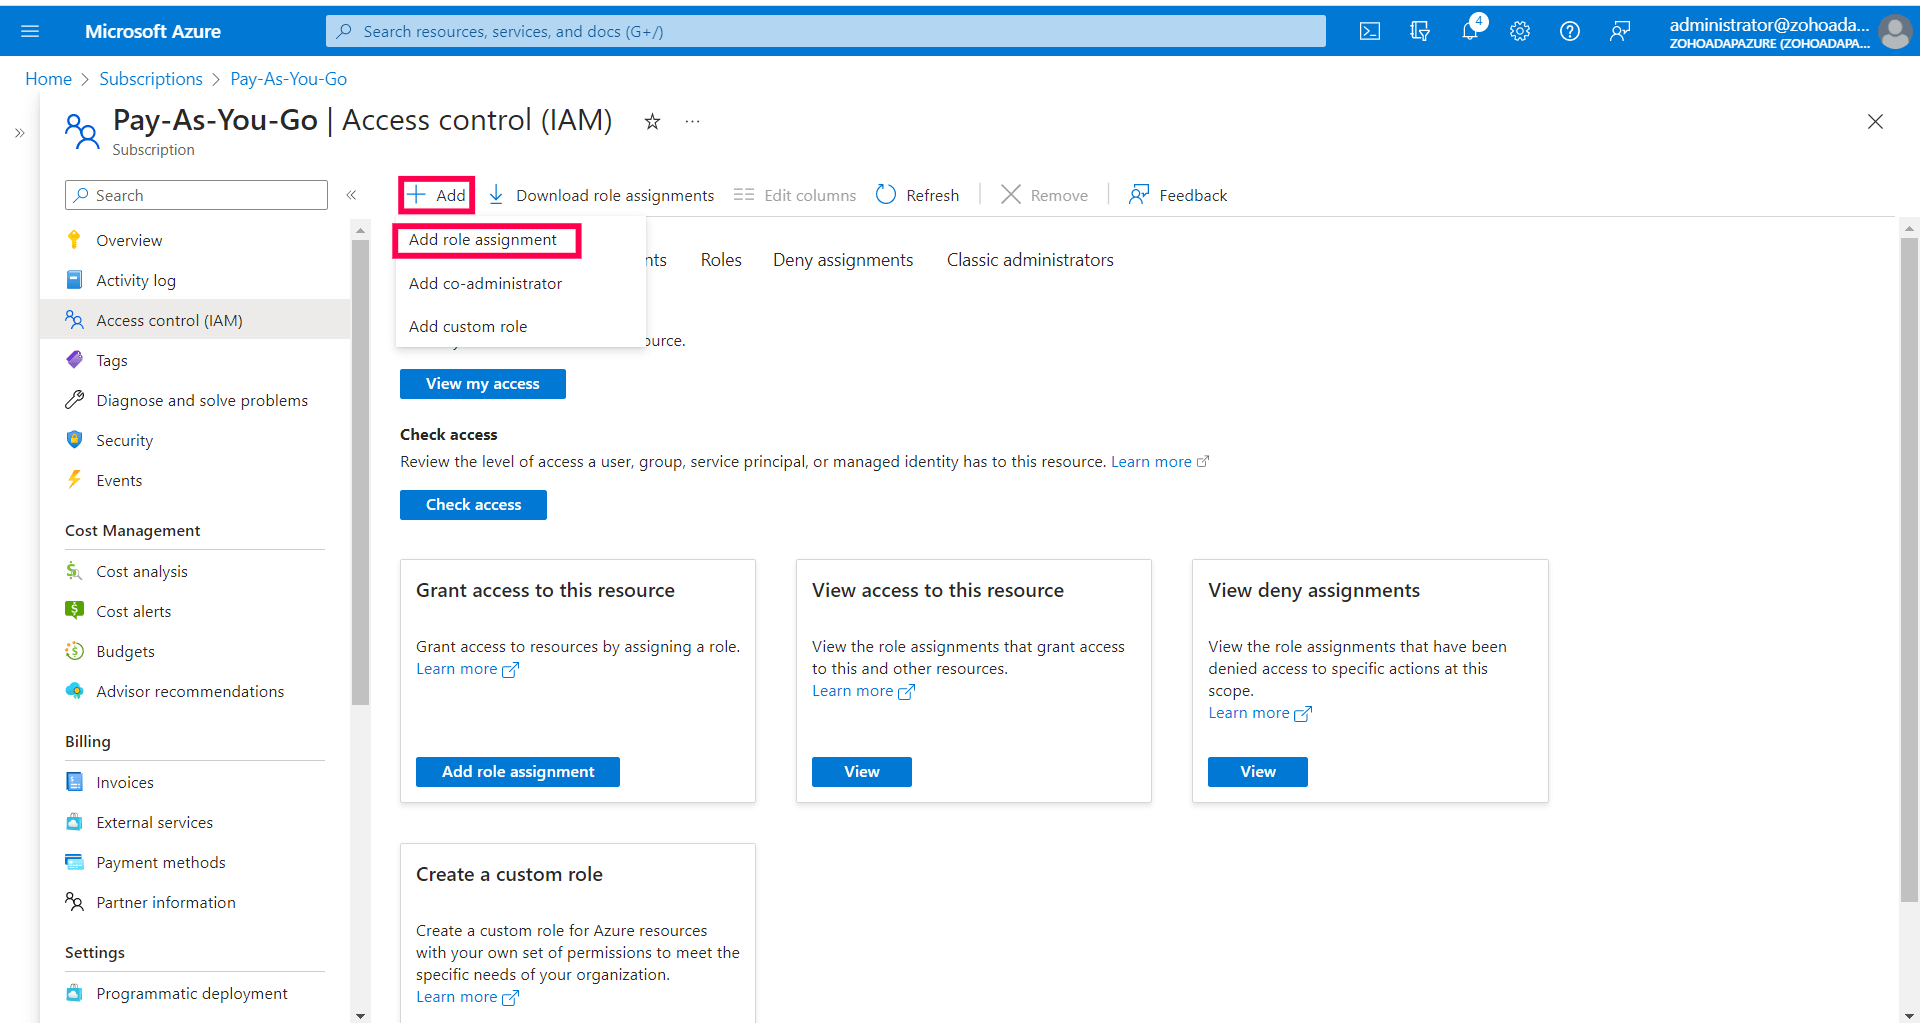
- Click + Add at the top and select Add role assignment from the three options.
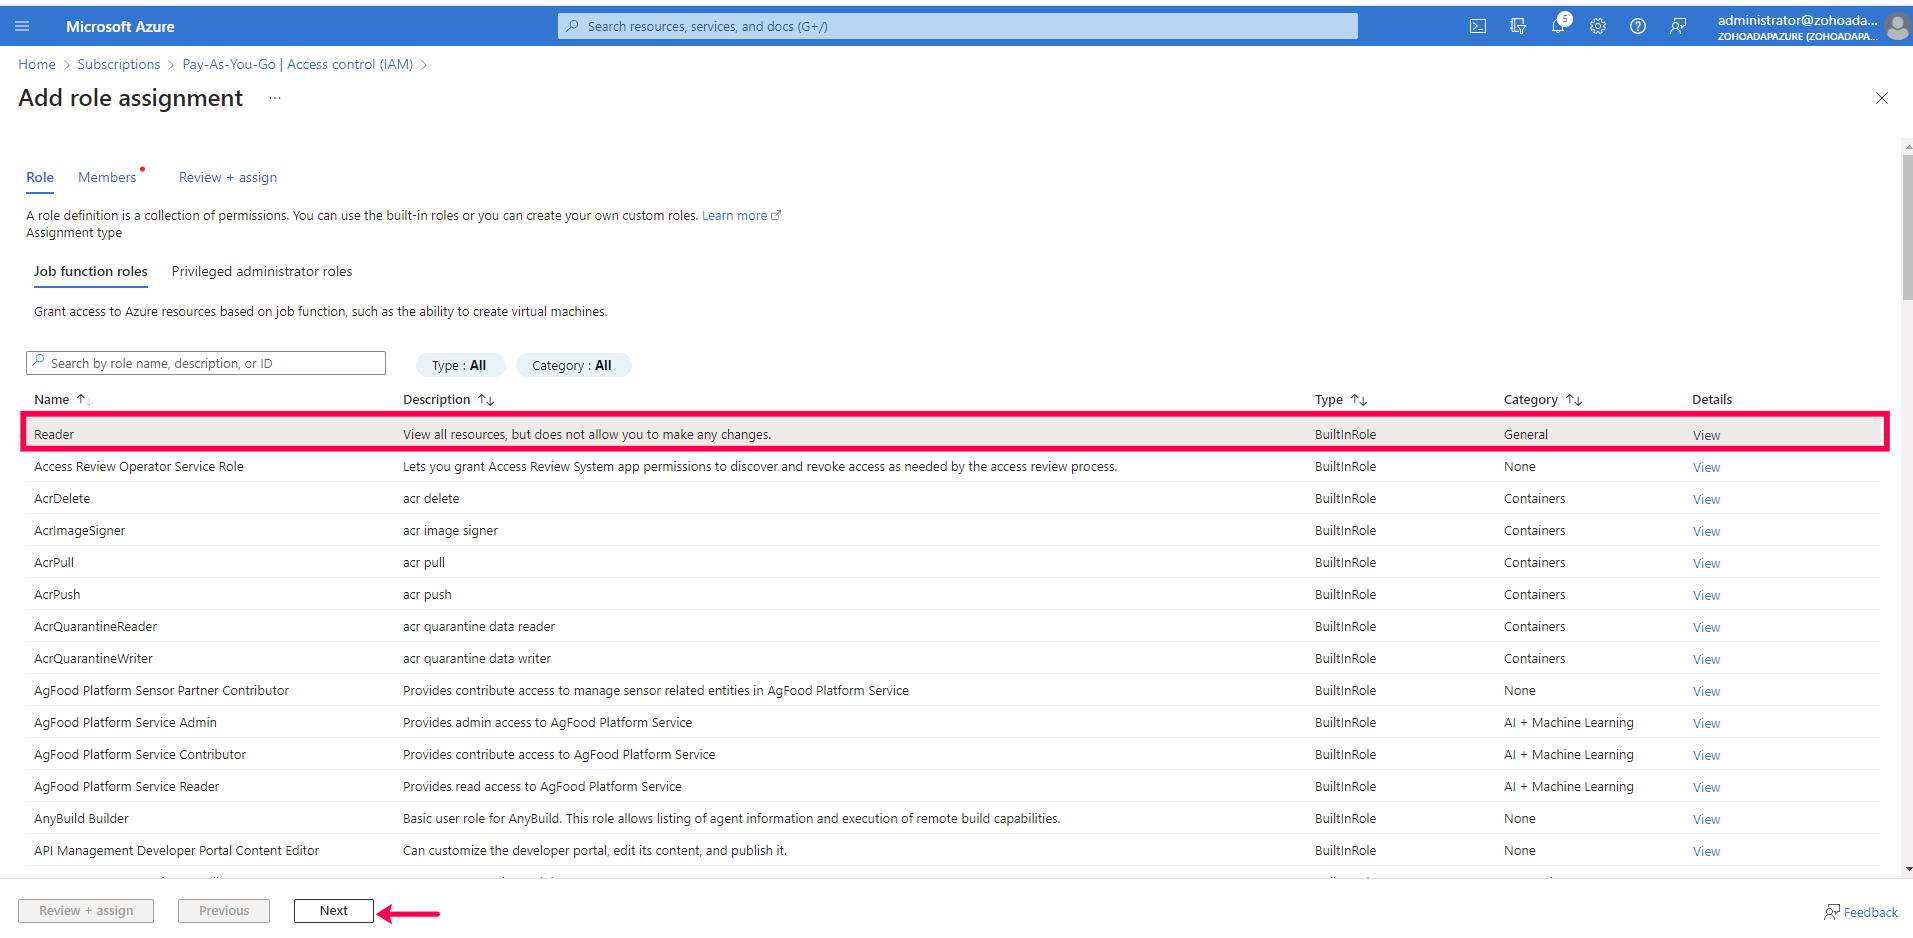
- Select the Reader role from the list and click Next.
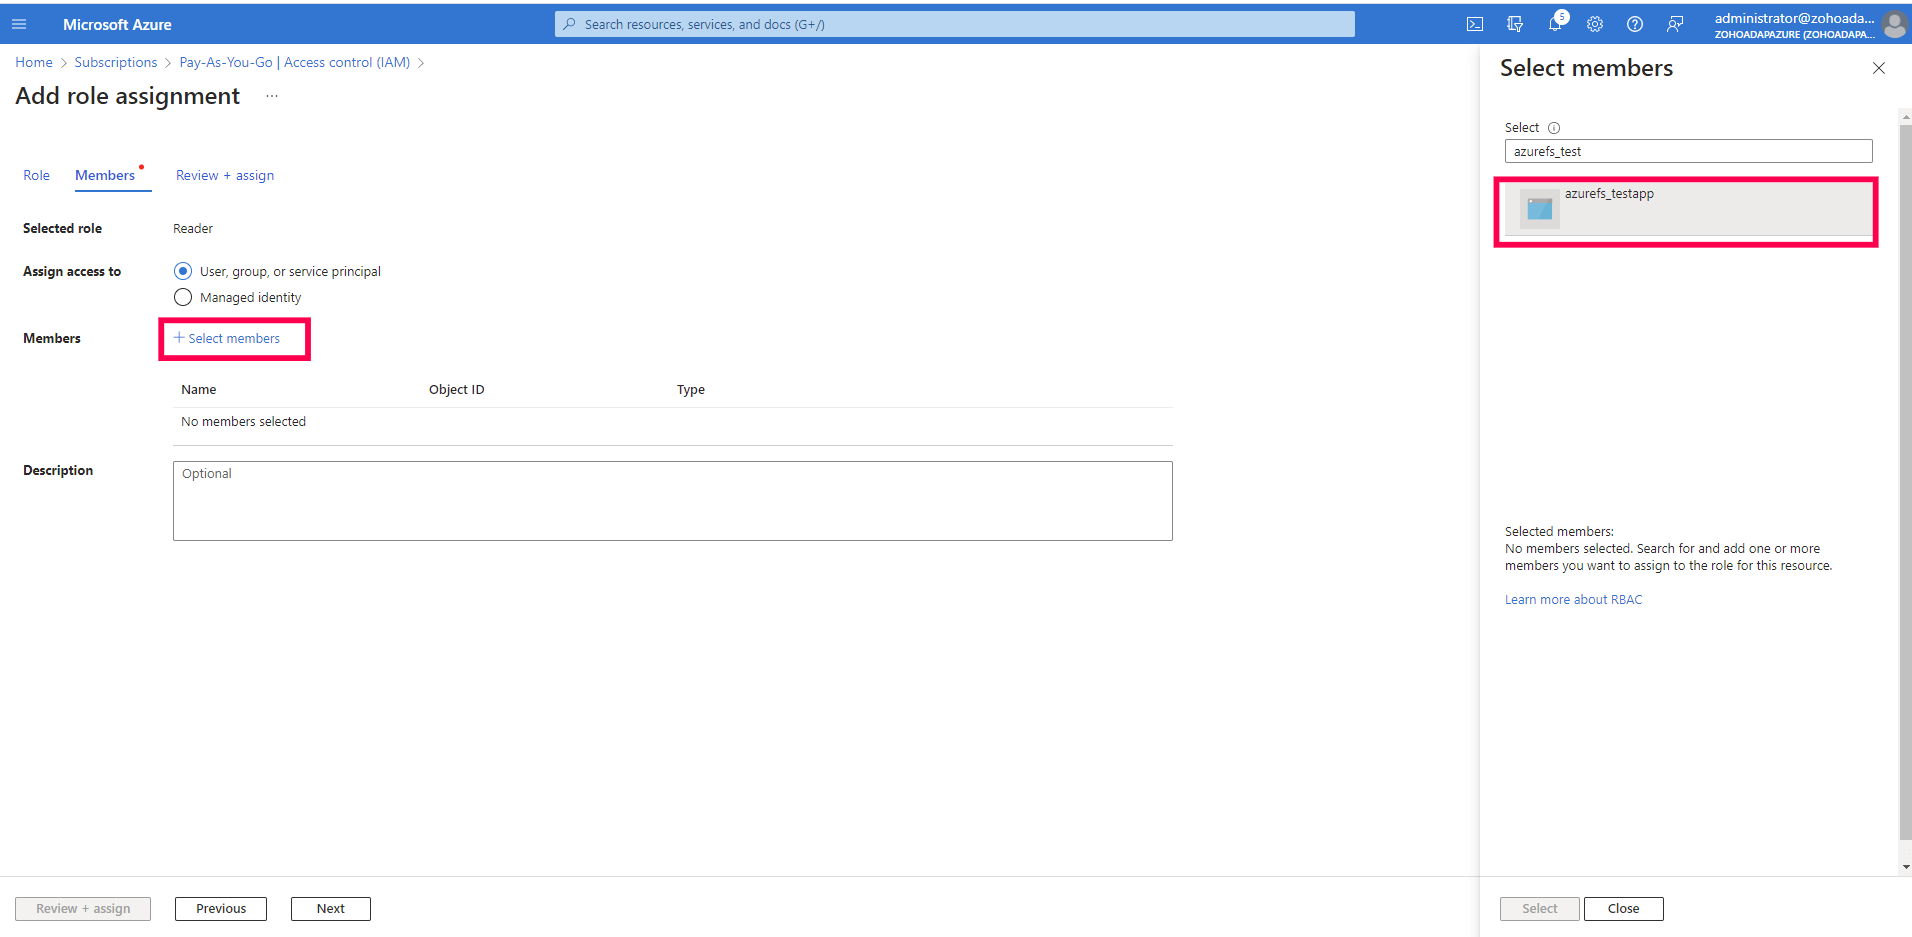
- Click + Select members and add the member to which you want to assign access (e.g., ADAudit Plus App).
- Click Review + assign.
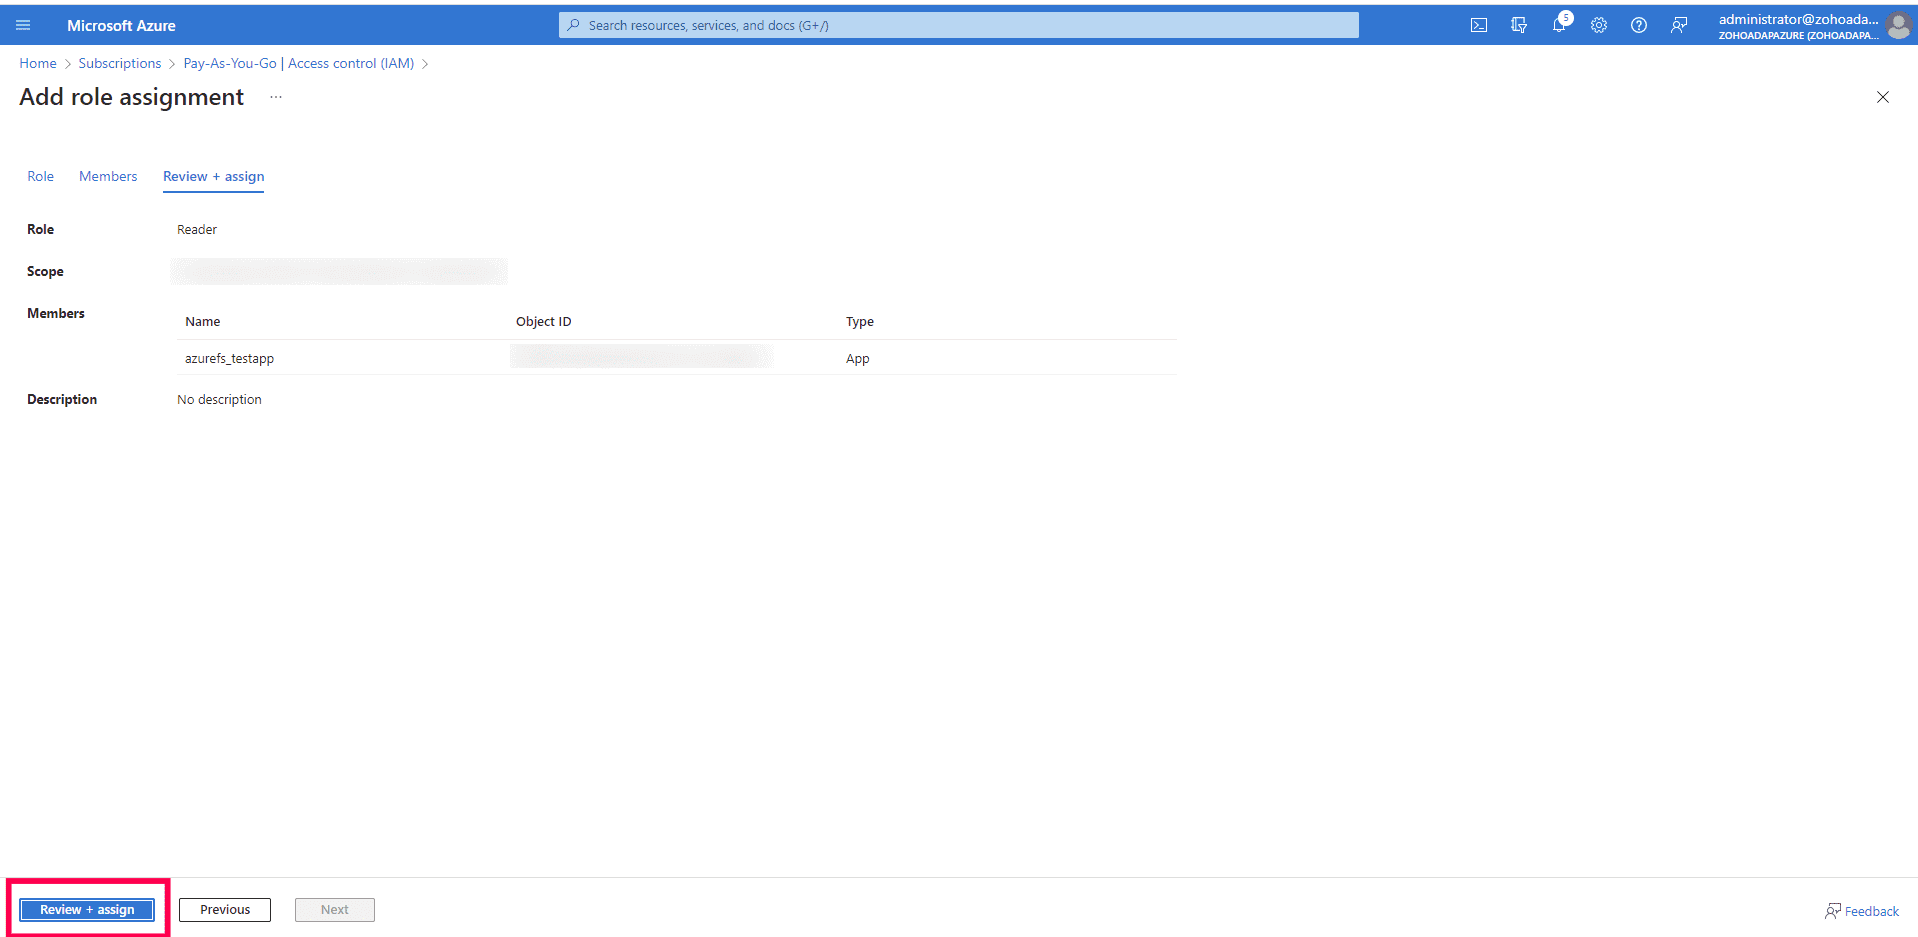
- Check that the specified role is assigned to the application at the subscription level.
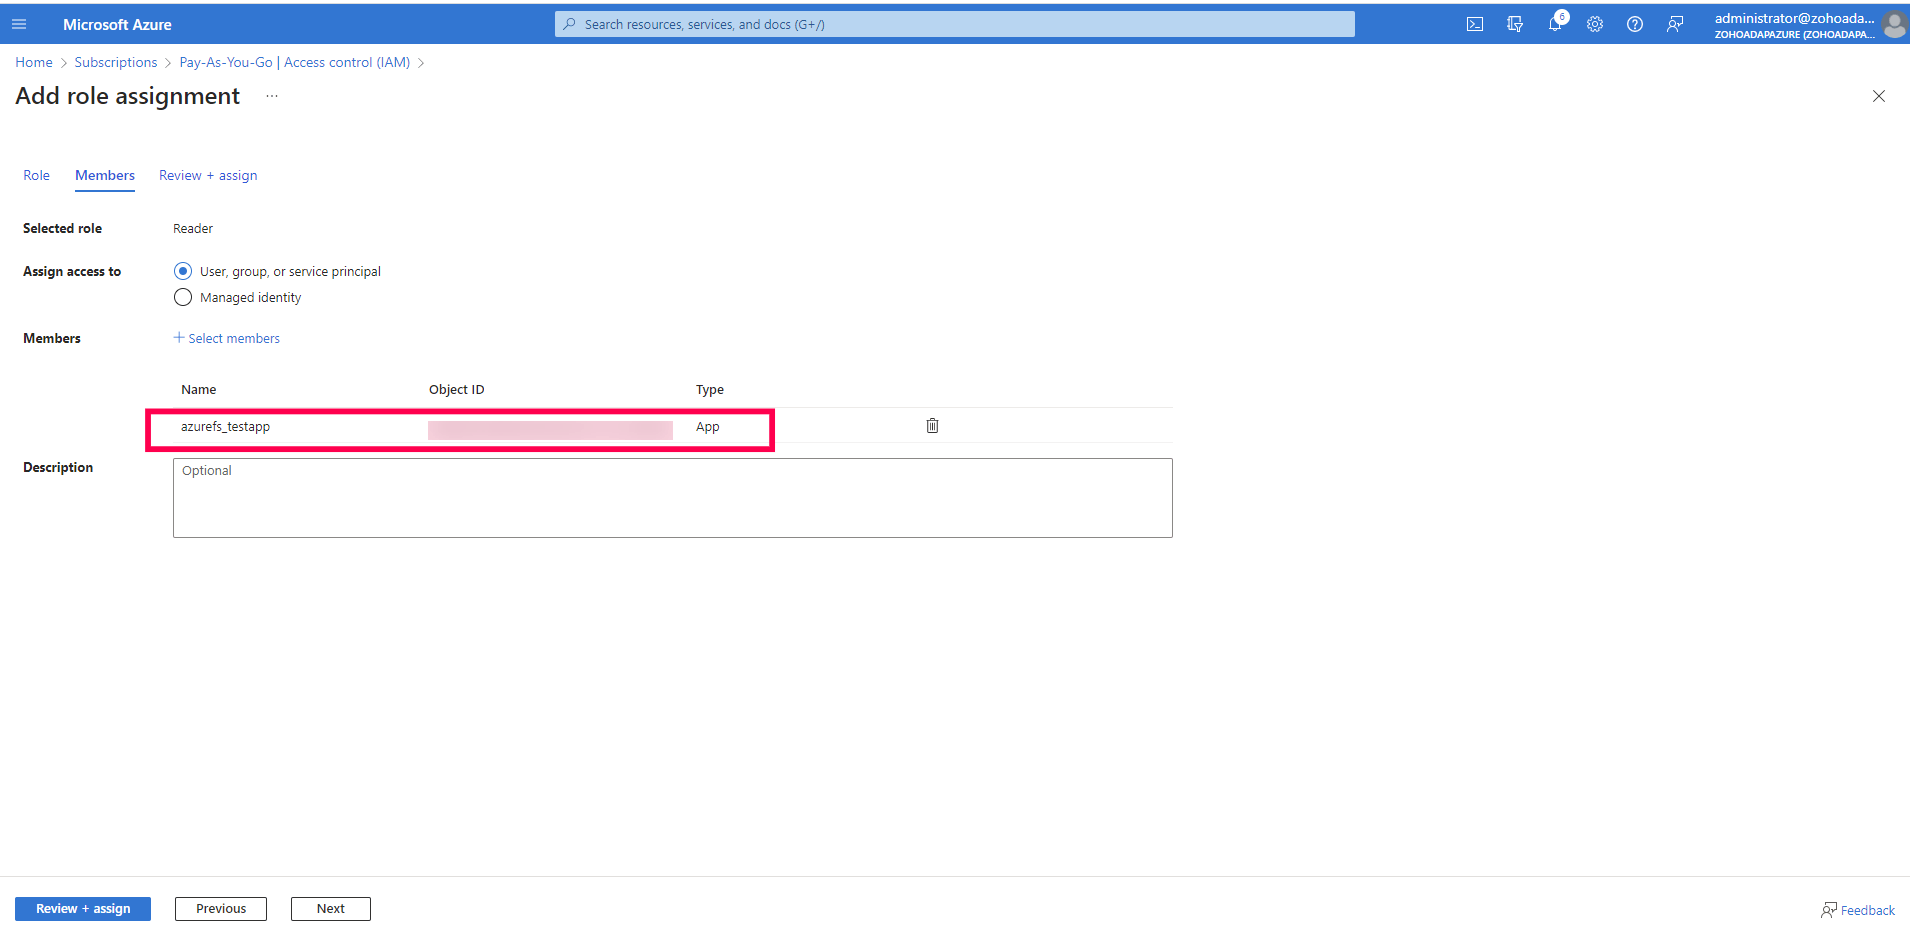
Grant the minimum privileges required for the Microsoft Graph API
To grant the necessary privileges for the Microsoft Graph API to allow the app to read data such as the users and groups, follow these steps:
- In the Azure portal, search for Microsoft Entra ID.
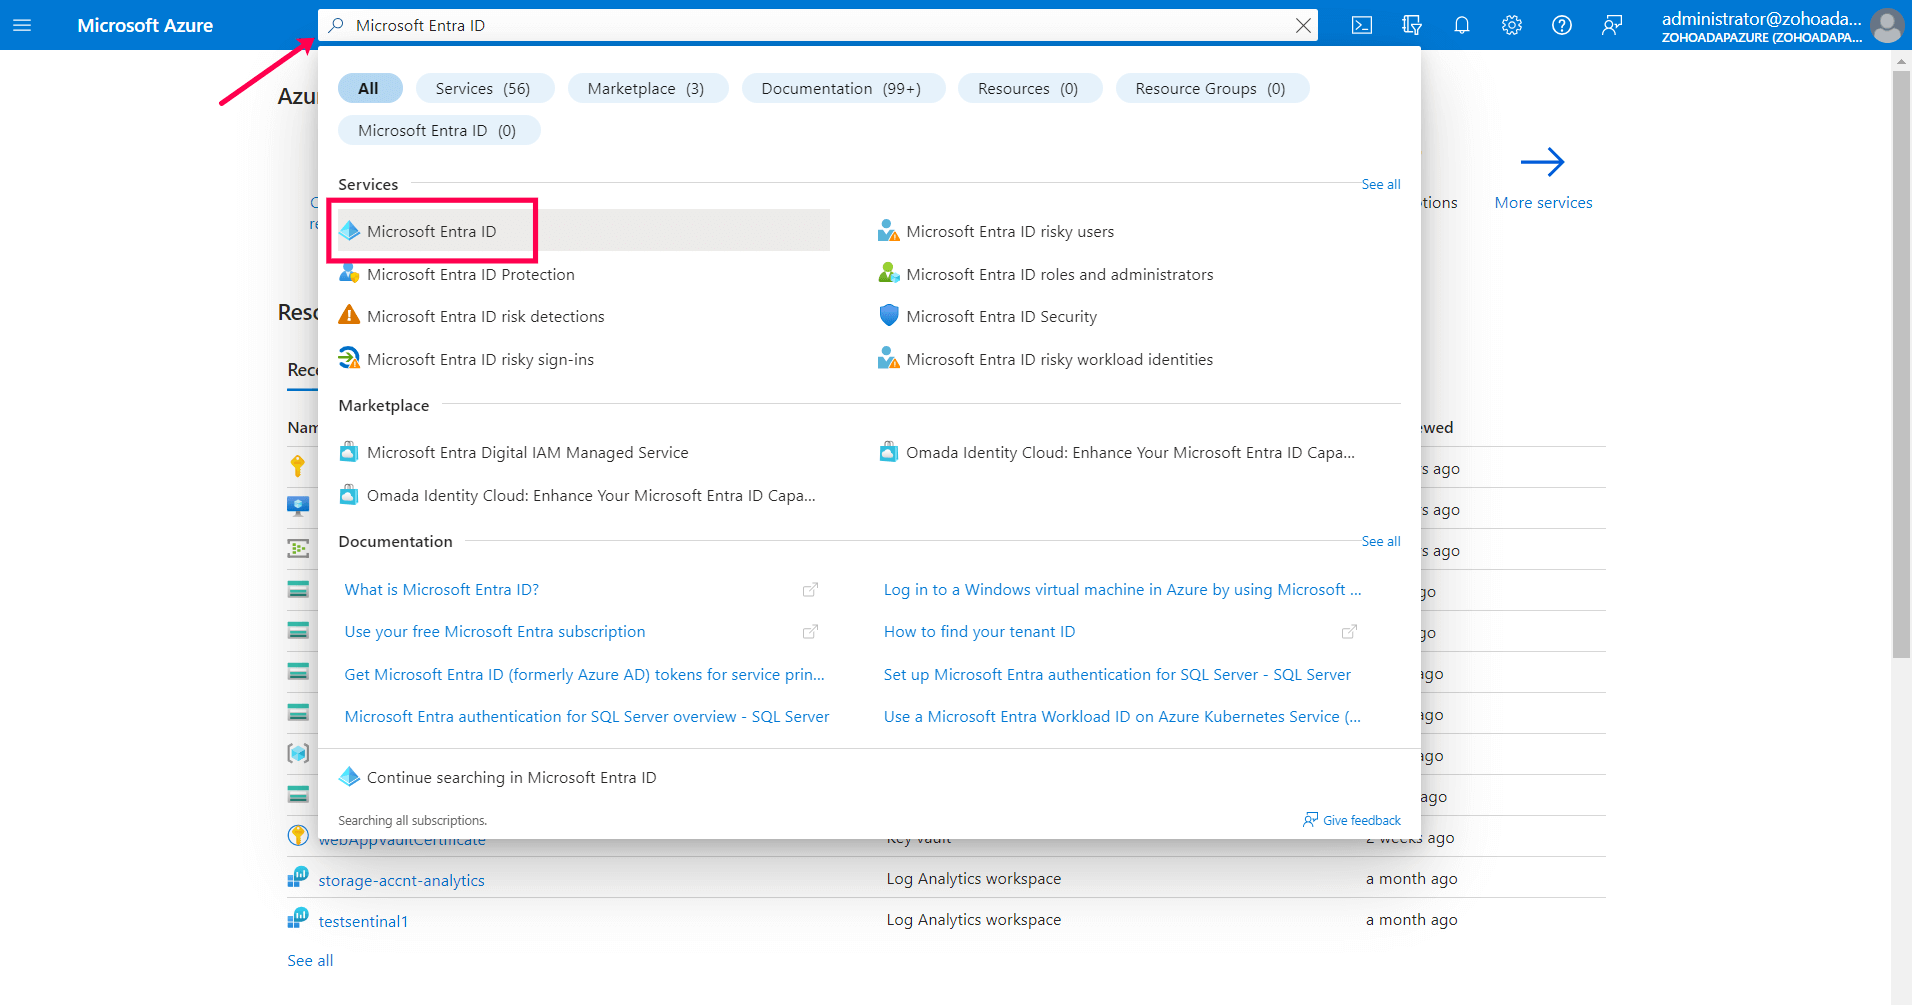
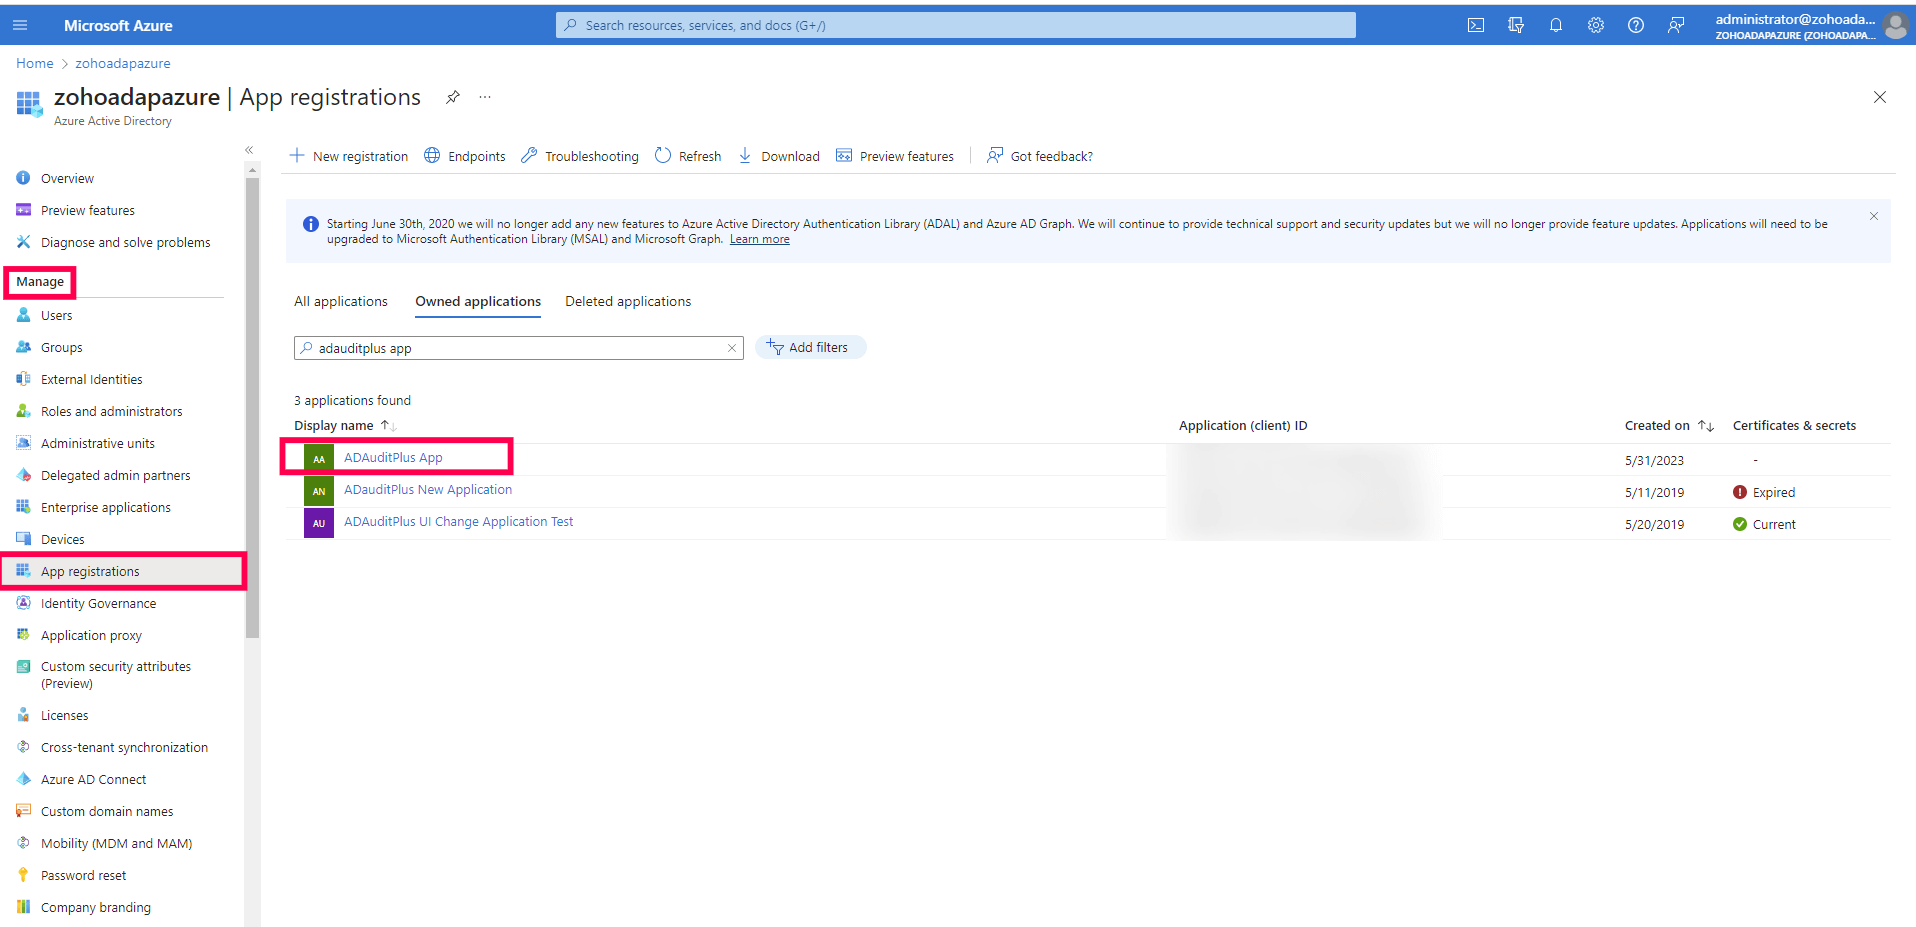
- Go to Manage > App registrations. Select your application under Owned applications (e.g., ADAudit Plus App).
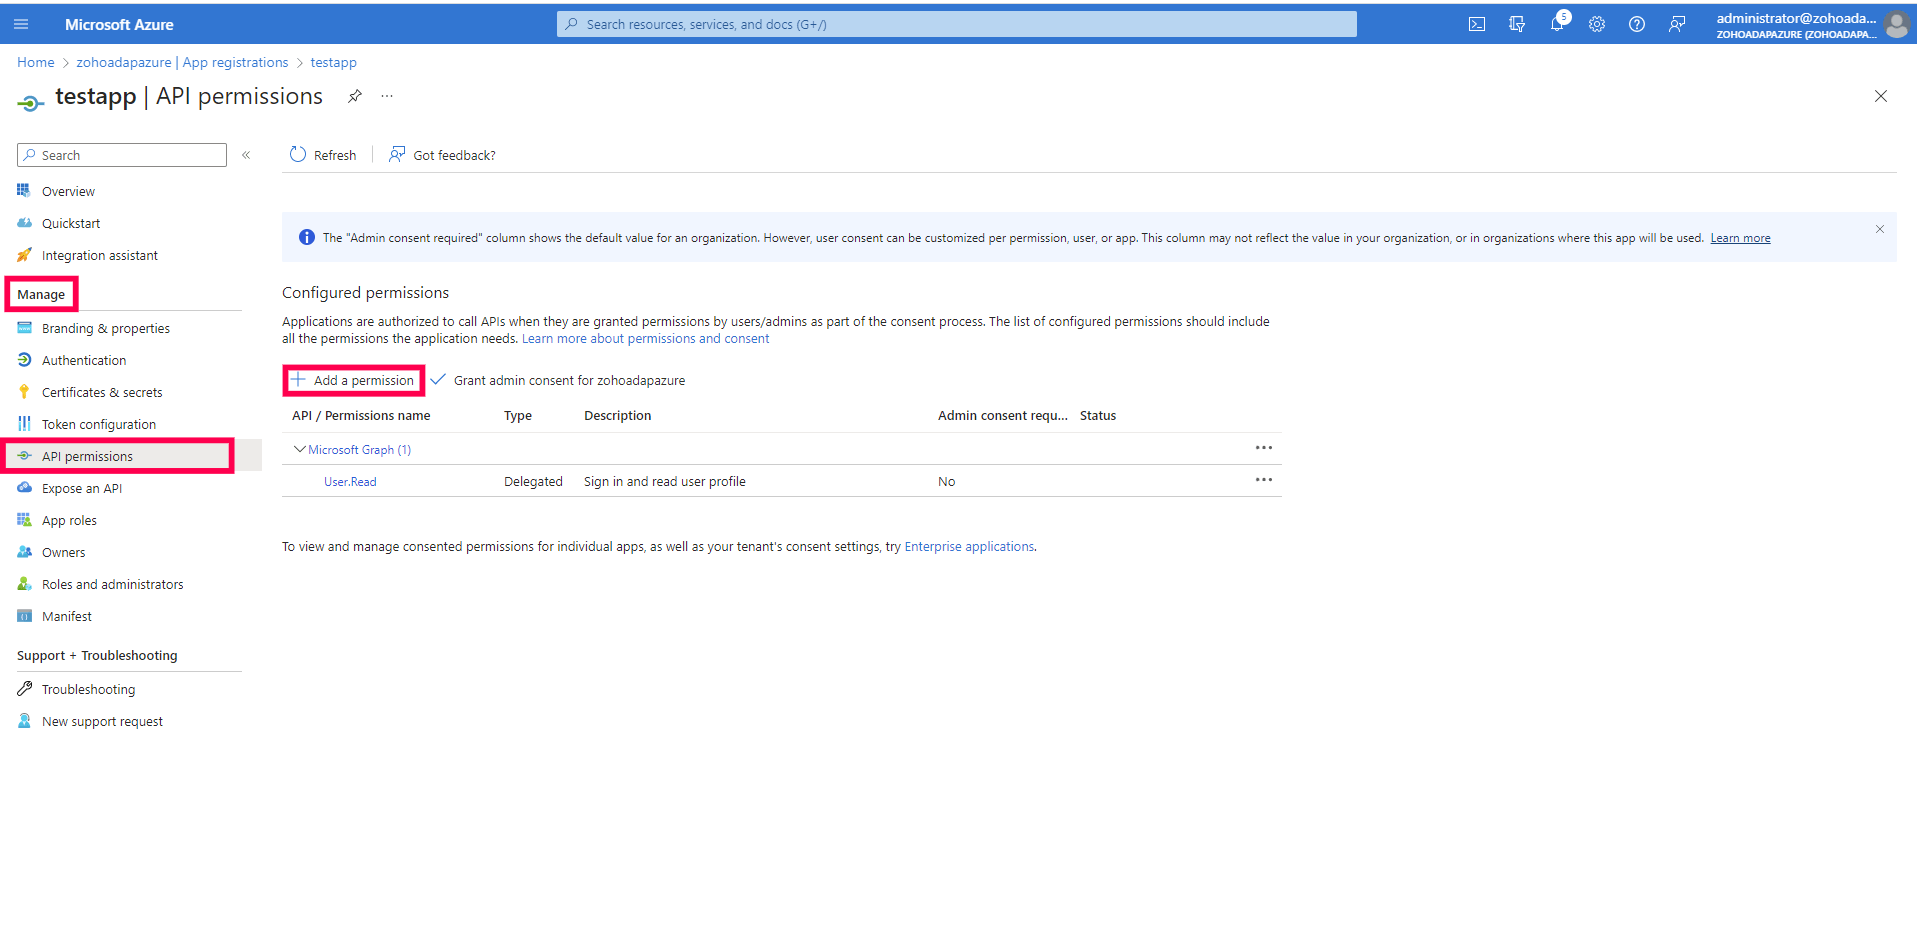
- Go to Manage > API permissions > + Add a permission.
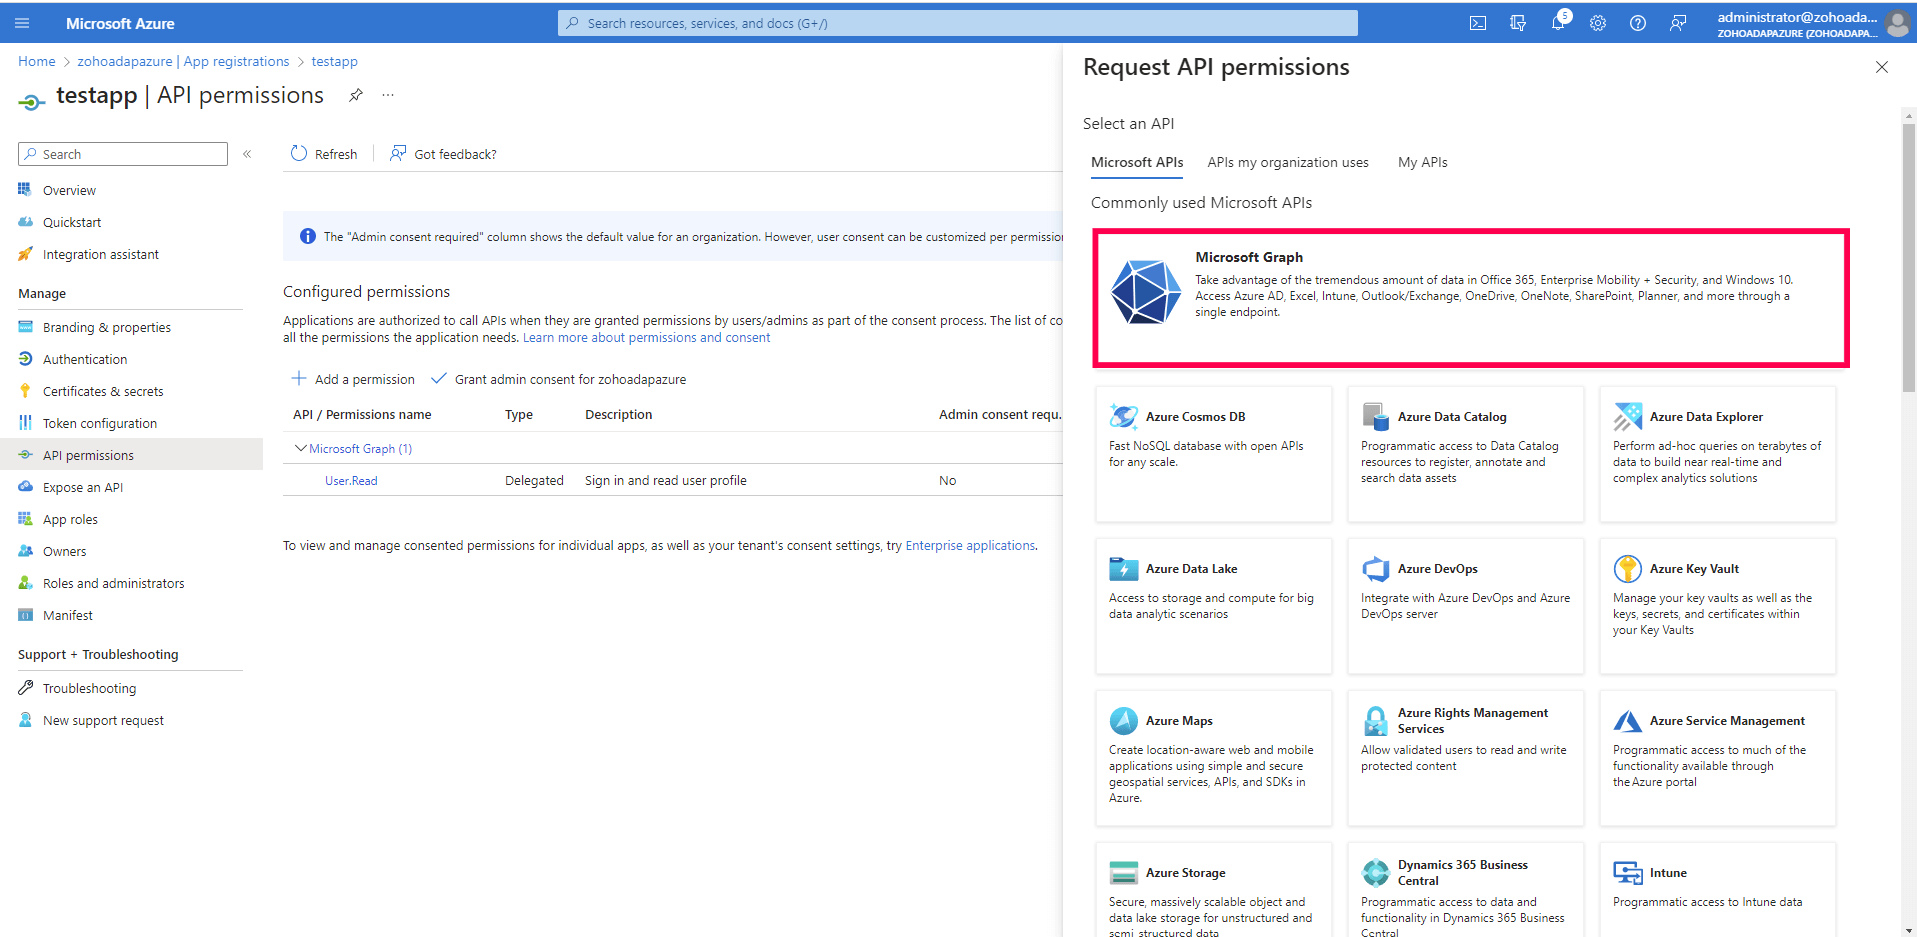
- Select Microsoft Graph.
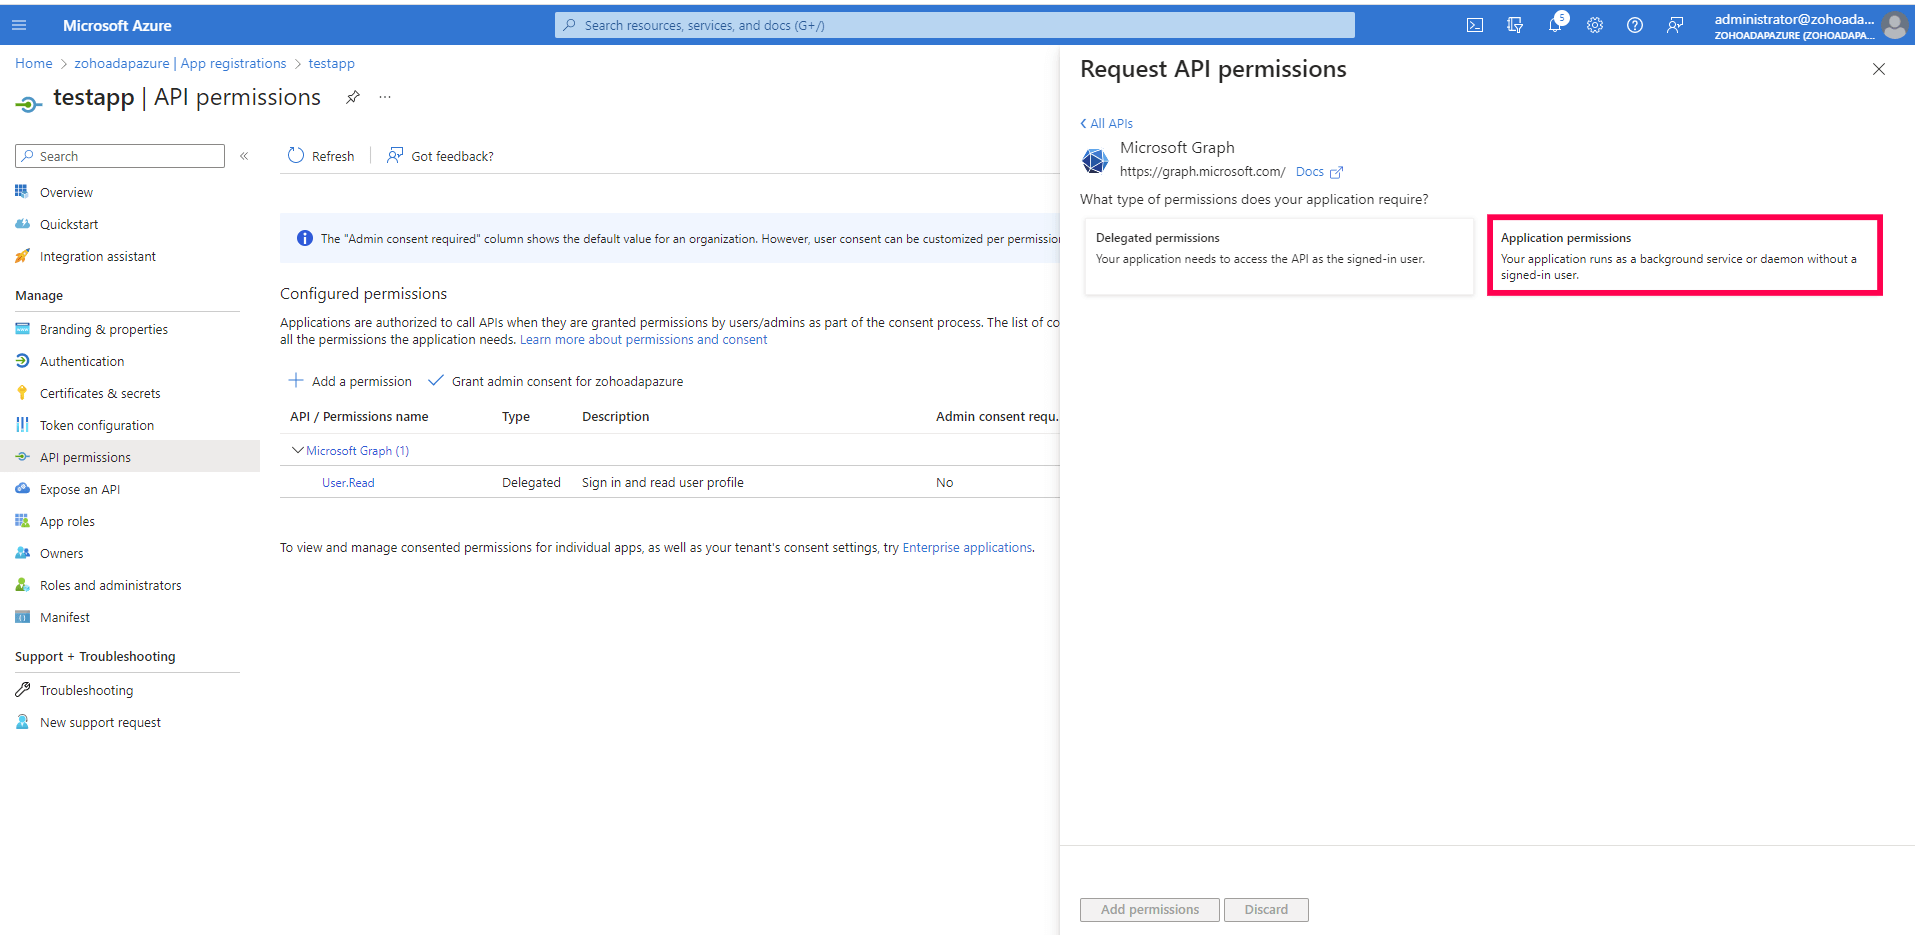
- Select Application permissions for the type of permissions required.
- From the Directory list, select Directory.Read.All.
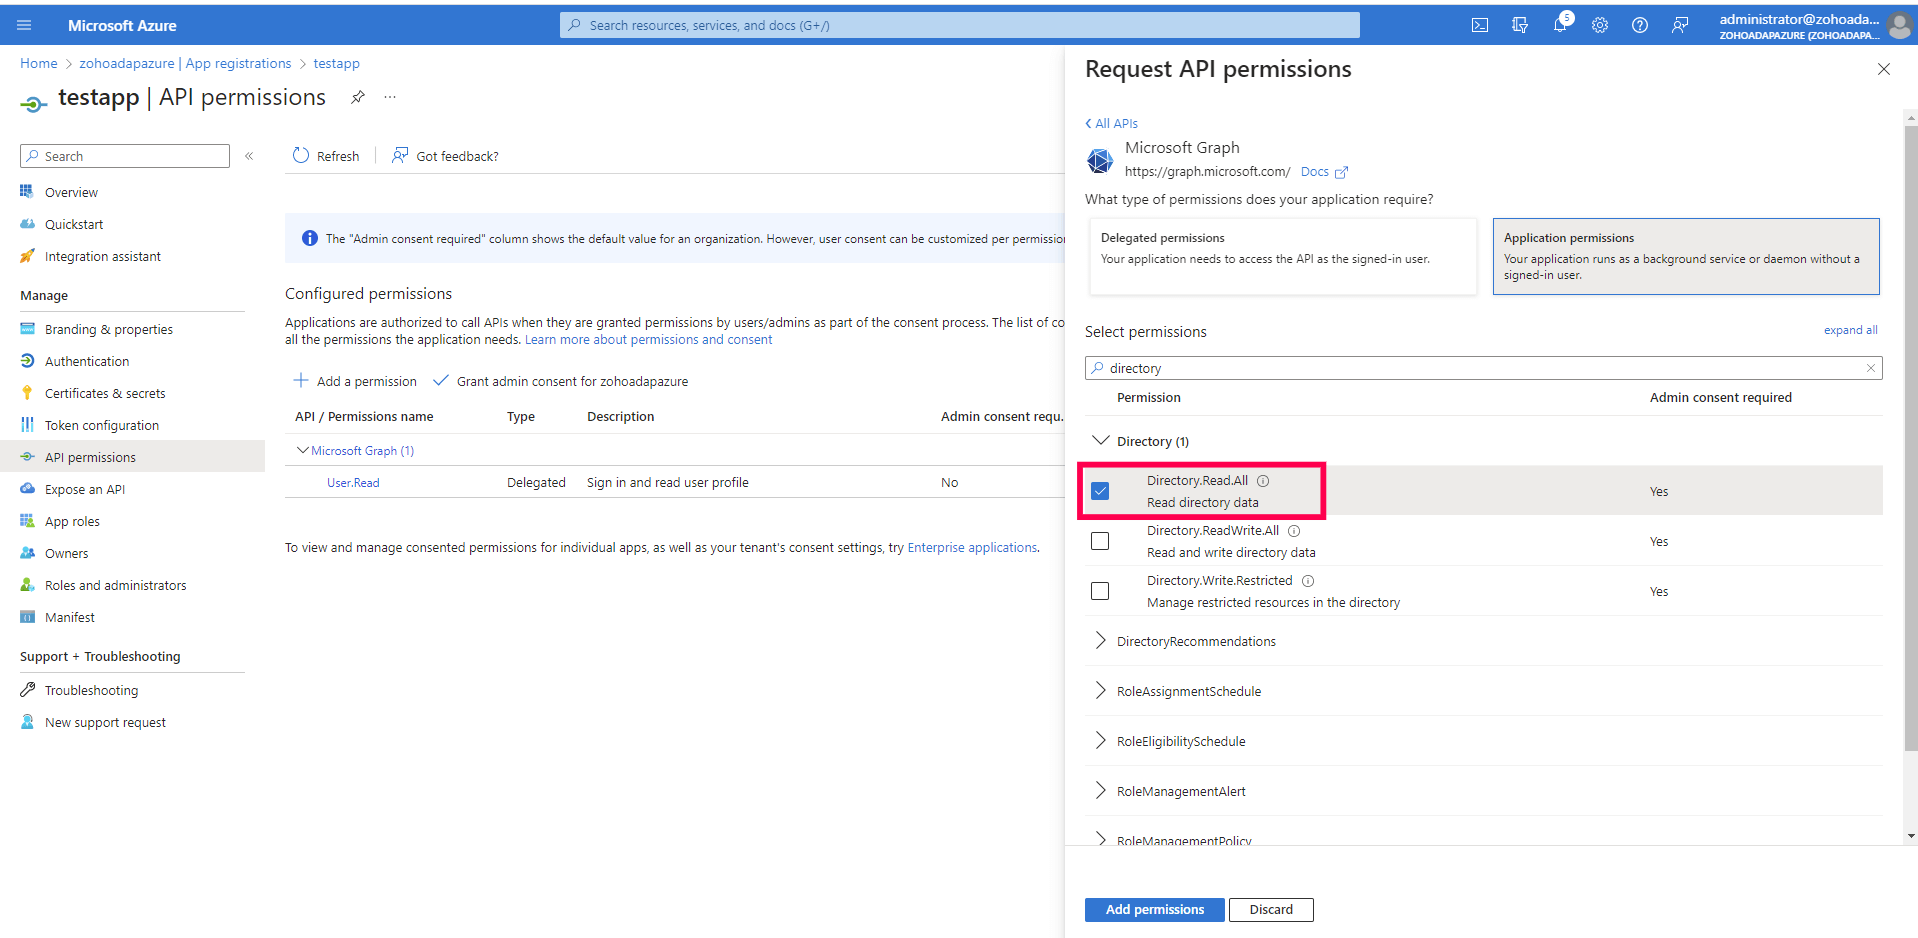
- Click Add permissions.
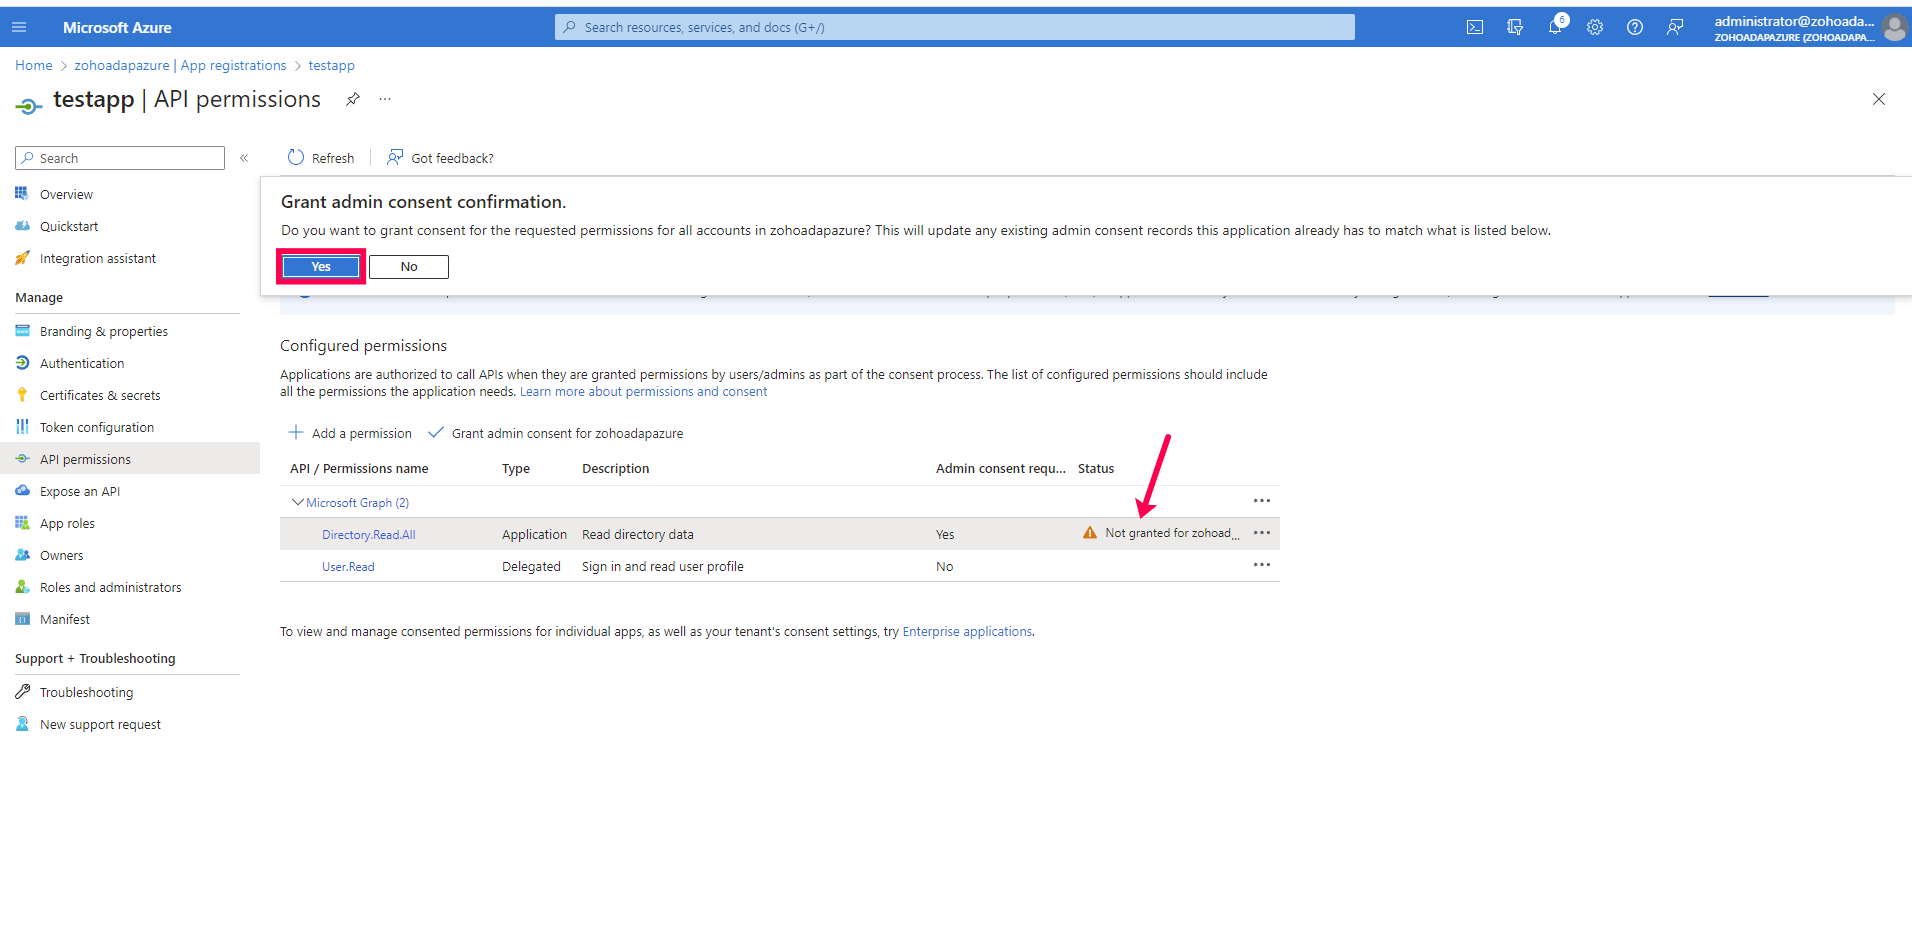
- Click Grant admin consent for <Tenant name>, where <Tenant name> will be the name of your Azure tenant.
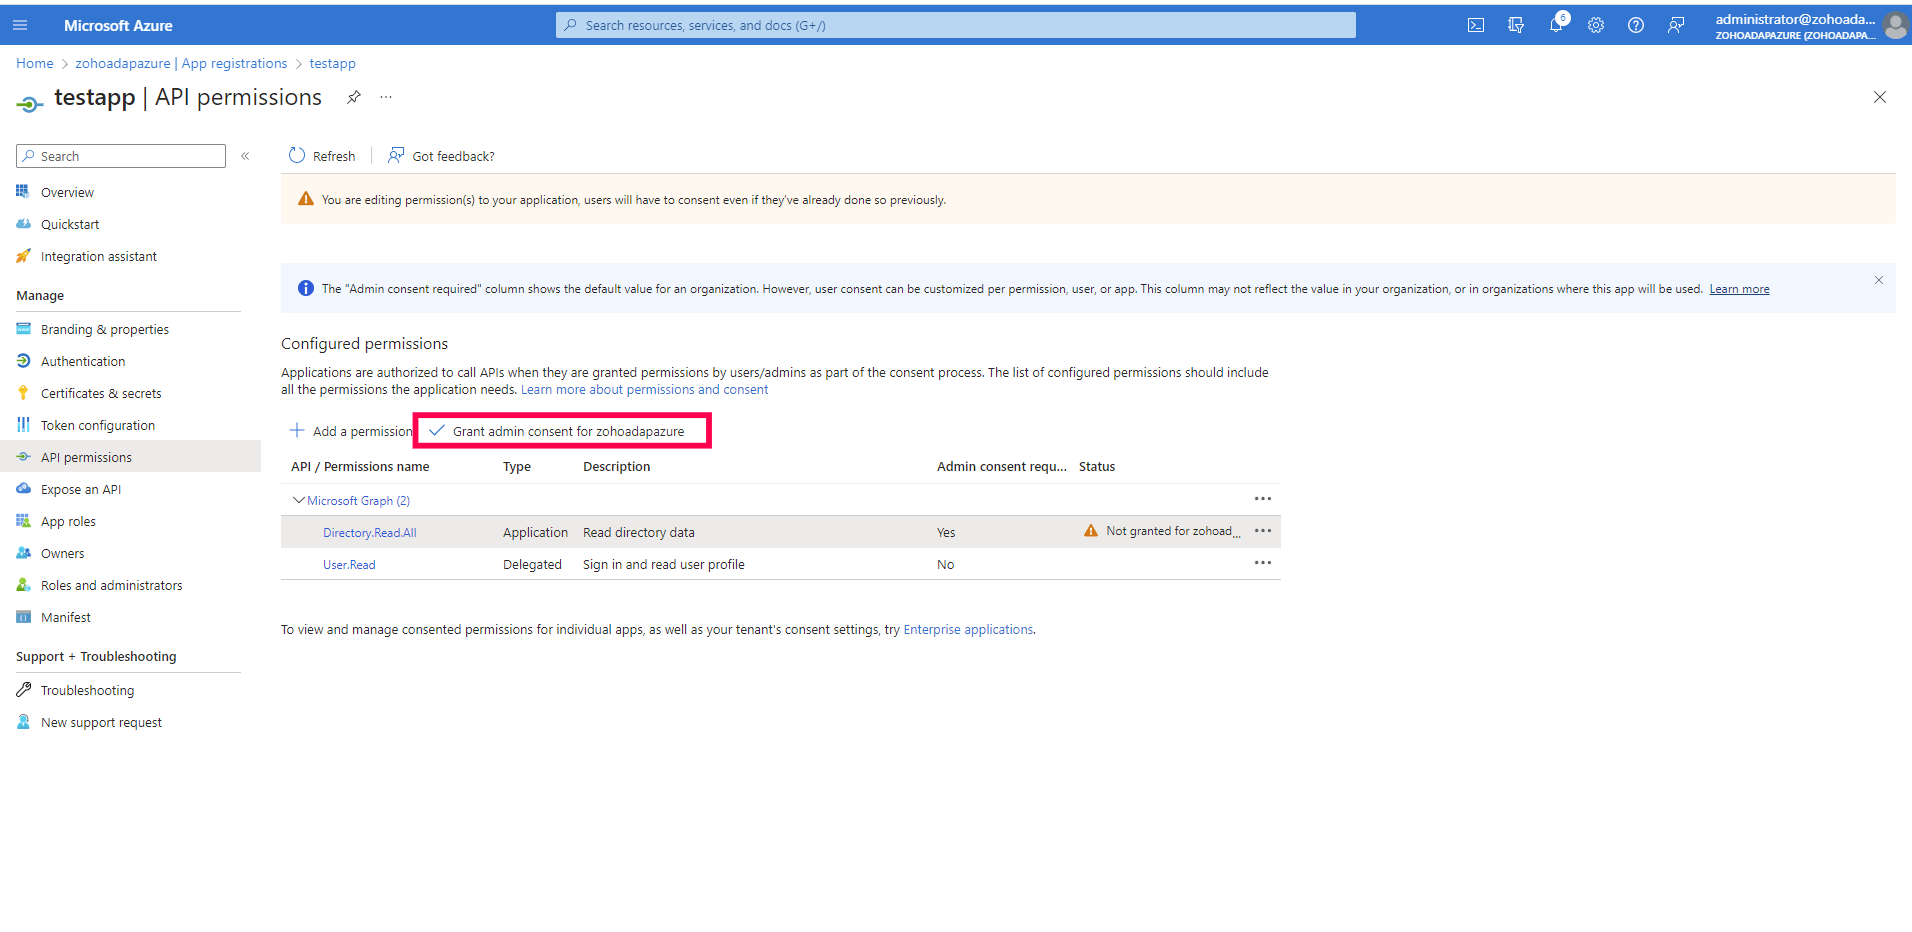
- Click Yes. The Not granted for <Tenant name> status will be changed to Granted for <Tenant name>.
Obtain the client ID and client secret
- In the Azure portal, search for Microsoft Entra ID.
- Go to Manage > App registrations. Select your application under Owned applications (e.g., ADAudit Plus App).
- Go to Manage > Certificates & secrets.
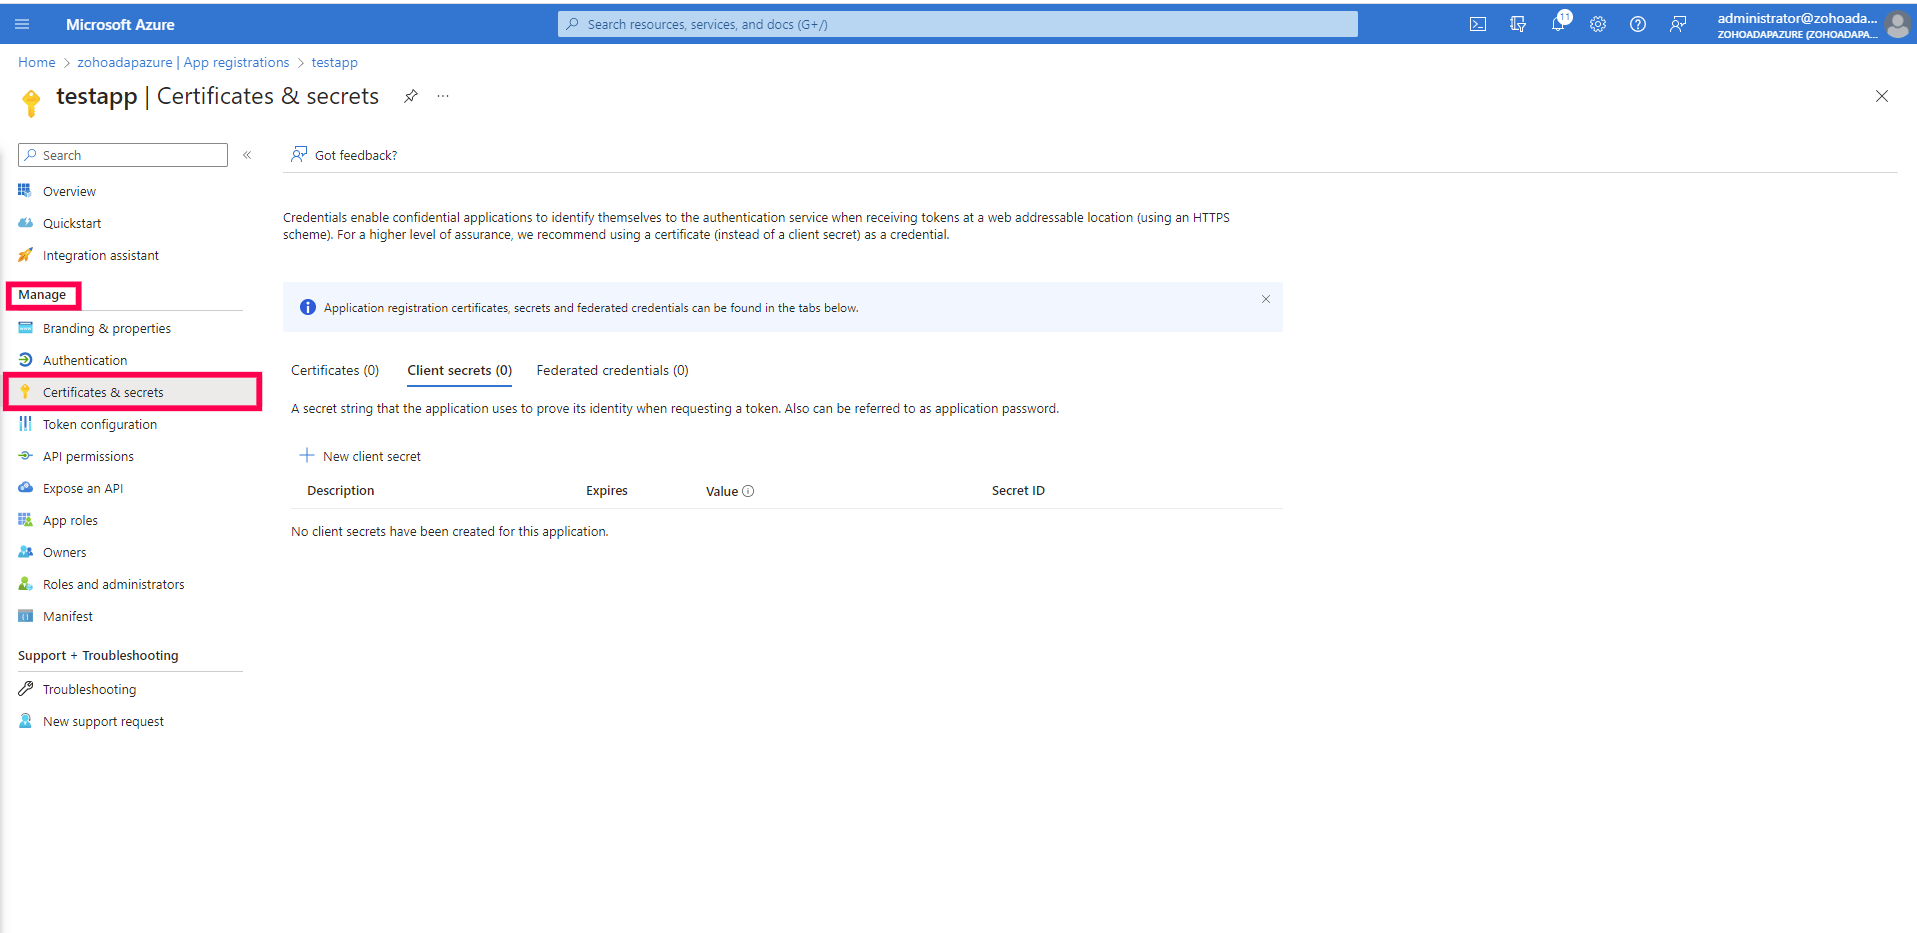
- Click + New client secret.
- Enter the description.
- Set the expiration date to 24 months, which is the maximum value that can be used.
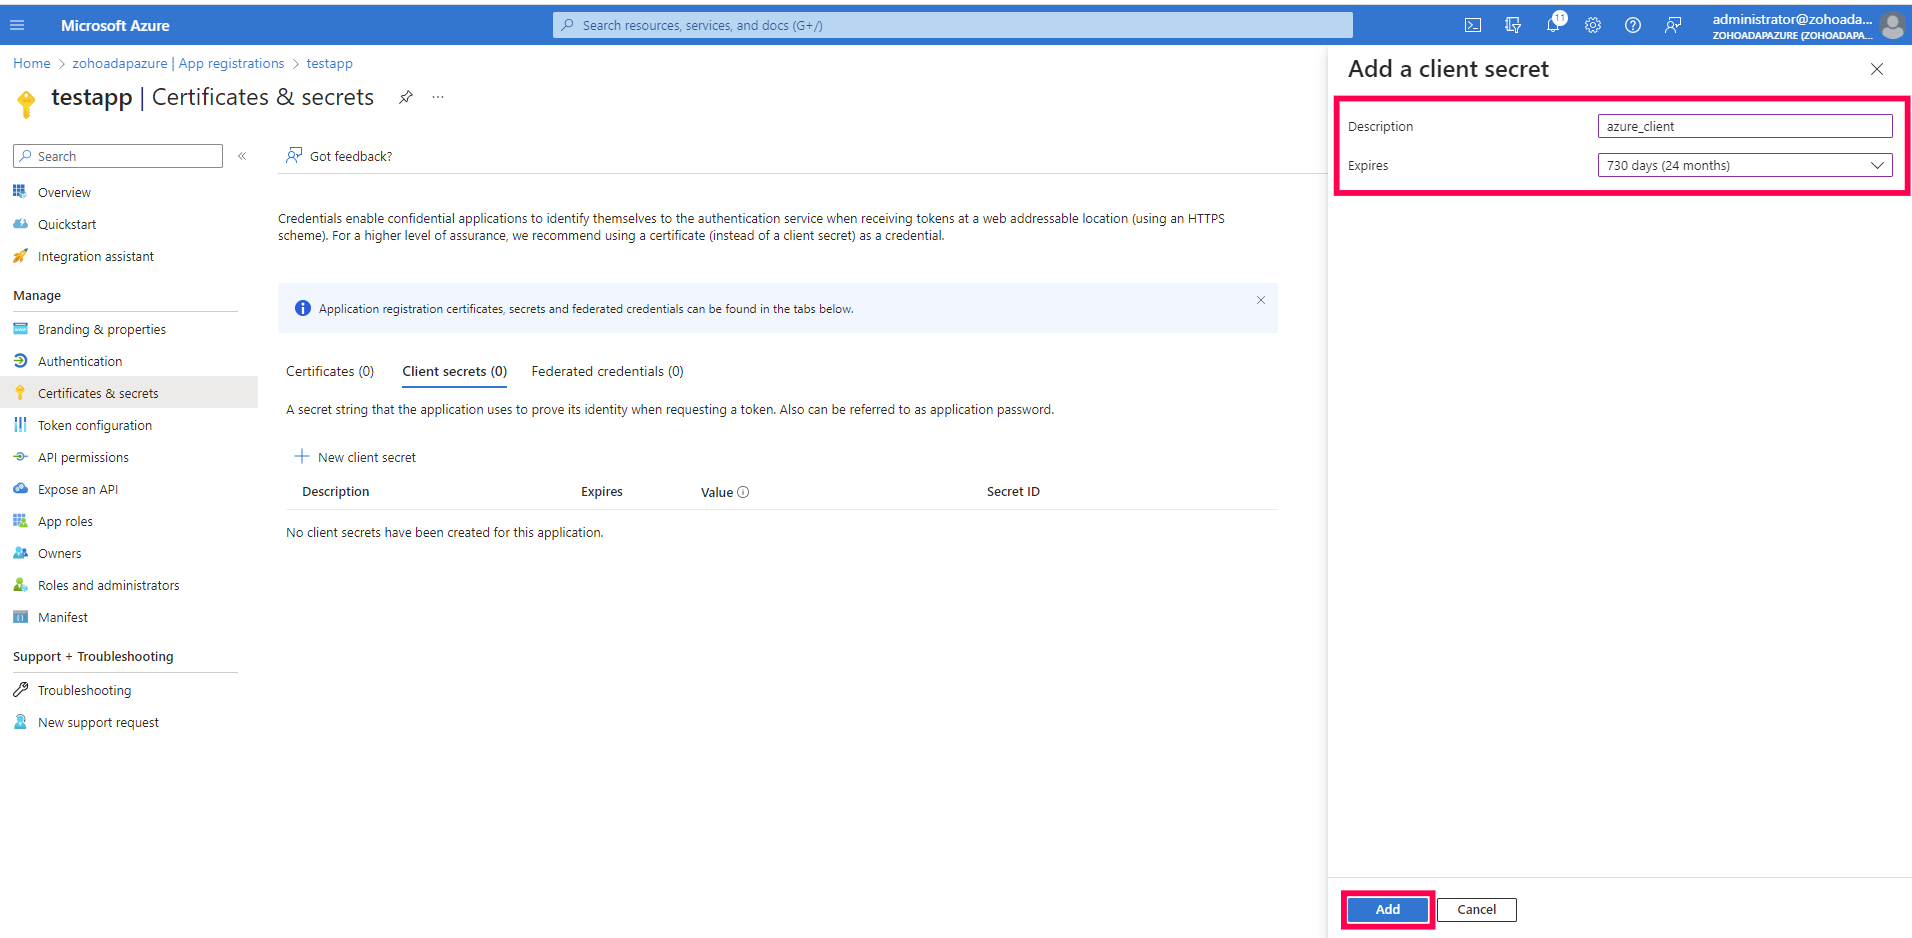
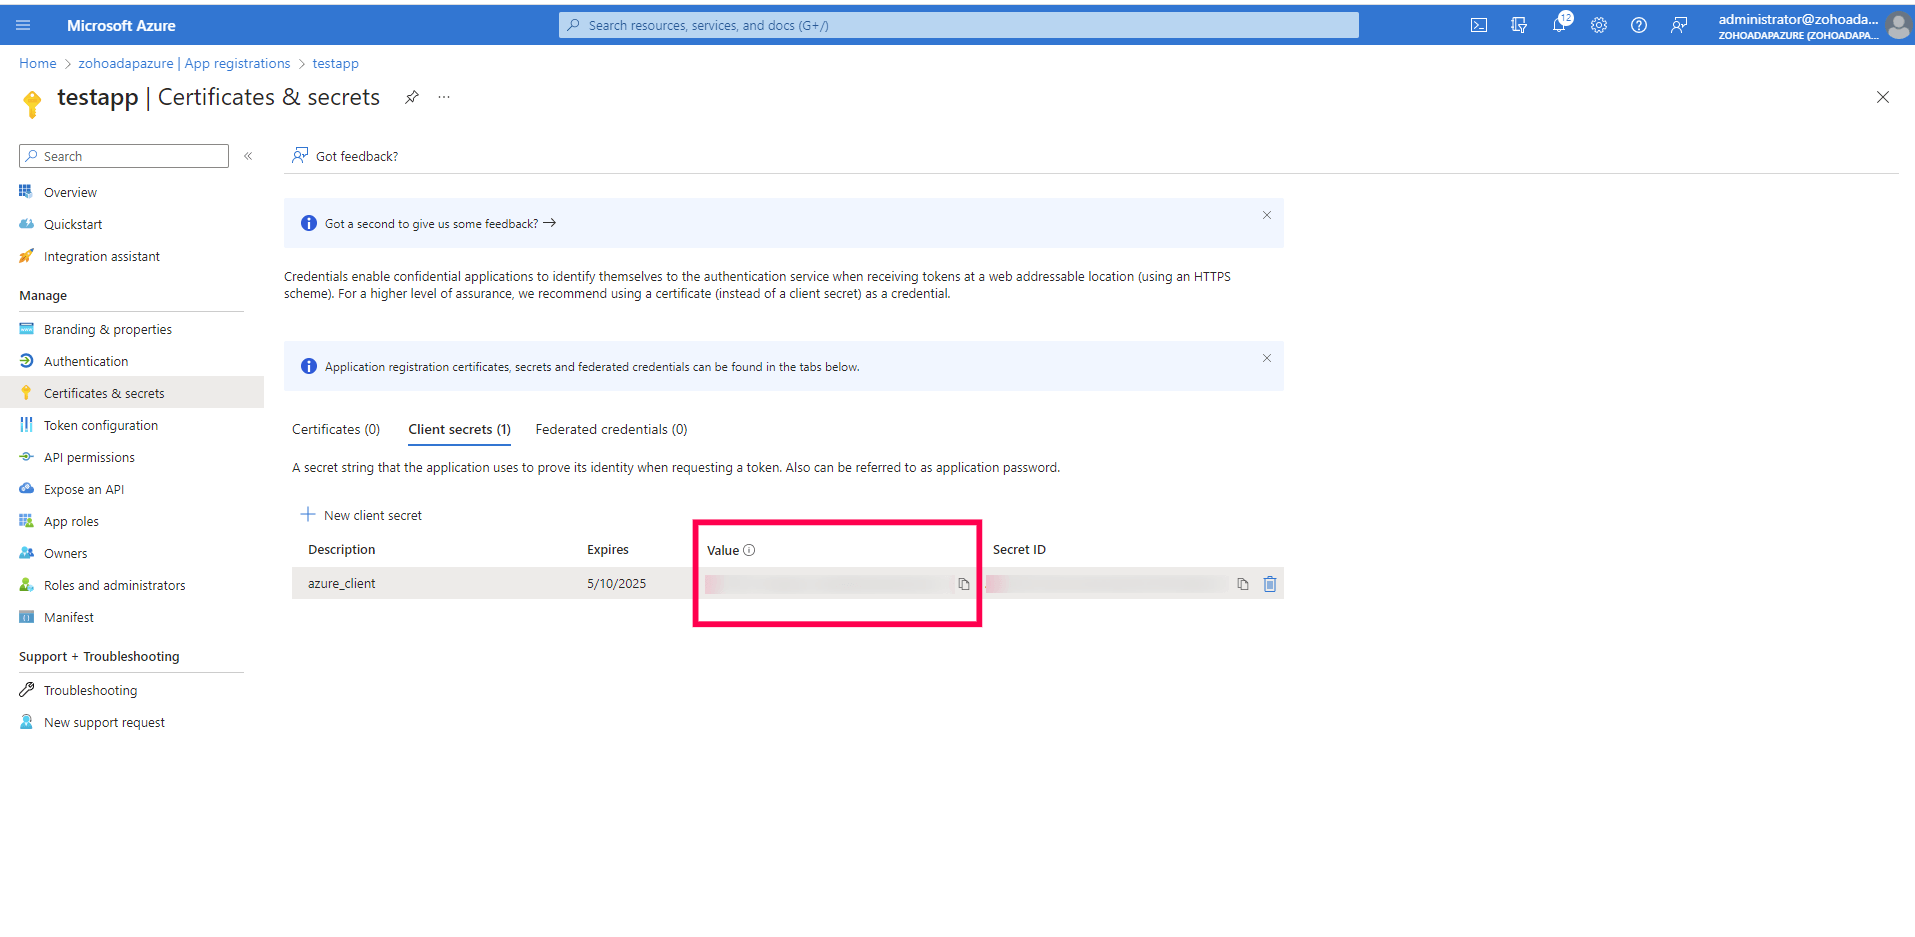
- Click Add. The values will be displayed.
- Copy the client secret value. The generated Value is the client secret. This value will be displayed only once, so make sure to copy it securely.
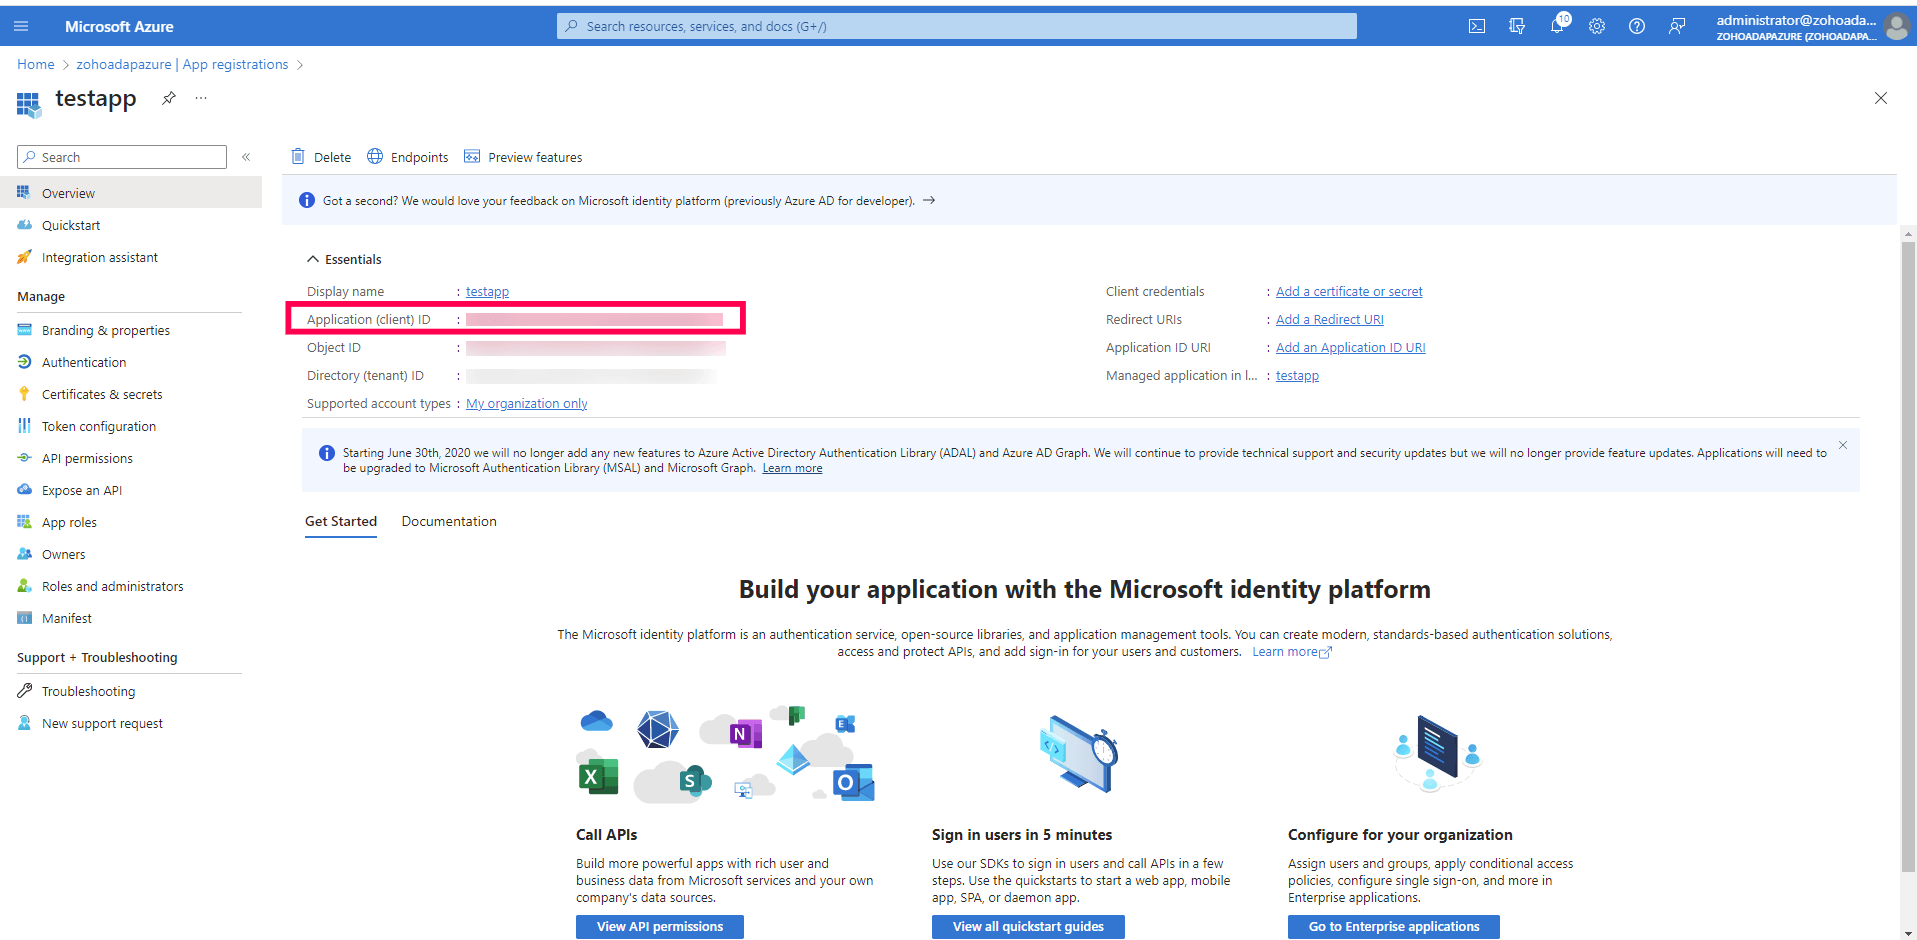
- Note down the Application (client) ID as the client ID. The client ID and secret ID will be necessary when configuring the tenant in ADAudit Plus.
Don't see what you're looking for?
-
Visit our community
Post your questions in the forum.
-
Request additional resources
Send us your requirements.
-
Need implementation assistance?
Try OnboardPro

 Click here to expand


