Zendesk integration
Zendesk can be configured in ADAudit Plus using one of the following two authentication types:
- OAuth authentication
- Basic API
Note: Only users with Admin/Agent privilege can proceed with the configuration.
Configure Zendesk with OAuth authentication
Before configuring Zendesk in ADAudit Plus by selecting OAuth as the authentication type, you will need to retrieve the unique identifier and secret from the Zendesk instance:
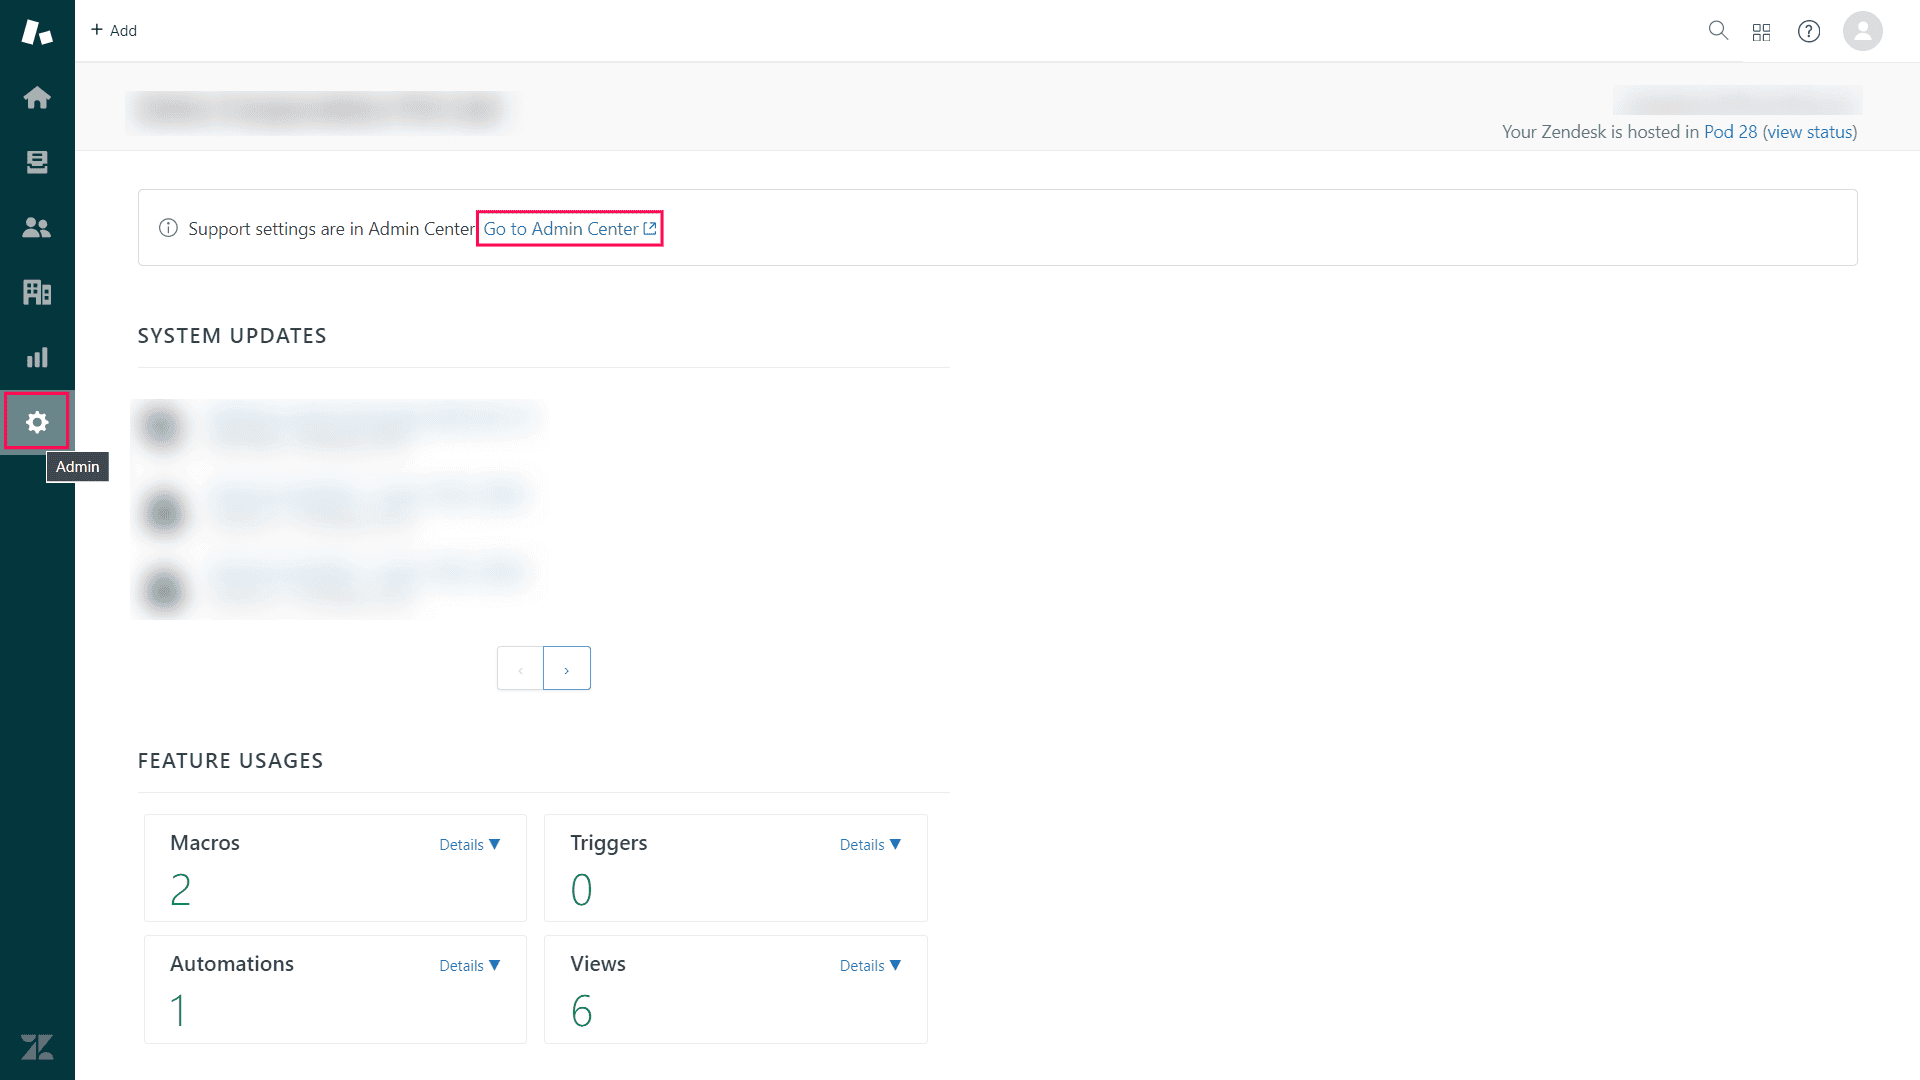
- Log in to your Zendesk console, click the gear icon (Admin) on the sidebar, and then click Go to Admin Center.

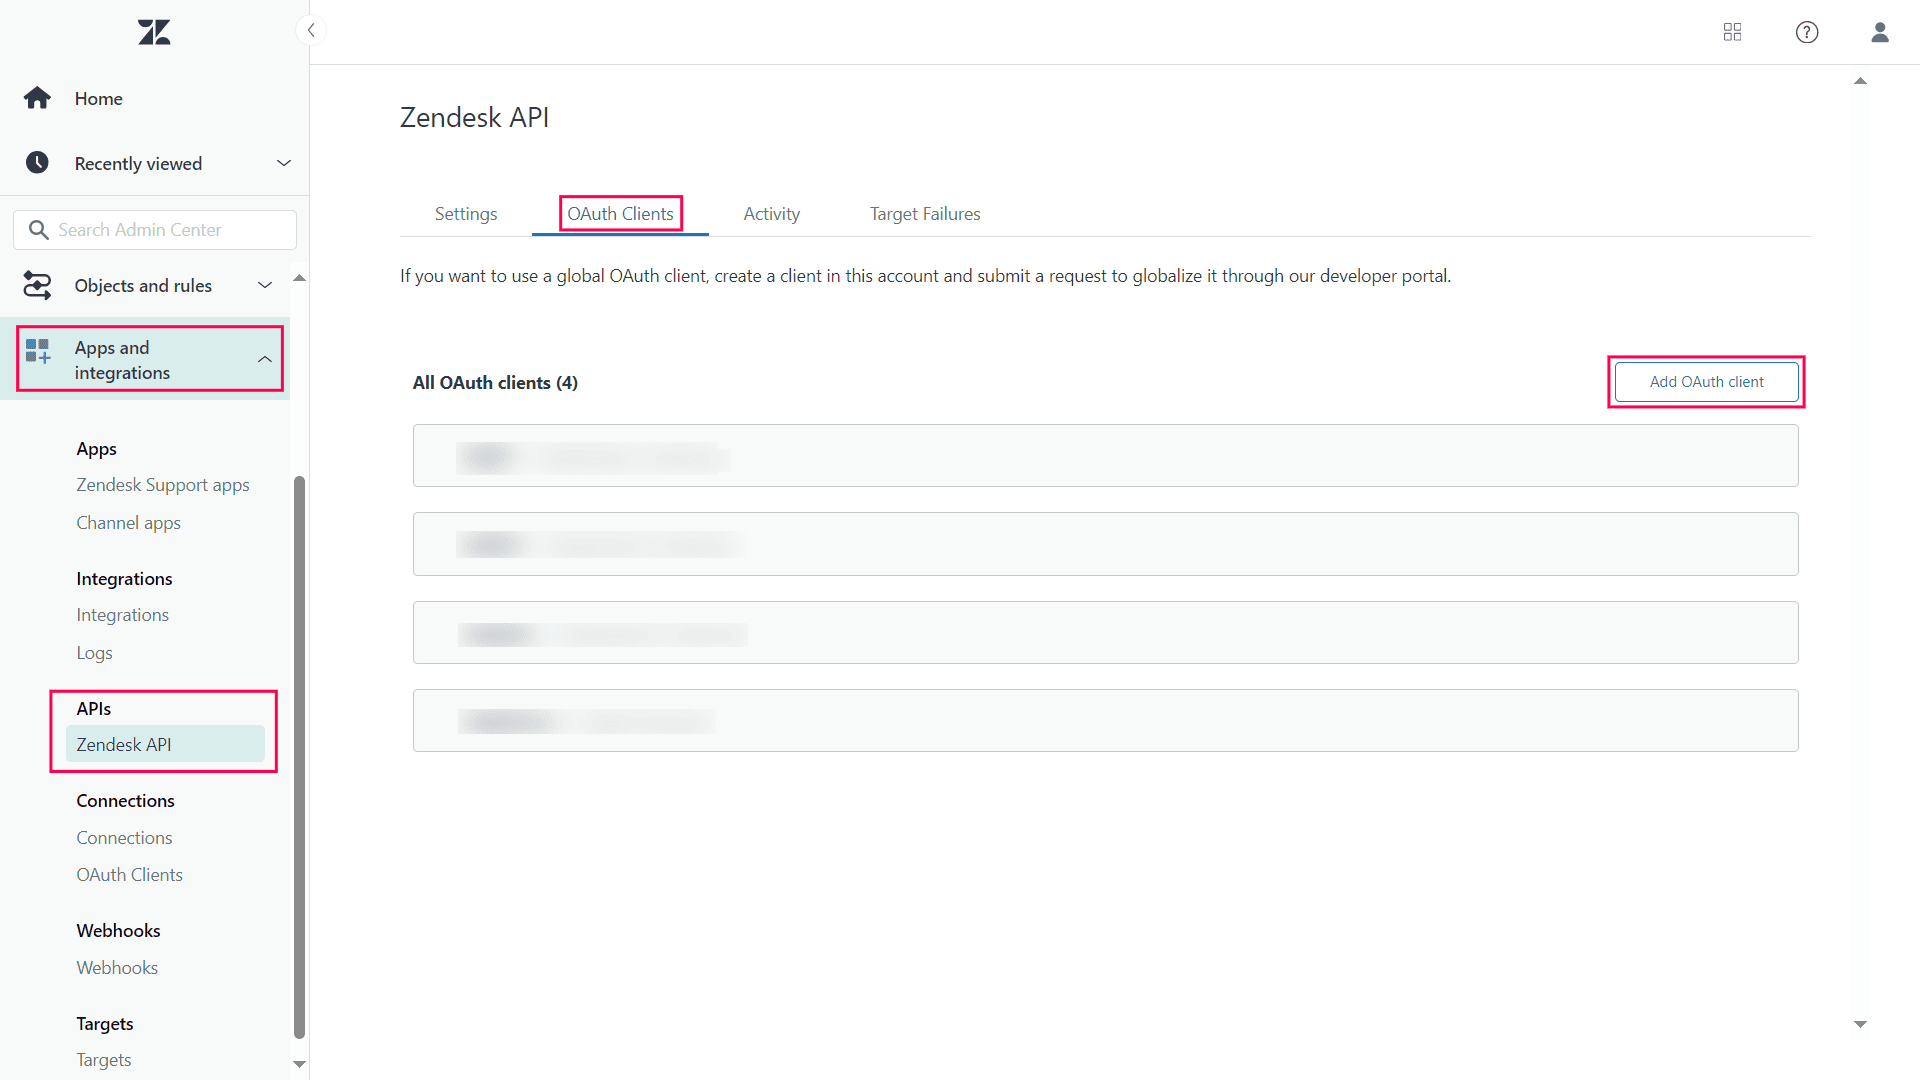
- In the Admin Center, click the Apps and Integrations drop-down on the sidebar, and select Zendesk API under APIs.
- Select the OAuth Clients tab and click Add OAuth client.

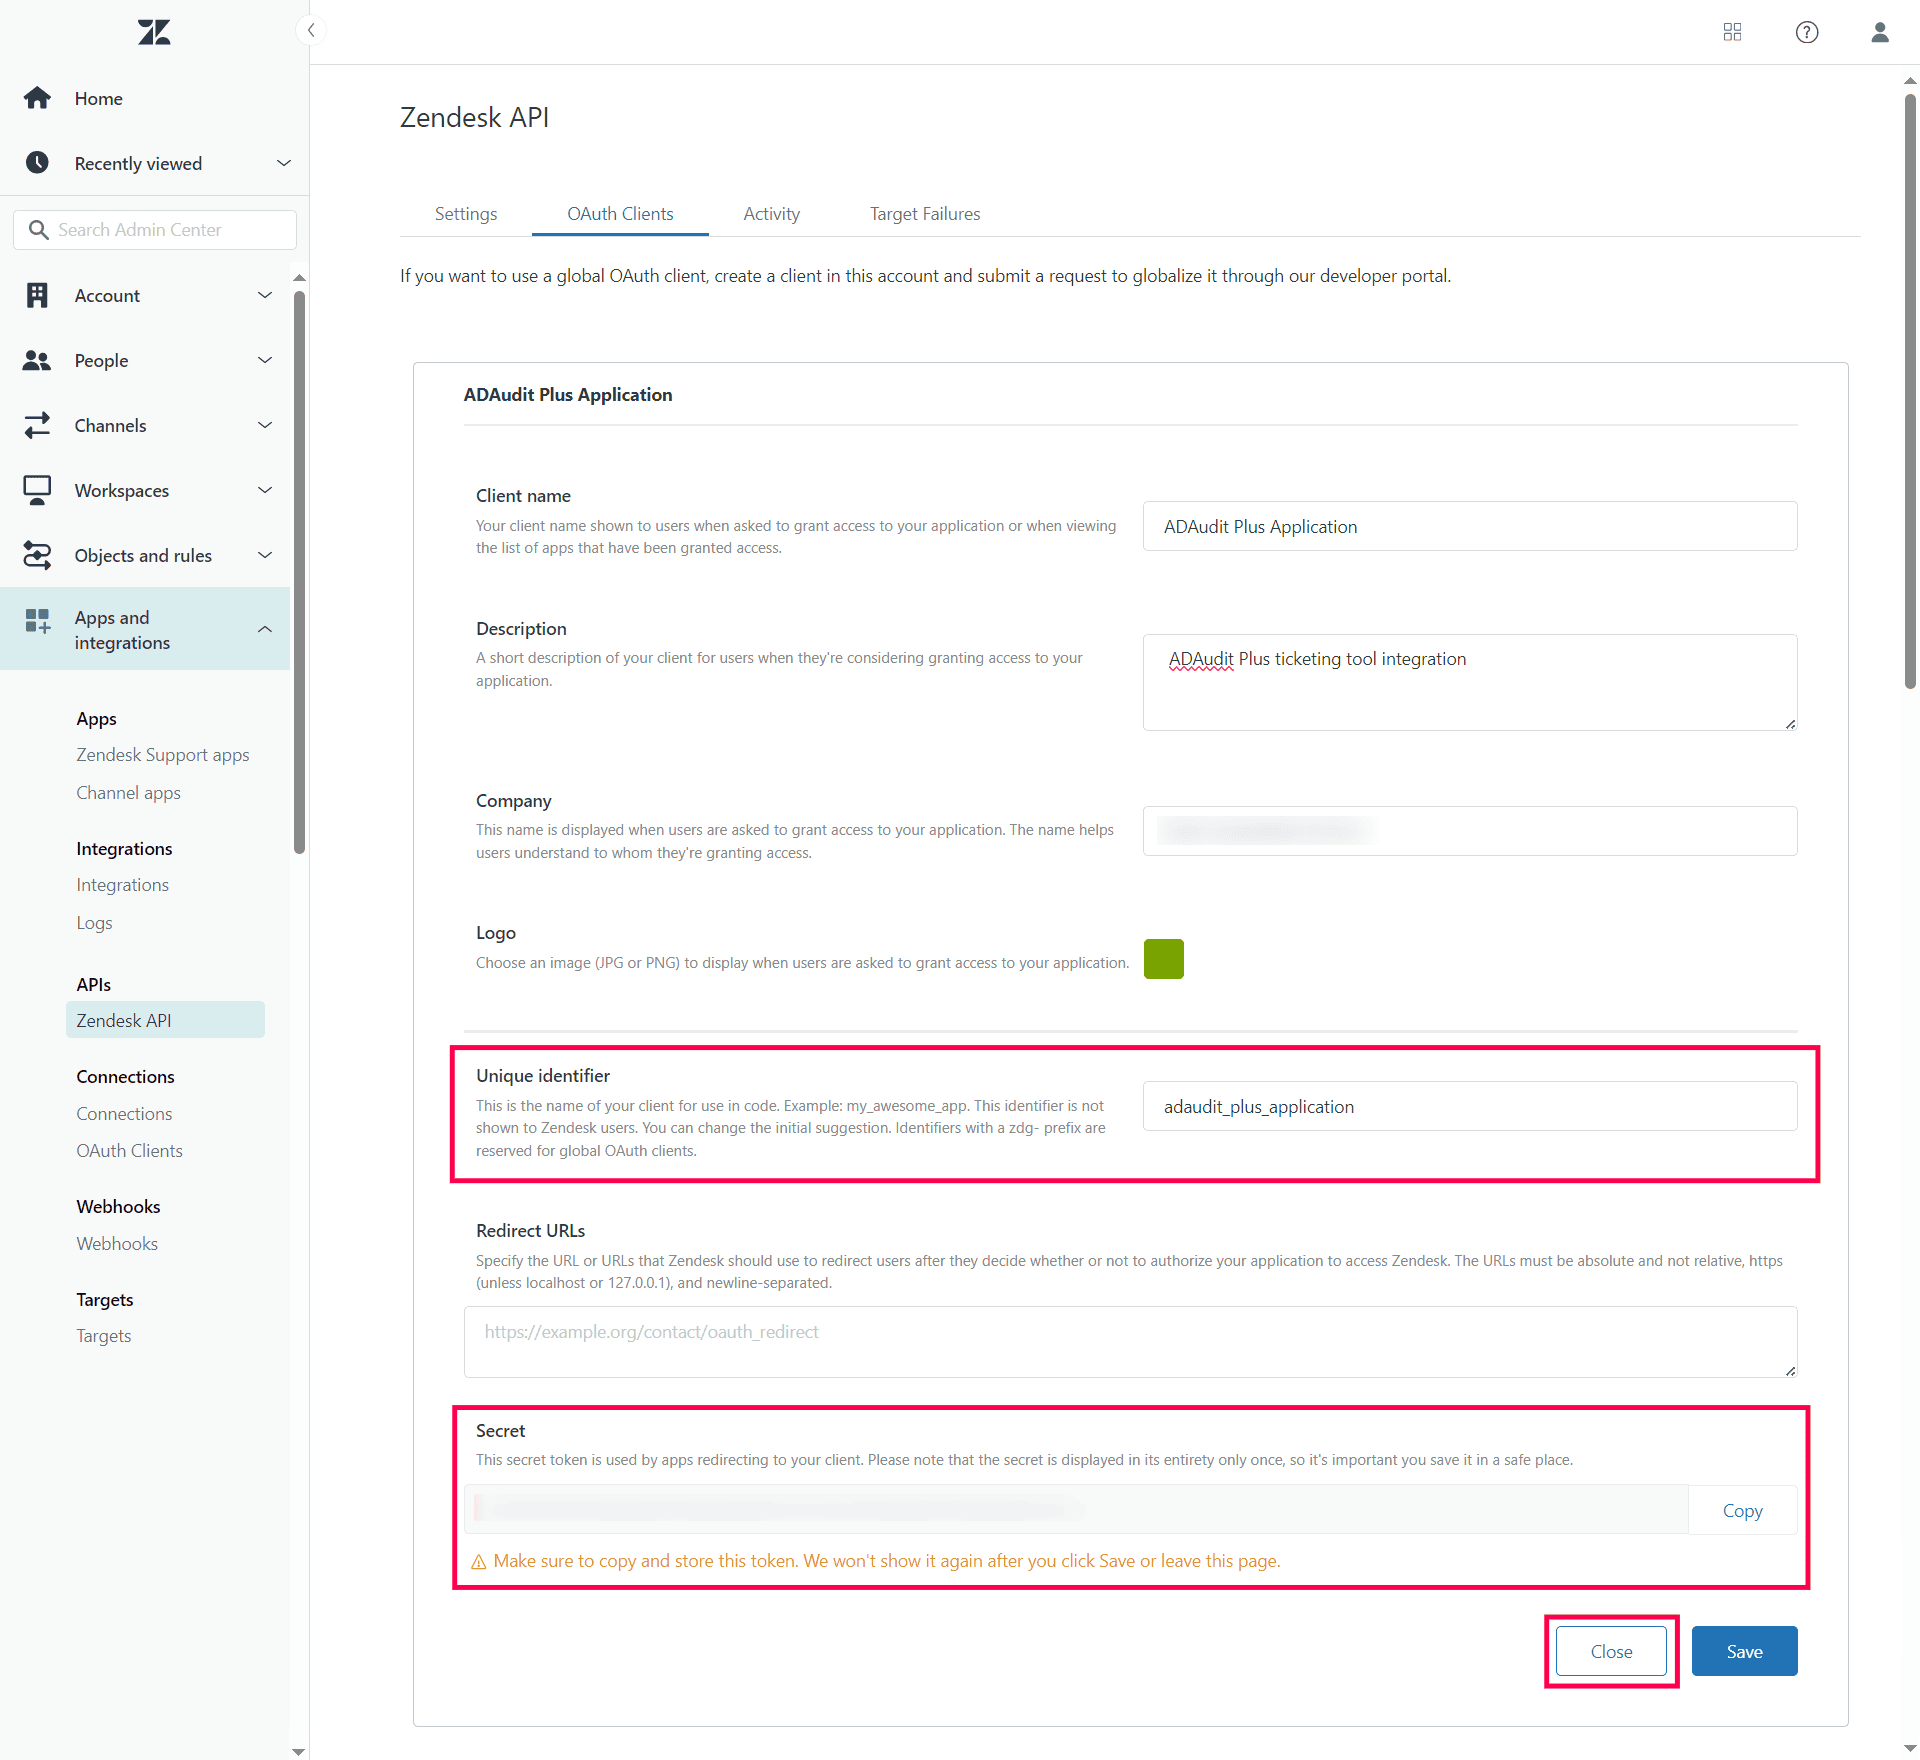
- Enter a suitable Client name, Description, and Company name and select a Logo.
- Copy the value that appears next to the Unique identifier field and paste it in a secure document. as this will be needed when configuring Zendesk in ADAudit Plus.
- Click Save.
- Copy the Secret code that is generated and paste it in a secure document, as this will also be needed when configuring Zendesk in ADAudit Plus. Once you click Save and close this window, the full token will never be displayed again.

- Click Save and proceed with the steps under Configure Zendesk integration in ADAudit Plus.
Configure Zendesk with basic API authentication
- Log in to your Zendesk console, click the gear icon (Admin) on the sidebar, and then click Go to Admin Center.
- In the Admin Center, click the Apps and Integrations drop-down on the sidebar, and select Zendesk API under APIs.
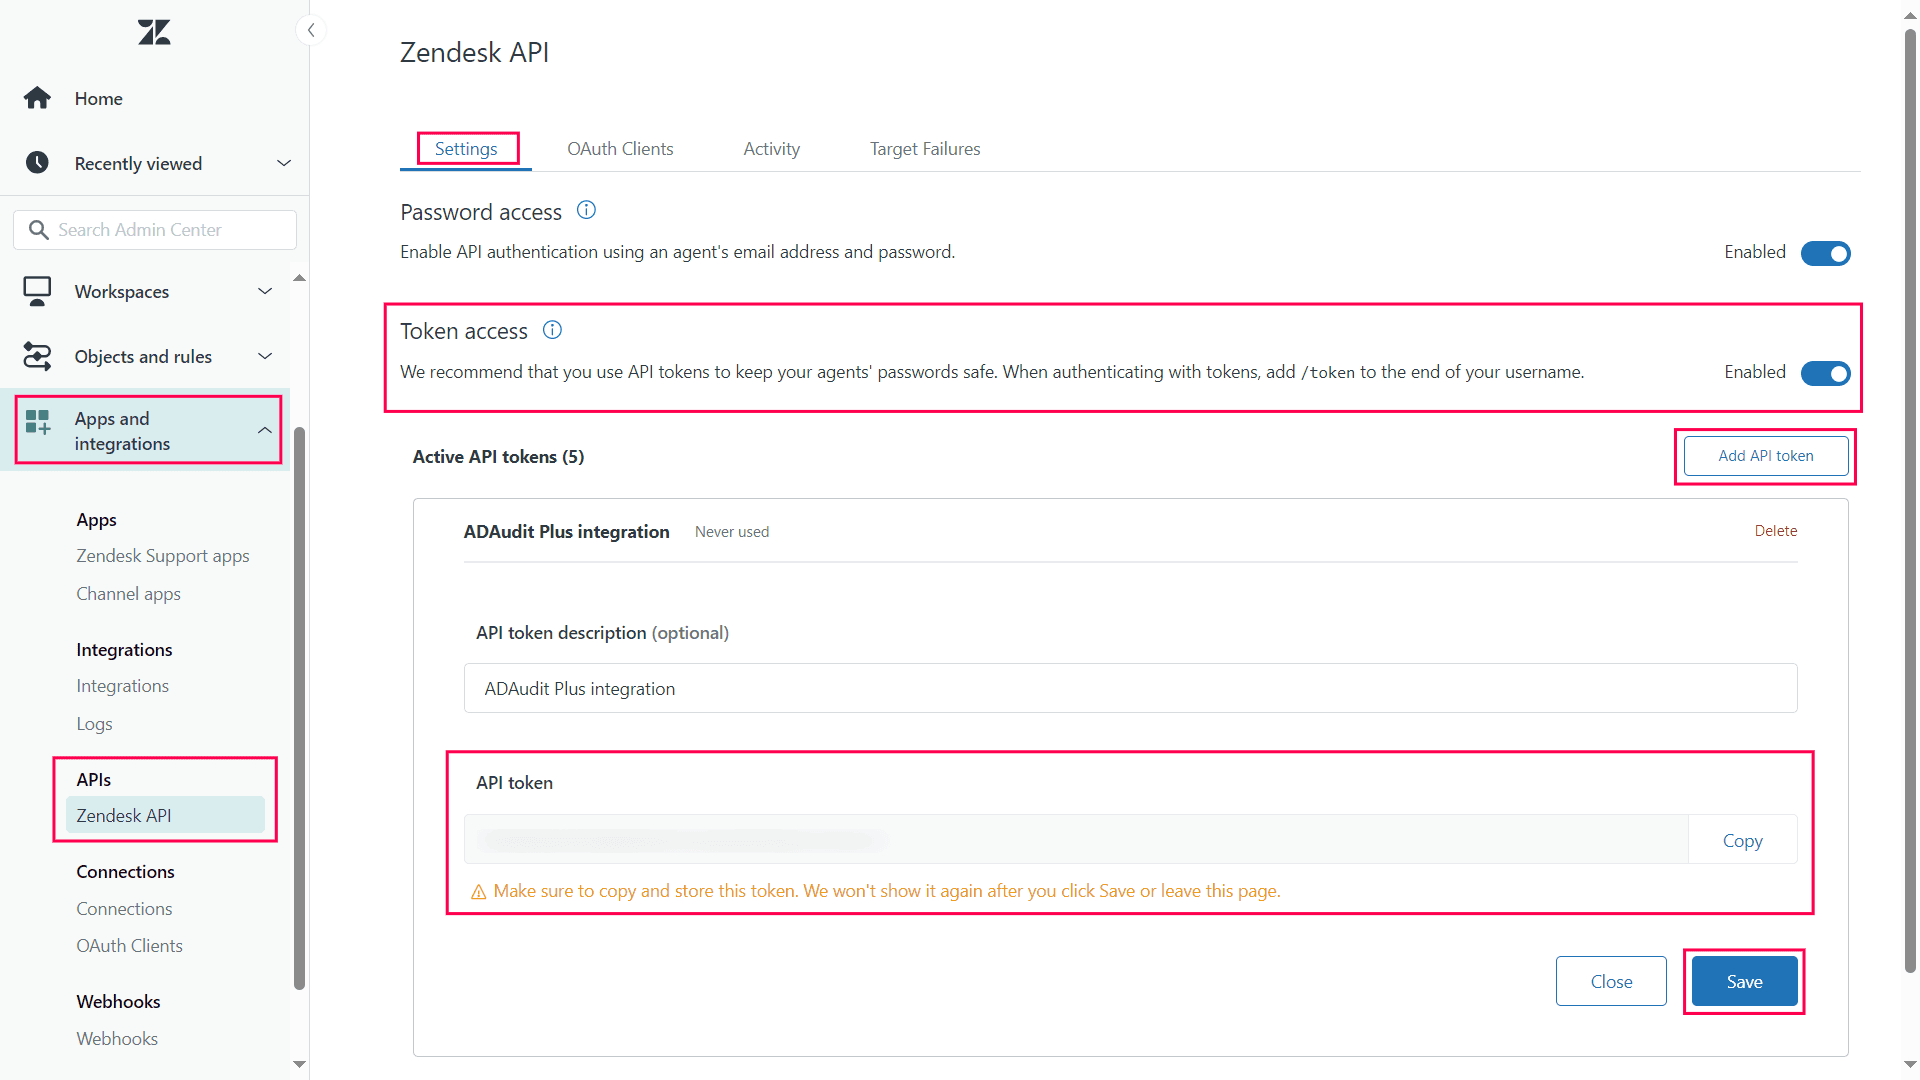
- In the Settings tab, ensure Token access is enabled.
- Click Add API token, copy the token that is generated, and paste it in a secure document. Once you click Save and close this window, the full token will never be displayed again.

- Click Save and proceed with the steps under Configure Zendesk in ADAudit Plus.
Configure Zendesk in ADAudit Plus
To configure Zendesk in ADAudit Plus:
- og in to your ADAudit Plus web console.
- Navigate to the Admin tab > Configuration > Ticketing System Integration.
- From the Ticketing Tool drop-down, select Zendesk.
- Enter the Zendesk subdomain name in the given field. For example, if your domain name is abc-123.zendesk.com, then the subdomain name would be abc-123.
- Next to Authentication Type,select either OAuth or Basic API and follow the steps corresponding to your selection.
- For OAuth:
- Enter the Login Name and Password of a valid Zendesk account in the ticketing tool.
- Enter the Unique identifier that you copied earlier from the Zendesk console.
- Enter the Secret code that you copied earlier from the Zendesk console.
- For Basic API:
- Provide the Email ID.
- Enter the API token that you copied earlier from the Zendesk console.
- Click Test and Save to establish communication and complete the configuration.
Don't see what you're looking for?
-
Visit our community
Post your questions in the forum.
-
Request additional resources
Send us your requirements.
-
Need implementation assistance?
Try OnboardPro

 Click here to expand


