Establishing a secure connection between ADAudit Plus and Microsoft SQL
ADAudit Plus supports storing and retrieving Windows servers' audit log data from Microsoft SQL databases. Administrators can secure the connection between their Microsoft SQL database and ADAudit Plus with an SSL certificate by following these three steps.
- Create or import an SSL certificate into Microsoft SQL Server.
- Associate the certificate with Microsoft SQL Server.
- Export the certificate and associate it with ADAudit Plus.
Note: If you've already associated a valid third-party SSL certificate with your Microsoft SQL Server, you can skip steps 1 and 2. It is recommended to have a third-party certificate.
Create or import an SSL certificate into Microsoft SQL Server
You can either create a self-signed certificate or import a third-party certificate using Internet Information Services (IIS) Manager.
Creating a self-signed certificate
- Open IIS Manager.
- Click the name of the server in the Connections column in the left pane. In the middle row of icons, double-click Server Certificates.
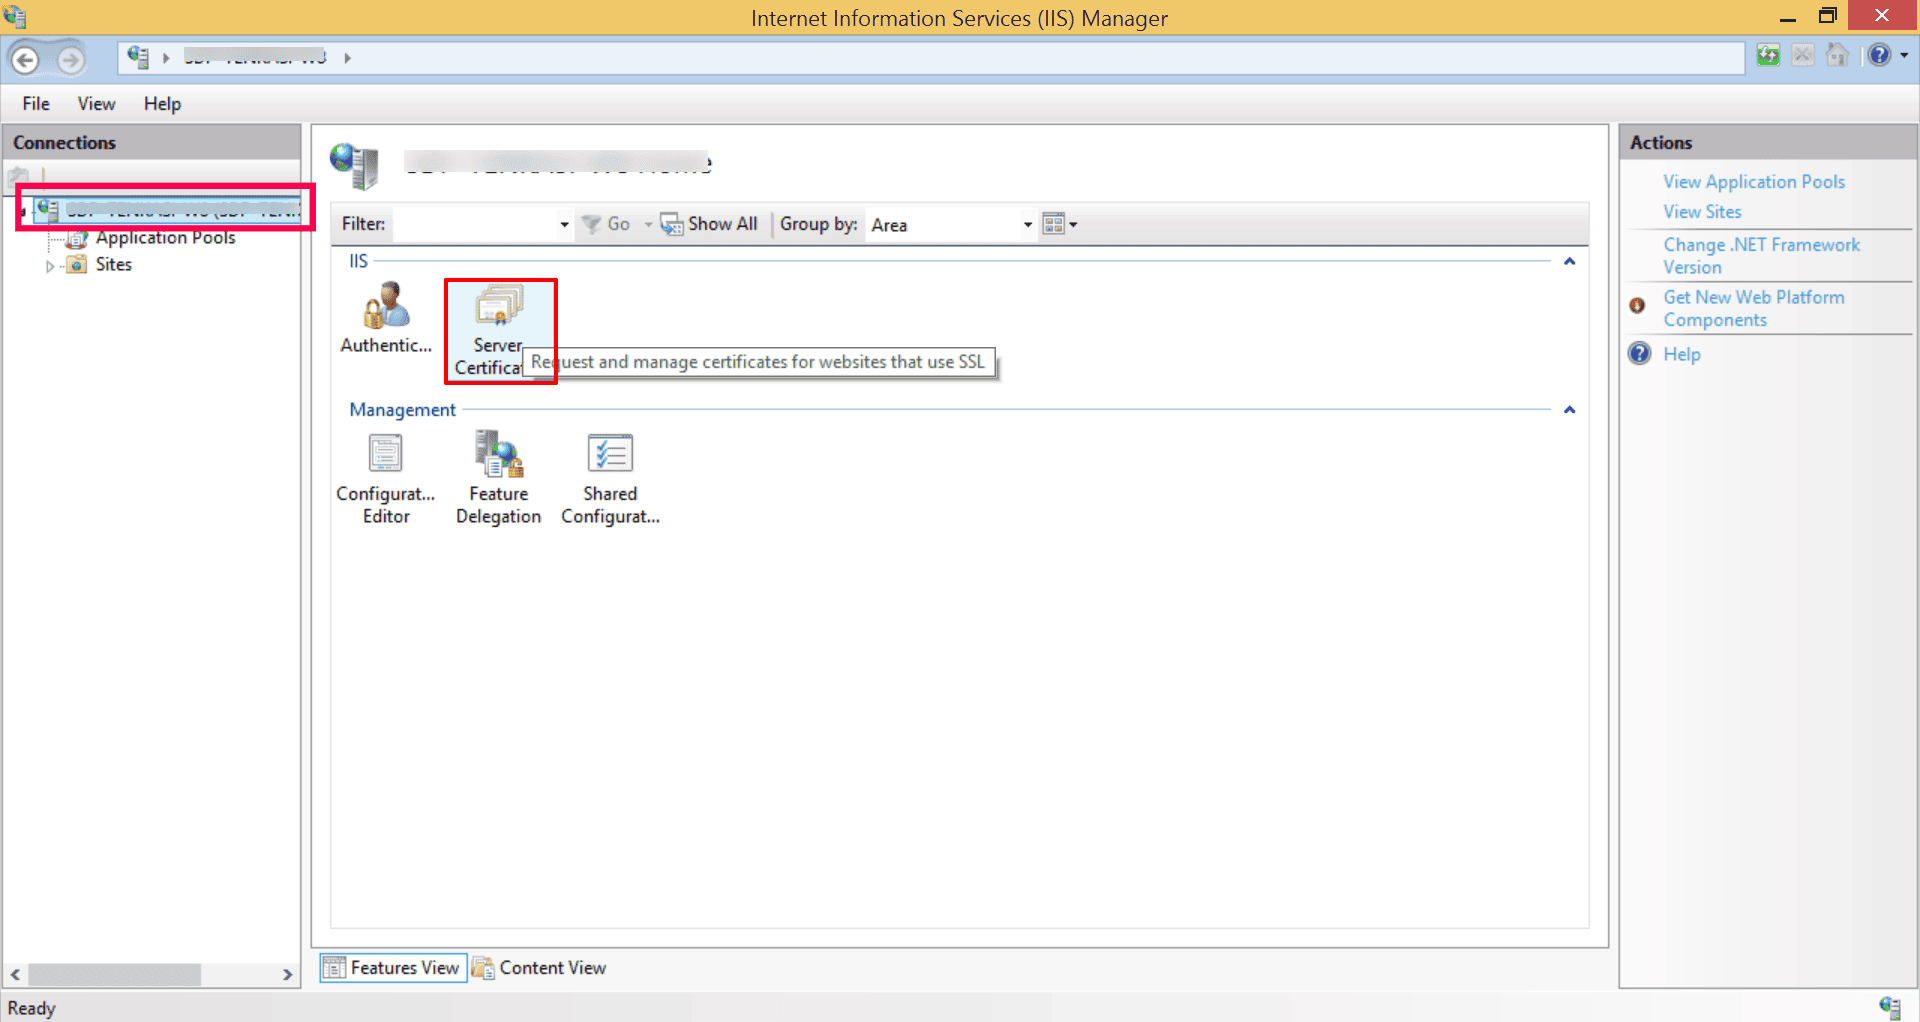
- Click Create Self-Signed Certificate in the Actions column on the right pane.
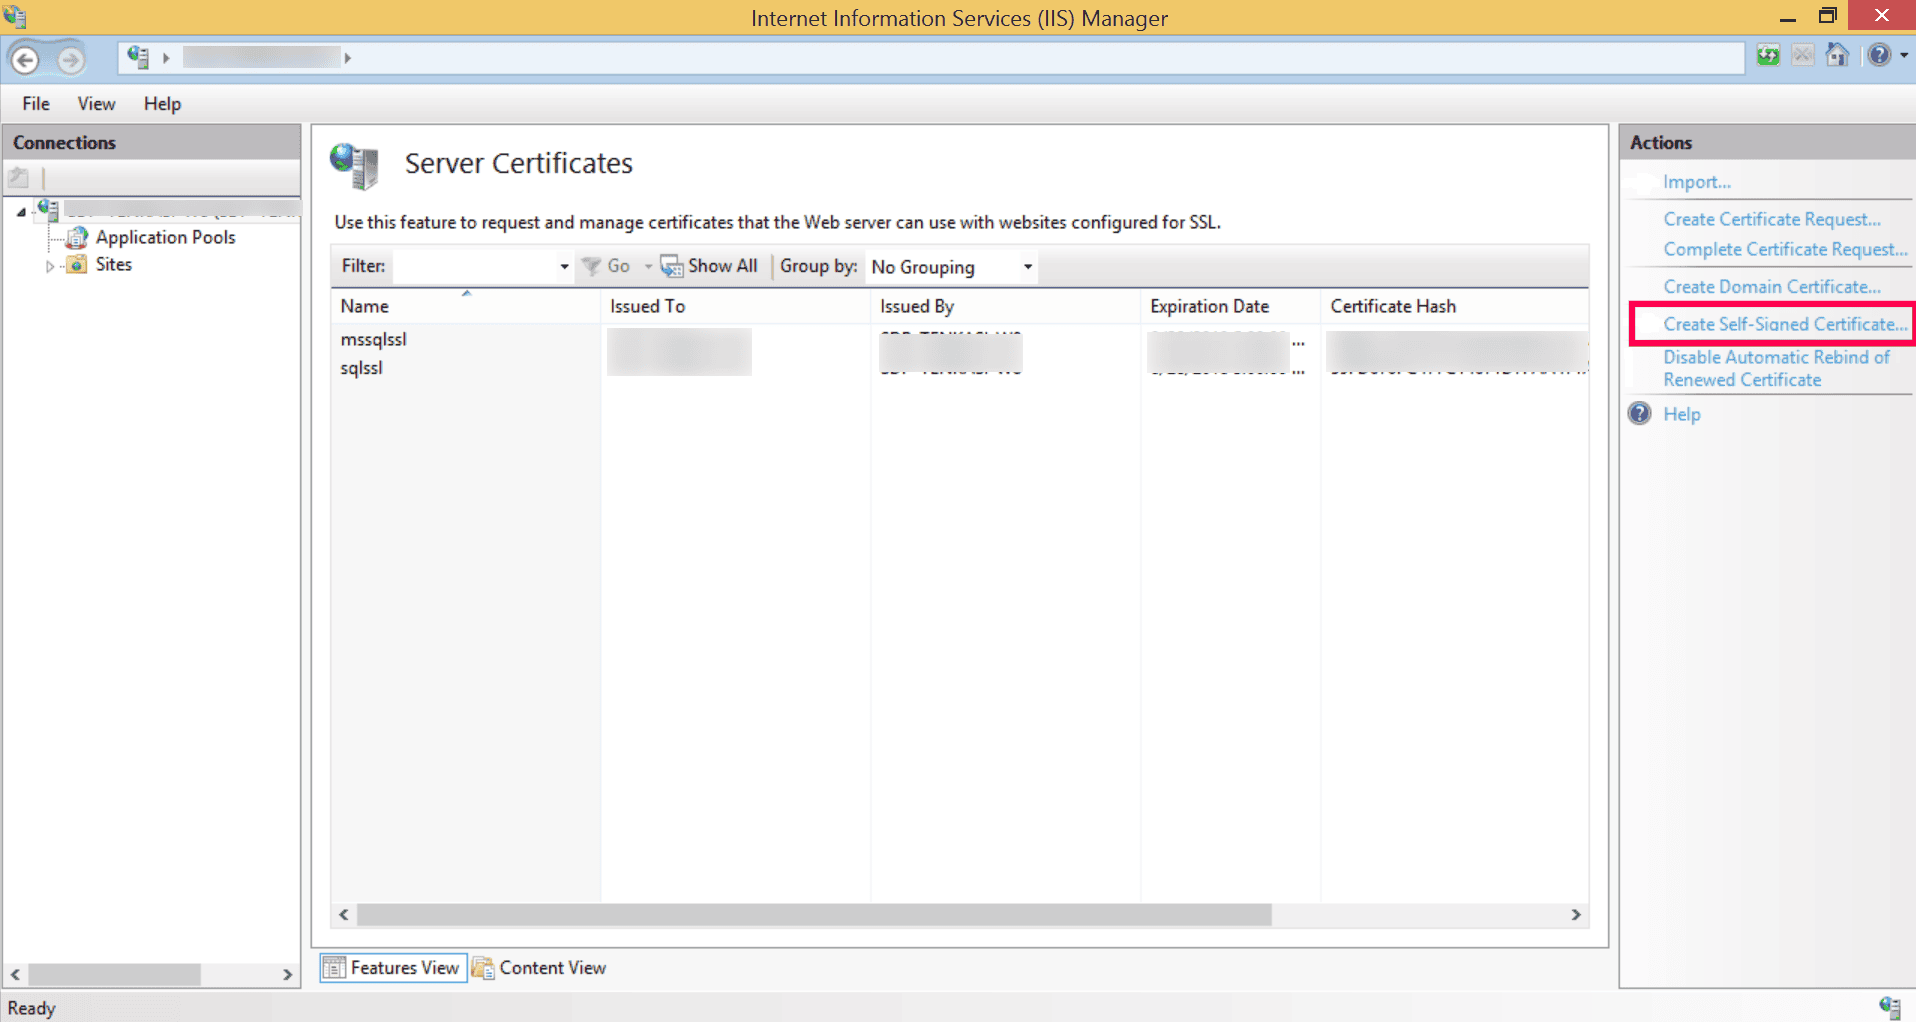
- Enter a name, and click OK to proceed.
- Click OK.
You should now see the SSL certificate, which is valid for one year.
Importing a third-party certificate
- Open IIS Manager.
- Click the name of the server in the Connections column in the left pane. In the middle row of icons, double-click Server Certificates.
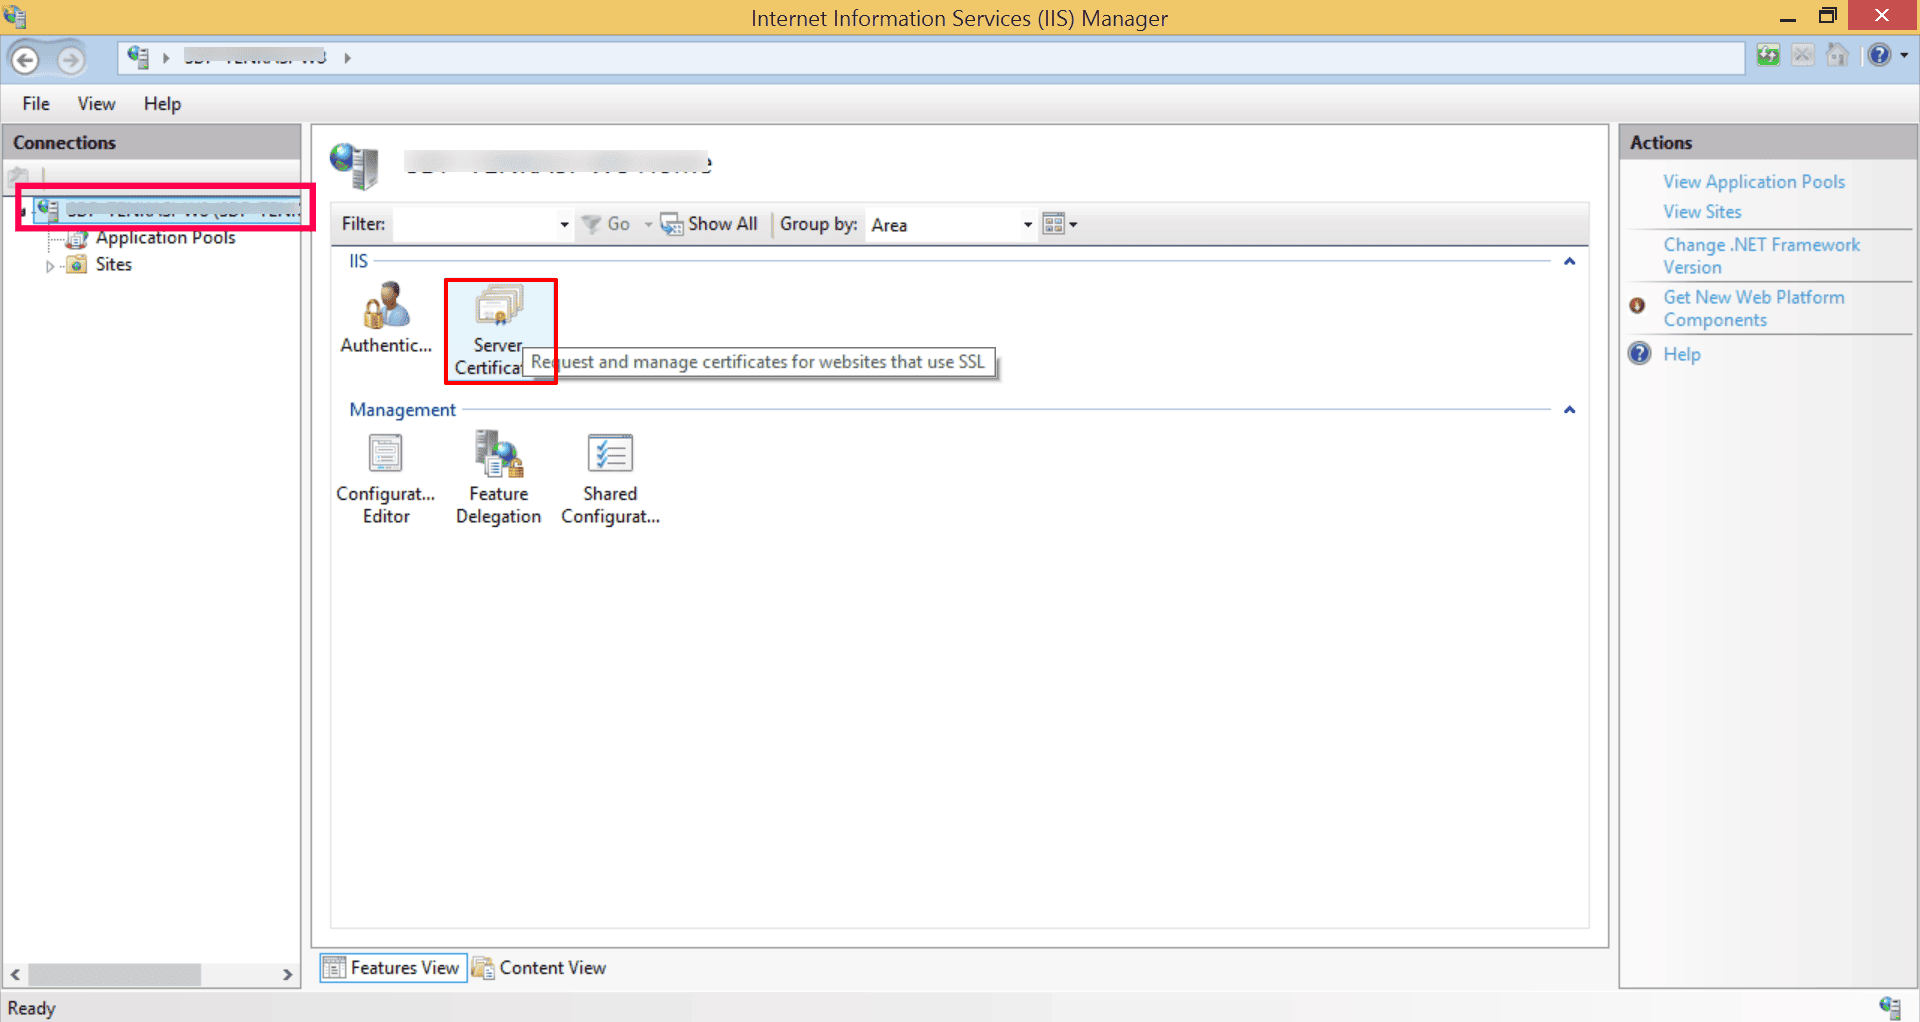
- Click Import in the Actions pane.
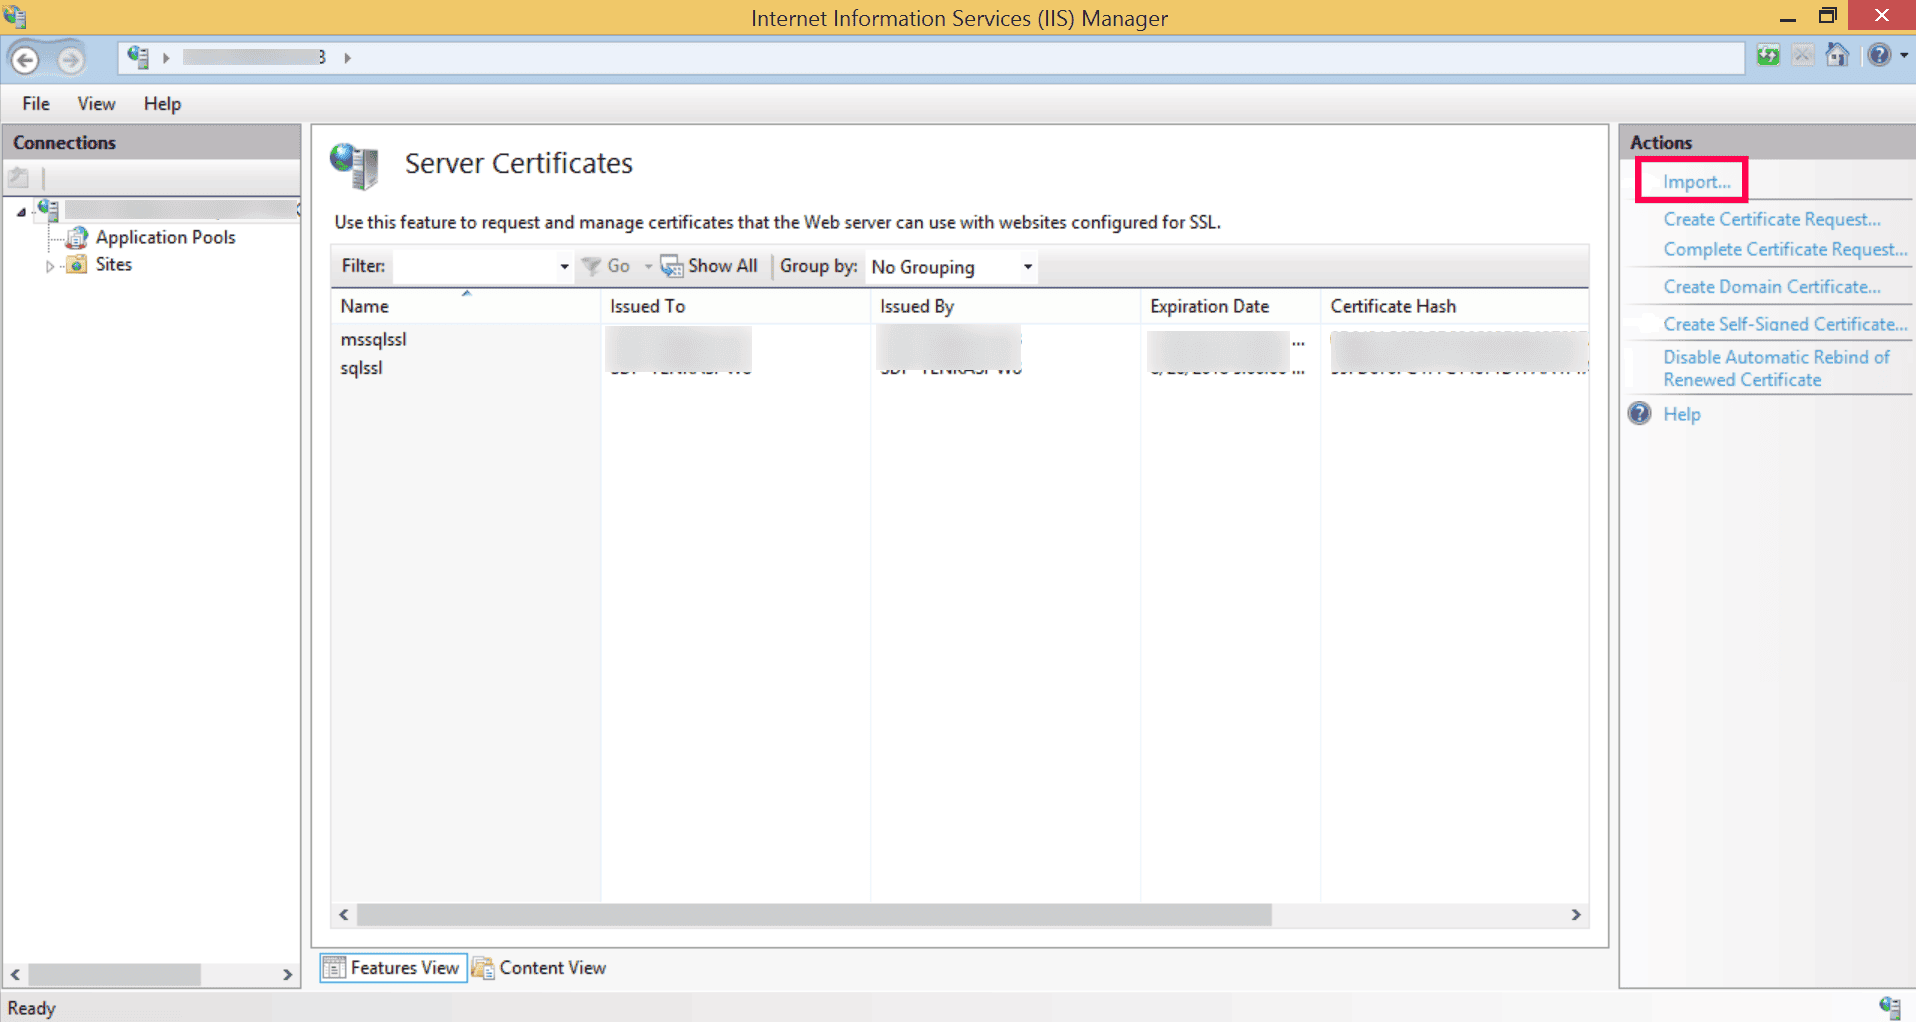
- Browse and select the certificate file. Make sure the certificate is in PFX format.
- Enter the password that you used while generating the certificate file.
- Click OK.
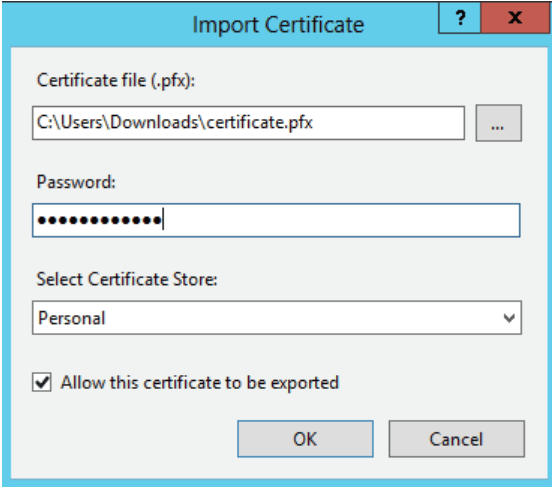
Note: You can also use the Microsoft Management Console (MMC) snap-in to create a self-signed certificate or import a third-party certificate.
Associate the certificate with Microsoft SQL Server
- Open SQL Server Configuration Manager.
- Expand SQL Server Network Configuration and right-click Protocols for the Microsoft SQL Server instance to which you want to associate the certificate. Then click Properties.
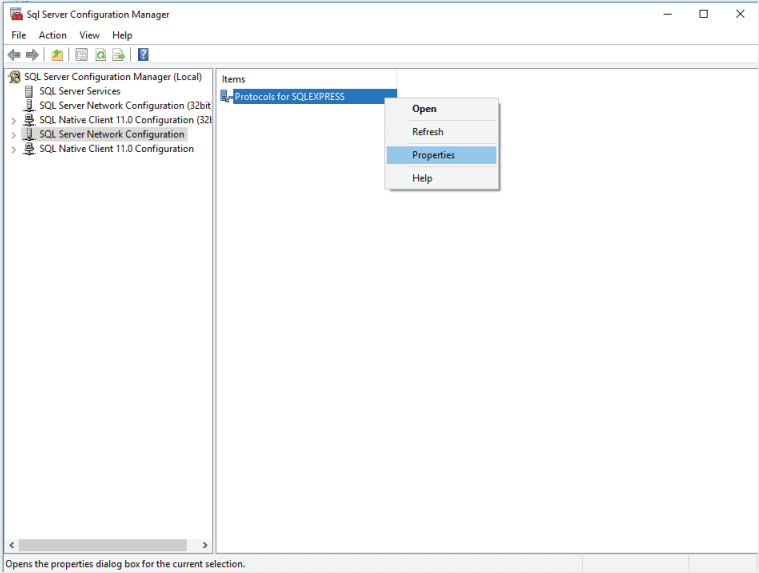
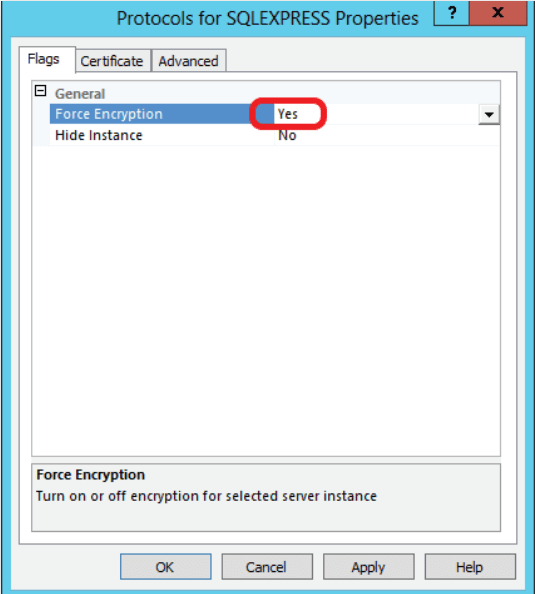
- On the Flags tab, select Yes in the Force Encryption box.
- On the Certificate tab, select the certificate you want to use from the drop-down.
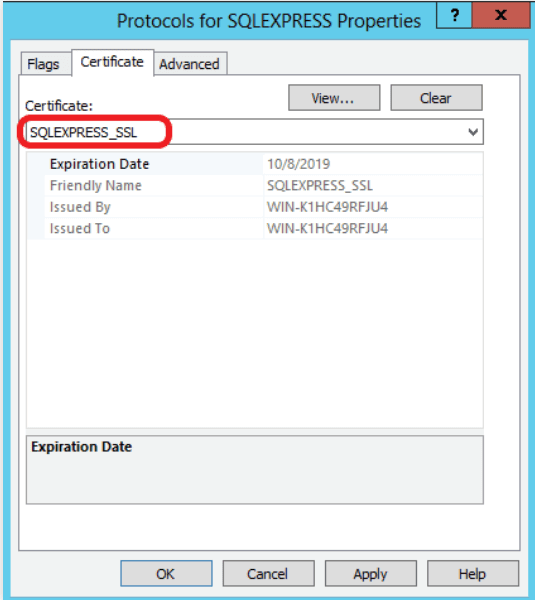
- Click OK.
- Restart the SQL Server.
Export the certificate and associate it with ADAudit Plus
Export the certificate using IIS manager
- Open IIS Manager.
- Click the name of the server in the Connections column in the left pane. In the middle row of icons, double-click Server Certificates.
- Open the certificate you want to use.
- Click the Details tab.
- Click Copy to file.
- In the Certificate Export Wizard that opens, click Next.
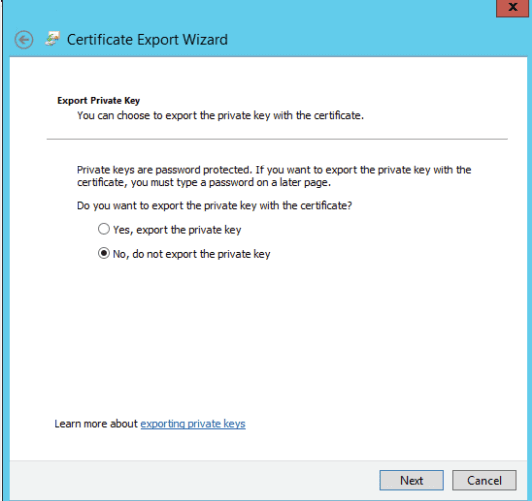
- In the Export Private Key screen, select No, do not export the private key, and click Next.
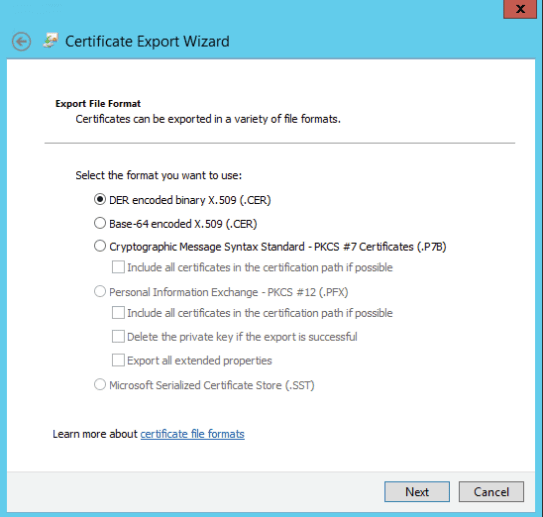
- In the Export File Format screen, select either DER encoded binary X.509 (.CER) or Base-64 encoded X.509 (.CER), and click Next.
- Enter a name for the file, and click Next.
- Click Finish.
Note: You can also use Microsoft Management Console (MMC) snap-in to export the certificate.
Associate the certificate with ADAudit Plus
- Copy the exported CER file to the <AdAudit Plus Installation directory>\bin folder.
- Open Command Prompt in that folder and run the following command:
ImportCert.bat -add "<certificate-name>" "<path-to-certificate>"
For example: ImportCert.bat -add "Template SSL CA" "C:\Template SSL CA.cer"
- Restart ADAudit Plus.
Don't see what you're looking for?
-
Visit our community
Post your questions in the forum.
-
Request additional resources
Send us your requirements.
-
Need implementation assistance?
Try OnboardPro

 Click here to expand


