OAuth authentication
OAuth is a secure authentication method that uses an authentication token instead of a password to connect your application to your user account. Using OAuth, resource owners can configure permissions separately for each client requesting access to the same resource and can also modify/revoke the access at any point of time.
To configure OpManager with an OAuth provider, you need to create or register an application with the respective provider. Moreover, for adding and updating actions authentication by the OAuth provider is required.
Follow the below steps to configure OAuth with Microsoft
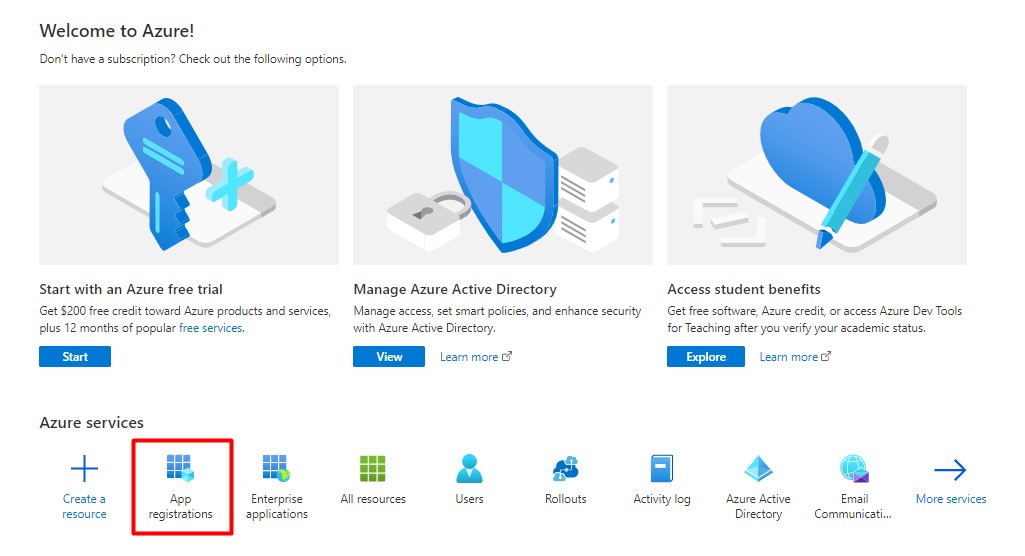
- Go to Microsoft Azure home page.
- In Azure services, go to App registrations,
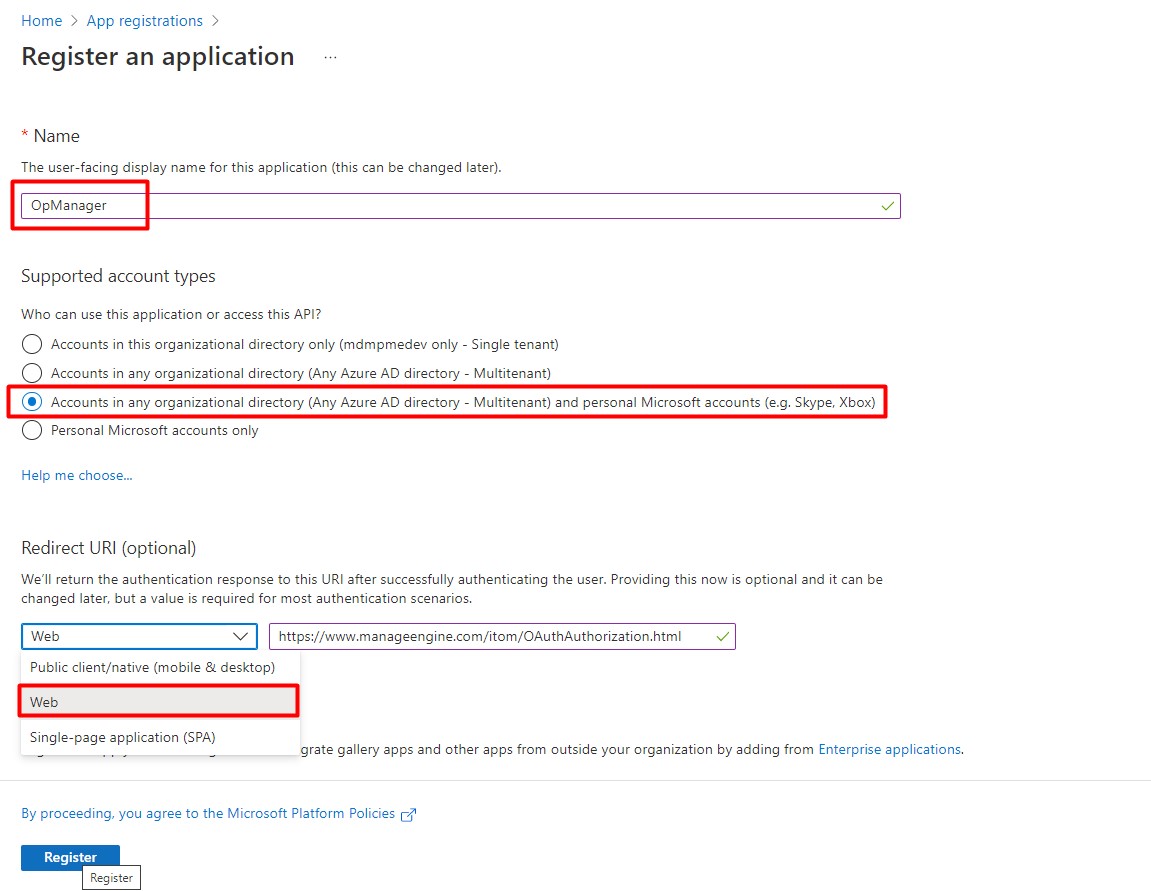
- Click New registration,
- Follow the below steps to register an application
- Enter the name of the application(OpManager).
- Choose the account type. The Accounts could be in any organizational directory (Azure AD directory or Multi-tenant) or personal Microsoft accounts (e.g. Skype, Xbox). You may choose to opt different account type based on your requirement
- For Redirect URL, choose type as Web and use <https://www.manageengine.com/itom/OAuthAuthorization.html> as redirecting URI. You can copy the Redirect URL from OpManager console -> OAuth Provider Settings page as well.
- Then click Register, to create an application.
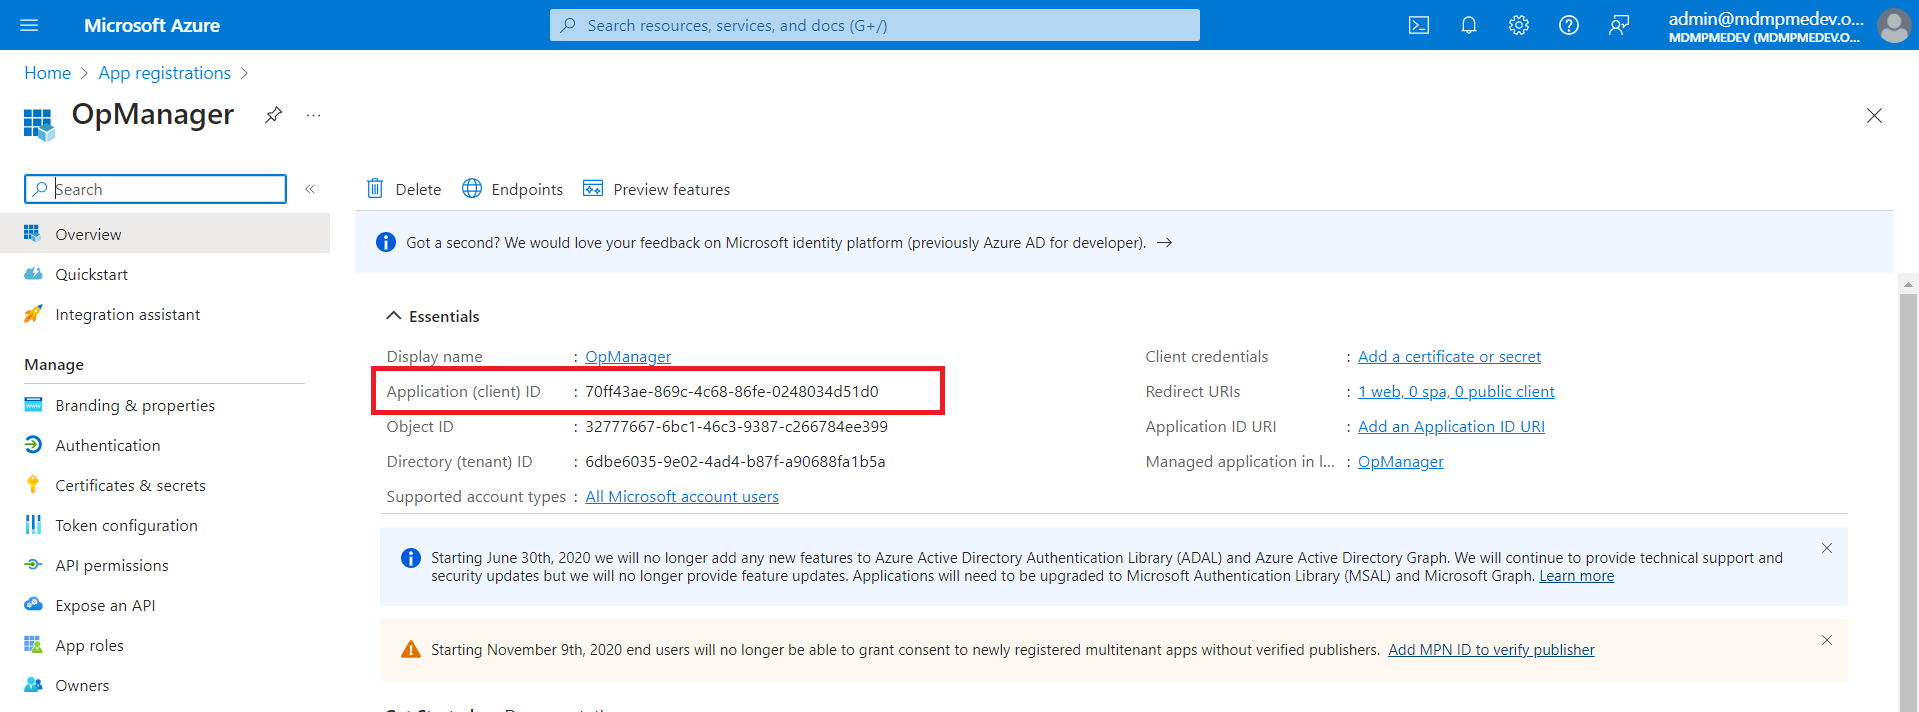
- After registering the application, you will be redirected to the Application home page. Copy the Application ID, it will be the Client ID.
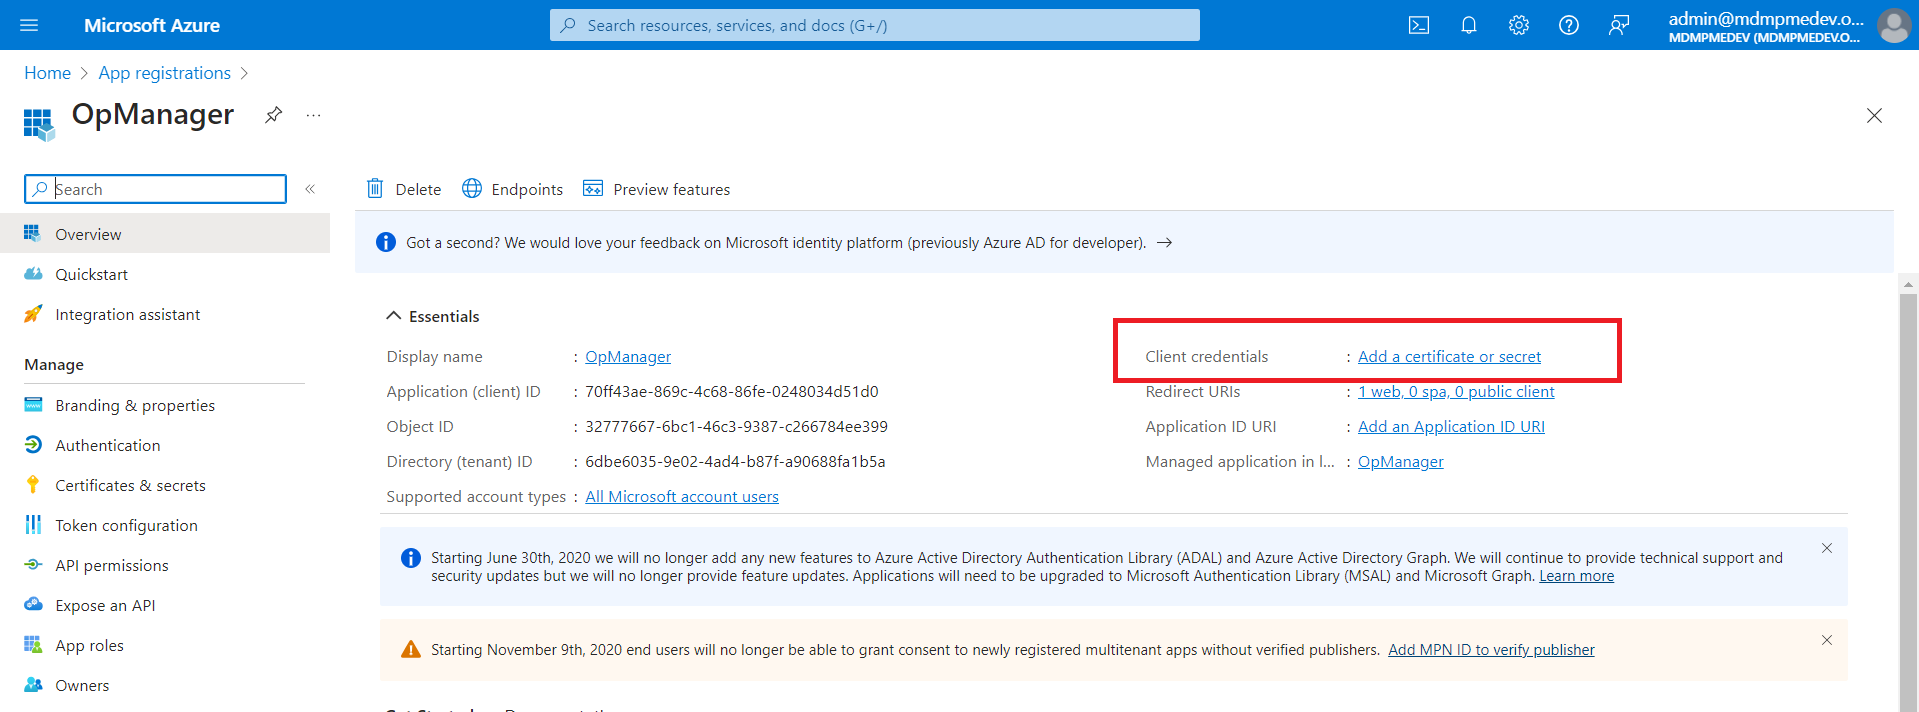
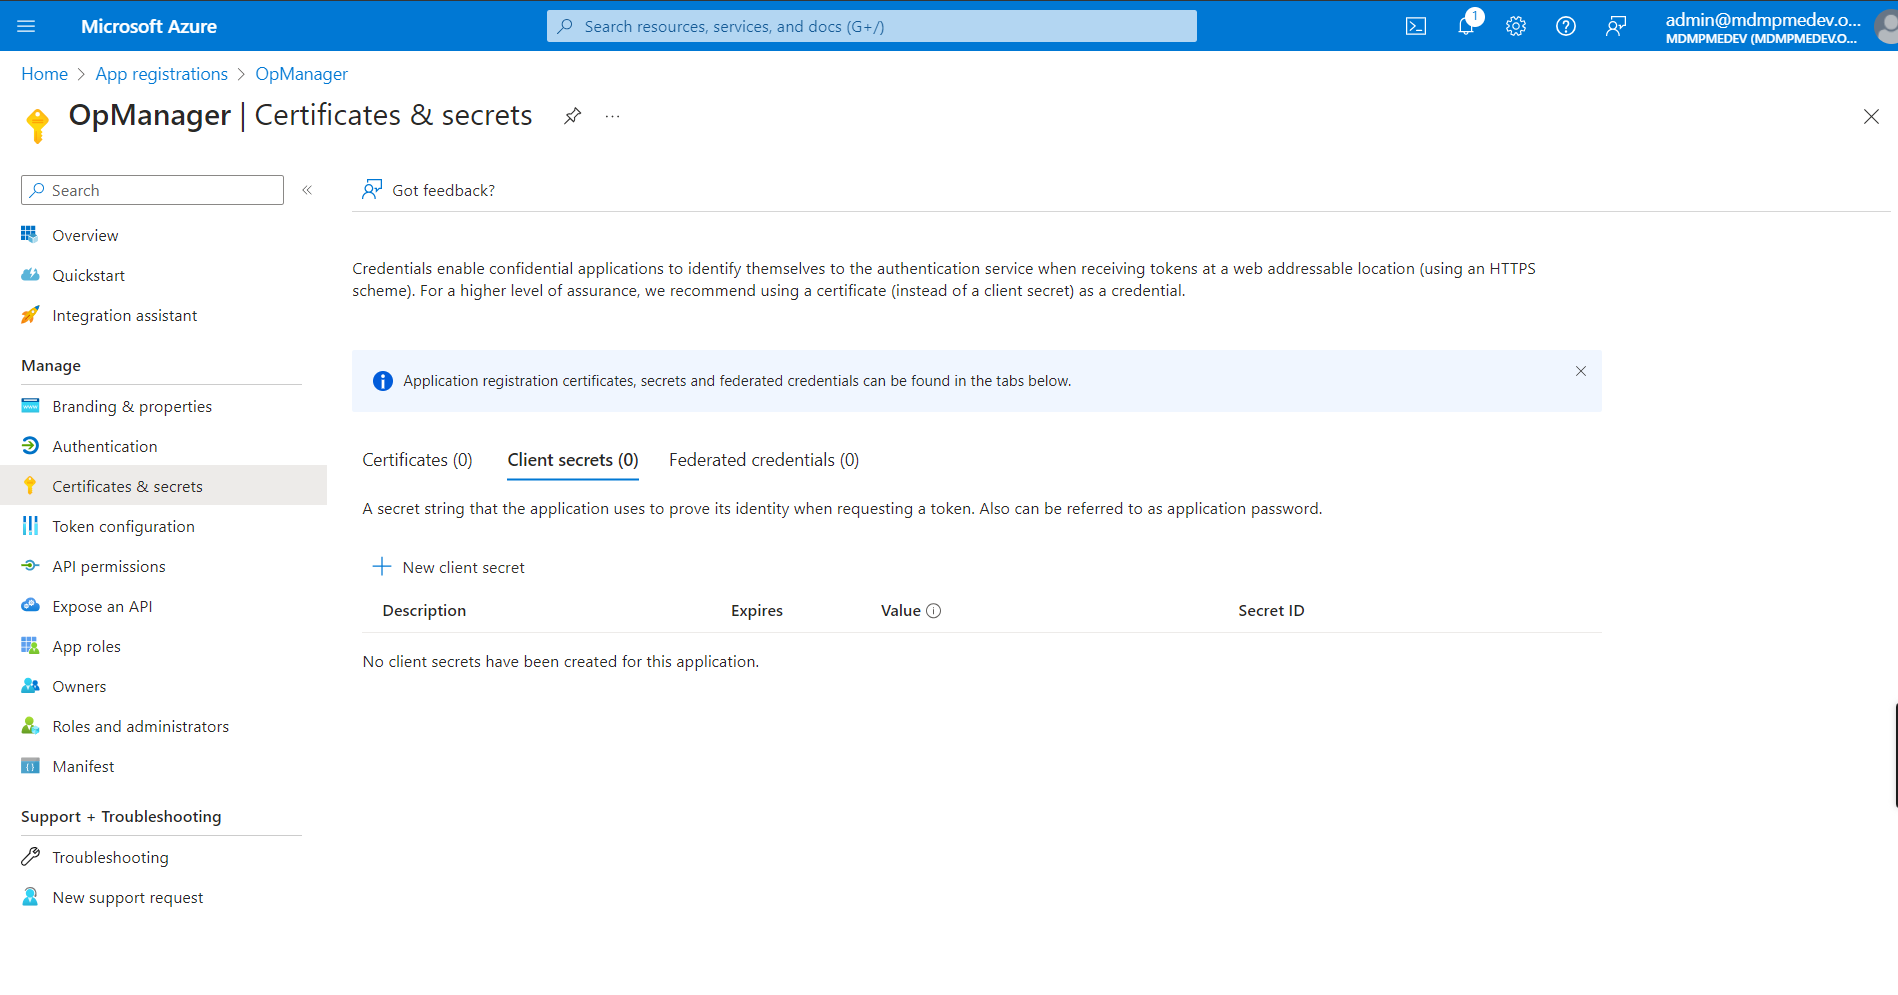
- Click "Add a certificate or secret" to get the Client Secret. Then follow the below steps,
- Click "New client secret".
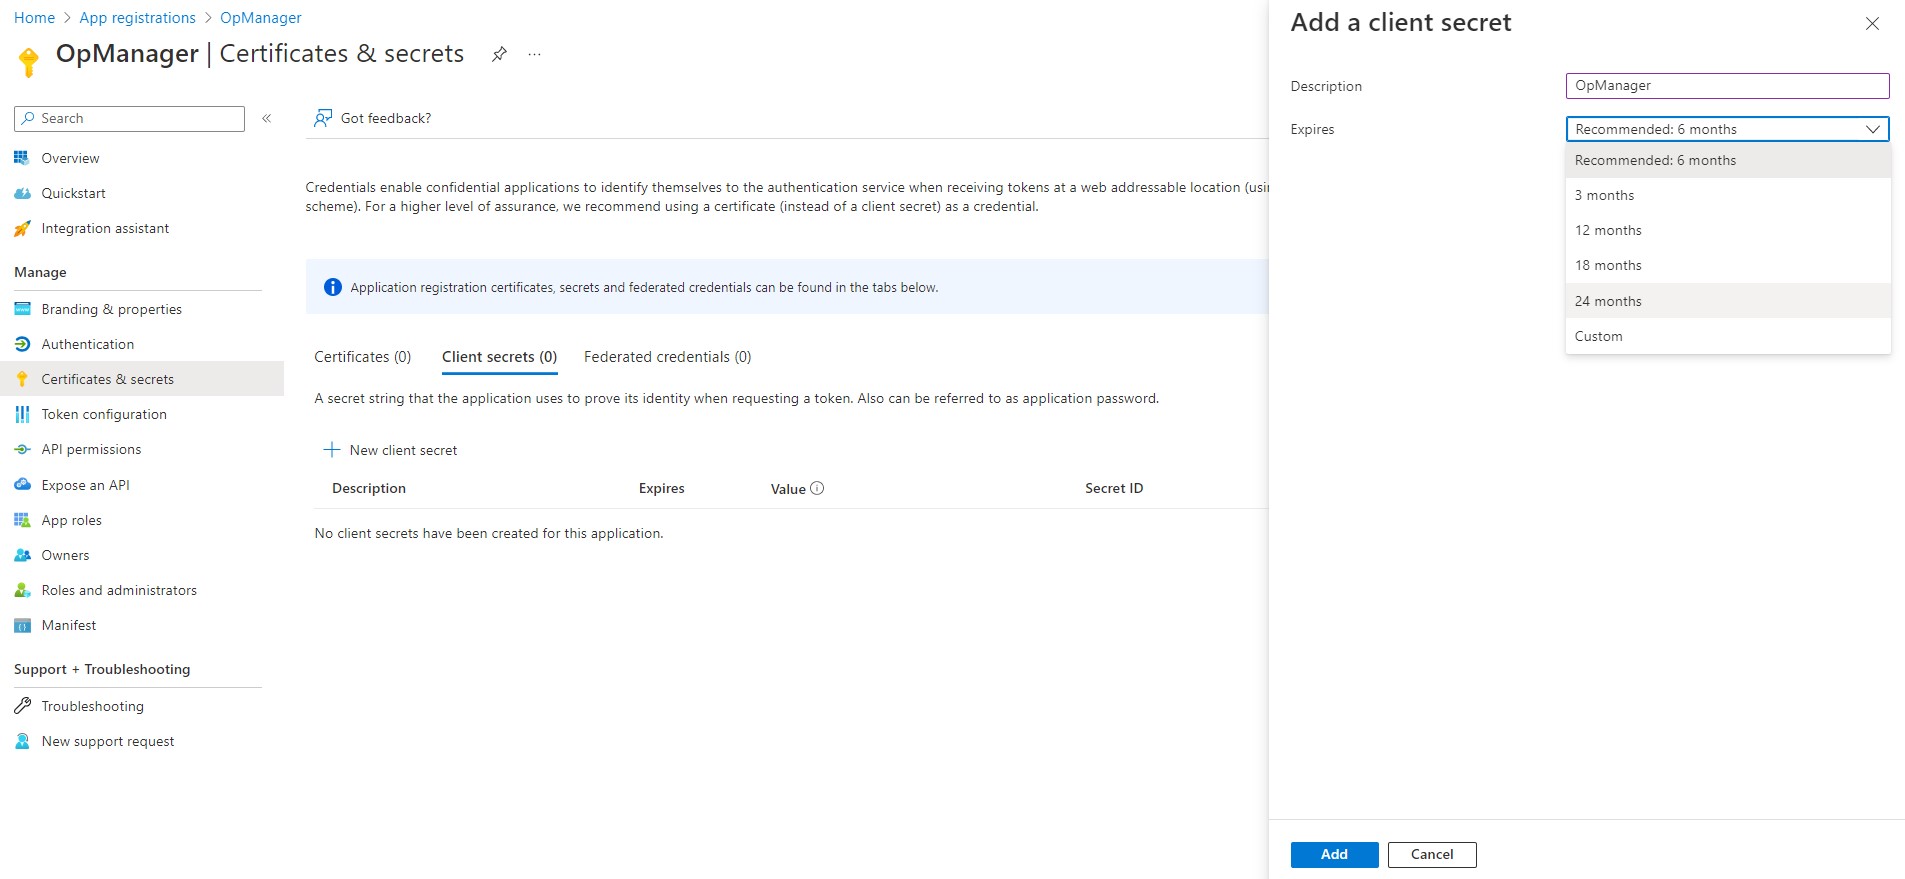
- Provide the Description & Expires time for the client secret, and click Add.
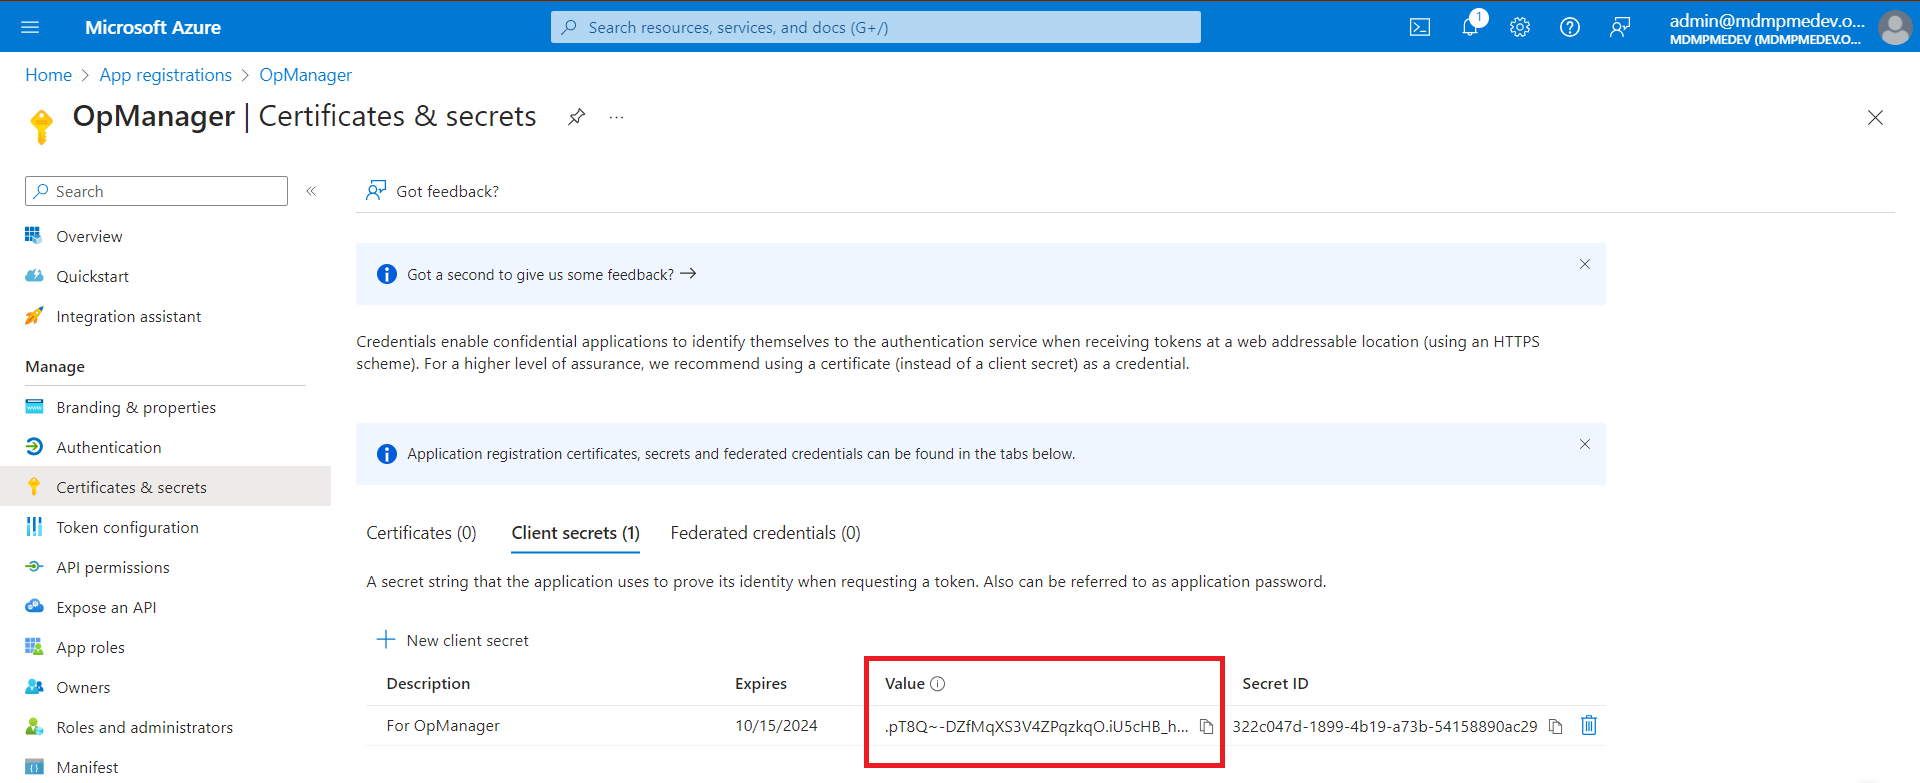
- Copy the Value, this will be the Client Secret. (Save this value for future use, as it will become unreadable after some time.)
- If the value goes unreadable, and you are in need of client secret, you can create a new client secret and use the value.
- This client secret will expire depending on the duration you provide. Once it has expired create a new client secret and use the value.
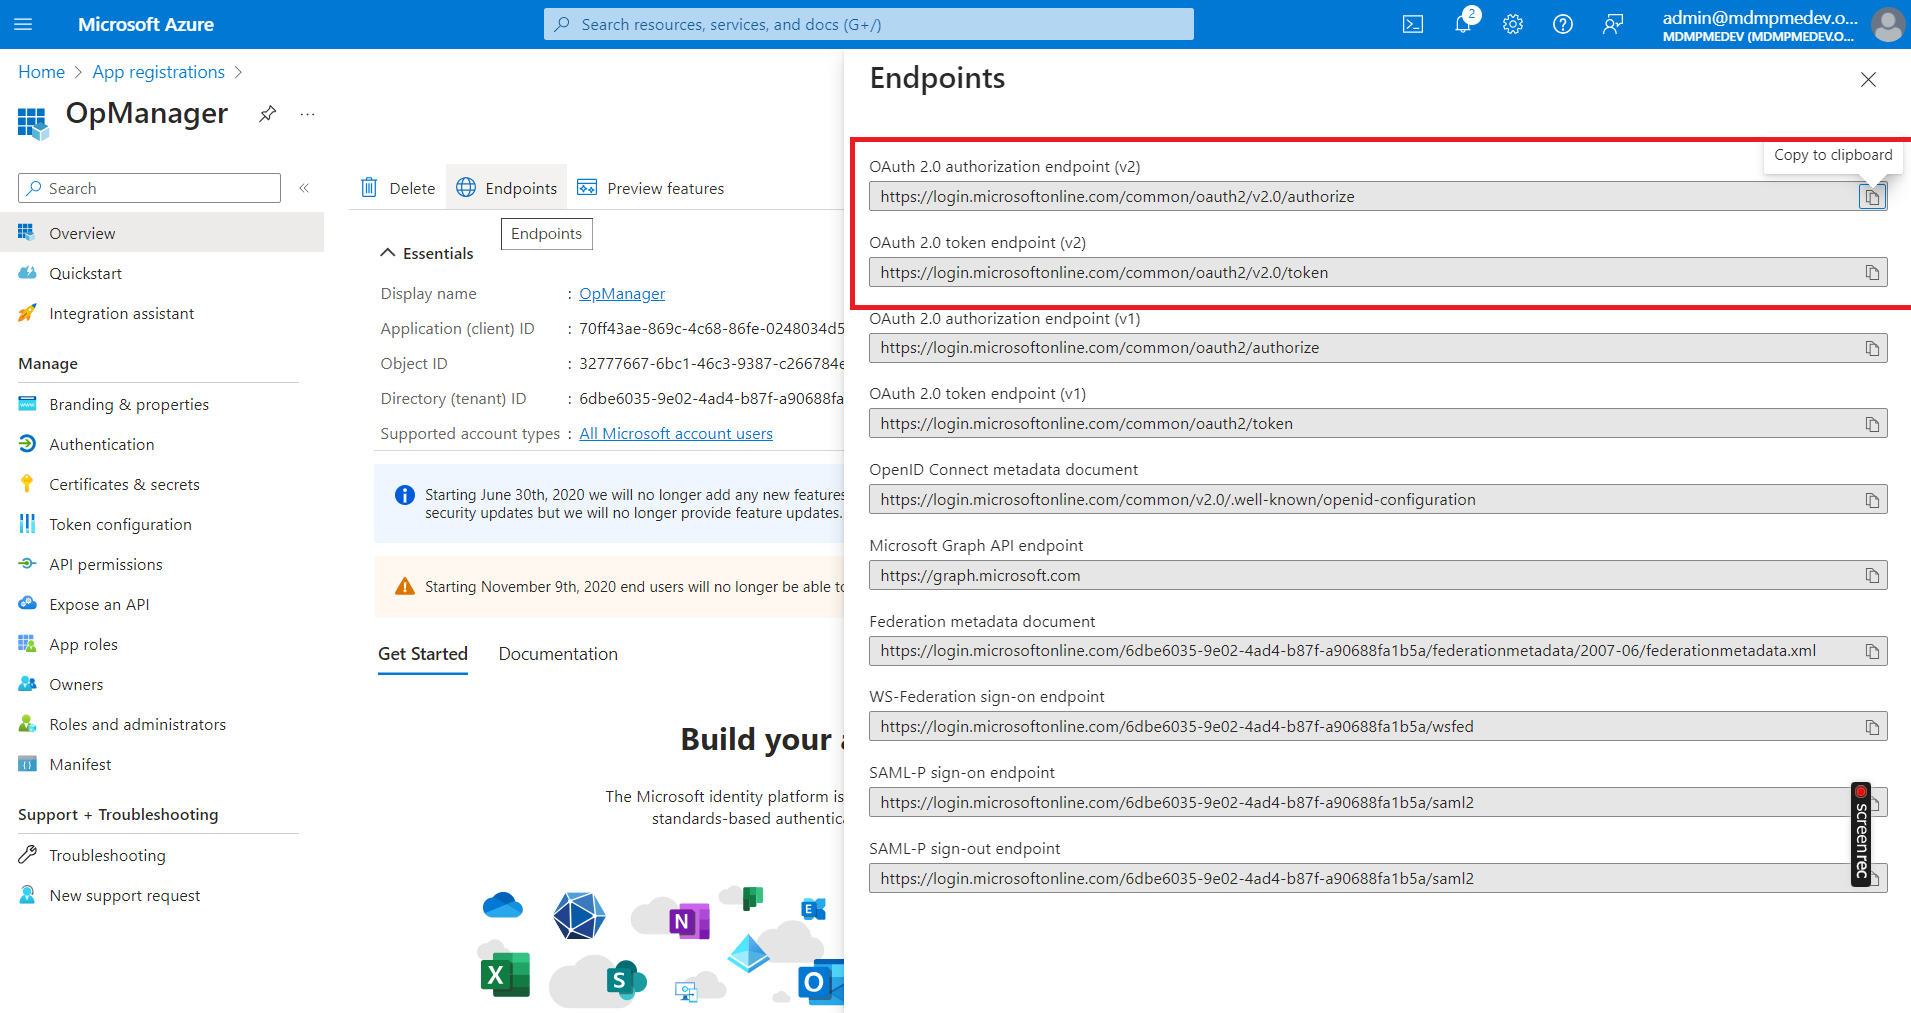
- For Authentication URL and Token URL, go to the Application home page (Overview) and click Endpoints, there copy "OAuth 2.0 authorization endpoint (v2)" as Authentication URL and "OAuth 2.0 token endpoint (v2)" as Token URL.
- Scope (SMTP.Send) is required for OpManager to access the Application to send email notifications. While configuring in OpManager console, Scope should be added as
https://outlook.office.com/SMTP.Send
Note:For offline access, this scope should be appended with 'offline_access'. The scope should be
"offline_access https://outlook.office.com/SMTP.Send.
This will be appended in OpManager by default and need not be added manually.
After configuring OAuth with Microsoft, open OpManager,
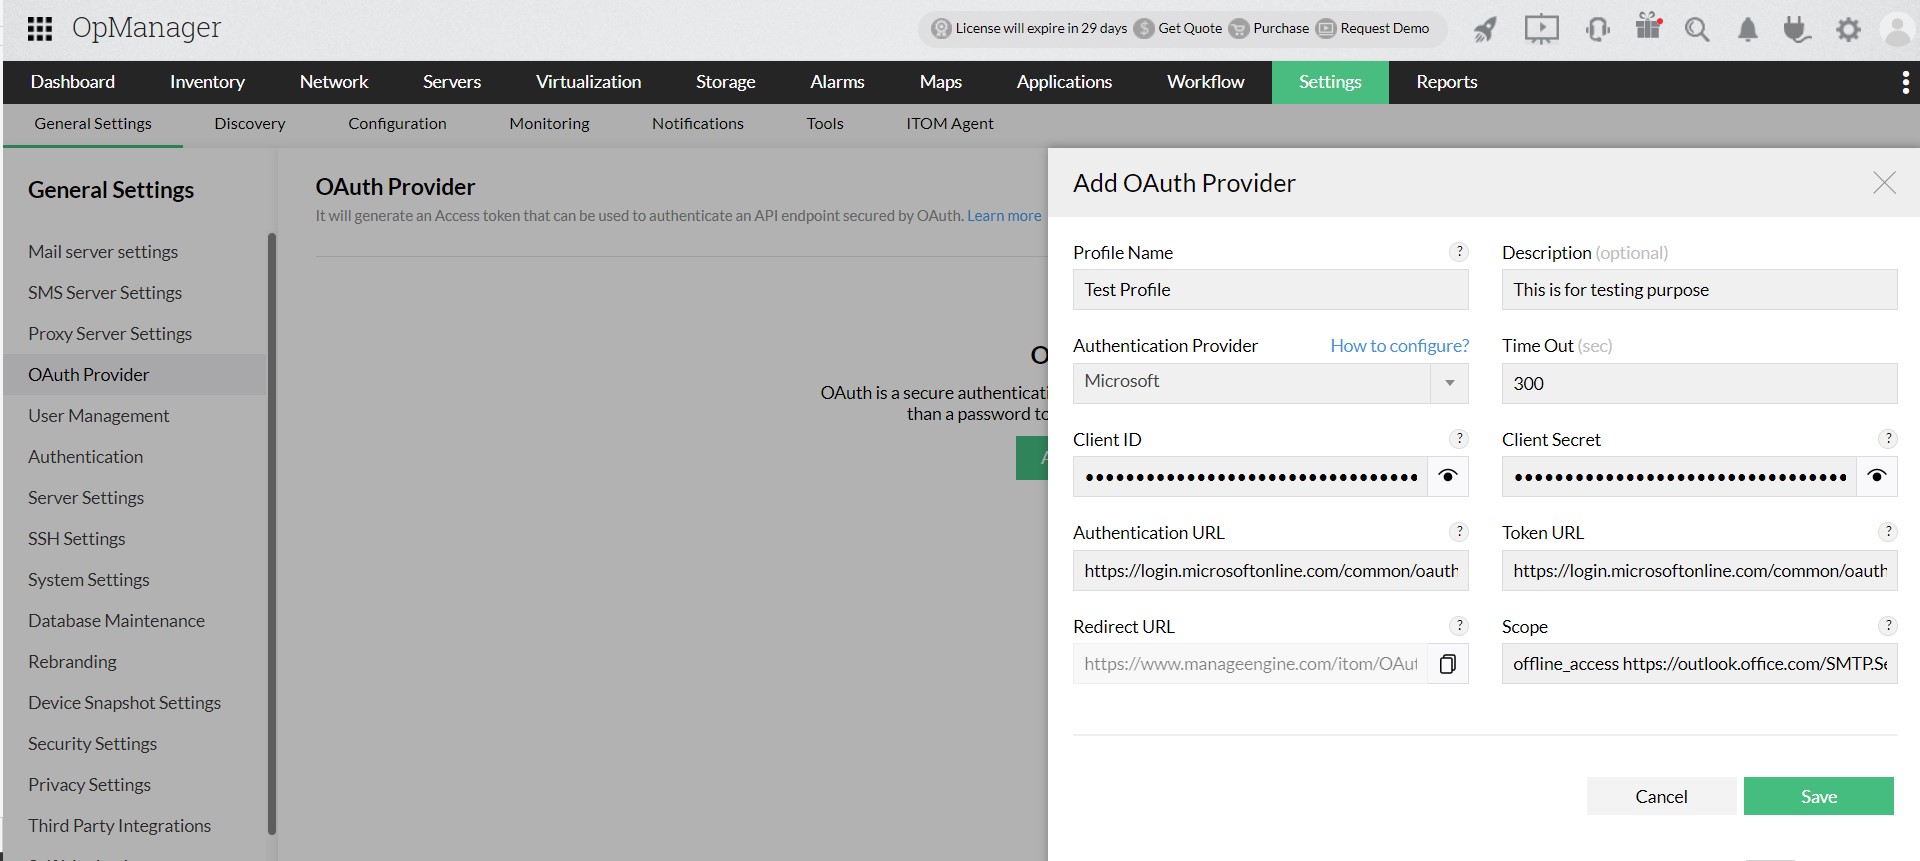
- Go to Settings > General Settings > OAuth Provider - Add OAuth Provider
- Provide the following details,
- Profile Name - A unique profile name for each profile.
- Description - Description about the OAuth profile.
- Authentication Provider - OAuth provider's name - Microsoft.
- Timeout - Time required to connect with the provider. Range: 10-300 sec.
- Client ID - Use the values copied from Step 5 of configuring OpManager with Microsoft.
- Client Secret - Use the values copied from Step 6 of configuring OpManager with Microsoft.
- Authentication URL - Use the values copied from Step 7 of configuring OpManager with Microsoft.
- Token URL - Use the values copied from Step 7 of configuring OpManager with Microsoft.
- Scope - Use the values copied from Step 8 of configuring OpManager with Microsoft.
- After providing the above details, save it. You will be redirected to Microsoft Sign in page. Provide Email and Password to Sign in. Then click 'Accept' to provide consent for accessing the application.
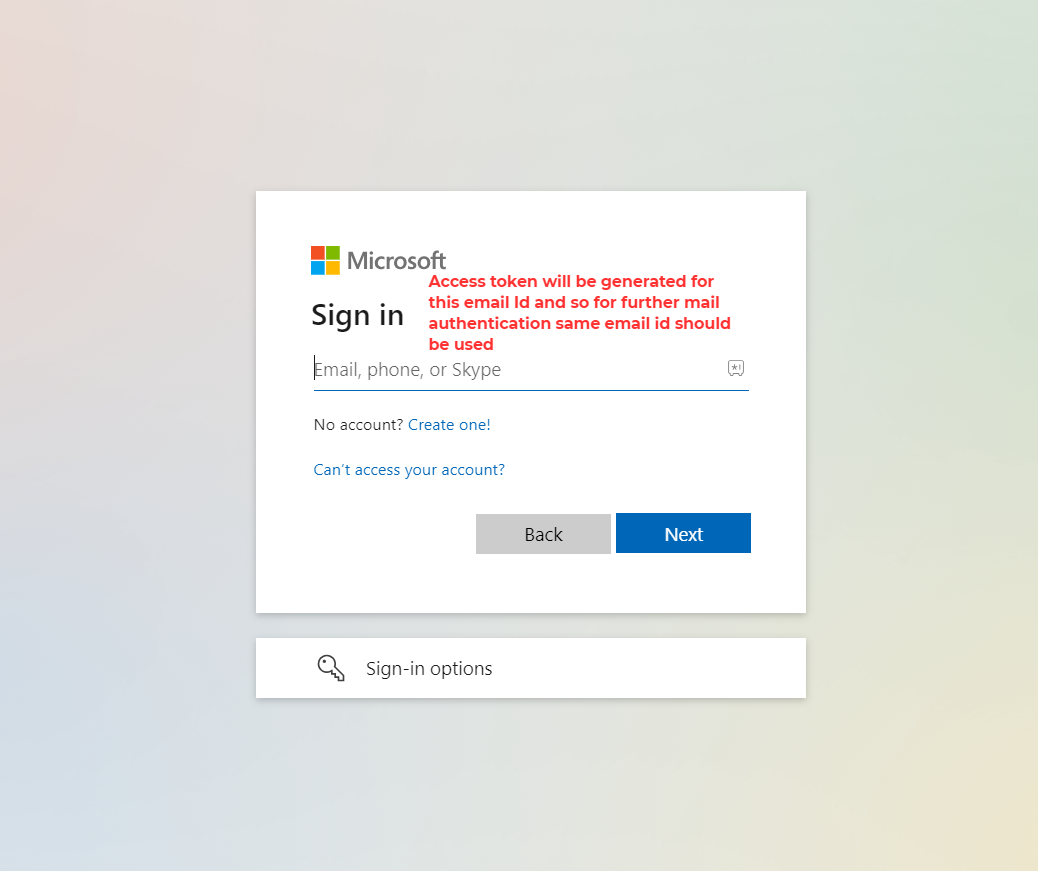
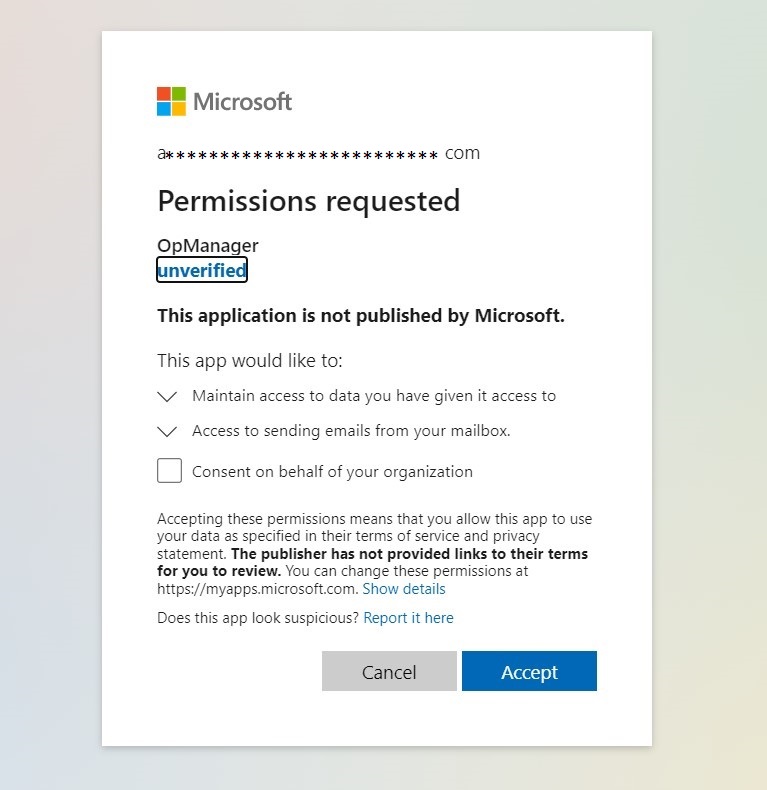
Note that the Access Token will be generated for the email provided here. So, if this OAuth Provider is selected for Authentication, make sure to use the same email address as username.
Important: If the "Permission Requested" window shows "Approve" button instead of "Accept" button, or "Need admin approval" window is shown, please click here to learn how to allow non admin users to proceed without admin consent.
Note:
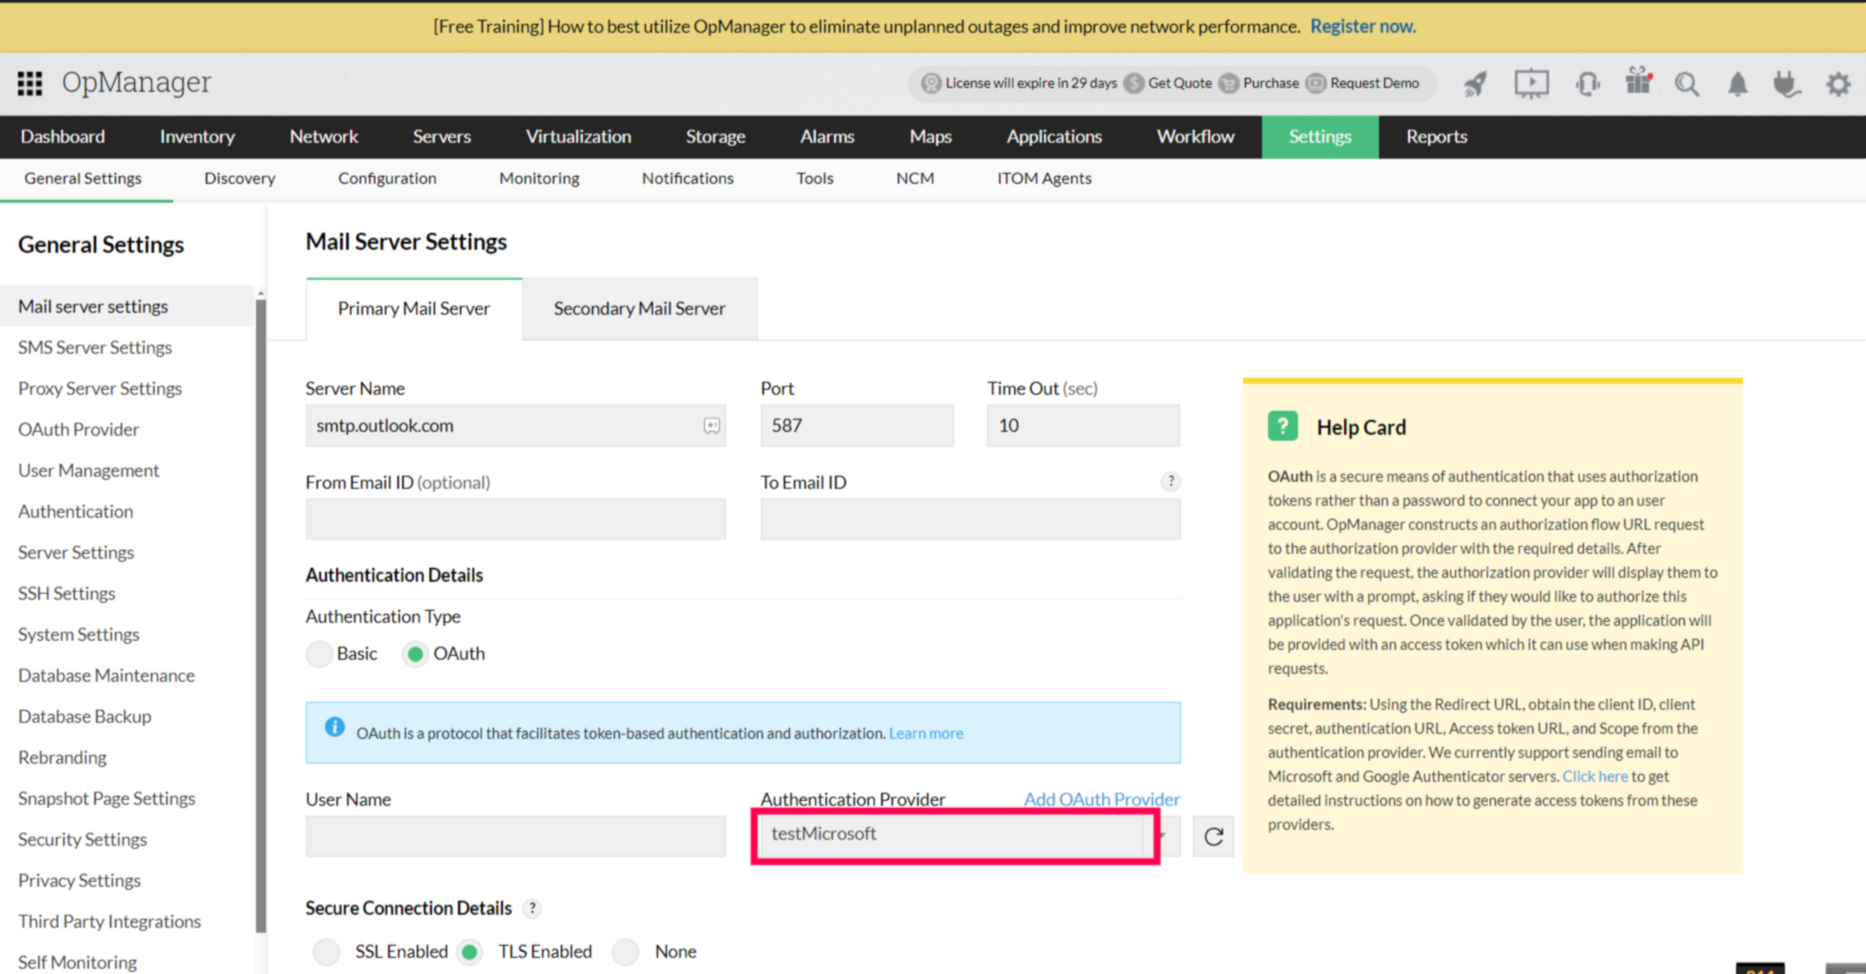
Now that you have successfully added an OAuth Provider, you can select that in Mail Server Settings for OAuth Authentication.
Until it is used in the mail server settings, the status of OAuth Provider settings will show Inactive.
Thank you for your feedback!
