Integrating OpManager with ServiceNow using 3rd party / self-signed SSL Certificate
OpManager's integration with ServiceNow using a 3rd party or self-signed SSL Certificate simplifies incident management and asset tracking. It ensures secure data transmission, promotes collaboration between teams, and streamlines IT operations, enhancing service delivery and operational efficiency.
OpManager can be integrated easily with ServiceNow using a 3rd party / self-signed SSL Certificate by using the following steps:
- Get the key store file and password used while generating the SSL certificates in OpManager. If certificate is present already, skip to step 3.
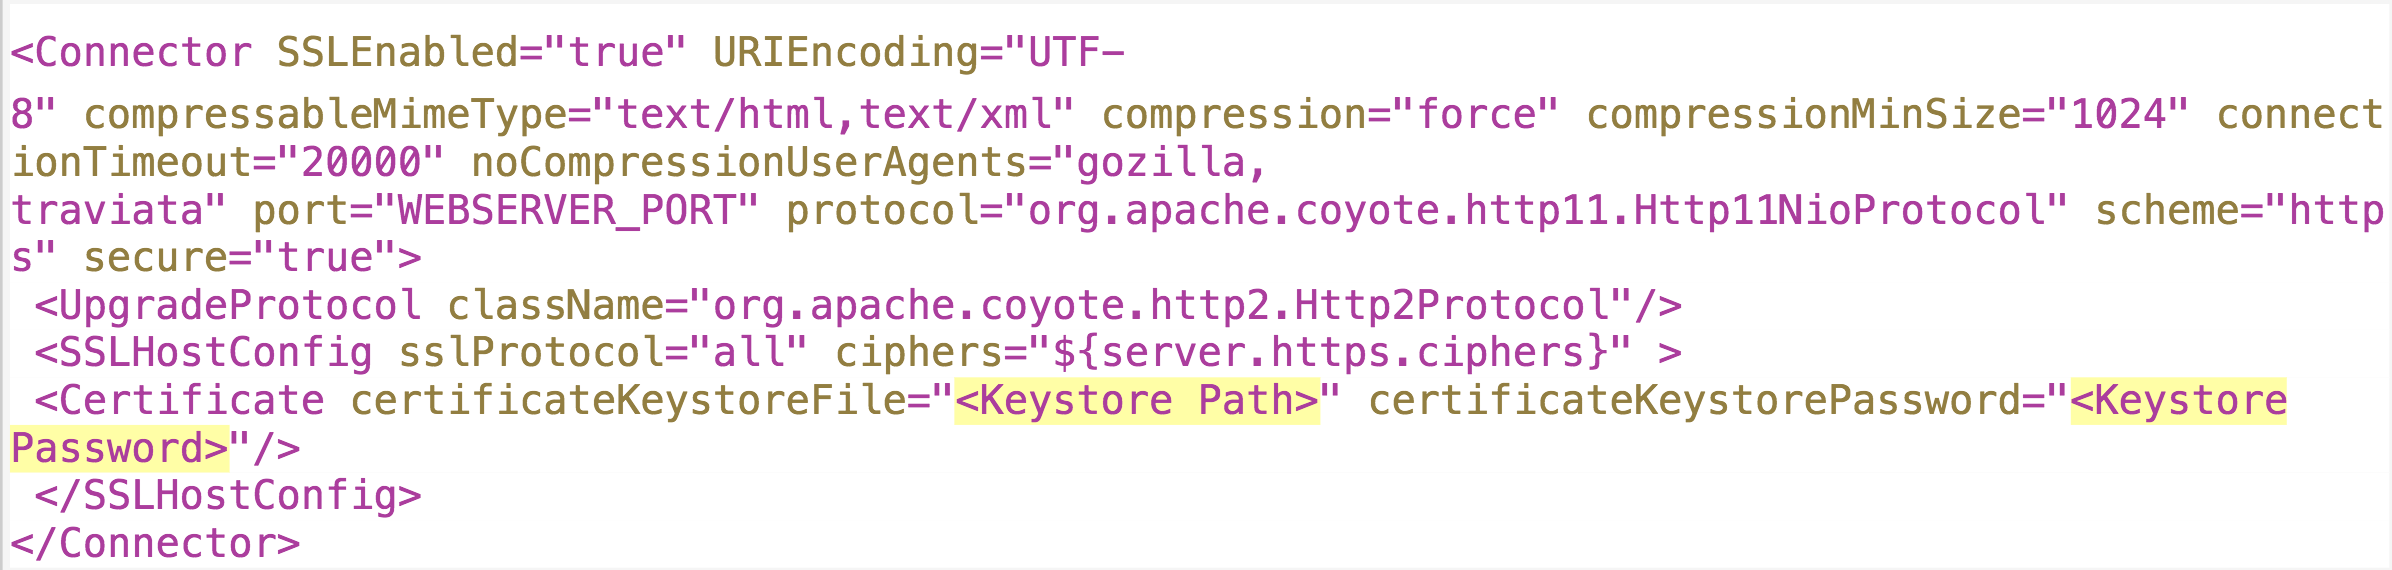
- To get the file path and password, open the file "server.xml" located under "<OpManager_Installed_Dir>/conf/server.xml" and check for the <Connector>tag.

- To export SSL certificate from keystore file, run the following command and if prompted for password, enter the password from Step 1

where Alias Name is the certificate alias name.
- You can get list of aliases from key store using the following command

To import the SSL certificate to a new trust store, run the following command
- If SSL Certificate is self-signed:

- If SSL Certificate is CA-signed:

Note: The Truststore password can be any password.
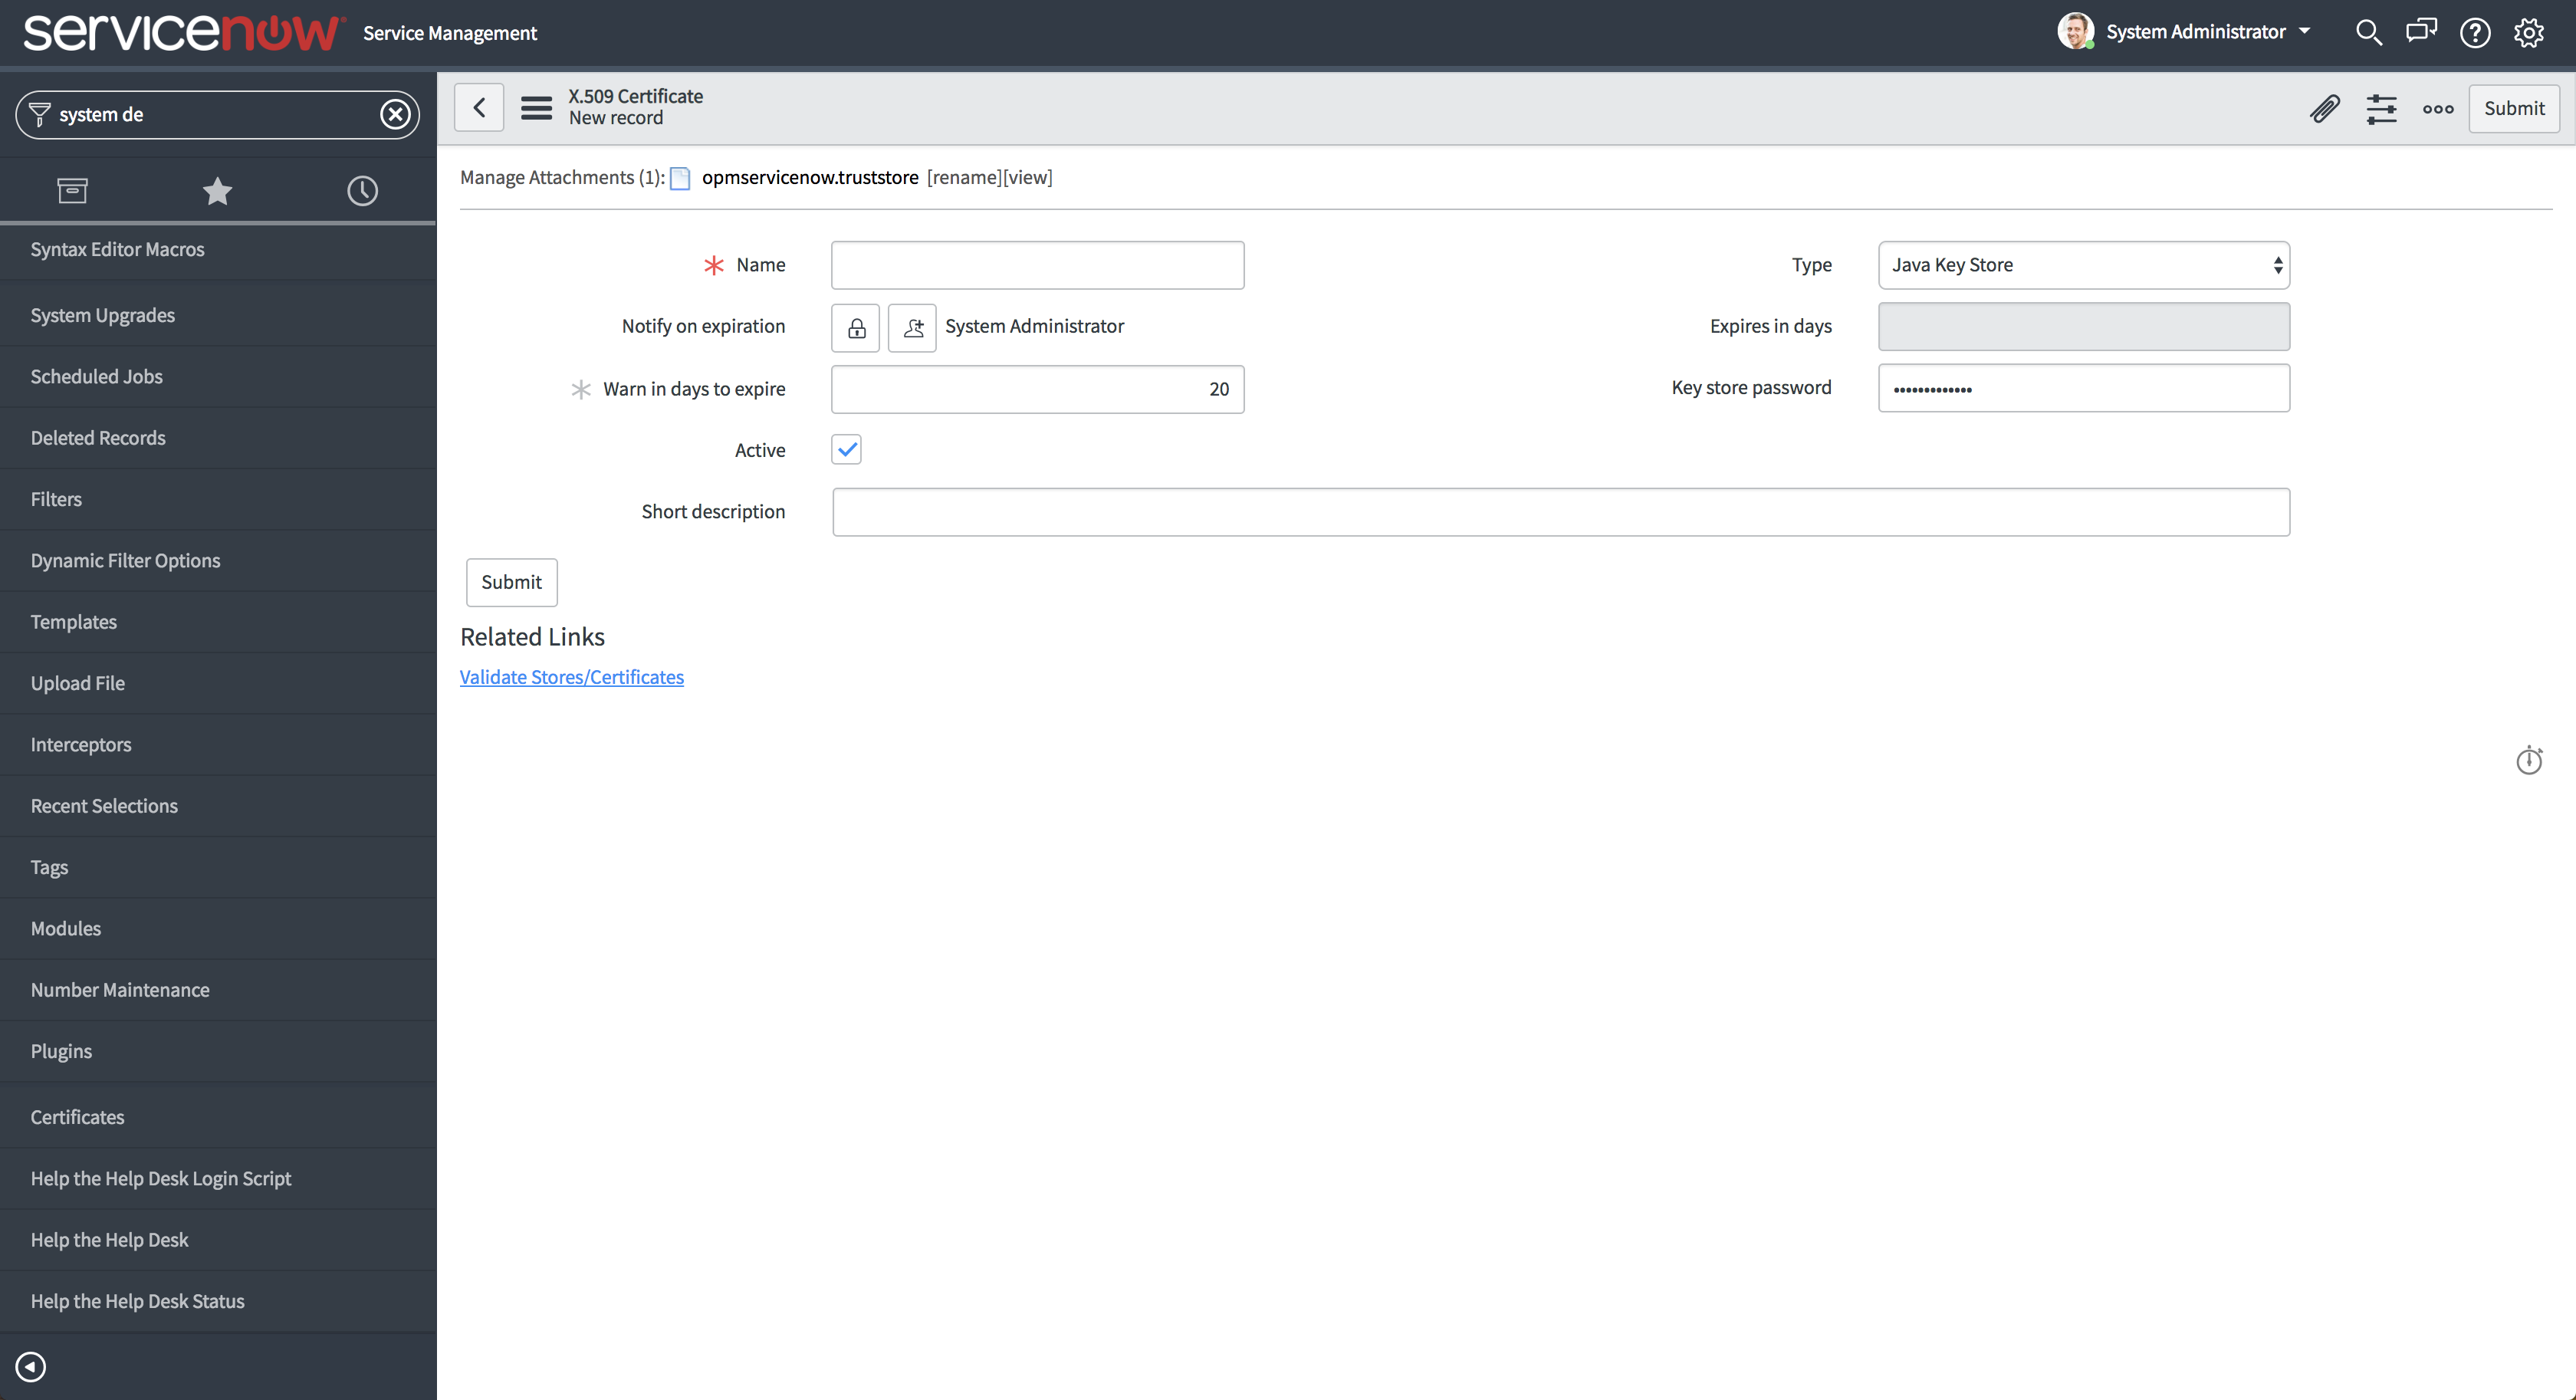
- Go to the ServiceNow Instance and select System Definition → Certificates → New.
- Select Type as Java Key Store and provide Truststore Password in the Key Store Passwordfield
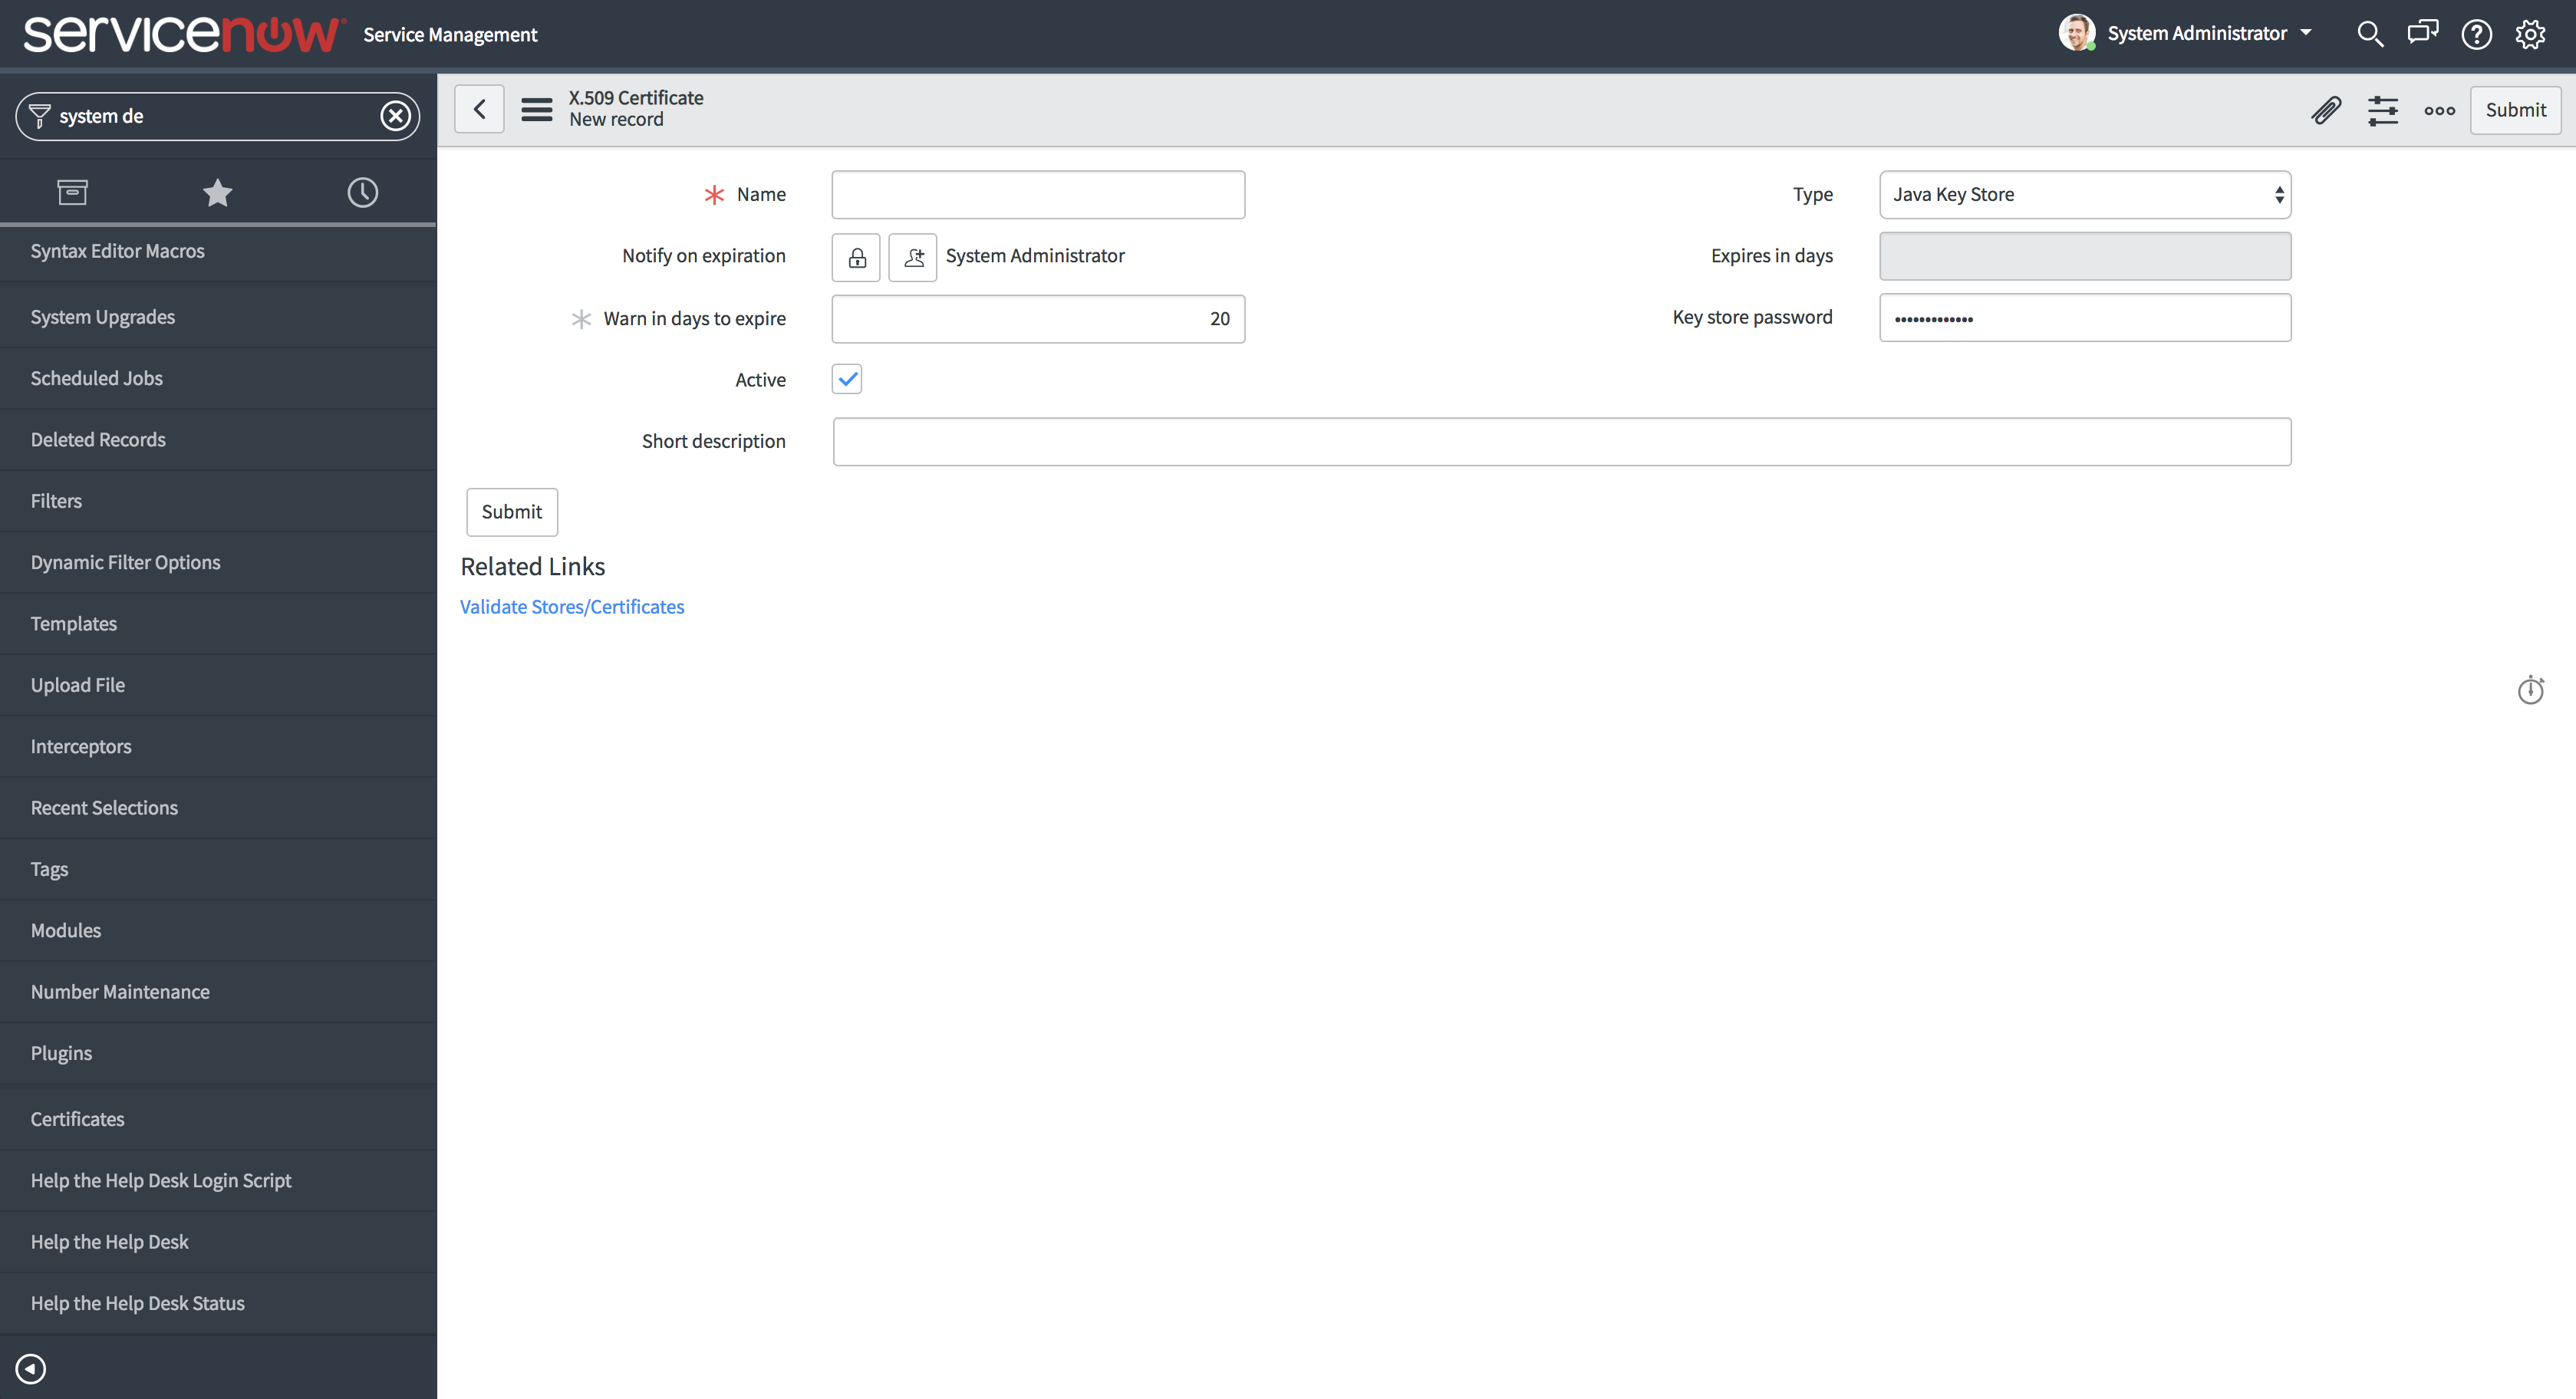
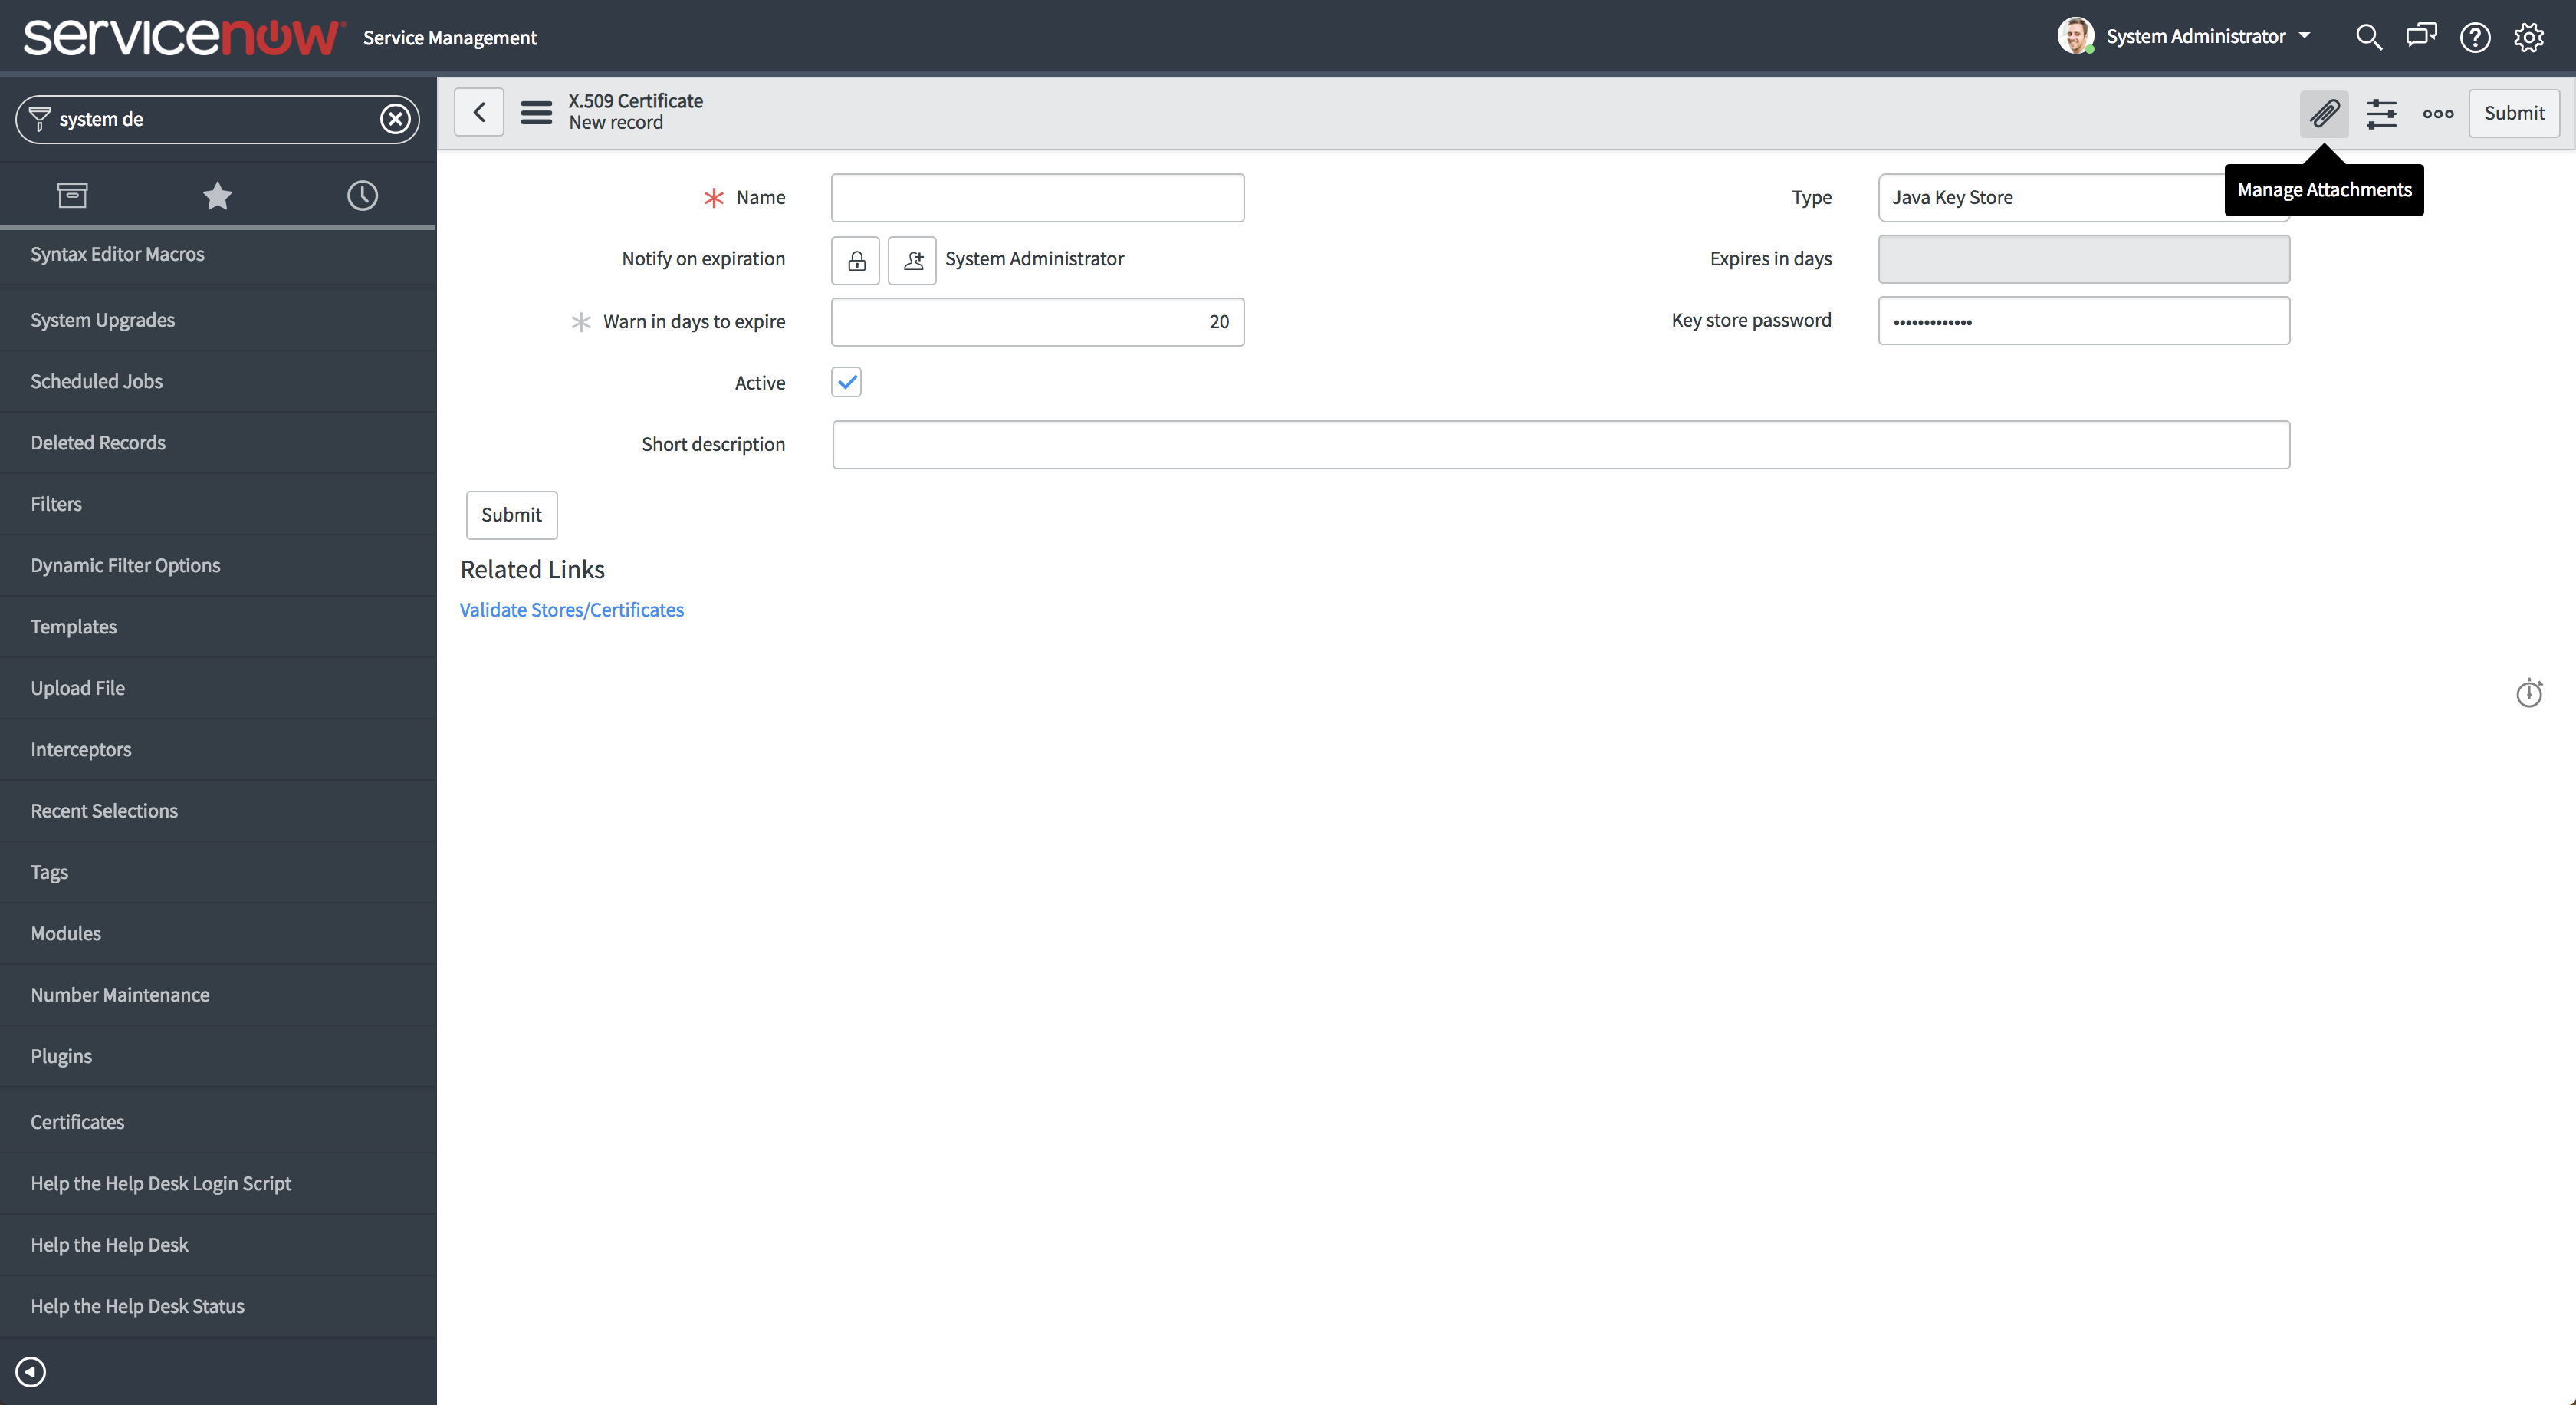
- Now select the message attachments and add the opmservicenow.truststorefile.
- Validate files before updating using Validate Stores/Certificates option and click on Submit..
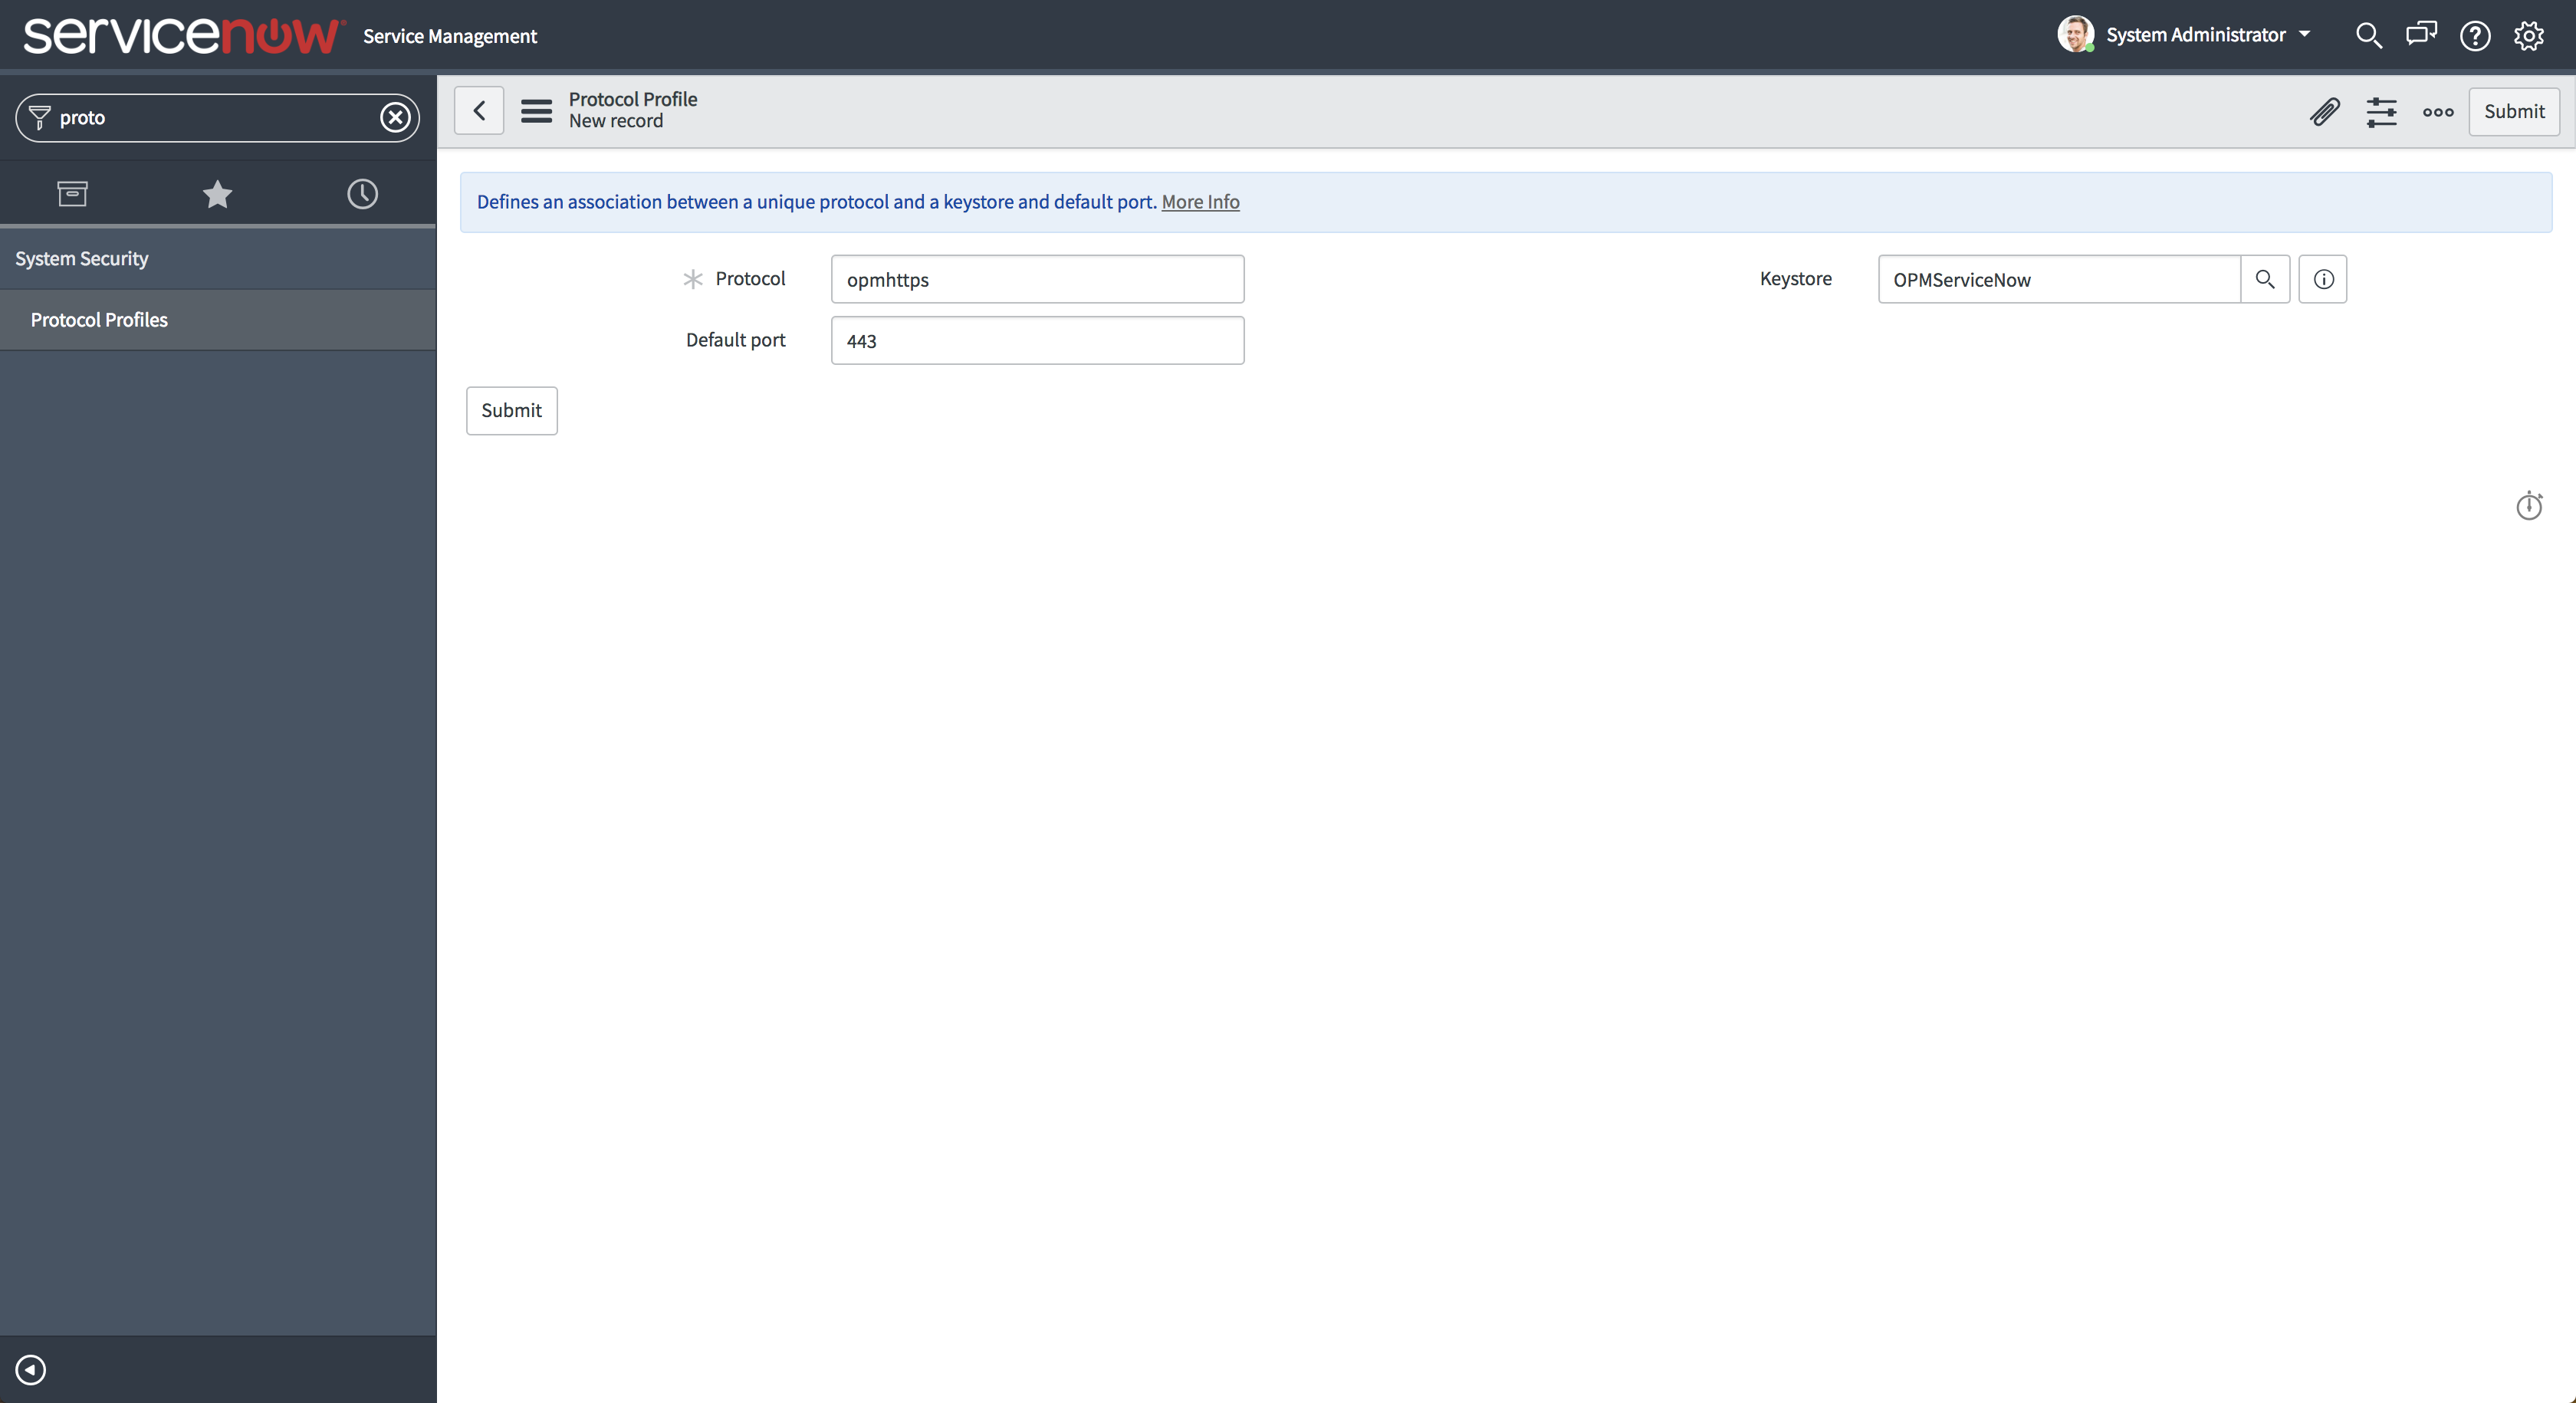
- Go to ServiceNow Instance → System Security → Protocol Profiles → New
- Set Protocol field as opmhttps and select the previously created Certificate entry in Keystore field and click on Submit.
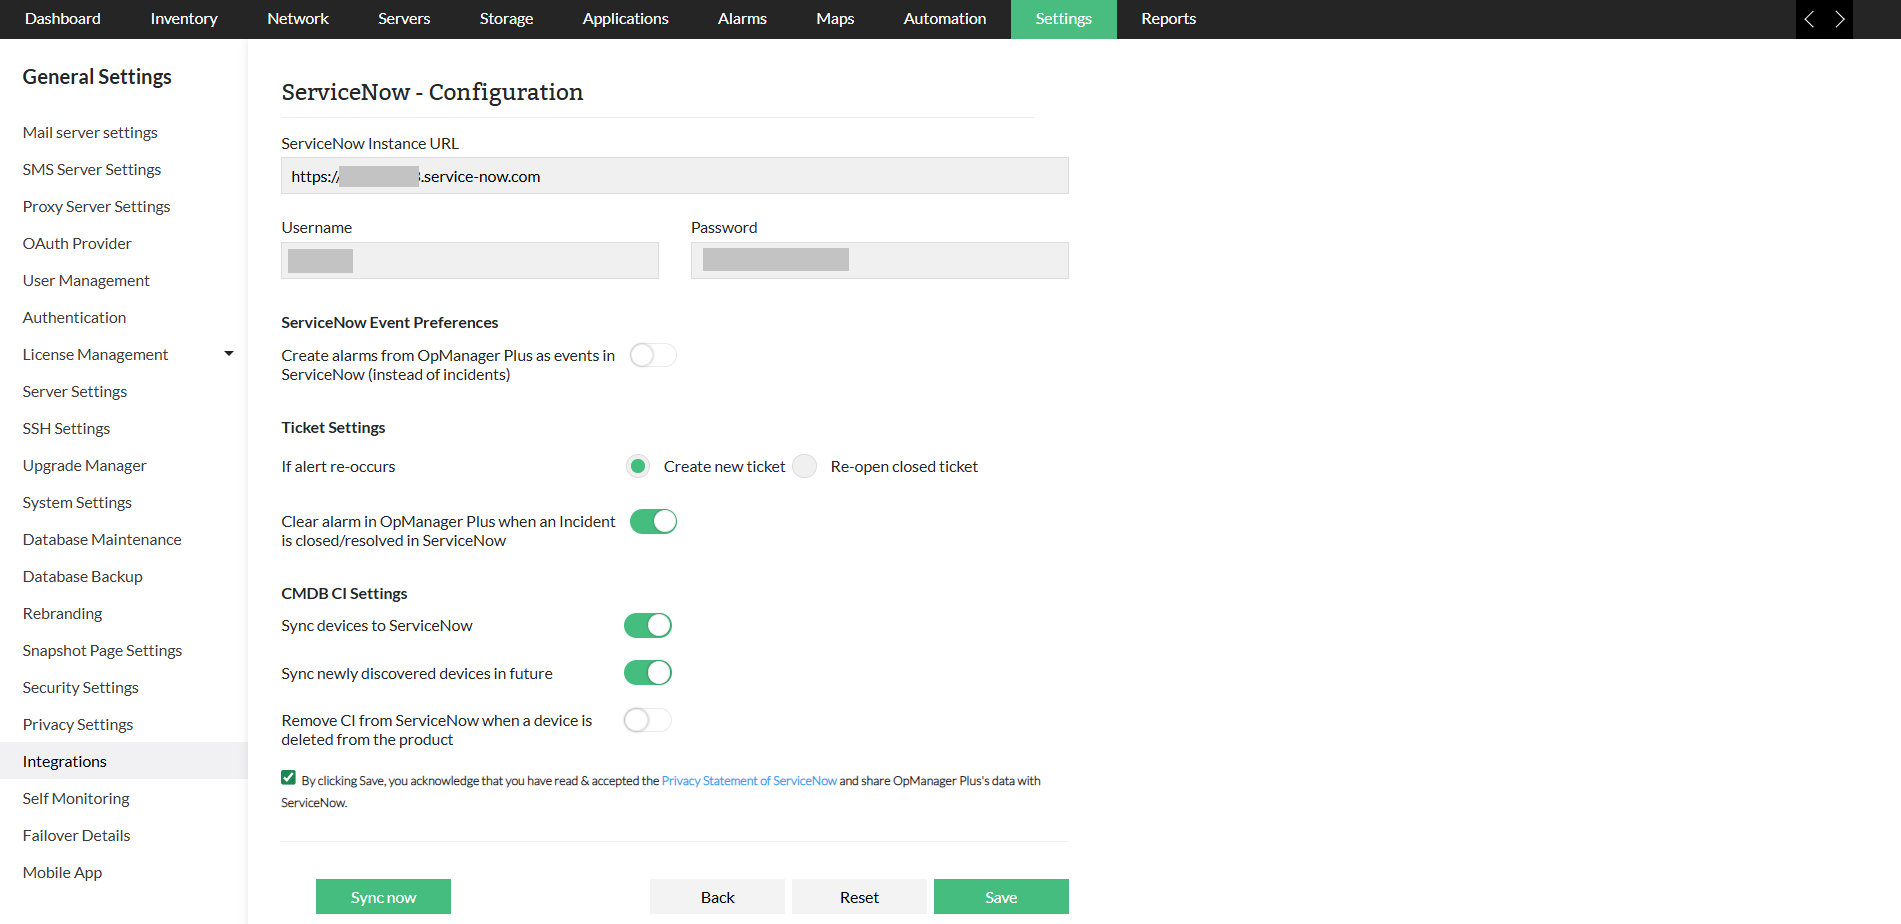
- In OpManager go to Settings → General Settings → Integrations → ServiceNow and click 'Configure'.
- Provide the ServiceNow instance details, and click 'Save'. Note that the URL should be of the form opmhttps://host_name:web_port/ where the web_port is OpManager's web port and host_name refers to the host name or IP Address of the OpManager instance.