Configuring Oauth Authentication for Mail Server
OAuth is a standard authorization protocol that provides delegated access to a protected resource using web tokens instead of passwords. With OAuth, resource owners can configure separate permissions for each client requesting access to the same resource and modify/revoke the access at any point of time.
How does OAuth work
OAuth authentication involves the following entities:
-
Resource Owner: The user who owns the protected resource.
-
Client: An end-user or application, requesting access to the resource.
-
Authorization Server: The server that generates the access token for the client with the resource owner's approval.
-
Resource Server: The server that hosts the protected resource.
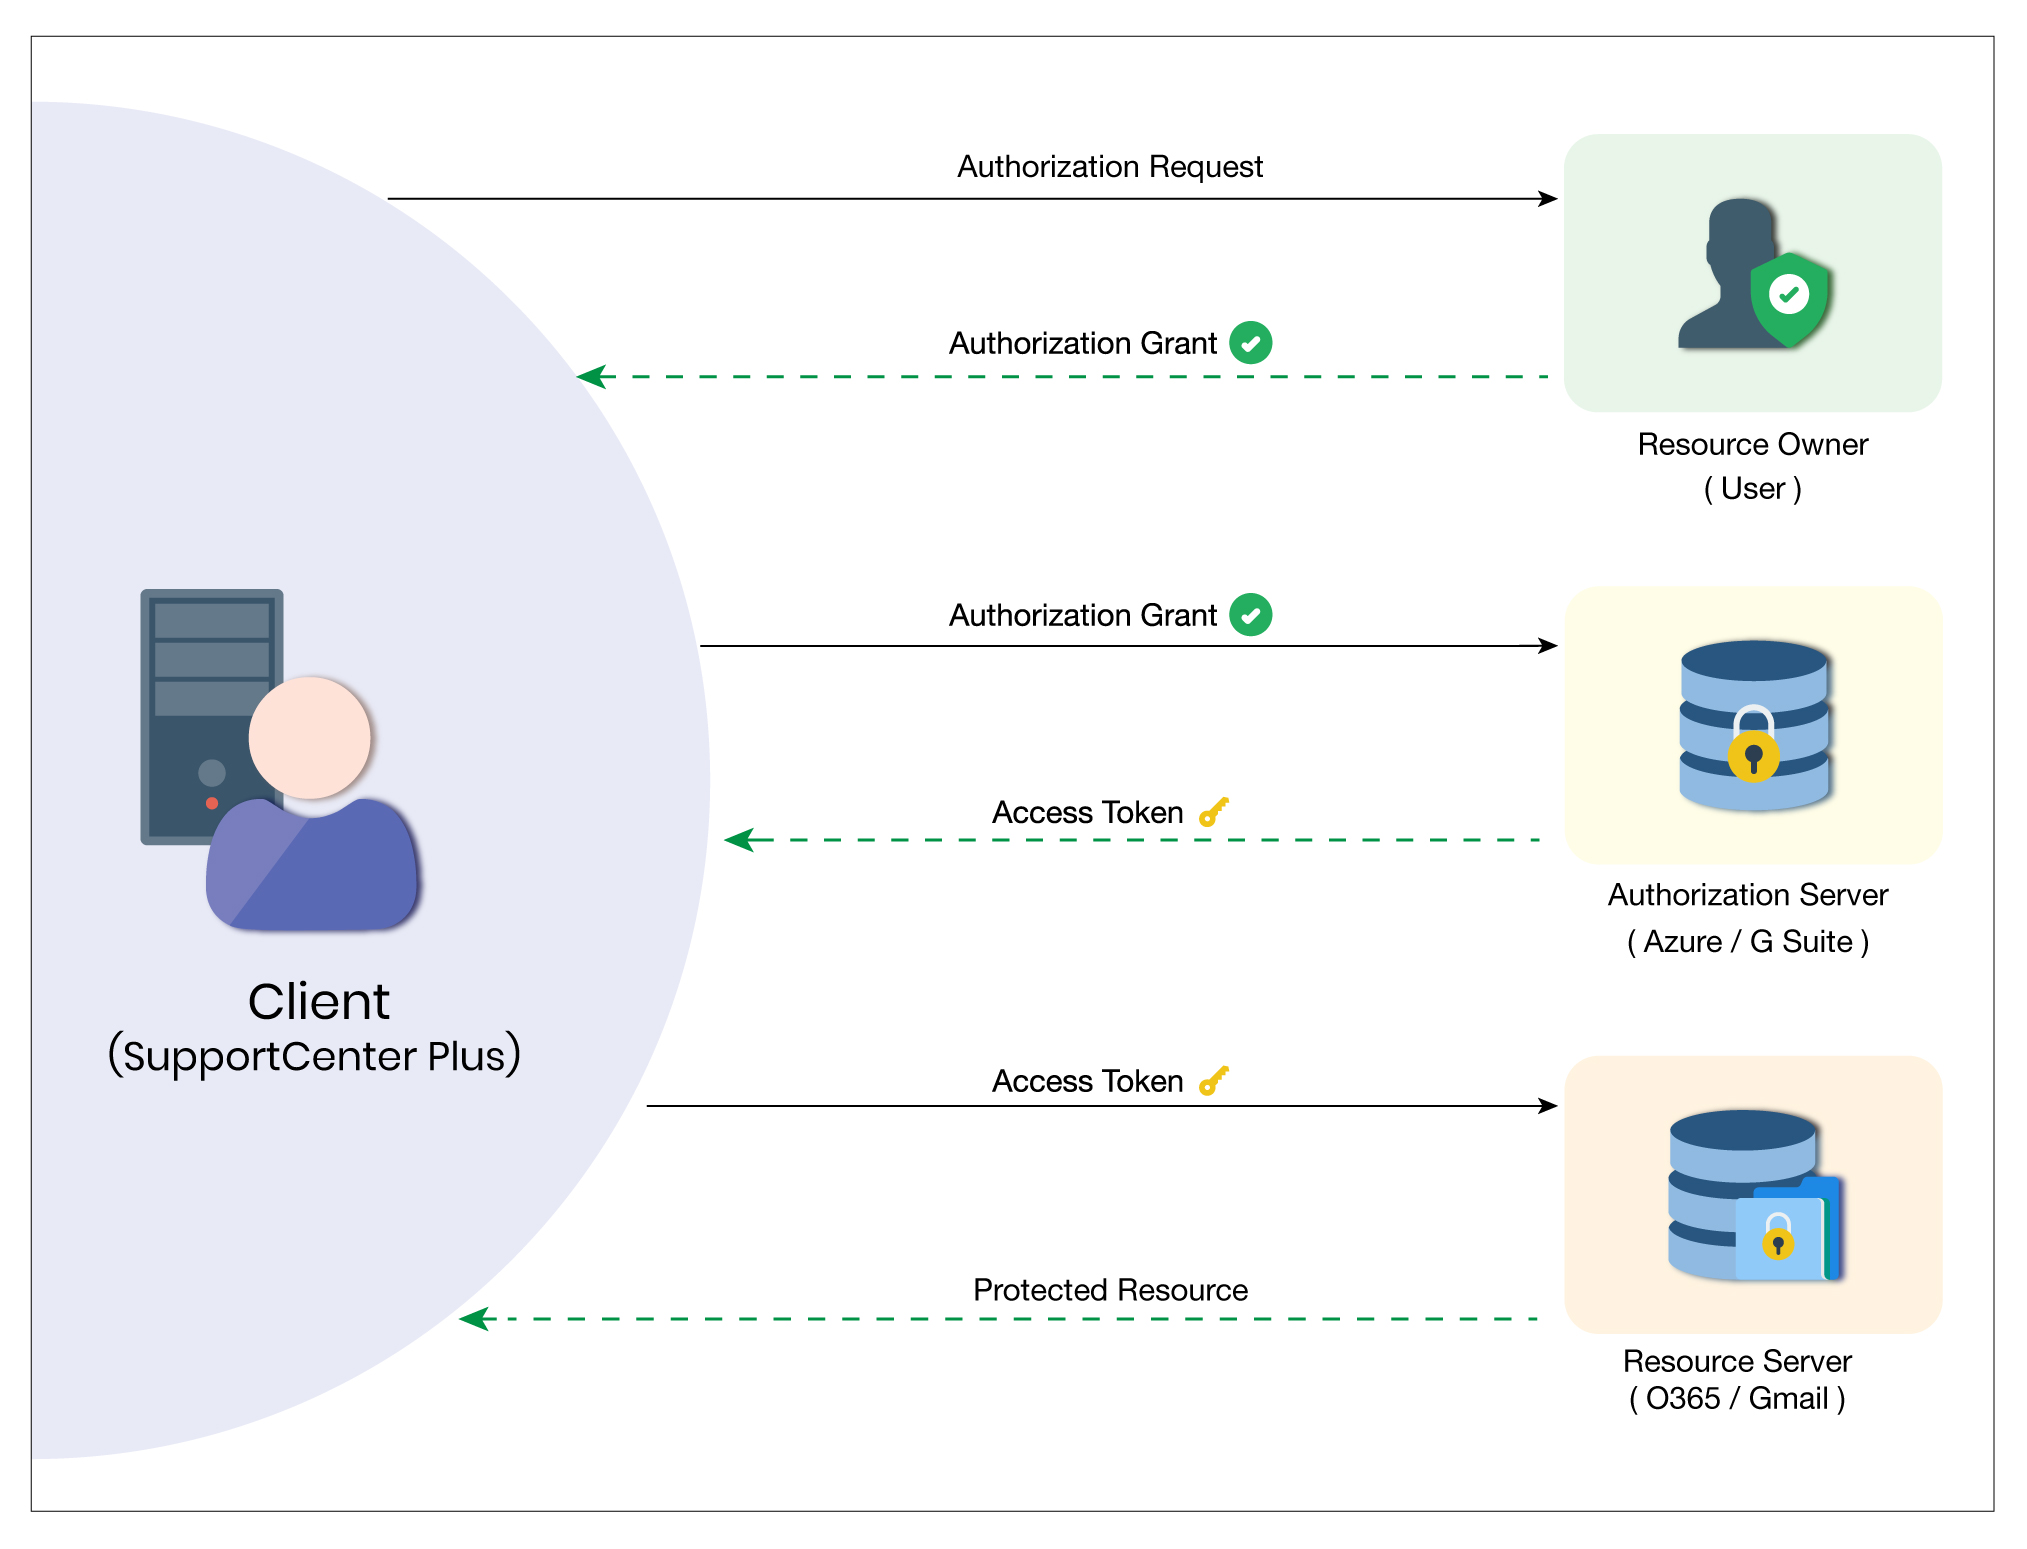
To access a protected resource, the client should obtain an authorization grant from the resource owner and pass it on to the authorization server. The authorization server validates the authorization grant and generates an access token with the approval of the resource owner. The client can use this token to access the protected resource hosted by the resource server.
The authentication process with OAuth is explained in the flowchart below:

In this case, SupportCenter Plus acts as the Client requesting access to the Mail Server (Resource Owner) and obtains the authorization grant. This authorization grant is processed through the Authorization Server of the corresponding mail box, say G Suite for Gmail, which generates an access token with the Resource Owner's approval. Using this access token, SupportCenter Plus can access the Mail Server.
Configuring OAuth for Incoming Mail Settings
To configure OAuth for incoming mail settings,
-
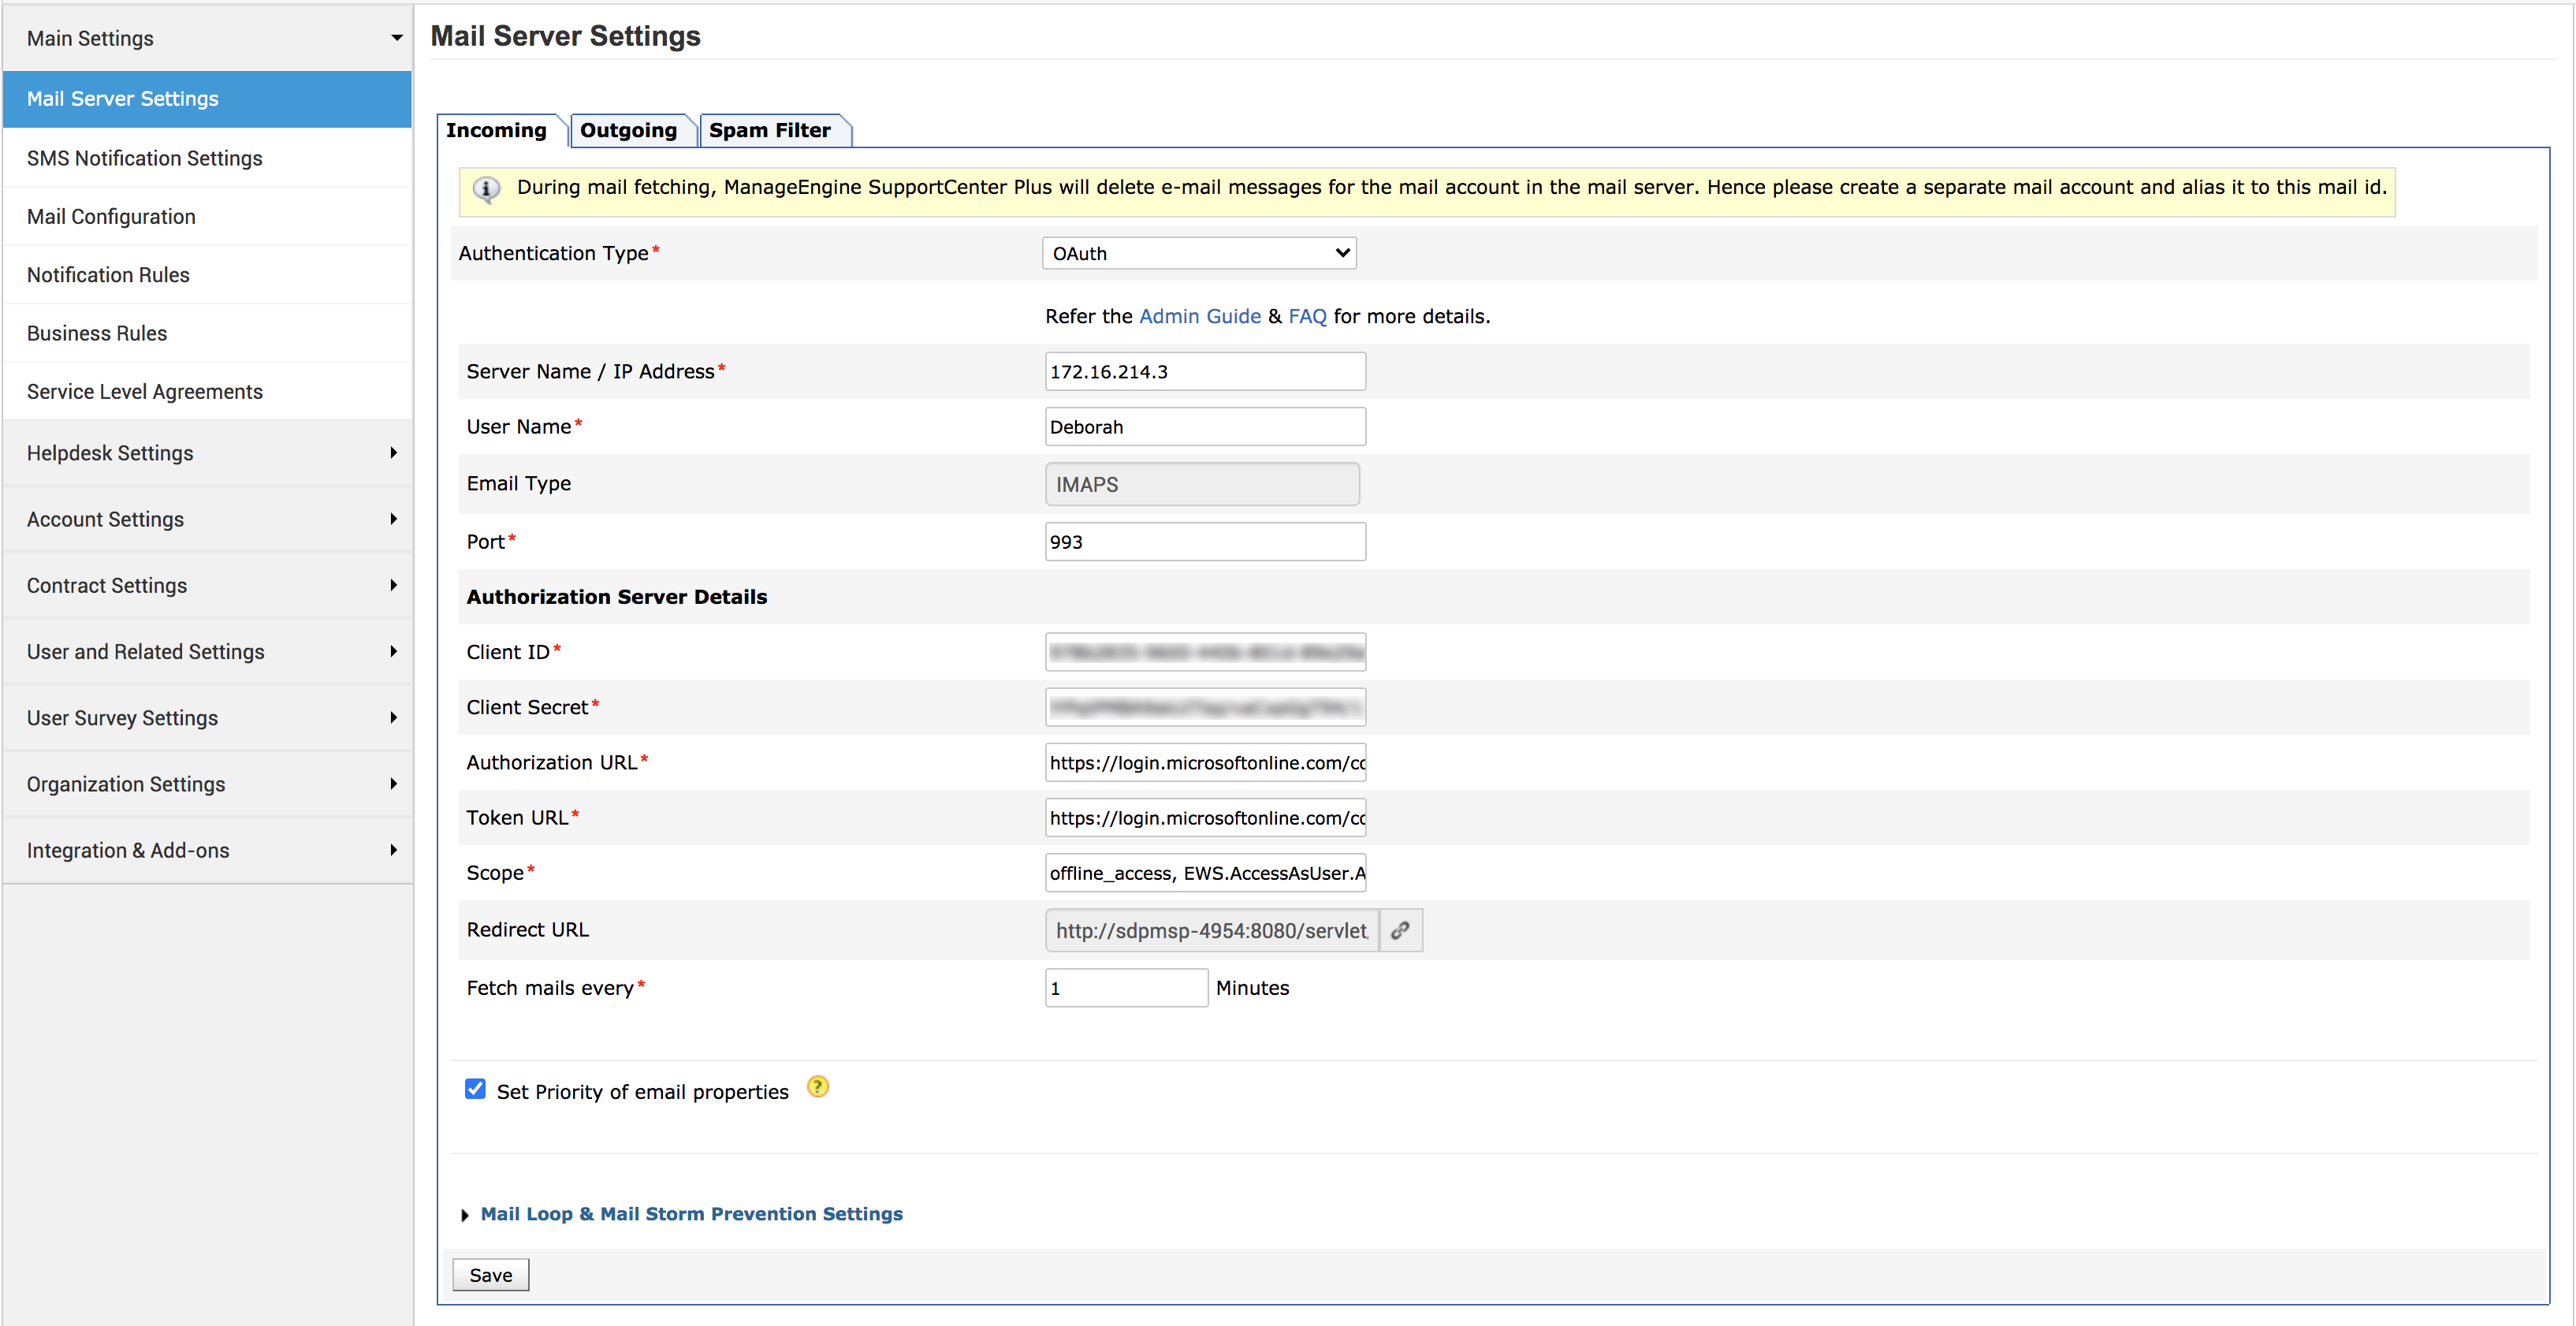
Go to Admin >> Main Settings >> Mail Server Settings >> Incoming.
-
Choose OAuth as the Authentication Type and provide the Server Name / IP Address of the mail server.
-
Enter the Username of the associated mailbox.
-
The Email Type is IMAPS and is non-editable, as OAuth authentication is supported for IMAPS only.
-
The relevant Port will be auto-populated. You can modify the port if required.

-
Obtain Client ID, Client Secret, Authorize URL, Access Token URL, and Scope from the authorization server using the Redirect URL. We have tested mail fetching for Java Mail API with Gsuite. Click the link to know the step-by-step instructions to generate the client details from these servers.
-
Enter the time interval (in minutes) to fetch emails.
-
Select the Set Priority of email properties checkbox. This option will automatically set the priority of requests sent via email. However, the priority configured via email command delimiter will override this option.
-
Click Mail Loop and Mail Storm Prevention Settings to display the following options:
-
Suppress auto-notification: Select this checkbox to prevent email looping. Specify the number of emails and the time span to stop email looping.
-
Stop email fetching: Select this checkbox to prevent email storming or DoS attacks. Specify the number of emails and the time span to stop mail fetching.

-
Click Save. The user consent window of the mail server pops up.
-
Provide your login credentials and submit your consent for the permissions.
-
A success message displays upon establishing a secure connection.
The application can now fetch emails from the mail server configured with OAuth authentication.
Configuring OAuth for Outgoing Mail Settings
To configure OAuth for outgoing mail,
-
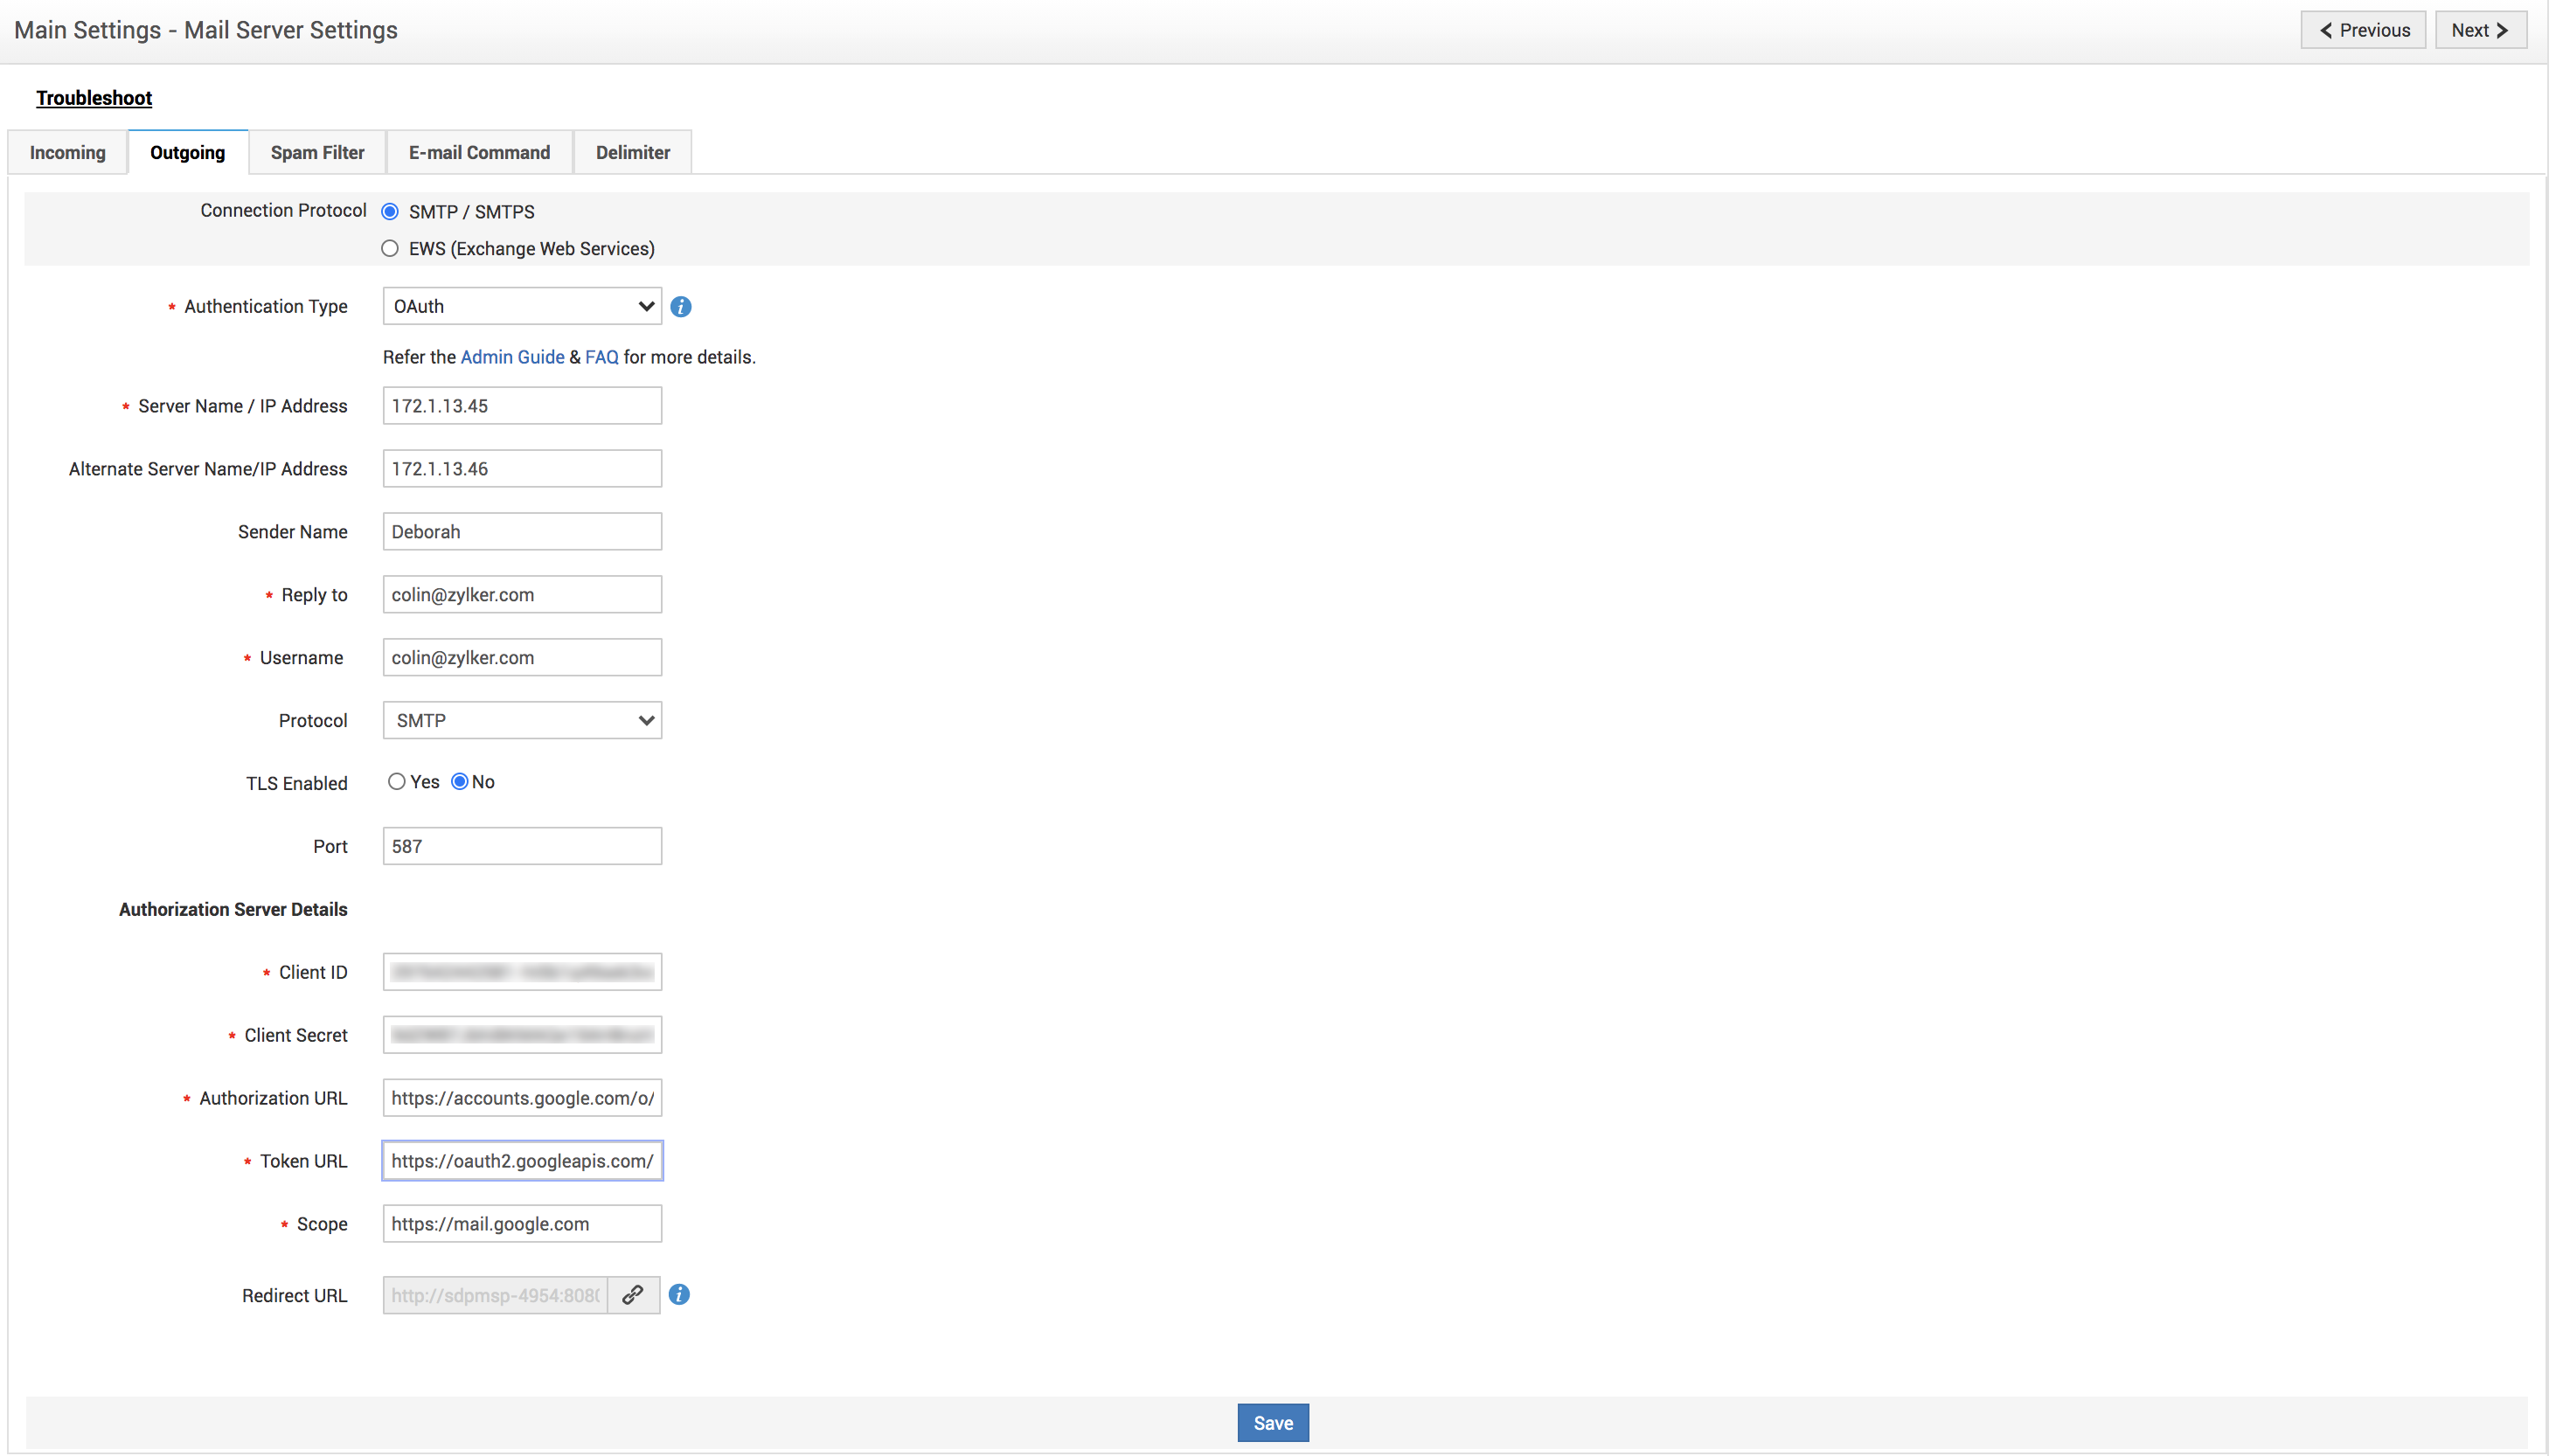
Go to Admin >> Main Settings >> Mail Server Settings >> Outgoing.
-
Choose OAuth as the Authentication Type and enter the Server Name/IP Address, Alternate Server Name/IP Address.
-
Enter the Username of the associated mailbox and choose the Protocol.
-
The Port will be auto-populated. You can modify the port if required.
-
Enable TLS if required.

-
Obtain Client ID, Client Secret, Authorize URL, Access Token URL, and Scope from the authorization server using the Redirect URL. We have tested mail sending for Java Mail API with Gsuite. Click the link to know the step-by-step instructions to generate the access tokens from these servers.
-
Select the Preferred encoding for outgoing mail from the drop-down list.
-
Click Save. The user consent window of the mail server pops up.
-
Provide your login credentials and submit your consent for the mentioned permissions. The configuration is completed with the display of a success message.
The application can now send emails from the mail server configured with OAuth authentication.


