Applications Manager Integration with LAMA (Logging and Monitoring Mechanism)
Overview
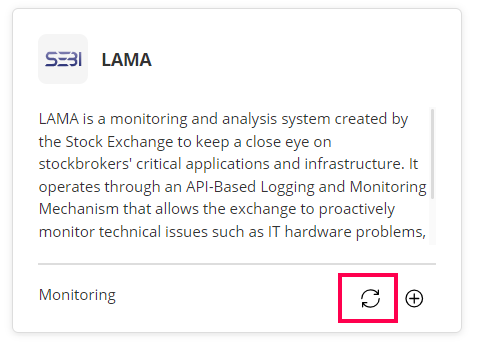
ManageEngine Applications Manager supports integration with LAMA, the API-based performance data gathering system for Stockbrokers in a single window to track the technical glitches of business-critical applications. LAMA, a monitoring and analysis system developed by the Stock Exchange, enables the transmission of crucial monitoring metrics from Applications Manager to the LAMA application. By configuring LAMA integration, users can ensure a seamless flow of essential monitoring data, facilitating comprehensive analysis and insights into the performance of their systems or applications.
Prerequisites
Note: Supported monitor types for LAMA Integration include:
- Database: MSSQL, MongoDB, MySQL, PgSQL, Cassandra, Couchbase, Oracle DB, Oracle NoSQL, Redis, SAP HANA, SQLAnywhere, and Sybase Replication
- Hardware: AIX, FreeBSD, HP, Linux, Mac OS, Novell, Sun Solaris, Windows, Windows Cluster
- Application: APM Insight, Custom monitor
Following are the list of prerequisites to be completed before initiating the 'LAMA Integration' configuration:
Note: These prerequisites are formulated with the assumption that all the critical monitors (Applications and Databases) are configured on Applications Manager and are working properly.
Creating Monitor Groups
- Go to Applications Manager's Home → New Monitor Group, and create three separate Monitor Groups which will hold the critical Applications, Database and Hardware servers.
- Incorporate the necessary critical monitors from the set of Applications and Database servers into their respective monitor groups.
Creating Business Hours
- Go to the Applications Manager Settings → Business Hours → New Business Hours. Establish the necessary Business Hours to align with the business hours of the corresponding Exchange (e.g., NSE, BSE, etc.) to which the data pertains.
- Ensure to select the appropriate working days and working hours when configuring the Business Hours.
Basic Configuration via XML
Note: Refer to our sample XML and configure the XML with the details corresponding to the LAMA Integration that is being setup.
- exchangeId - Specifies the value corresponding to the Exchange that you are configuring for:
1- National Stock Exchange
2- Bombay Stock Exchange
3- Metropolitan Stock Exchange
4- Multi-Commodity Exchange
5- National Commodity and Derivatives Exchange
- applicationId - Specifies the value corresponding to the Application type that we are configuring for:
1- Client Connectivity
2- Order Management System
3- Risk Management System
4- Exchange Connectivity
- applicationGroupName - Specifies the name of the Monitor Group the critical Applications (APM Insight Monitors) are mapped to.
- databaseGroupName - Specifies the name of the Monitor Group the critical Databases are mapped to.
- serverGroupName - Specifies the name of the Monitor Group the critical Hardware servers are mapped to.
- SpecialDays- Mention the dates at which data should be sent to LAMA only on a specific timeframe.
- The first three characters of the Month are to be entered in the 'month' parameter.
- Multiple time frames can be mentioned using 'startTime' and 'endTime' parameters.
- Holidays- Mention the dates at which data should not be sent to LAMA.
Note: If a particular date is specified in both SpecialDays and Holidays, the preference will be given to SpecialDays.
- The first three characters of the Month are to be entered in the 'month' parameter.
- Multiple dates separated by comma (,) can be entered in the 'dates' parameter.
Note: The LamaConfiguration.xml file can be found under <APM_Home>/working/conf.
Reload Configuration
- Navigate to Applications Manager Settings → Add-on Settings (under Product Settings).
- Reload the LamaConfiguration.xml using the reload option available in the LAMA Integration Card.

Configuring LAMA for integration
After completing the prerequisites, follow the steps given below to configure the LAMA integration from the Applications Manager UI:
- Navigate to Applications Manager Settings → Product Settings →Add-on Settings.
- Click on 'LAMA integration' to start the configuration.
- Fill in the required fields that pop up in the UI:
- Display Name - The preferred Display name for the particular LAMA Integration
- Data Push Interval - Time interval (in minutes) in which the data should be pushed to LAMA (Default - 5 mins)
- Member ID - Member Id corresponding to the LAMA Integration
- Login ID - Username for accessing the LAMA Portal
- Password - Password for accessing the LAMA Portal
- Secret Key - Secret key for accessing the LAMA Portal
- Business Hours - Business hour that is configured specifically for the LAMA Integration
- Client Authentication API - Specific critical API(s) of the critical Application that are to be grouped under Client Authentication
- Trading API - Specific critical API(s) of the critical Application that are to be grouped under Trading
- In case of failure, send mail to - Mail id(s) to which the email needs to be sent in case of any data push failure (Ensure that Mail server has been configured).
- Enable Notifications - Notification and mail alerts can be enabled or disabled.
- Send notification on empty data push - Enable this option to receive notifications when no data is present for the configured monitors during the poll interval.
- Send mail at every poll - If disabled, notifications will be sent only when there is a status change.
- Once all the required details are filled, click on the 'Save' button.
- LAMA is now successfully configured, and you can begin sending data to the LAMA Portal.
Note: "<APM_Home>/logs/integrations/apmlama.txt" - Use this file to check the status of the LAMA Integration.
Thank you for your feedback!
