Creating New Change
There can be different types of changes that can happen in an organization. It can be a Major, Minor or Standard change. For any change a request for change has to be sent to the change management team by creating a New Change.
To create a new change,
-
Log in to the ServiceDesk Plus - MSP application using your user name and password.
-
Click the Create New link at the top left hand side of the page ->and select the Change option. This opens the New Change form. Or click the Changes tab and select the New Change button to open the New Change form.
-
Select the Requested By requester from the list by clicking on the Requester icon
 . This opens the requester list page and click the requester title.
 -
Select the Technician from the combo box.
-
Select the Category, Sub Category and Item from the combo box.
-
Select the Status of the change say Open from the combo box.
-
Select the Impact, Urgency and Priority of the change from the combo box.
-
Select the Change Type from the combo box. Say Major.
-
Select the Scheduled Start Time and Scheduled End Time from the calender button.
-
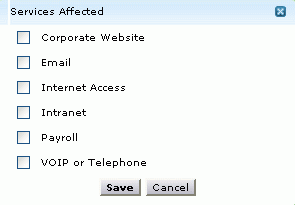
Select the affected IT Services by the change from the list by clicking on the icon
 . This opens the Services Affected pop up box as shown below. Select the affected IT services and Save the changes.

-
Select the Assets Involved with the change by clicking the icon
 . This opens the Select Assets page. Select the Type of Assets or the category of assets to be involved from the combo box. Ex: Workstations, Routers, Switches and so on. Select the Available Assets under the selected type from the list and move to Assets involved using >> button. And Save the changes.
 -
Specify the Title of the change in the given text field. This is a mandatory field.
-
Specify the details about the change in the Description field.
-
If you have any file attachments for the change click the Attach File button and attach files.
Note: Maximum size of an attachment file can be 10MB.
-
Save the changes. You can see the new change created in the change list view page.

