Change Template
Change Template lets you custom create change templates for the most common and frequently requested changes. Each template can possess different fields, field values and workflow, thus customizing or pre-defining change forms so as to suit the changes that may arise in your organization.
The change template enables the Change Requester to initiate a change quickly with all the necessary fields pre-filled, thereby increasing the productivity of your help desk team.
Remember: New change templates being configured will copy the configurations of the change template that is set as default.
To access the Change Template configuration wizard,
- Login to the ServiceDesk Plus application using the user name and password.
- Click the Admin tab in the header pane.
- In the Problem/Change Management block, click Change Template.
To custom create a new change template, follow the steps mentioned below:
- Click on Add Change Template button available in the Change Template List View.
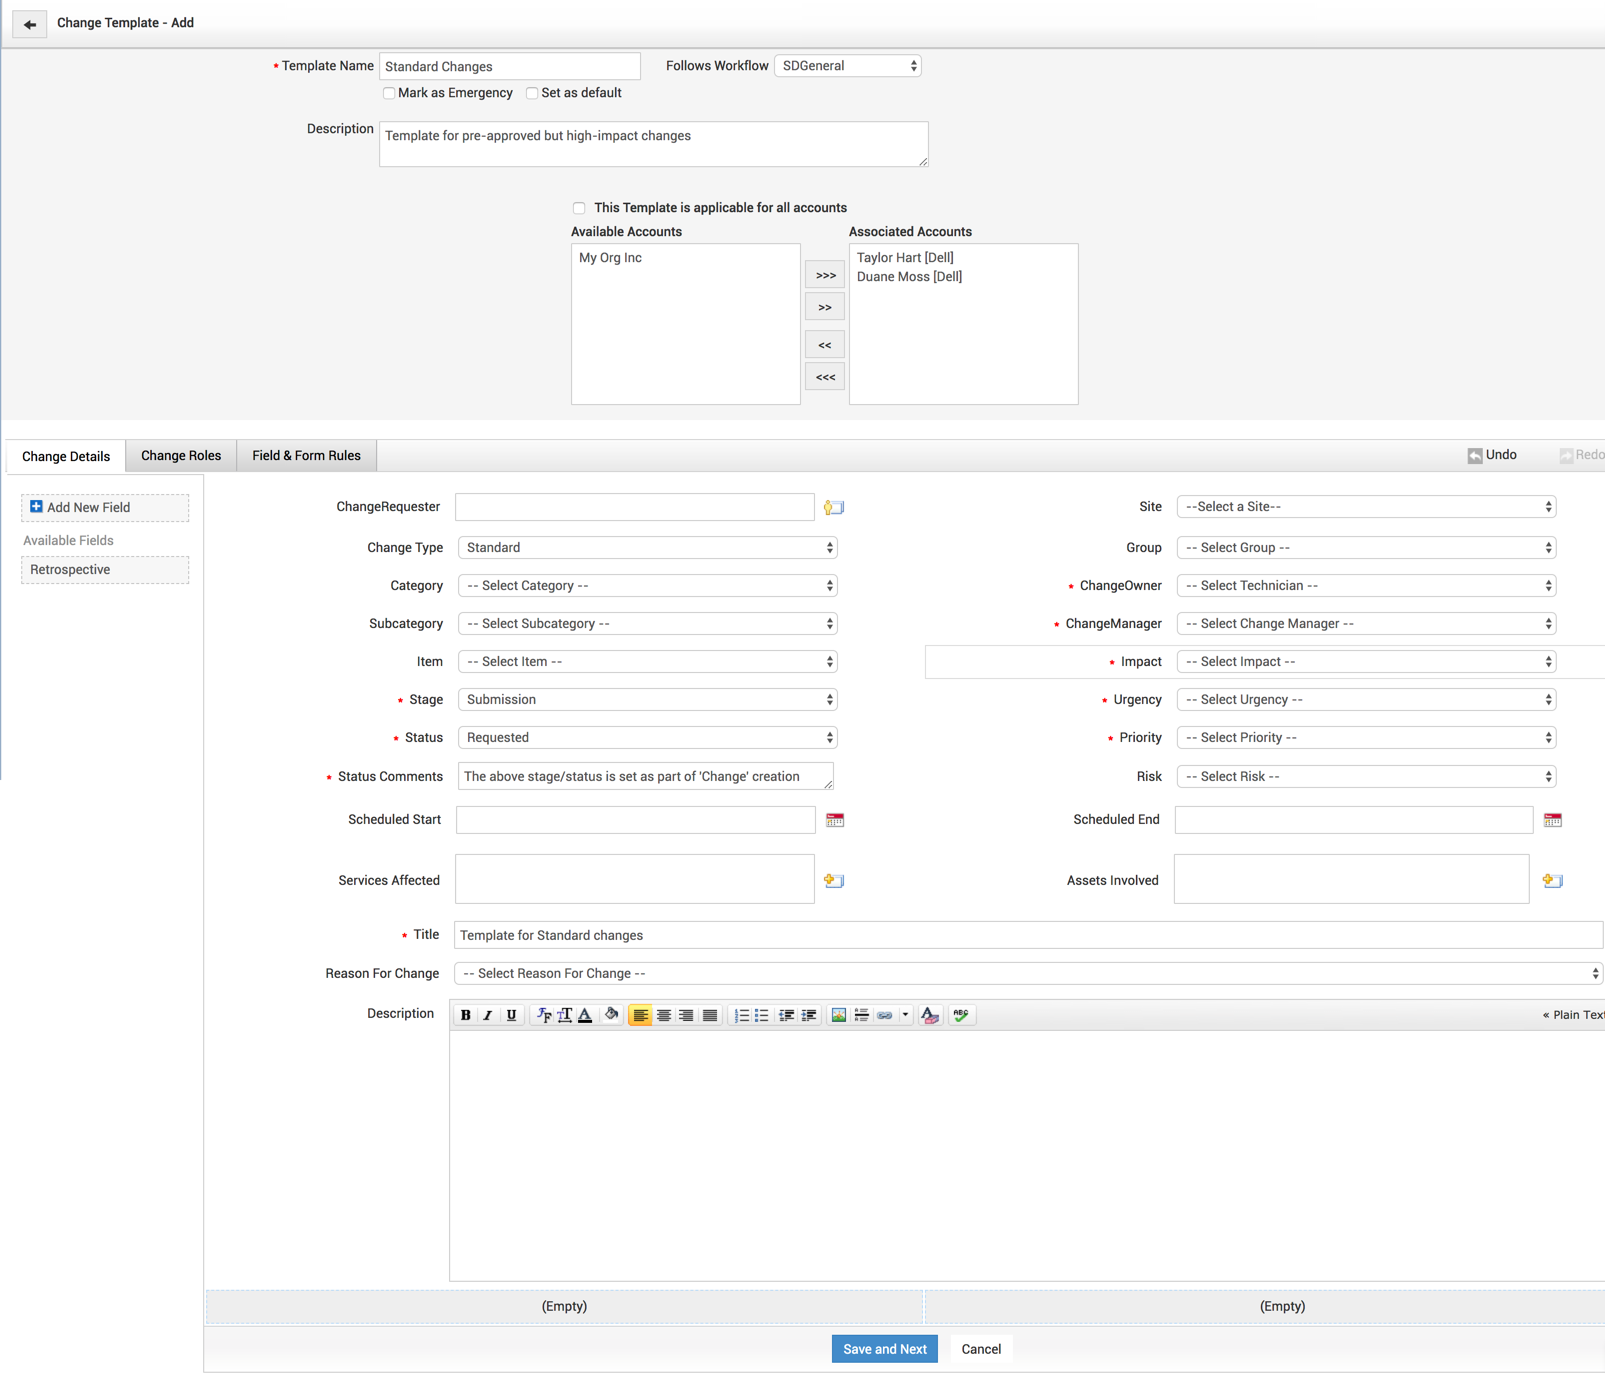
- Add Change Template page will open up, This page will be split into 3 sections: Template-Workflow section, Canvas and Drag and Drop Fields section.
- To add the text fields, enter the label name in the form fields beside Label field. If required, enter the description for the field.
The Change Template will be displayed with three tabs namely:
- Change Details
- Change Roles
- Field and Form Rules
Template-Workflow section
This section will help you do the following:
-
Provide a name to the change template
-
Decide the workflow the change template would follow (by allowing you to select workflow from Follows Workflow dropdown)
-
Set the change template being configured as the default template (by checking Set as default checkbox)
-
Mark the change template being configured as the emergency template (by checking Mark as Emergency checkbox)
-
Provide a short description for the change template stating why it is being created
Canvas section
This section helps you design the change form by lettng you:
- Add/Delete fields available in the canvas
- Adding Fields: Click and drag fields onto the canvas from Drag and Drop fields section of change template.
- Deleting Fields: By clicking on on hover Delete
 icon
icon - Set fields as mandatory (by clicking on on hover Edit drop-down
 and selecting mandatory field checkbox)
 - Drag and Drop section
This section helps you design the change form by lettng you:
- Drag and Drop fields onto the Canvas
- Configure new fields, store them in the drag and drop section, and add them to the Canvase based on your requirements
- Configuring new fields: Drag and drop Add New Field section from Drag and Drop and decide whether the field to be added is text or numeric or Date/Time field using Add New Field pop-up and okay it for the field to be added.

Click Save to save the change template.

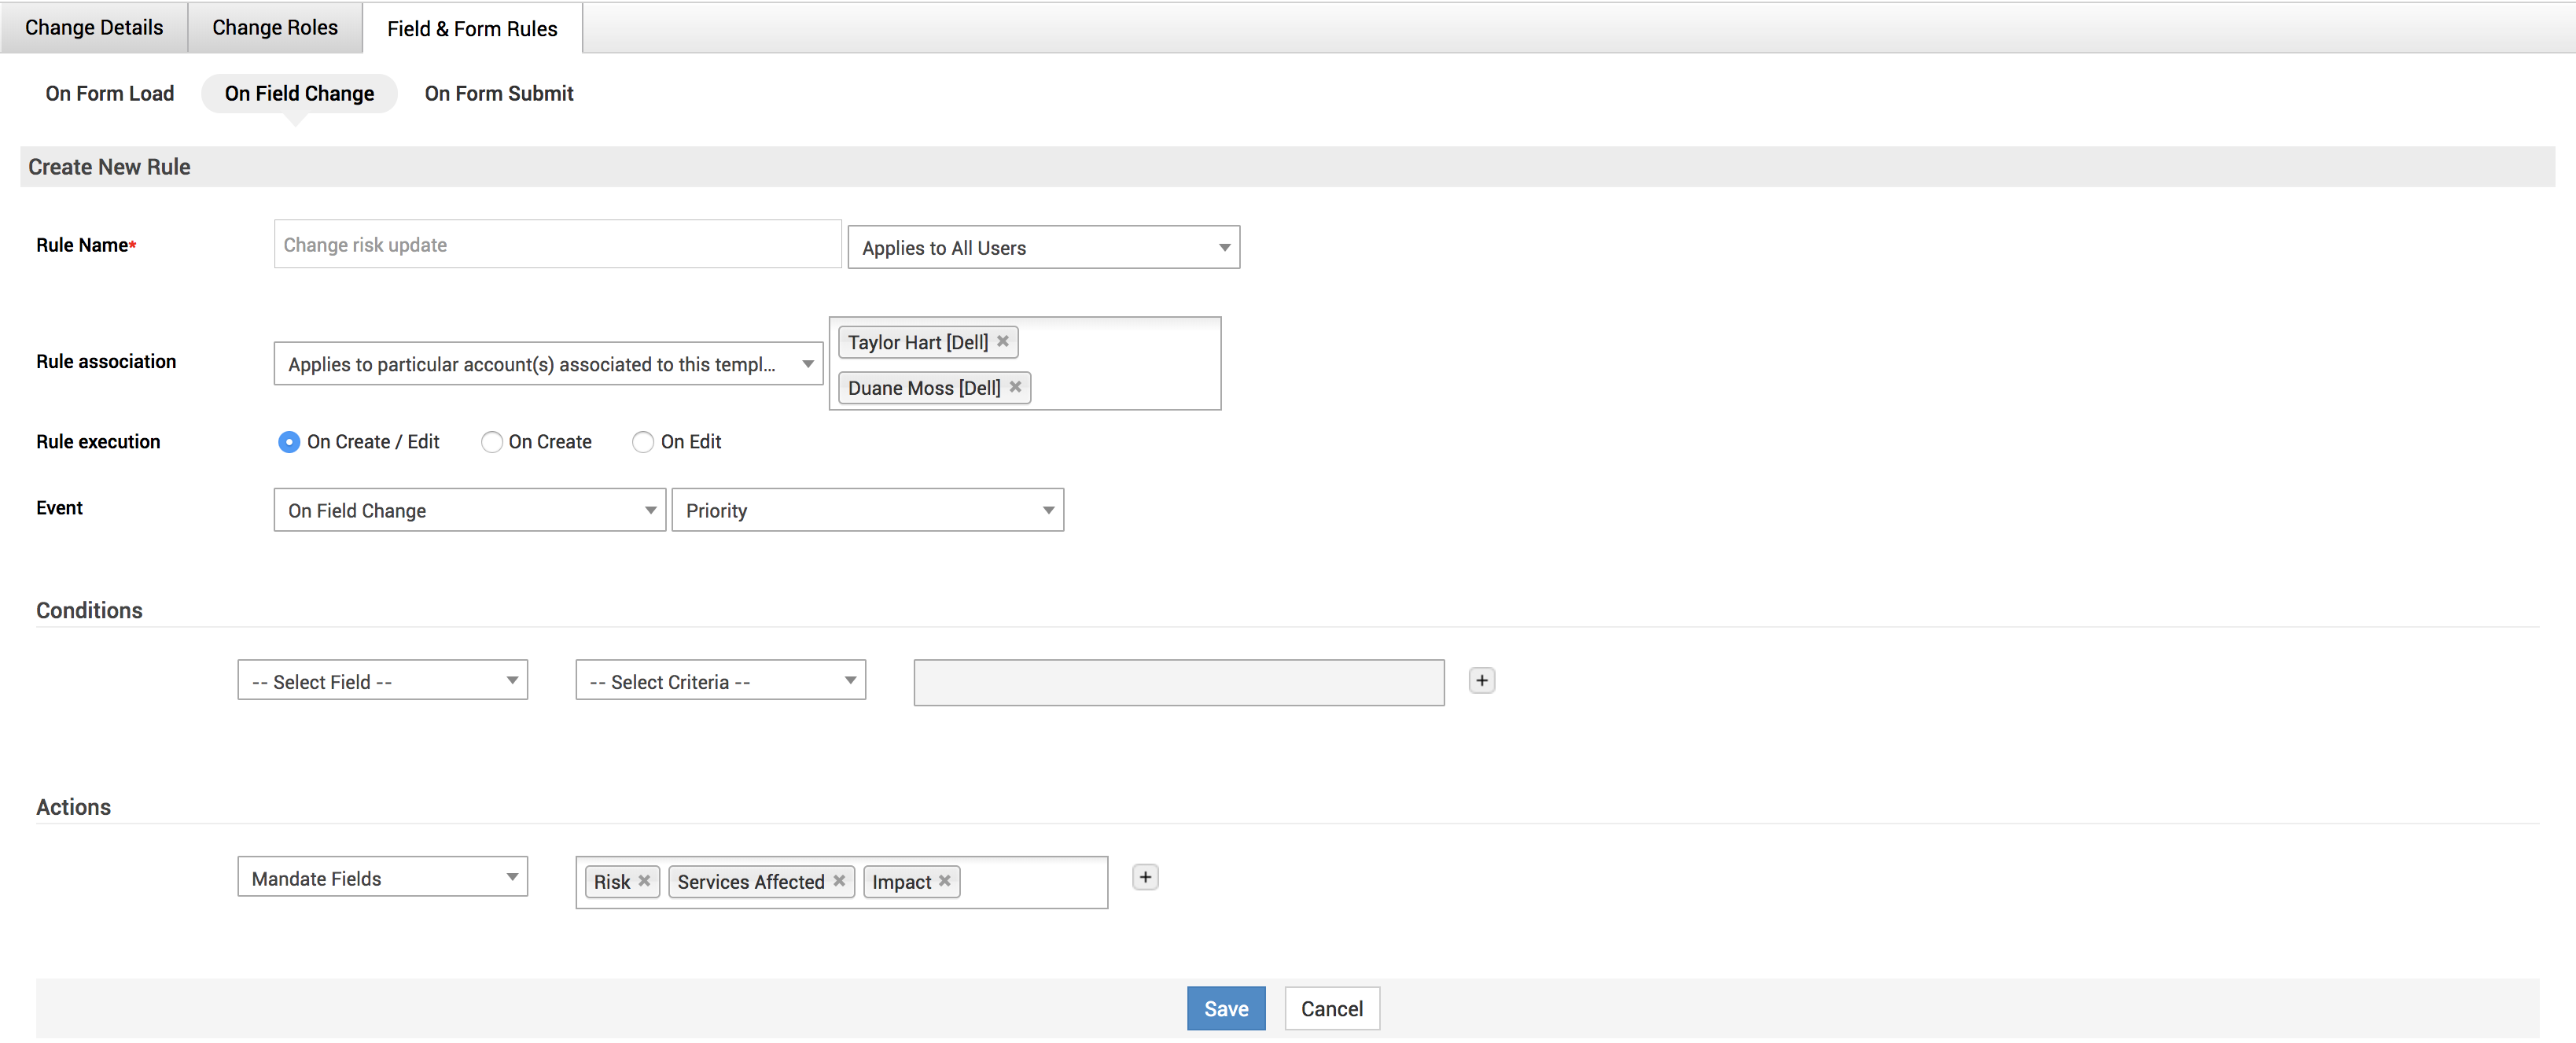
Field and Form Rules:
Field & Form Rules lets the Administrator to define rules that can be executed on a change form.The defined rules can be enabled or disabled. The rules that are disabled will not be applied.
- On Form Load:Allows rules to be executed when the change form is loaded.
- On Field Change:Allows rules to be executed when the field value changes. Rule will be applied when a field value mentioned in the rule is changed.
For above two events:
1.The rules defined should contain atleast one action to be executed.
2.The actions will be executed after checking the criteria. If no criterion is set, then the actions will be executed in the order in which it is organized. - On Form Submi:Allows rules to be executed on submission of the change form. Execute Script is the only action allowed for this event. Rules defined for this event should contain a valid script. Script will be executed after checking the set criteria and if no criterion is defined then the script will be executed directly.


