Custom Trigger for Releases
Use release custom triggers to automatically set off predefined actions on a release that matches the criteria. You can configure email/SMS notifications, custom functions, or even custom scripts as custom actions. You can also use triggers to execute actions on other modules. Custom triggers are categorized and executed through trigger groups.
Role Required: SDAdmin
Create Trigger Group
To Create a new Trigger Group,
-
Go to Admin > Automation > Custom Triggers > Release.
-
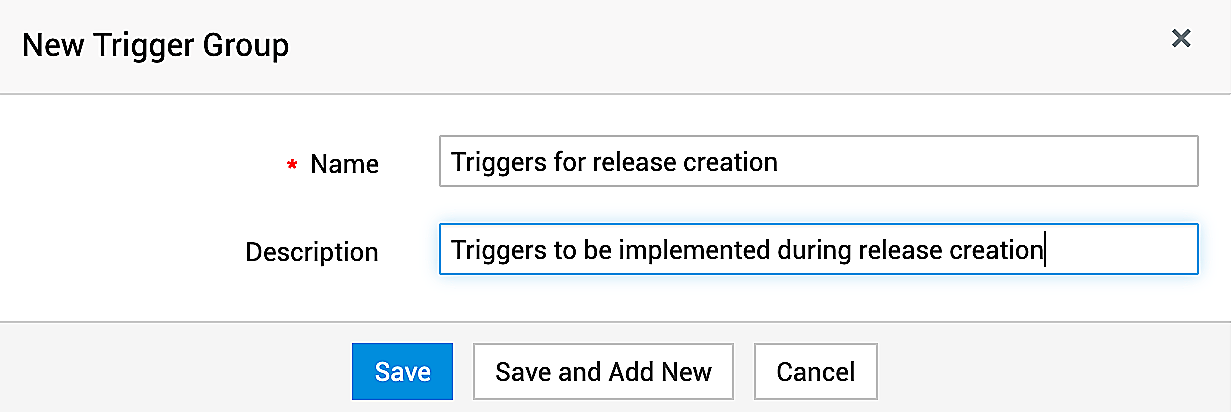
Click +Trigger Group.
-
Provide a Name and Description for the group.
-
Click Save or Save and Add New.

Create Custom Trigger
To create a new Custom Trigger,
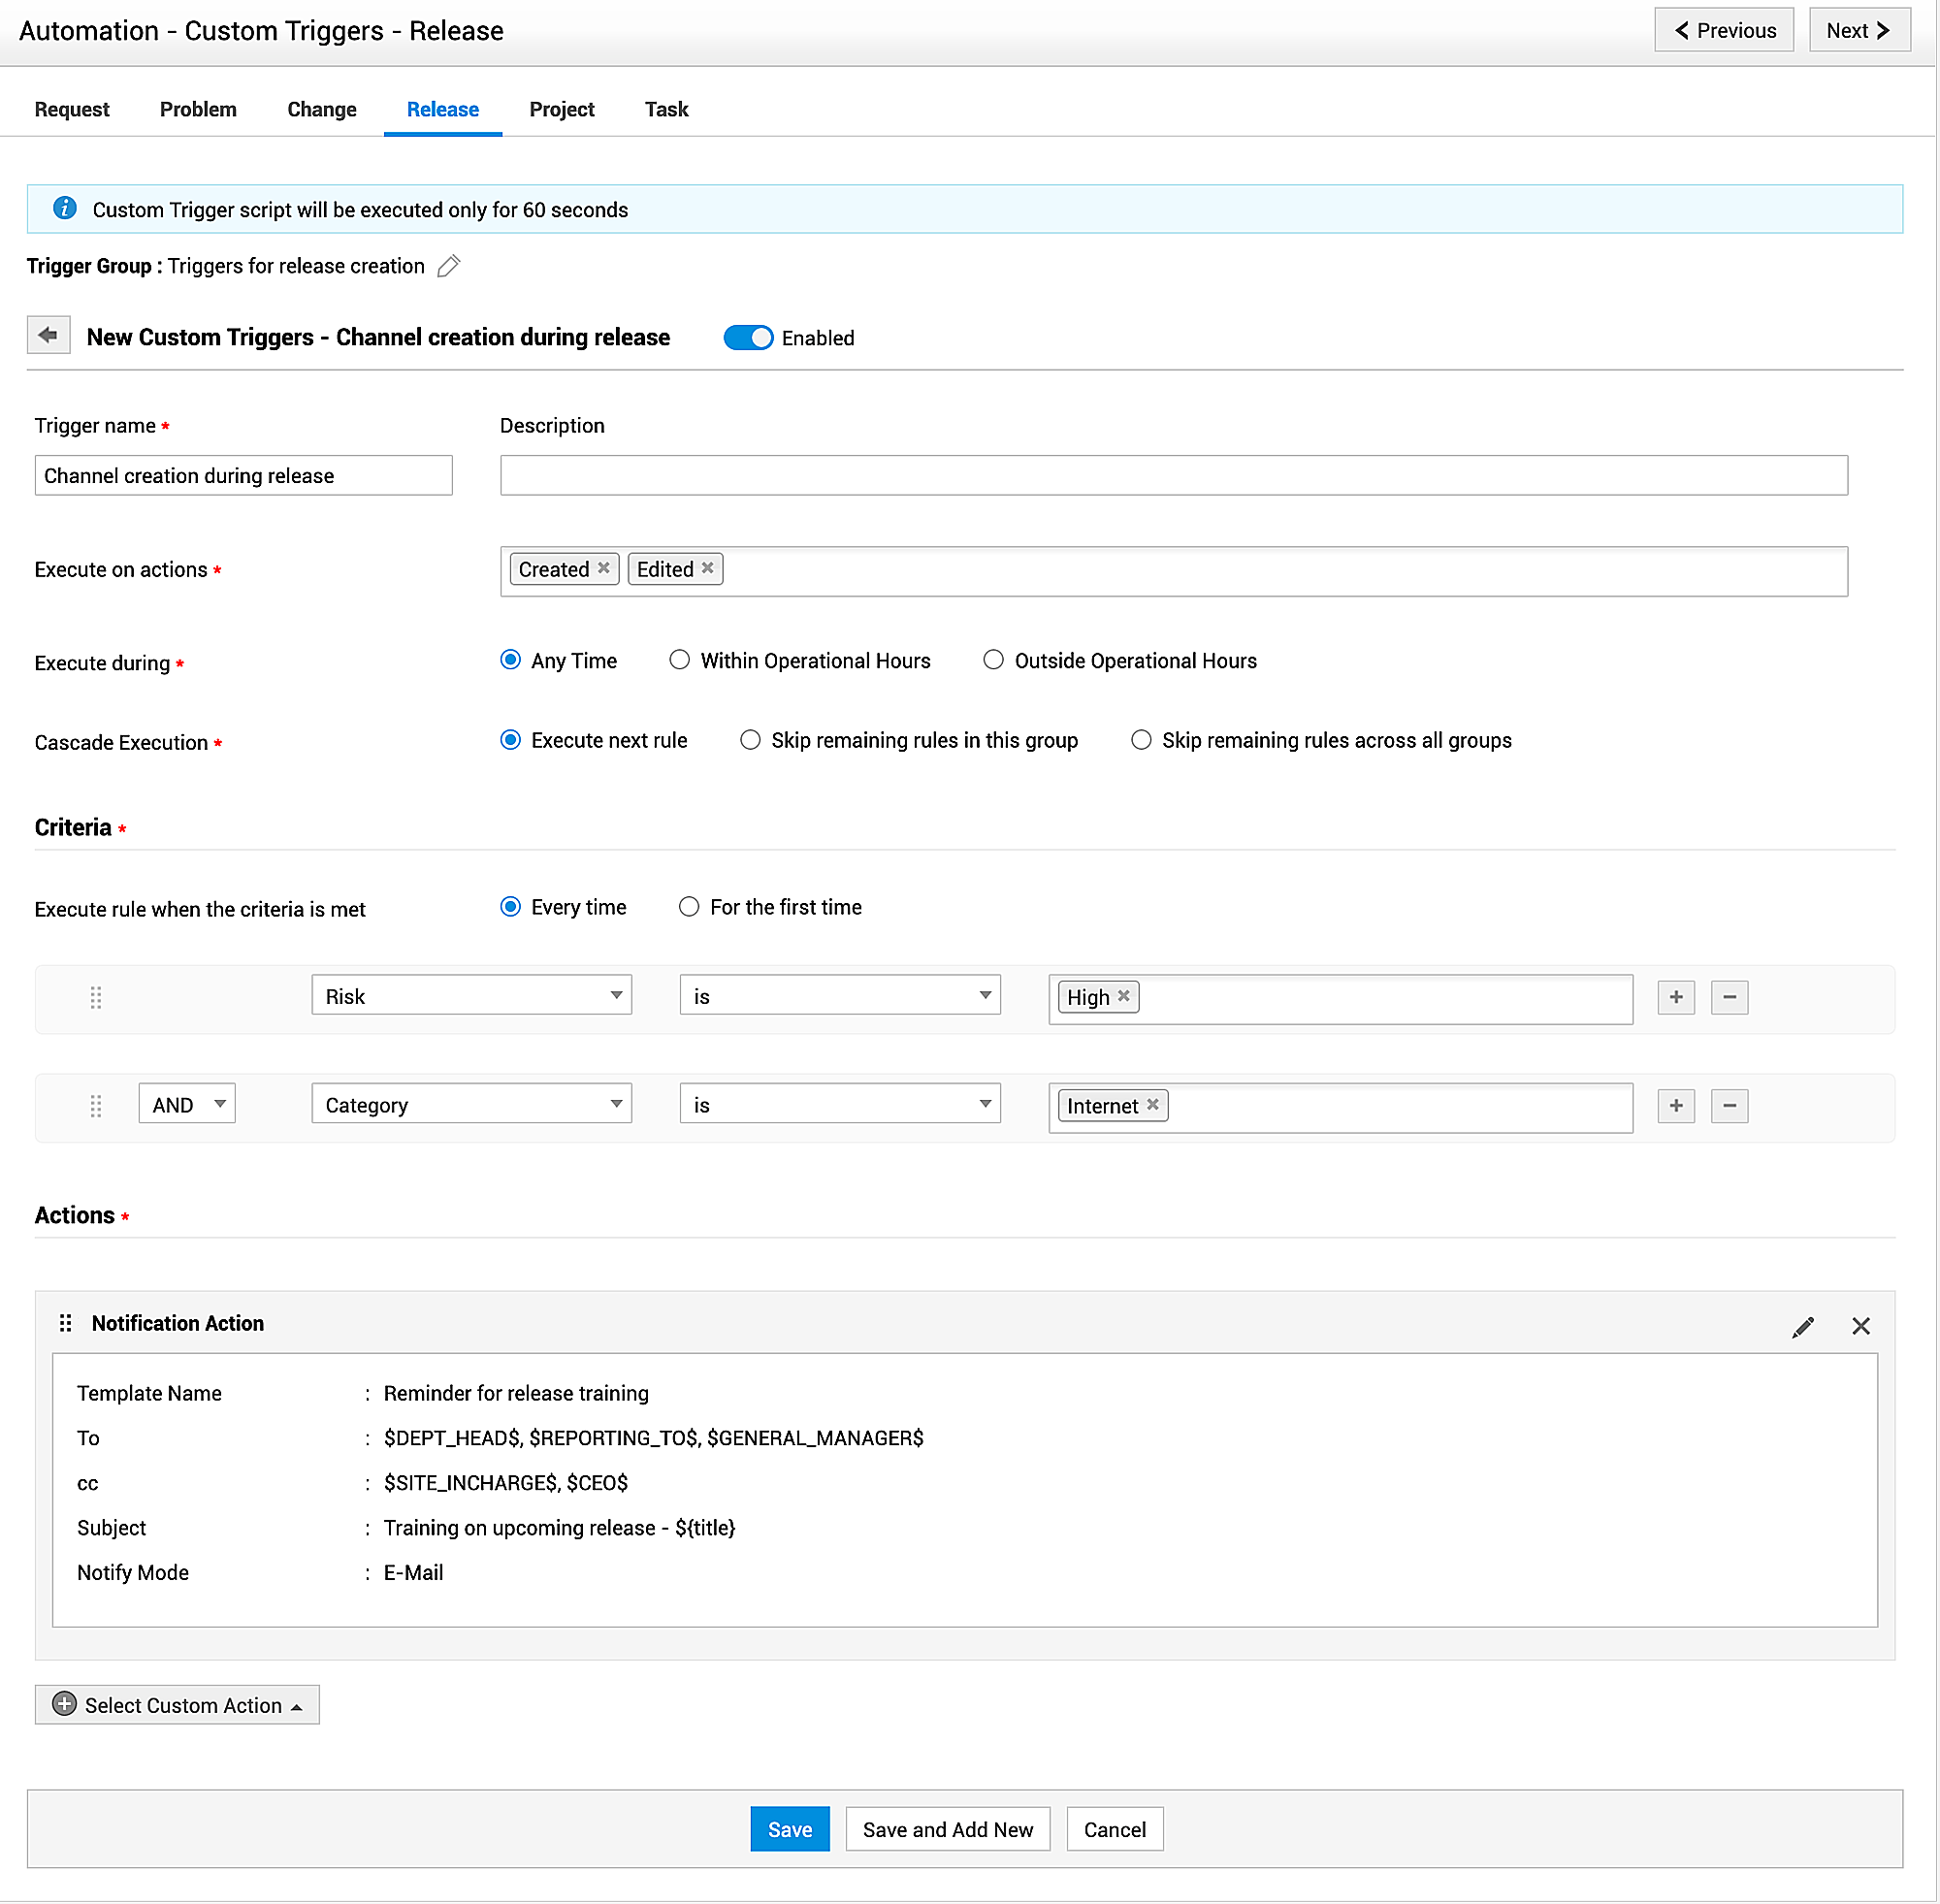
1. Go to the respective trigger group and click Add Trigger.
2. Fill out the displayed form using the following pointers:
-
Trigger Name: Provide a name for the trigger.
-
Description: Describe the trigger or add relevant notes.
-
Execute on actions: Choose whether the trigger should be executed when the release is created, edited, or deleted permanently.
-
Execute during: Using this option, you can choose to execute the trigger only within or other than operational hours. The default choice is Any Time.
-
Cascade Execution: Use this option to modify the order of the next applied trigger. You can choose to skip all remaining triggers in the current group or even across all groups.
-
Criteria: Choose the criteria for releases using the drop-down lists. You can configure up to 50 criteria in AND/OR combinations for a custom triggers.
-
Execute Rule when the criteria is met: This option is available only if you have chosen to apply the trigger when a release is edited. Choose whether the trigger must be applied only for the first time or every time the criteria is met.
-
Actions: Configure the actions to perform when a release satisfies the specified criteria. You can choose to trigger notifications (via email/SMS), execute custom script, class or custom function, If-If action, or If-Else action. You can modify the order of the actions by simple drag-and drop method using the Drag to reorder
 icon.
icon. -
Click Save.

Triggers List View
From the triggers list view, you perform the following actions
-
View Triggers in a Trigger Group: To view the custom triggers configured within a group, click
 in the required group.
-
Enable/Disable Trigger: You can enable/disable a custom trigger from the list view using the toggle button beside the required trigger.
-
Organize Trigger Groups: Configure the order to execute trigger groups on a release. Click Organize in the list view and rearrange the trigger groups from the displayed pop-up using a simple drag-and-drop method.
-
Organize Custom Triggers: You can also modify the execution order of custom triggers within a trigger group. Hover over the required trigger group and click Organize to perform the action.
-
Cascade Execution: You can modify the option configured for cascade execution of a custom trigger from the list view. To do this, click the cascade execution drop-down beside the trigger and choose the required option.
-
Edit Trigger Group: To edit a trigger group, click
 beside the required group name. Modify the details and click Update.
 -
Edit Custom Trigger: To edit a custom trigger, expand the trigger group and click
 beside the required trigger. Modify the details and click Update.
 -
Delete Trigger Group: To delete a trigger group, select the required groups by enabling the corresponding check boxes and click
 . A confirmation message pops up. Click Proceed to complete the action. Deleting a trigger group will also delete all the triggers configured in the group.
 -
Delete Custom Trigger: To delete a custom trigger, select the required trigger by enabling the corresponding check box and click
 . A confirmation message pops up. Click Proceed to complete the action.
 -
Move Triggers Across Groups: You can move triggers from one group to another. To do this, select the required custom triggers by enabling the corresponding check box. From the displayed options, click Move to Group and select the required group to complete the action.
-
Actions: You can use the Actions drop-down to bulk enable/disable the custom trigger and also to modify the option configured for cascade execution of the custom trigger.
Actions
The following are the actions that can be configured using the triggers.
Notification Action
Notify technicians or any concerned person about the release and its activities via email/SMS. You can create new templates for notifications and save them. These saved templates will be listed under the notification template window.
To create a notification action,
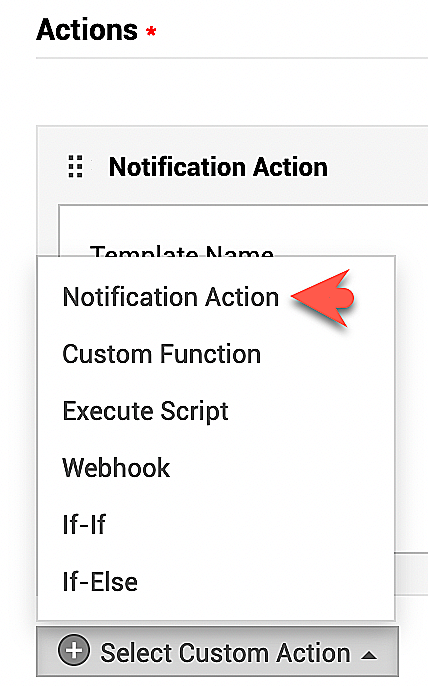
- Select Notification Action in the Select Custom Actions drop-down.

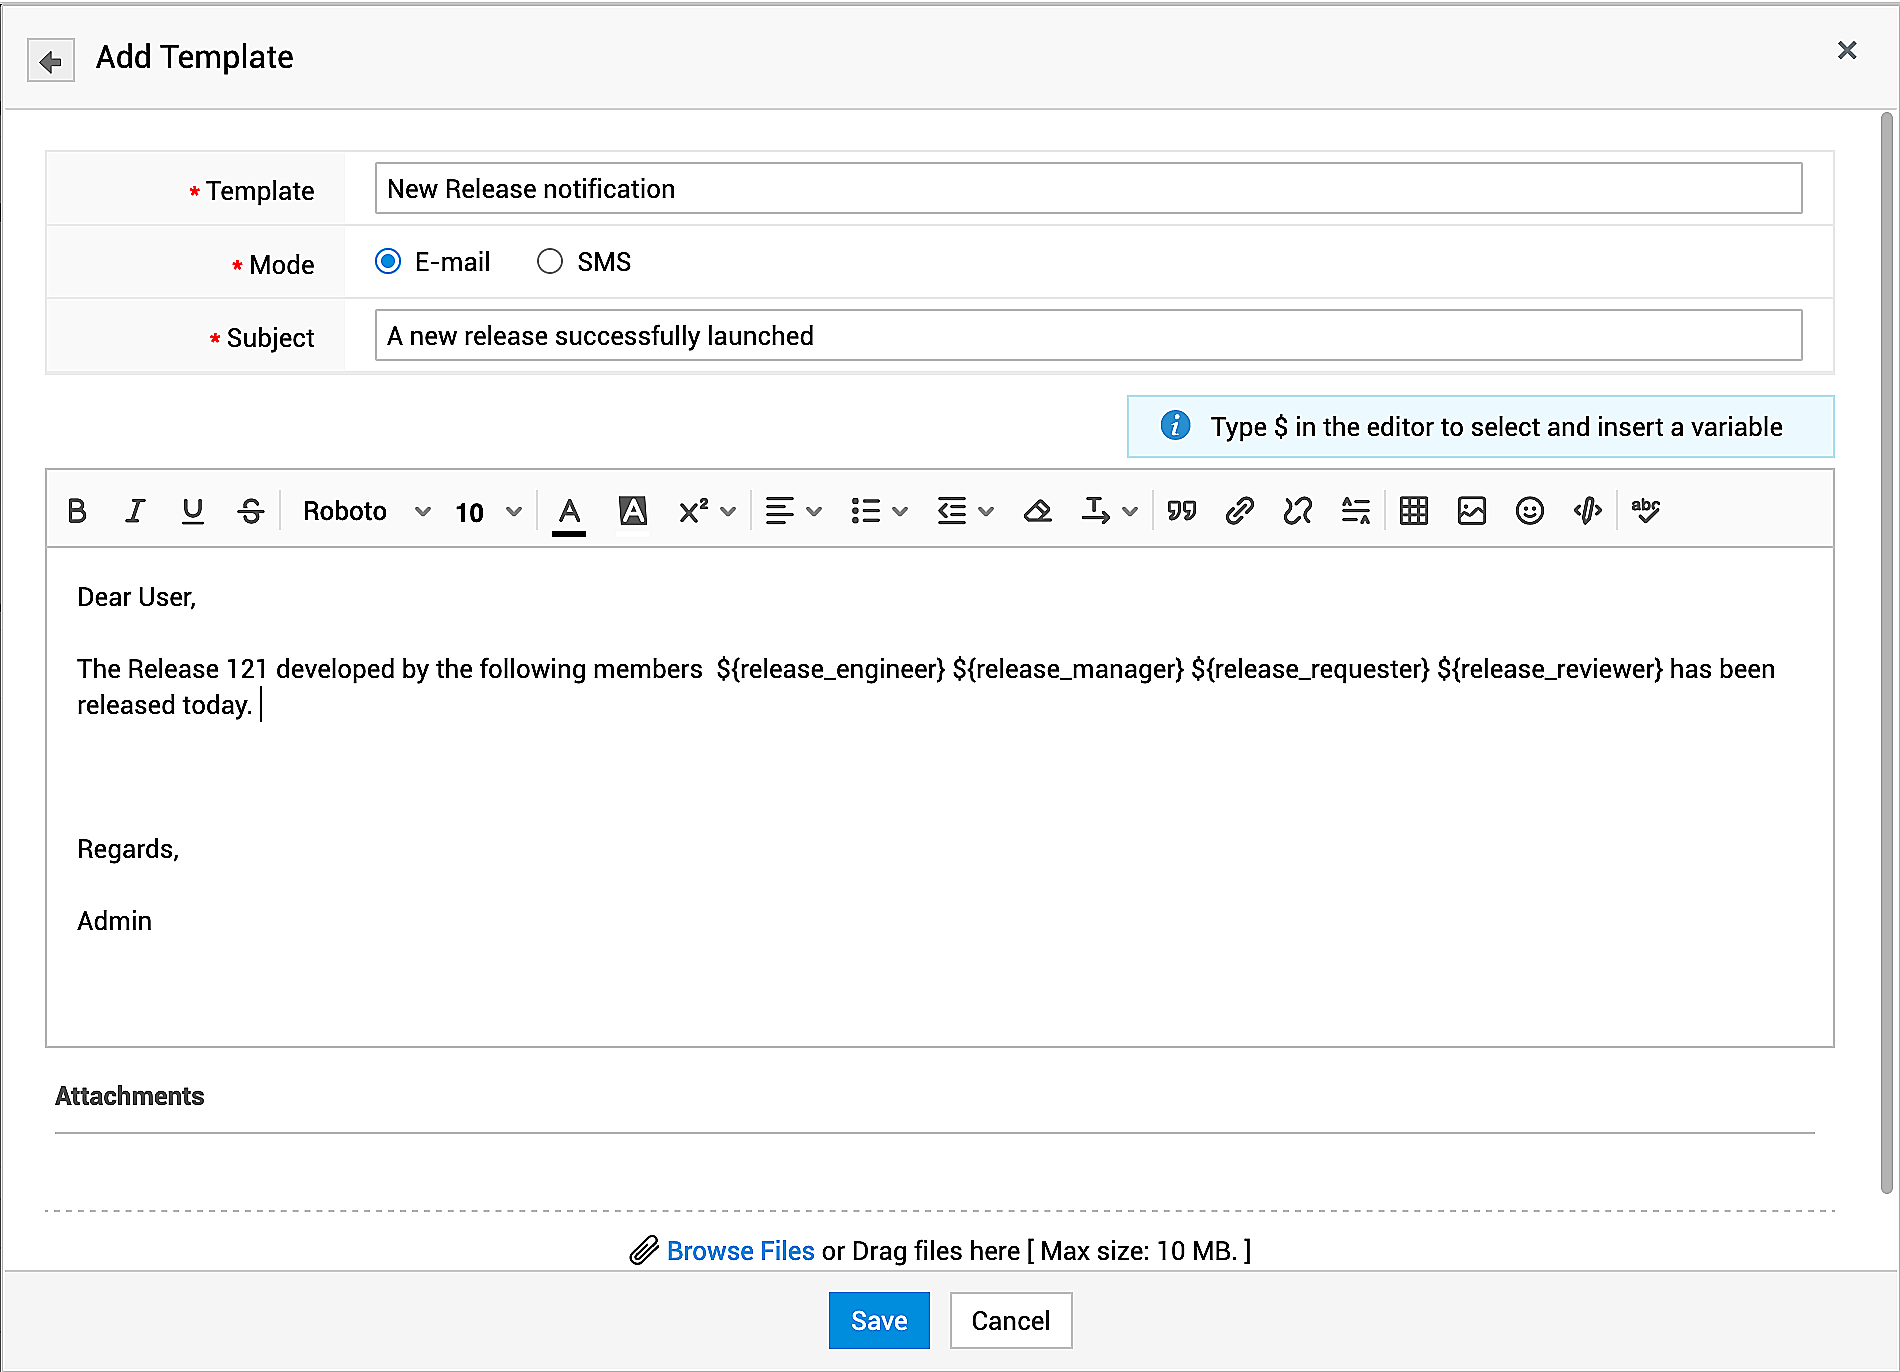
- Choose an existing template or click + New to add a new template.

-
Enter a template name if its a new template.
-
Select a mode for notification. E-mail or SMS.
-
Enter a Subject and add a relevant notification message.
-
You can use the $variables to include release roles, release title, links etc.

-
Click Save.
Custom Scripts
Custom scripts allow users to modify the application's behavior and UI. In a script file, you can program the actions to be performed. Follow the steps described in the document given below to program the required actions effectively.
Writing Custom Script (A sample Python file)
Custom Function
By executing custom functions in release custom triggers, you can manipulate data in ServiceDesk Plus and third-party applications. You can use custom functions to update the release fields or create tickets in other applications. releaseObj and context are the arguments supported in custom functions.
If-If Actions
The If-If action allows you to bundle multiple custom actions and execute them when the specified criteria is met.
You can configure only one If-If action for an automation rule.
To configure If-If Actions,
-
Under Actions, click Select Custom Action > If-If.
-
Configure the criteria using the drop-down lists. You can create up to 10 criteria using AND/OR combinations.
-
Configure the actions using the available options: notifications, field updates, custom scripts, custom functions, custom class, webhooks, or negate action.
-
Click Add If block to add another block or click Update.
If-Else Actions
You can use the If-Else action to configure actions when the criteria is met and when it is not met.
You can configure only one If-Else action for an automation rule.

