Project Members
Efficient staff alone does not ensure a project's success. Meticulous planning of project staff; the permissions given to a projectrole; the flexibility in changing project roles and more come into play to ensure the project as a whole turns out to be a success.
To configure the project's staff, that is, to add members to a project, assign roles to project members and establish the project hierarchy click on Members tab.
-
Click on Members tab in the Project Details page. Click Add Members button.
-
Available Users List already configured in ServiceDesk Plus - MSP will be displayed.
-
Select Project Member(s) by enabling the check box beside the member name. (OR you can add Technicians of your choice).
-
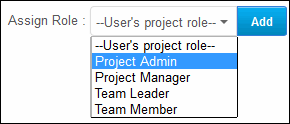
Select Project Role from Project Role drop-down and click on ADD button.

However well-planned your project might be things are bound to go off-course when there are innumerable Tasks to be executed. To ensure project managers are ready enough to face such incidents they are allowed to 'change project member role' as and when required.
This feature is predominantly used to ensure grey areas of the project get enough attention. That is, let's say a project member has completed his part and is free, yet the project is progressing at a rather slow rate, then this member could be assigned some other role that might help speed up the project.
Speeding up the Project is not the sole objective, you can also use this option just to change the role of the project member, if such a need arises.
To change the role,
-
Click on Members tab.
-
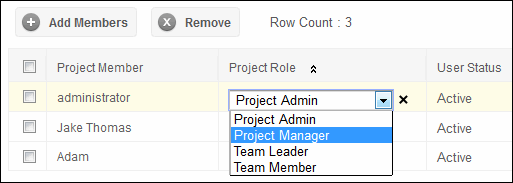
Click on Project Role of the member for whom you want to change the role. A drop down box appears.
-
Select a role to be assigned to the member from the drop down.

Changing Project Member Status
While creating a Project a number of unforeseen events that might occur should be taken into account. For example: a member falling sick, a member deciding to quit, or a member requesting a role change and so on.
Such project members can be kept in the bench by changing their status to Inactive. Milestones and Tasks associated with inactive members can be assigned to other project members. Inactive project members can be reinstated by change their status to active.
-
Click on Members tab.
-
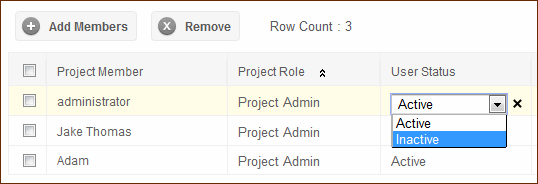
Click on User Status to be changed. A drop down box appears.
-
Select Inactive option to keep Project Member in the bench.
-
Select Active option to reinstate Project Member.
Note: At a given time, only one role can be assigned to a project member.

Project Members can be deleted in two ways:
a. Bulk Delete: From Member List View, select Project Members to be deleted by enabling the check box beside the member name, and click on Remove button.
b. Single Delete: Select Project Member to be deleted and click on Delete icon ![]()
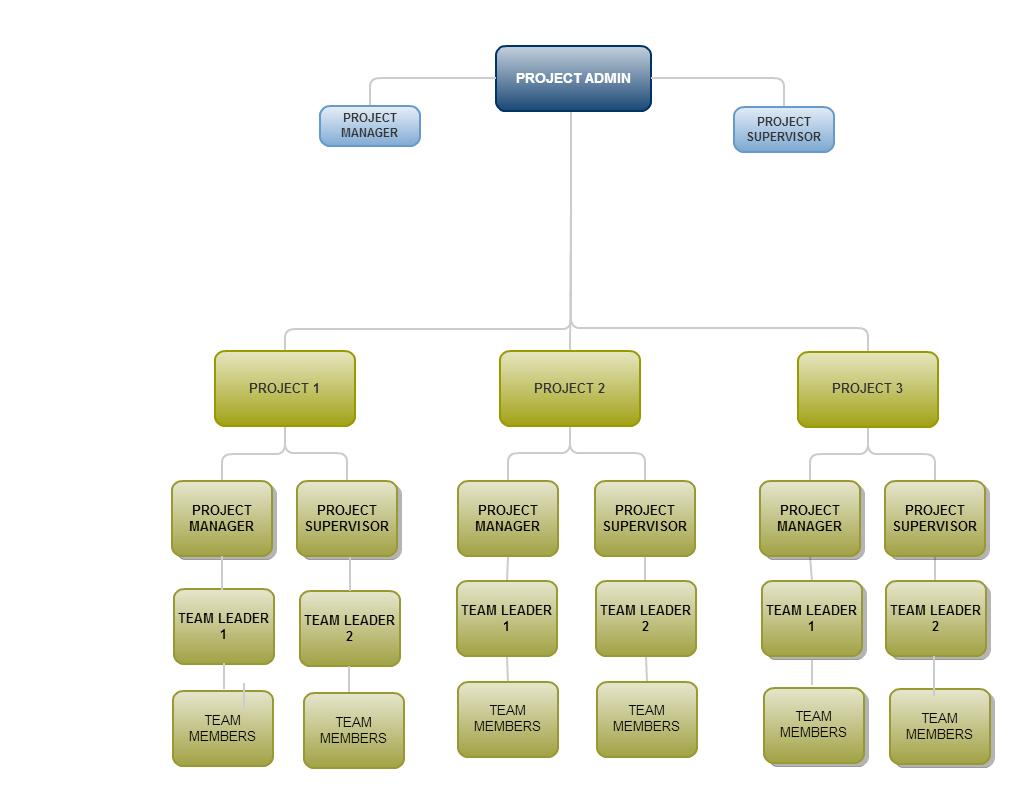
Member Hierarchy Diagram Example


